
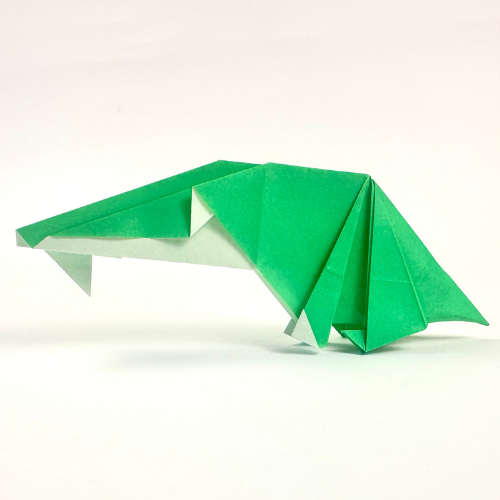
How to Fold an Easy Origami Crocodile
This origami crocodile, called Mr Crocodile, was designed by Adriano Mariani, and there is something unmistakably poetic about it.
From its slightly clumsy body to the single visible tooth and the bold, expressive eye, this model has a strong personality — like it just wandered out of a picture book. It is not your typical crocodile fold, and that’s what makes it so charming.
The sequence includes a few tricky folds, but it remains accessible to anyone with a little folding experience. A beautiful and simple model to slow down with and enjoy.
Origami Crocodile Step-by-Step Instructions
- Difficulty: Easy – Beginner Level 5
- Folding time: 5-10 minutes
Recommended Paper
15×15 cm (6×6 in) Kami
Step 1


Start with the colored side of the paper facing up in a diamond position. Fold and unfold both diagonals.
Step 2

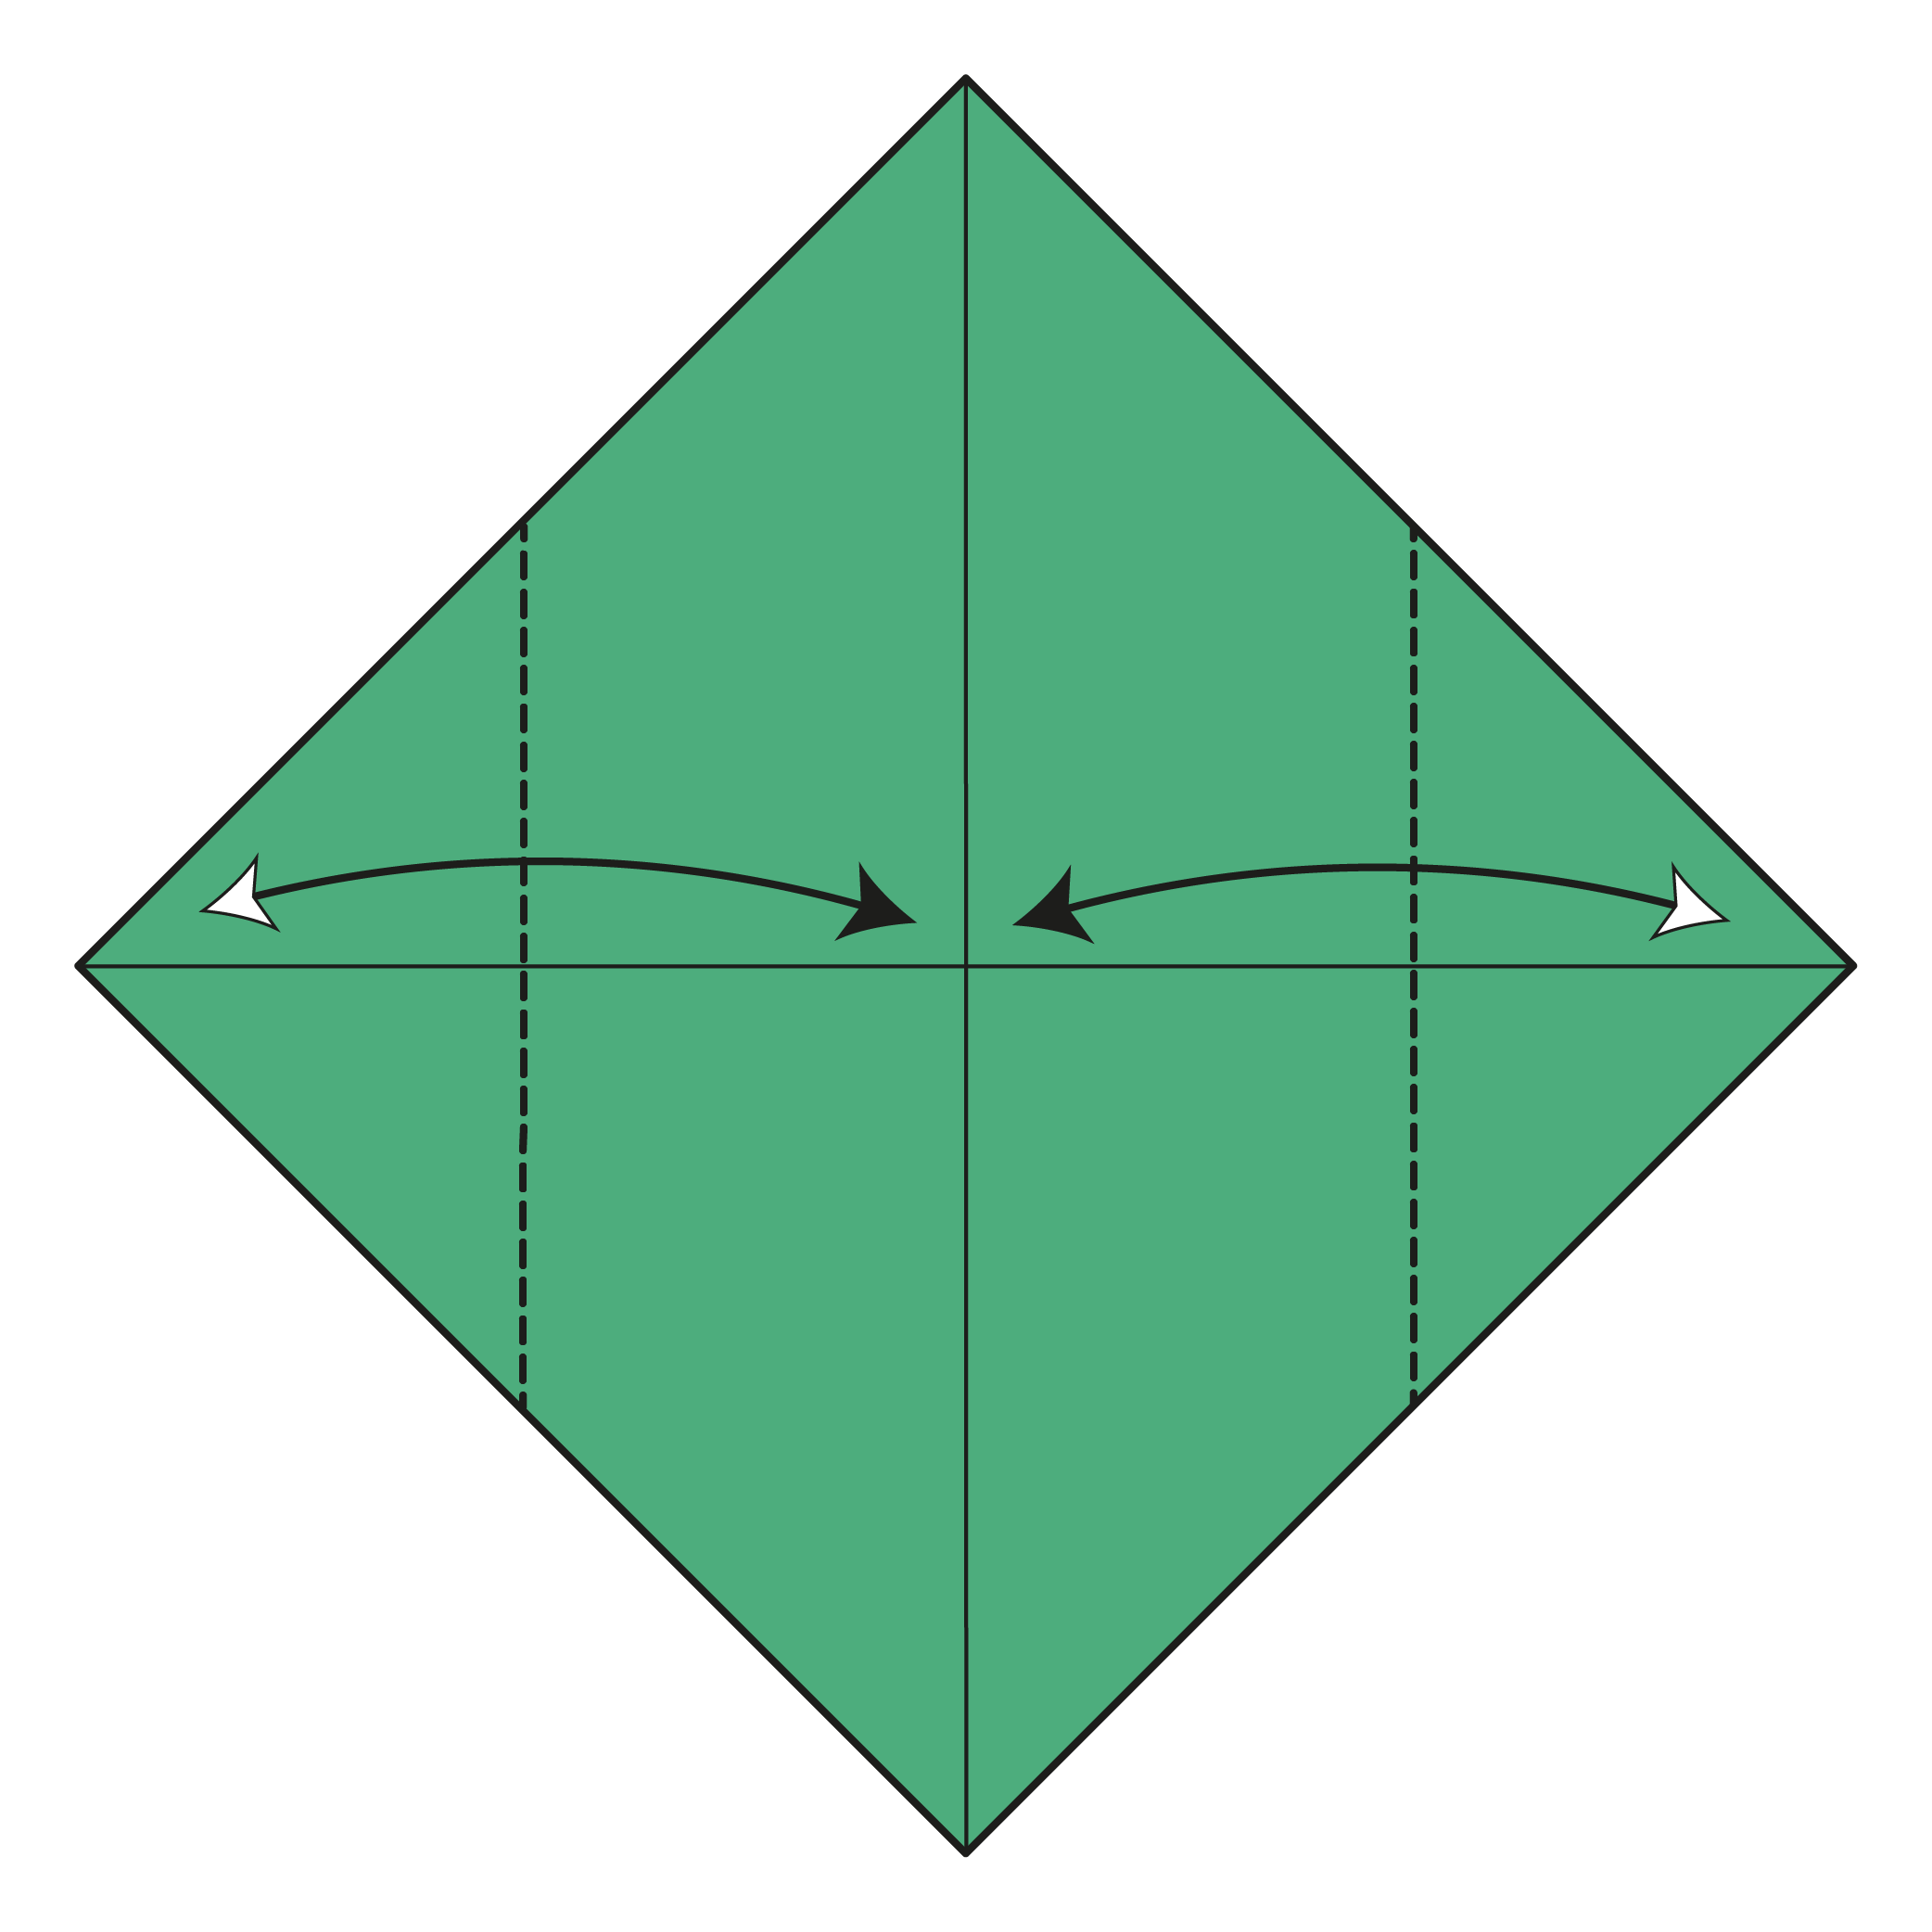
Fold and unfold the left and right corners to the center point.
Step 3

Mountain fold the creases made in Step 2 to the centerline.
Step 4


Slightly fold the left and right corners inward.
Step 5

Fold the bottom corner up to the reference point, then unfold.
Step 6
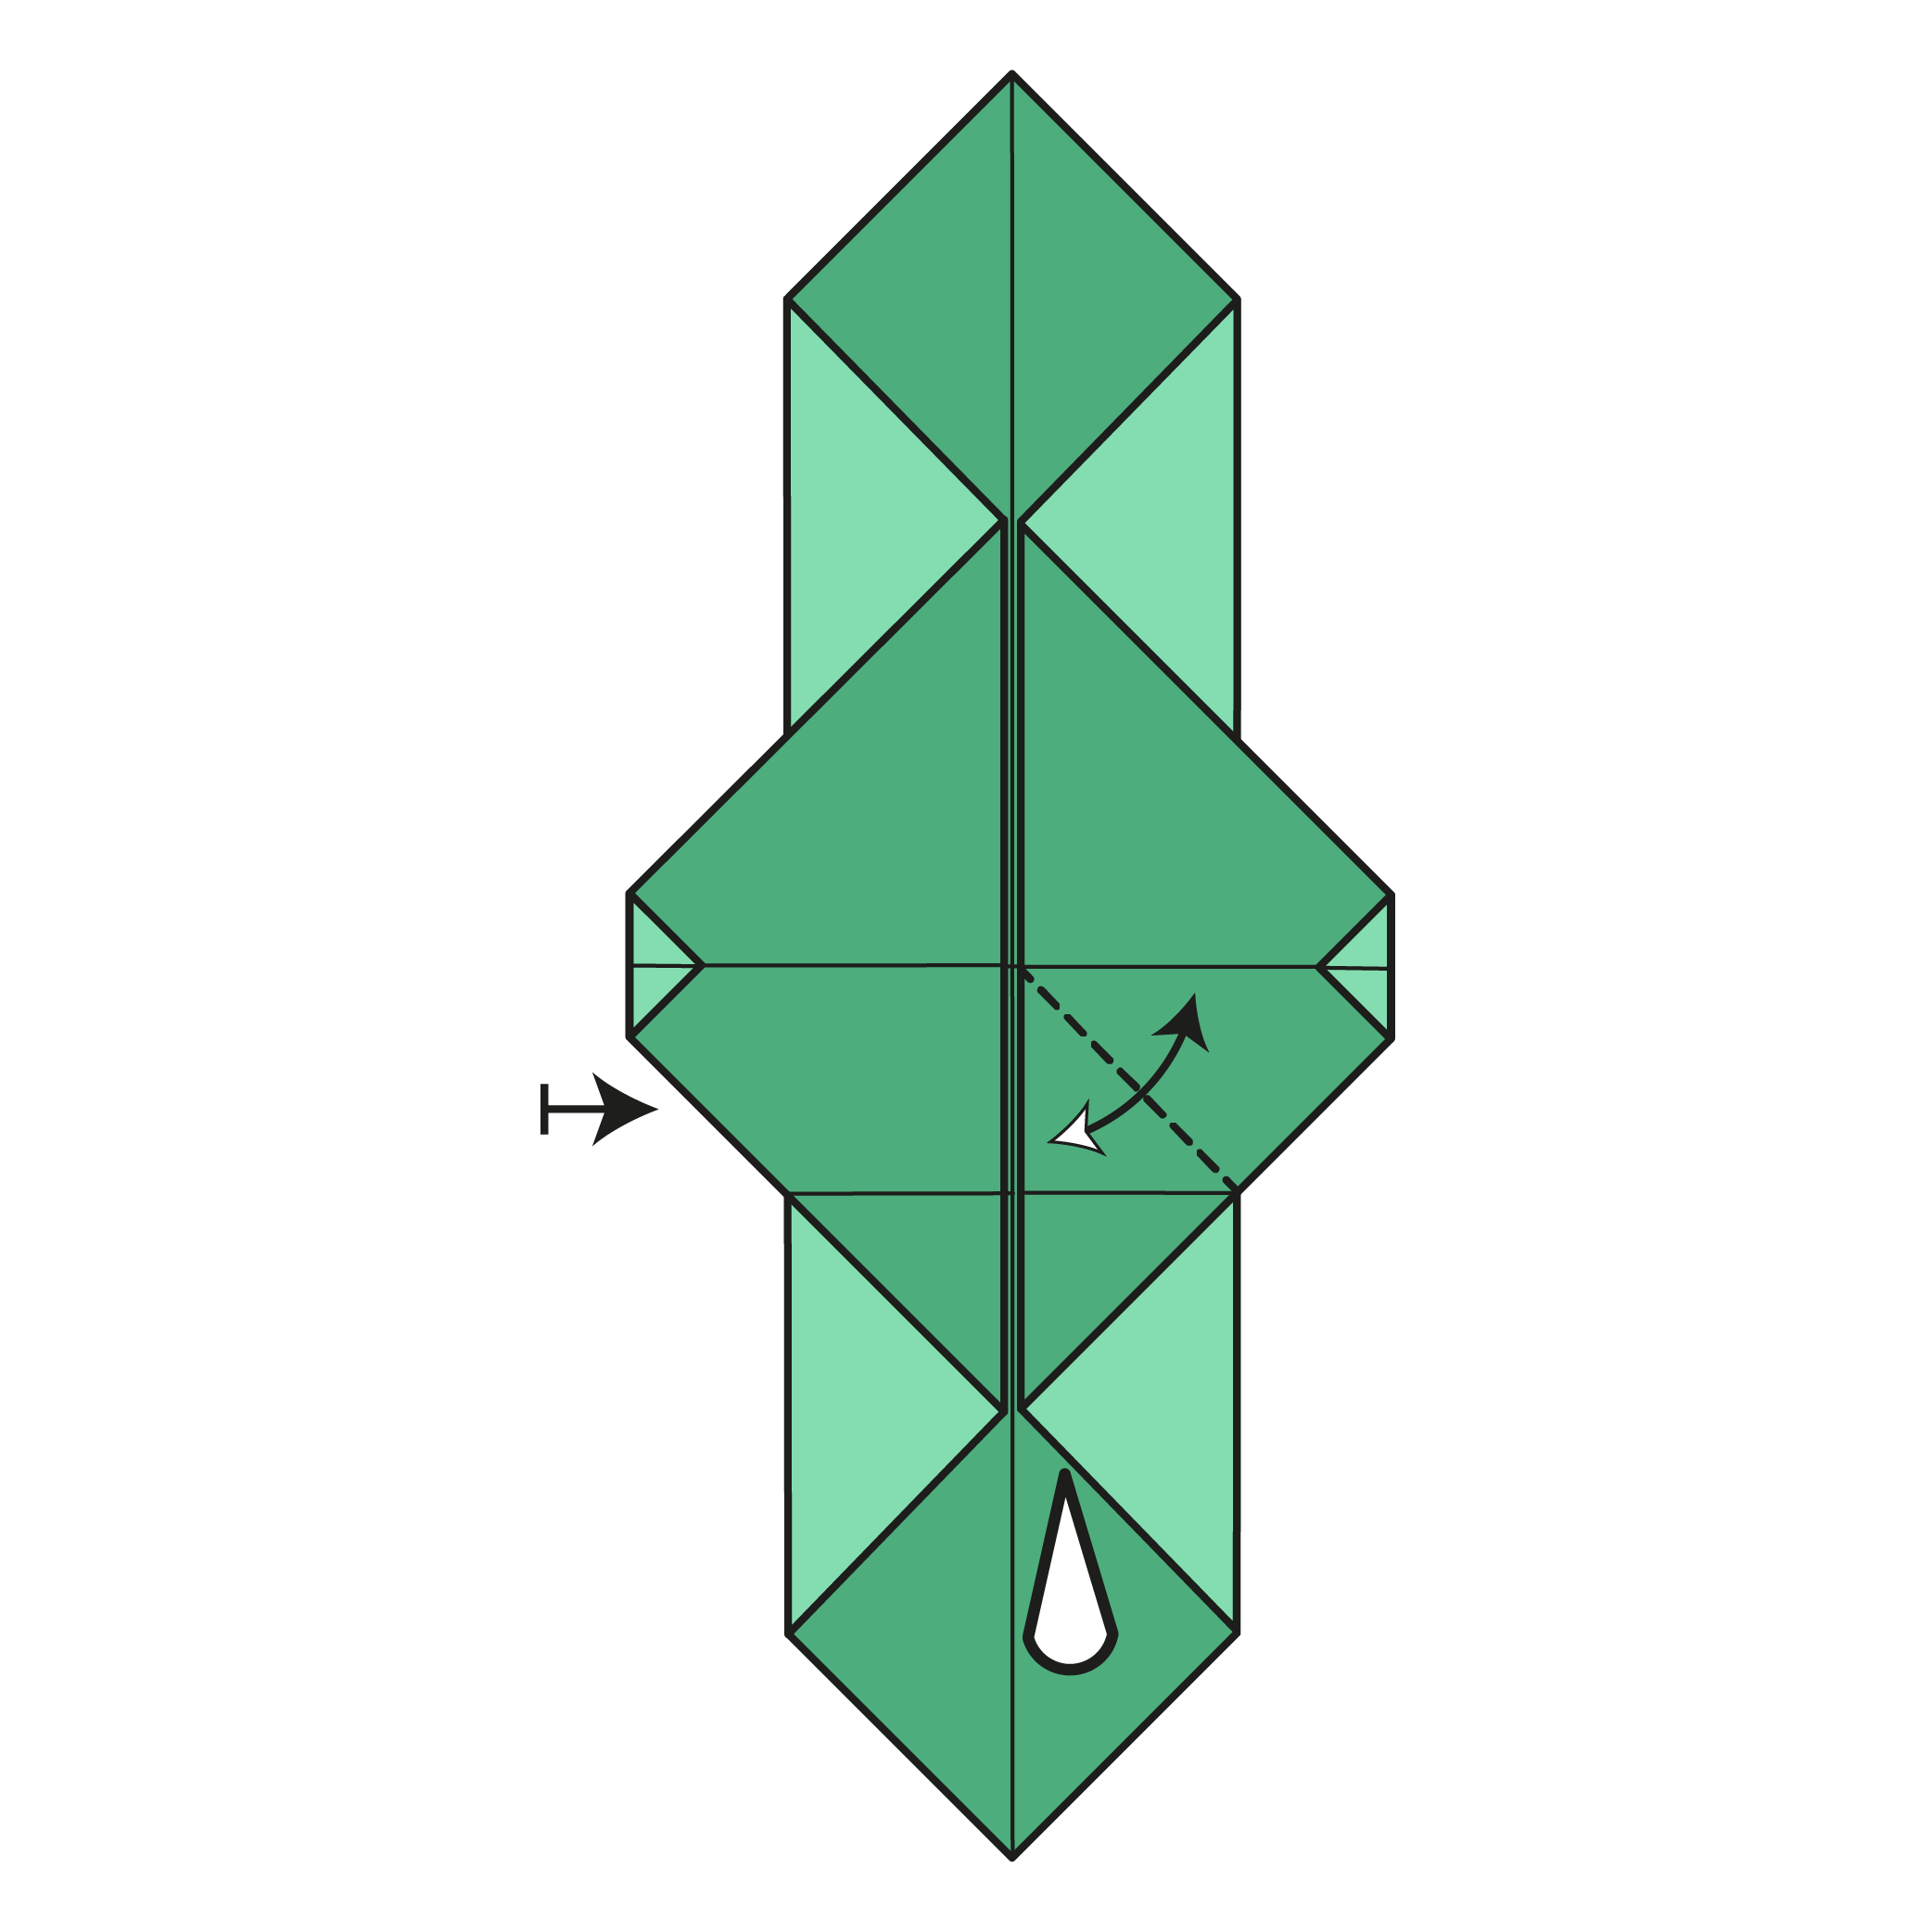
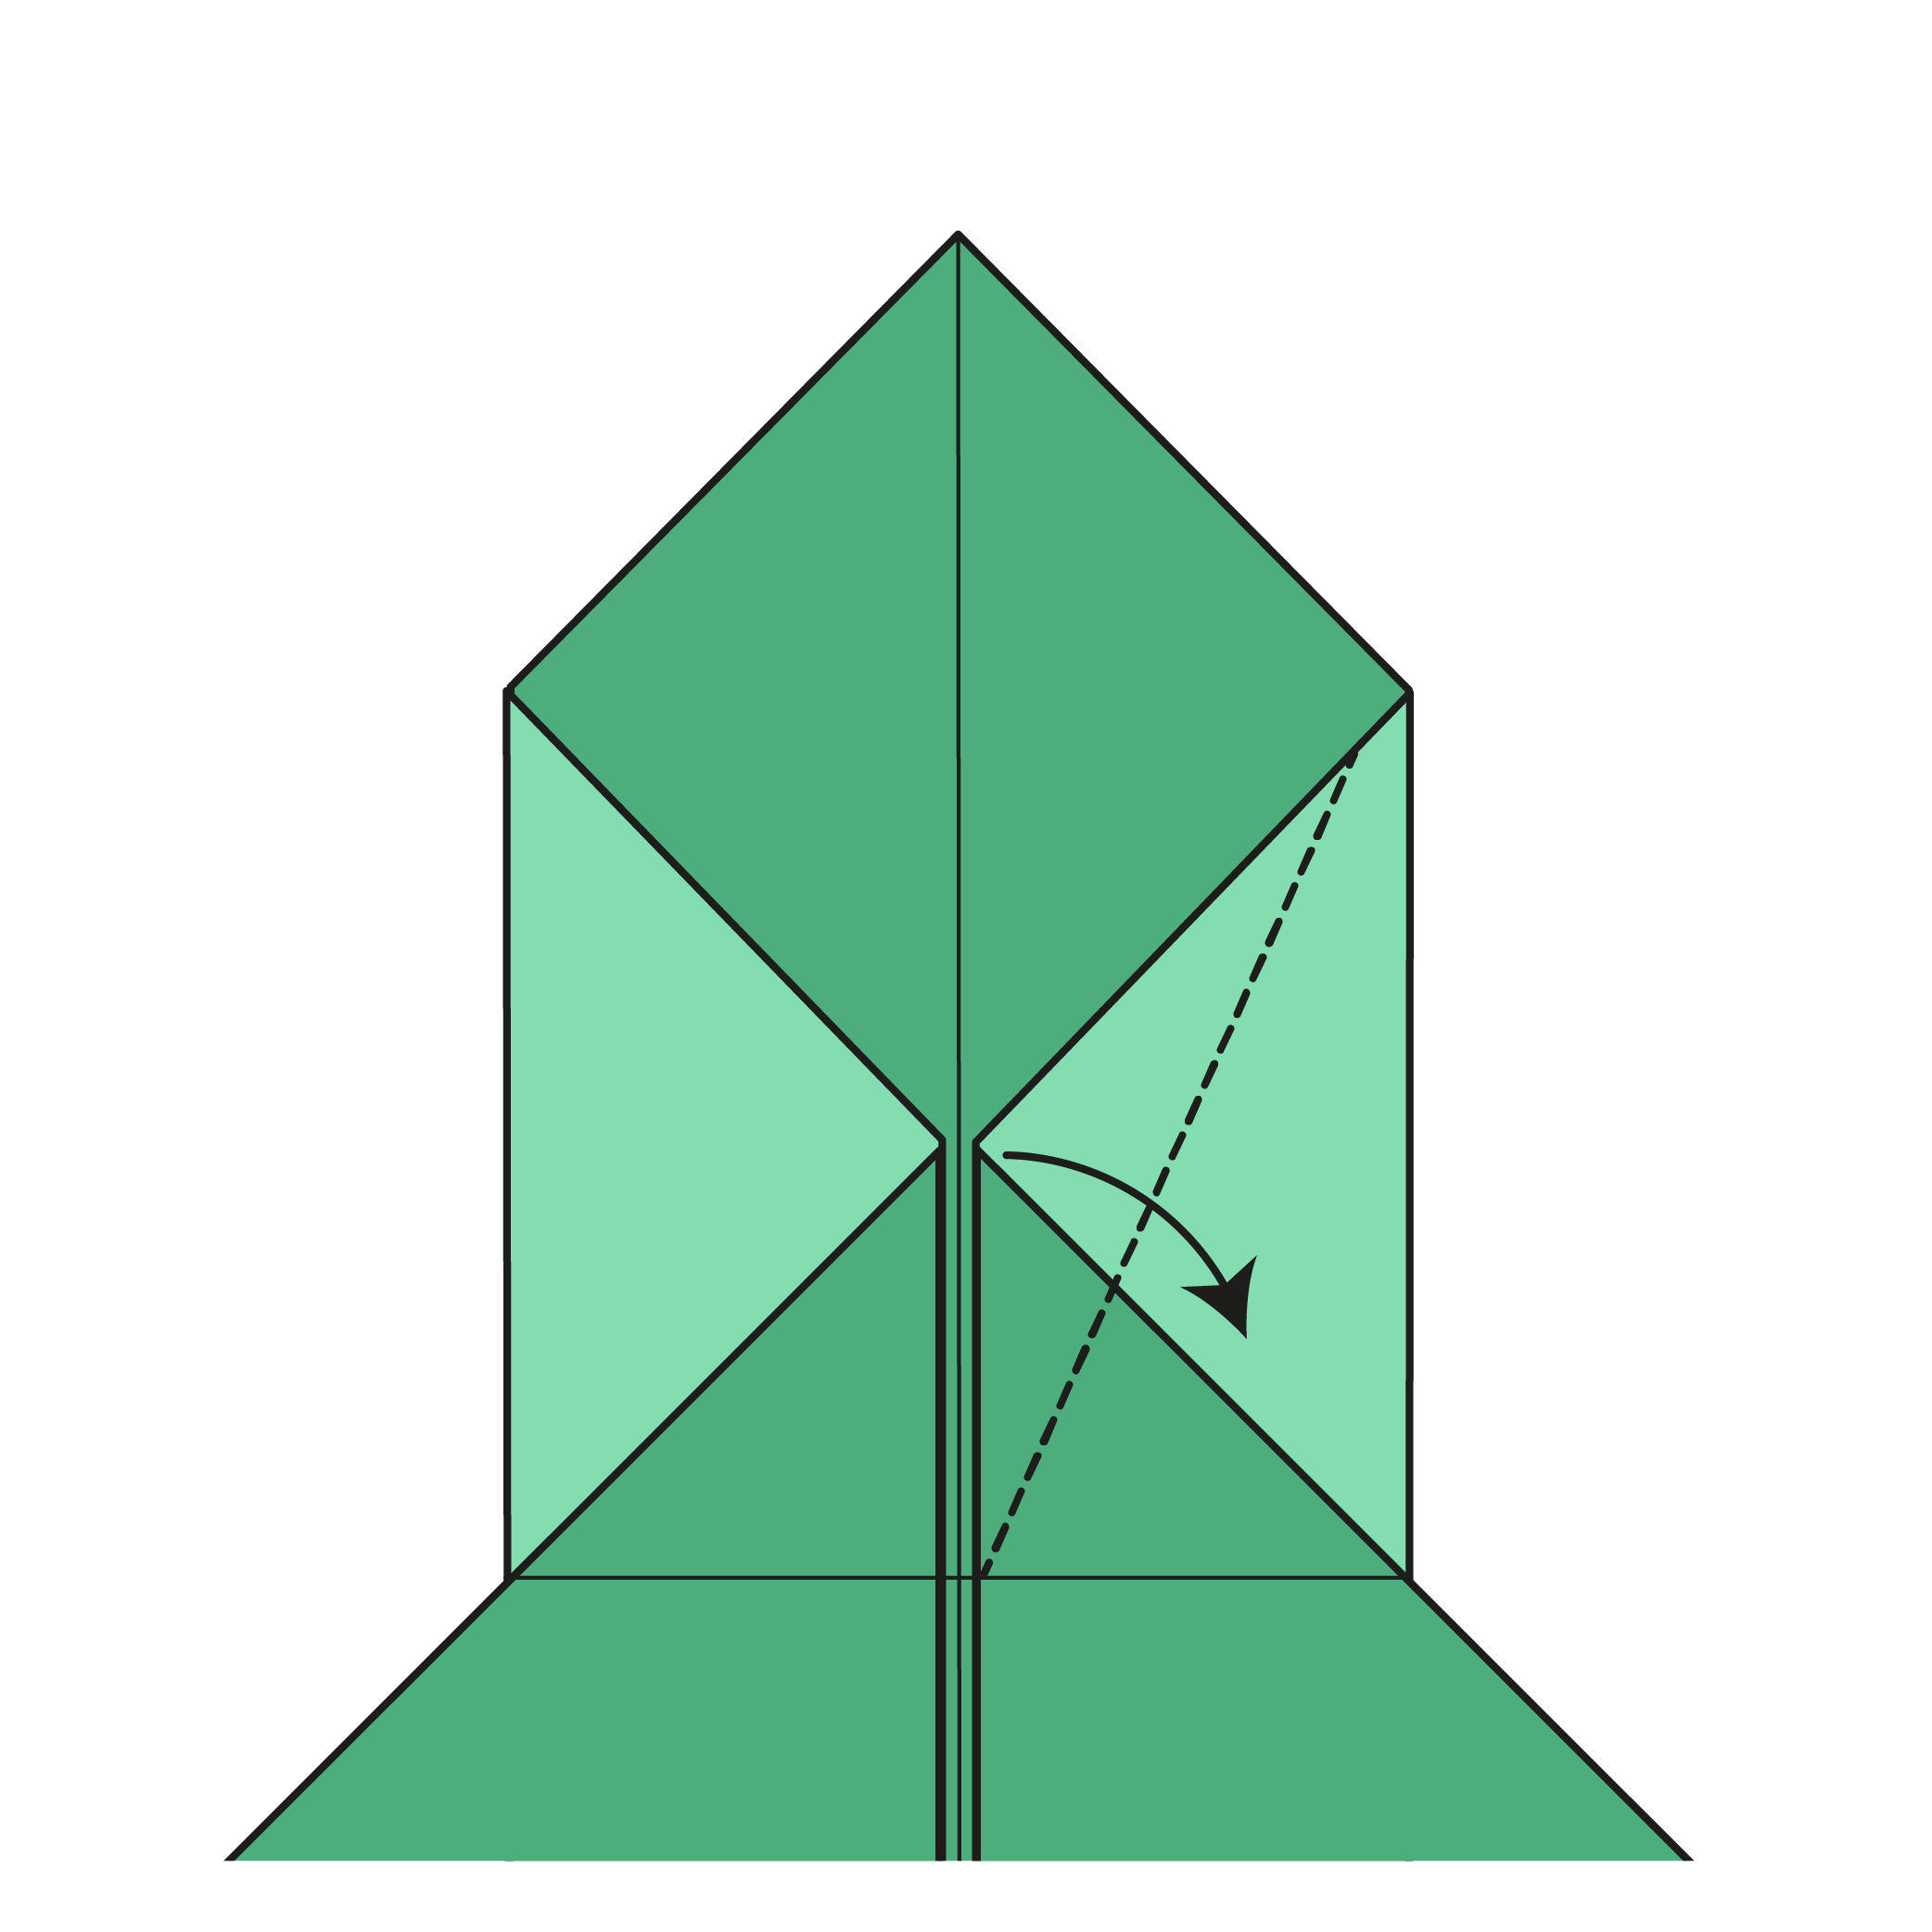
On the right side, lift the top layers and fold the centerline to the horizontal line. Unfold, then repeat on the left side.
🐊 Note: The bottom part won’t lie flat during this step. Don’t worry, that’s normal!
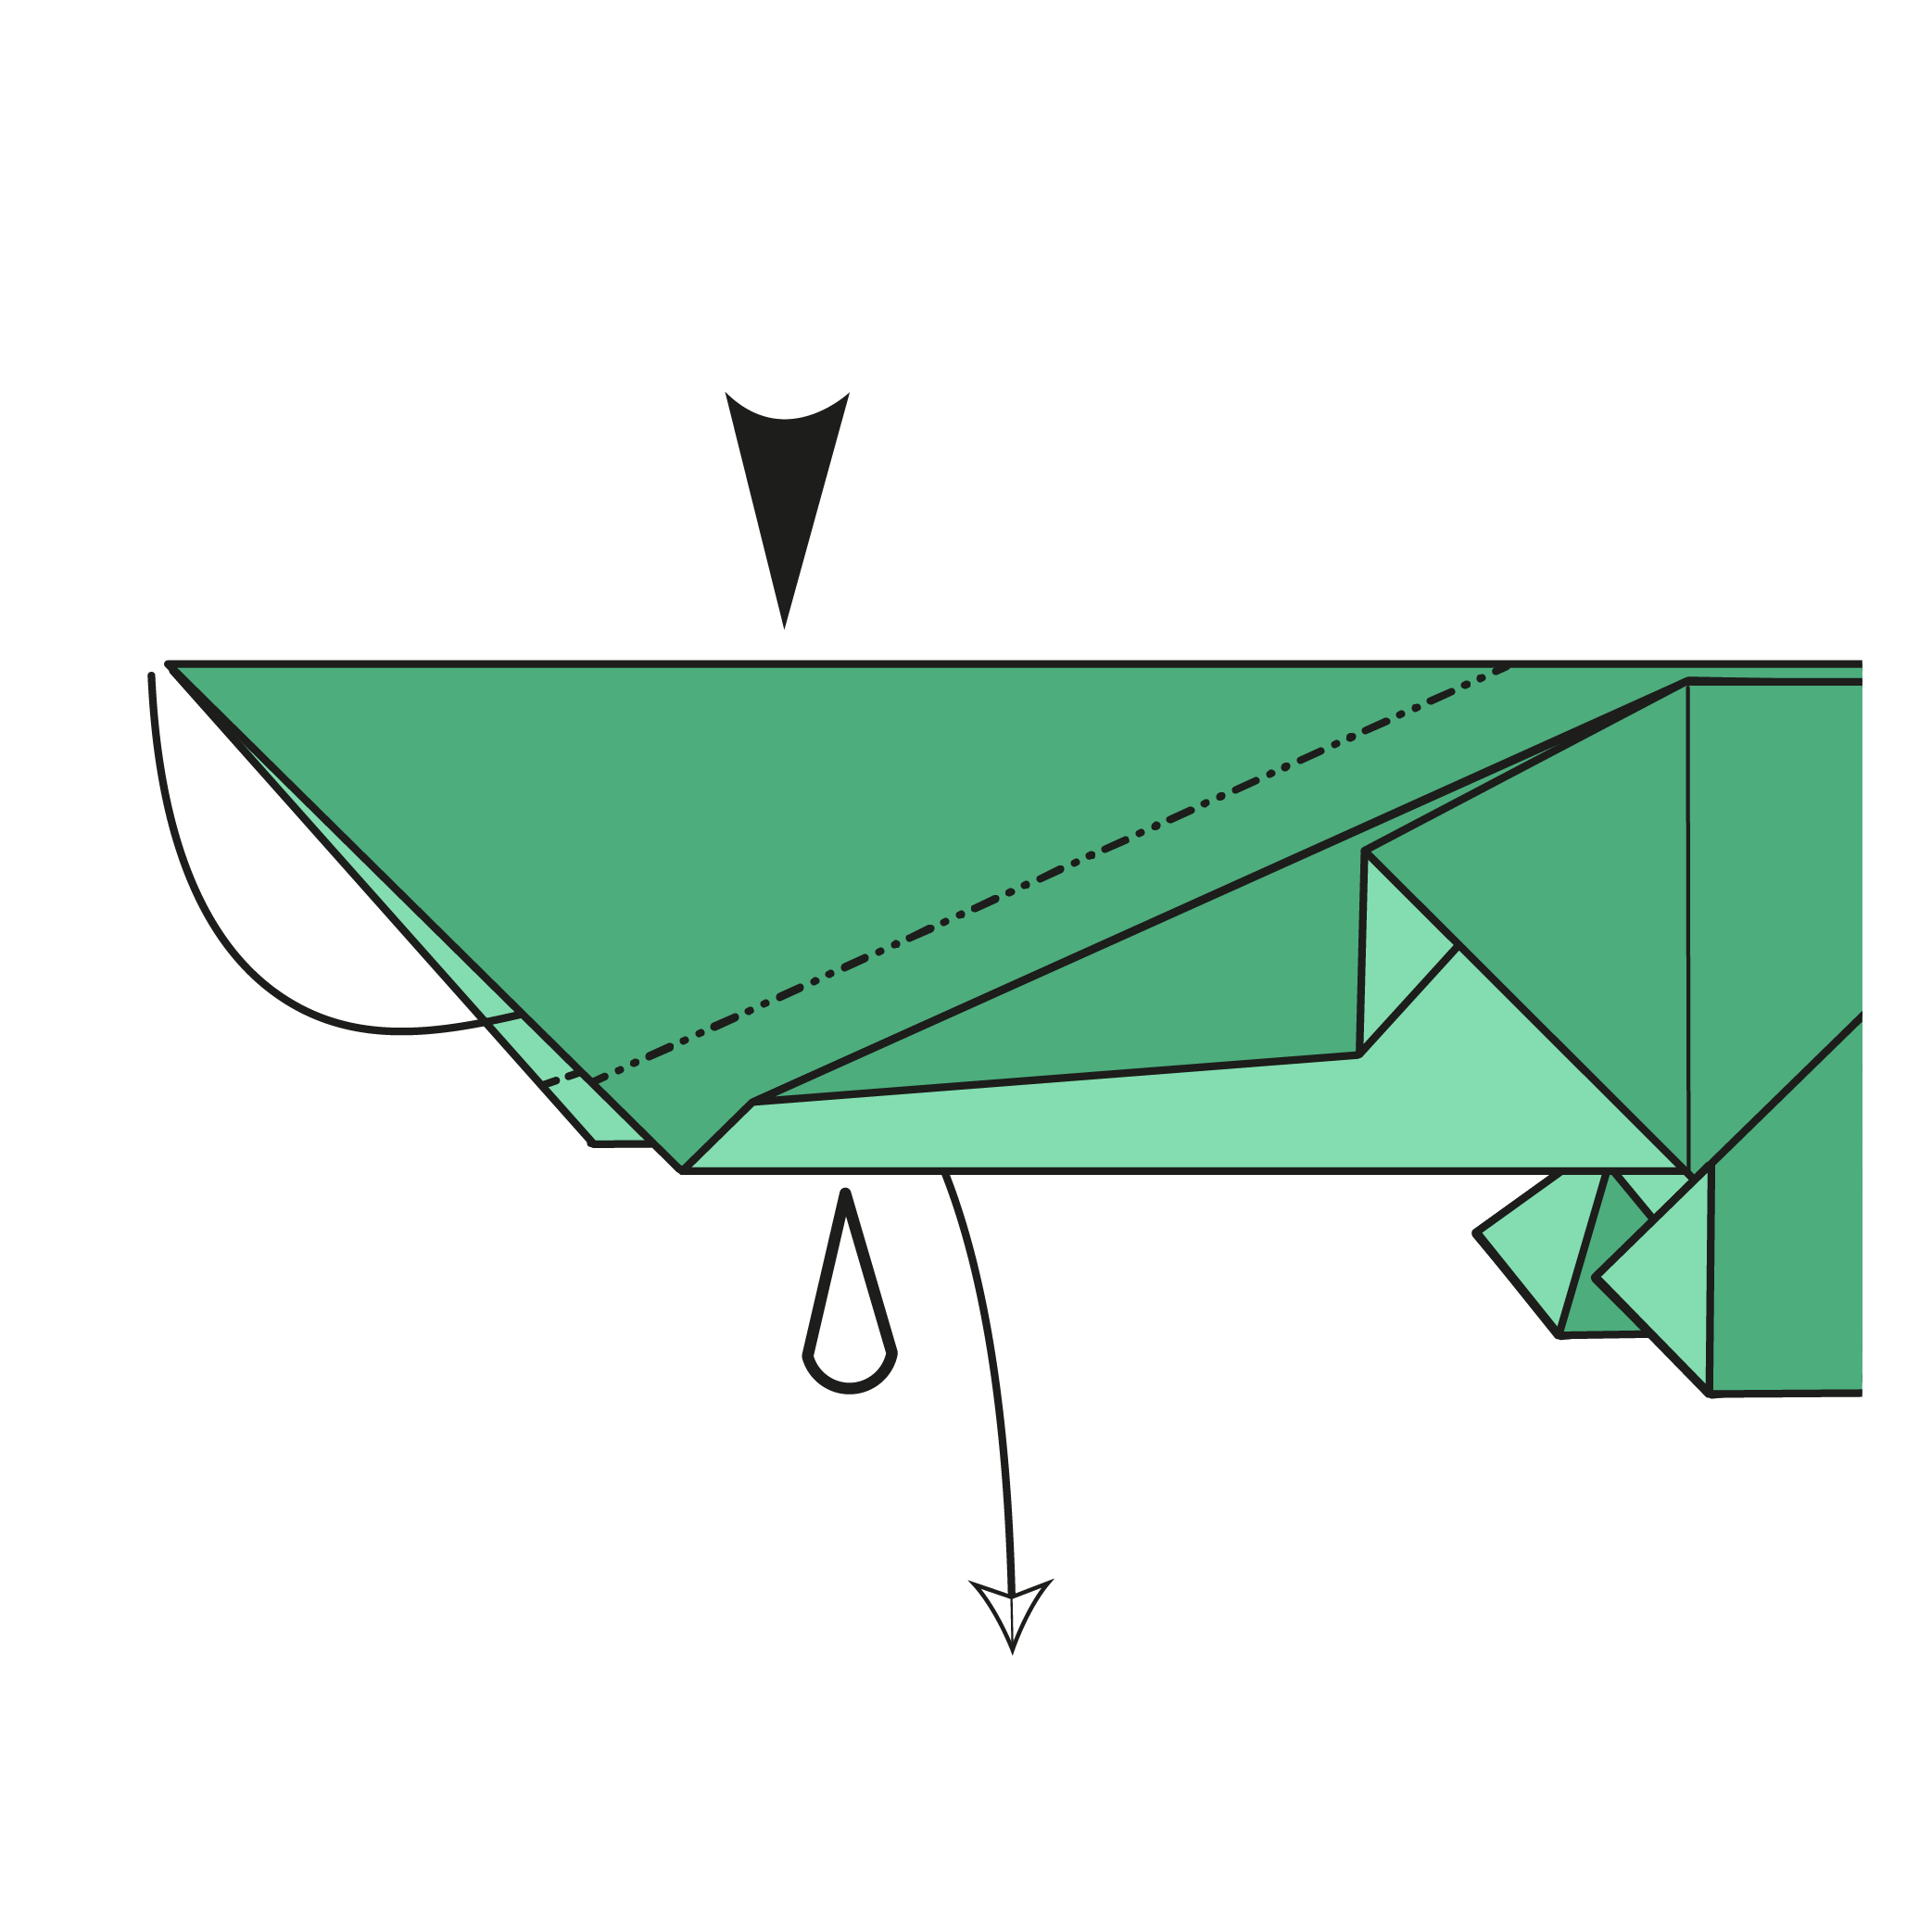
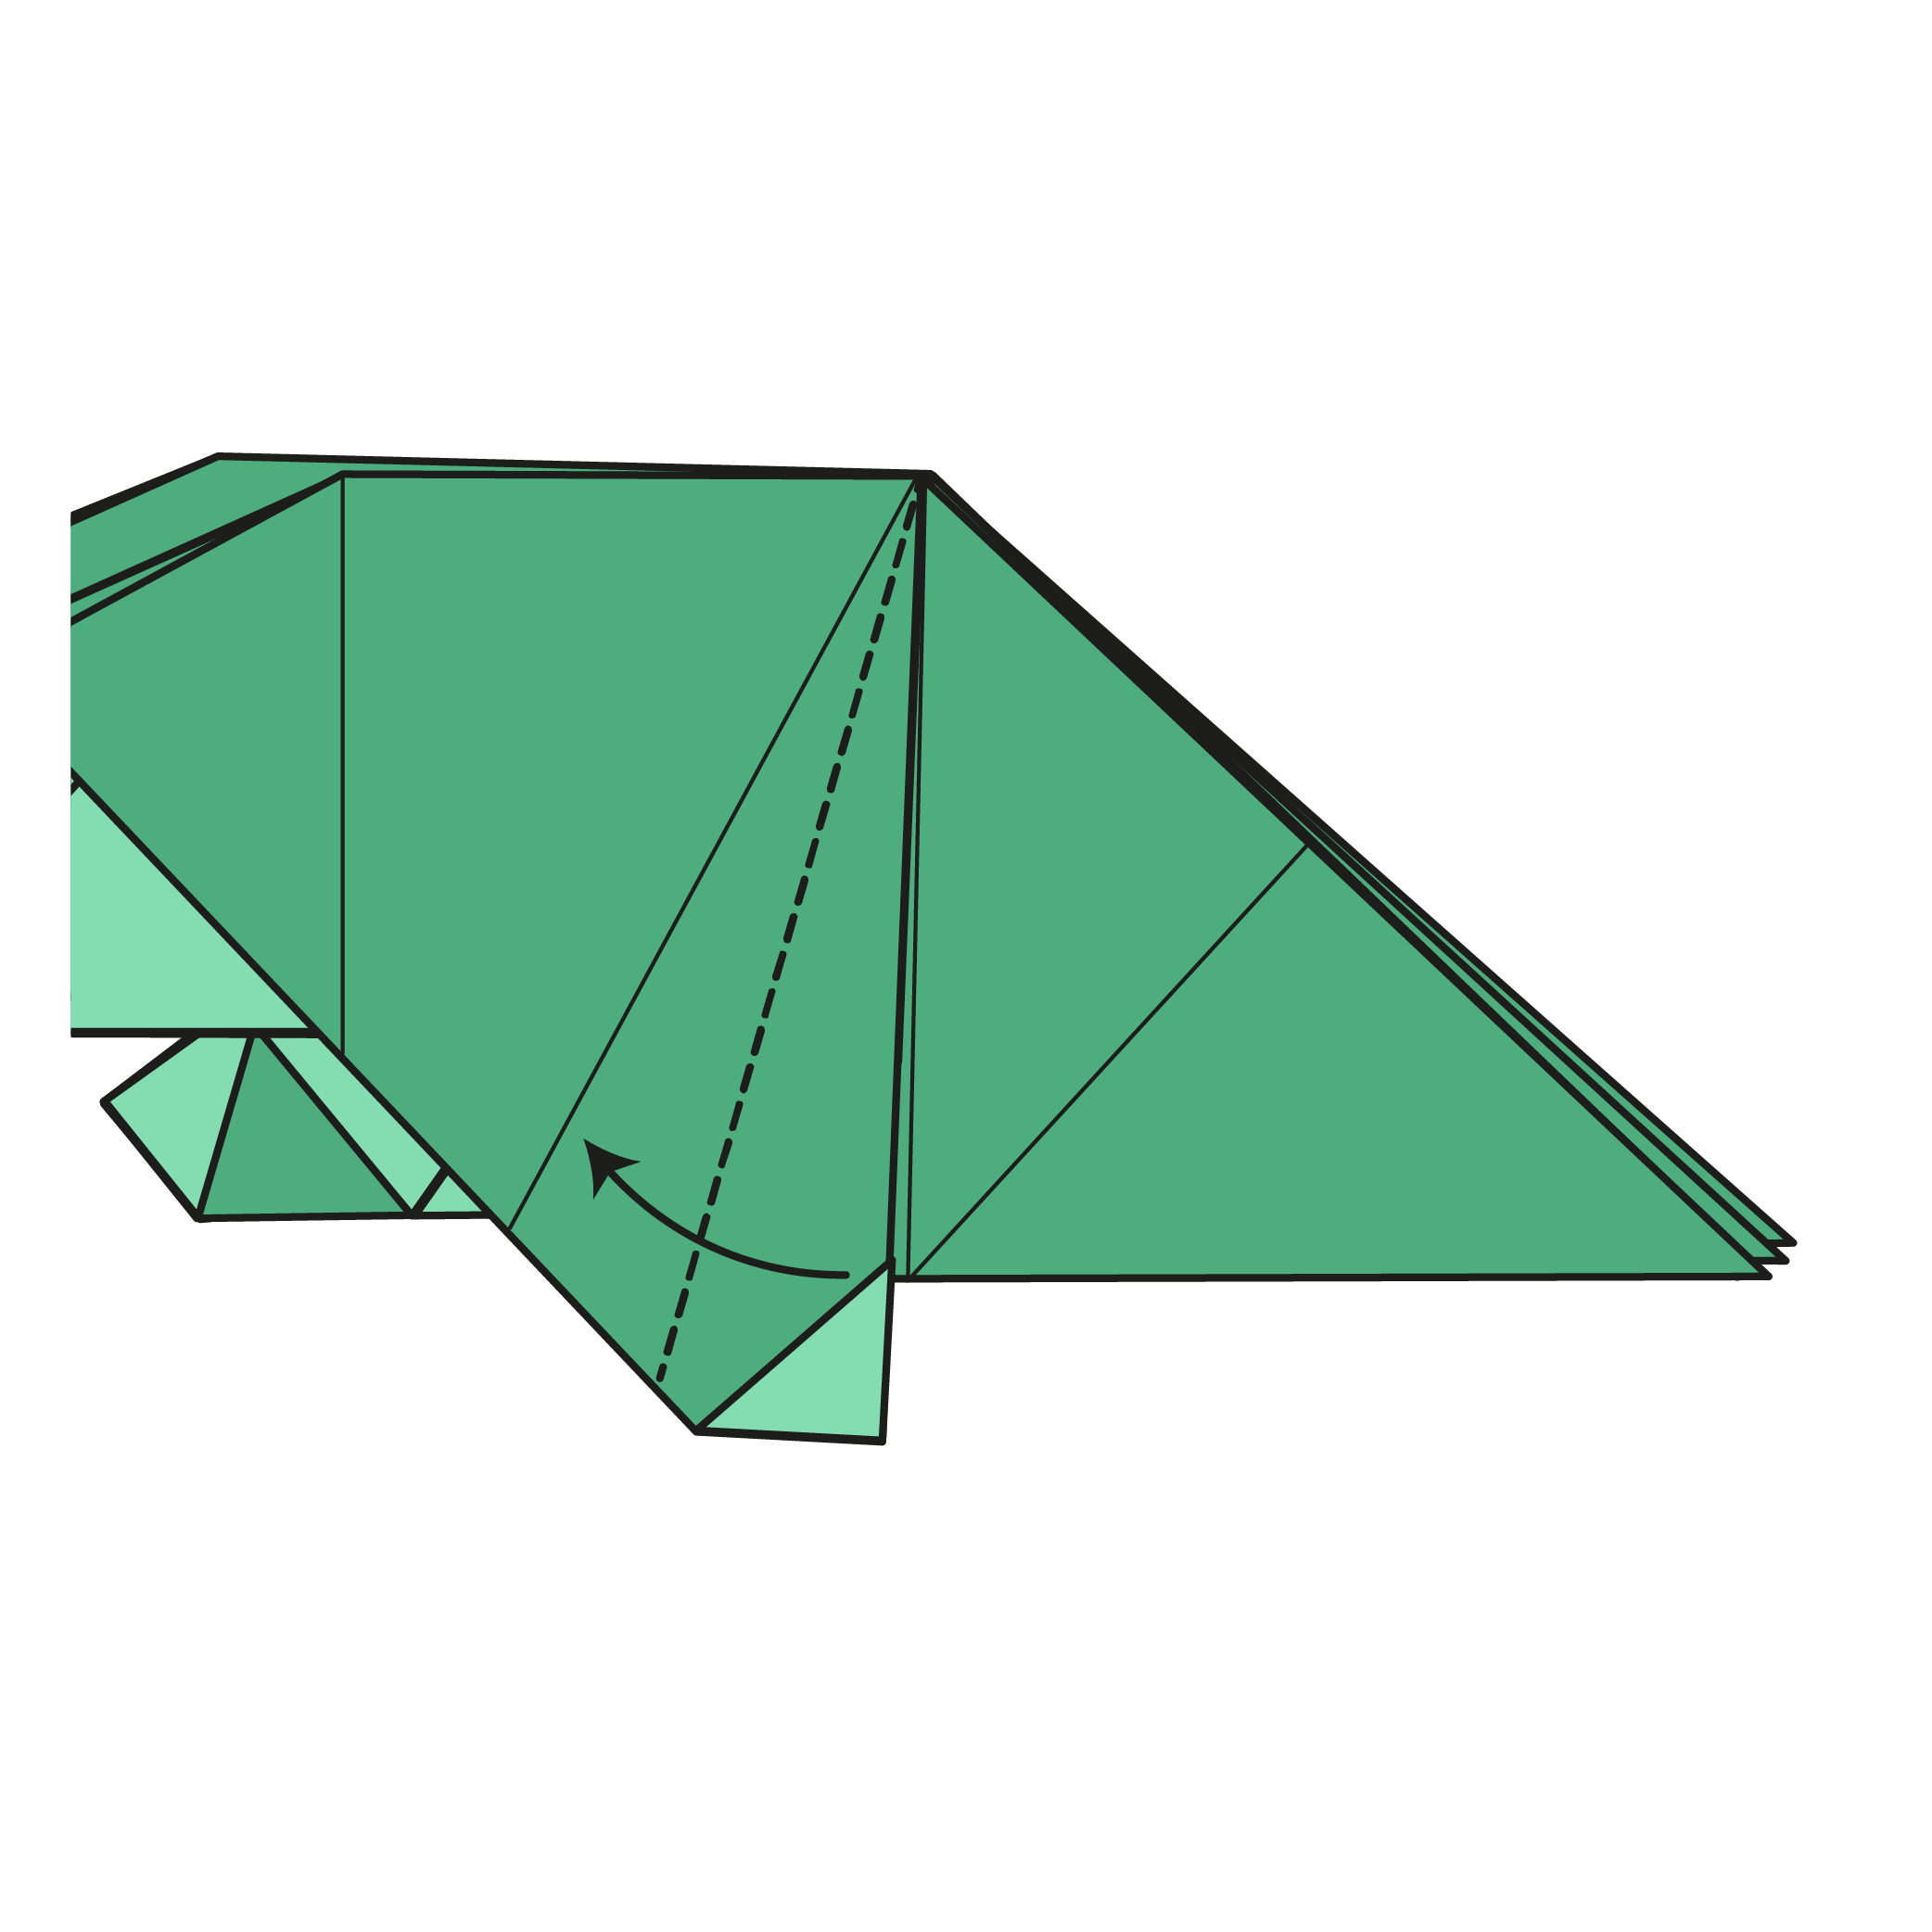
Step 7

Bring the bottom corner up and fold along the creases from Step 6 to flatten the model.
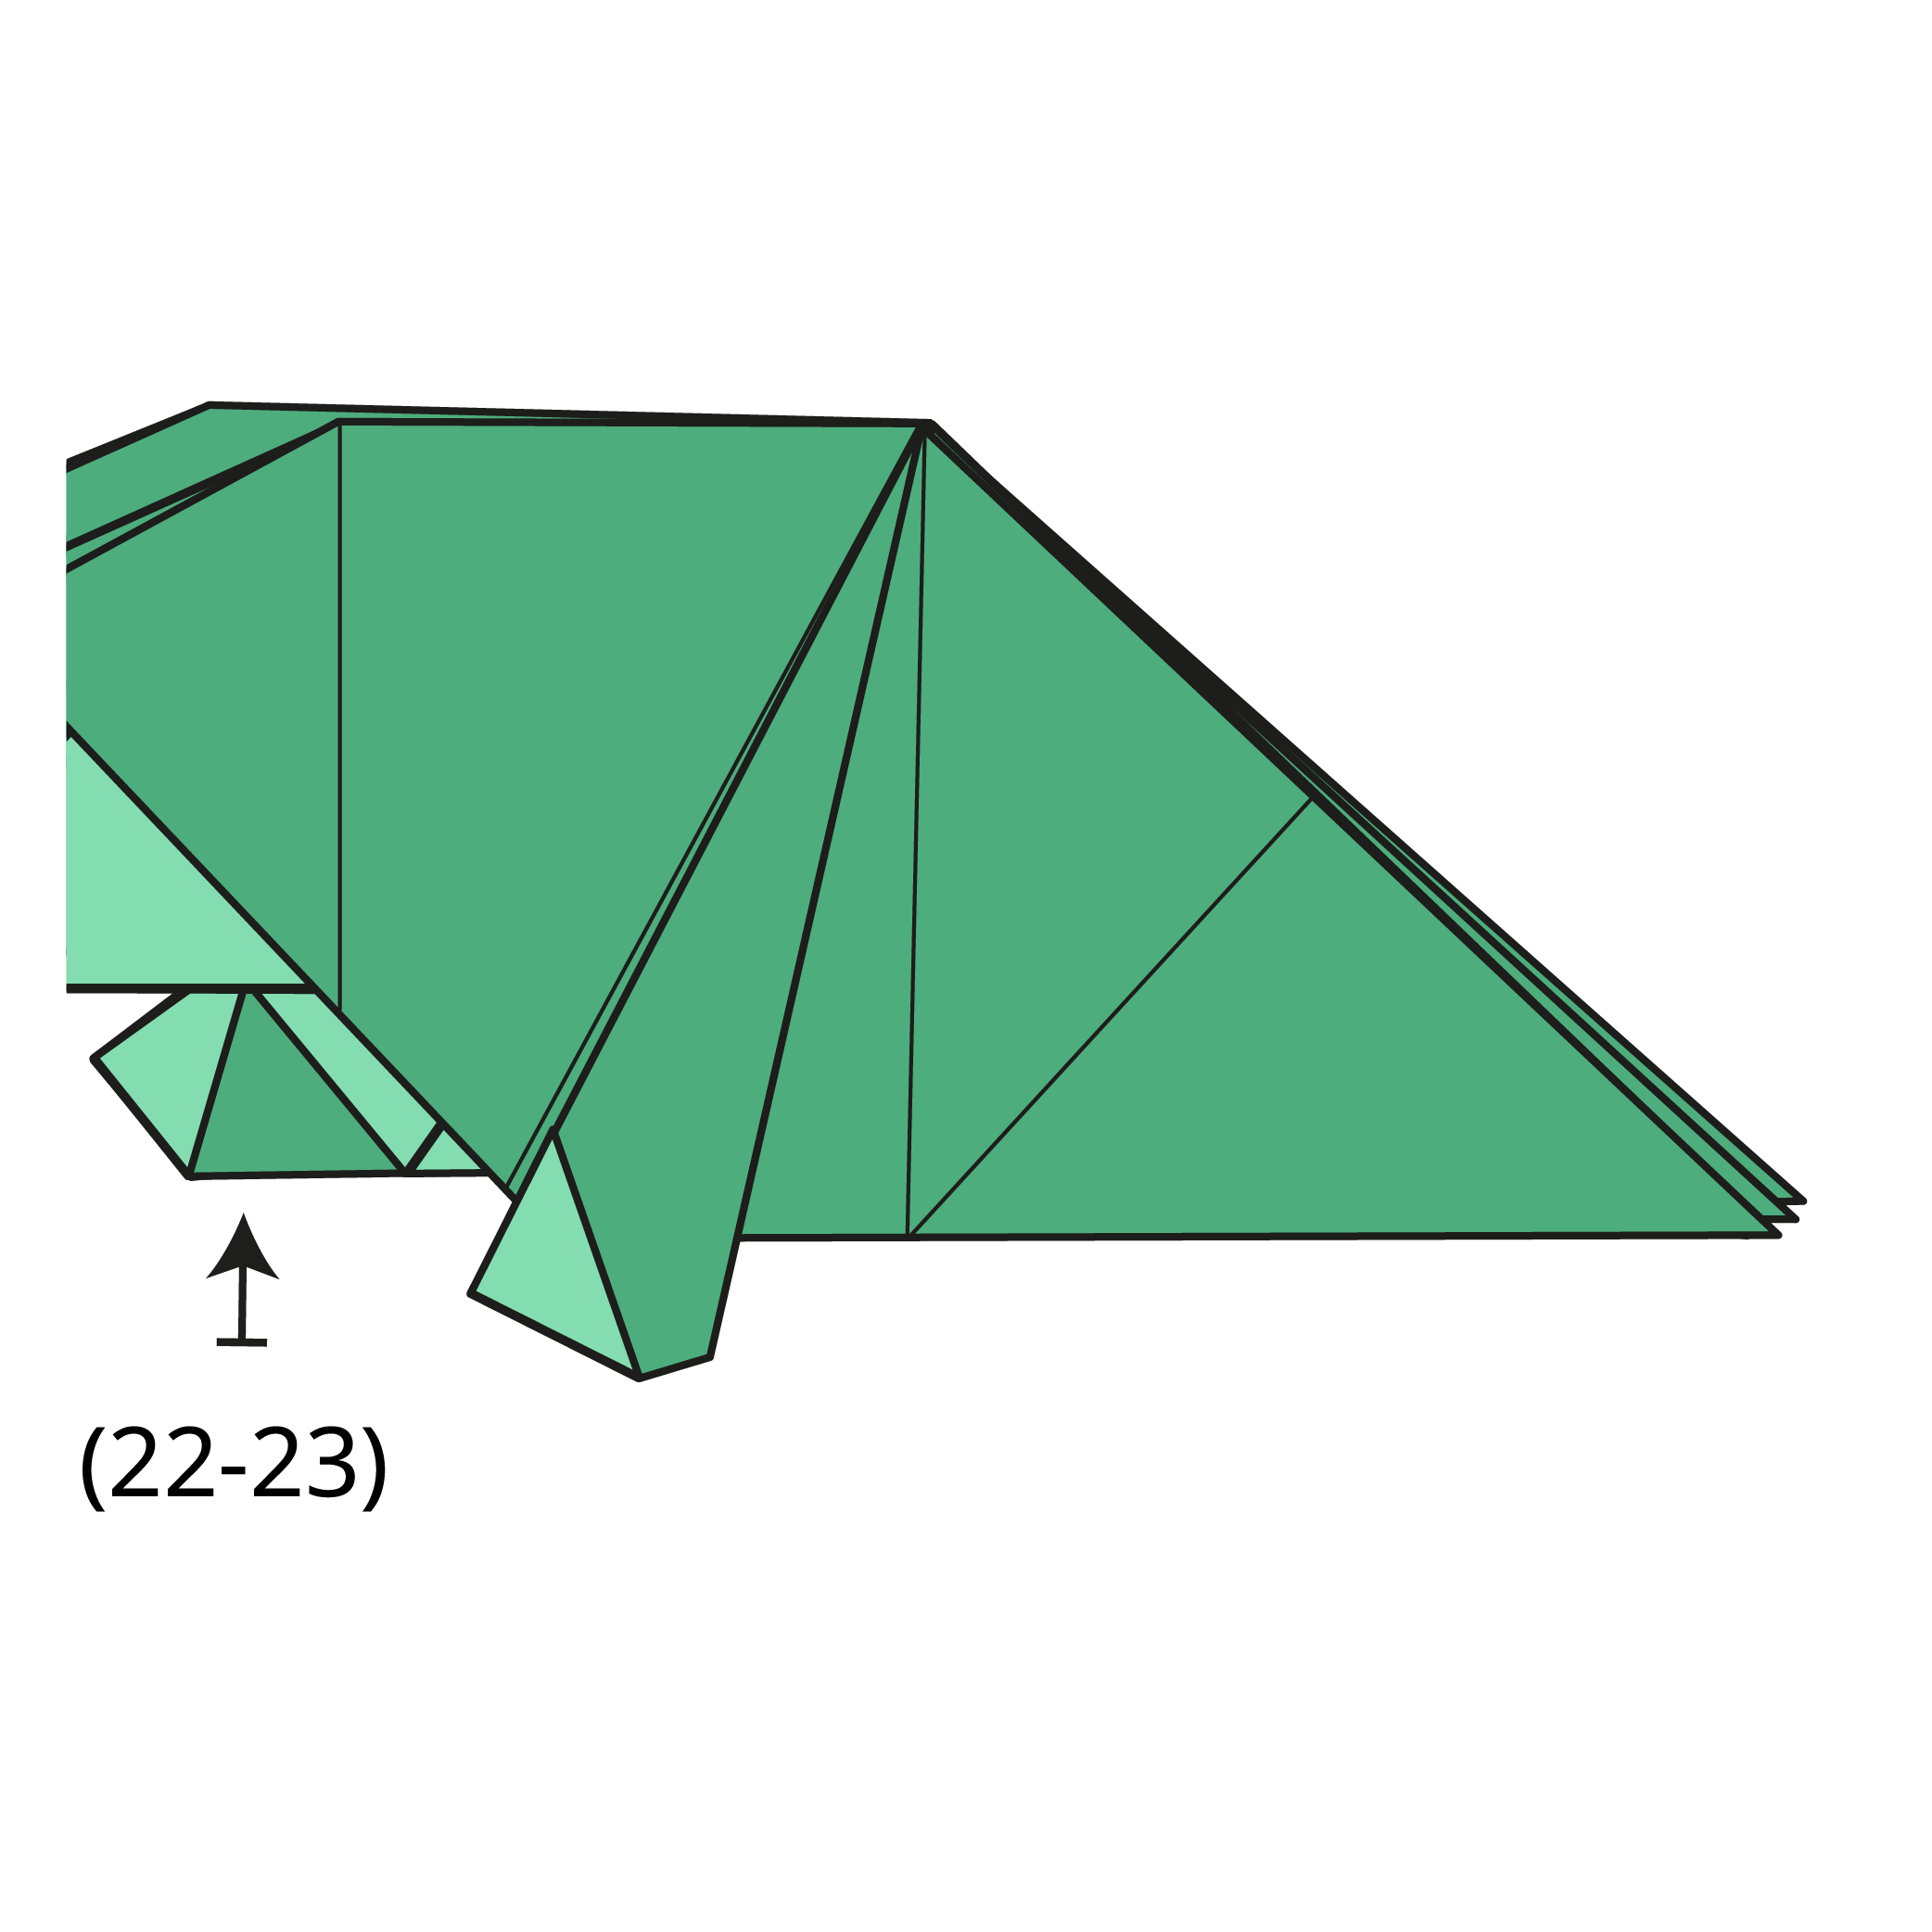
Step 8

Fold the top flap’s top corner down along the dotted line.
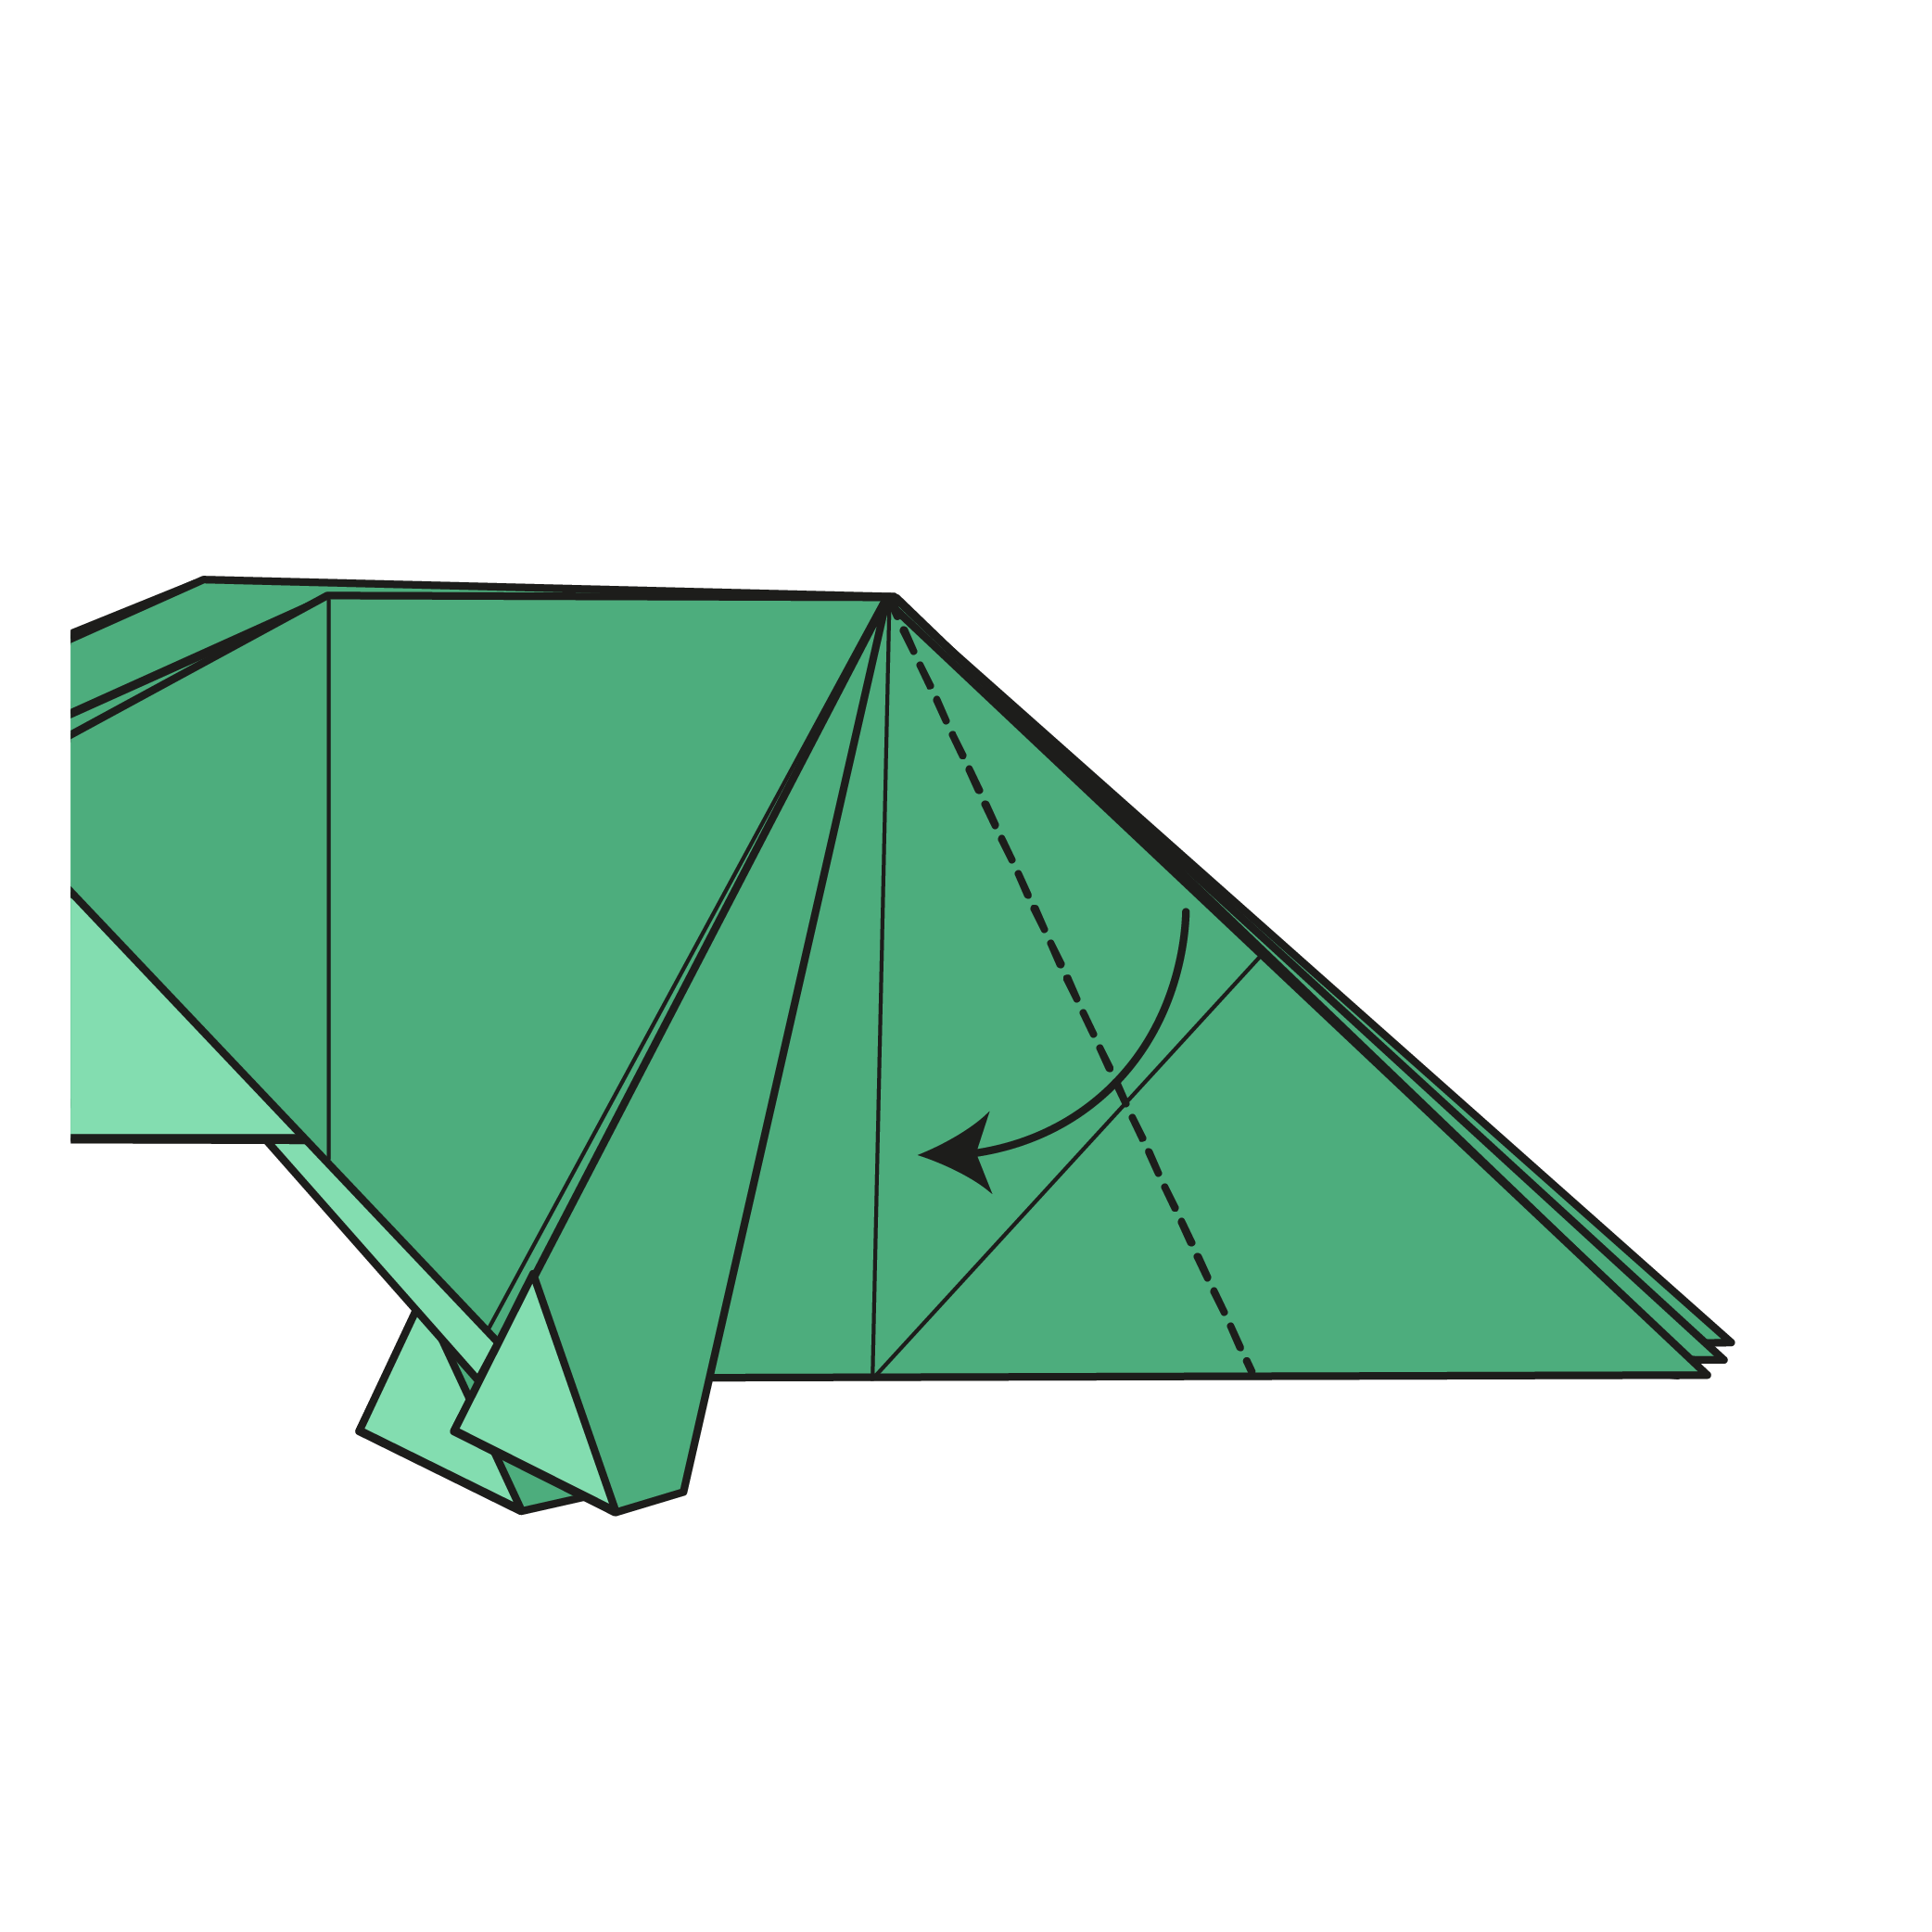
Step 9
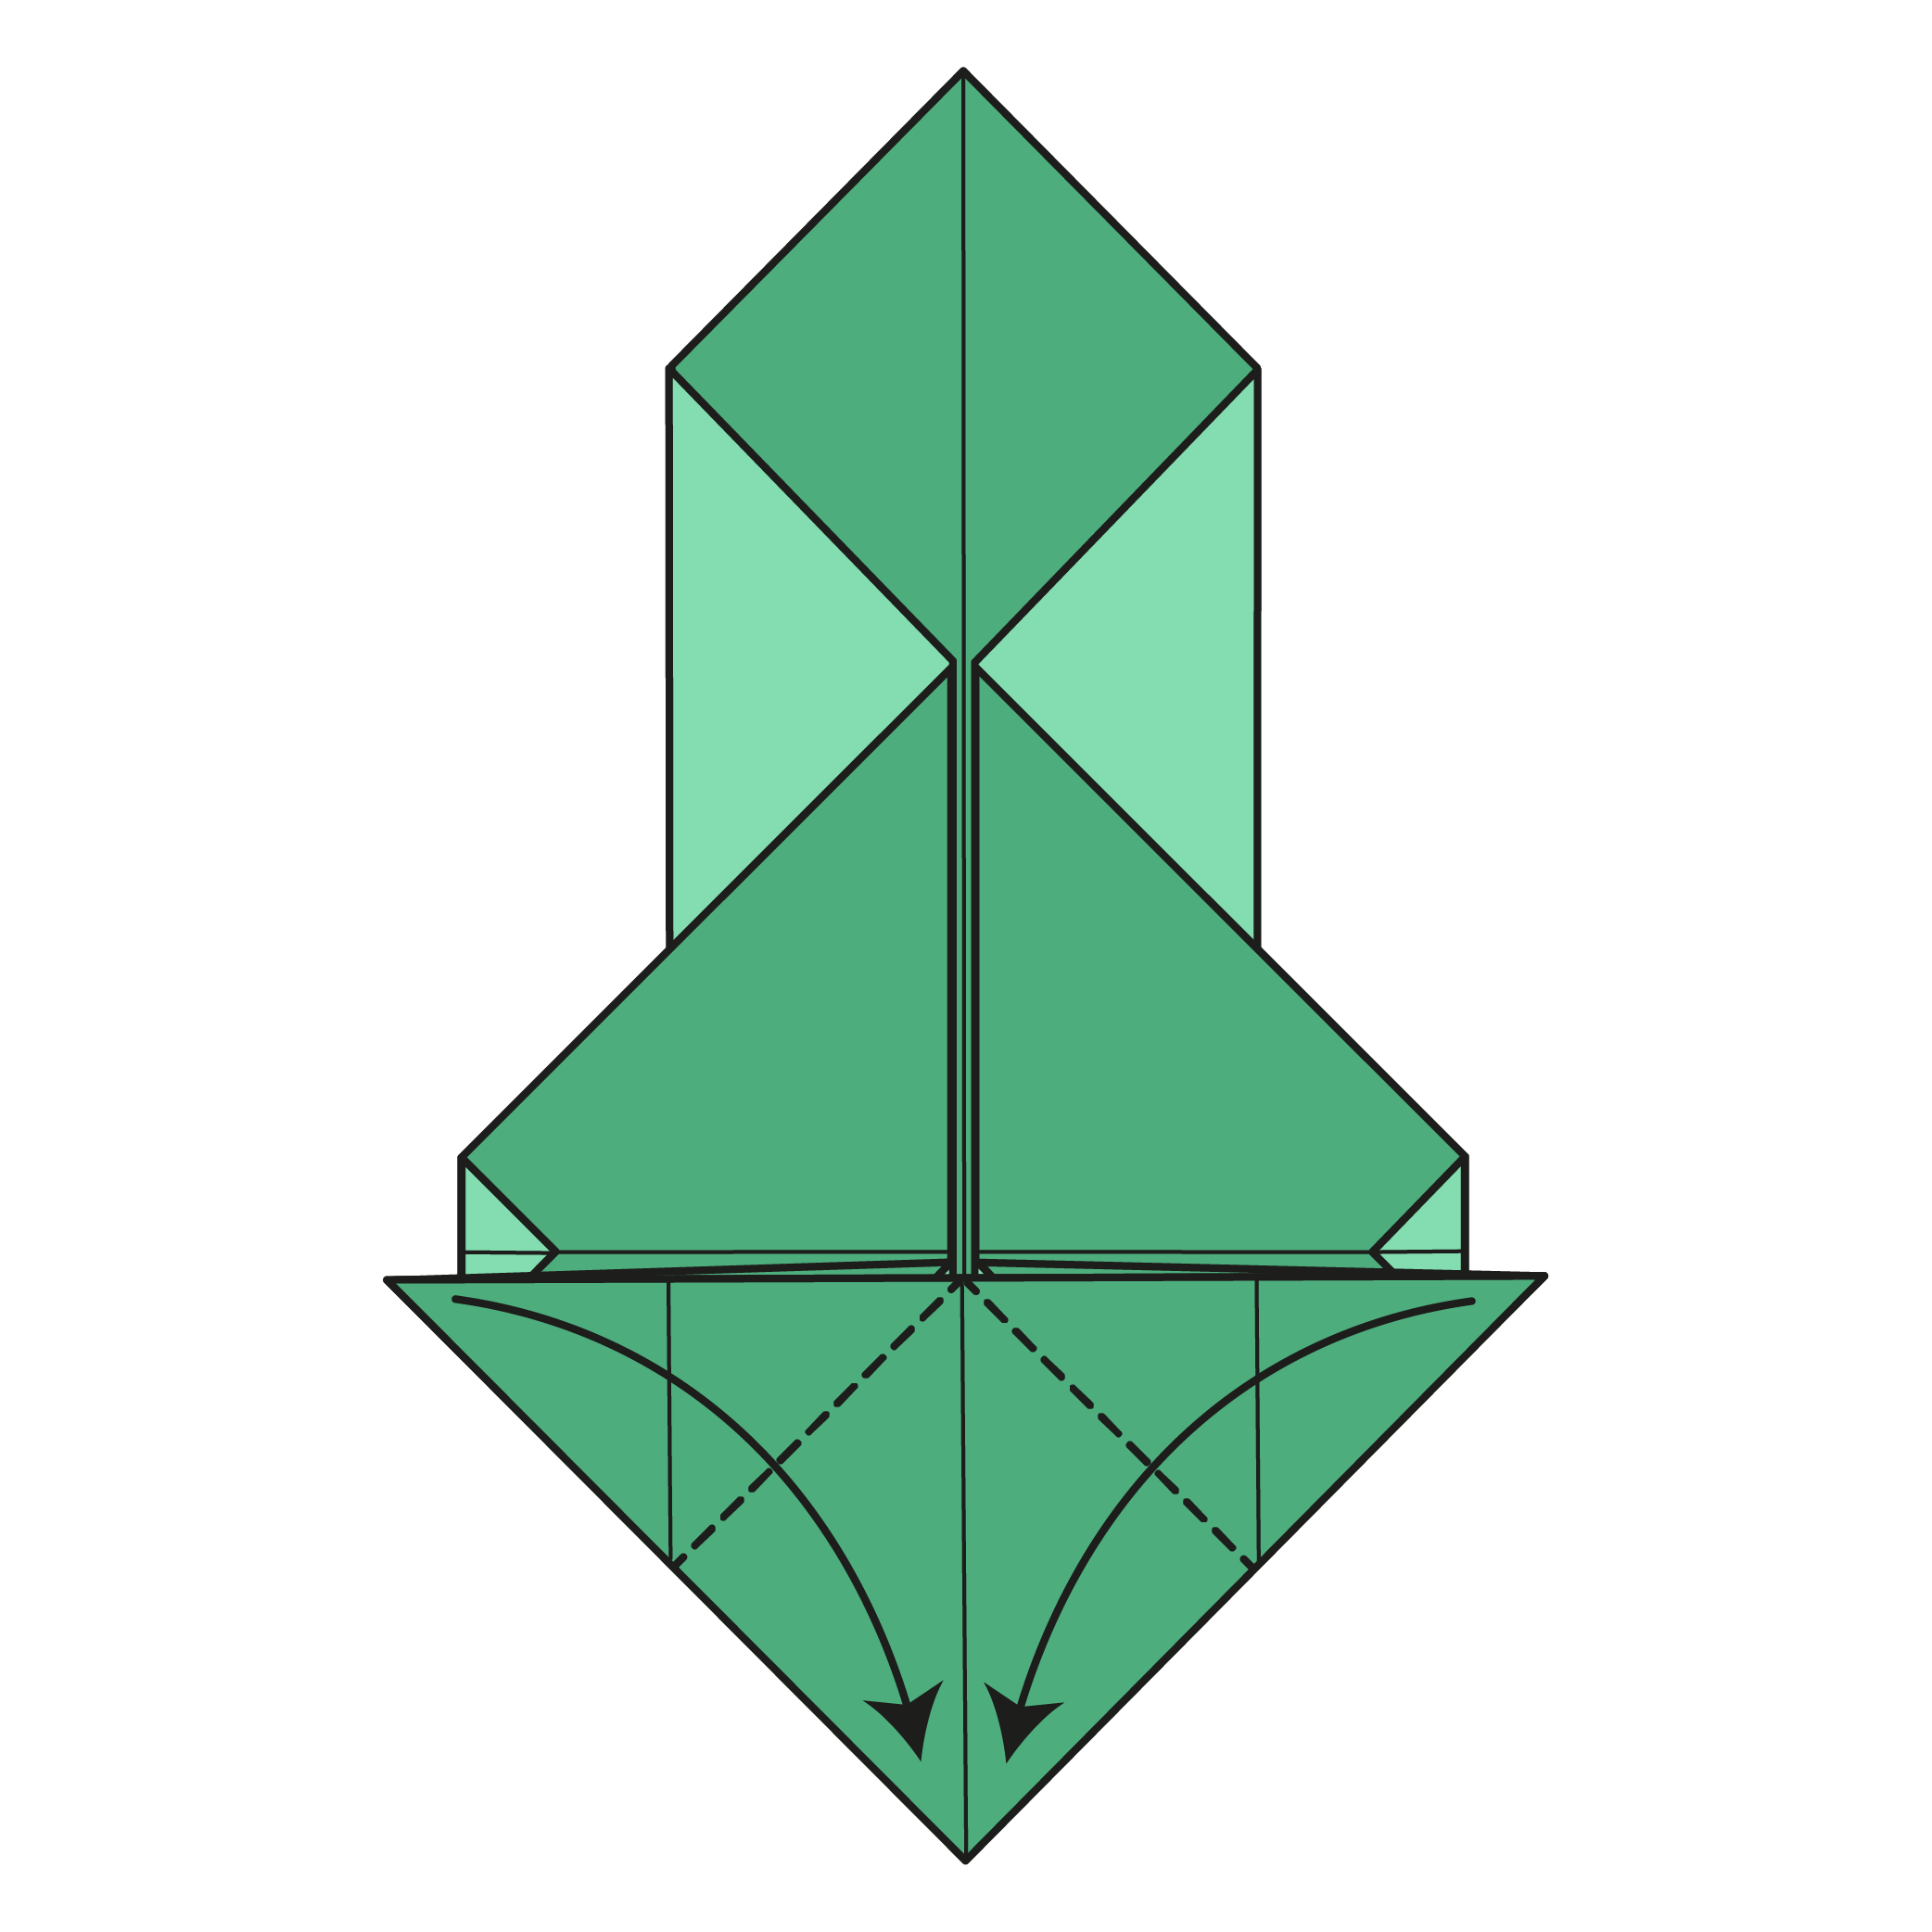
Fold the top flap’s left and right corners down to meet the bottom corner.
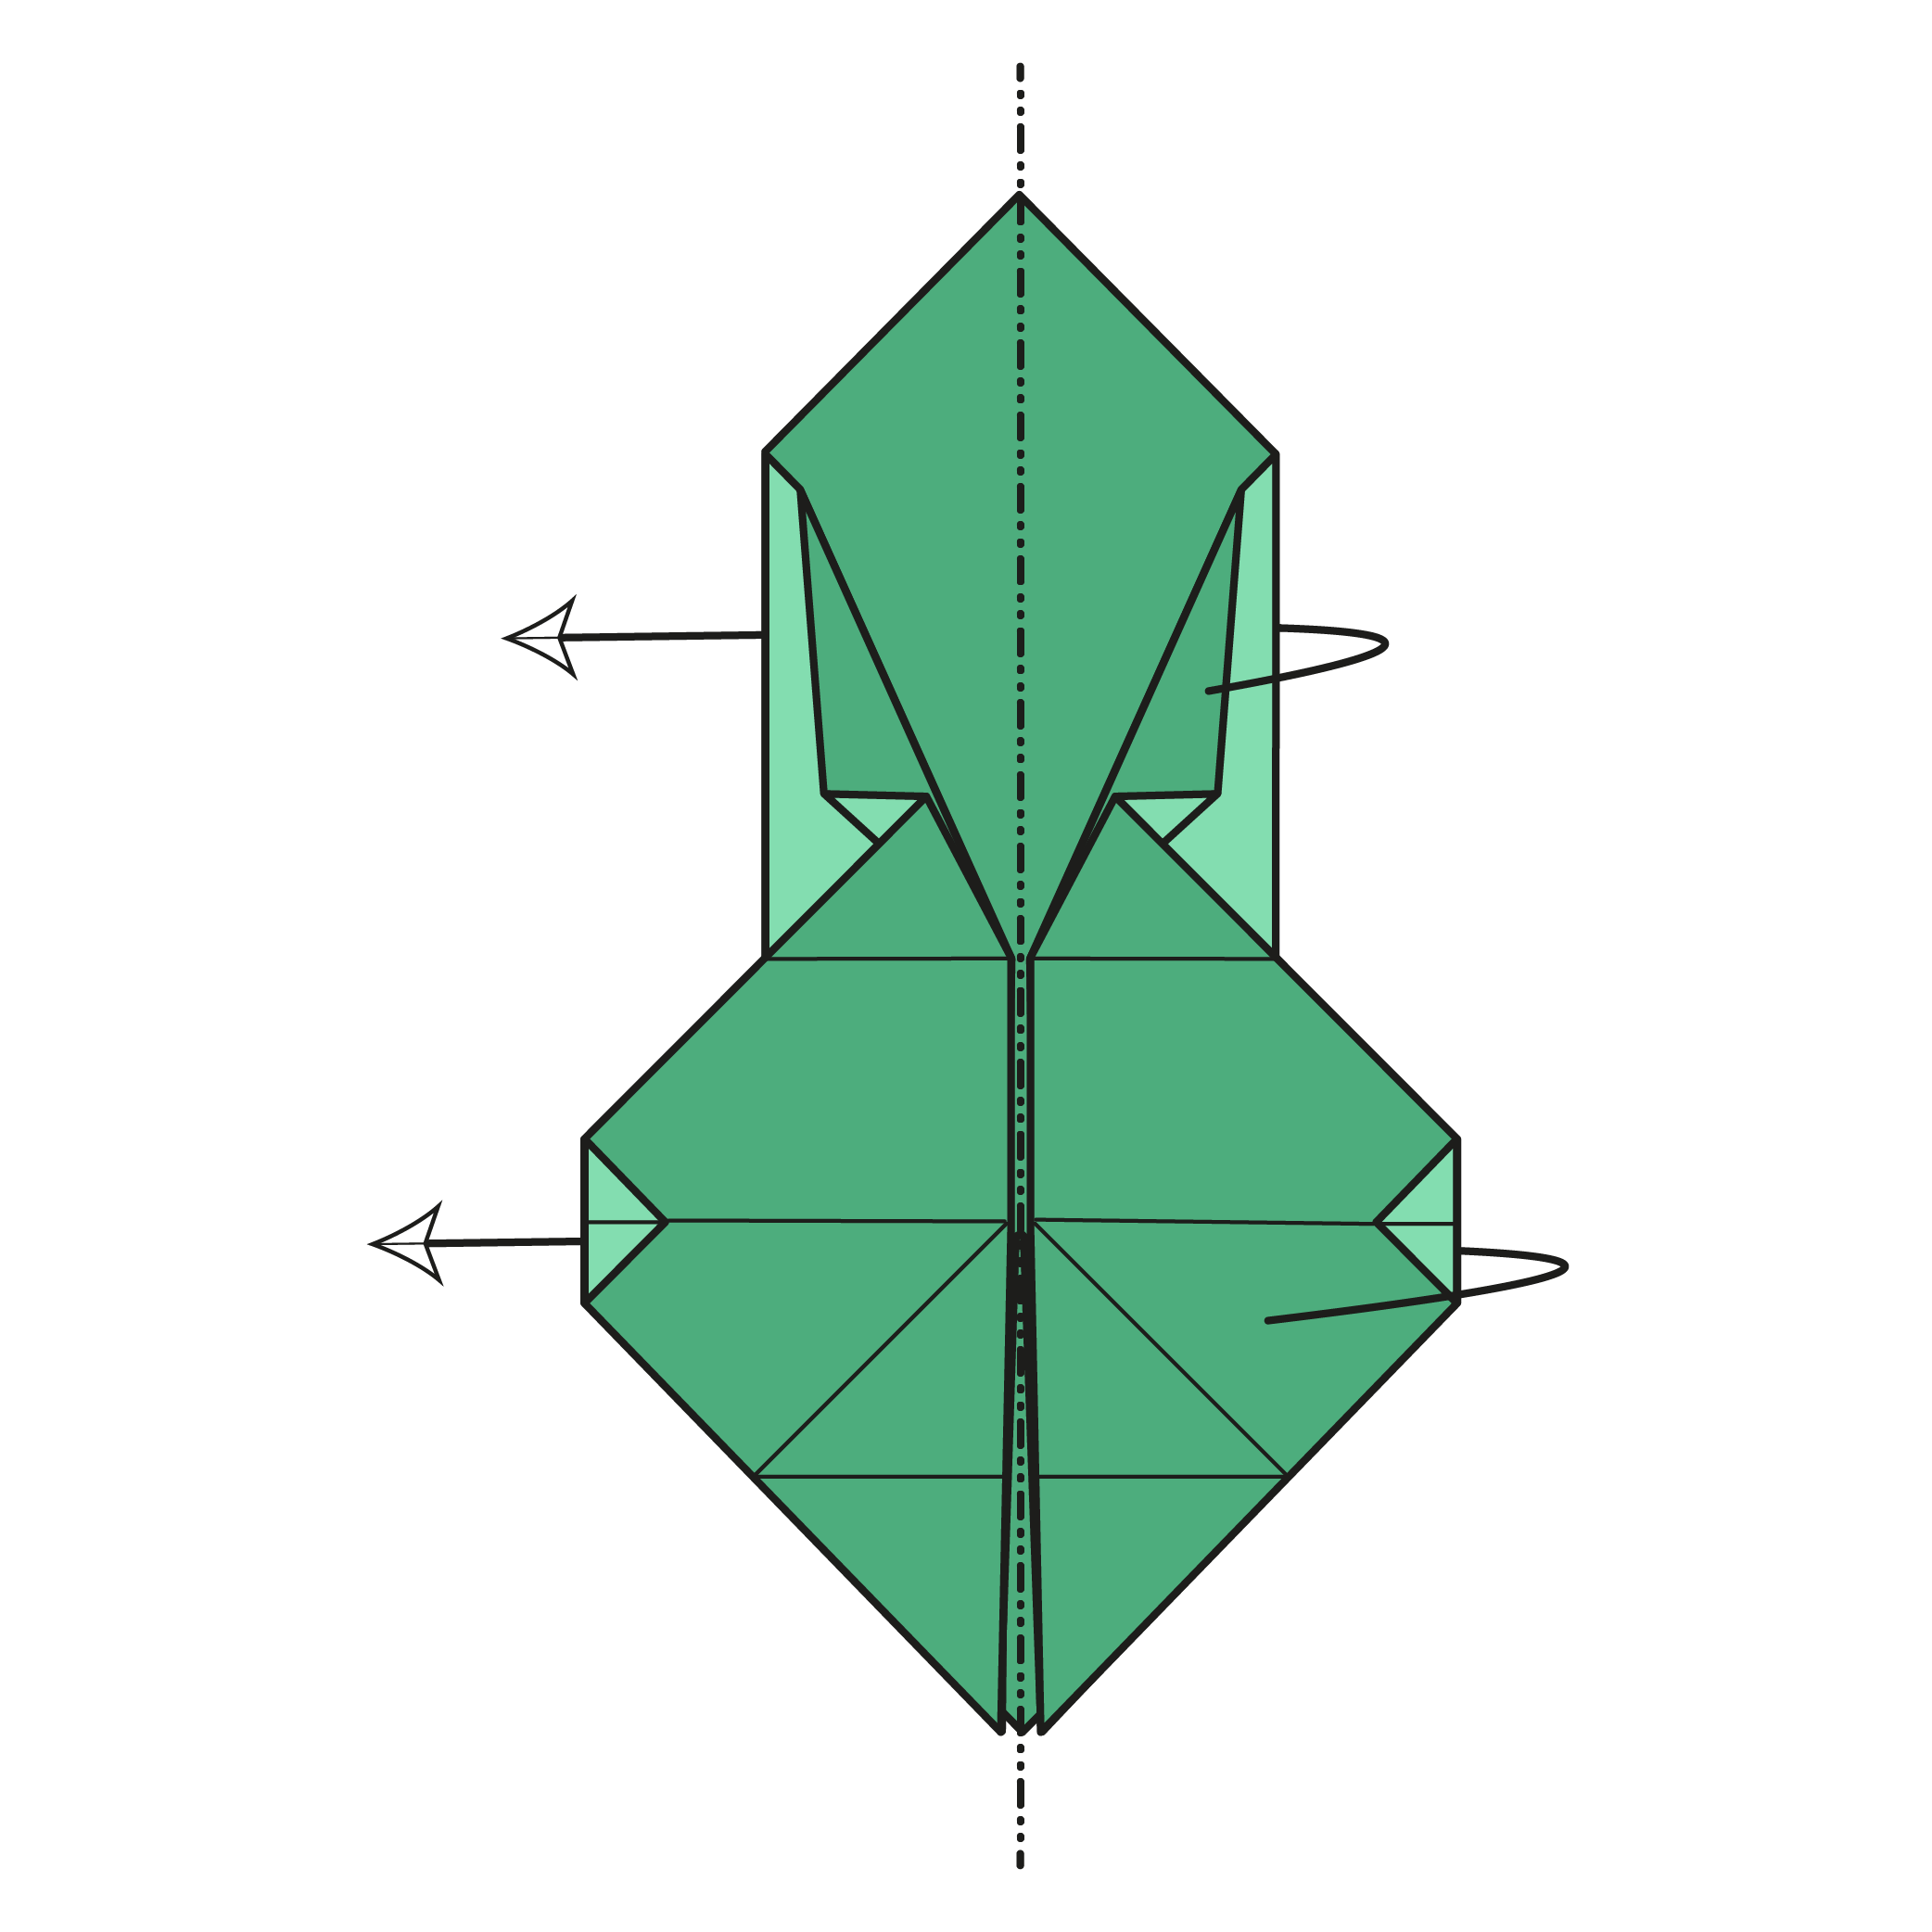
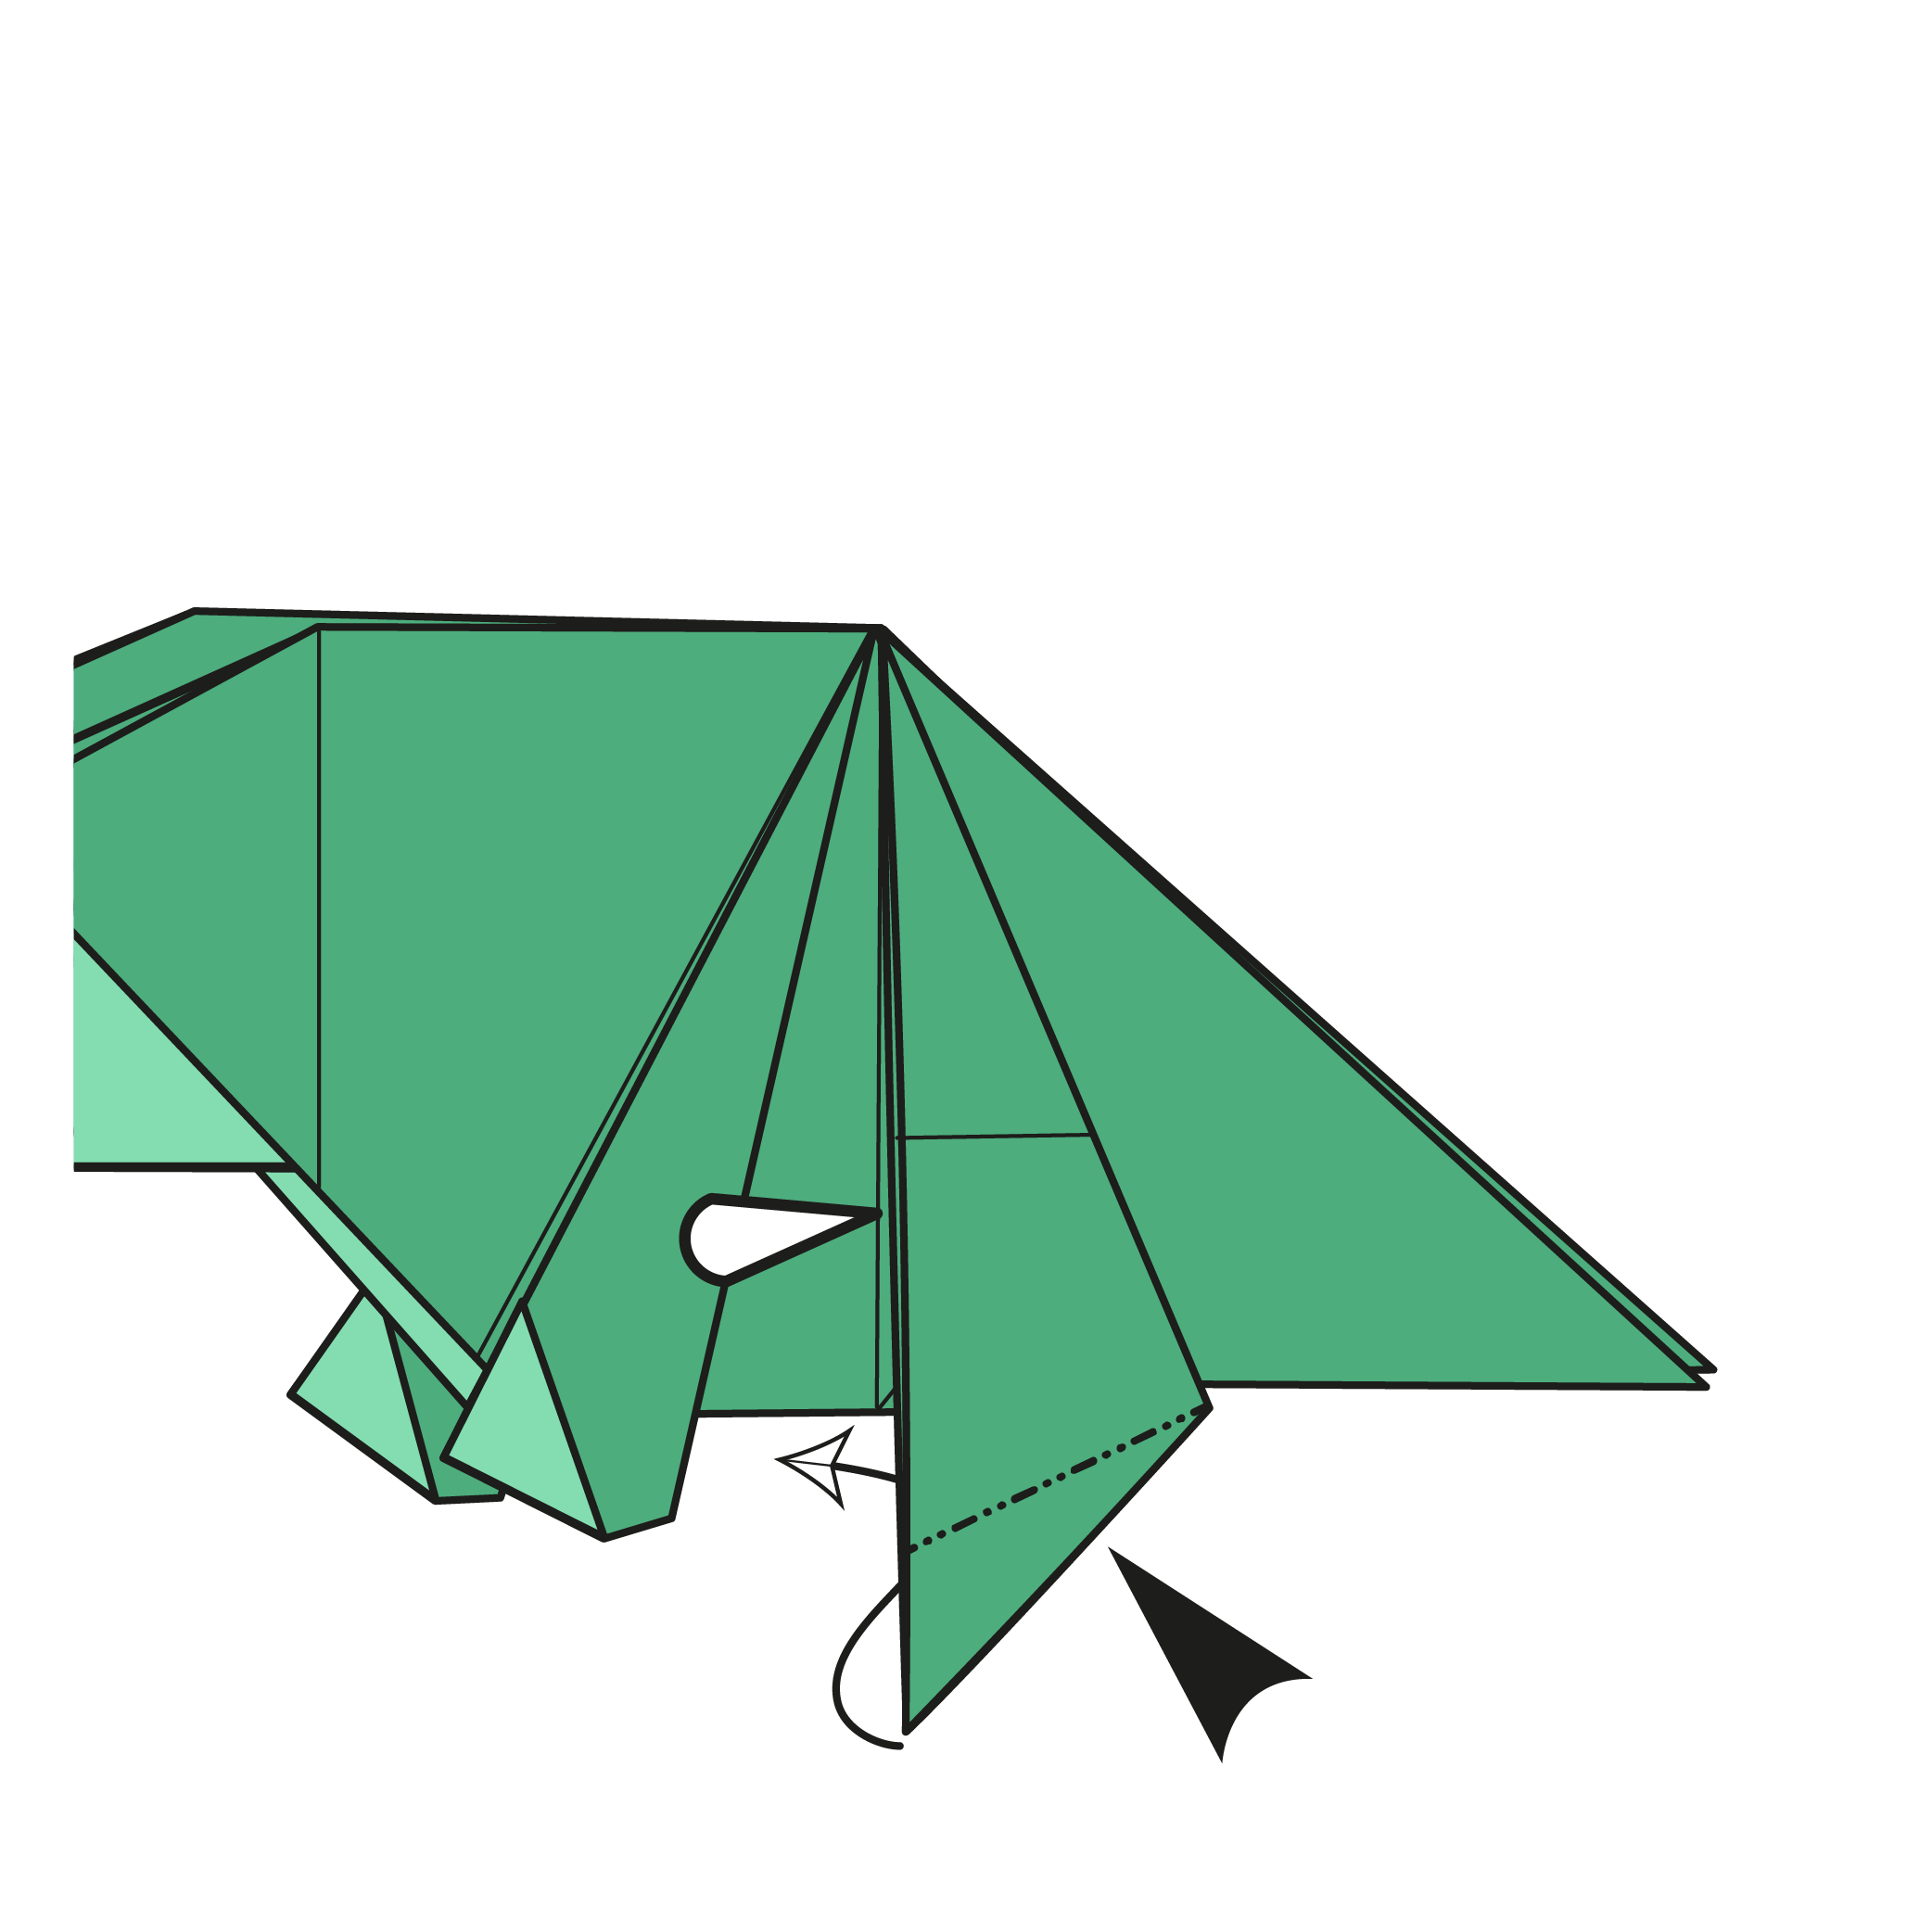
Step 10
Mountain fold the top corner down to meet the bottom corner. Then unfold.
Step 11

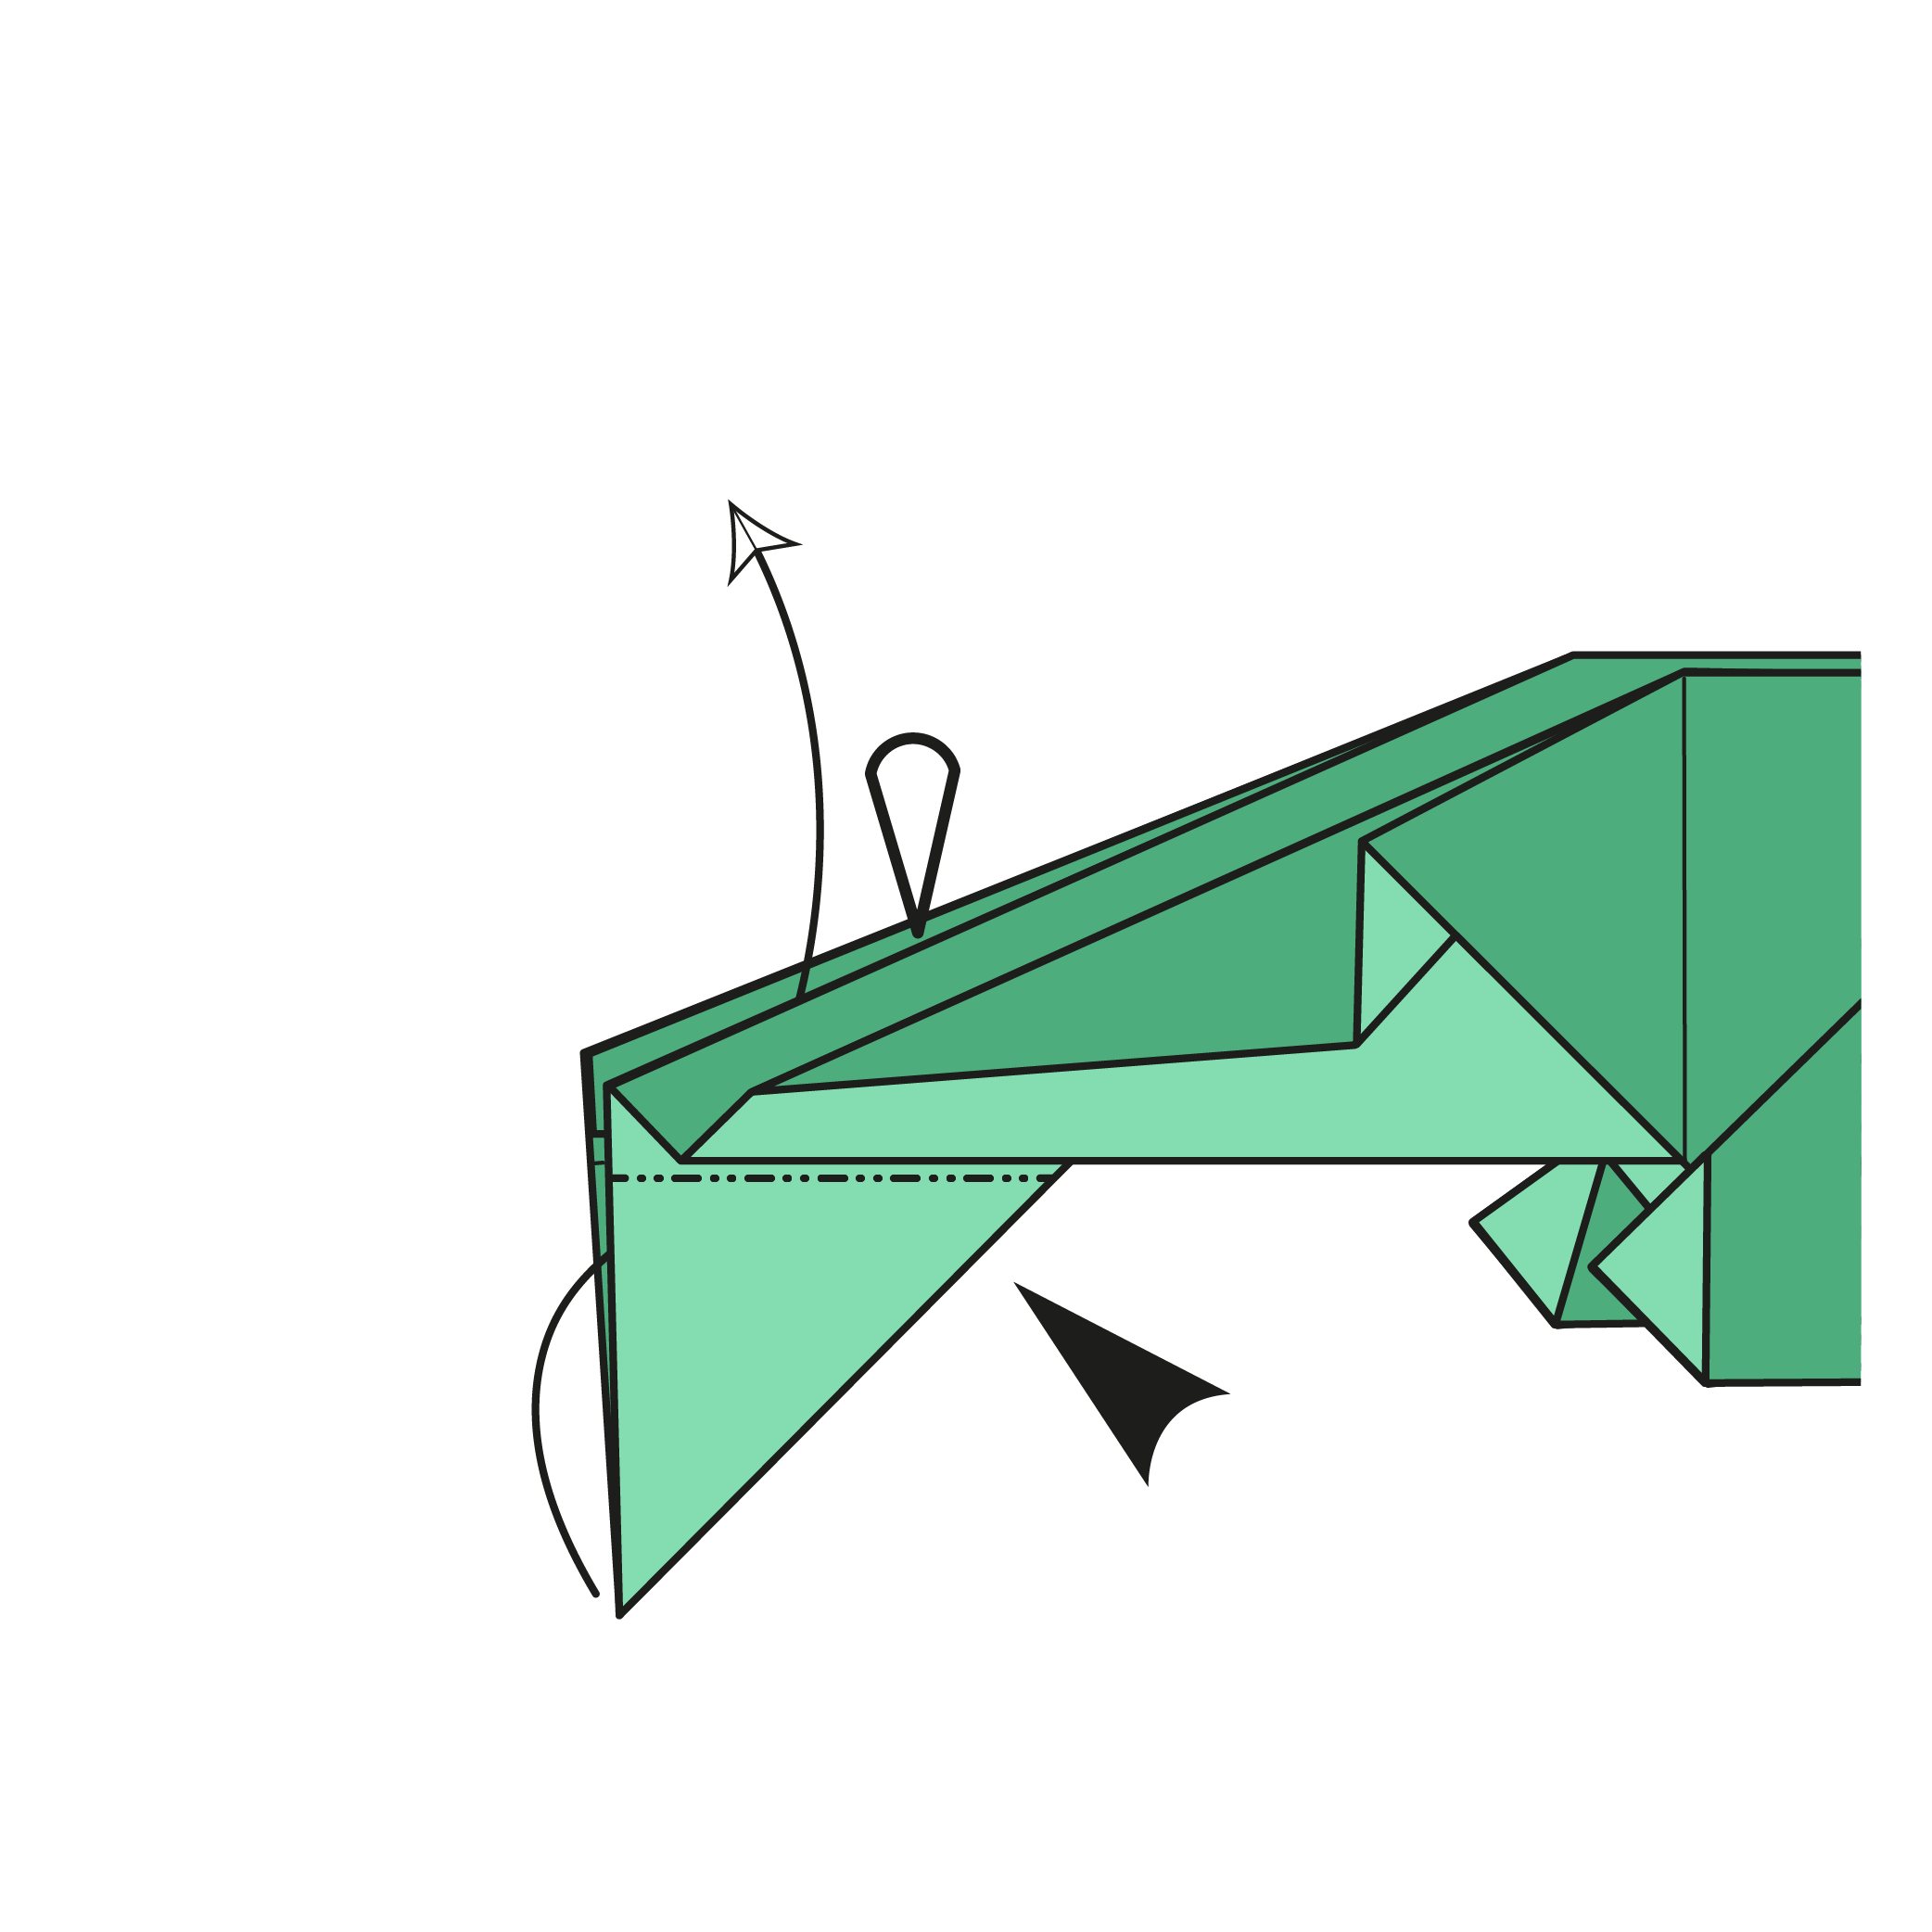
On the right side, fold along the dotted line, starting where the vertical and horizontal lines intersect. Leave a small gap at the top.
Then, unfold.
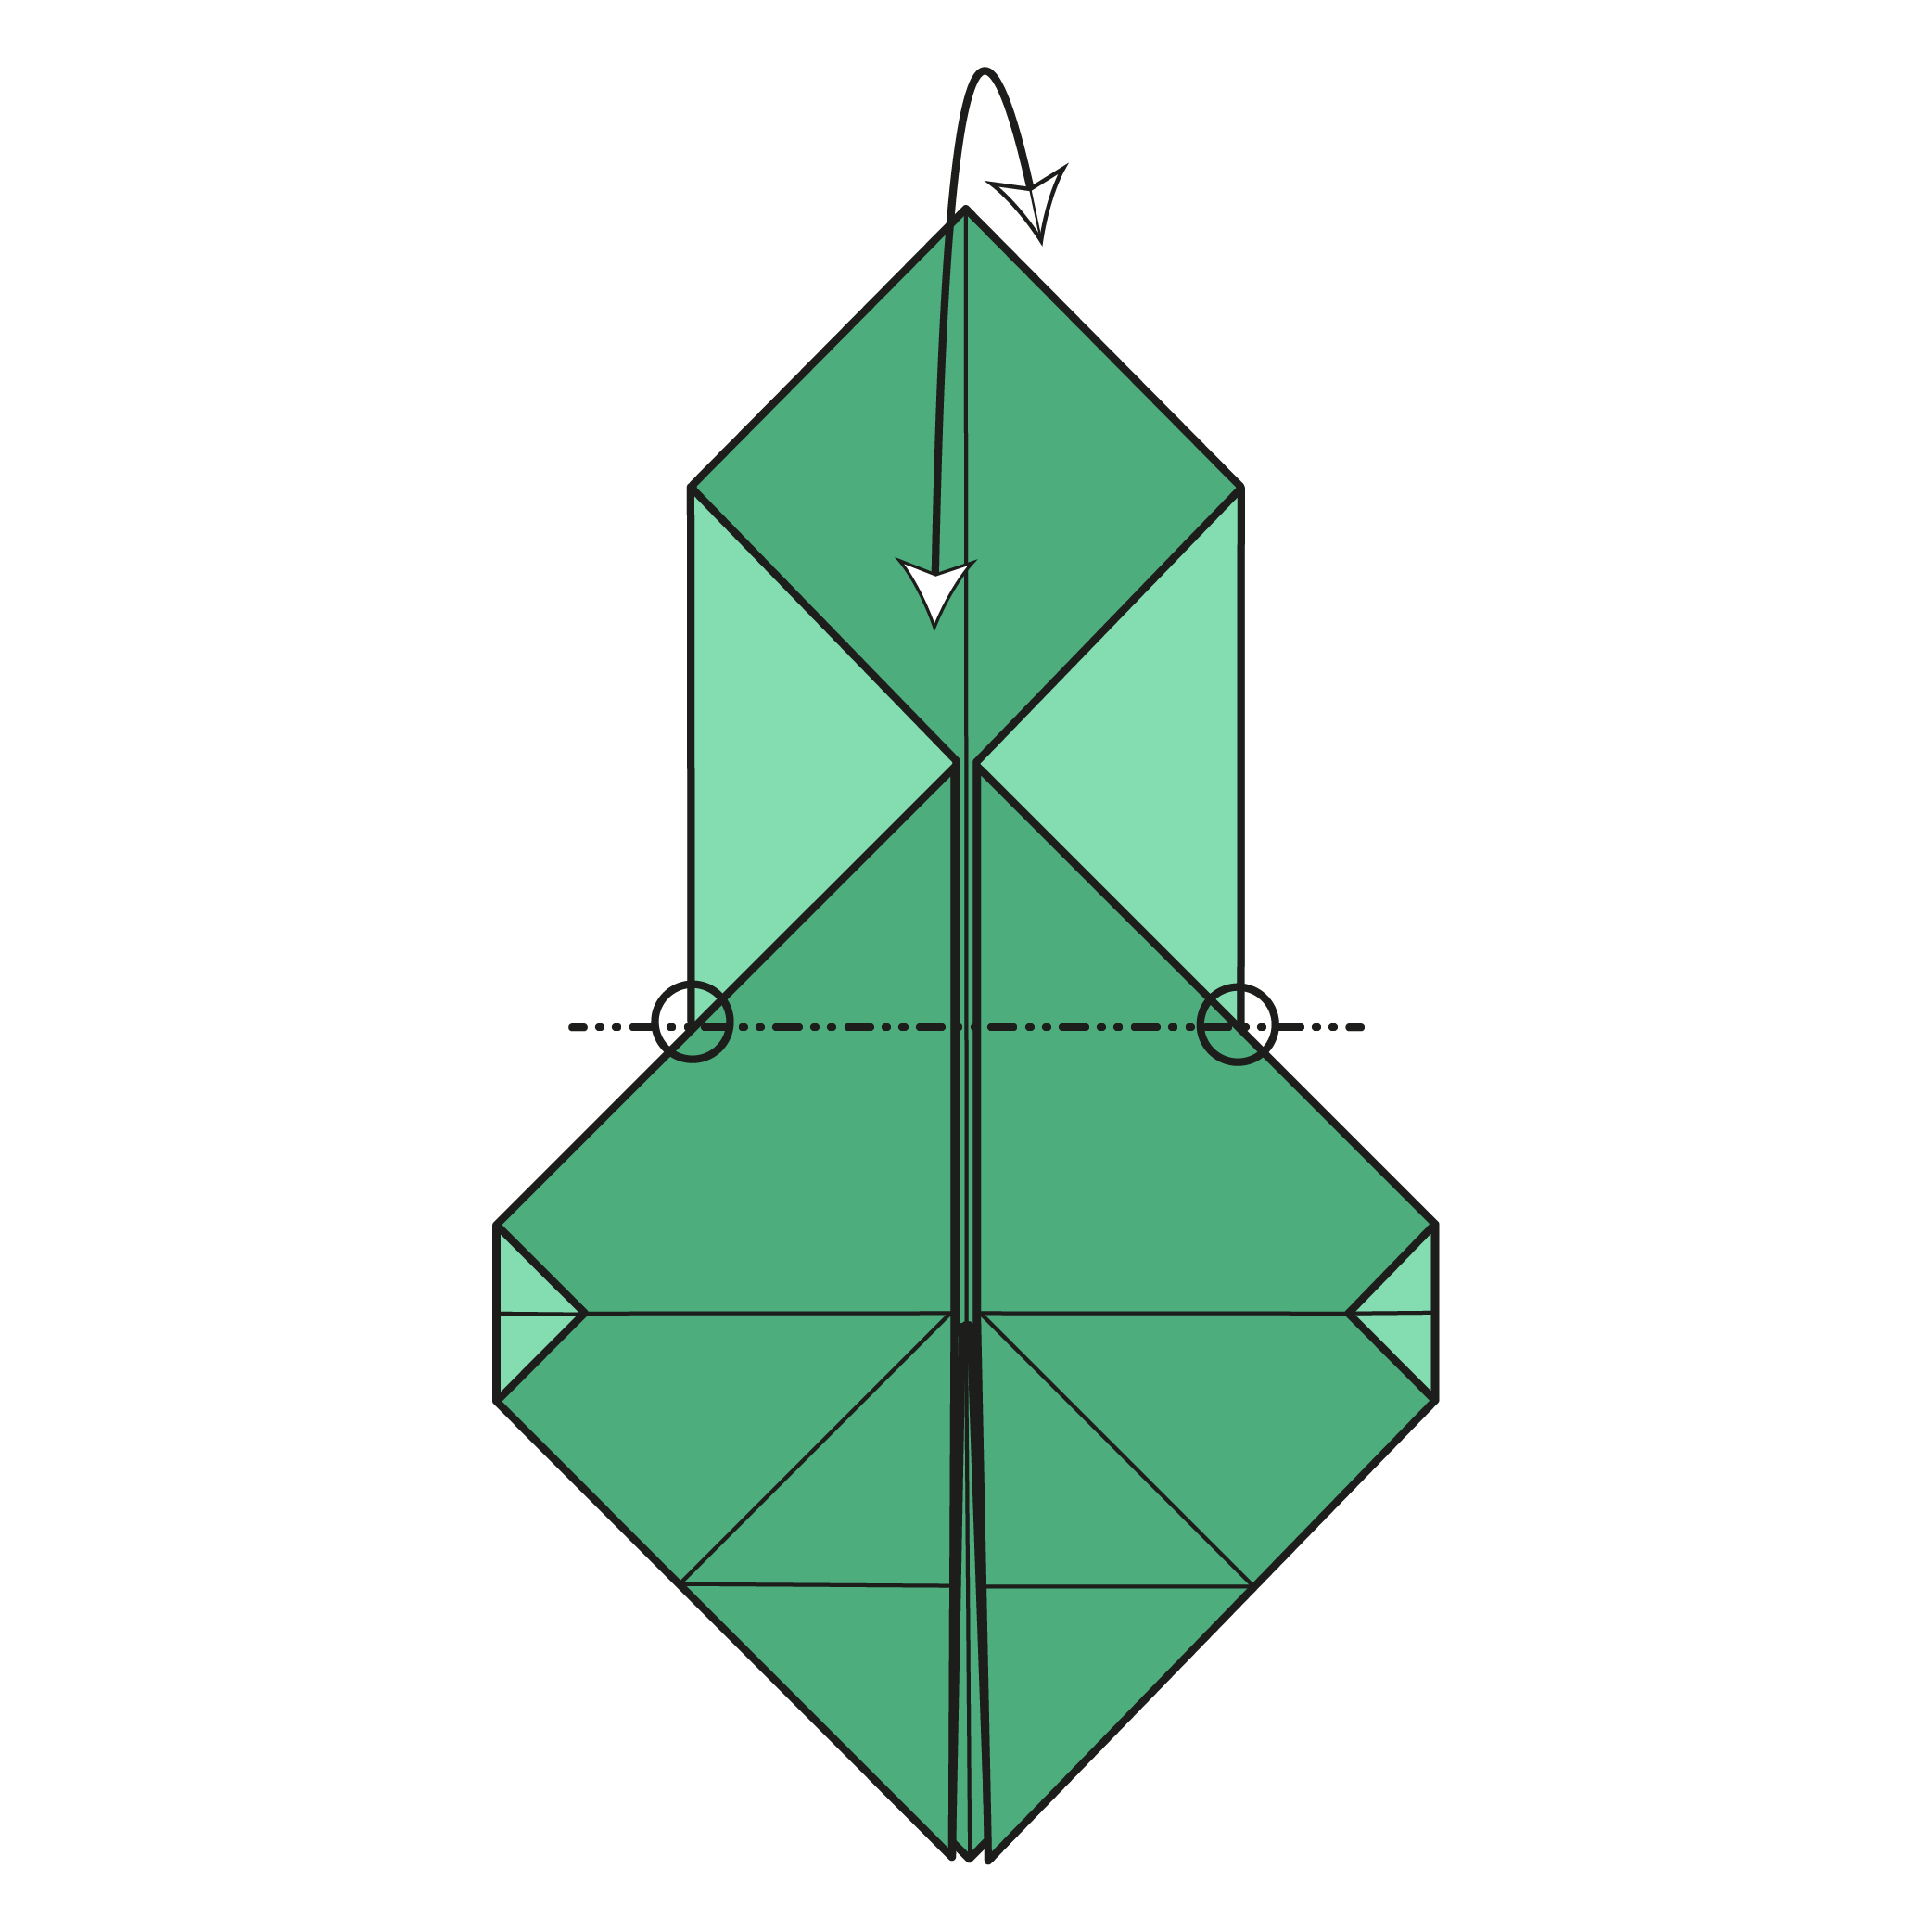
Step 12

Reverse fold along the creases made in Step 11.
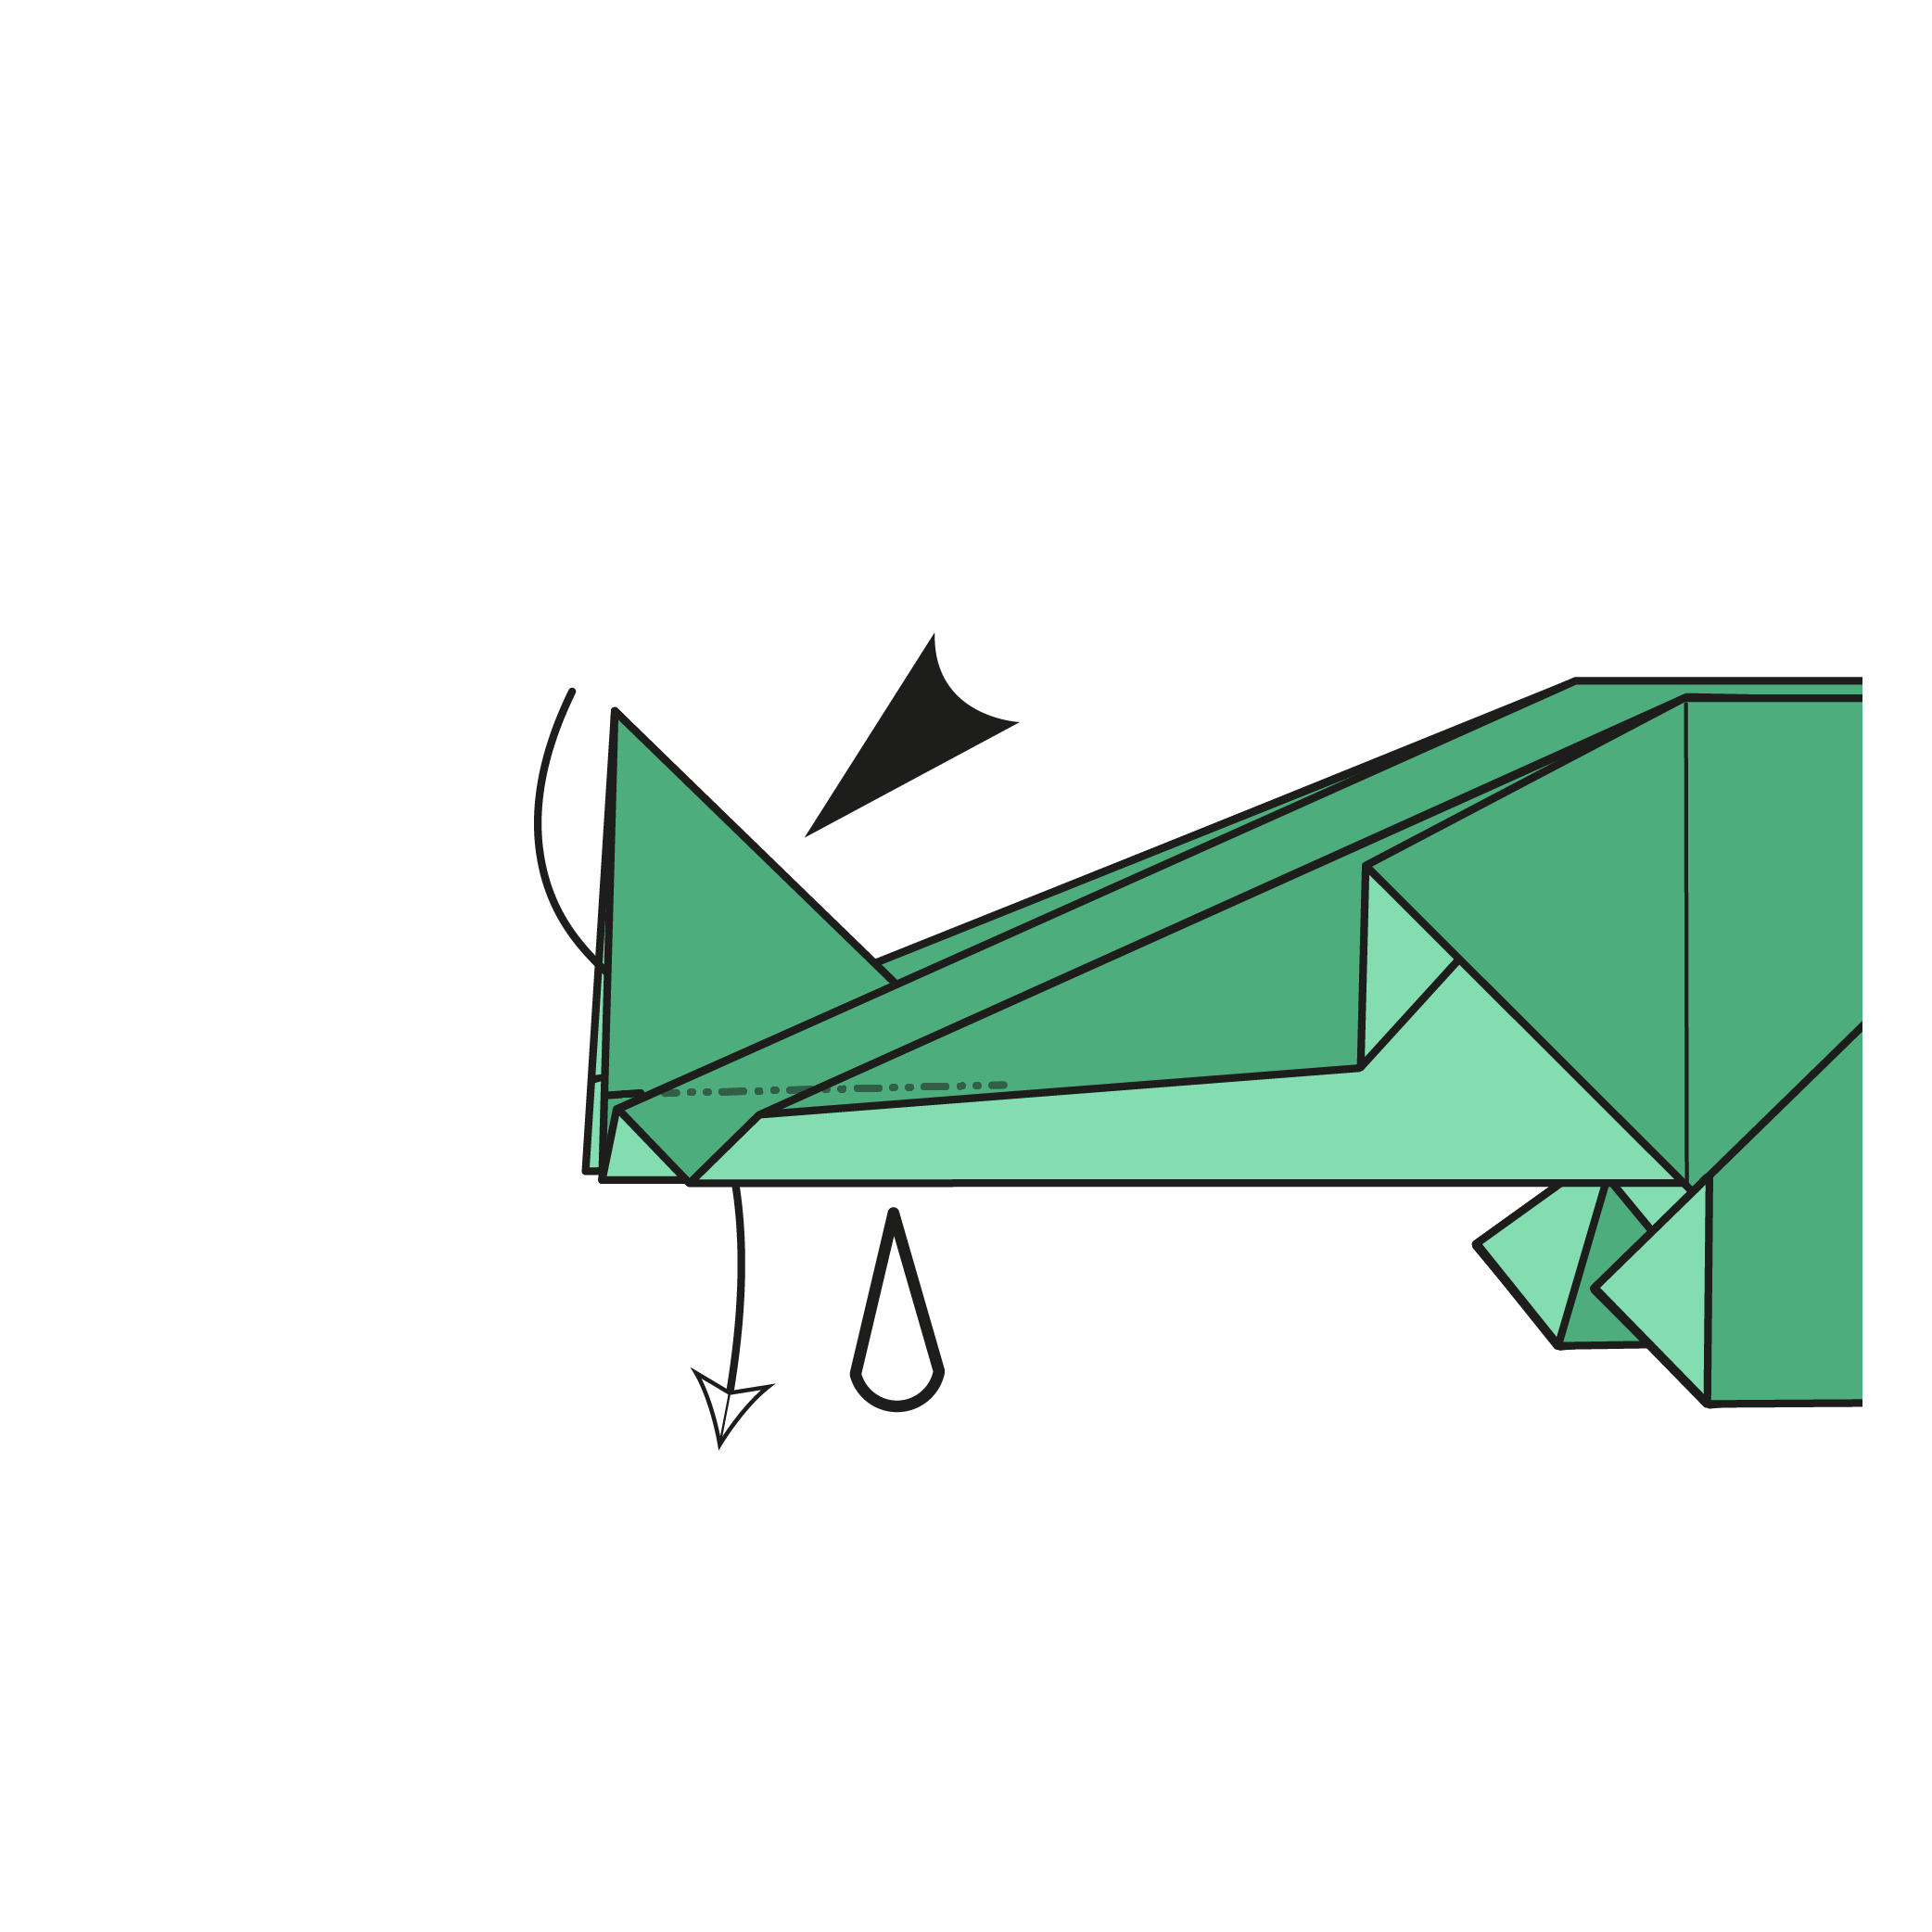
Step 13

Repeat Steps 11 and 12 on the left side.
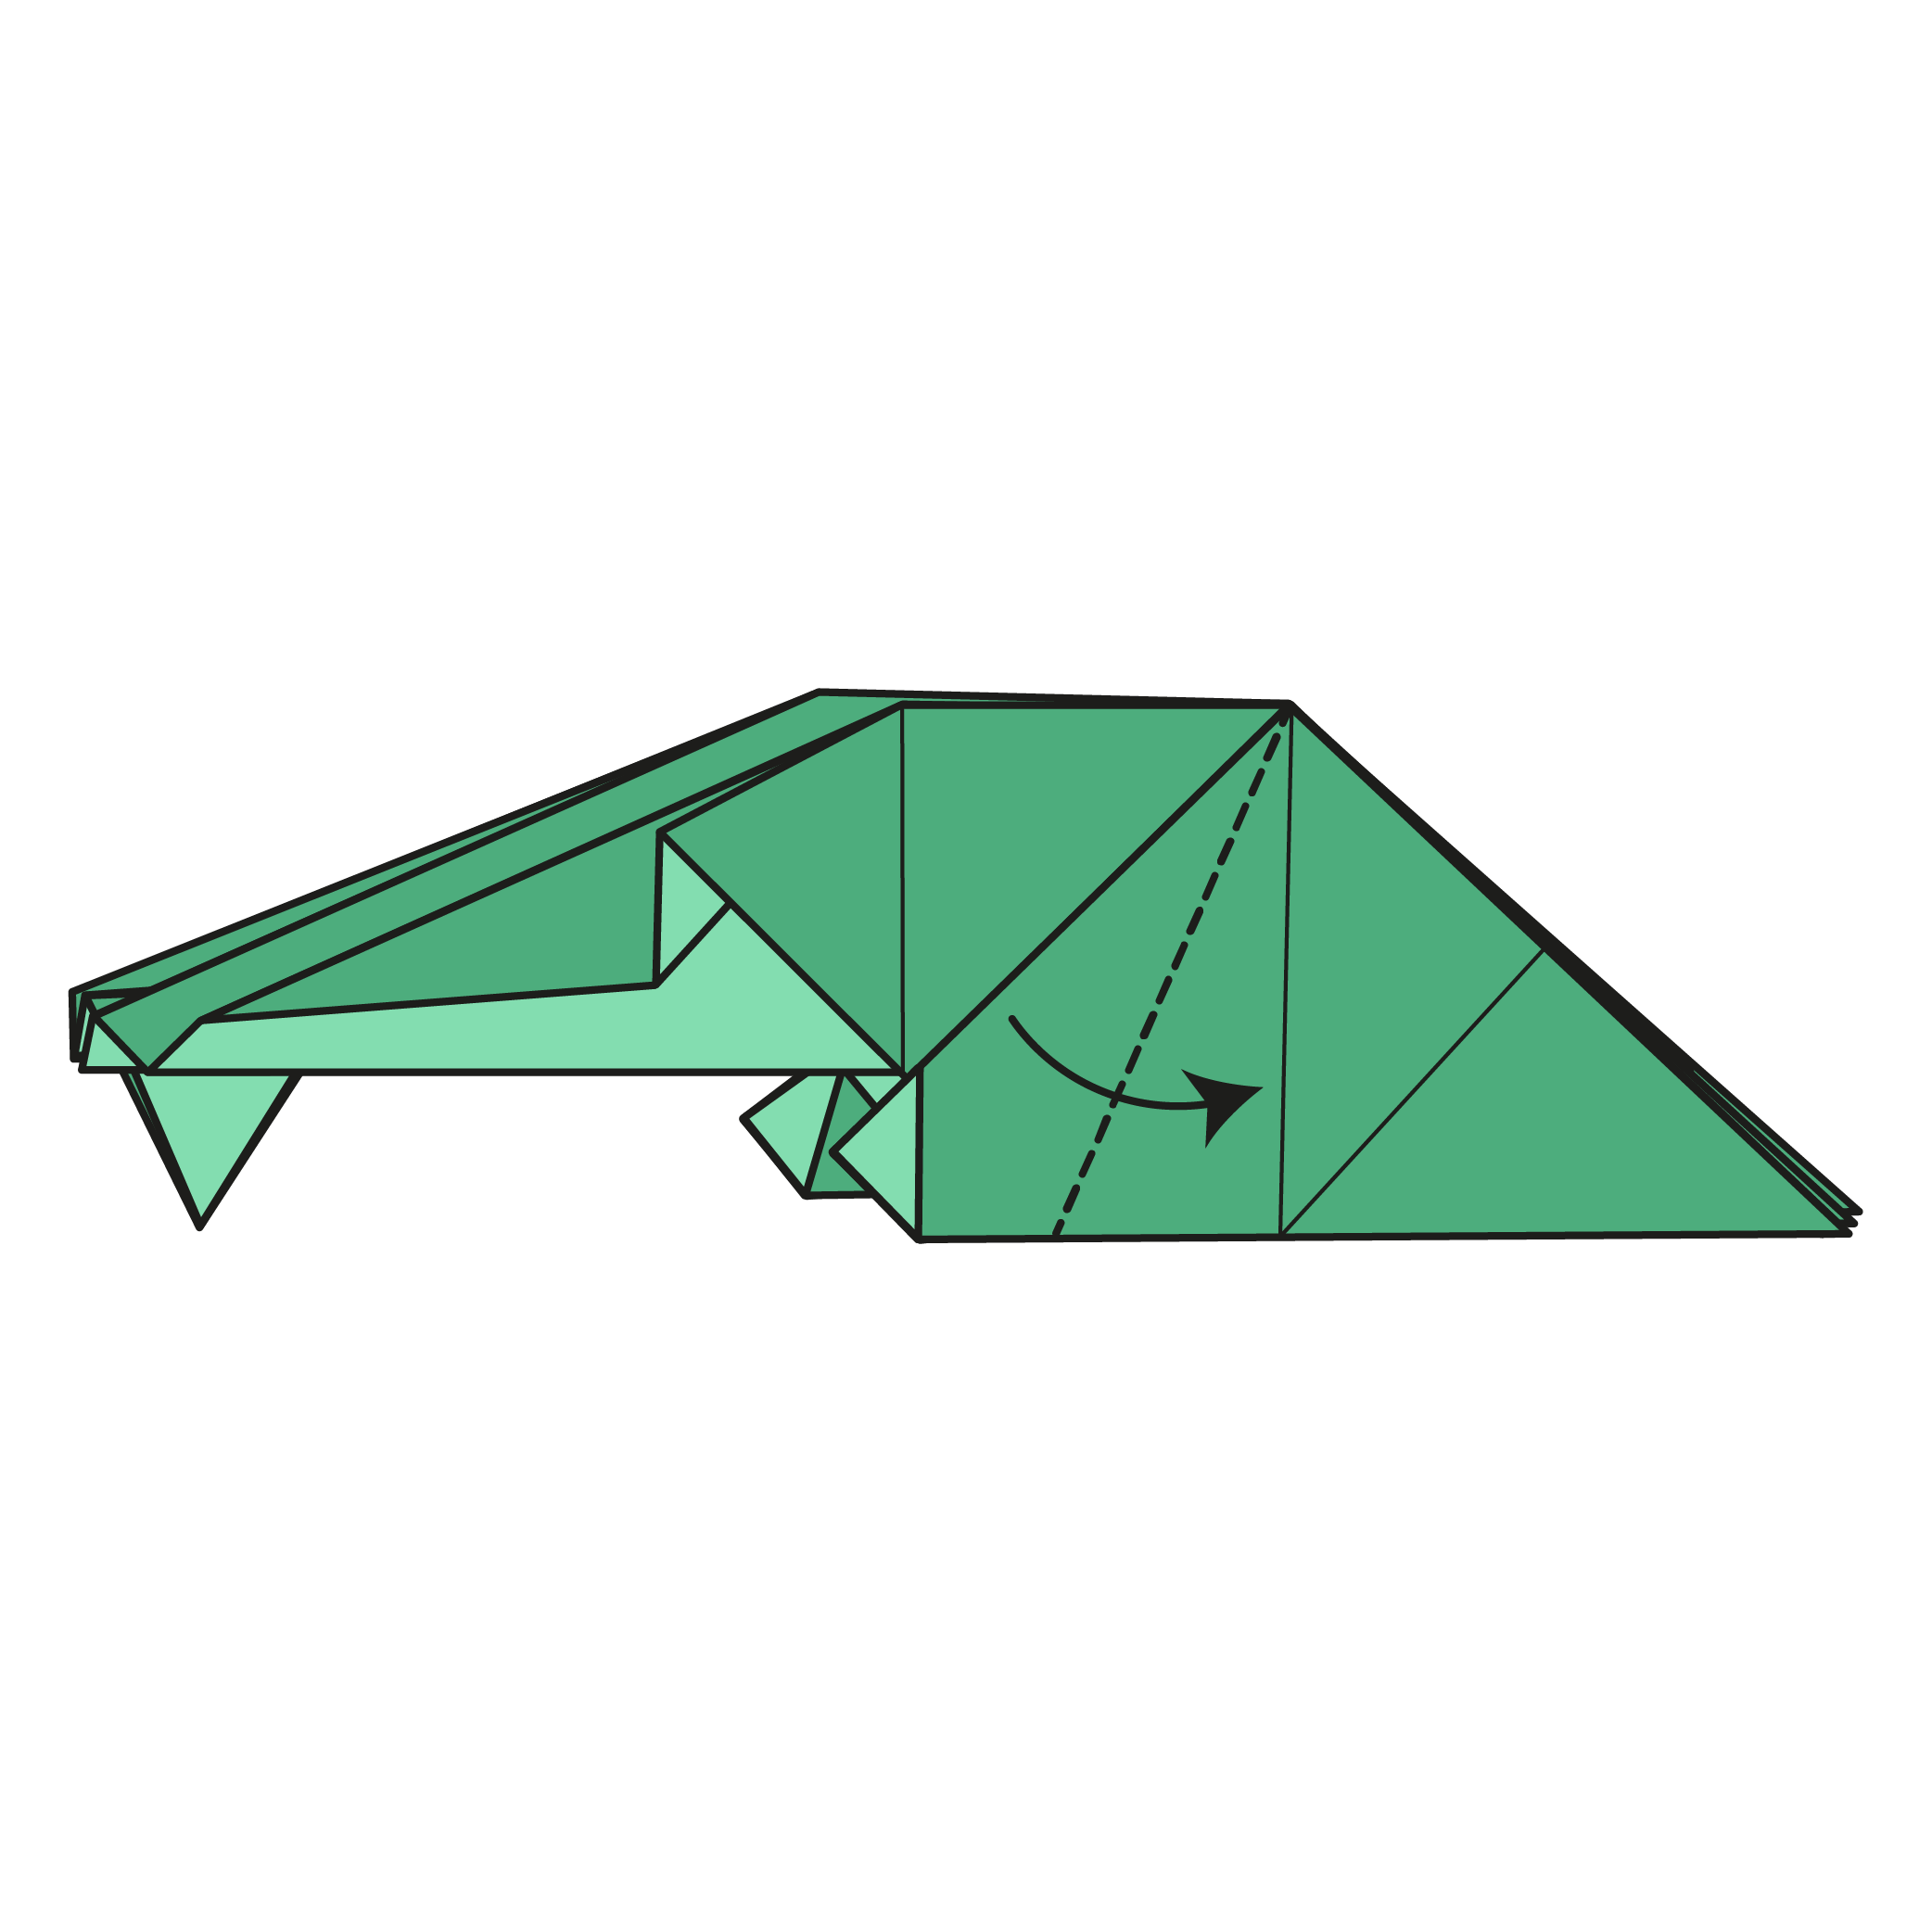
Step 14
Mountain fold the model in half from right to left.
Step 15

Crimp fold by bringing up the horizontal creases on both sides so they meet the reference points.
Step 16

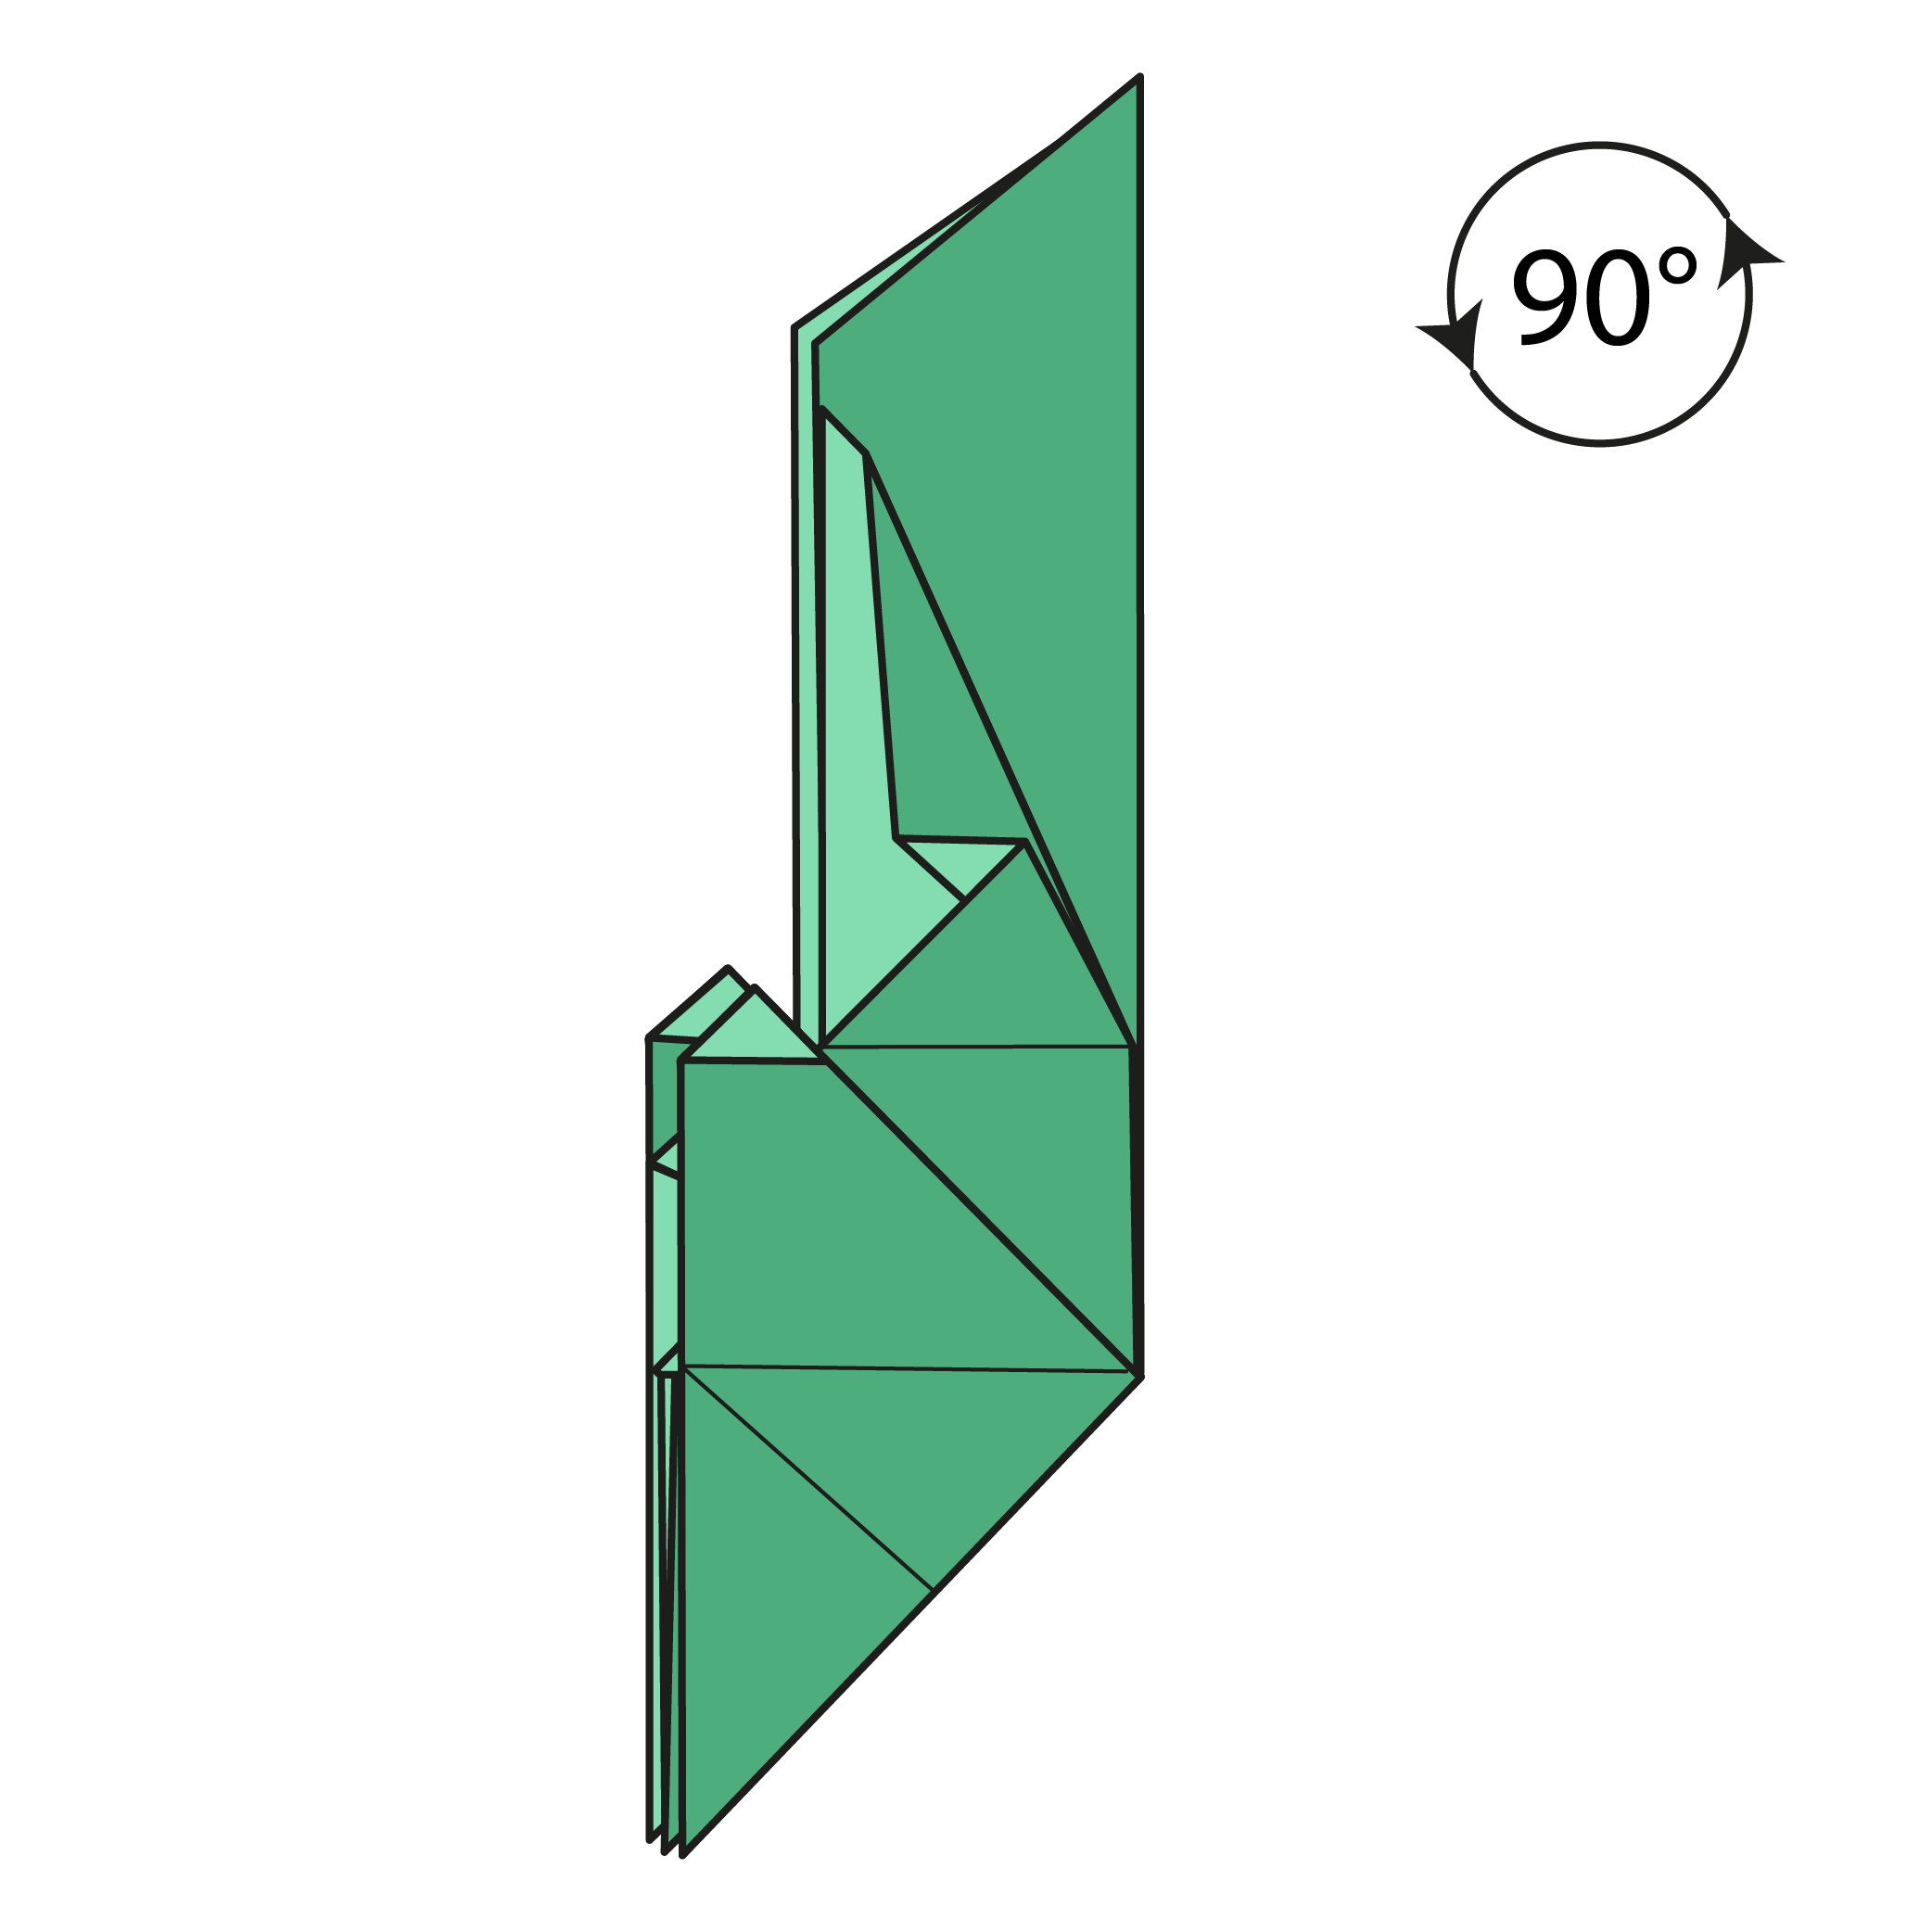
Rotate the model 90° counterclockwise.
Step 17
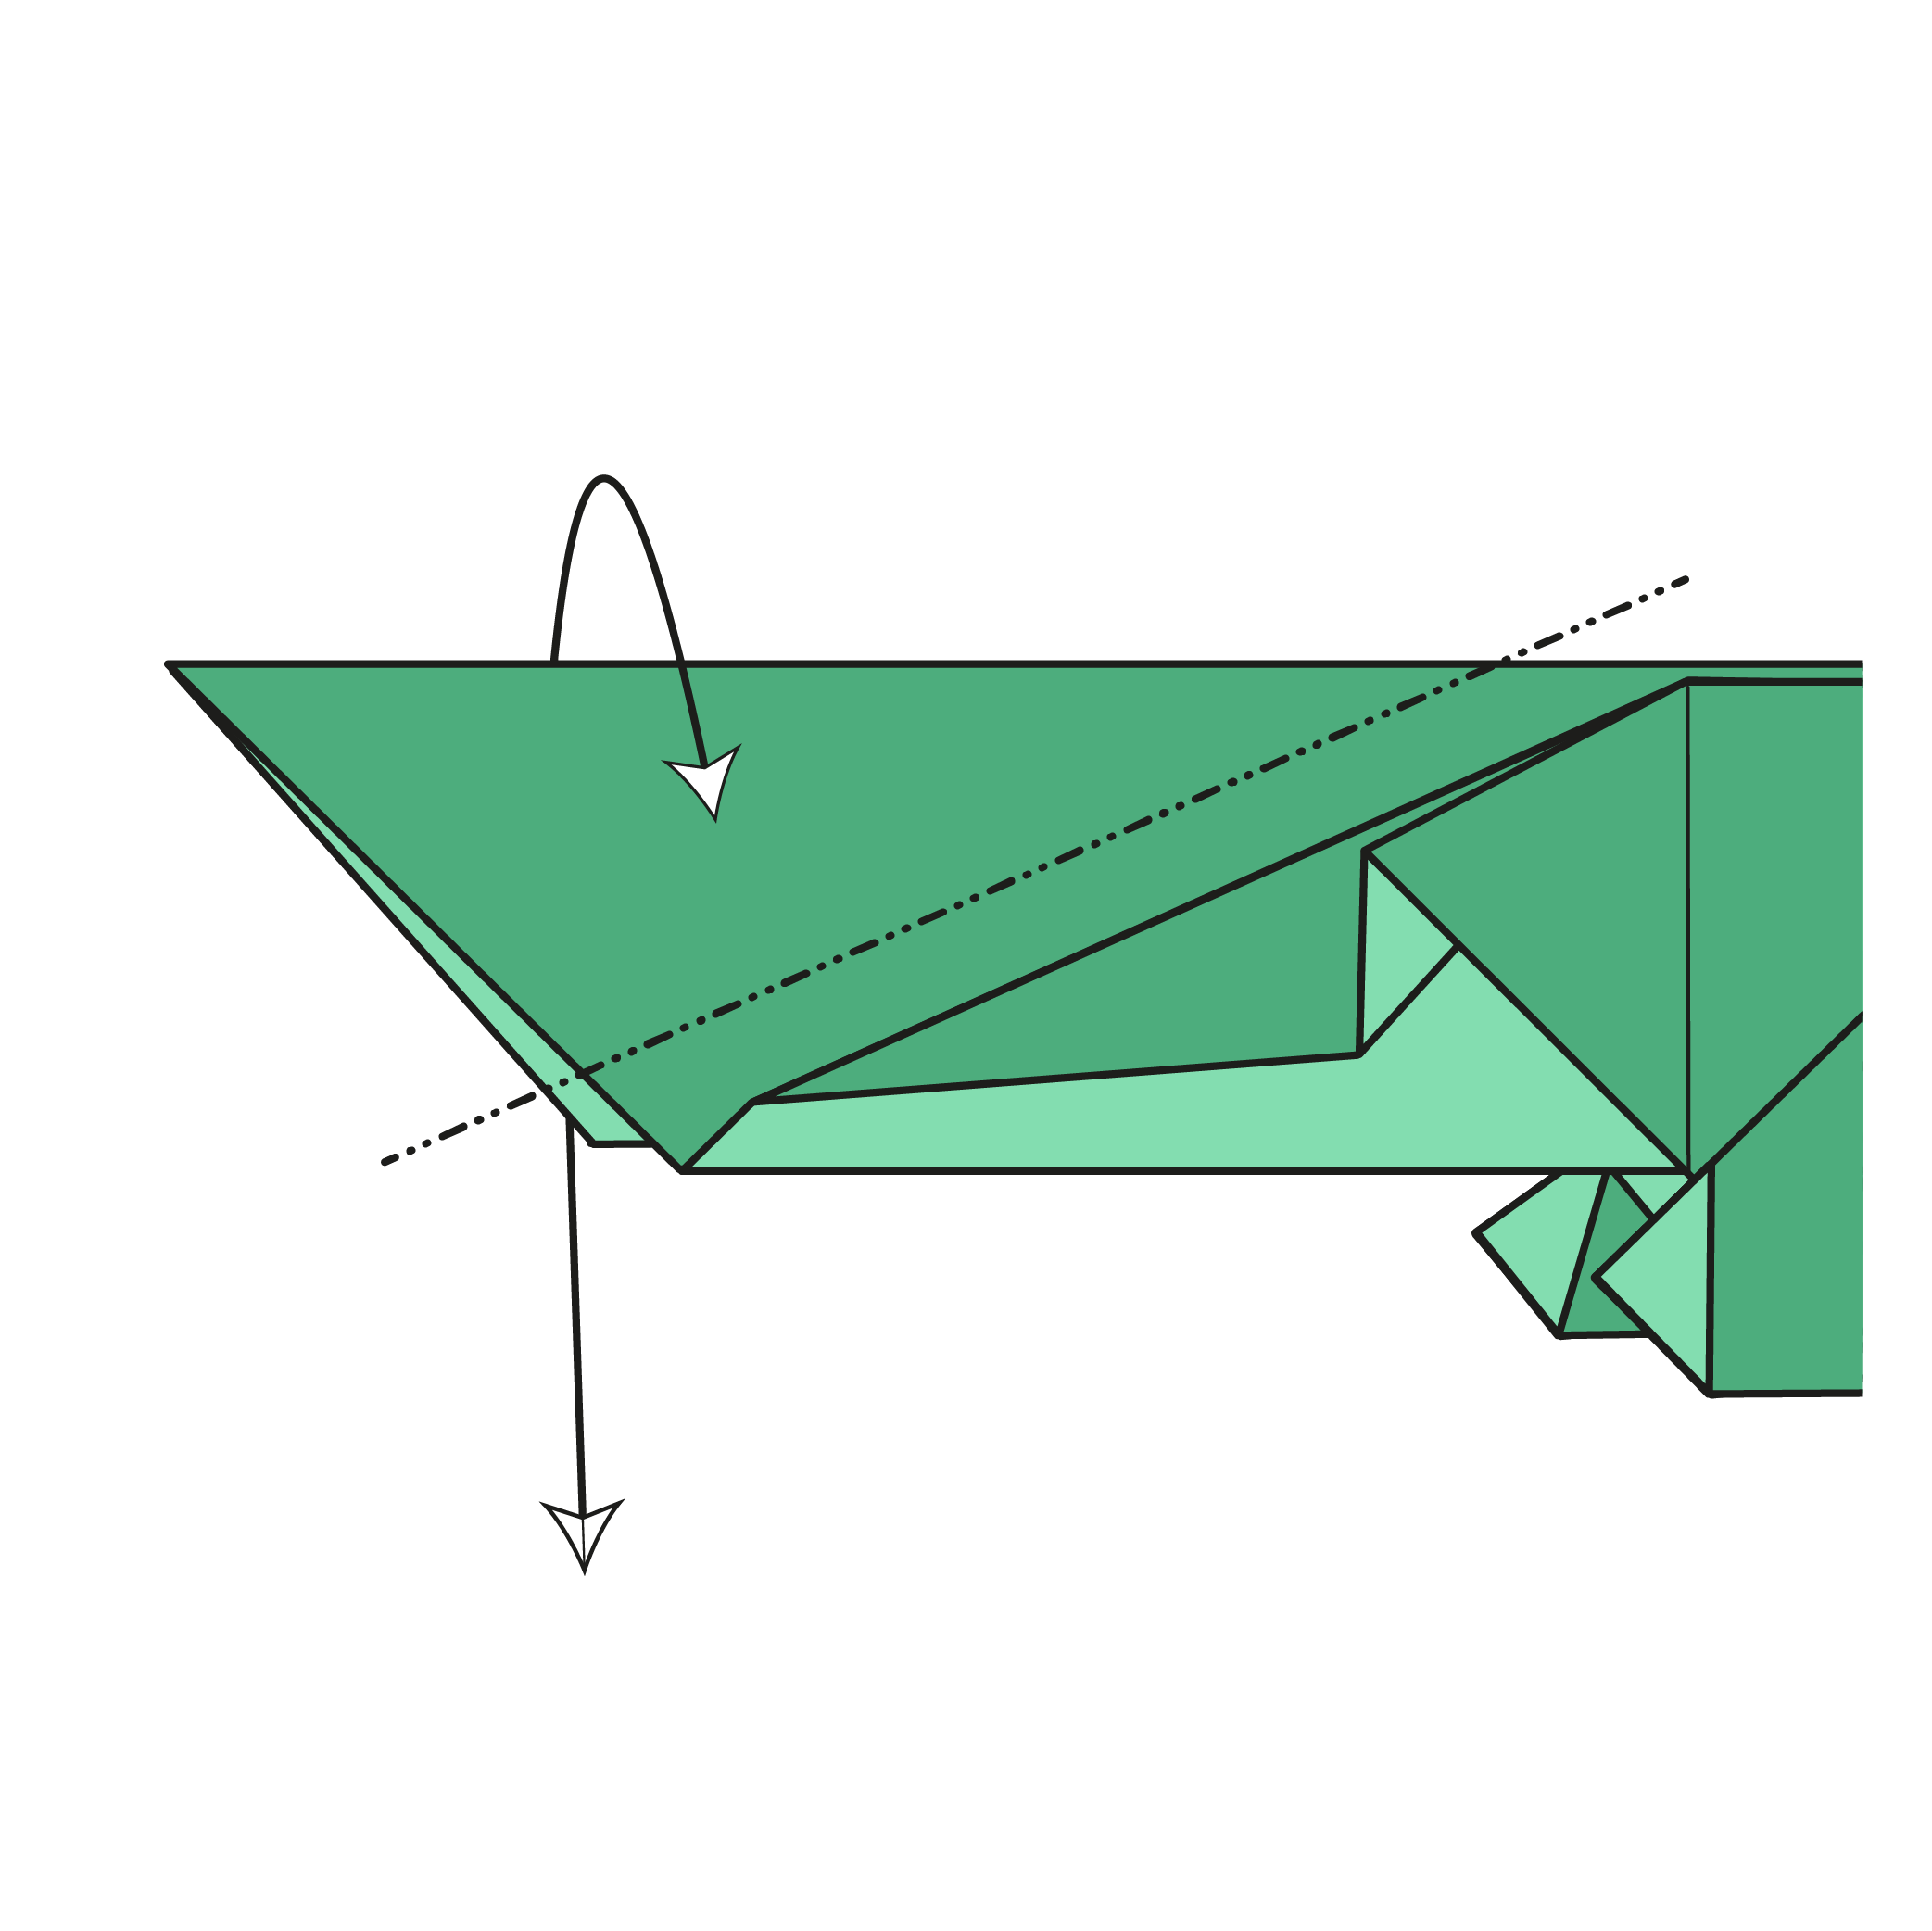
Bring the left corner down and mountain fold along the dotted line. Crease well and unfold.
🐊 Folding tip: Want a longer or shorter tooth? Adjust this fold a little to suit your style.
Step 18
Inside reverse fold along the crease you just made.
Step 19

Fold the white triangle up along the horizontal line. Crease well and unfold.
Step 20
Inside reverse fold along the crease from Step 19.
Step 21
Inside reverse fold the flap from the previous step to shape the crocodile tooth.
Step 22
Fold the front leg’s left edge in to meet the centerline.
Step 23
Fold the leg flap in half.
Step 24
Repeat Steps 22 and 23 on the other side.
Step 25
Fold the top flap’s right corner in to meet with the nearest vertical line.
Step 26

Fold the back leg’s bottom edge up to meet the horizontal line. Crease well and unfold.
Step 27
Inside reverse fold along the crease you just made.
Step 28
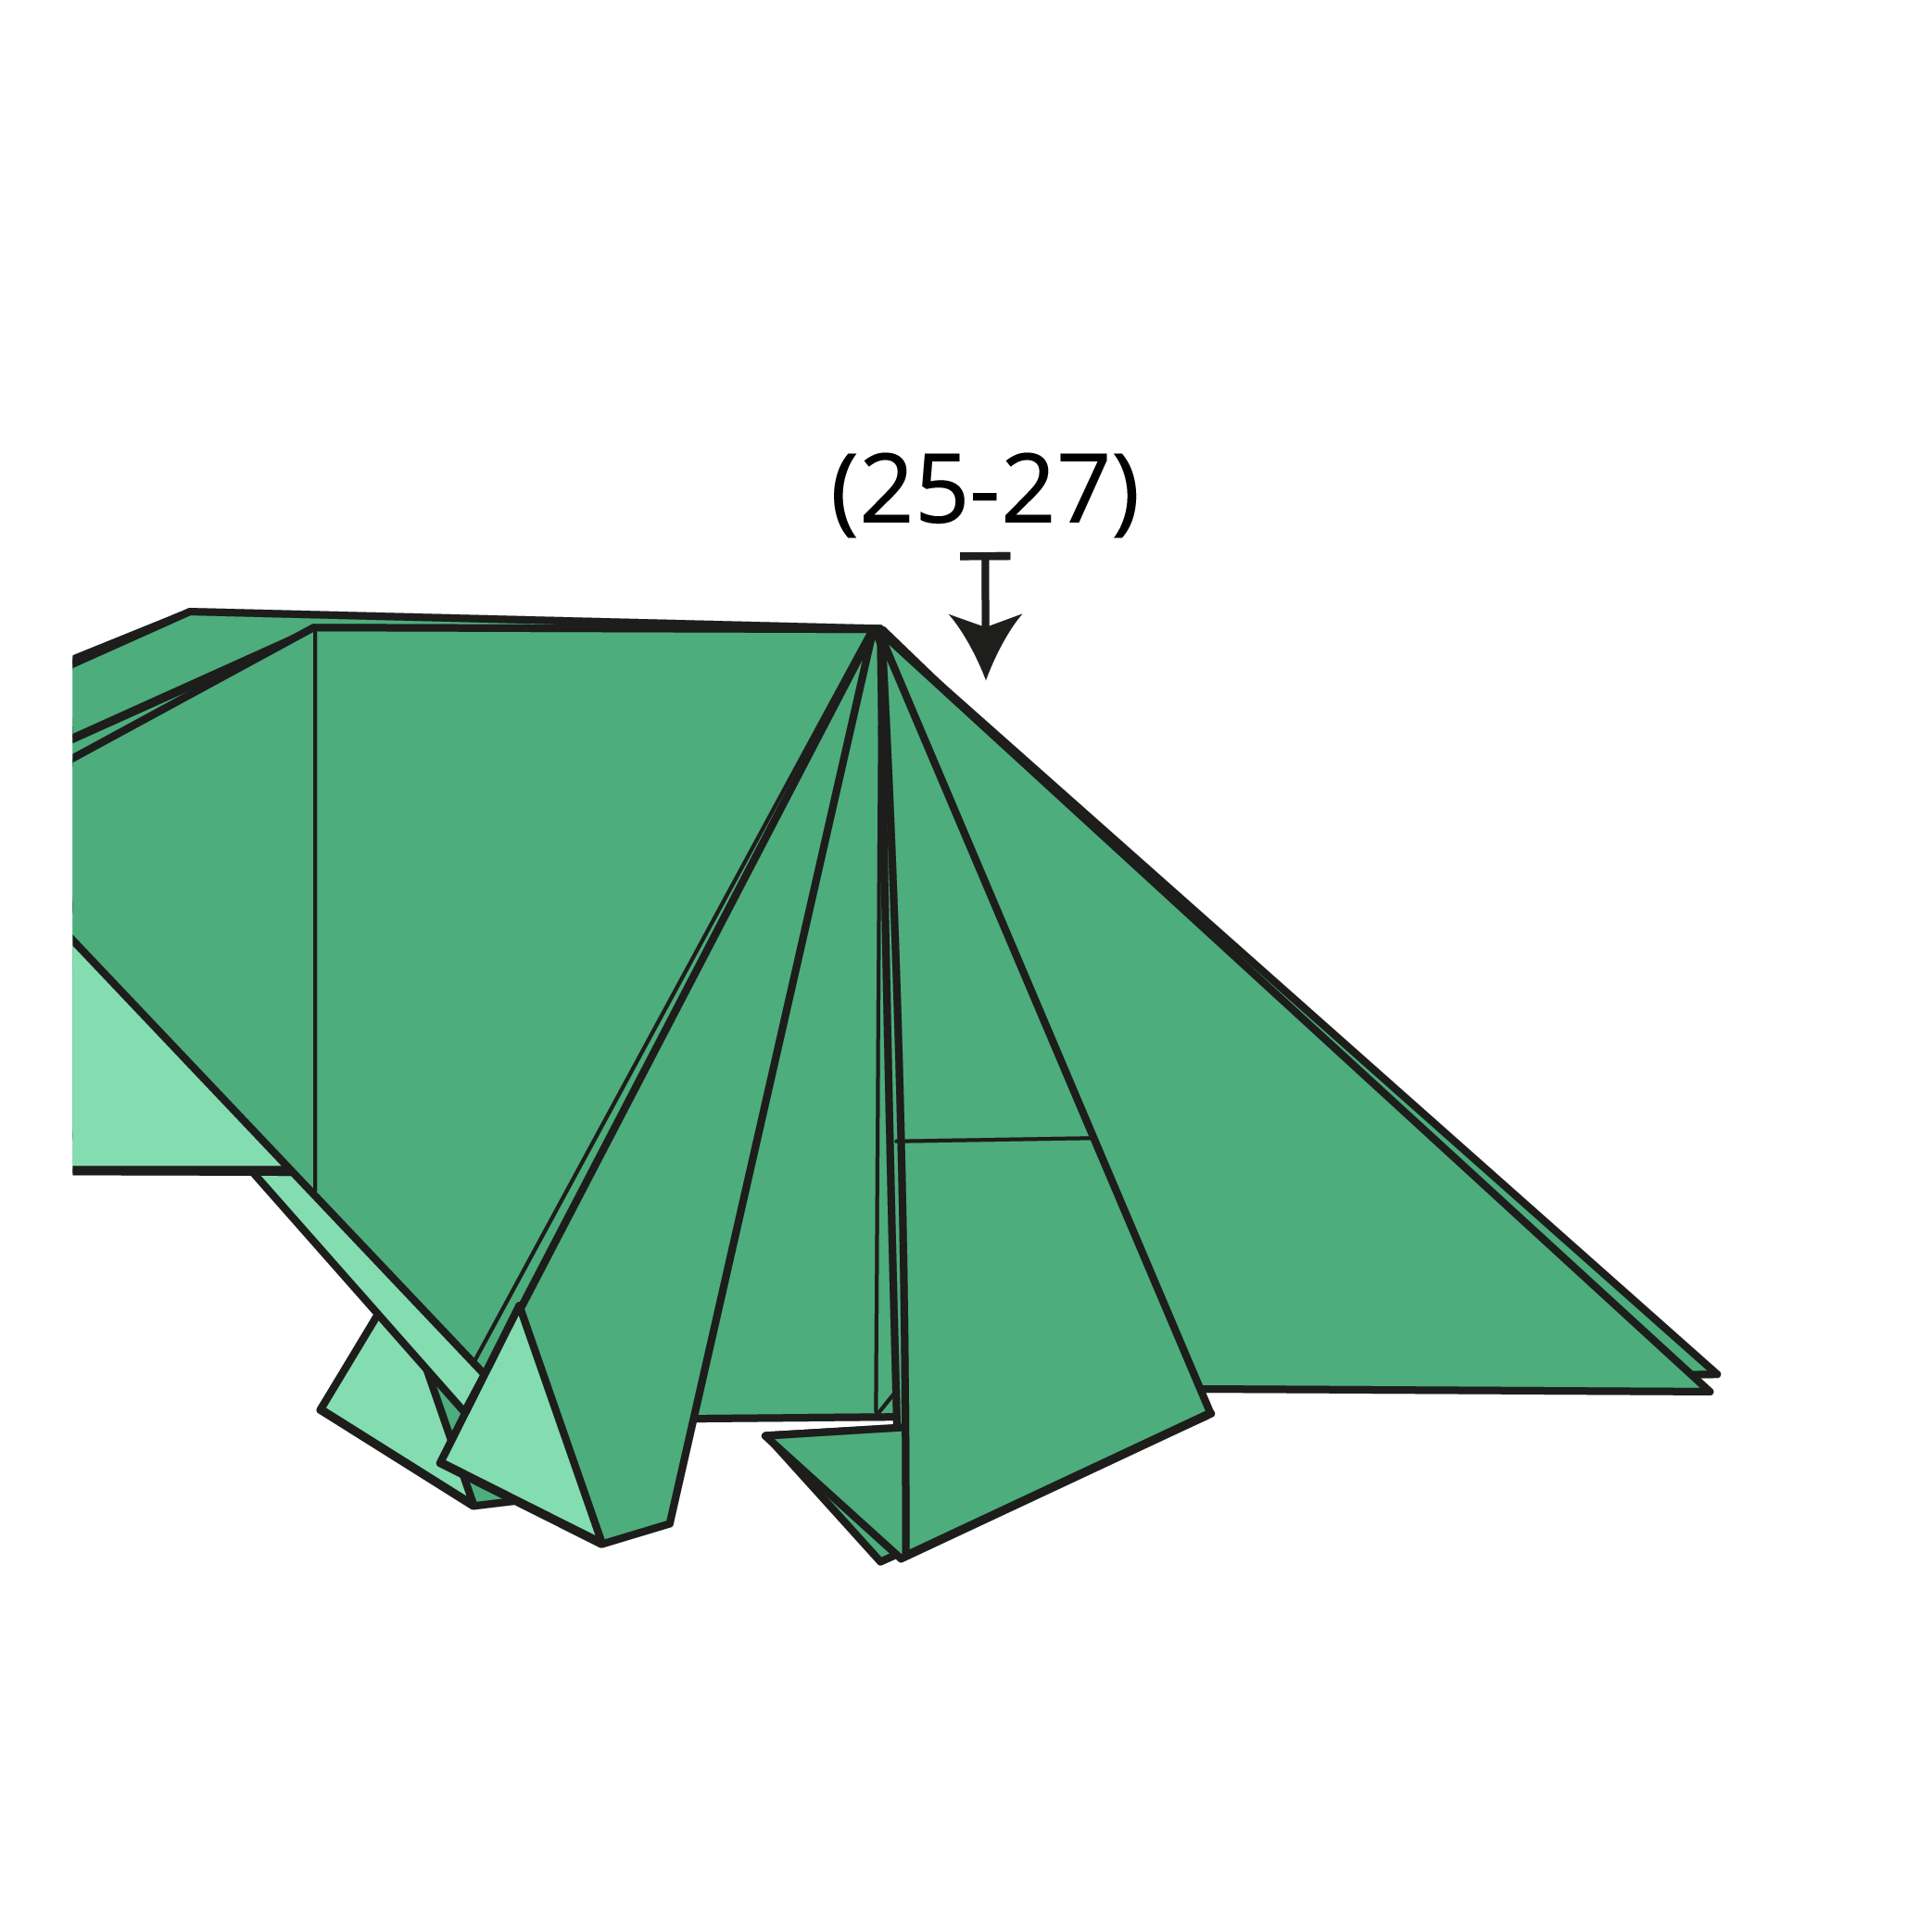
Repeat Steps 25 to 27 on the other side.
Step 29
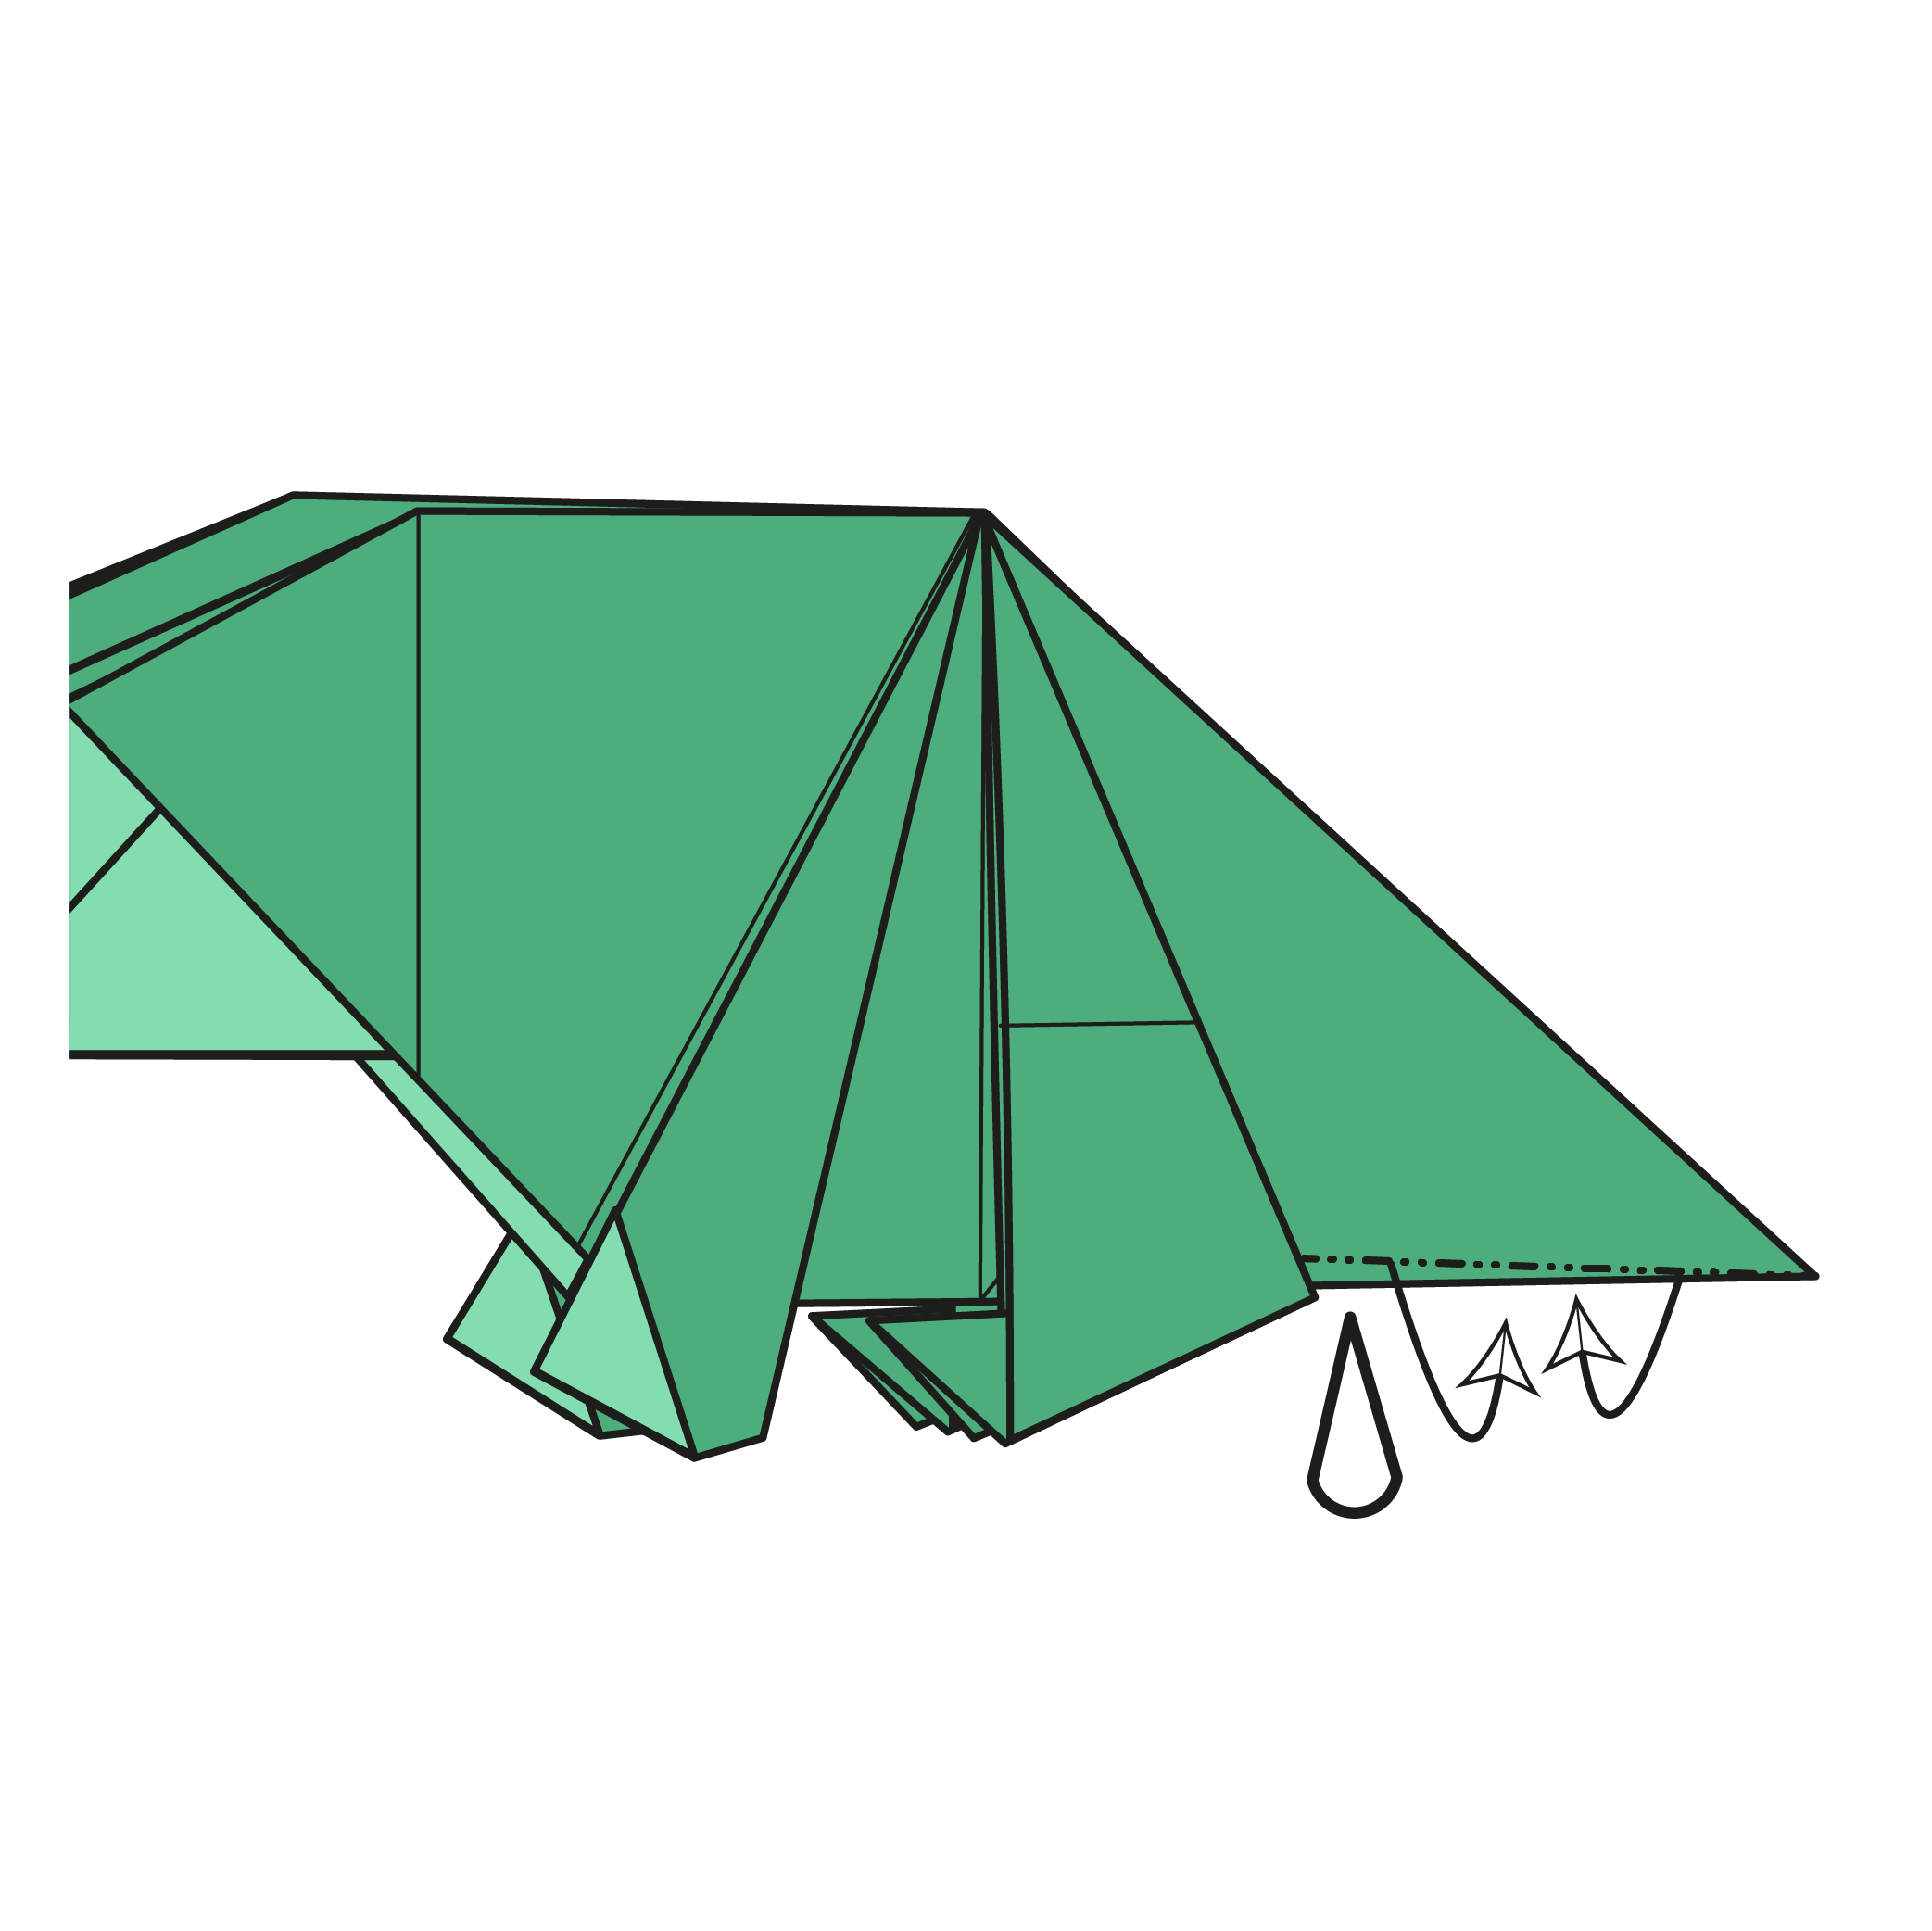
Thin the tail by folding the edges inward as shown in the diagram.
Snap to it! Your origami crocodile is complete!

Display tip: Mr. Crocodile has a big, heavy head and might not stand up on his legs. I found two fixes for this:
- Fold a longer tooth (see Steps 17 to 21) so it acts like a fifth leg for support.
- Stick a small piece of paper, folded on itself, inside the model to work as a counterweight.
I hope you enjoyed the folding and the quiet expressiveness of this origami crocodile.
It is simple on the surface, but full of small choices that give it life. From the posture to the shape of the snout, it is unmistakably Adriano’s style, full of character, and just a little bit strange in the best possible way.
If you want to share your crocodile, we would love to see it. Tag us on social media or drop it in the comments. And if you want to keep folding, subscribe to our origami YouTube channel or join the newsletter to keep in touch.

Download the Complete Origami Crocodile Printable PDF Instructions
This printable PDF is part of our Origami Friends membership on Patreon. As a member, you get access to these diagrams, our full library of 120+ printable PDFs, and member-only content.
Watch the Origami Crocodile Video Tutorial
Enjoyed this tutorial?
Subscribe to our YouTube channel for new inspiring origami videos every week!


CAN I USE SQUARE PAPER ?
you supposed to use square paper
I made a dog and a dog just by drawing and altering the crocodile