

How to Fold an Easy Origami Swan

 Traditional/Unknow
 Let’s learn how to fold a traditional origami swan. This is one of the most popular origami models, and it’s a great place to start if you’re new to paper folding.
With its long curved neck, pointed beak, and folded wings, the finished swan has a simple shape that looks elegant on display. It’s easy to fold and comes together in just a few minutes.
This tutorial is perfect for beginners. You’ll also learn your first swivel folds as you shape the neck and head, making it a great way to build confidence before trying more advanced models.
At the end of the tutorial, I’ll also show you a few simple shaping tricks to give your swan more personality and a more realistic look.
Origami Swan Step-by-Step Instructions
- Difficulty: Super Easy – Beginner Level 1
- Folding time: Under 5 minutes
Recommended Paper
6 x 6 in (15 x 15 cm) origami paper (Kami)
Step 1
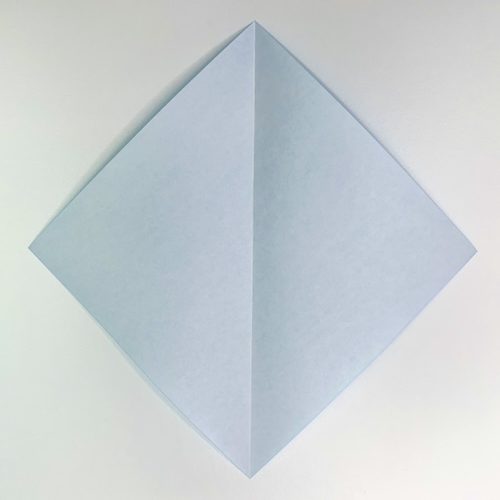
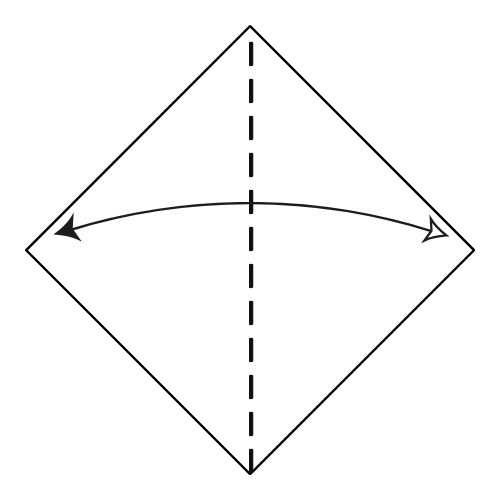
Start with the white side facing up in a diamond position. Fold the paper in half vertically, then unfold to create a center crease.
Step 2
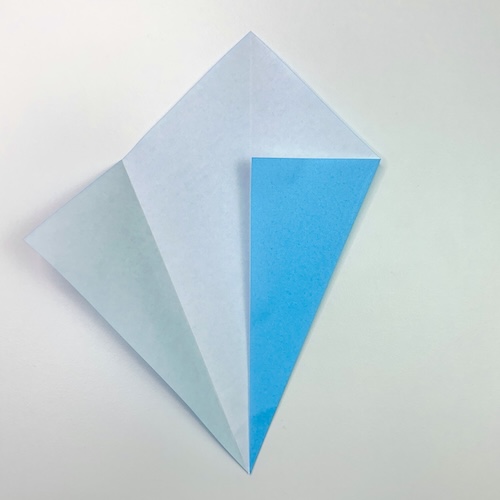
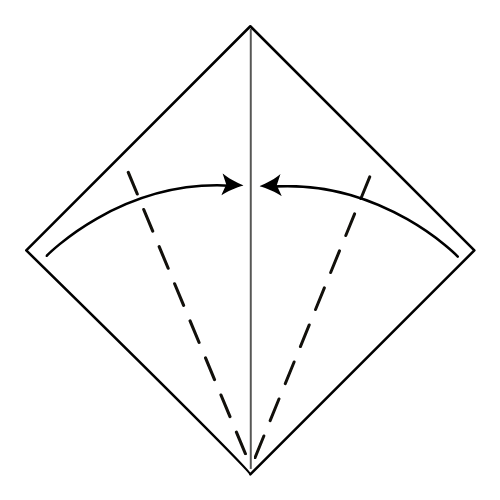
Fold the bottom edges to meet the vertical center crease.
Step 3
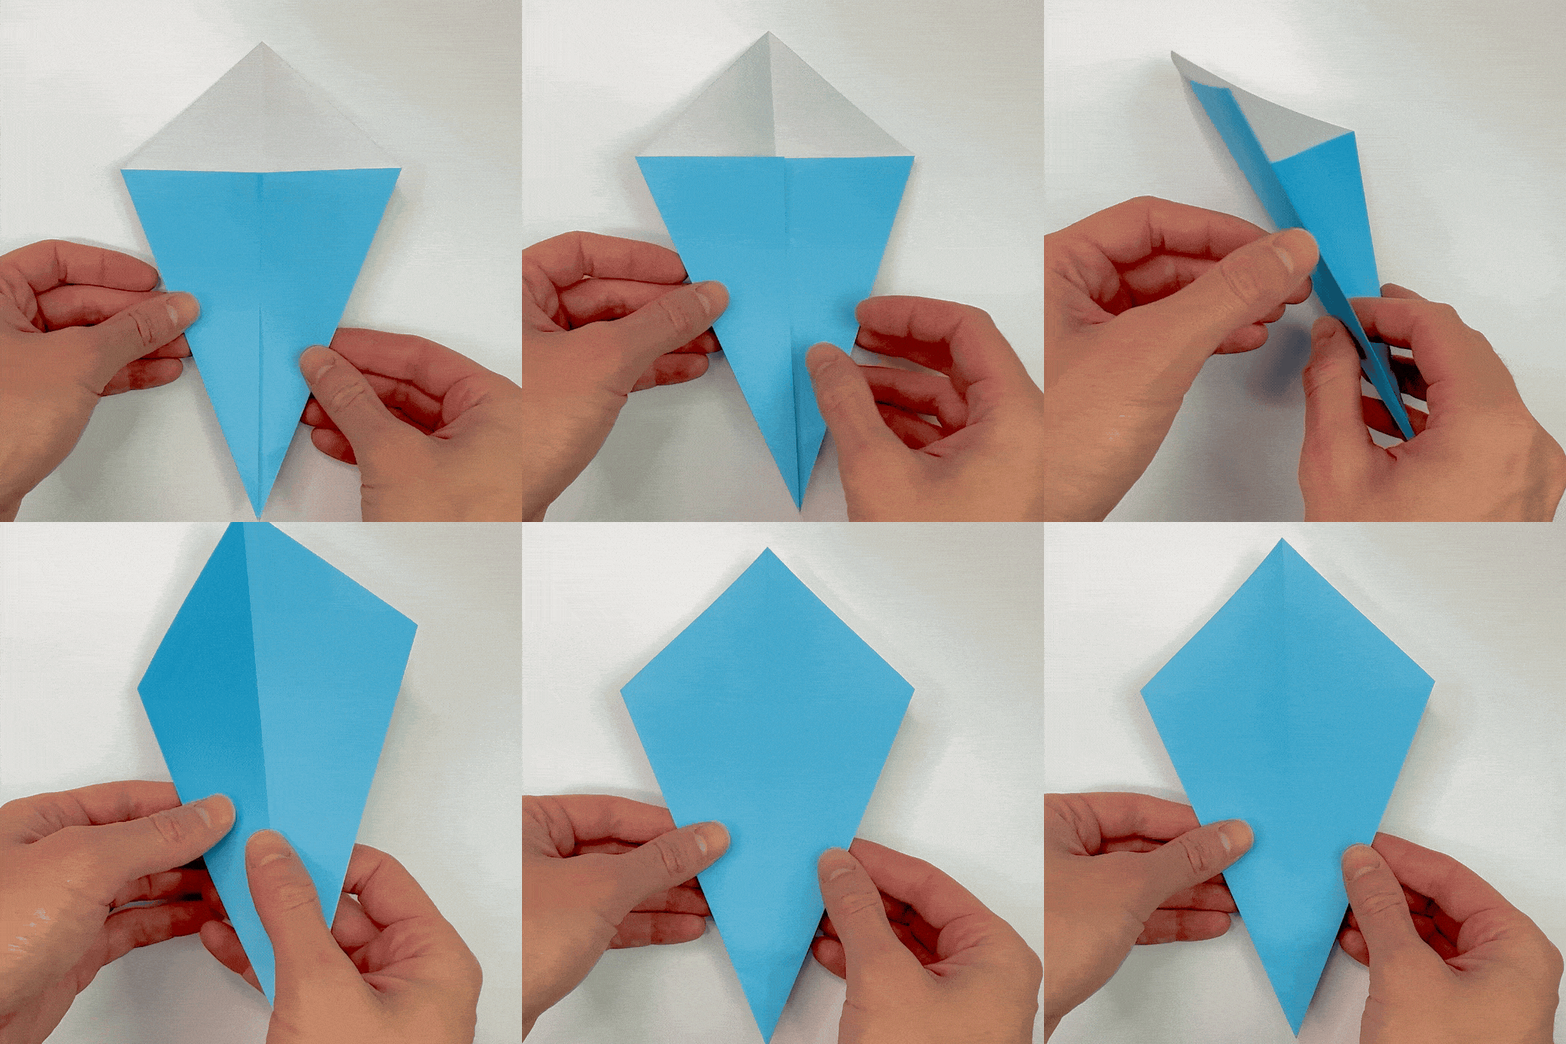
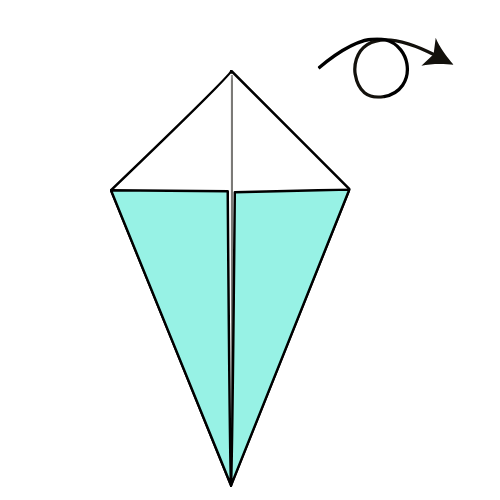
Turn the paper over.
Step 4
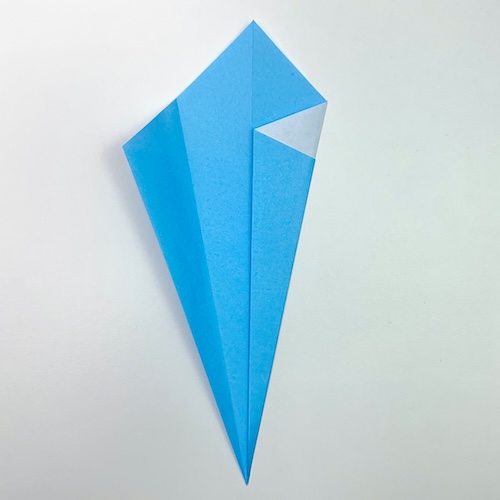
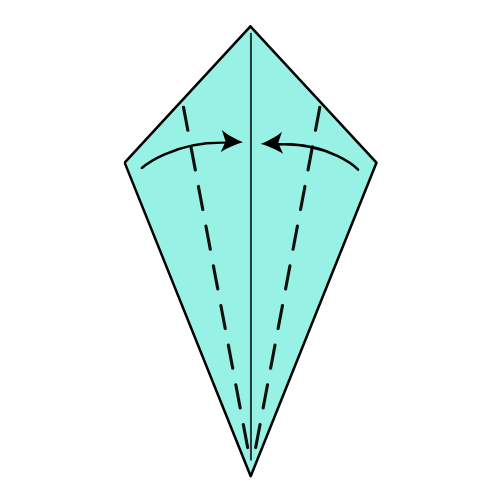
Fold the bottom edges to the center crease again.
🦢 Folding tip: Hold the layers firmly as you fold. If they slide forward too much, a large gap can open at the back. Holding them well helps keep that gap smaller.
Step 5
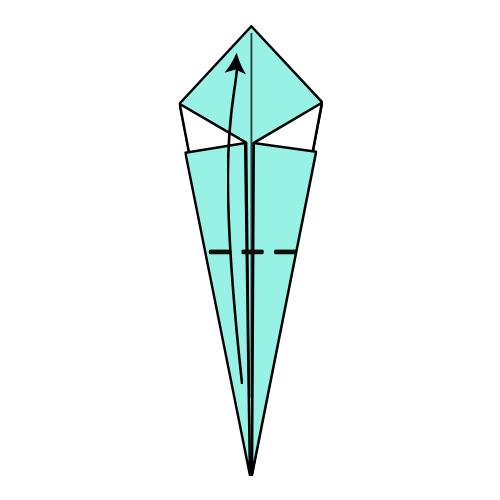
Fold the bottom corner up to meet the top corner.
Step 6
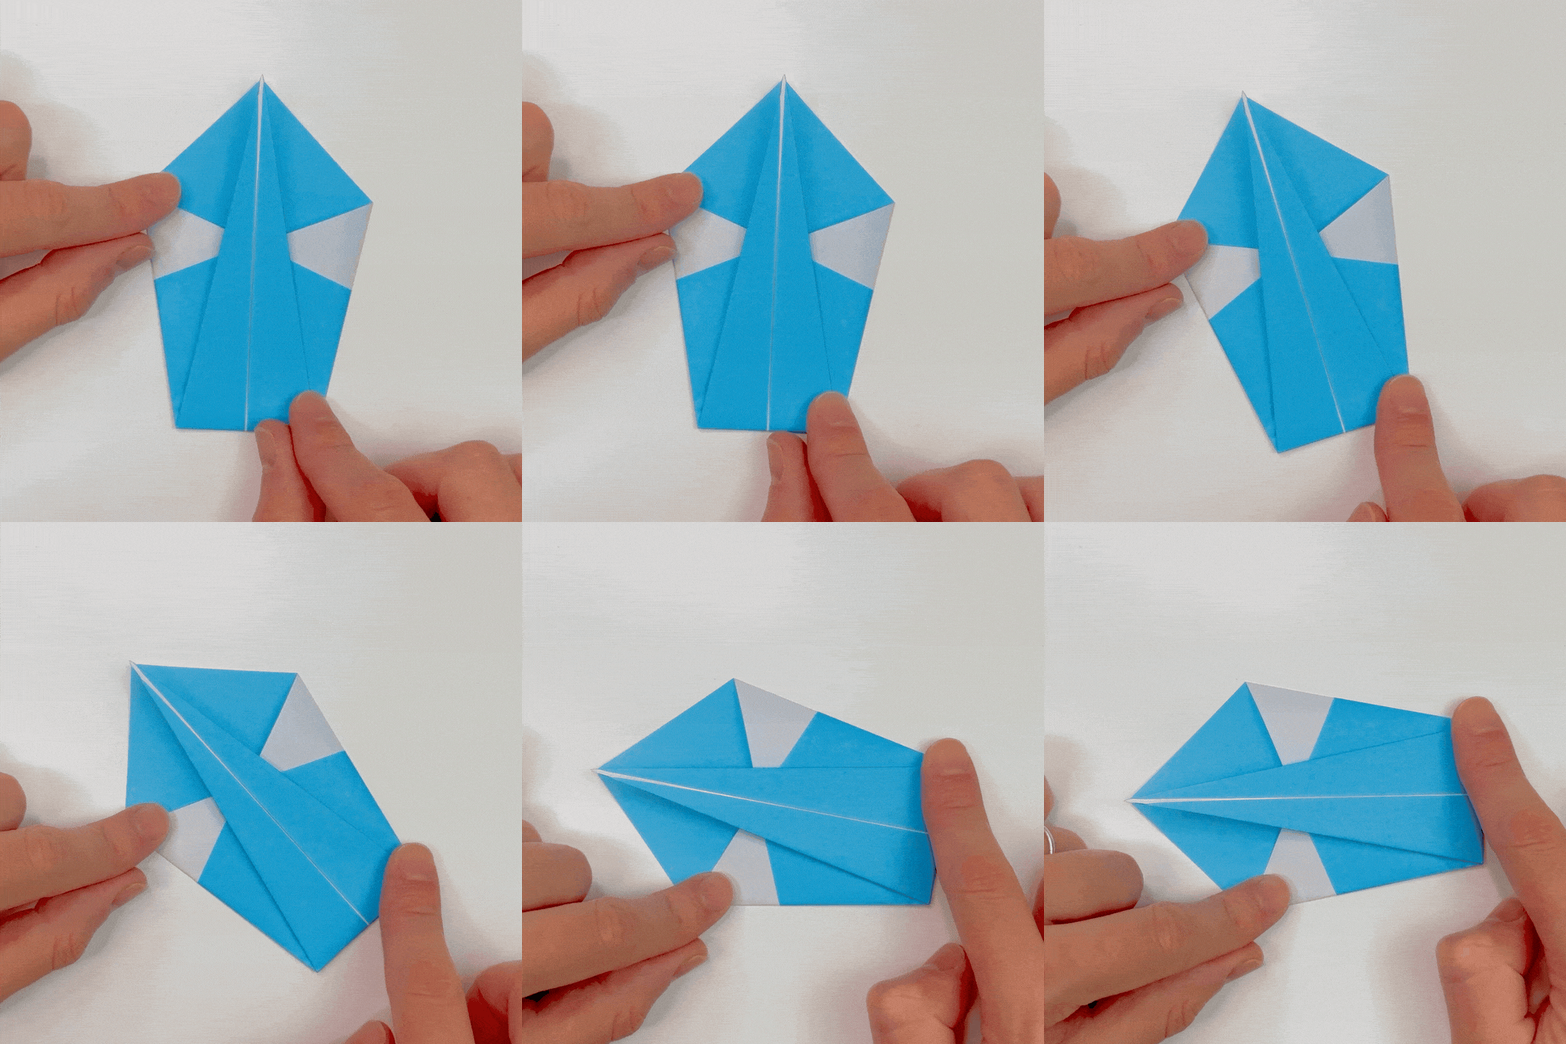
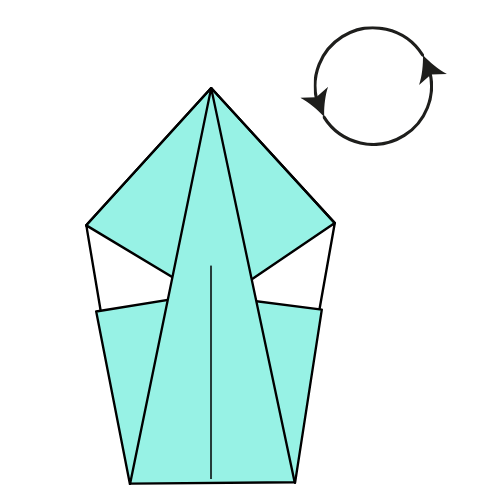
Rotate the paper 90° counterclockwise.
Step 7
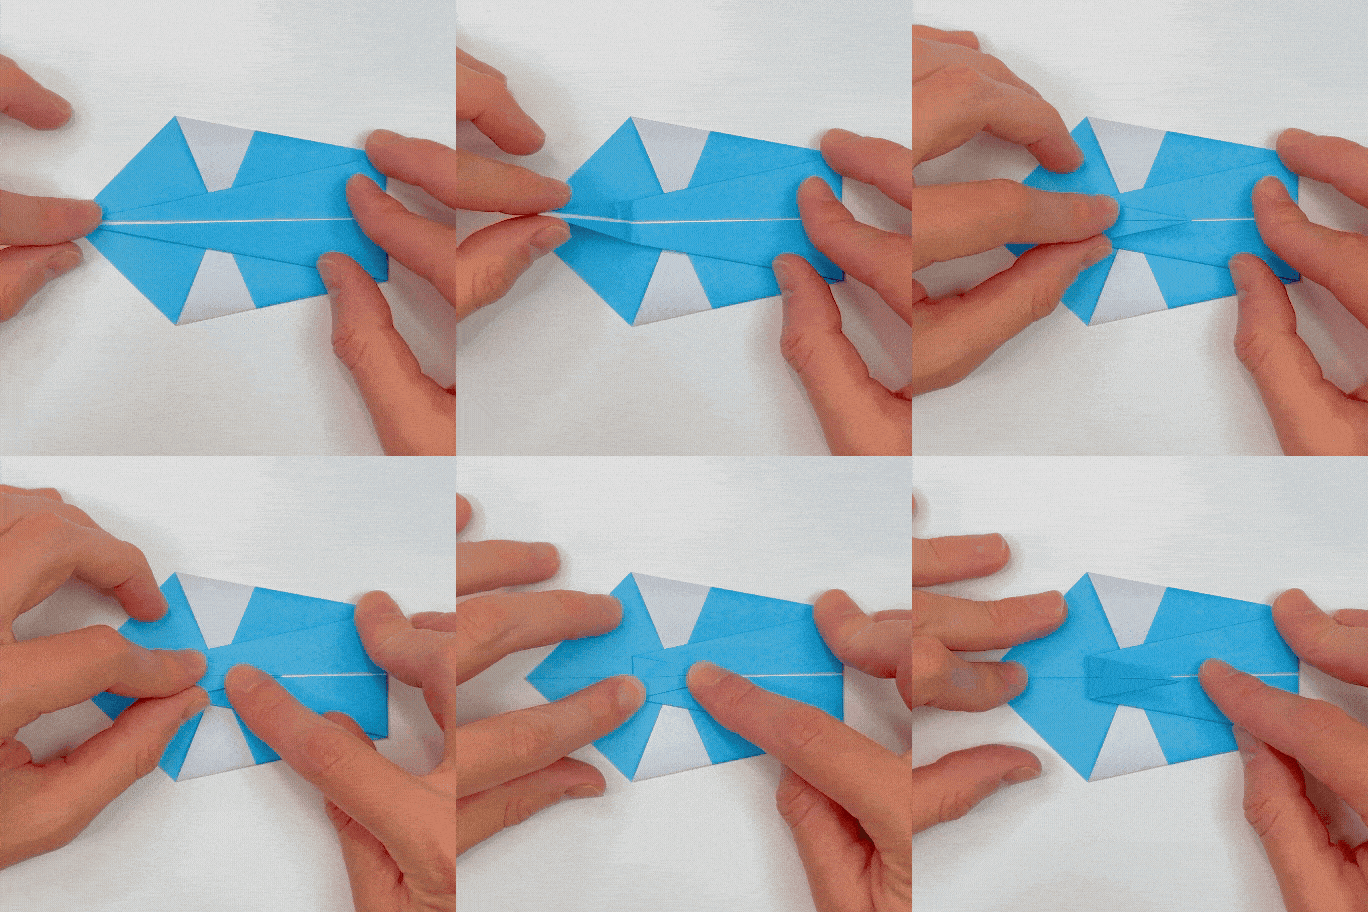
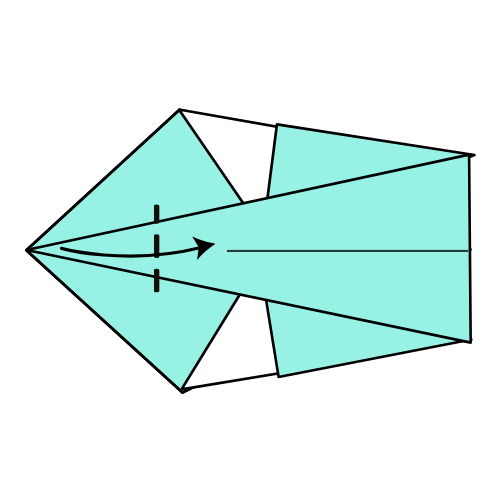
Fold the top flap’s left corner to the right. There is no exact reference point, so fold it to your preferred position. This will become the swan’s head.
Step 8
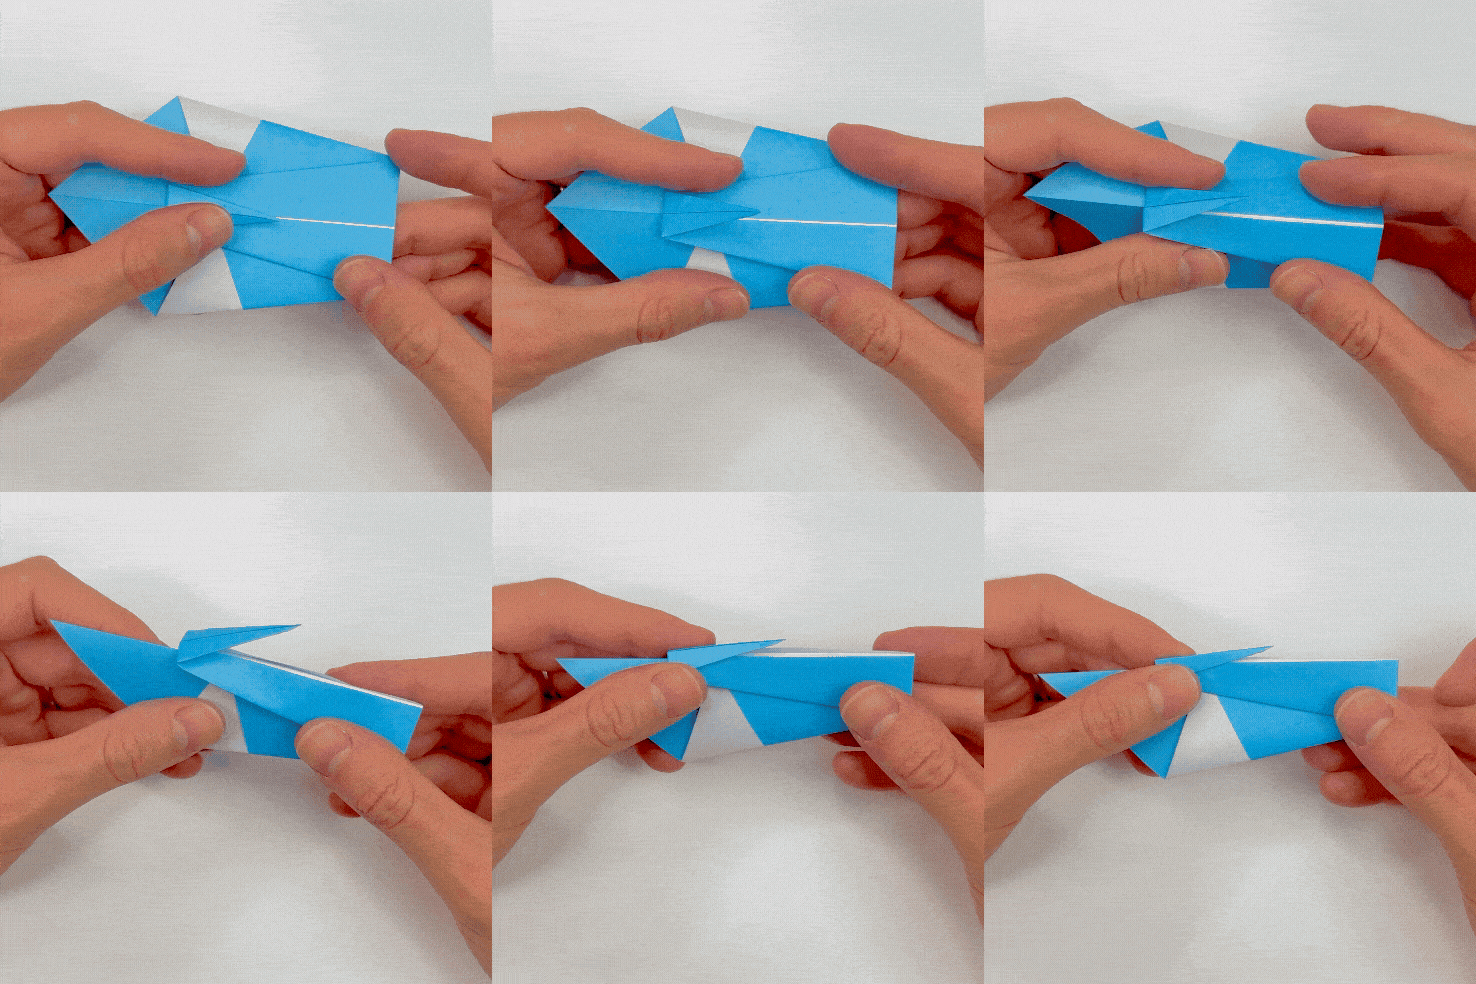
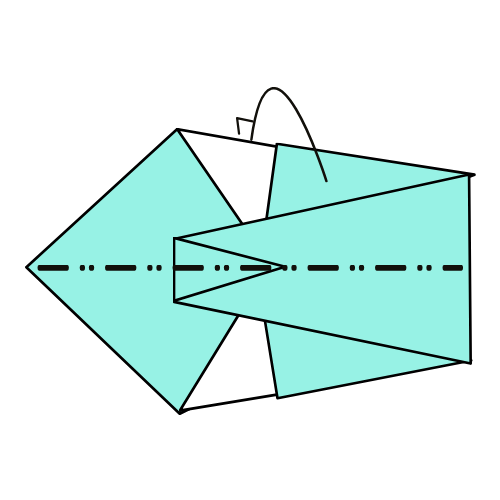
Mountain fold the top section to the back of the model, folding it in half.
Step 9
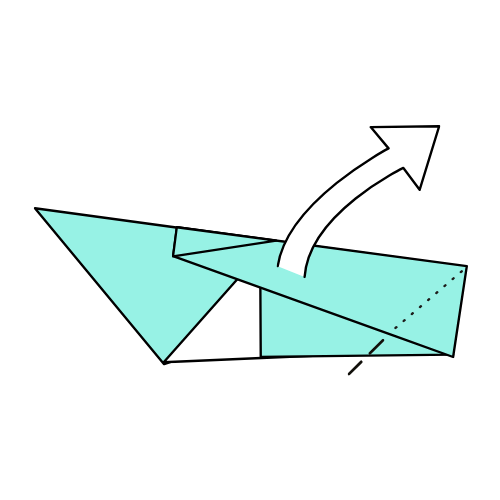
Pull the swan’s neck upward, adjust the angle to your liking, then flatten the paper.
Step 10
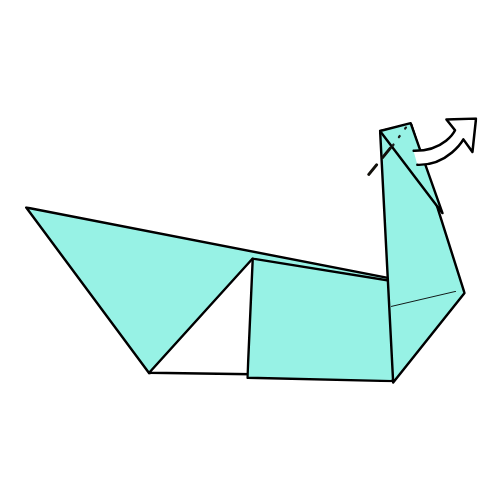
Repeat the same process for the swan’s head. Lift it up, adjust the angle to your liking, then flatten it.
Completed! Shape Your Swan Further
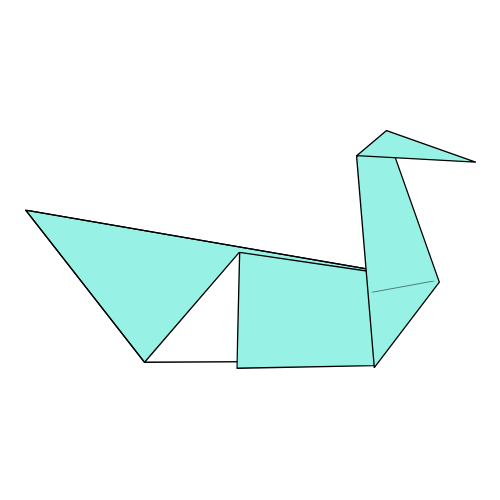
You can make your origami swan look even more realistic with a few simple adjustments. In just 4 easy steps, you can give it a completely different look. Watch the video to see how I shape mine.
I hope you enjoyed folding this traditional origami swan. It’s a simple model, but one that many folders come back to again and again.
Once you’ve folded your first swan, try making a few more with different paper colors or patterns. You can also experiment with the neck and wings to give each swan its own look.
If you fold one, feel free to share a photo in the comments. I’d love to see your swans and the papers you choose.
If you’d like to keep folding, have a look at our easy origami tutorials or explore more origami birds on the site.
You can also get new tutorials and folding ideas in our newsletter here. And if you’d like to fold along with videos, you can subscribe to our origami YouTube channel.
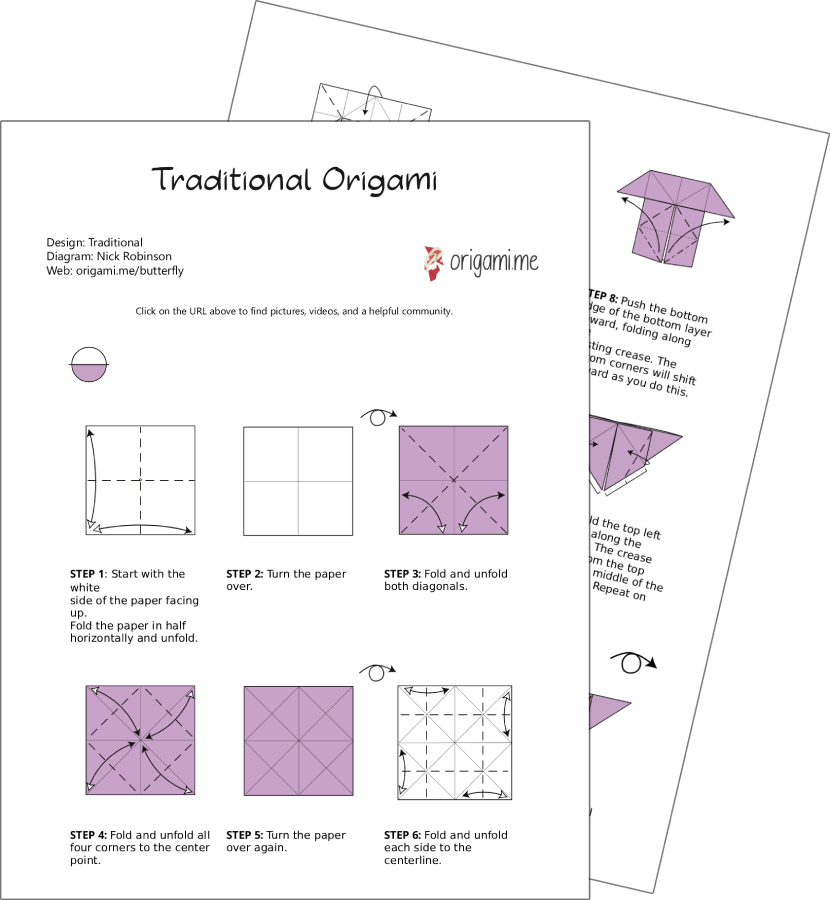
Download the Full Origami Swan Printable PDF
Instructions
We’d love to keep you in the loop, so by sharing your email with us, you’ll be signed up for our mailing list. Don’t worry; we won’t bombard you with spammy emails, and your information is safe with us – we won’t share it with anyone else.
🎓 Need printables licensed for classroom or group use? See the Origami Library for Educators →
Watch the Origami Swan Video Tutorial
Enjoyed this tutorial?
Subscribe to our YouTube channel for new inspiring origami videos every week!





cool
thanks for the tutorial!! here is my first attempt.
It’s looking really good. Nice shaping!
This is very incredibly easy for how nice looking it is thank you now if I ever have scrap piece of paper and I’m bored I can make it the only origami I like more now is ur flapping bird
Thank you! I’m really glad you enjoyed it 😊 I love simple models like this that you can fold almost anywhere with a scrap of paper.
Here’s how mine came out
Neat folds! Well done 🙂
I actually made this! Thanks!
Well done! It’s an excellent model to start with 🙂
Loved making it ❤️
Beautiful! Thanks for sharing 🙂
What the heck is this 😭🥀
Hi Nels, you’re not far! Take our free course here. Boice shows exactly how to fold this origami swan.
this is amazing thank you so much you know what I feel like making a million of these
Your swan looks great! I love your dog plushie. I bought the same one for my son when he was born 😊
Does this look good? I just colored it and added an invisible design. I don’t have design paper!!!
It’s looing great! 🙌 Now you can shape it a bit to bring it to the next level.
the steps were a little confusing, so I watched the video.
Also, are you guys going to post a origami unicorn?
Thank you for your feedback. You’re right! I’m going to update this tutorial soon.
For the unicorn, we’re still looking for the right model in term of design and difficulty. But it’s on our list, for sure 😉
There is a missing step between step 6 and 7 for folding the swan’s head.
Hi there! The steps seem good to me. You just fold the model in half and then pull the neck upwards. I’ve also added a link to our reel to help you shape it further. You can find it after the steps.