How to Fold an Origami Squid
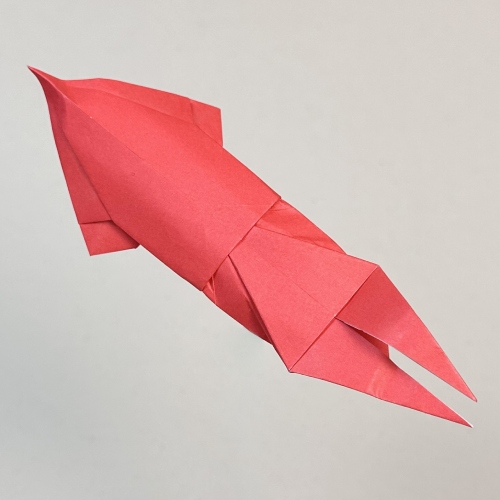
Let’s learn how to fold an origami squid designed by Caleb Witte. This model has a long, streamlined shape with layered folds that give it a natural, fluid look once finished.
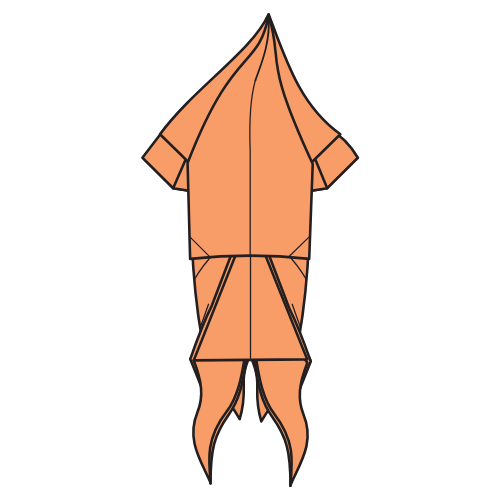
The body narrows toward the tip, while the front tentacles split into two long, curved points. Smaller tentacles tucked underneath add extra detail and help complete the silhouette. With a little shaping, the model starts to feel much more lifelike.
This is a low-intermediate model that remains accessible to beginners with some folding experience. There are no especially difficult steps, but the model does require precision during the pre-creasing and some of the smaller folds.
Origami Squid Step-by-Step Instructions
- Difficulty: Low-Intermediate
- Folding time: 20 minutes
Recommended Paper
15×15 cm (6×6 in) Kami or kraft.
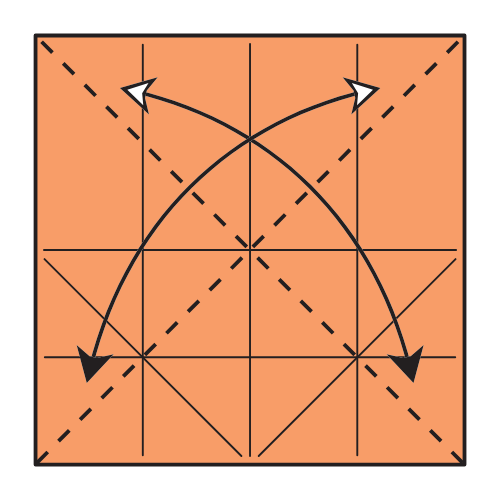
Step 1
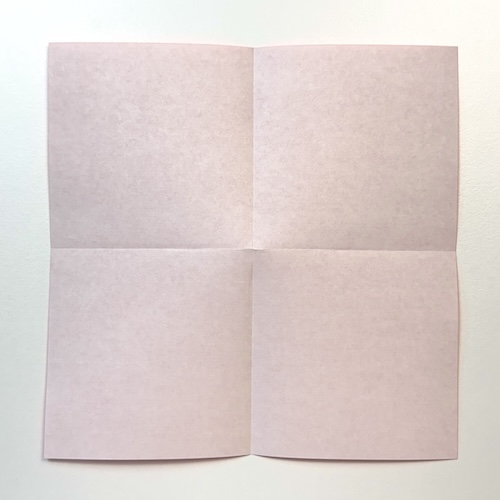
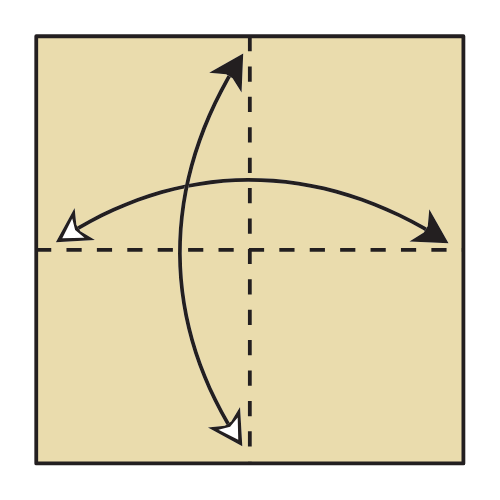
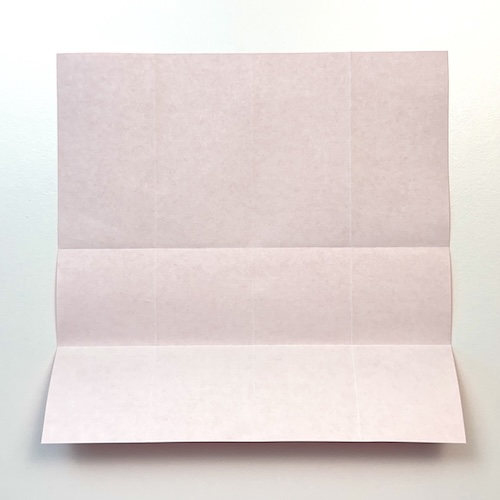
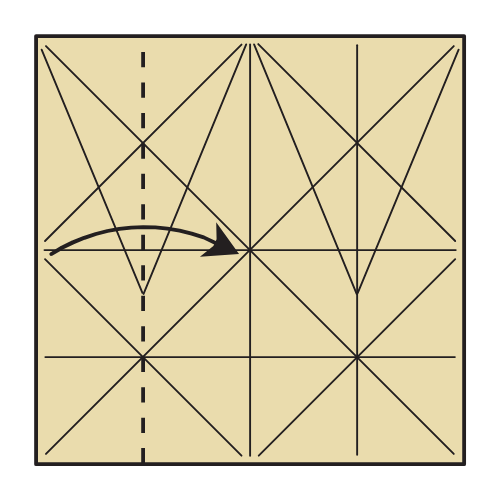
Fold and unfold the paper side to side in both directions.
🦑 Folding tip: We’ll do a lot of pre-creasing from Steps 1 to 12, so take your time and make each fold as accurate as possible.
Step 2
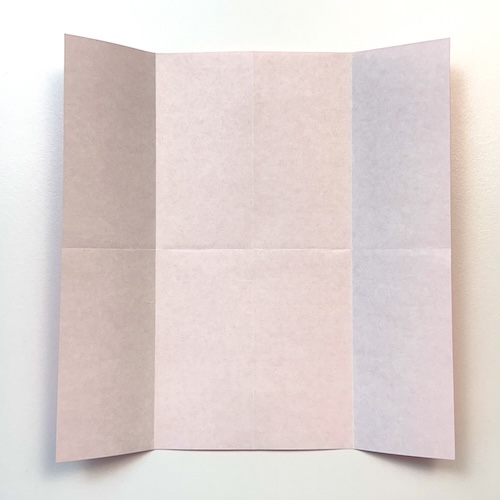
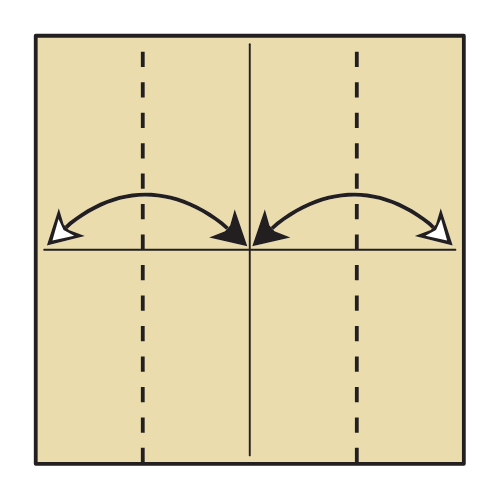
Fold and unfold the left and right edges to the vertical centerline.
Step 3
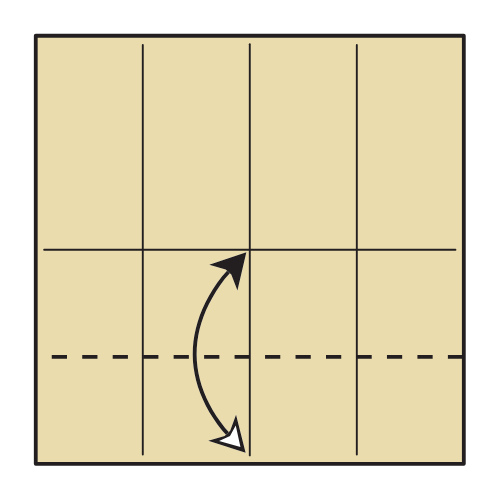
Fold the bottom edge to the horizontal centerline, then unfold.
Step 4
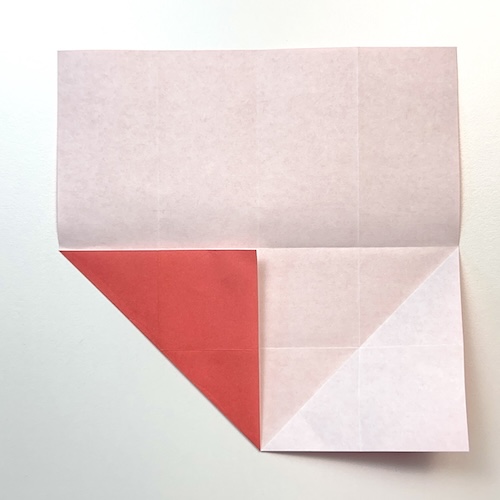
Fold and unfold the bottom left and right corners to the center.
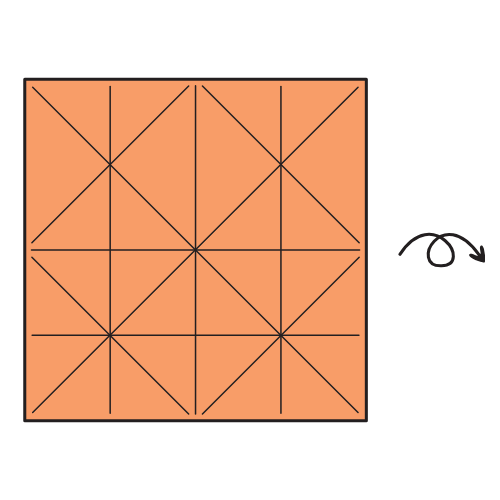
Step 5


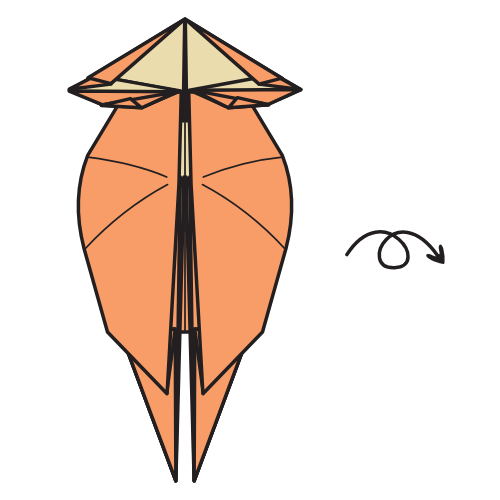
Turn the paper over.
Step 6

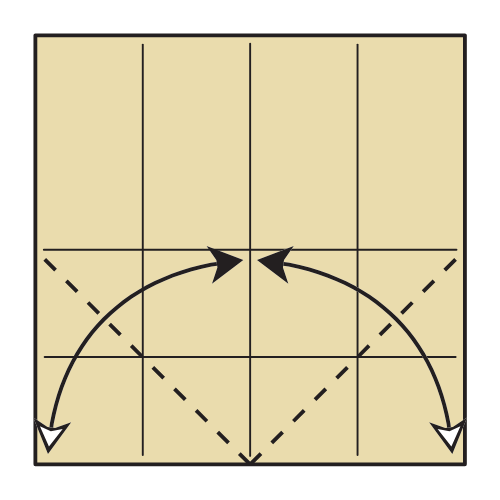
Fold and unfold along both diagonals.
Step 7
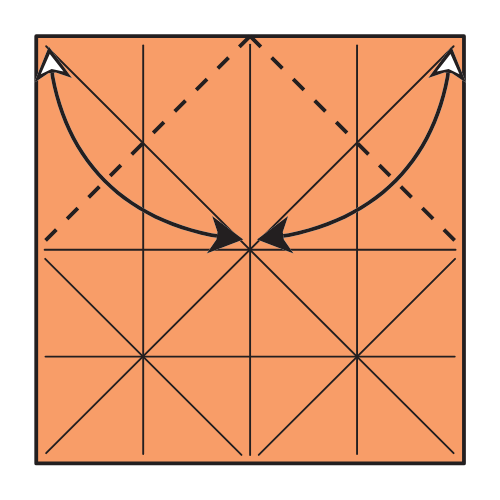
Fold and unfold the top left and right corners to the center.
Step 8

Turn the paper over.
Step 9
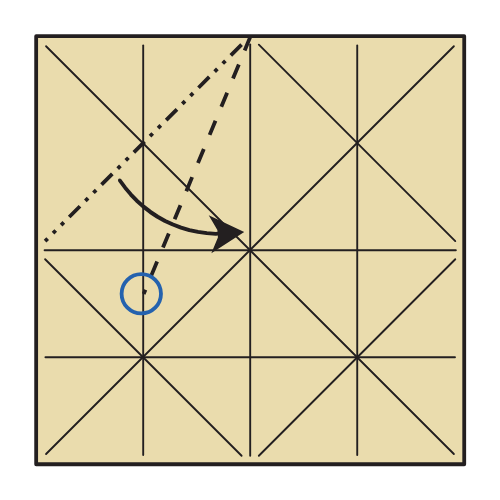
Pinch the mountain fold from Step 7 and fold it to the vertical centerline, but only crease down to the circled point.
Step 10

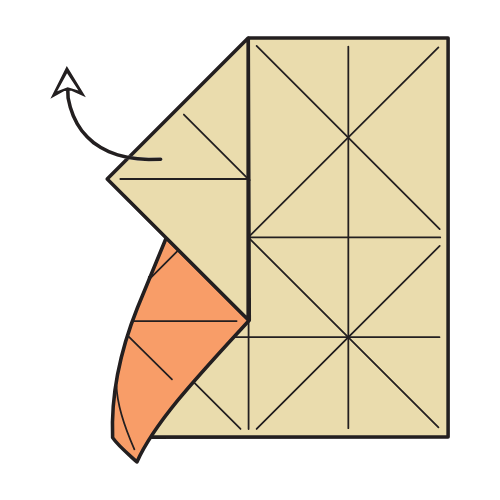
Your paper should look like this. Now unfold Step 9.
Step 11
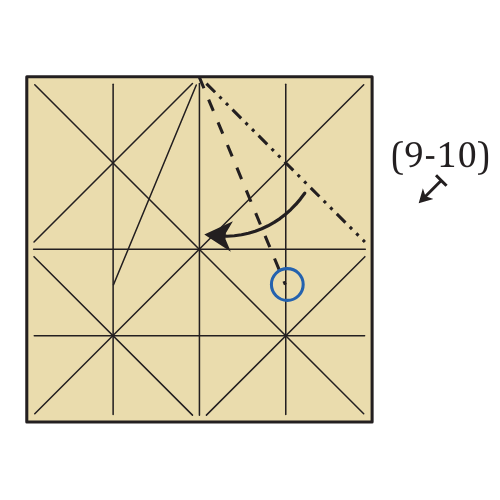
Repeat Steps 9 and 10 on the right side.
Step 12
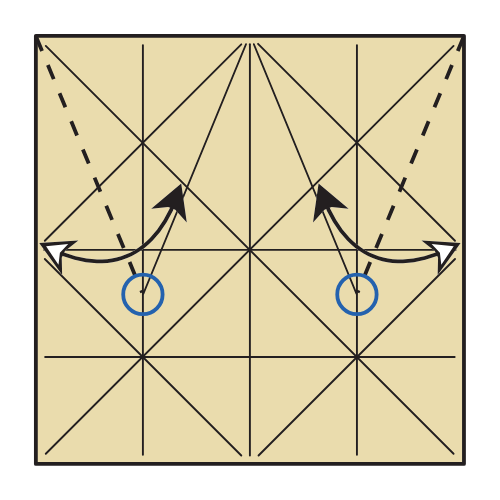
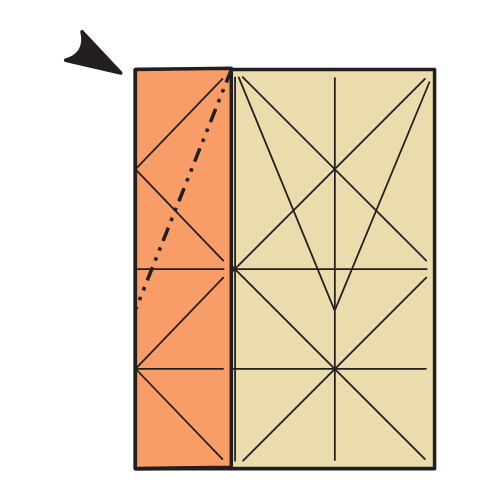
Fold the left edge to the nearest diagonal, only creasing down to the circled point, then unfold. Repeat on the right side.
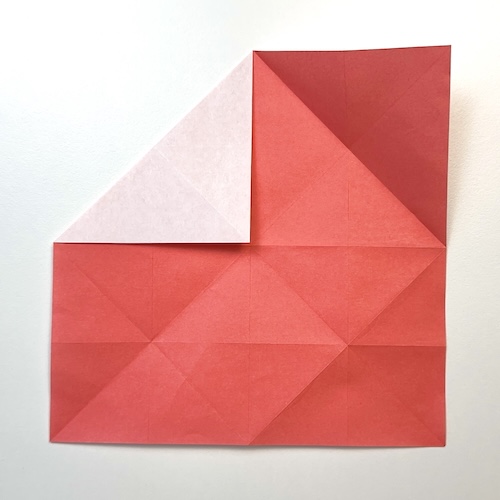
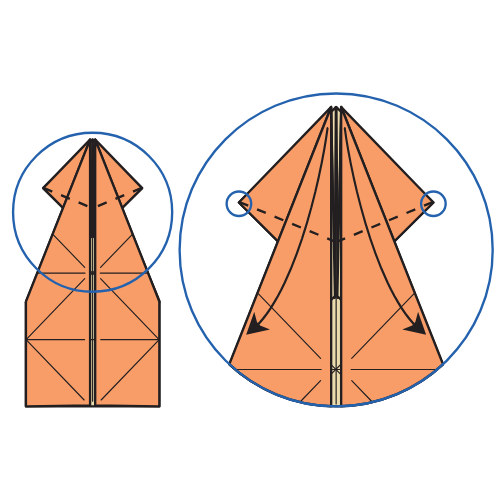
Step 13
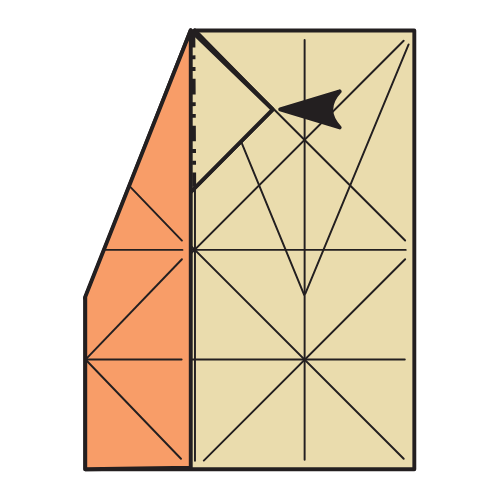
Fold the left edge to the centerline along the existing crease.
Step 14
Inside reverse fold along the existing creases from Steps 9 and 12.
Step 15
Inside reverse fold again along the existing creases.
Step 16
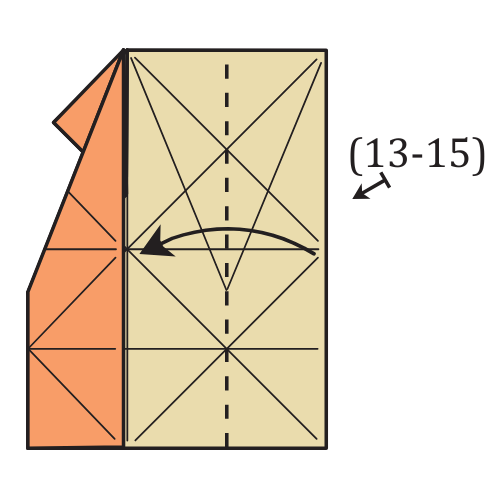
Repeat Steps 13 to 15 on the right side.
Step 17
Fold the corners down as far as they will go so they lie along the edges.
🦑 Folding tip: Check the next diagram to see where the folds will go before making them.
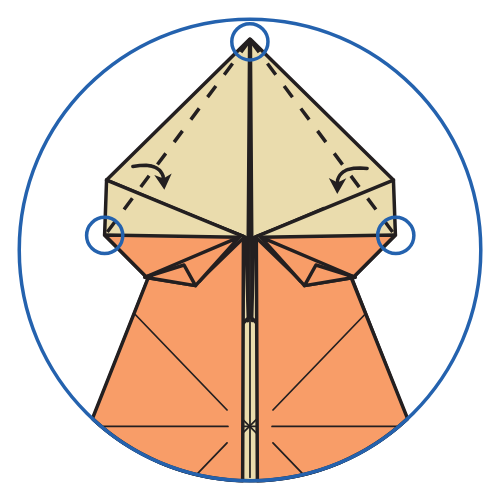
Step 18
Fold the corners to the circled point.
Step 19
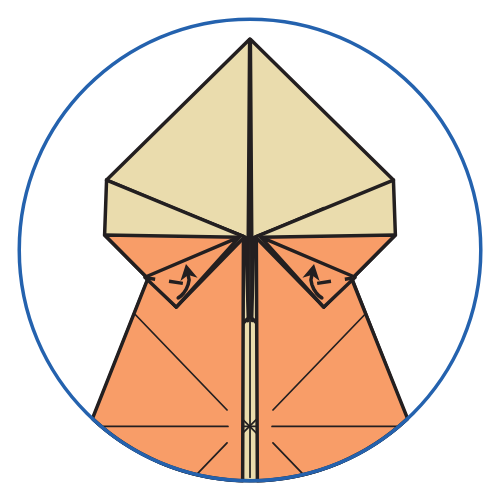
Fold the small corners up to the nearest crease line.
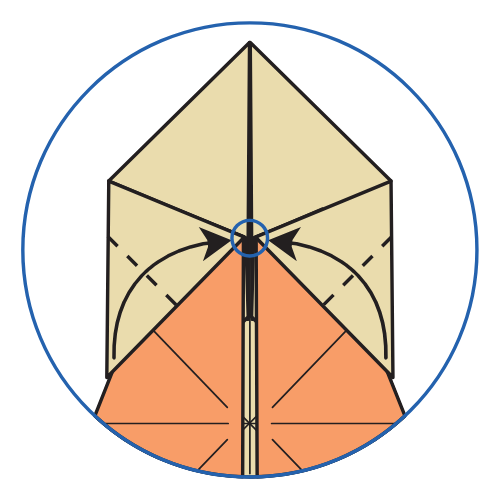
Step 20
Fold the edges inward using the fold lines that connect the circled points.
Step 21
Inside reverse fold the bottom corners.
Step 22
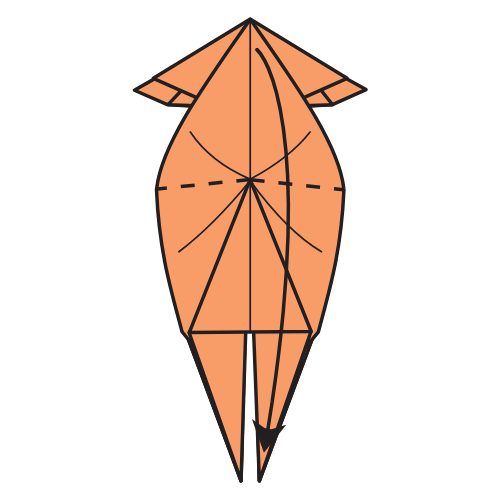
Reverse fold the far corner upward.
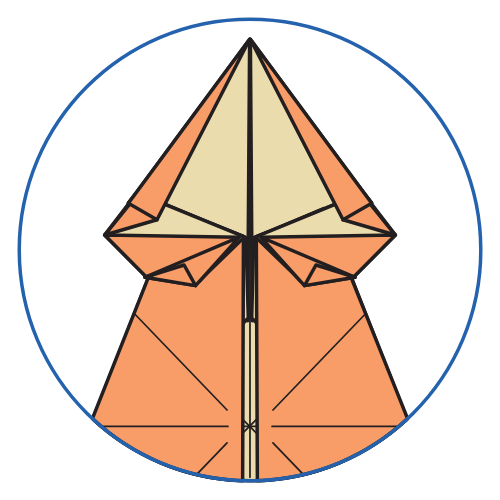
Step 23
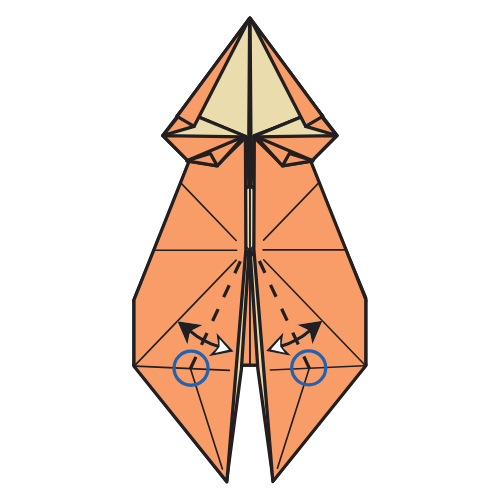
Fold and unfold edge to edge, creasing firmly only up to the circled point.
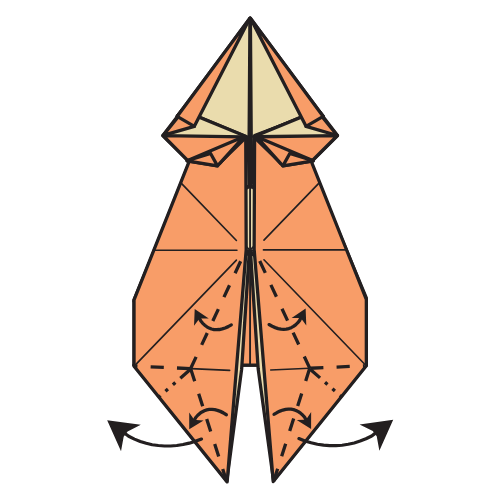
Step 24
Fold and unfold the central edges to the nearest crease lines, creasing firmly only down to the circled points.
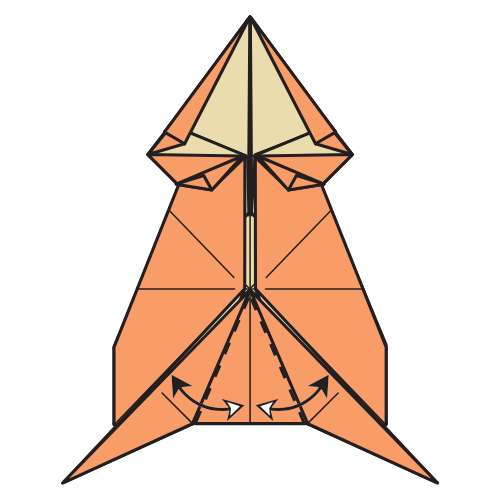
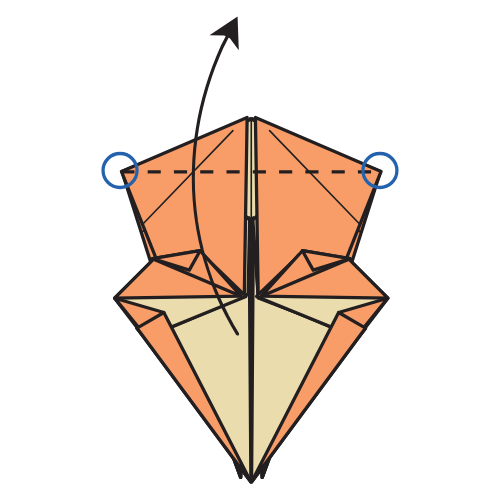
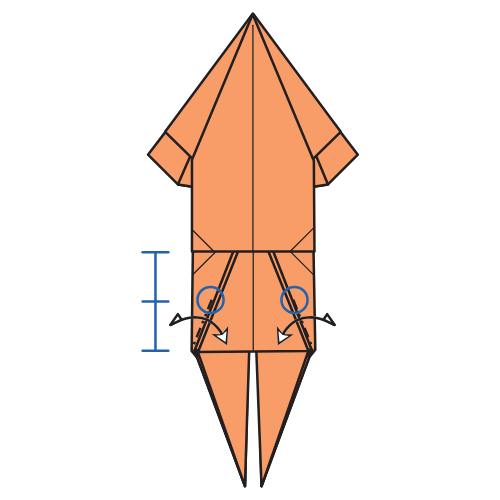
Step 25
Rabbit-ear fold the corners out to the sides.
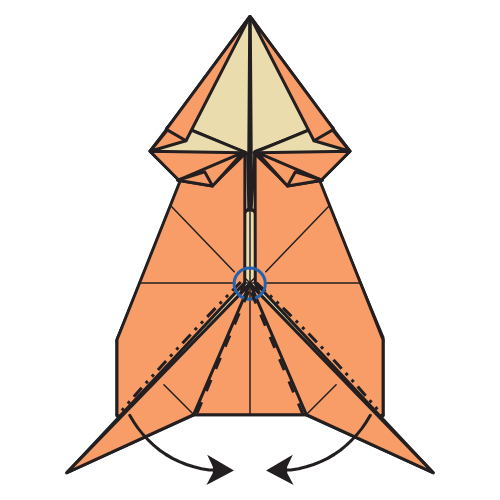
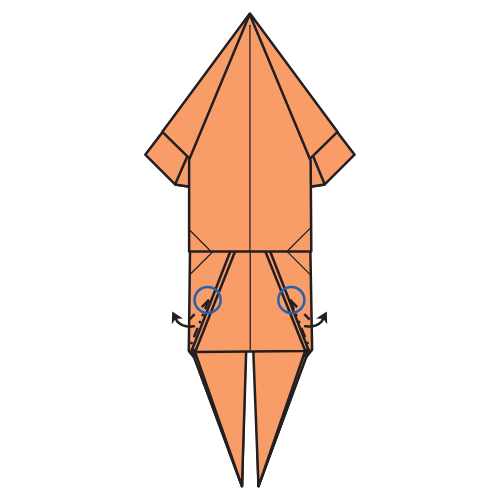
Step 26
Fold and unfold along the folded edges.
Step 27
Pleat fold using the existing creases so the circled point forms a vertex pointing upward toward you. The paper will not lie flat until after Step 29.
Step 28

Turn the model over.
Step 29
Fold the top corner down to the bottom to flatten the paper.
Step 30
Fold the near flap upward.
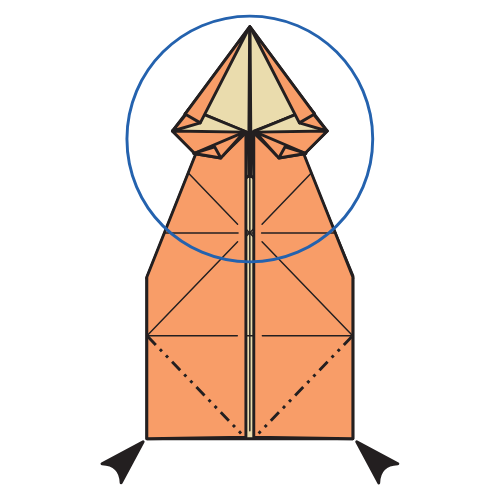
Step 31
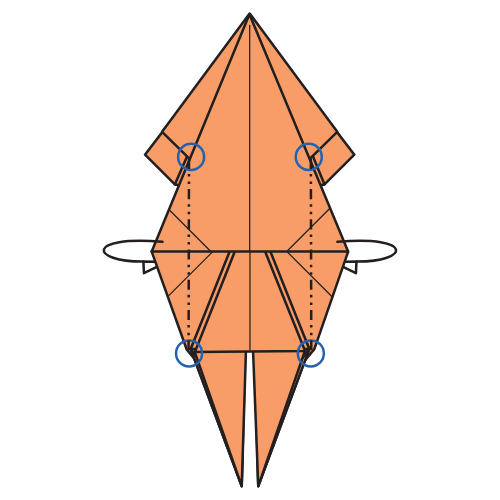
Mountain fold the left and right corners behind the model.
Step 32
Pinch a mountain fold along the folded edges on each side, marking firmly only to about the circled point, then unfold.
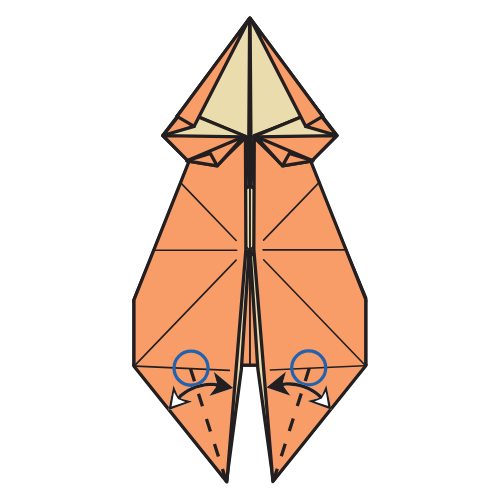
Step 33
Make small pleat folds on each side. The circled points should come toward you. The paper will not lie flat from this point onward.
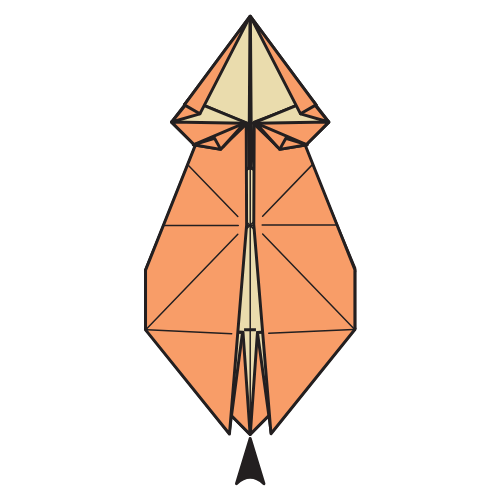
Step 34
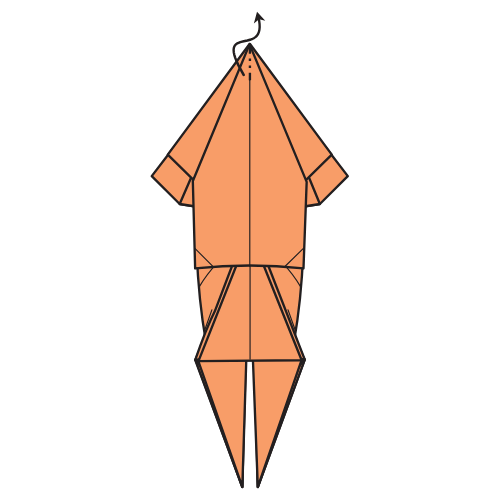
Pinch the top corner of the squid and curl it slightly.
Step 35
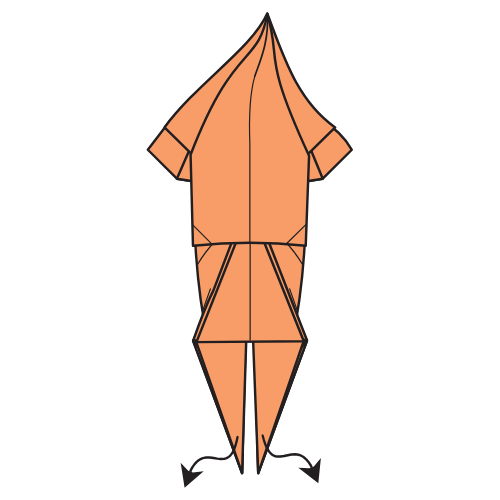
Curl the tentacles.
Nice Work, Your Origami Squid Is Ready to Swim 🦑
I hope you enjoyed folding this origami squid. It’s a satisfying model to shape, and the final silhouette has a lot of movement.
If you fold one, feel free to share a photo in the comments. It’s always interesting to see how different shaping choices change the personality of the model.
If you’d like to keep folding, you can explore more origami animals here.
You can also get new tutorials and folding ideas in our newsletter here. And if you prefer video instructions, you can follow along on YouTube.

Download the Complete Origami [Keyword] Printable PDF Instructions
This printable PDF is part of our Origami Friends membership on Patreon. As a member, you get access to these diagrams, our full library of 120+ printable PDFs, and member-only content.