
How to Fold an Origami Envelope
Let’s learn how to fold this origami envelope designed by Kitamura Keiji. It’s a clean and practical model with a clever locking system that keeps the envelope closed without glue or scissors.
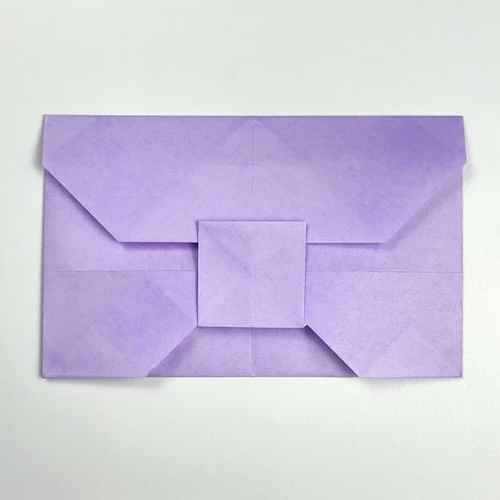
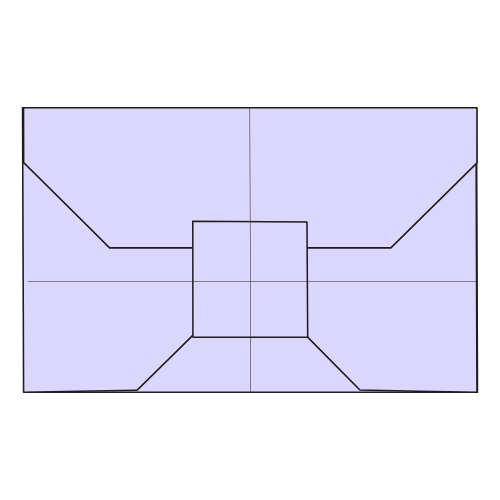
The finished envelope has a compact rectangular shape with a central square that holds the left, right, and top flaps in place. The layered folds give the design a neat, structured look while still feeling decorative, especially with patterned paper (chiyogami).
This model is relatively easy to fold, though it does require a bit of precision for everything to line up properly. It’s the kind of design that becomes especially satisfying after a few repetitions, once everything aligns neatly.
I recommend using regular printer paper for your first attempt as test paper before moving on to origami paper or decorative sheets. Once finished, the envelope works beautifully for small notes, gift cards, or money gifts.
Origami Envelope Step-by-Step Instructions
- Difficulty: Easy – Beginner level 3
- Folding time: 10 minutes
Recommended Paper
- 9.5 × 9.5 in (24 × 24 cm) kraft, wrapping, or origami paper (Kami or Chiyogami)
Makes an envelope measuring approximately 6.7 × 4.2 in (17 × 10.6 cm) - 5.9 × 5.9 in (15 × 15 cm) paper
Makes a smaller envelope measuring approximately 4.2 × 2.6 in (10.6 × 6.6 cm)
This tutorial was updated in May 2026 with clearer steps and improved visuals.
Step 1
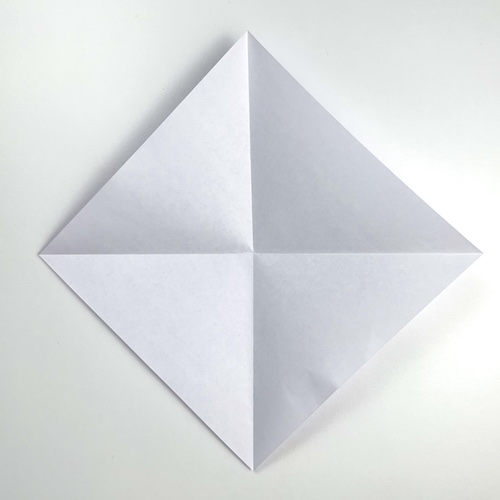
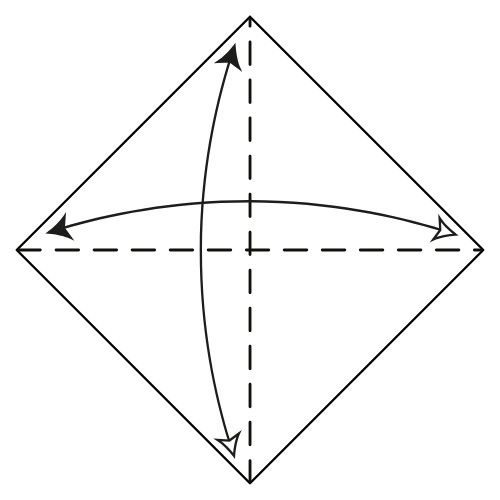
Start with the white side facing up in a diamond position. Fold and unfold the paper in half horizontally and vertically.
Step 2
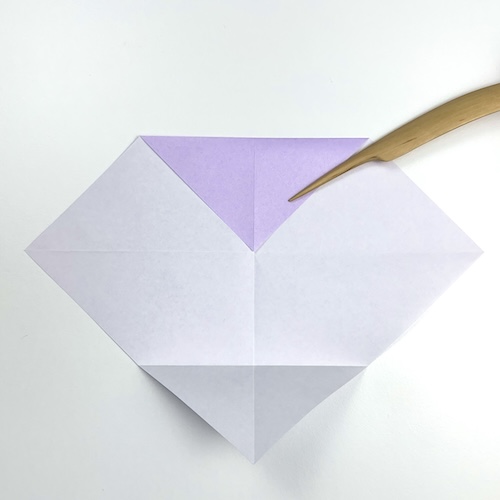
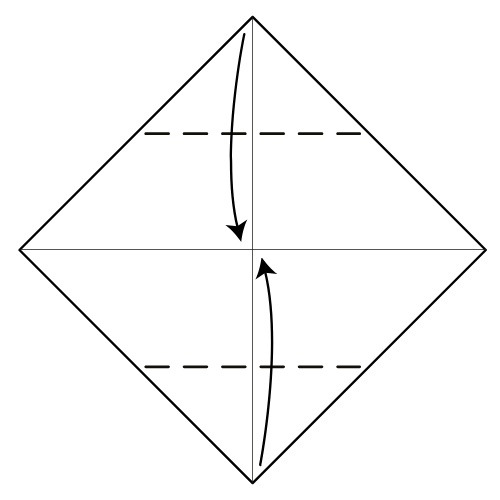
Fold the top and bottom corners to the center point.
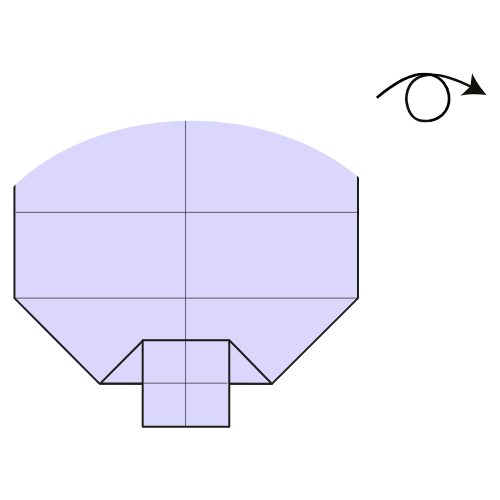
Step 3

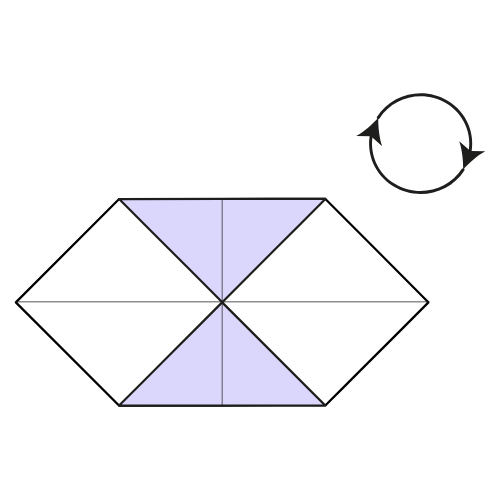
Rotate the model 90° clockwise.
Step 4
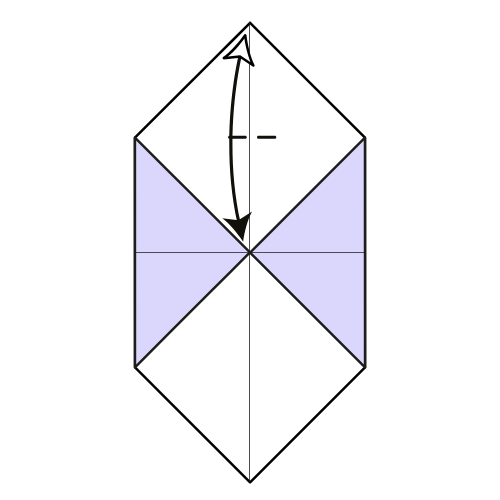
Fold the top corner down to the center point. Make a light pinch mark, then unfold.
✉️ Folding tip: Make the pinch mark as lightly as possible so it does not show too much on the finished model.
Step 5
Fold the bottom corner up to the pinch mark you just made, then unfold.
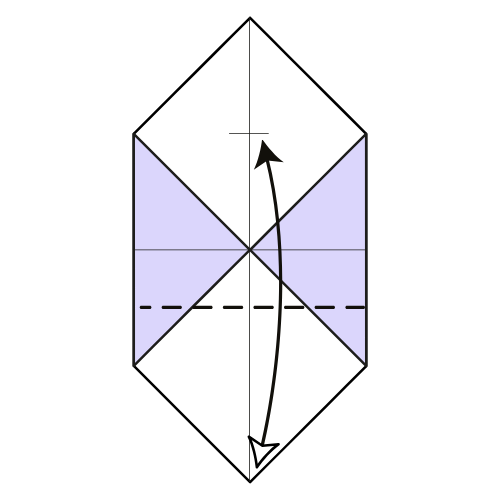
Step 6
Fold the bottom corner up to the crease made in Step 5.
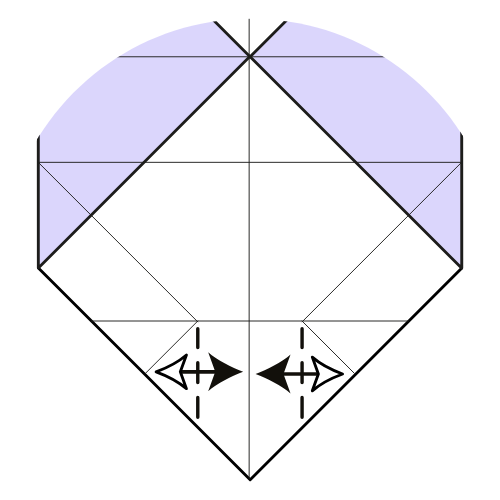
Step 7
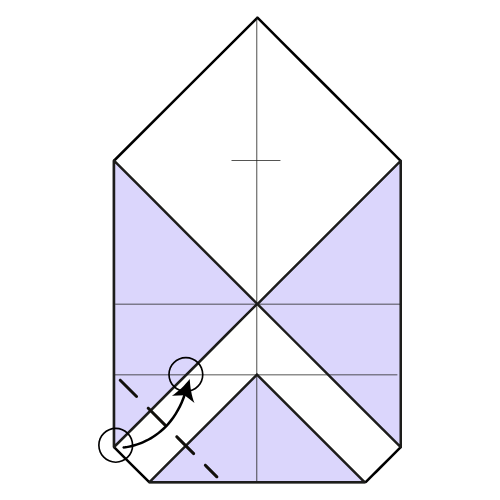
Fold the bottom left section upward, aligning the left edge with the crease from Step 5. The circled points should meet.
✉️ Folding tip: Hold the layers firmly while folding so the paper does not shift.
Step 8

Repeat Step 7 on the right side.
Step 9
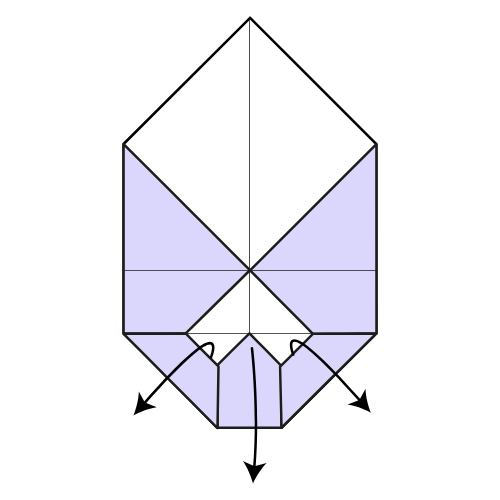
Unfold Steps 6 through 8.
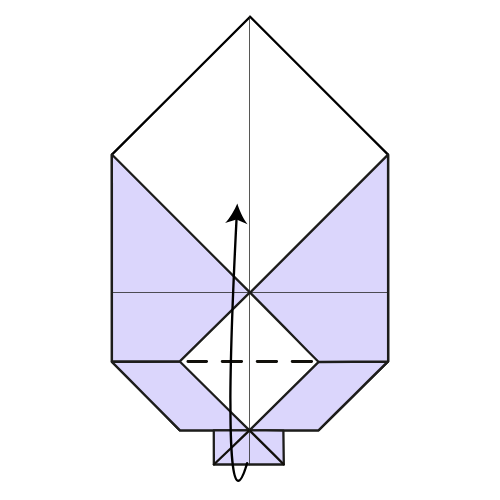
Step 10
Fold along the dashed lines, using the existing creases as guides.
✉️ Folding tip: This step can be a little tricky. To make the fold easier, before unfolding the model in the previous step, lightly mark two mountain folds along the raw edges. Then unfold and use those crease lines as guides.
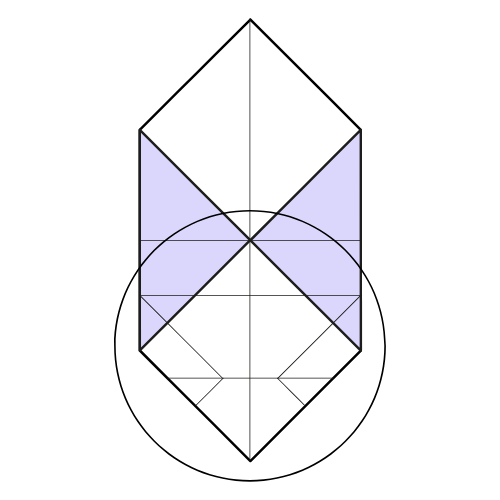
Step 11
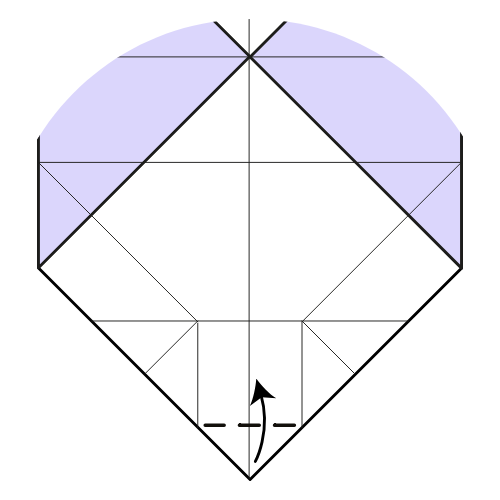
Fold the bottom corner up, using the creases from Step 10 as guides.
Step 12
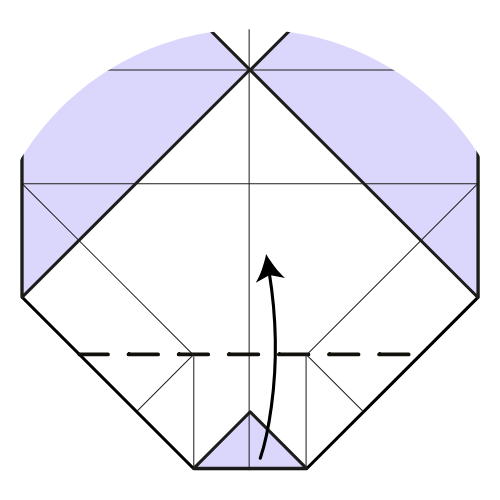
Fold the bottom area upward along the existing crease.
Step 13
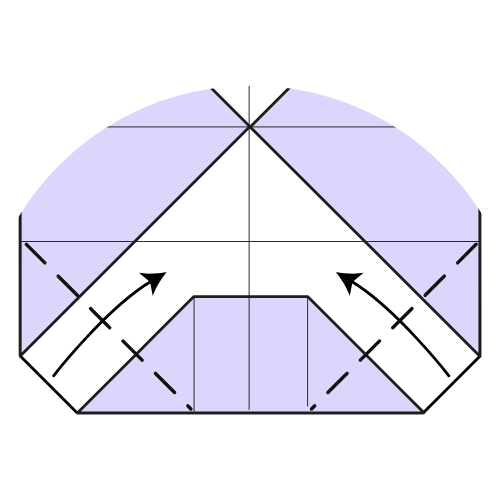
Fold the bottom left and right sections inward along the existing creases.
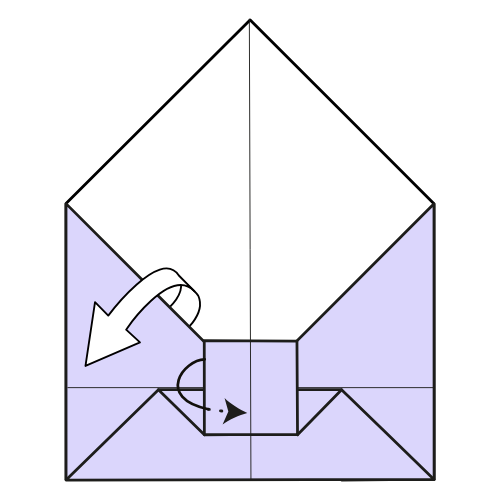
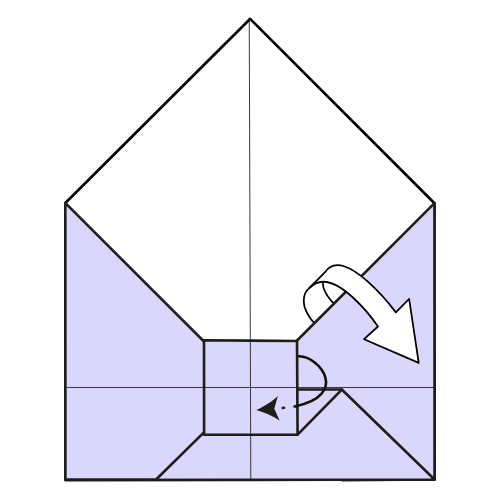
Step 14
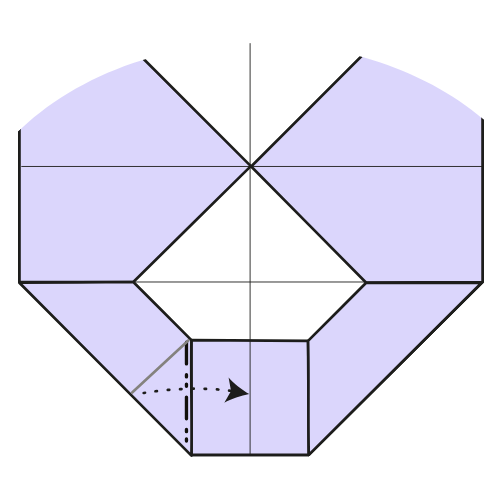
Flip the hidden flap from left to right.
Step 15
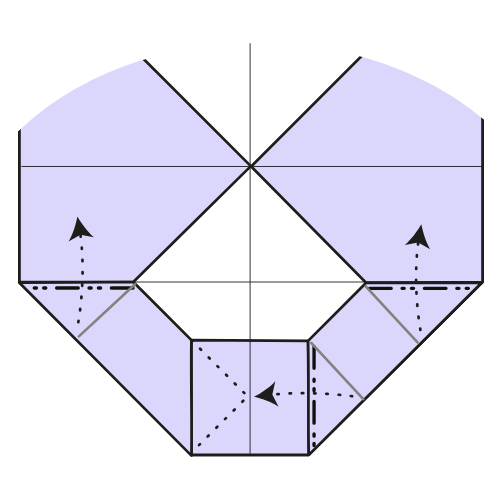
Repeat Step 14 for the remaining hidden flaps, 3 more times.
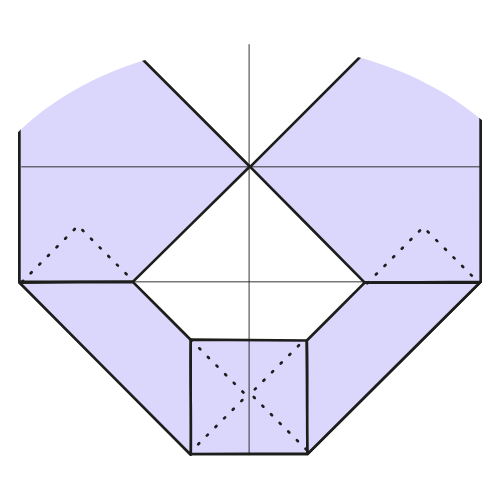
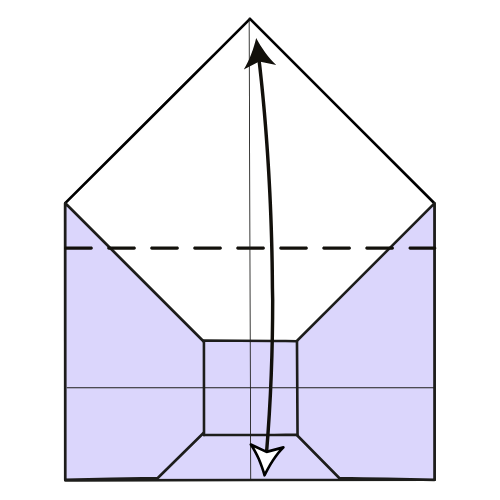
Step 16
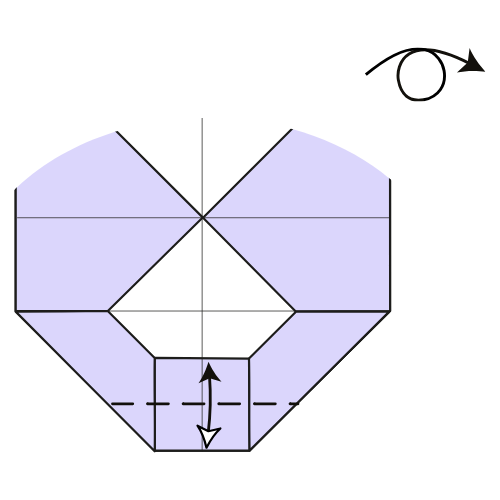
Fold the bottom edge up to the nearest horizontal edge. Unfold, then turn the model over.
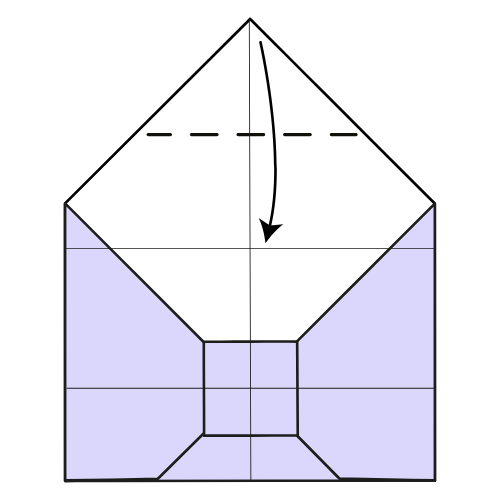
Step 17
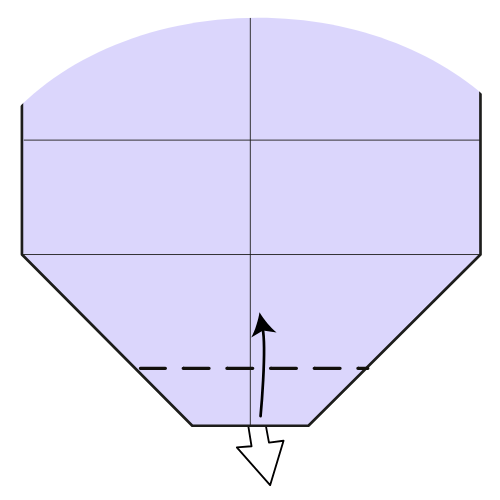
Fold along the crease made in Step 16. The square flap will move from the back to the front.
Step 18
Turn the model over.
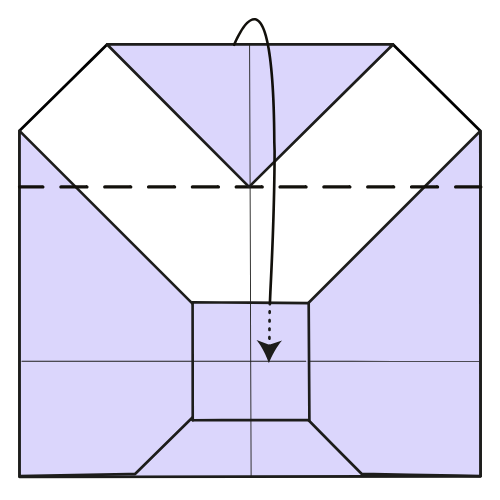
Step 19
Fold the bottom area upward along the existing crease.
Step 20
Gently untuck the left flap and tuck it underneath the square.
✉️ Folding tip: If the envelope is not flattening well here, slightly adjust the fold made in Step 17.
Step 21
Repeat Step 20 on the right side.
Step 22
Fold the top corner down to the bottom edge, then unfold.
Step 23
Fold the top corner down to the crease made in Step 22.
Step 24
Fold along the crease from Step 22 and tuck the flap underneath the square.
Finished! Your Origami Envelope Is Ready to Use.
I hope you enjoyed folding this origami envelope. The locking design is simple, but very satisfying once all the flaps fit neatly into place.
Patterned paper works especially well for this model. You can use ready-made chiyogami paper or even make your own using wrapping paper.
If you fold one, feel free to share a photo in the comments. It’s always nice to see the different papers and variations people use.
You can also explore more easy origami tutorials and useful origami models on the site.
And if you’d like more folding ideas, you can join our newsletter here. You can also follow along with our video tutorials on YouTube.

Download the Complete Origami Envelope Printable PDF Instructions
This printable PDF is part of our Origami Friends membership on Patreon. As a member, you get access to these diagrams, our full library of 120+ printable PDFs, and member-only content.
Watch the Origami Envelope Video Tutorial
Enjoyed this tutorial?
Subscribe to our YouTube channel for new inspiring origami videos every week!


love it!
I messed up on one of the parts….It looks so bad!
This one needs precision so I recommend using a perfect square and thin paper like Kraft or Kami.
Can I do this on a 6×6 in paper? I know it’ll turn out smaller but I decided to ask in case it doesn’t work out.
Hi Melissa, Yes, absolutely! It works with any square paper. If you’re planning to use it as a letter, I recommend going with a slightly larger size.
so fun and easy but if your making many have patience!
worked well and please post a video!
Hi Harmony! You can find the video at the bottom of the article 👌
Will 15×15 paper work for the envelope
Hi Jessica, Absolutely, a 15×15 cm sheet will work perfectly. We used that paper size for the envelopes in the featured image. You’ll get a 10.5×6.5 cm (about 4×2.5 in) envelope.
this is pretty hard lol
That was really good
I agree
This was so easy!