
How to Fold an Origami Heart Card
Some messages deserve more than just words. This lovely origami heart card, designed by Nick Robinson, lets you fold your feelings into something tangible. A heart that opens to reveal a personal note inside.
With a few simple folds and a smart color change, this model transforms paper into something meaningful, making it perfect for love notes, special occasions, or just a small gesture to brighten someone’s day.
Pick a paper that speaks to you, and let’s begin.
Origami Heart Card Step-by-Step Instructions
- Difficulty: Easy – Beginner Level 2
- Folding time: 5 minutes
- Model designer: Traditional
- Paper: Kami 15×15 cm (6×6 in)
Step 1


Start with the colored side facing up. Fold the paper in half vertically, then unfold it.
Step 2


Fold each side toward the center crease, then unfold to leave guiding creases.
Step 3


Fold the lower corners inward, aligning them with the creases made in Step 2.
Step 4

Using the existing creases from Step 2, fold both sides back toward the center crease.
Step 5


Turn the model over.
Step 6


Fold the bottom edge up about one-third of the way.
Step 7


Fold the top edge down to meet the dotted guideline.
Step 8


On the right side, fold up a tiny corner of the top layer created in Step 7.
Step 9

Squash fold the top layer along the dotted lines.
Step 10


Tuck the small flap created in Step 9 behind the bottom layer.
Step 11

Repeat Steps 8–10 on the left side.
Step 12


Slightly fold along the center crease and adjust the angle so the heart card can stand on its own.
💖 Your Heart Card is complete!

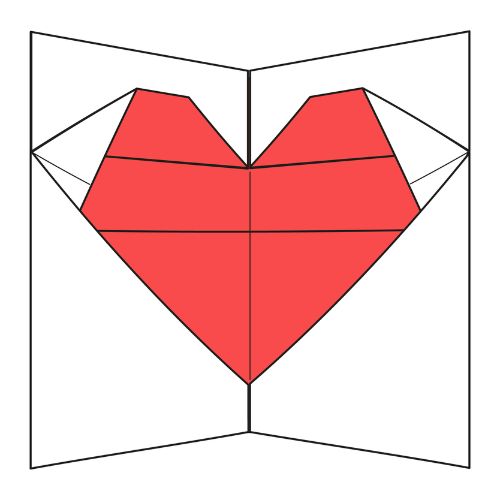
And just like that, your message has taken shape.
Whether you keep it simple or use beautiful paper with patterns, each origami heart card carries a story.
Don’t hesitate to share your creations with us in the comments or on socials. We’d love to see them!

Download the Complete Origami Heart Card Printable PDF Instructions
This printable PDF is part of our Origami Friends membership on Patreon. As a member, you get access to these diagrams, our full library of printable PDFs, and member-only content.
Watch the Origami Heart Card Video Tutorial
🌸 Enjoyed this tutorial? Subscribe to our YouTube channel for new inspiring origami videos every week!


How to you use it
You can write a message inside.