
How to Fold an Origami Hexagonal Box
This elegant hexagonal box was designed by Nick Robinson, based on a model by the legendary Shuzo Fujimoto.
While the original is folded from a full square, Nick’s clever adaptation begins with just half a square and greatly simplifies the folding sequence and collapse.
The result is more accessible, quicker to fold, and just as satisfying, without losing the beauty of the geometric forms.
And since it only uses half a square, you can fold two boxes from a single sheet of paper.
Origami Hexagonal Box Step-by-Step Instructions
- Difficulty: Low-Intermediate
- Folding time: 20 minutes
Recommended Paper
Printer paper or Kami 24×24 cm (9.5×9.5 in) for a 6x5x3 cm (≈ 2.4x2x1.2 in) box. This is good for a first fold. Go for something thicker for a more usable box.
For the tutorial, we used 24×24 cm (9×9 in) Japanese Kraft Duplex 100 g/m².
Step 1
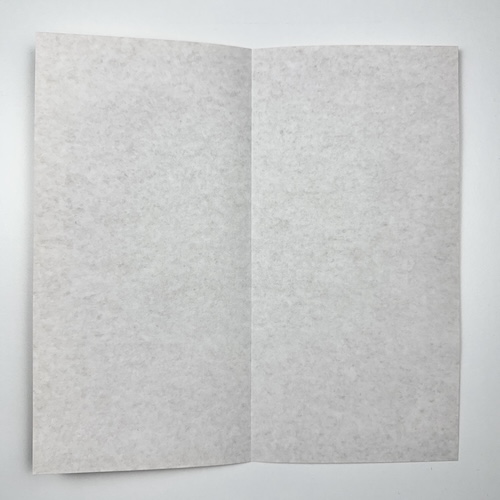
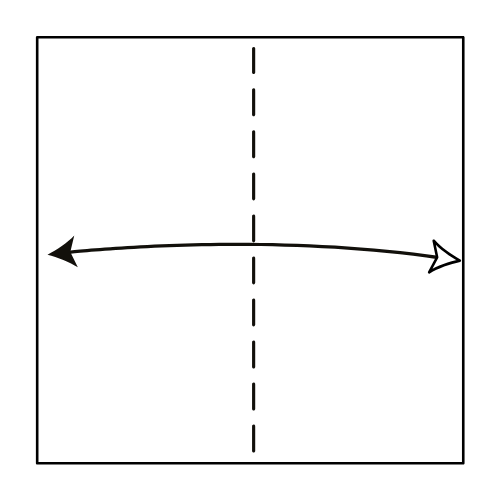
Start with the white side of the paper facing up. Fold it in half vertically, then unfold.
Step 2
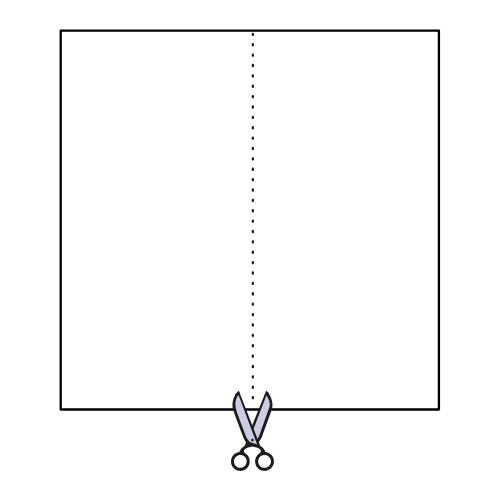
Cut along the crease you just made.
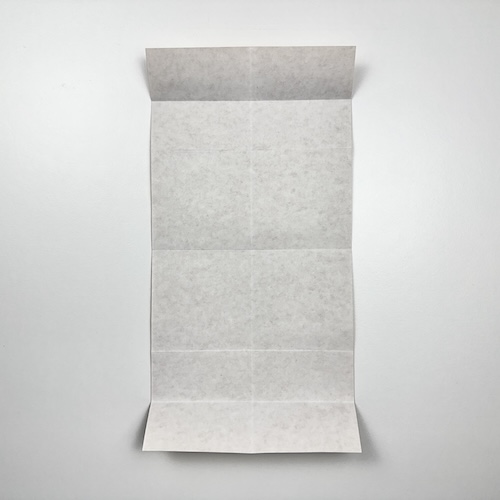
Step 3


Fold the piece in half vertically again, then unfold.
📦 Folding tip: This model needs sharp creases. Use your nail or a folding tool to press down each fold firmly.
Step 4


Fold in half horizontally, then unfold.
Step 5


Fold the top and bottom edges to meet the center crease.
Step 6

Fold the top and bottom edges again, this time to meet the creases you just made in Step 5.
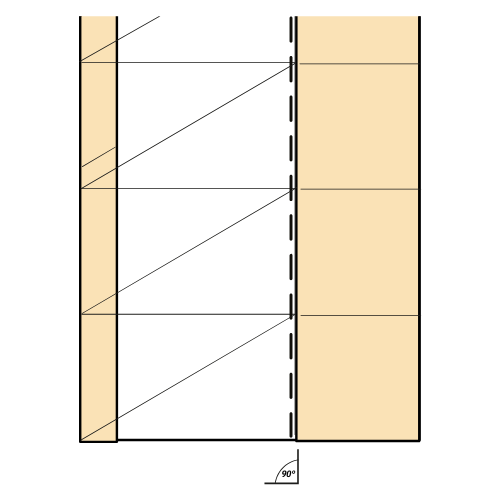
Step 7


Fold and unfold the bottom edge to the second crease from the top. Then do the same for the top edge, folding it to the second crease from the bottom.
Step 8
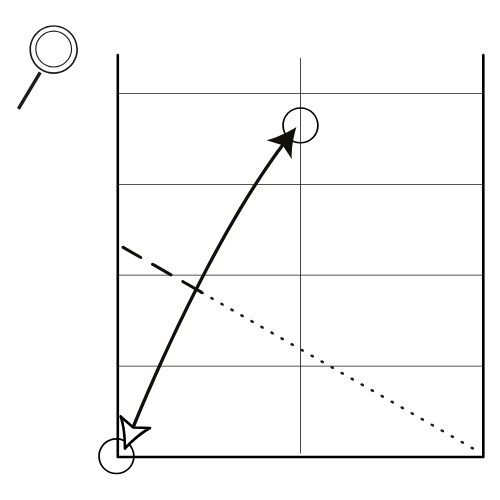
Fold the bottom left corner to the circled point, but only crease the left edge. Start the fold from the bottom right corner.
Step 9
Rotate the model 90° counterclockwise. Then, fold the bottom edge up to the reference point you made in Step 8.
Step 10
Fold the top left edge to the nearest vertical crease.
Step 11

Fold the top edge down to the horizontal centerline.
Step 12
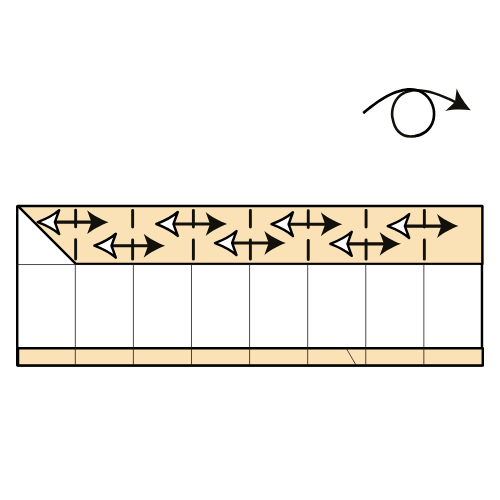
Reinforce all the vertical creases in the top colored section. Then turn the model over.
Step 13

Reinforce all vertical creases in the bottom section. Then turn the model over again.
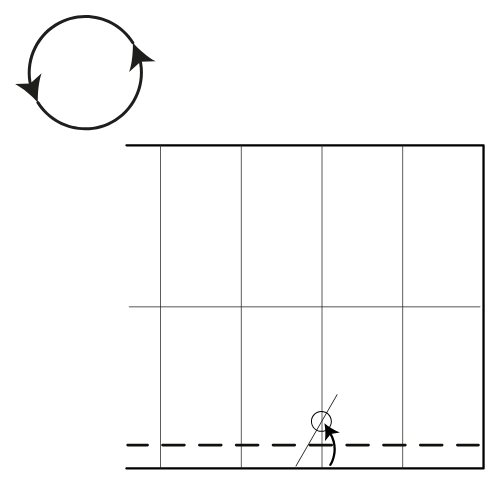
Step 14


Rotate the model 90° clockwise.
Step 15

Fold and unfold a diagonal crease across the bottom left rectangle.
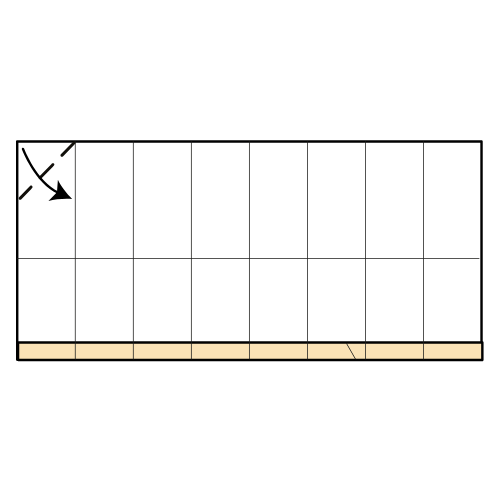
Step 16

Repeat Step 15 for all rectangular sections.
📦 Folding tip: If you’re comfortable with mountain folds, try turning the model over and creasing while holding it mid-air. It helps you make cleaner, more accurate folds.
Step 17

Fold the right section up, forming a 90° angle with the left section.
Step 18

Collapse the paper along the existing creases as shown.
Step 19

Repeat Step 18 for all sections.
📦 Folding tip: The more you fold, the harder it gets to collapse each section, especially as they start to sit on the edge of the box. Keep going! They’ll eventually all fit into place.
Step 20

Turn the model over.
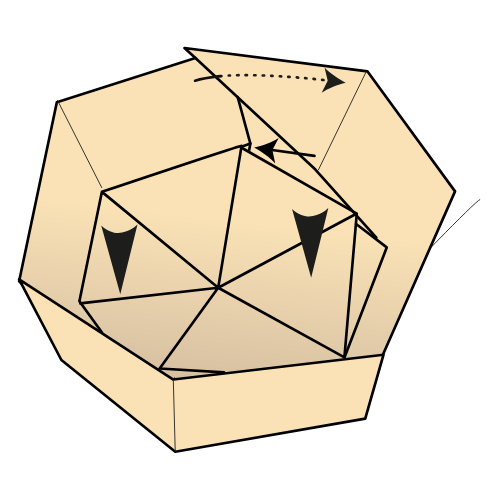
Step 21
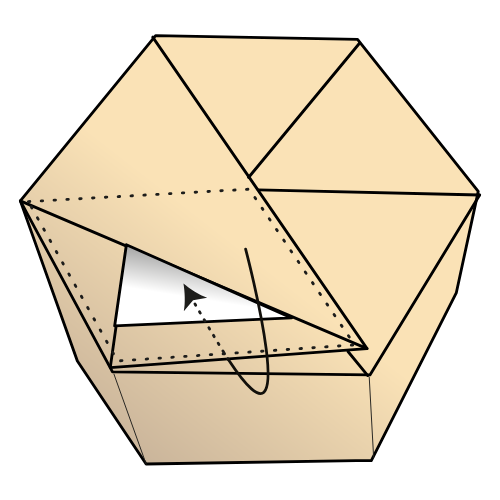
Swivel fold the dotted area inside the box.
📦 Folding tip: This part is tricky. If you’re not sure how to swivel the flap into the box, watch the video for guidance.
Step 22

Turn the model over again.
Step 23
Tuck one side of the box under the other.
📦 Folding tip: Use the tip of your folding tool to help lift and move the flap. It’s a tight fit, so don’t hesitate to unfold things a bit, then refold them.
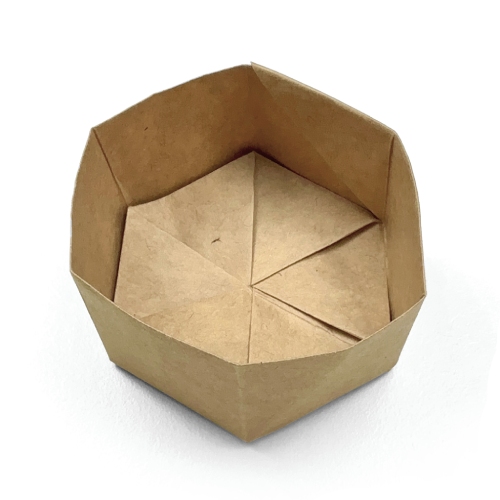
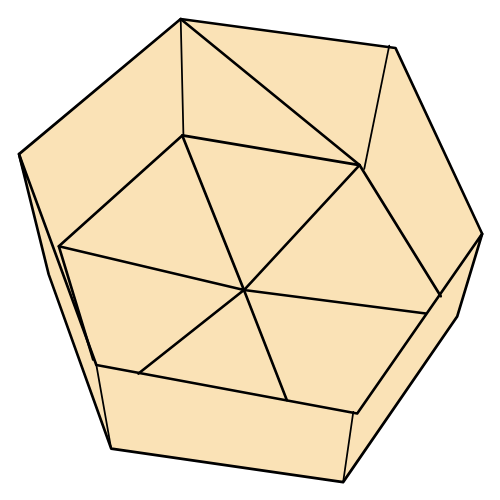
The completed origami hexagonal box! 📦

Challenge: Want to go a step further? Try folding a matching lid!
To do this, simply cut a slightly smaller rectangle (just a few millimeters narrower on each side) to form the base. You can also create a shorter lid by folding the flap from Step 11 in half.
We’d love to see what you create! Share your version with a lid in the comments or tag us on social media.
And if you enjoy elegant origami like this, don’t forget to check out our YouTube channel and newsletter for more tutorials, tips, and inspiration each week.

Download the Full Origami Hexagonal Box Printable PDF
Instructions
We’d love to keep you in the loop, so by sharing your email with us, you’ll be signed up for our mailing list. Don’t worry; we won’t bombard you with spammy emails, and your information is safe with us – we won’t share it with anyone else.