
How to Make an Origami Ninja Star
If you’re ready to unleash your inner ninja, let’s learn how to fold an origami ninja star, inspired by the traditional Japanese shuriken.
This model is made using two square sheets of paper and can be folded in under 10 minutes. The steps are simple, which makes it a good project for beginners.
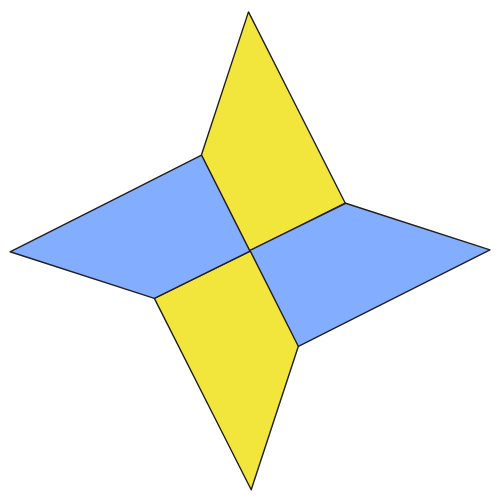
Once assembled, the star has four sharp points and a flat, balanced shape. It’s easy to hold and fun to throw, so you can test your ninja skills right away.
Follow the steps below to make your own paper ninja star.
Origami Ninja Star Step-by-Step Instructions
- Difficulty: Easy – Beginner level 2
- Folding time: 5-10 minutes
Recommended Paper
15×15 cm (6×6 in) Kami
This tutorial was updated in March 2026 with clearer steps and improved visuals.
Step 1
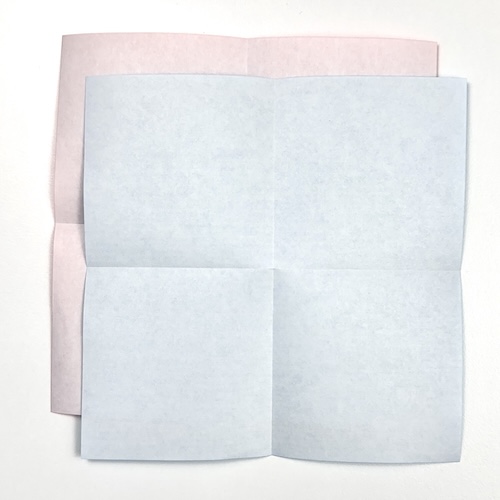
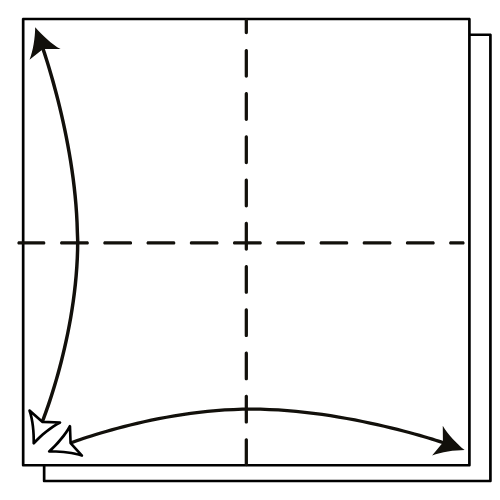
Start with two identical square sheets of paper, white side up. Fold and unfold each sheet in half vertically and horizontally to create two centerlines.
Step 2
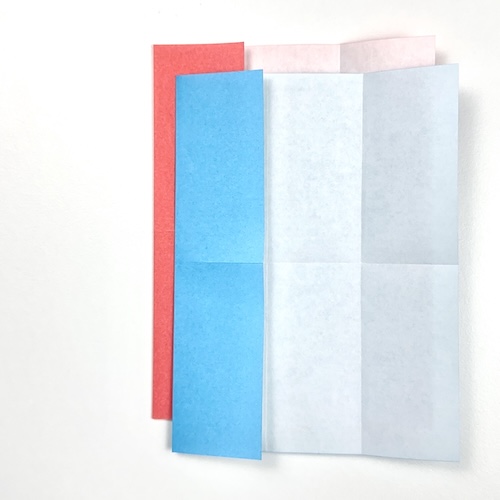

Fold the left and right edges of both papers to the vertical centerline.
Step 3
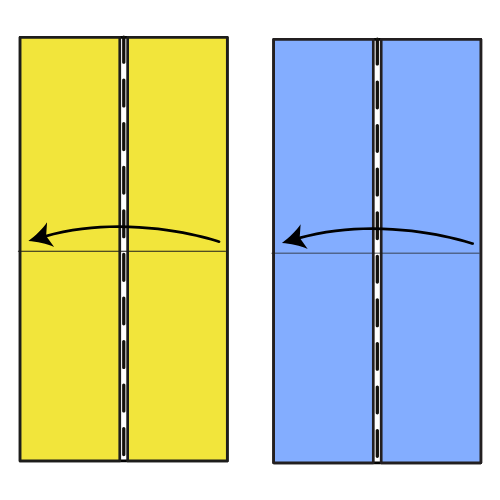
Fold both papers in half lengthwise.
🥷 Folding tip: If you cut a square sheet in half, you can start directly from this step. The model will be thinner and easier to fold, but slightly less sturdy.
Step 4
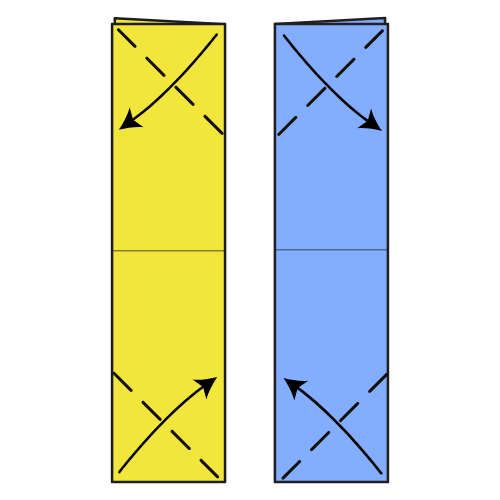
First unit: Fold the top edge to the left edge. Then, fold the bottom edge to the right edge.
Second unit: Fold the top edge to the right edge. Then, fold the bottom edge to the left edge.
Step 5

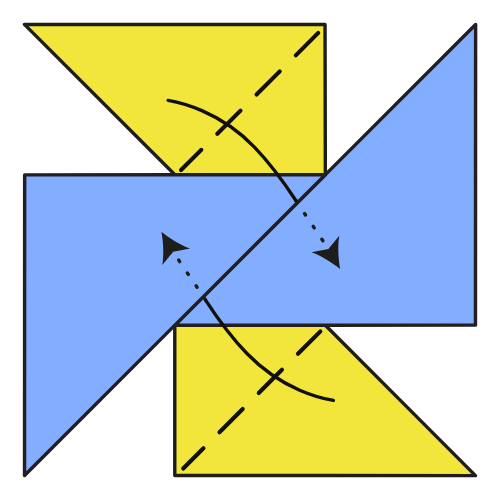
First unit: Fold the top corner to the right along the diagonal of the square area. Then, fold the bottom corner to the left along diagonal of the square area.
Second unit: Repeat the same folds but mirrored. Fold the top corner to the left and the bottom corner to the right.
🥷 Folding tip: Before creasing, check the back of the unit to make sure the layers line up neatly.
Step 6

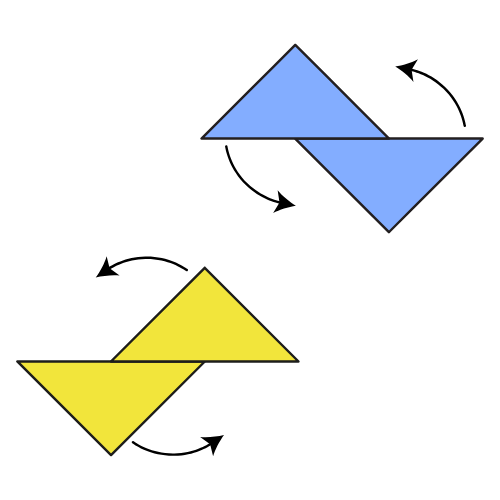
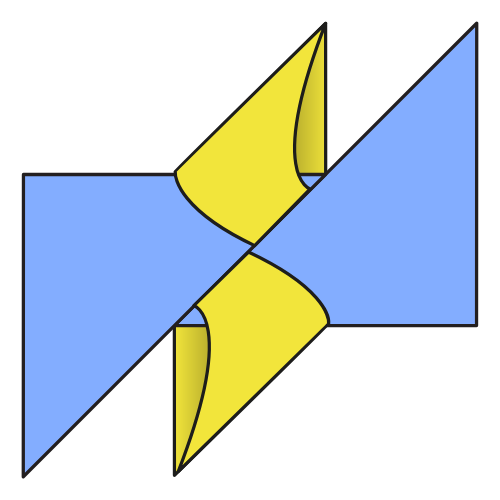
Rotate the first unit about 45° counterclockwise. Then, rotate the second unit about 22° counterclockwise.
Step 7
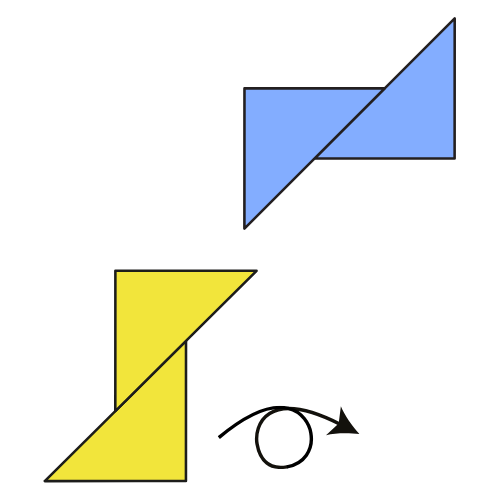
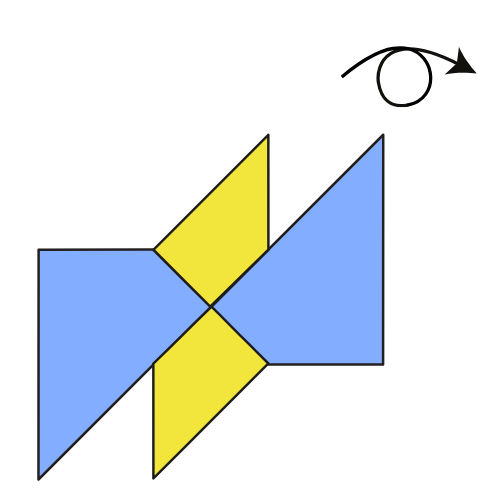
Turn the first unit over.
Step 8


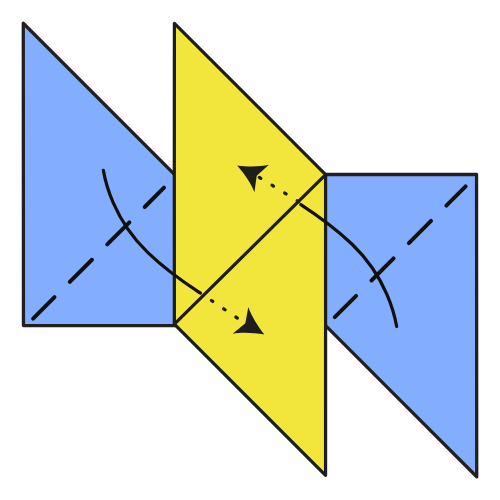
Place the second unit on top of the first unit.
Step 9
Tuck the tips of the first unit’s flaps into the pockets of the second unit. Adjust the layers, then crease firmly.
Tucking in process.
Step 10
Turn the model over.
Step 11
Tuck the tips of the second unit’s flaps into the pockets of the first unit. Adjust the layers, then crease well.
🥷 Folding tip: The model becomes quite layered at this stage, so the tucks may feel tight. Take your time and gently roll the layers between your fingers to help them slide into place.
Your Shuriken Is Complete, Ready to Be Thrown! 🎉
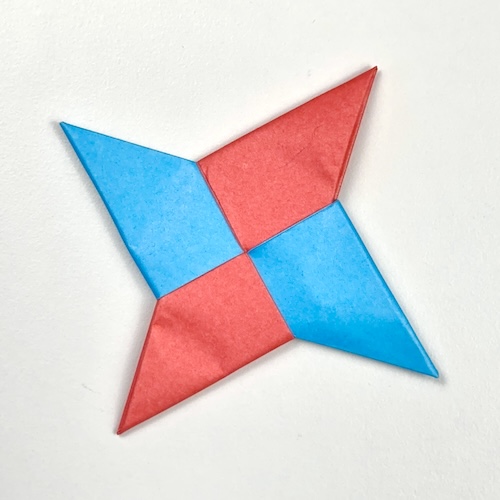
I hope you enjoyed folding this origami ninja star. It’s a quick model, but a really fun one once everything locks into place.
If you make one, feel free to share a photo in the comments. It’s always nice to see the different colors and combinations people come up with.
If you’d like to keep folding, you can explore more easy origami tutorials or check out our collection of origami animals.
You can also get new tutorials and folding ideas by joining our newsletter. And if you prefer video instructions, you can also subscribe to our origami YouTube channel here.
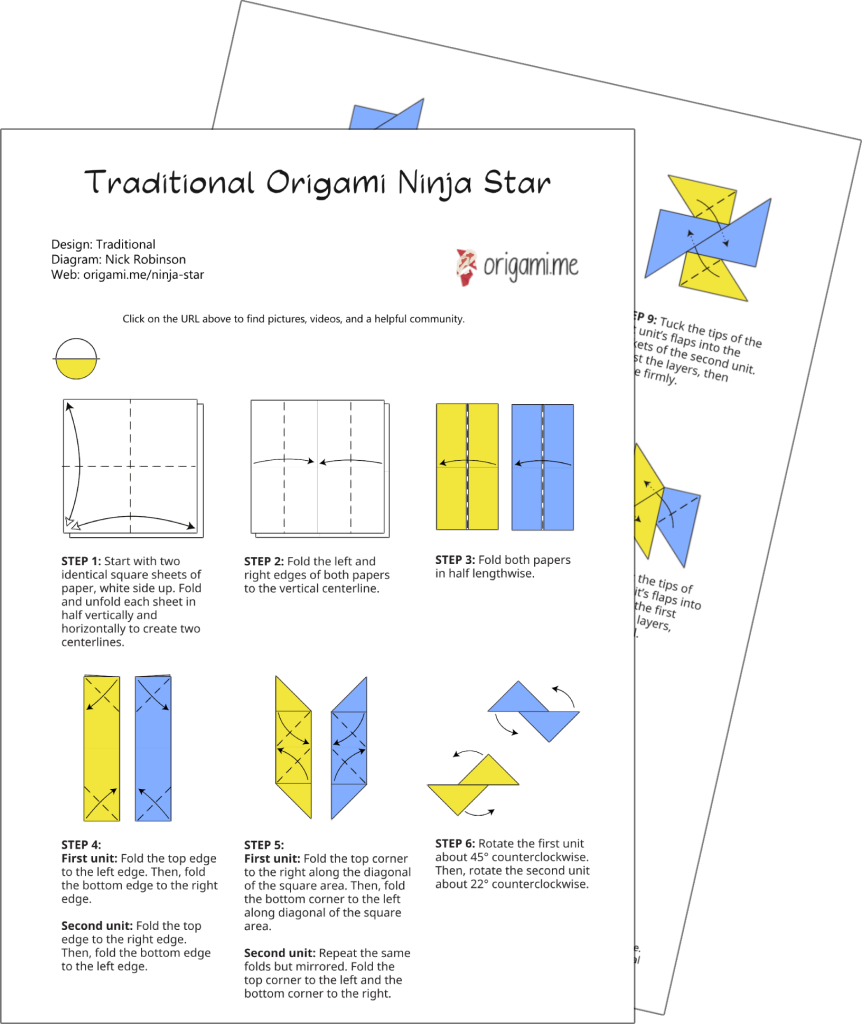
Download the Full Origami Ninja Star Printable PDF
Instructions
We’d love to keep you in the loop, so by sharing your email with us, you’ll be signed up for our mailing list. Don’t worry; we won’t bombard you with spammy emails, and your information is safe with us – we won’t share it with anyone else.
Watch the Origami Shuriken Video Tutorial
Enjoyed this tutorial?
Subscribe to our YouTube channel for new inspiring origami videos every week!


Lovely ninja star I use to torment my bro with👍
I cant do it properly its a glitch I think, can you see step 9 10 11
Hi Vaishnov, all is correct. There is no glitch 😉 If you can watch the videos, they should be helpful. If not, you can have a look at our Beginner’s guide.
I have tried so hard and I can do many complicated origamis but for some reason I just find this so hard. I have tried so many different ways to do it.
Hi Sienna, if you can watch the videos, they should be helpful. What step gives you trouble?
where do I get shiny origami paper like you do in the picture?
Hi Kimberly, search for foil origami paper on Amazon or Origami-Shop.
ok sounds great
hello fellow origami people! this was a magnificent project that I put my heart into and greatly failed, I generously hope you do better than me as a flunked this project and failed to live up to the name jeffrey..
Hi! What kind of paper did you use?
thin small square peices.
Try 6×6 in (15×15 cm). It should be easier. If you have an issue with thickness, you can also start from Step 3.
When I made it, it looked brand new. I tested it outside and accidentally flew at our roof. thankfully I live in Philippines, it has been a sunny season since January so it won’t be wet.
When everything locked into place I was staring at the back thinking it was the front ( I used white paper for both side so yah)and I was crashing out but when I flipped it instant realisation 😅😅😅🤣NOW I CAN COOK MWAHAHAAHHAHAAHAHAHAHA😈😈😈🎉
Don’t test it outdoors! See what happened to mine!
made this at school, hope I don’t get it taken. 😉
it turned out so well!! I need to memorize the instructions.
Its so great , it was a good idea to make origami ninja star
Perfect, for a school war (Boys VS Girls)
Good idea. It’s school right now.
It was a WAR (one of us breaked a leg)
one of us breaked a WHAT?!?!
Yes MWAHAHAHAHAHAHA😈
Thank you sooo much now i know how to make a gliding shuriken like it was preparing some cereal with milk! Yo gusto mucho hacer el origami con hojas quadrados y quiero mucho el origami. Gracias!
De nada, Dullahi! I hope you’re having fun with the shuriken.
cool
what size are the papers?
In this tutorial, we used two square sheets of paper, each measuring 6×6 inches (15×15 cm). But feel free to use smaller or larger square paper instead. You’ll just create a shuriken that’s either smaller or larger!
50×50 size i am super smaz
🙂
🙂
why is it so hard
Hi, if you have trouble with this tutorial, I recommend reading our origami beginner’s guide. Happy folding!
my wife keeps on throwing these at me is there a sharper version i can use on her
🤣🤣 My son did the same! For obvious reasons, I can’t officially recommend any sharper options here… but let’s just say they do exist 🤫
its not hard
True