
How to Fold an Origami Chameleon
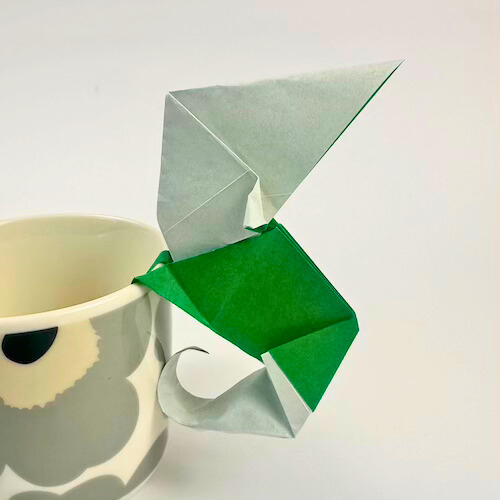
This origami chameleon by Adriano Mariani is one of those models that instantly catches the eye — playful, sculptural, and full of personality.
It doesn’t aim for realism but instead captures the quirky essence of a veiled chameleon in just a few expressive folds. The curved tail, tilted head, and angled limbs give it a sense of alertness, as if it’s quietly observing its surroundings. It’s an excellent model to perch on the edge of a planter or the rim of a mug, where it can quietly “hang out.”
With a few trickier steps, this model leans toward the low-intermediate level and offers a rewarding fold for beginners looking to try something a little more challenging.
Origami Chameleon Step-by-Step Instructions
- Difficulty: Low-Intermediate
- Folding time: 10-15 minutes
- Model designer: Adriano Mariani
- Paper: 15×15 cm (6×6 in) Kami works well for a double-sided paper if you want to avoid the color change. We used a Liminous Thai sheet from the Origami-Shop on our featured photo.
Step 1
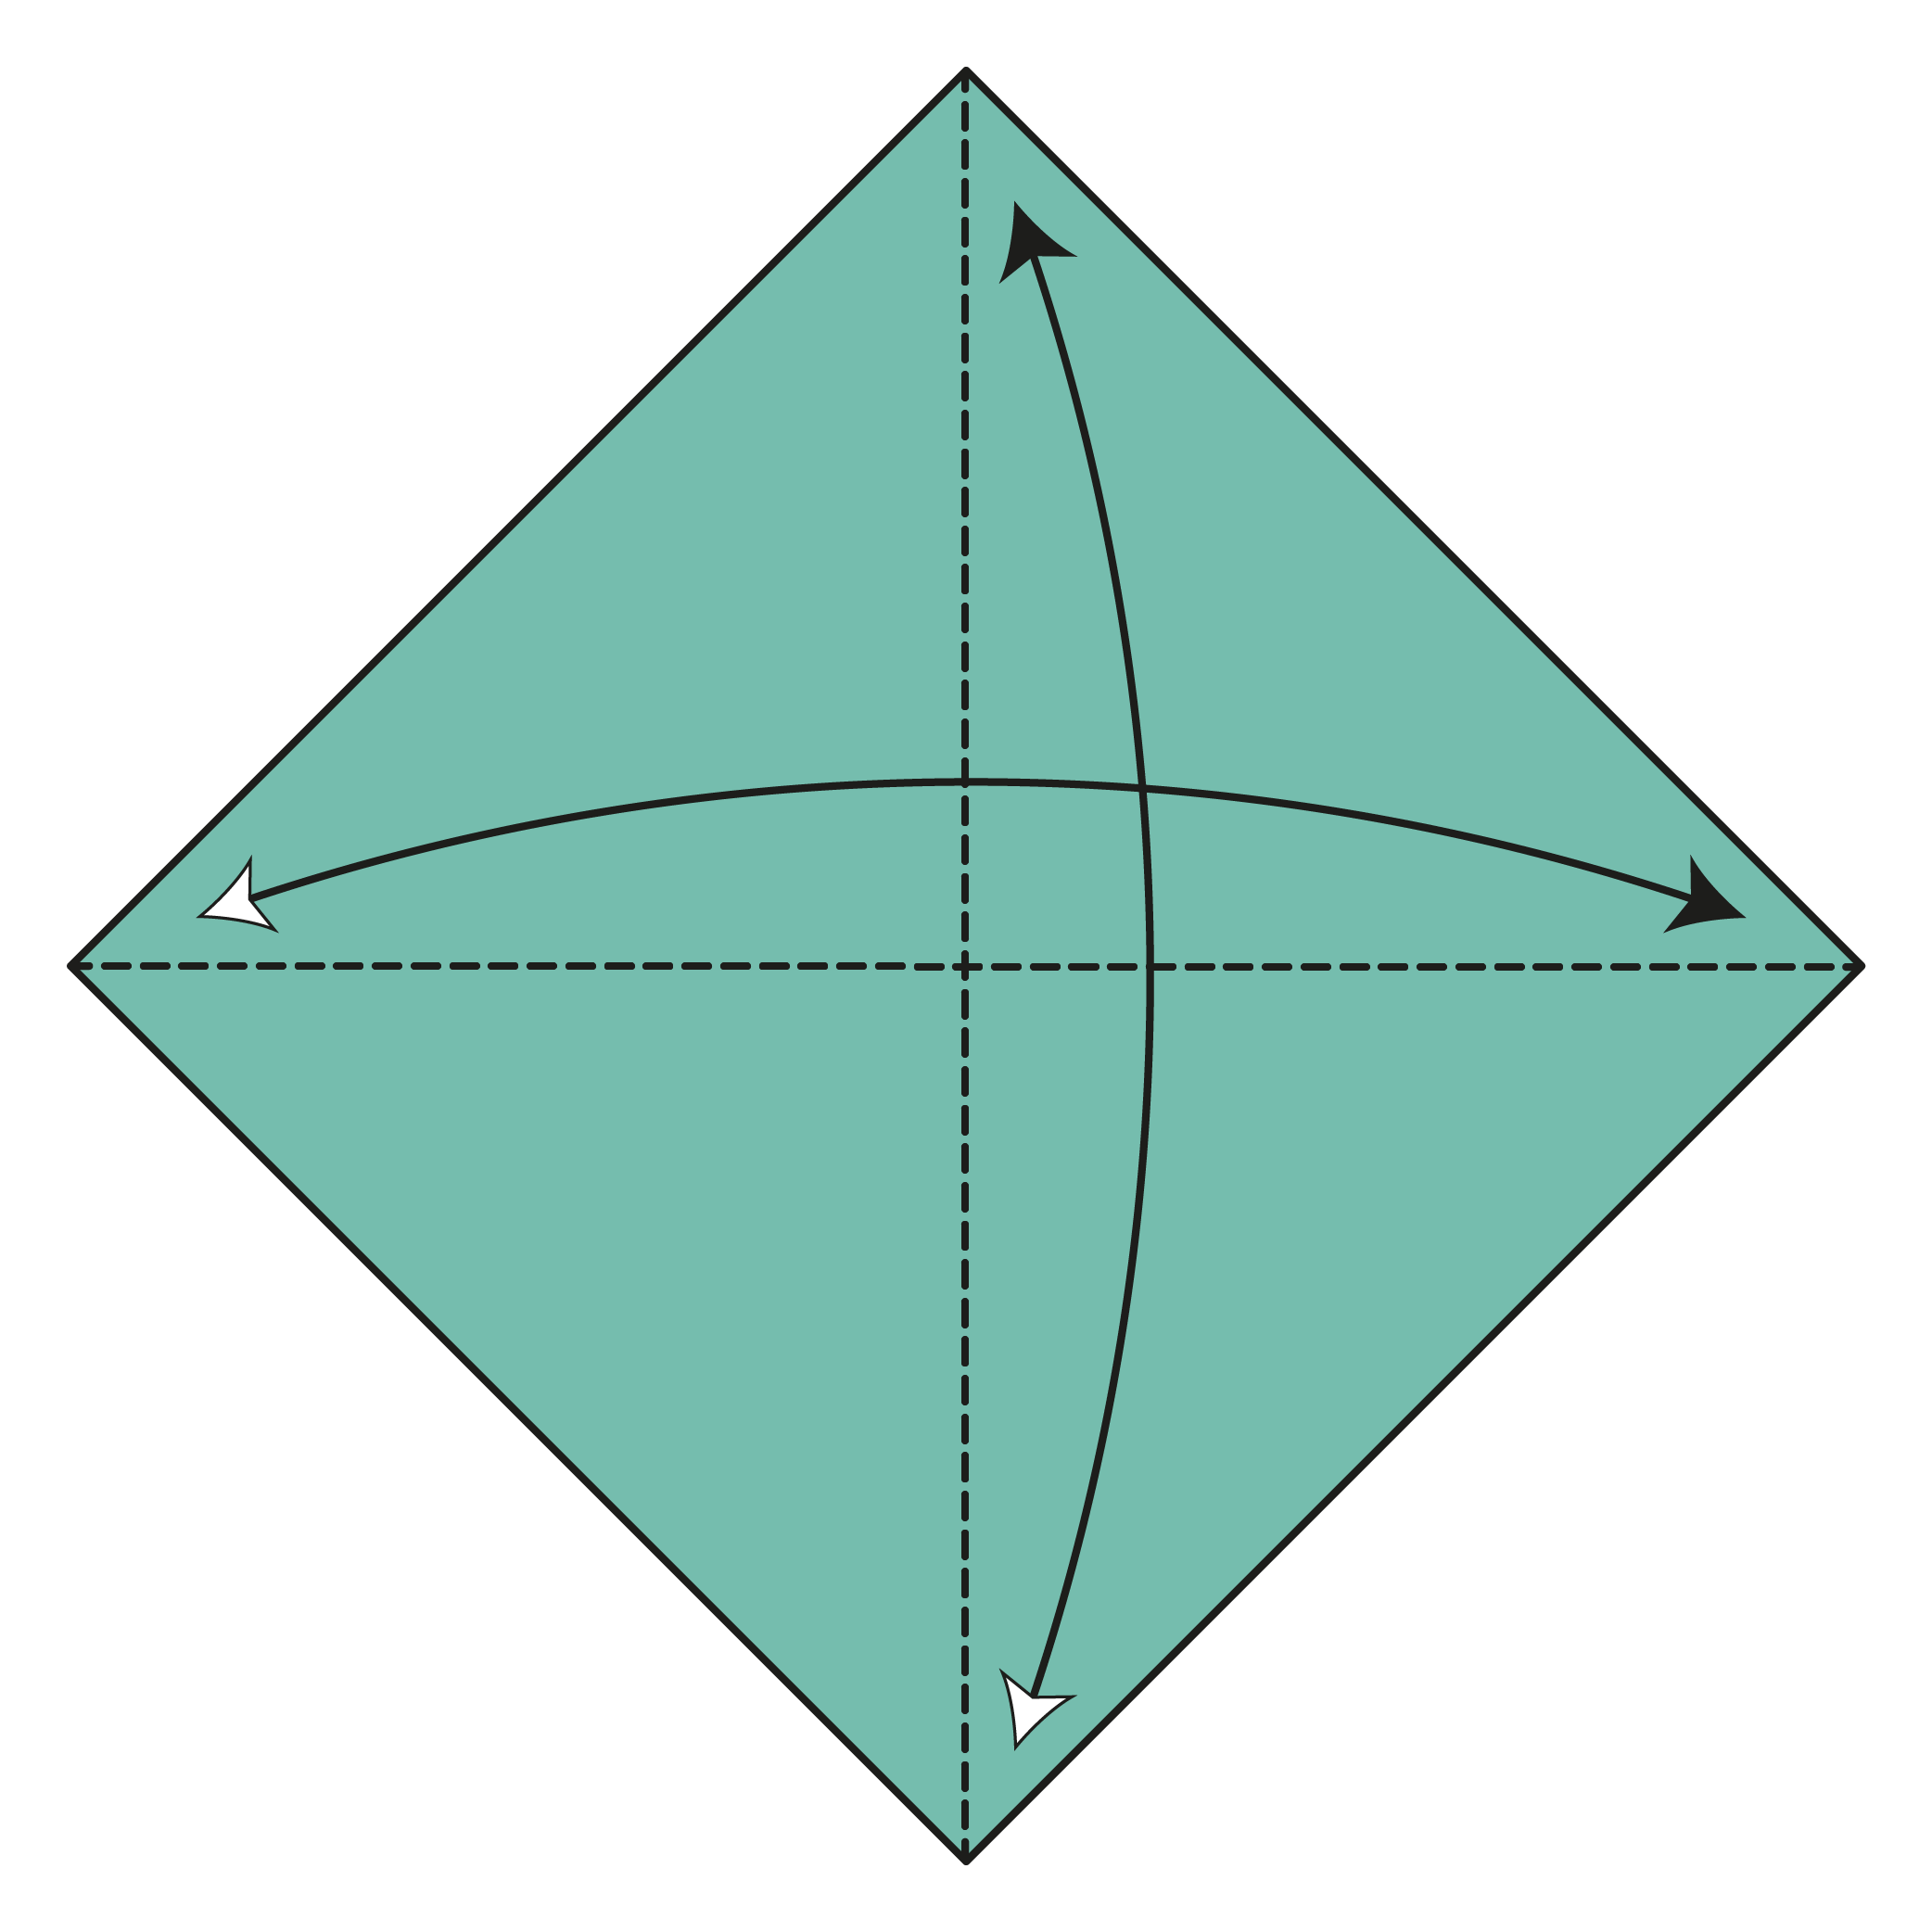
Start with the colored side of the paper facing up in a diamond position. Fold and unfold both diagonals.
Step 2

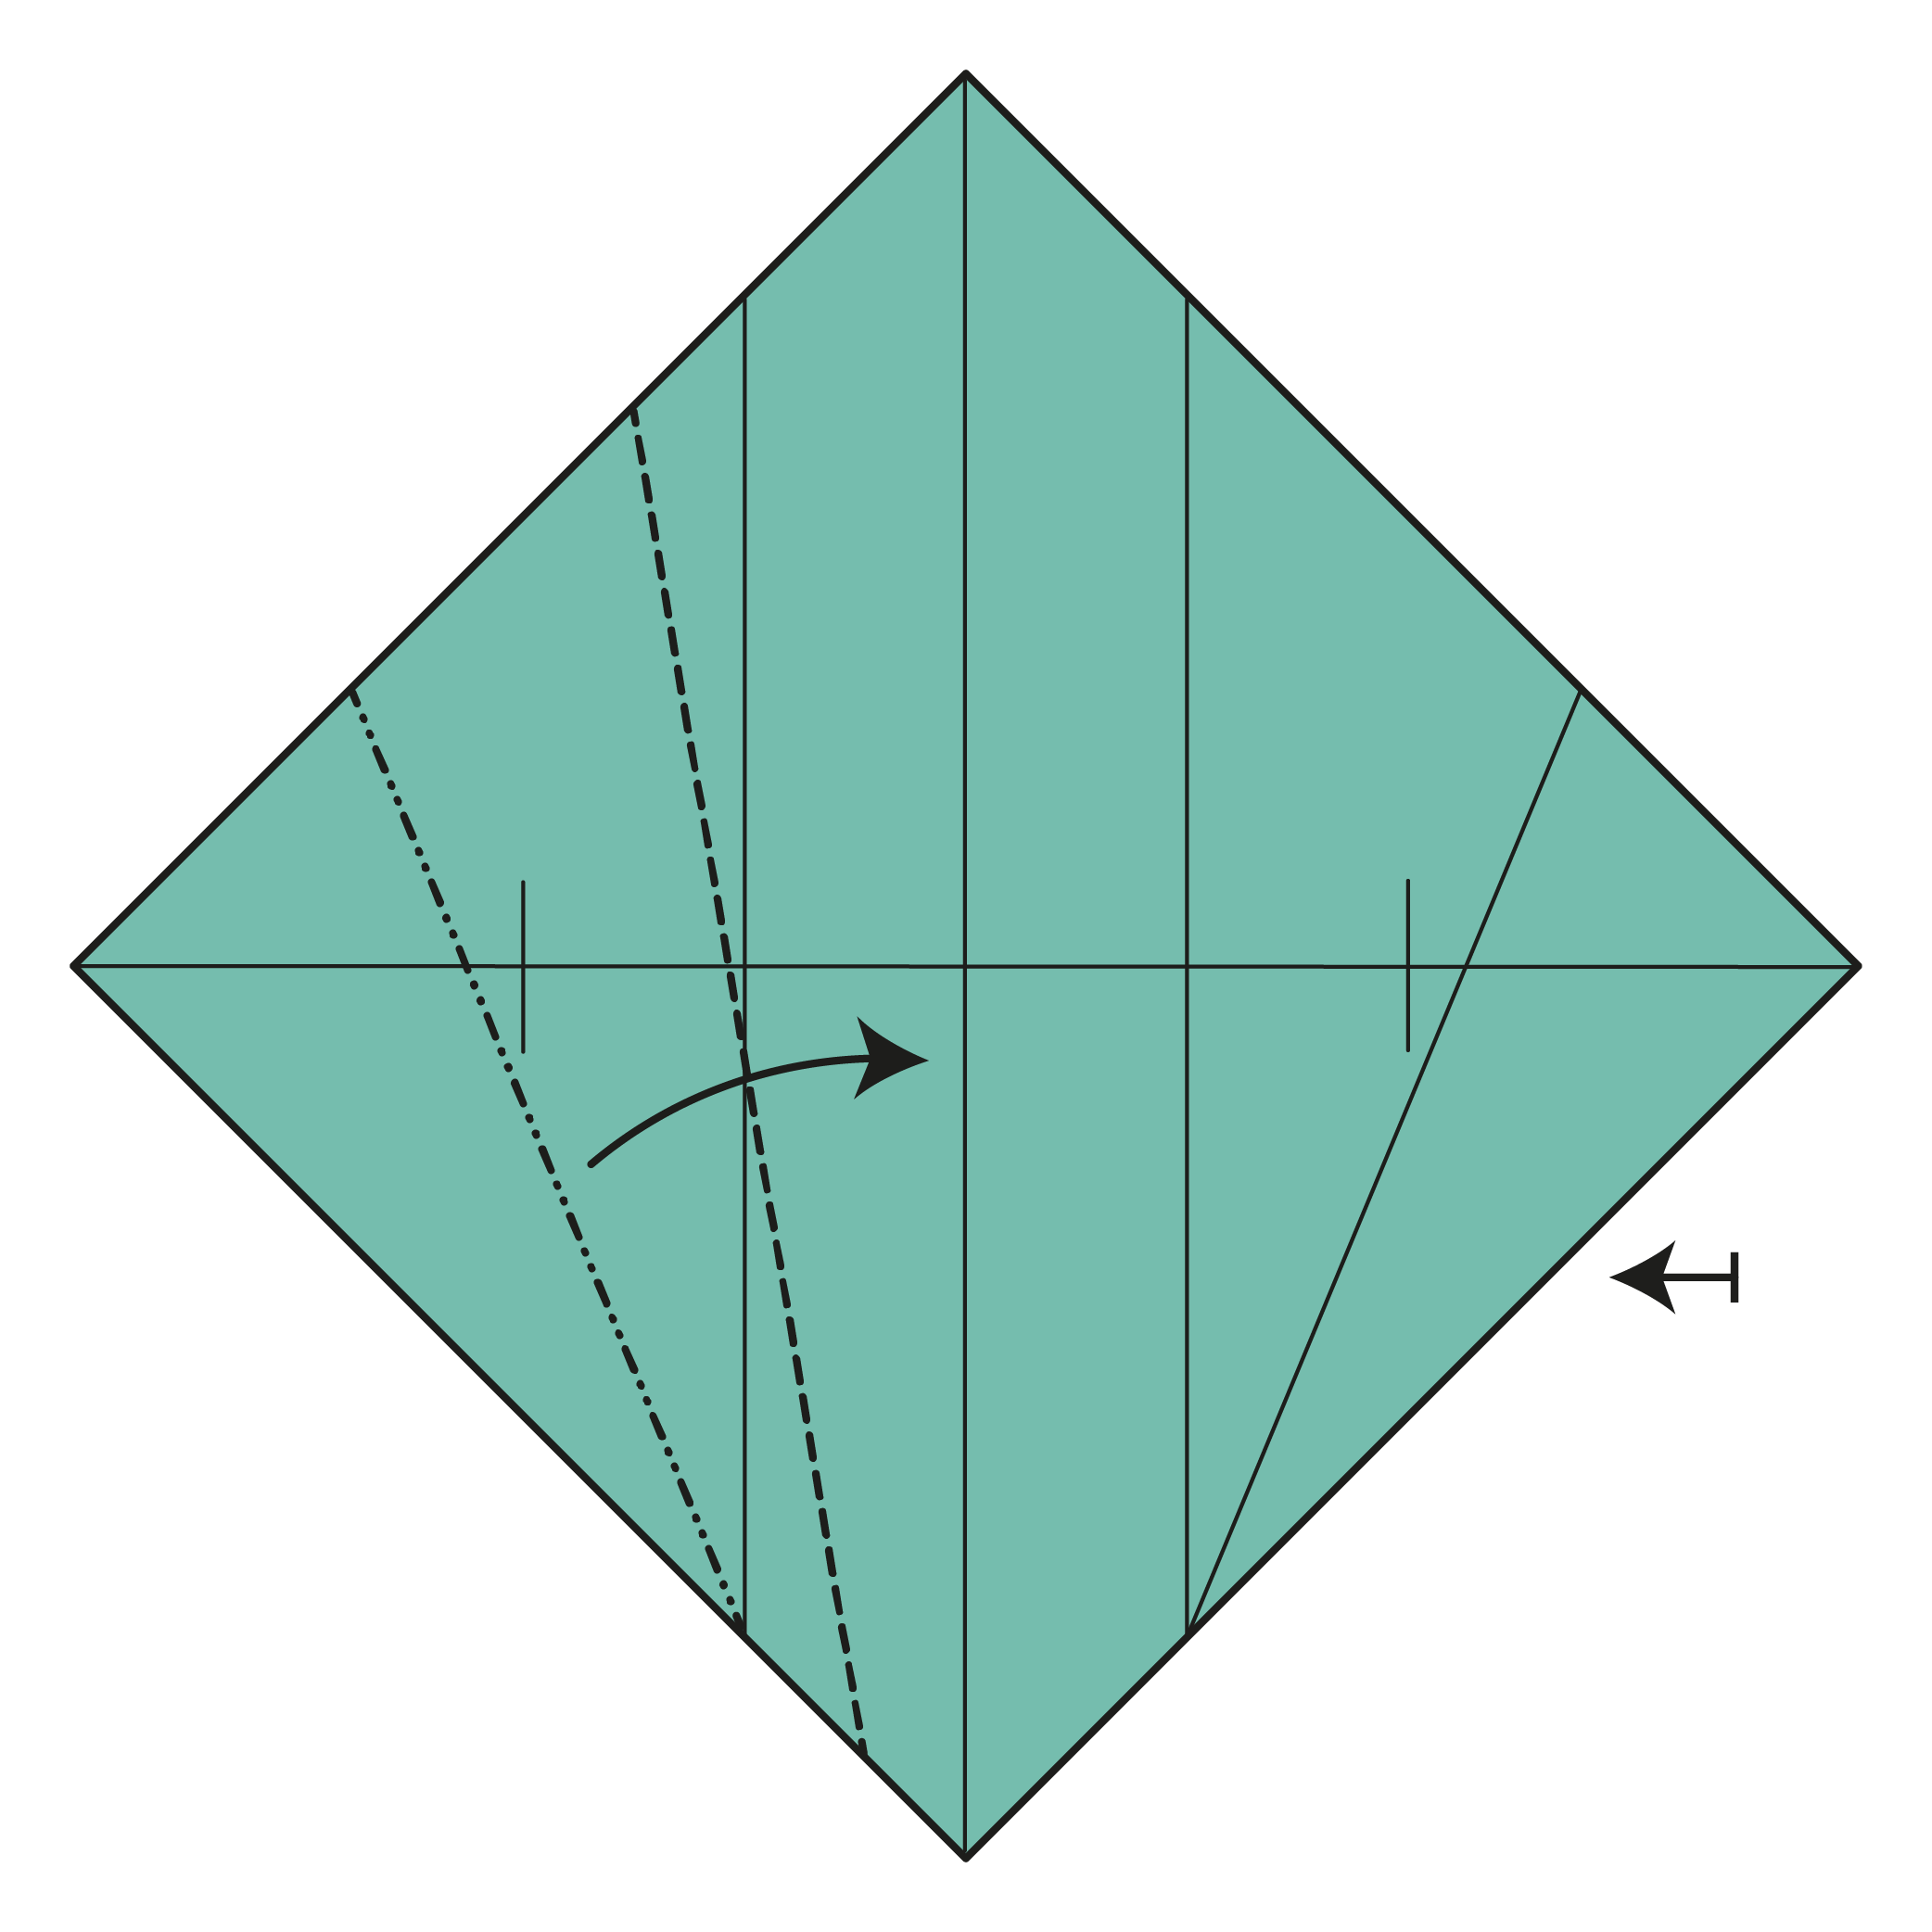
Bring the left and right corners to meet the center point. Pinch lightly to mark reference points on each side, then unfold.
Step 3


Fold the left corner to the right reference point, then unfold.
Step 4


Repeat Step 3 on the right side.
Step 5

On each side, fold the bottom edge to meet the crease made in Steps 3 and 4. The crease should begin where the existing creases and edges intersect. Then, unfold.
Step 6
On each side, mountain fold the crease made in Step 5 and fold it to meet with the centerline.
Step 7


Fold the top left flap’s right corner down along the dotted line. This crease should run from the top left to the bottom right corners of the diamond-shaped area. Then, unfold.
Step 8
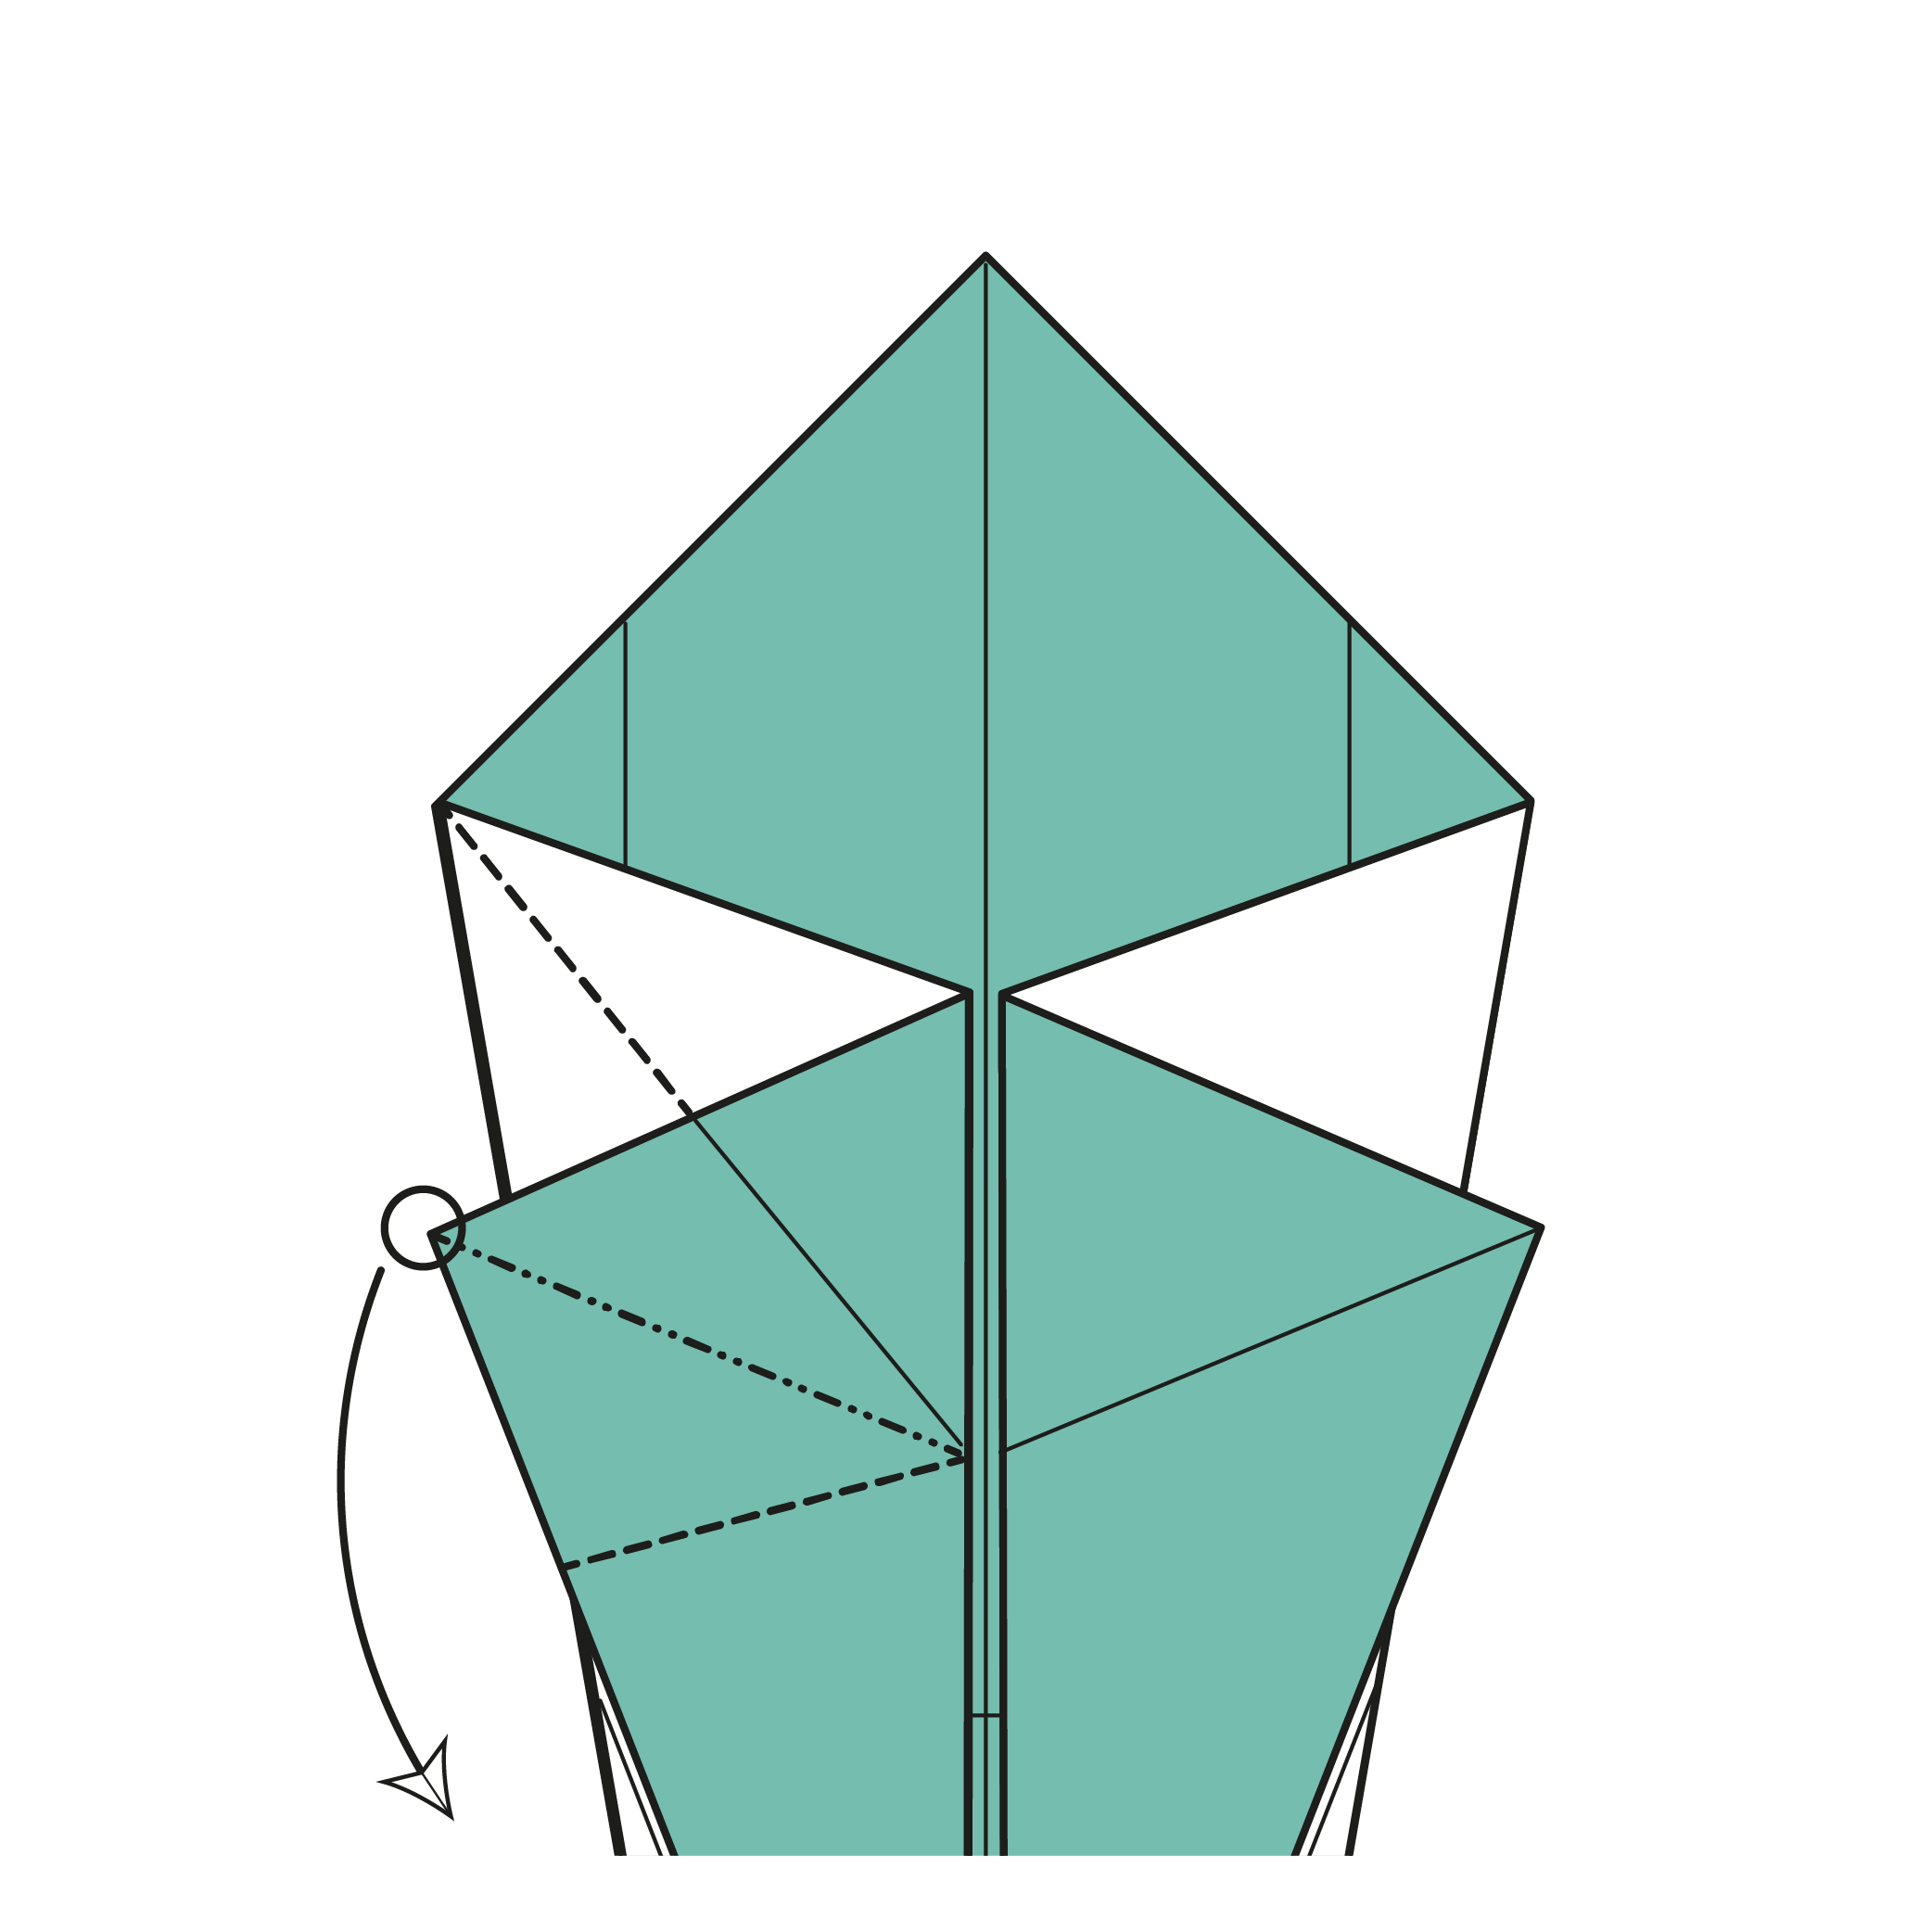
Swivel fold using the existing creases as guides. The reference point should move downward.
Step 9

Repeat Steps 7 and 8 on the right side.
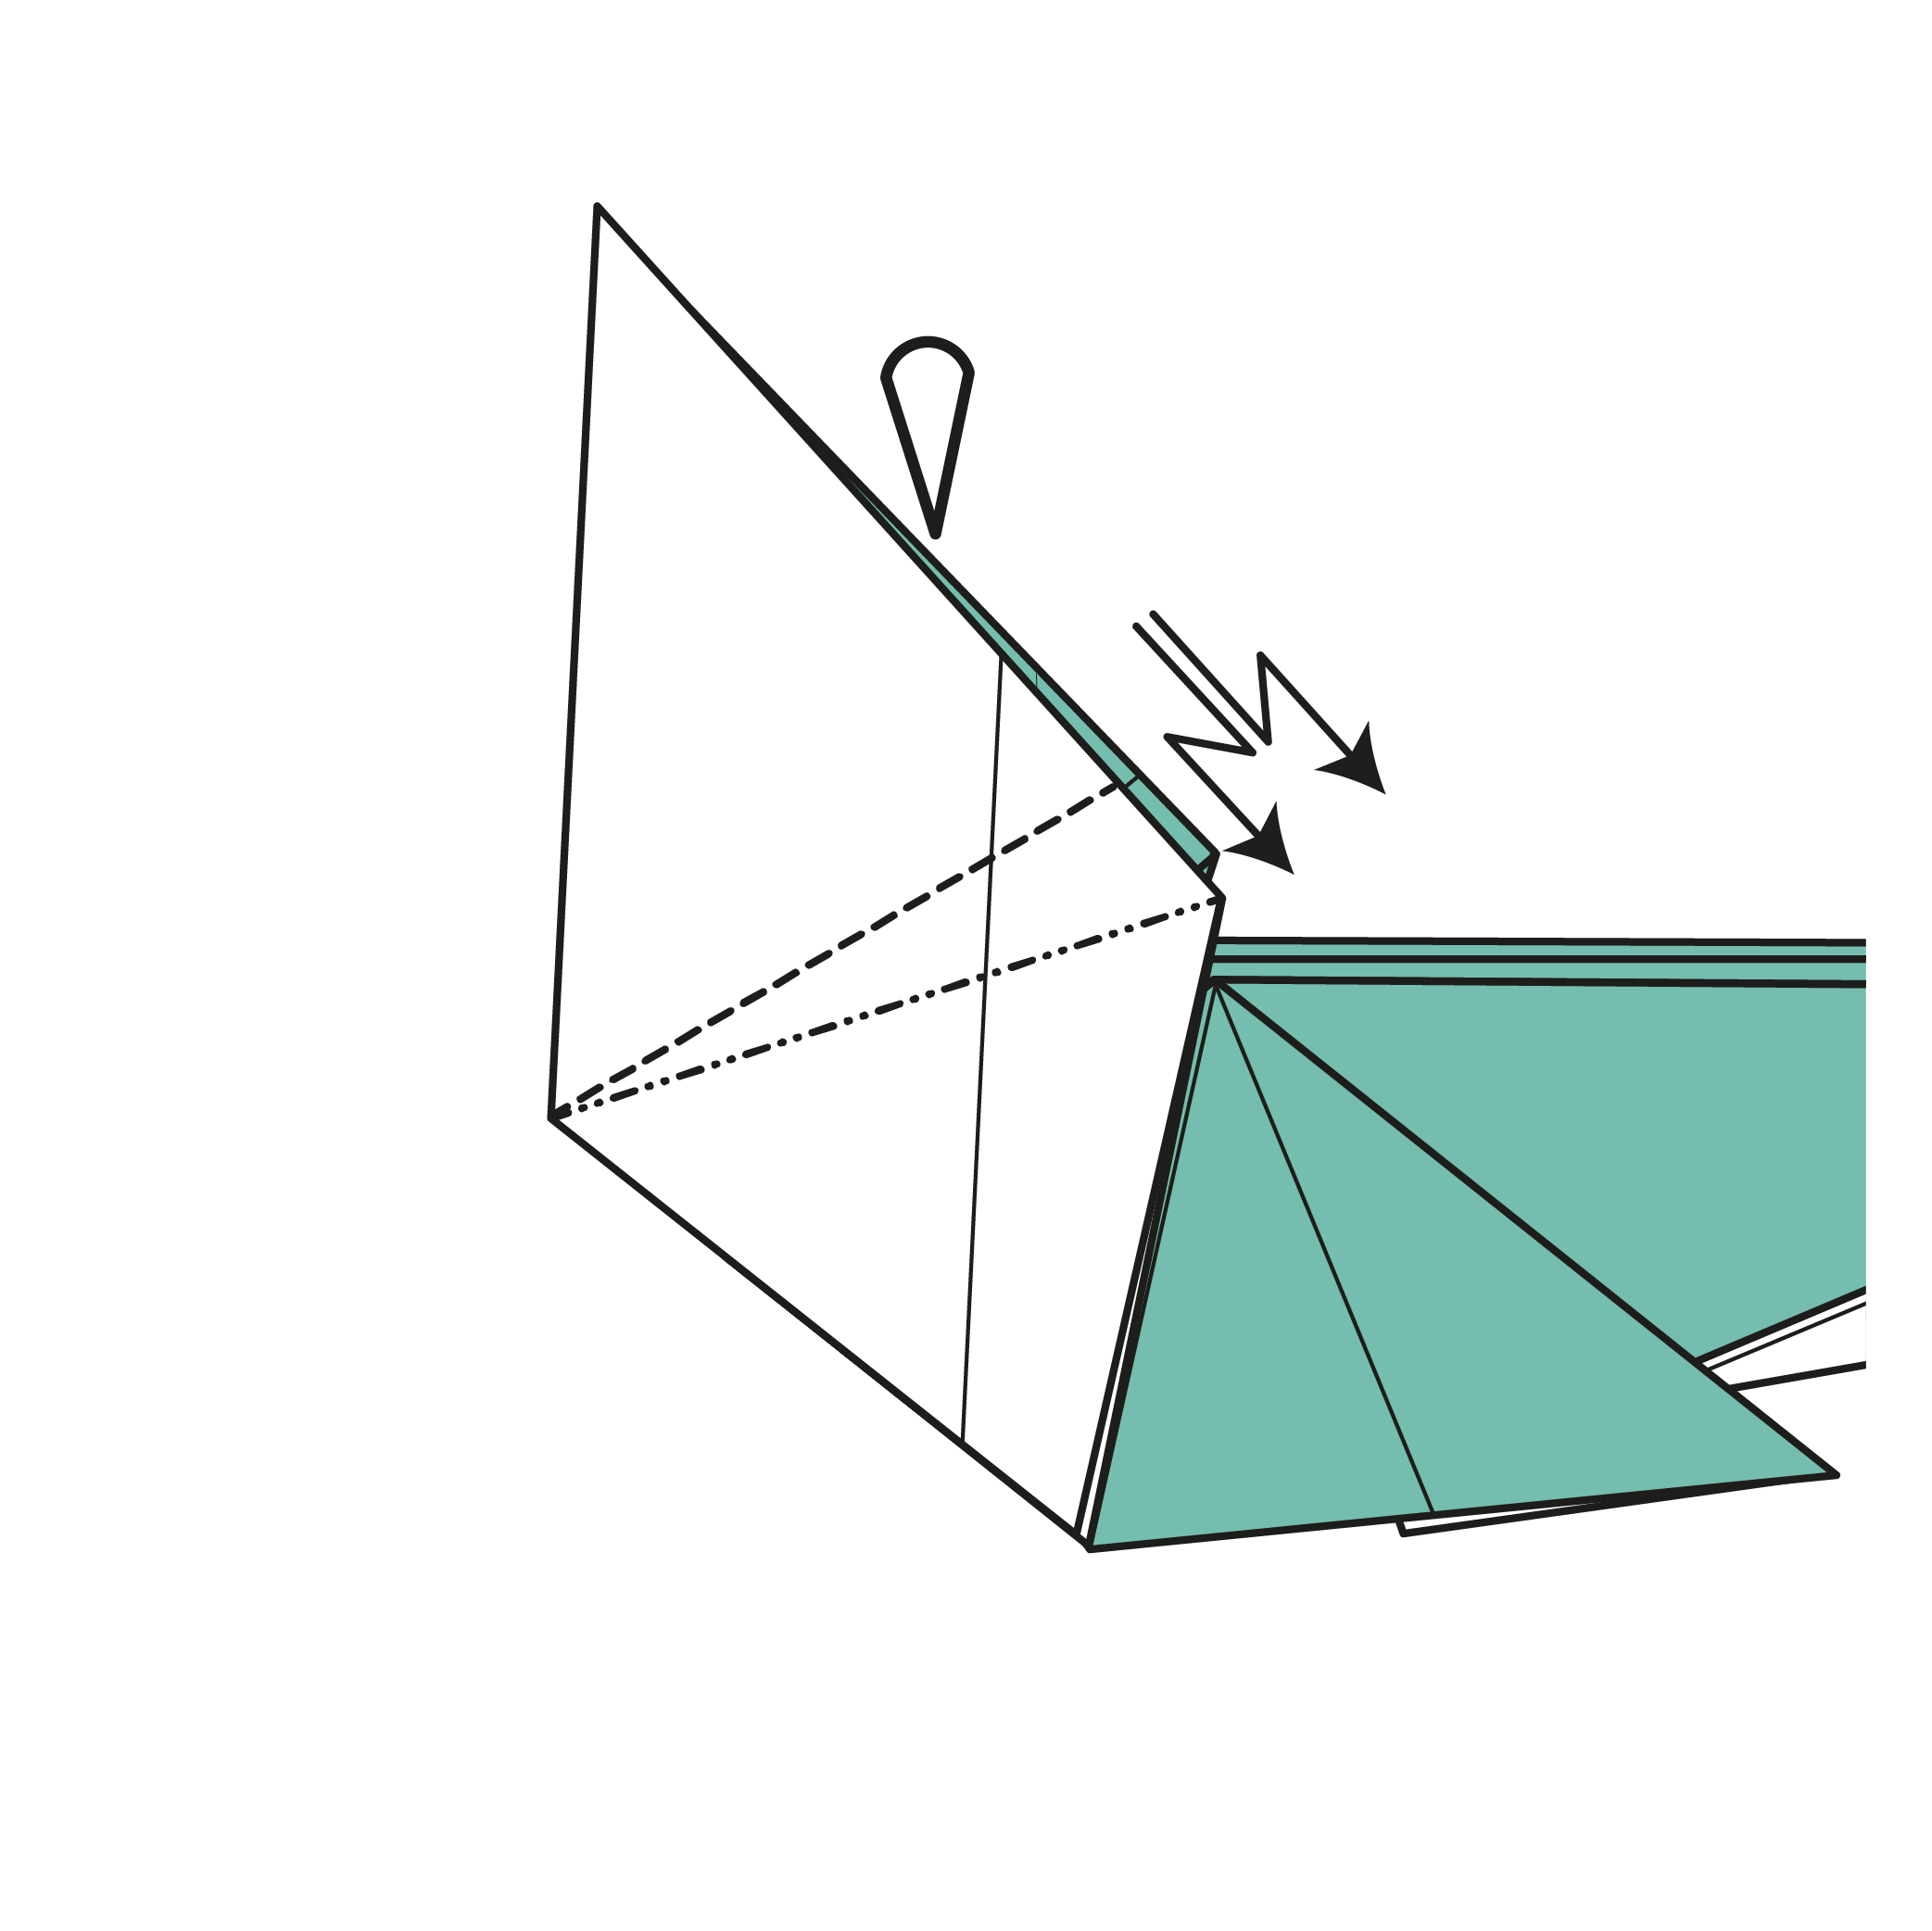
Step 10

Mountain fold the model in half, right to left.
Step 11
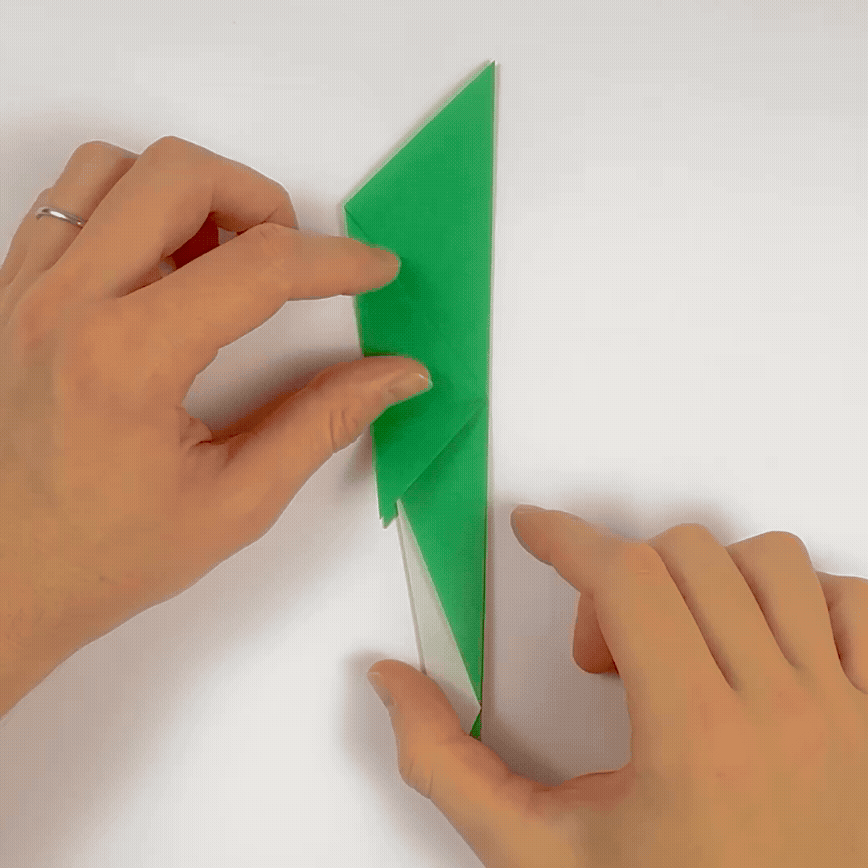
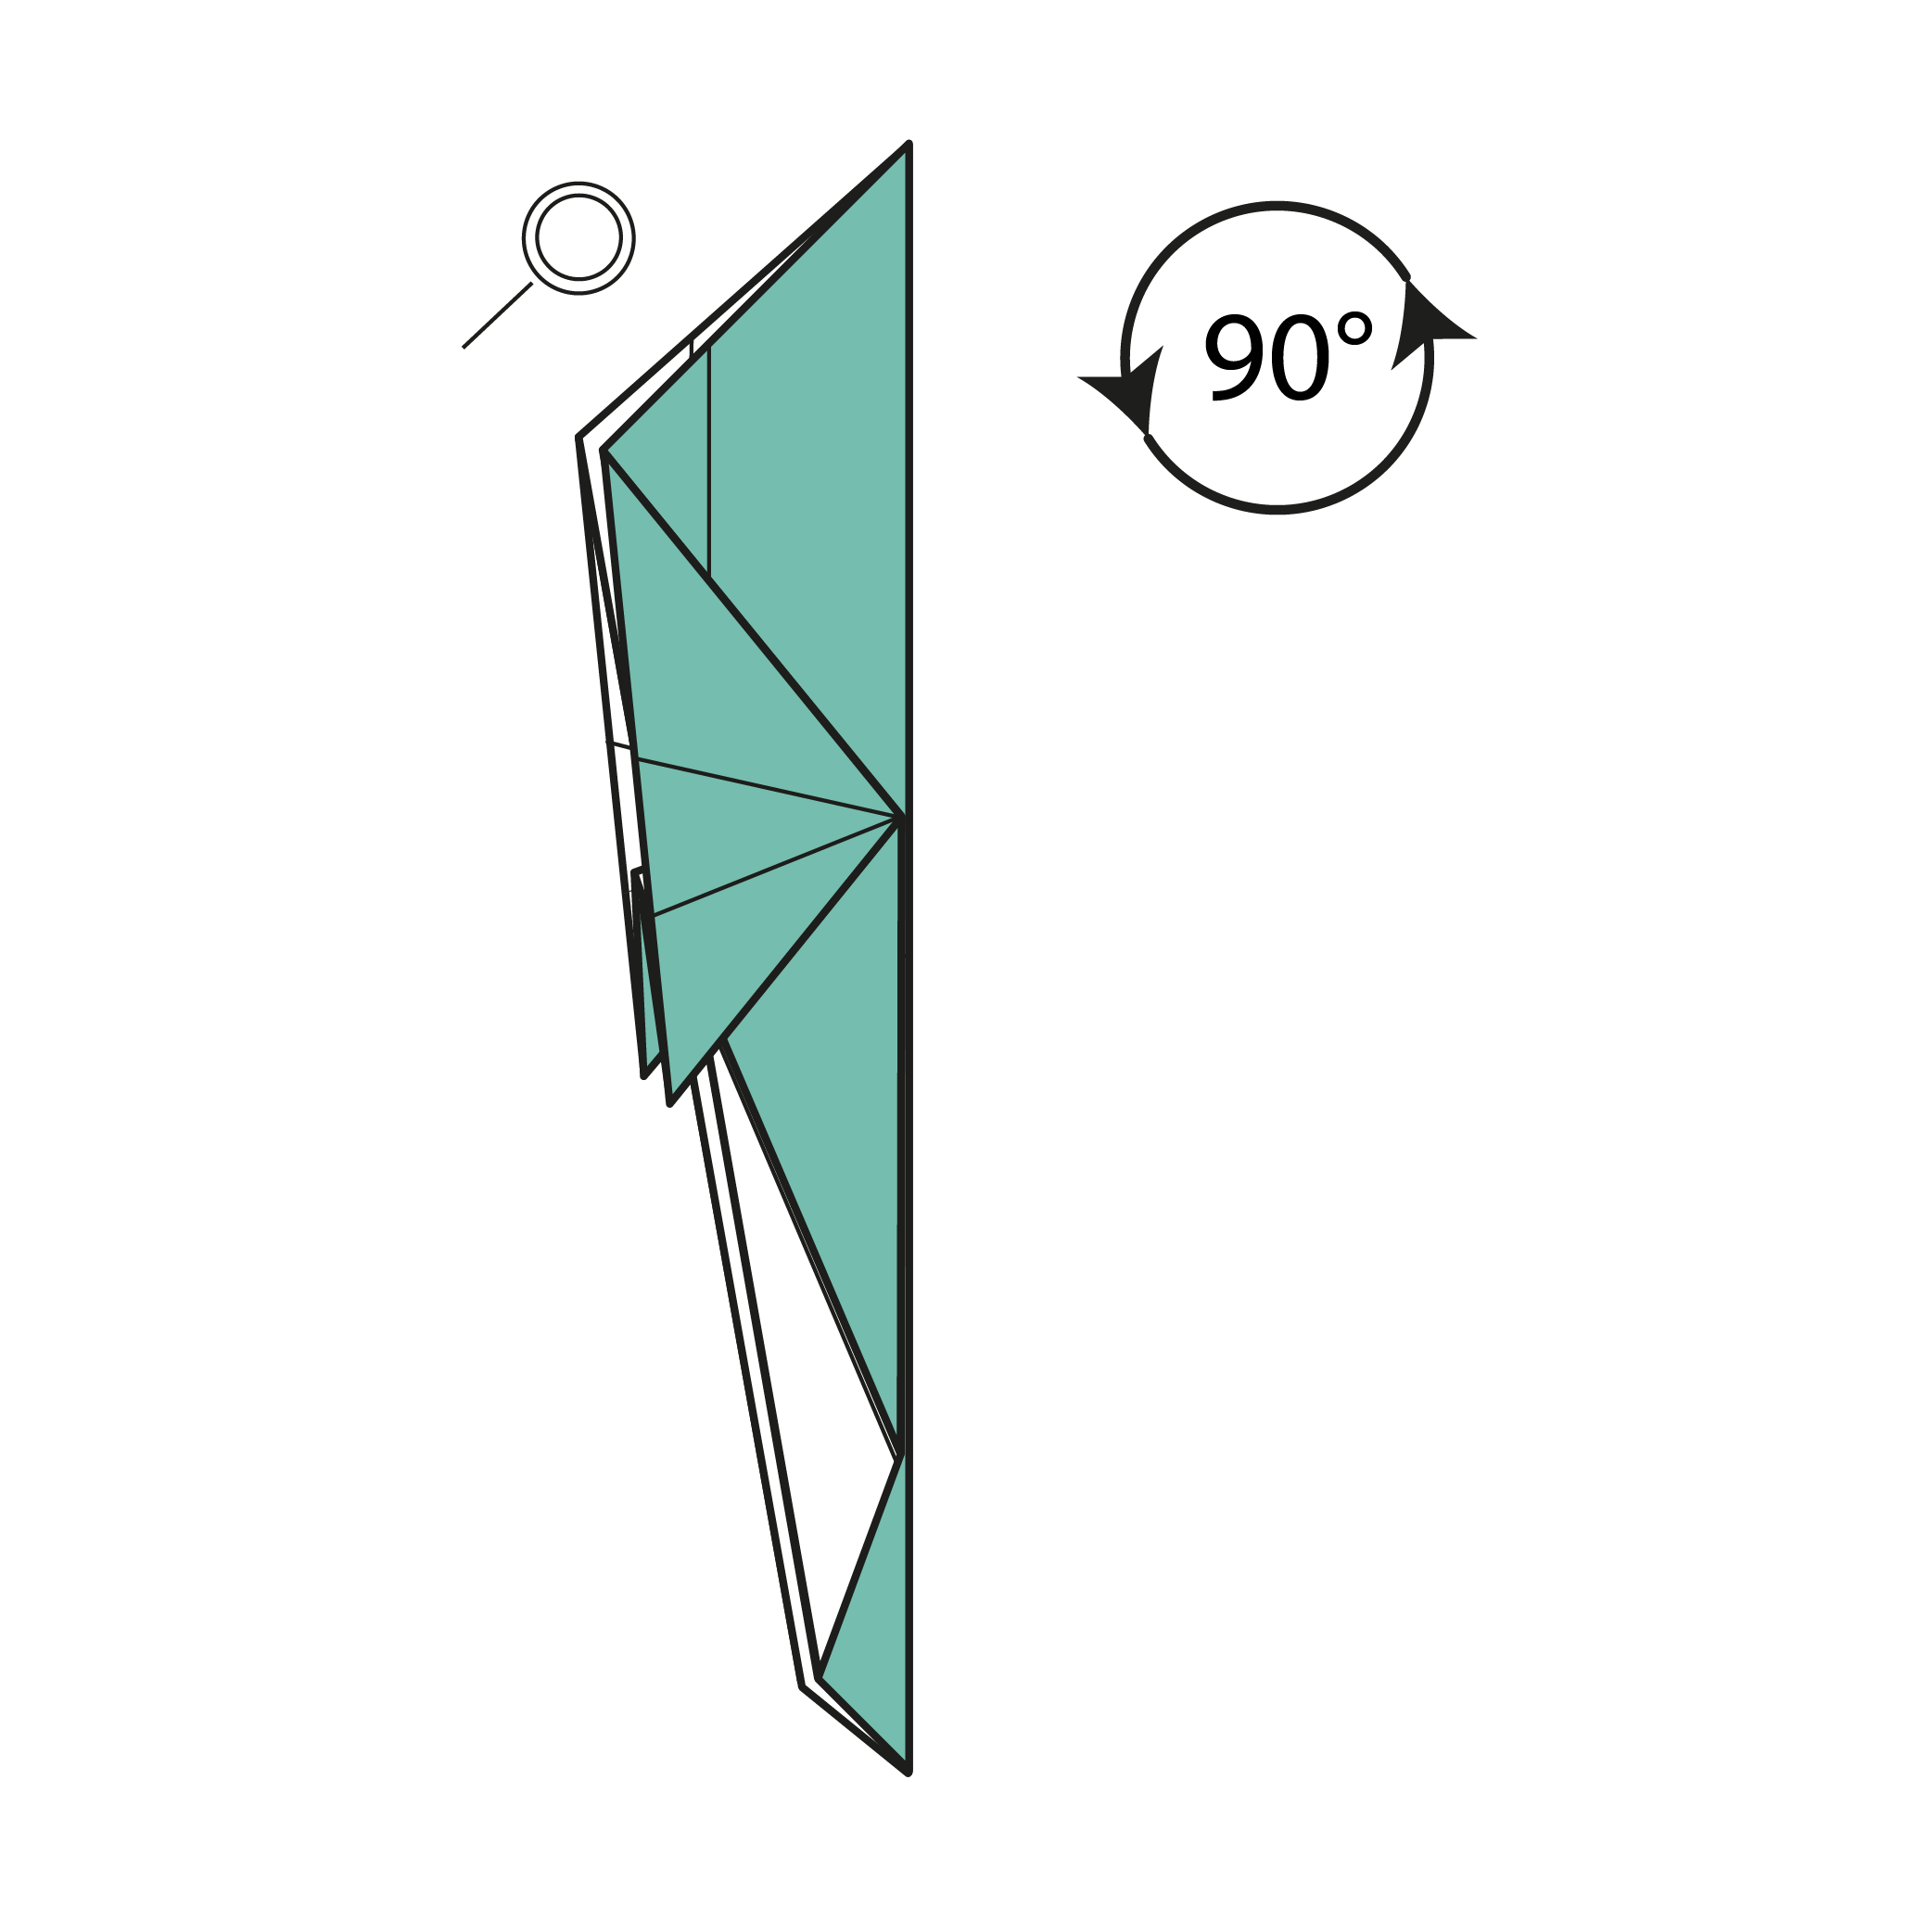
Rotate the model 90° counterclockwise.
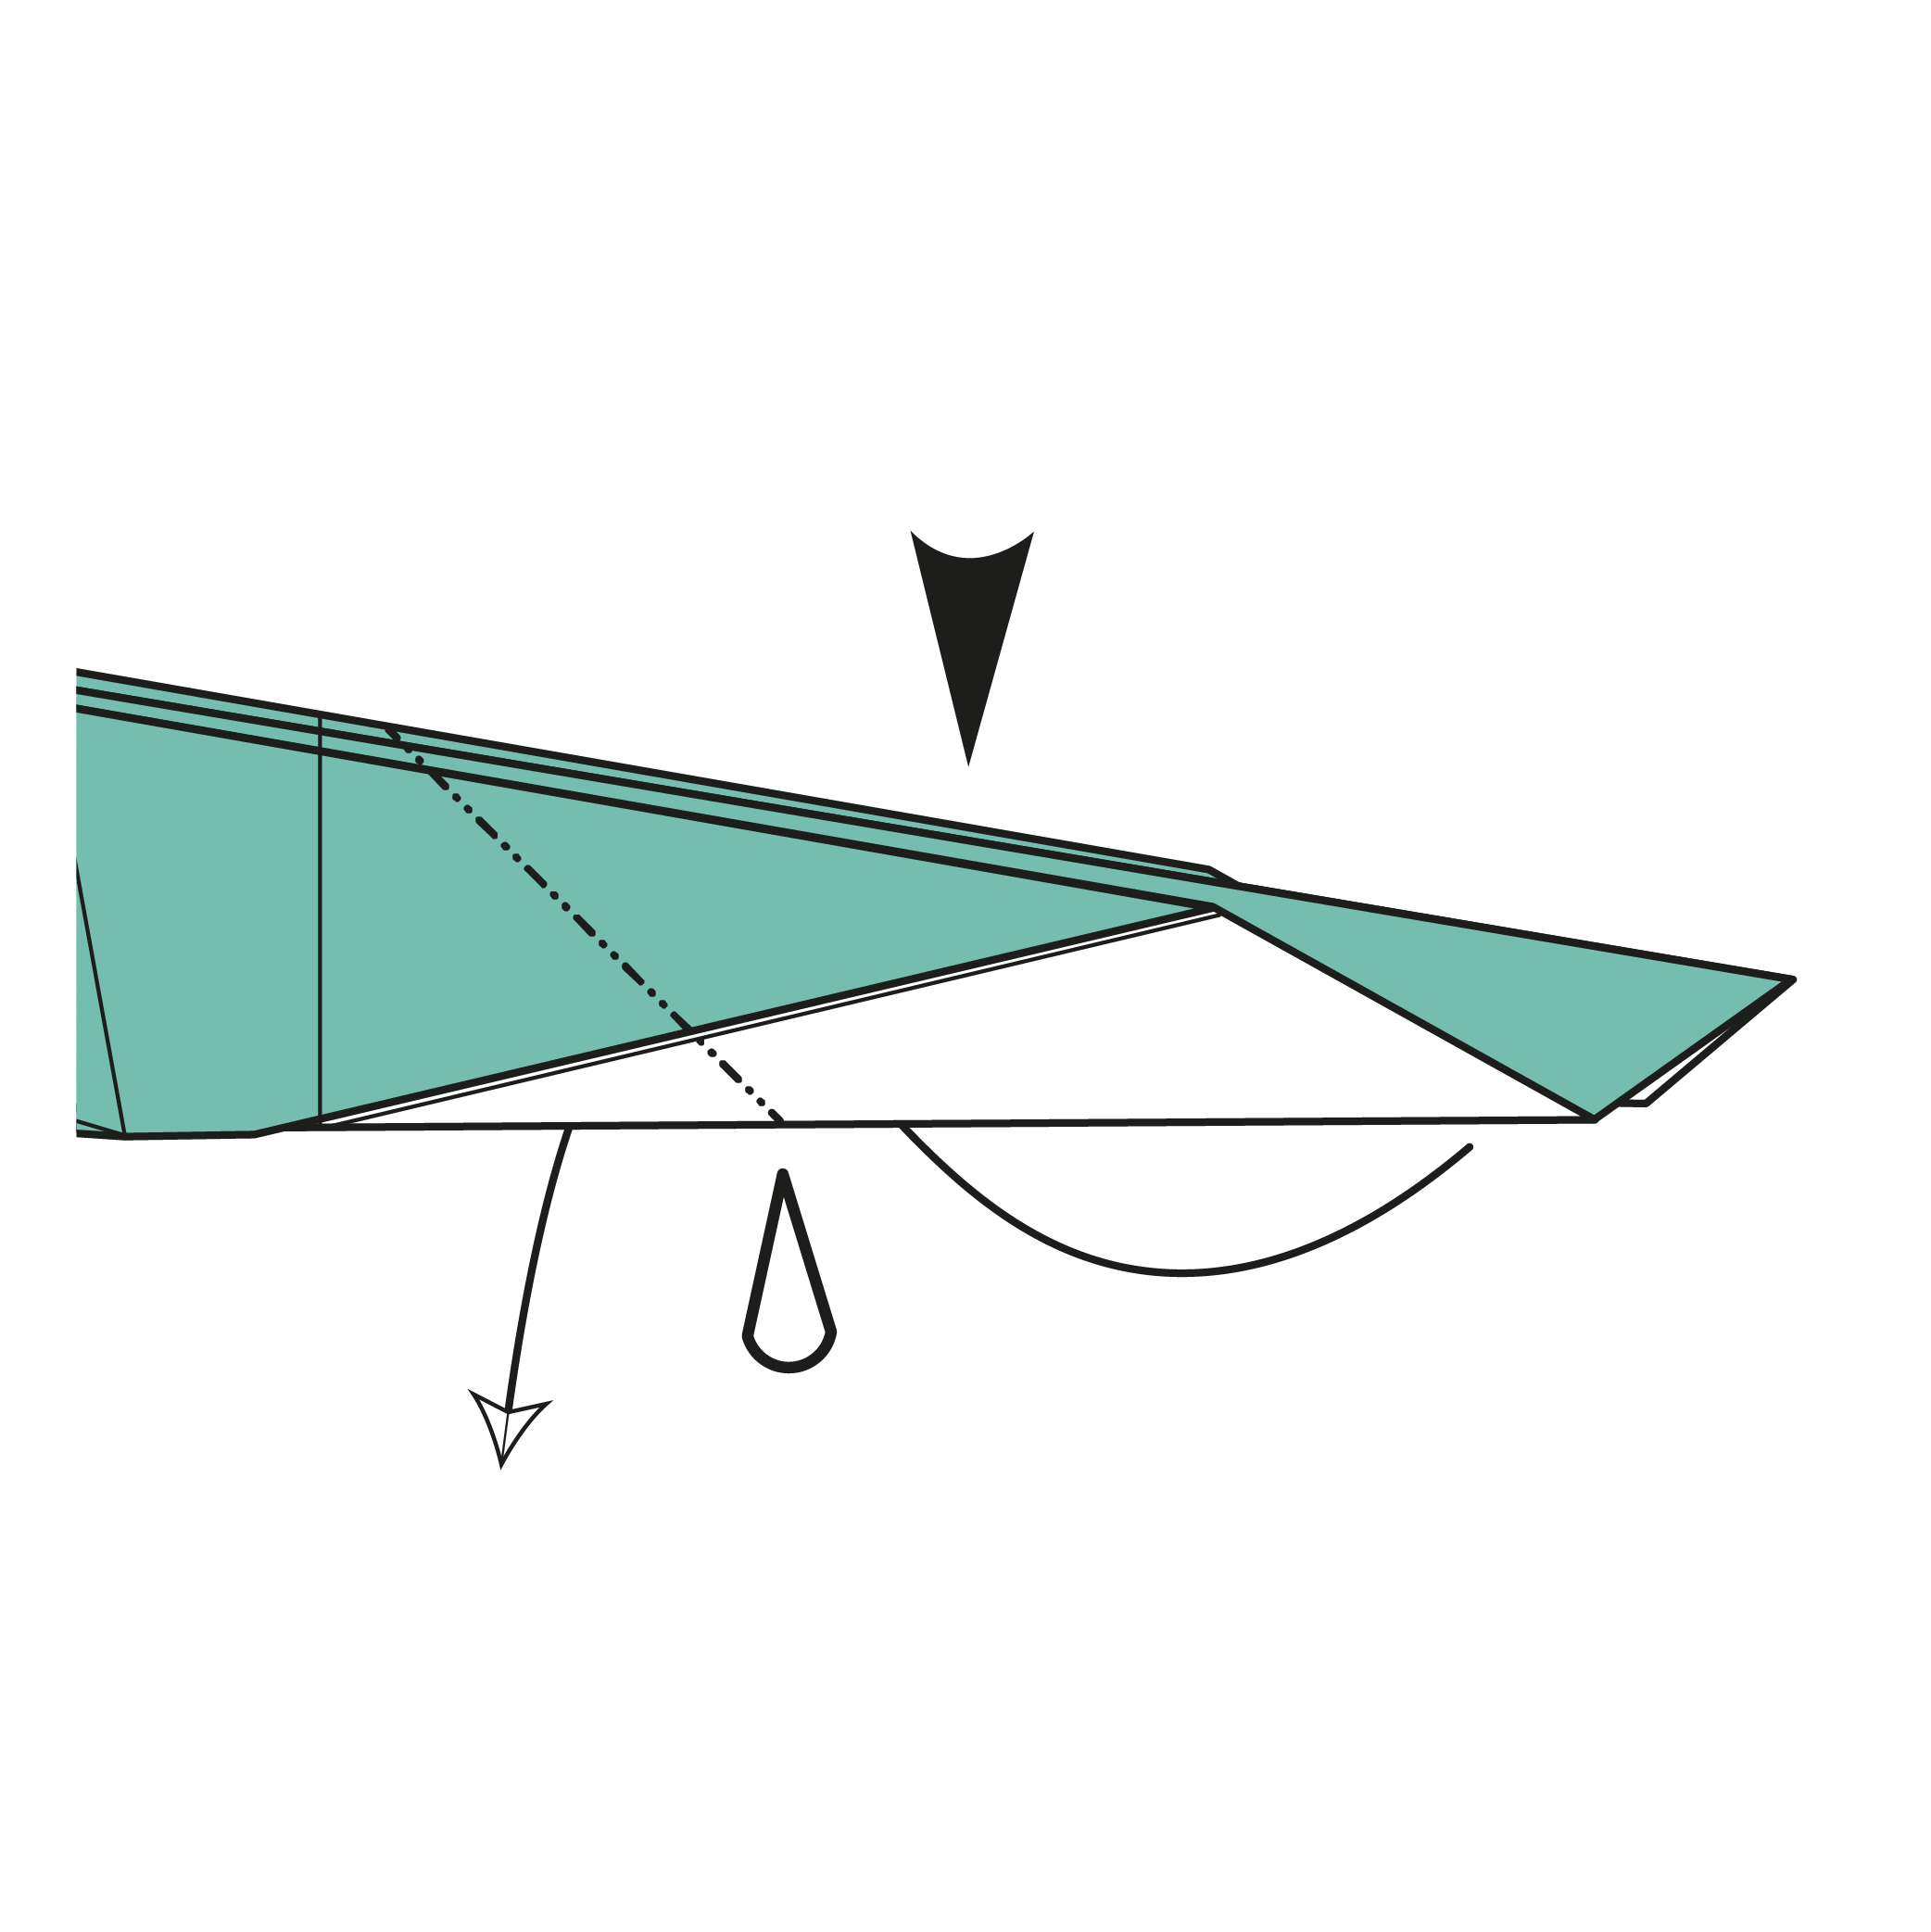
Step 12
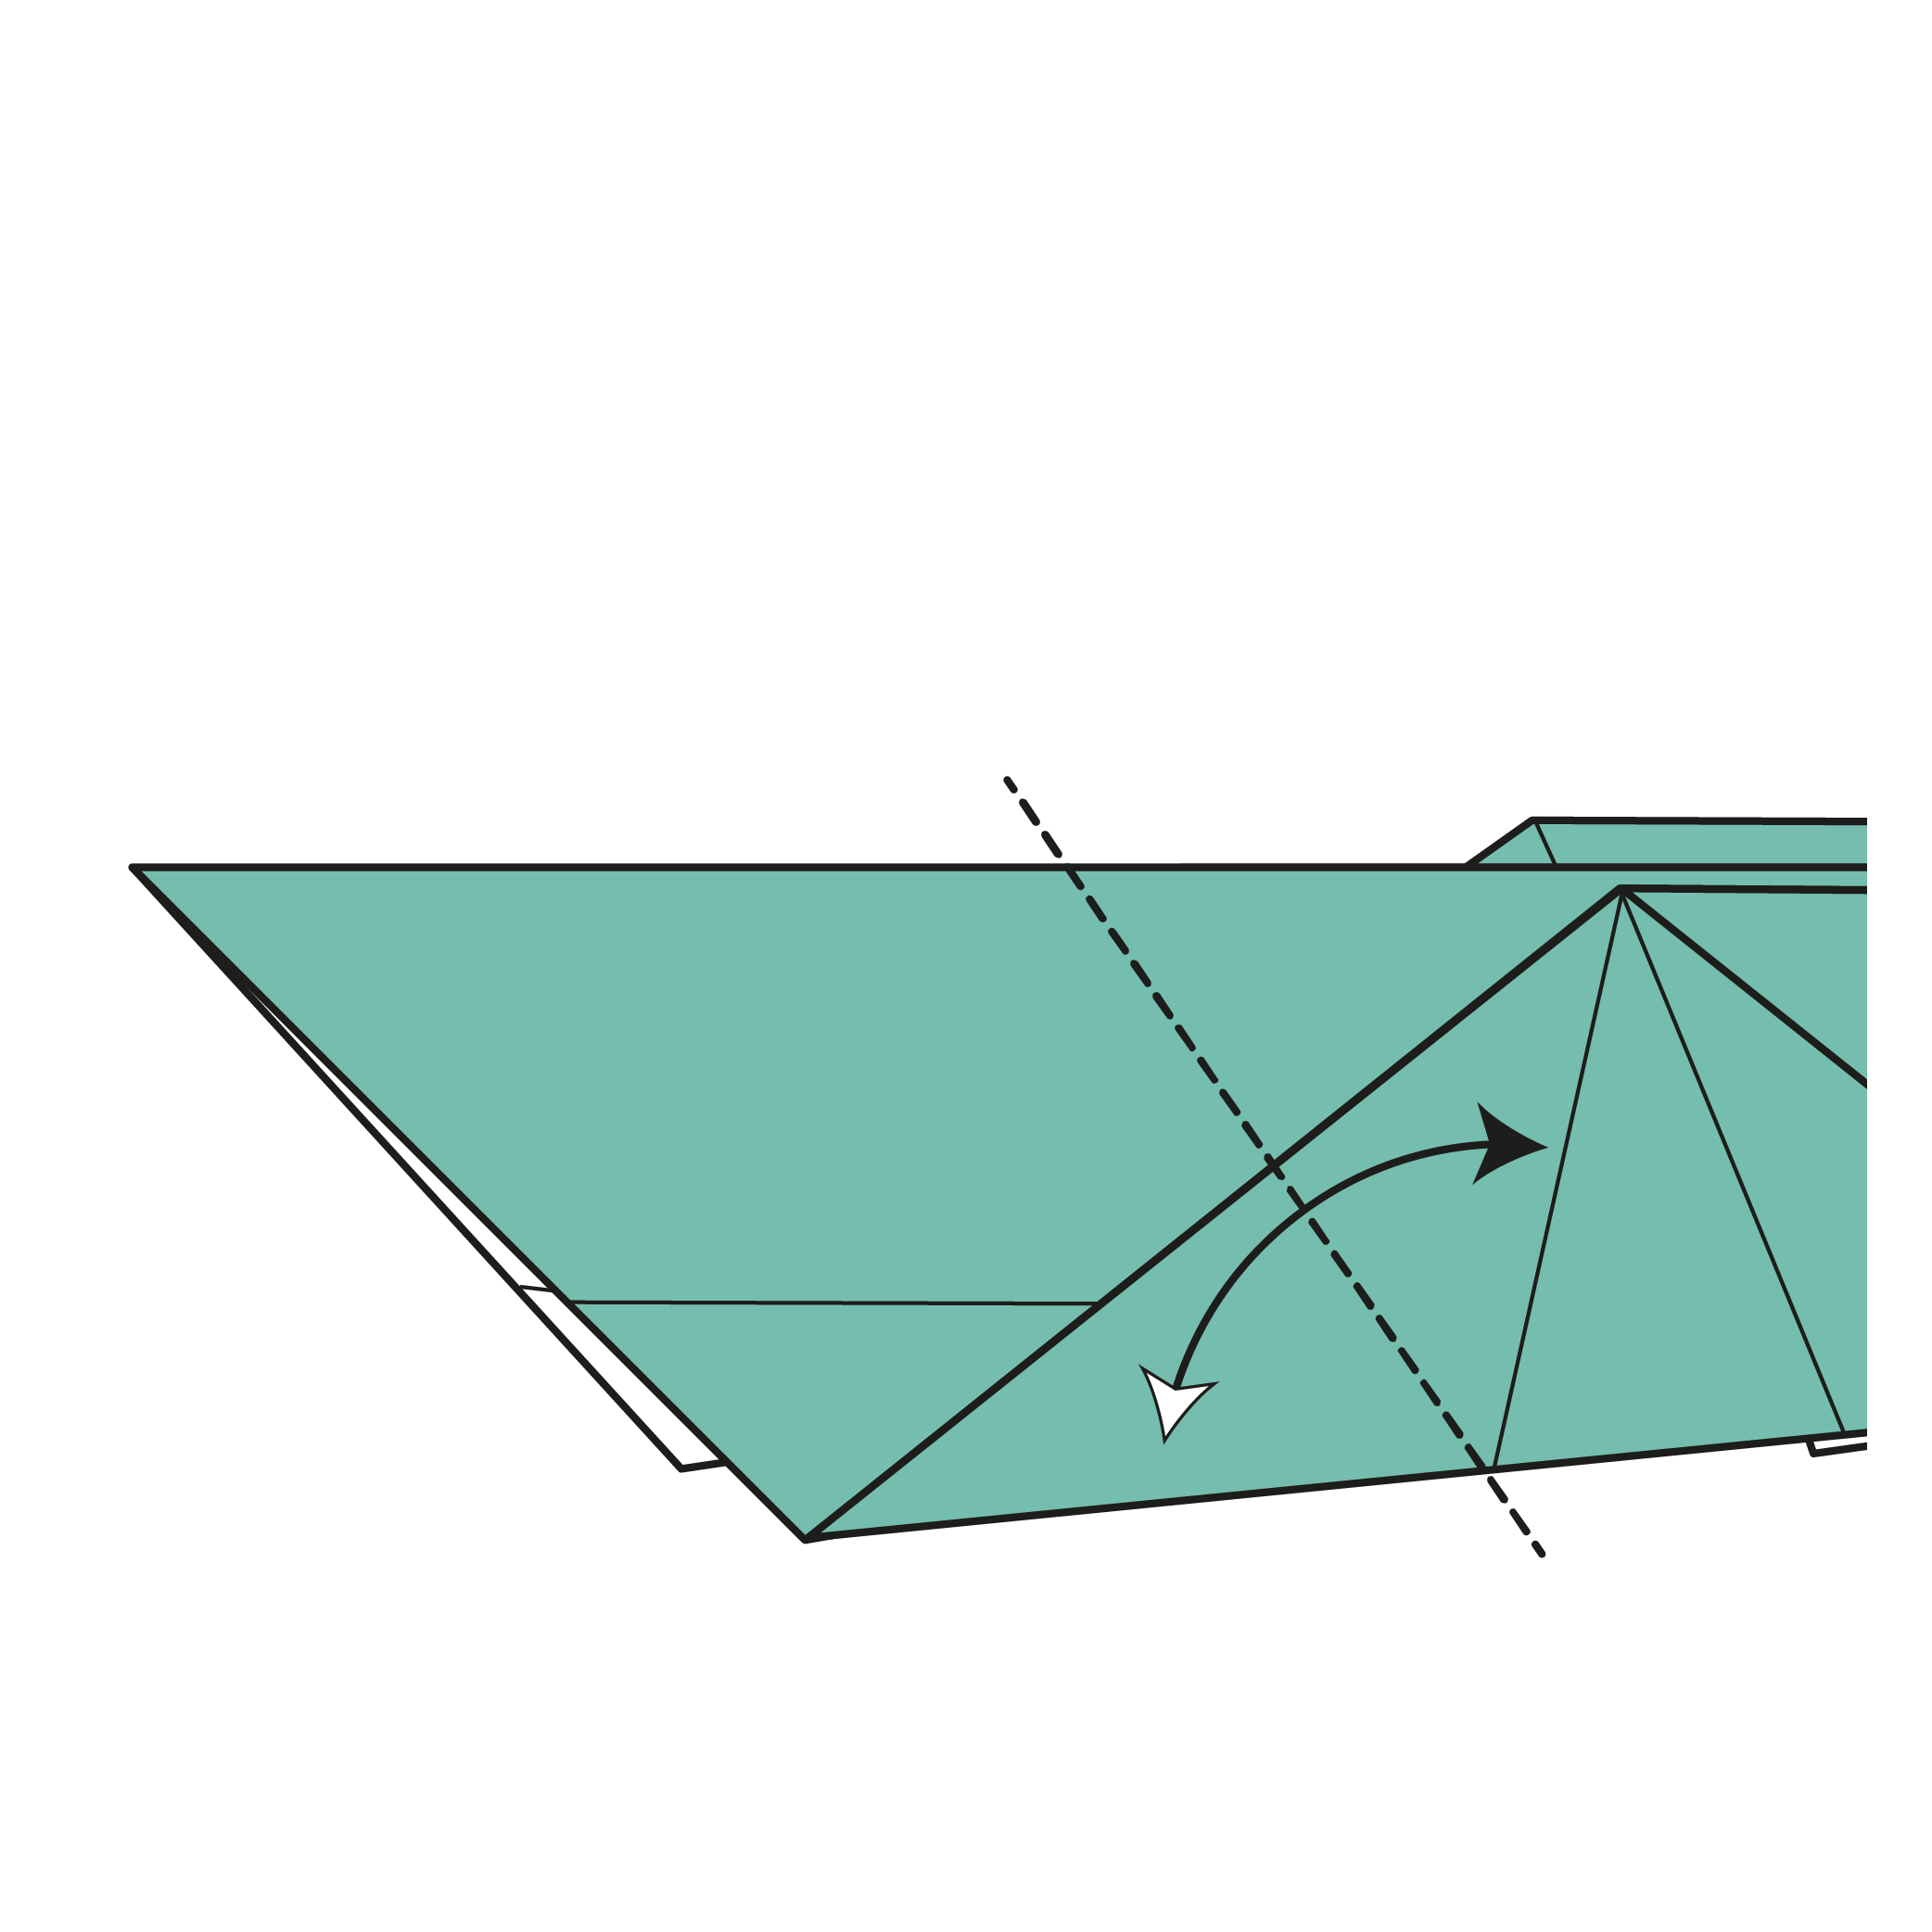
Fold the bottom left edge to the nearest crease line. Crease well, then unfold.
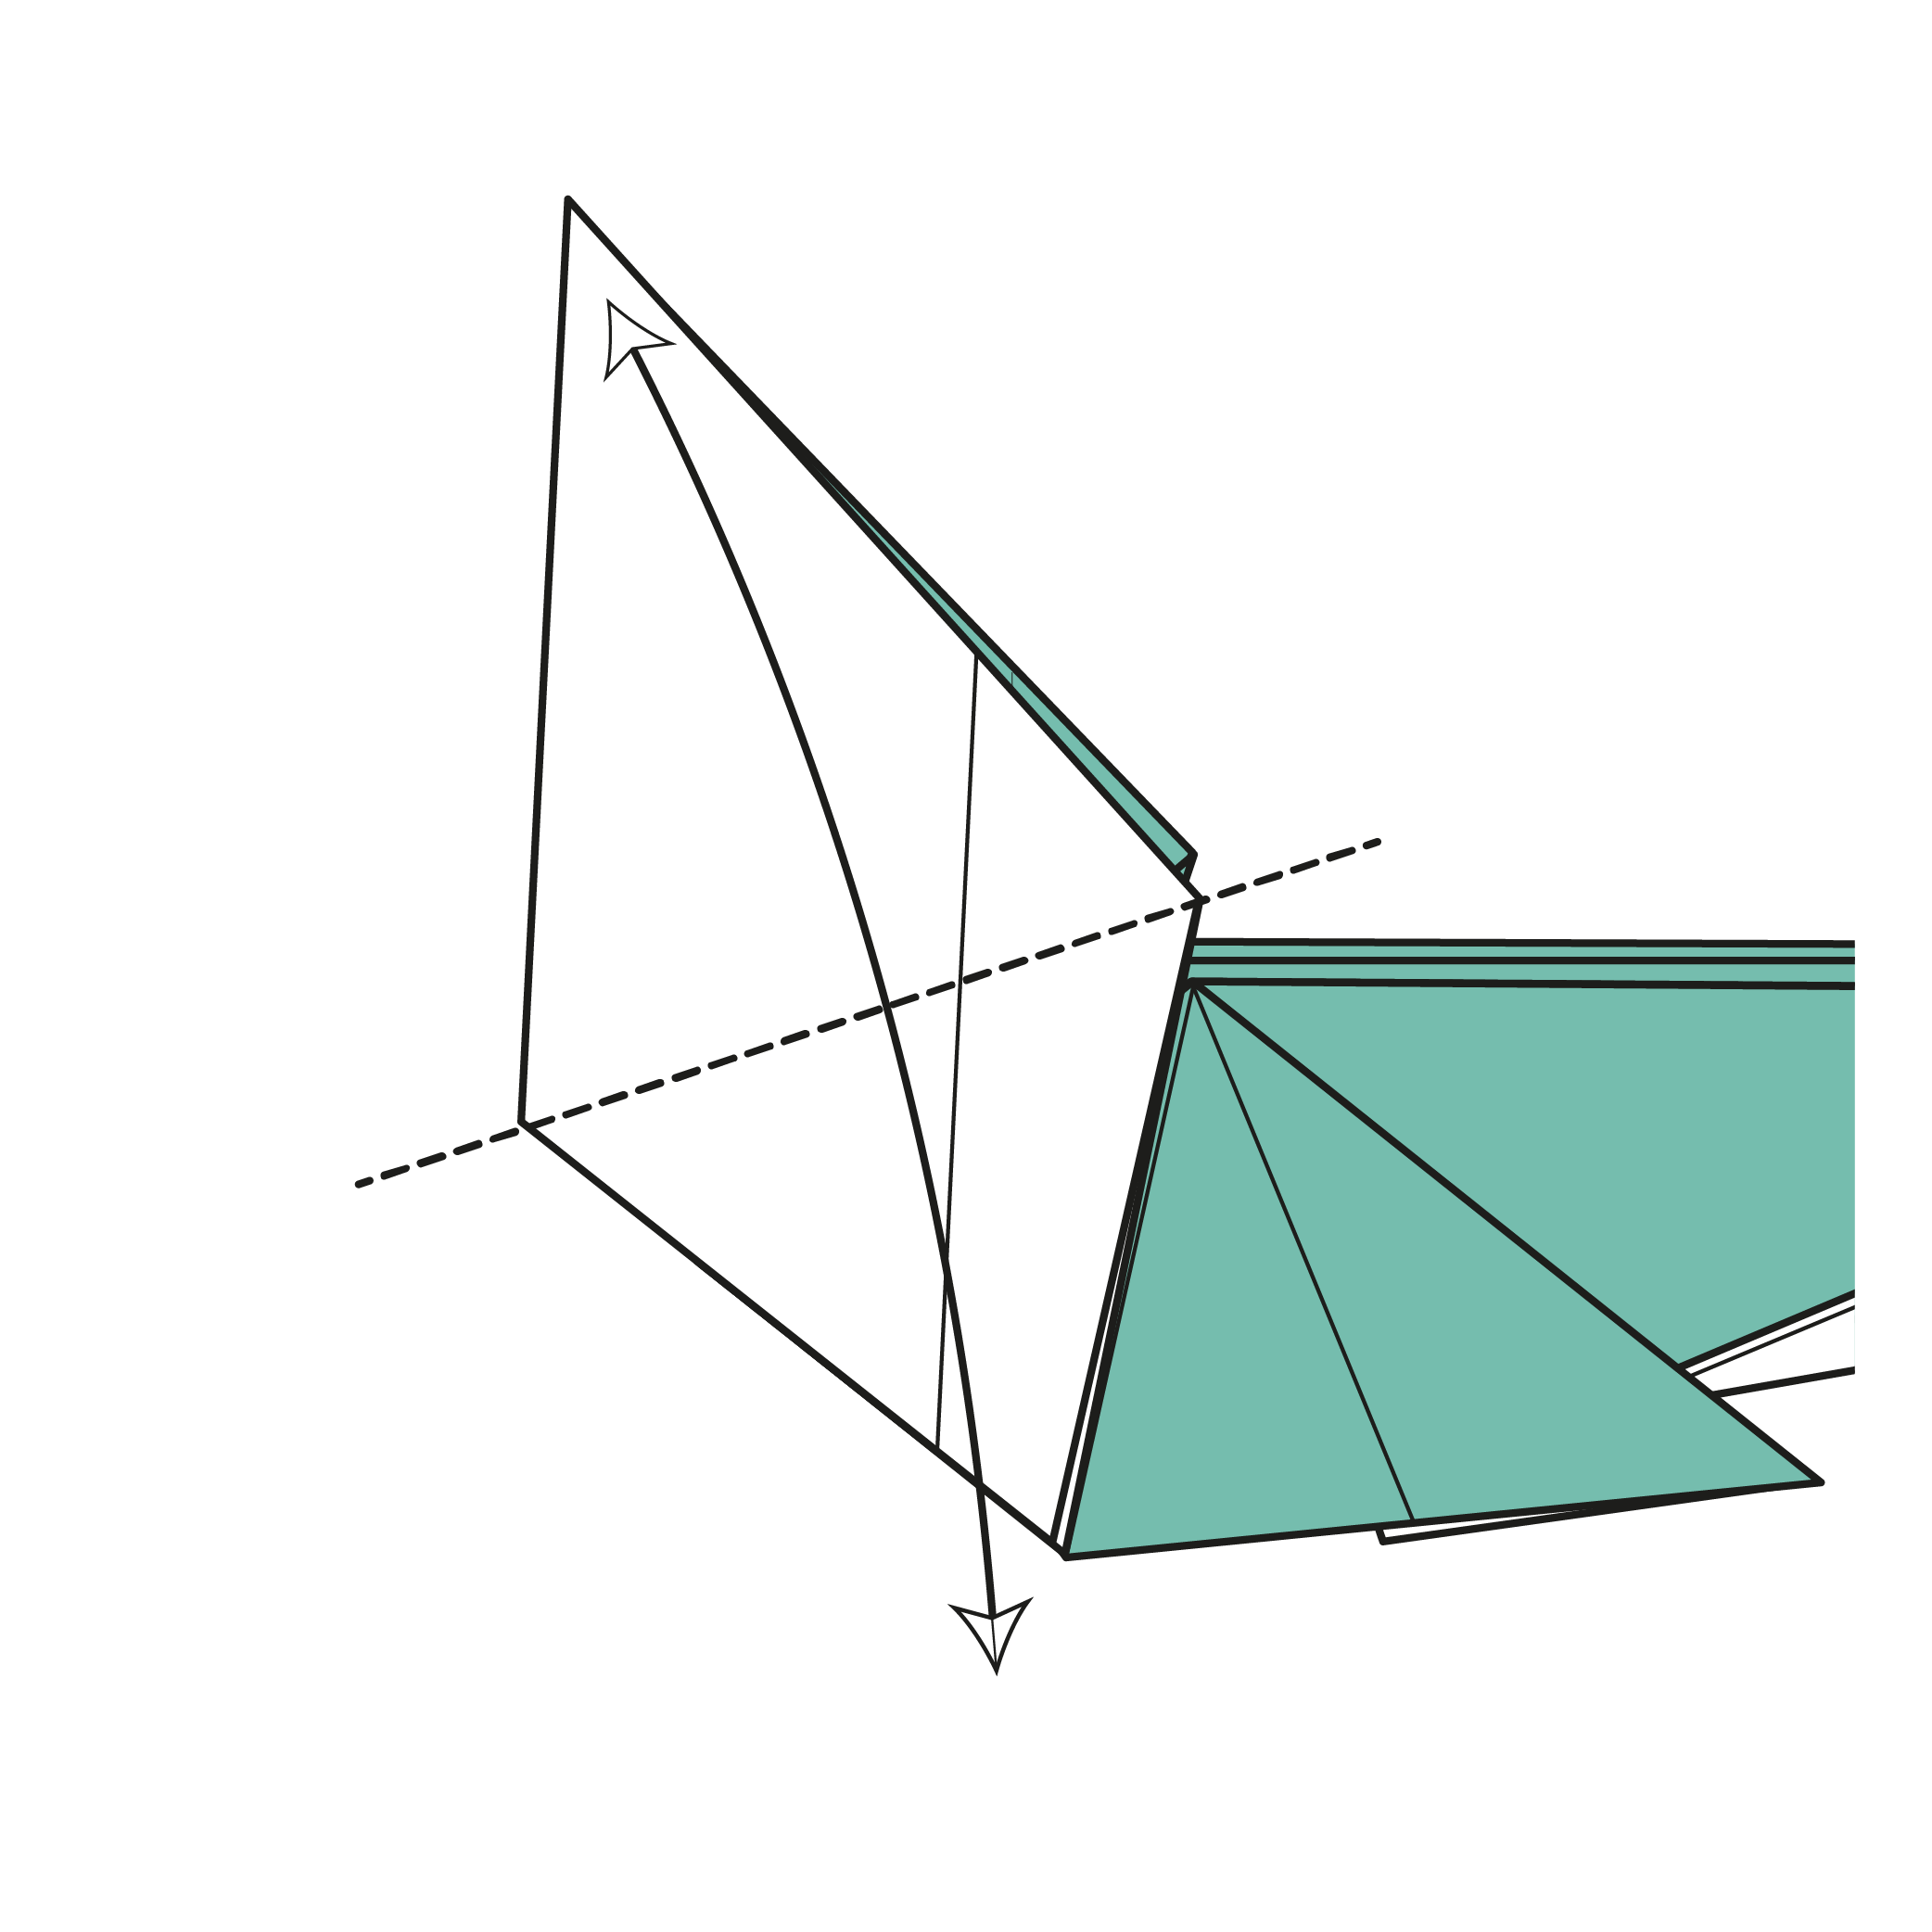
Step 13

Make an outside reverse fold along the crease from Step 12.
Step 14
Focusing on the white area, fold from the top corner to the bottom corner. Then, unfold.
Step 15

Fold the reference point to meet the crease from Step 14. Start the crease from the left corner. Then, unfold.
Step 16
Open the layers and crimp fold along the creases from Steps 14 and 15. The top part should sink inside the lower part.
Step 17

Mountain fold along the dotted lines on both sides.
Step 18

Fold the corner down to form the chameleon’s eye.
Step 19

Open the eye flap and push it down slightly to give it volume and a subtle color change. Don’t flatten it completely.
🦎 Folding tip: Play around with the angle to create different eye shapes.
Step 20

Repeat Steps 18 and 19 on the other side.
Step 21

Fold the top flap to the left to form the front leg. Repeat on the other side.
Step 22

Mountain fold along the dotted line to shape the front leg. The crease should begin where the colored and white sides meet. Repeat on the other side.
Step 23

Fold and unfold both legs along the dotted line to give them a 90° bend.
🦎 Folding tip: You can shape the legs to your liking to add volume or adjust the leg position.
Step 24


Fold the tail to the left, creating a 90° angle between the tail and body. Crease well, then unfold.
Step 25

Fold the tail downward with a 90°angle between the tail and main body, leaving a small gap between the beginning of the crease and the crease from Step 24. Crease well, then unfold.
Step 26
Inside reverse fold the tail along the creases from Step 25.
Step 27

Thin the tail by folding its right edge along the dotted line. The crease runs from the top right to the bottom corner. Unfold, then repeat on the other side.
Step 28

Mountain fold along the creases made in Step 27.
Step 29

Fold the right corner toward the head, aligning it with the reference point. Crease along the dotted line, then unfold.
🦎 Folding tip: Start by folding along the crease from Step 24. Then pivot the bottom section until the two reference points touch.
Step 30

Crimp fold along the creases from Steps 24 and 29.
Step 31

Curl the tail to the left.
🦎 Folding tip: Use a pen or rounded tool to curl the tail smoothly around it.
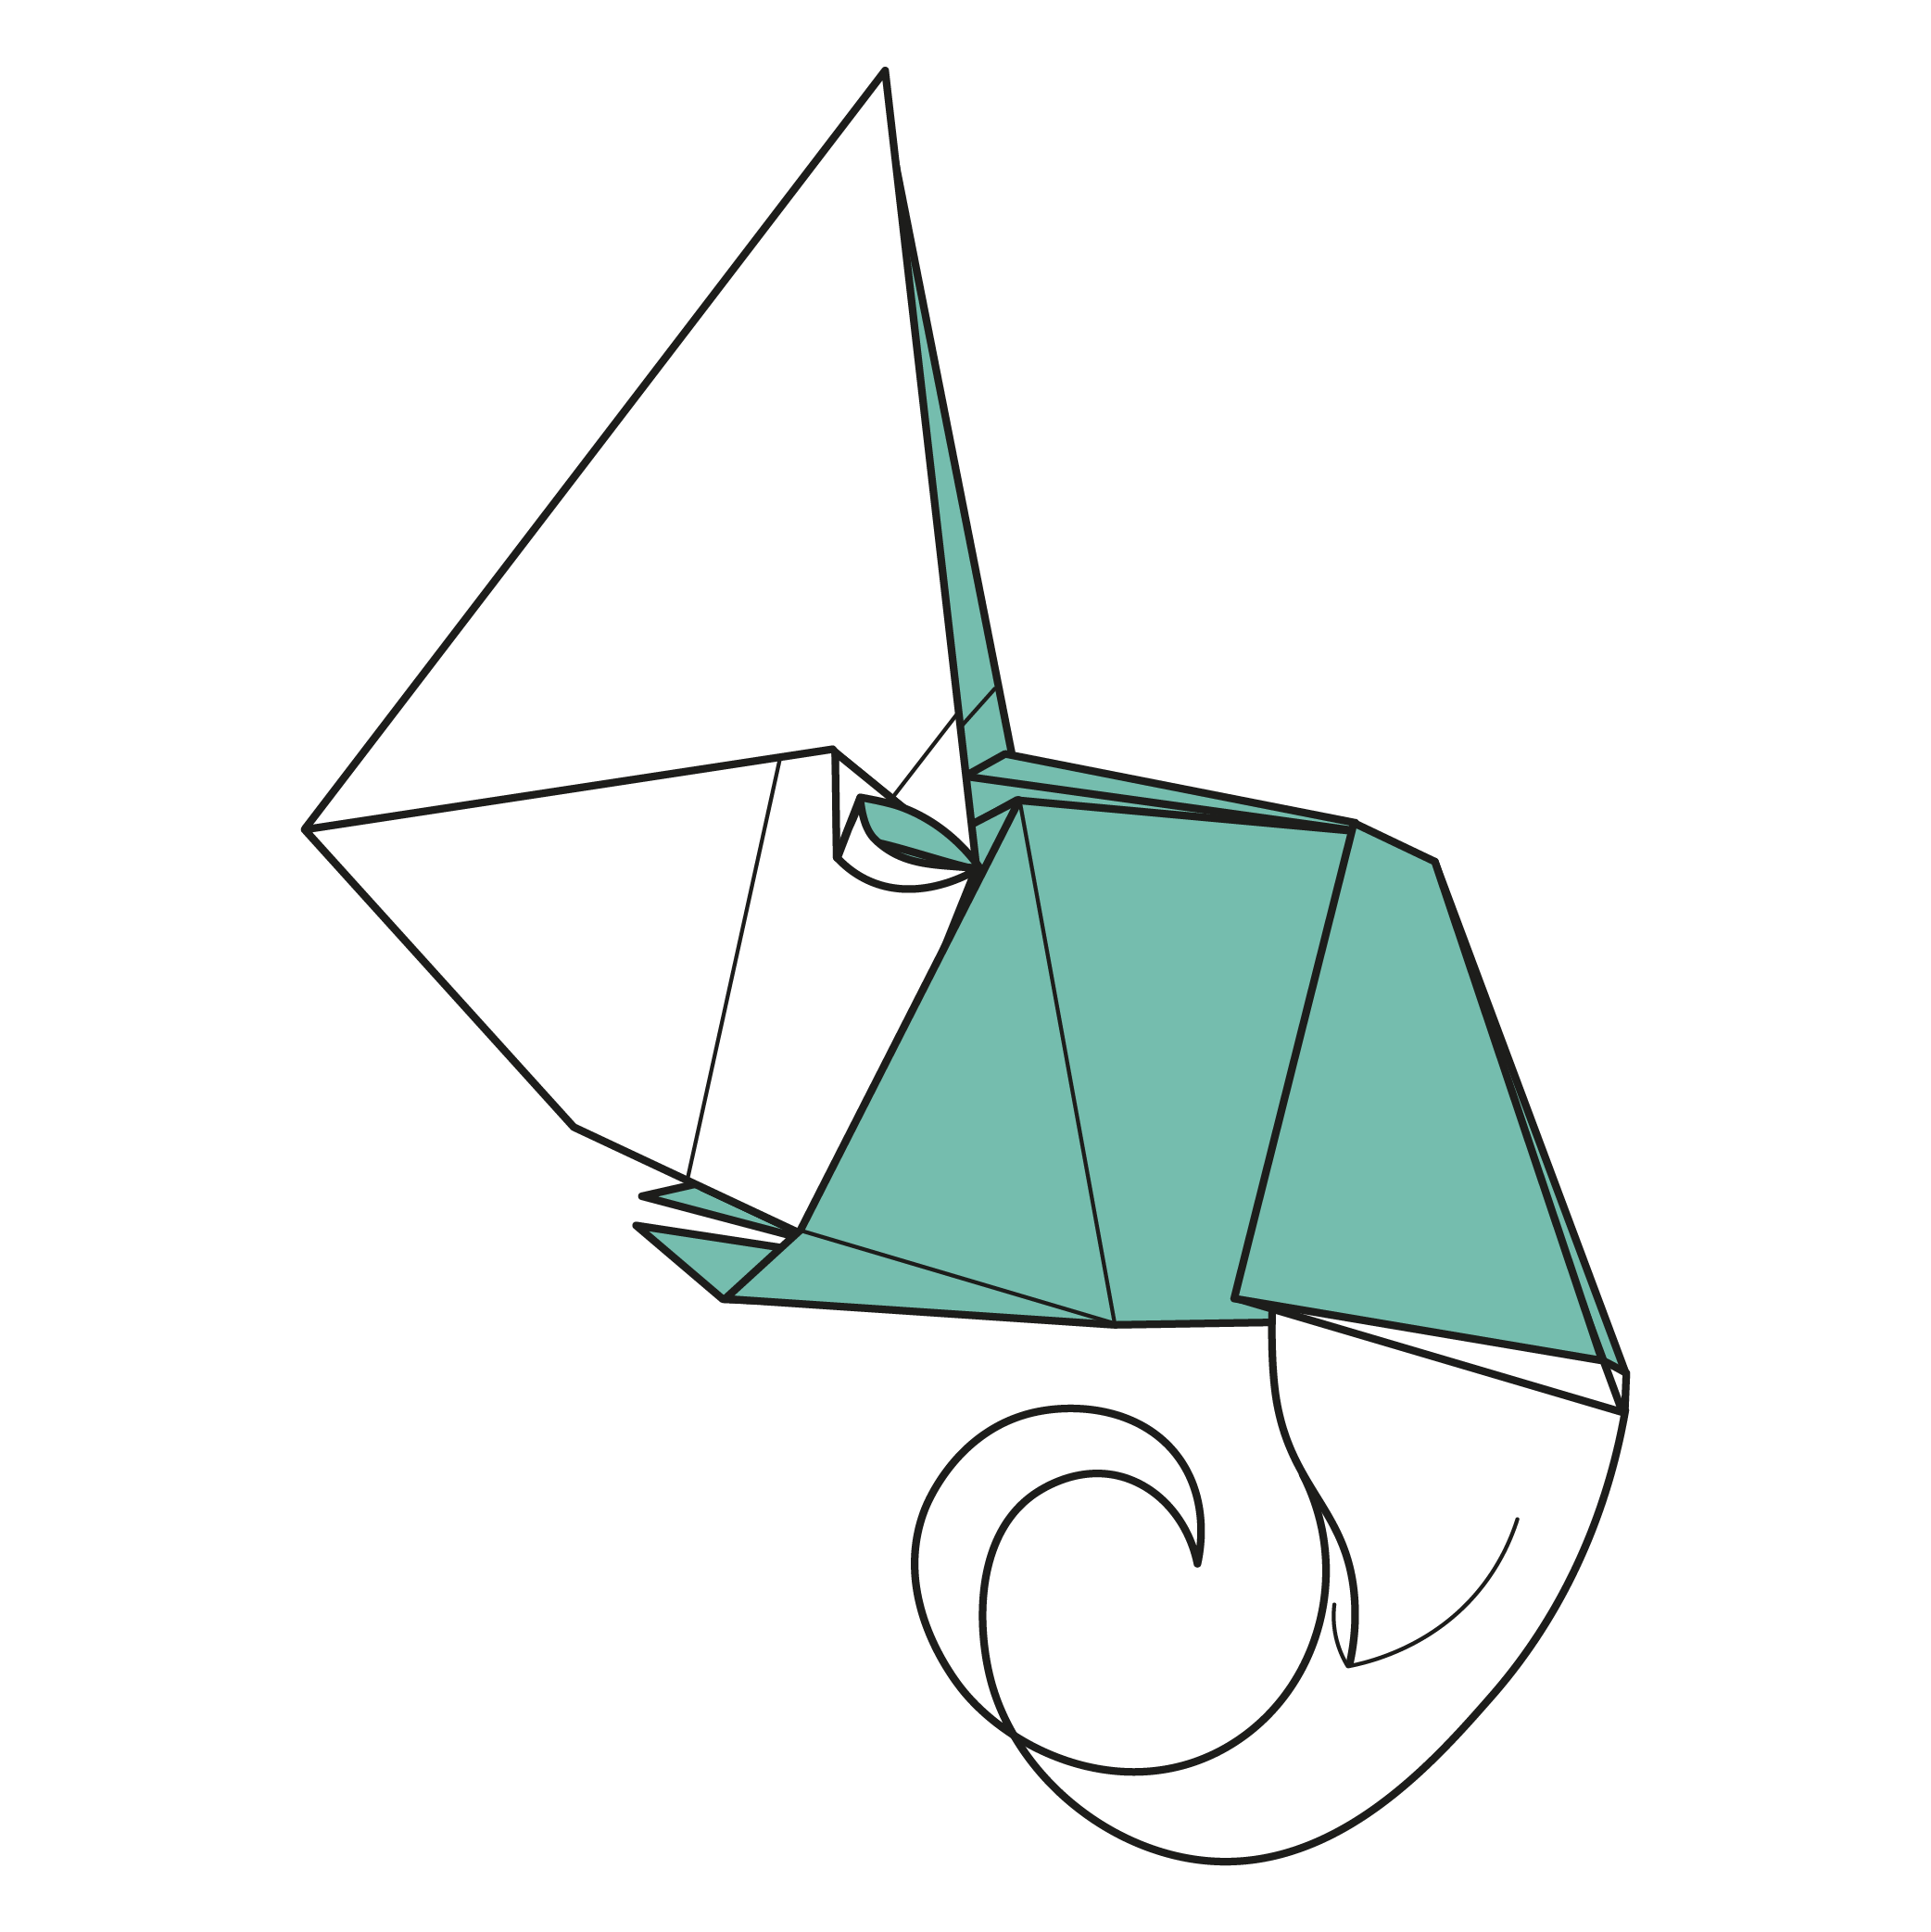
The completed origami chameleon!
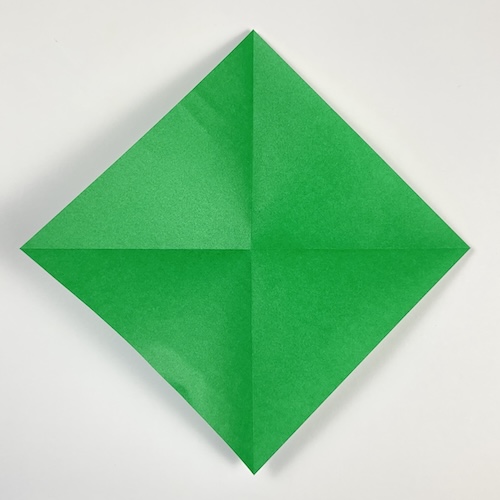
Start with the white side of the paper facing up. Fold in half and unfold.
If you enjoyed folding this little reptile, try giving it a home, whether that’s nestled among plants or watching over your workspace from a shelf.
And if you’re sharing your chameleon on socials, don’t forget to tag us. We’d love to see where it ends up!
For more animal-themed models with personality, take a look at our origami animal category, where there’s always another creature waiting to be folded.
Download the Full Origami Chameleon Printable PDF Instructions

We’d love to keep you in the loop, so by sharing your email with us, you’ll be signed up for our mailing list. Don’t worry; we won’t bombard you with spammy emails, and your information is safe with us – we won’t share it with anyone else.


Very Good ????