
How to Fold an Easy Origami Bat
Here’s a fun little project that I really enjoyed: an origami bat designed by Sébastien Limet.
What makes this model interesting is how it starts with a wrong diagonal fold that feels a bit unexpected. It’s actually a clever trick to shape the bat’s ears right from the beginning.
The whole model comes together in just a few minutes, and it’s accessible even if you have little folding experience. The final model is sharp, clean, and full of personality.
If you’re using paper with a white side, just a heads-up: part of the white will show through because of the wrong diagonal fold. For the best result, I recommend using double-sided paper in the same color.
Origami Bat Step-by-Step Instructions
- Difficulty: Easy – Beginner Level 3
- Folding time: Less than 5 minutes
- Model designer: Sébastien Limet (@mister_paperfold)
- Paper we used: 15×15 cm Tant
Step 1
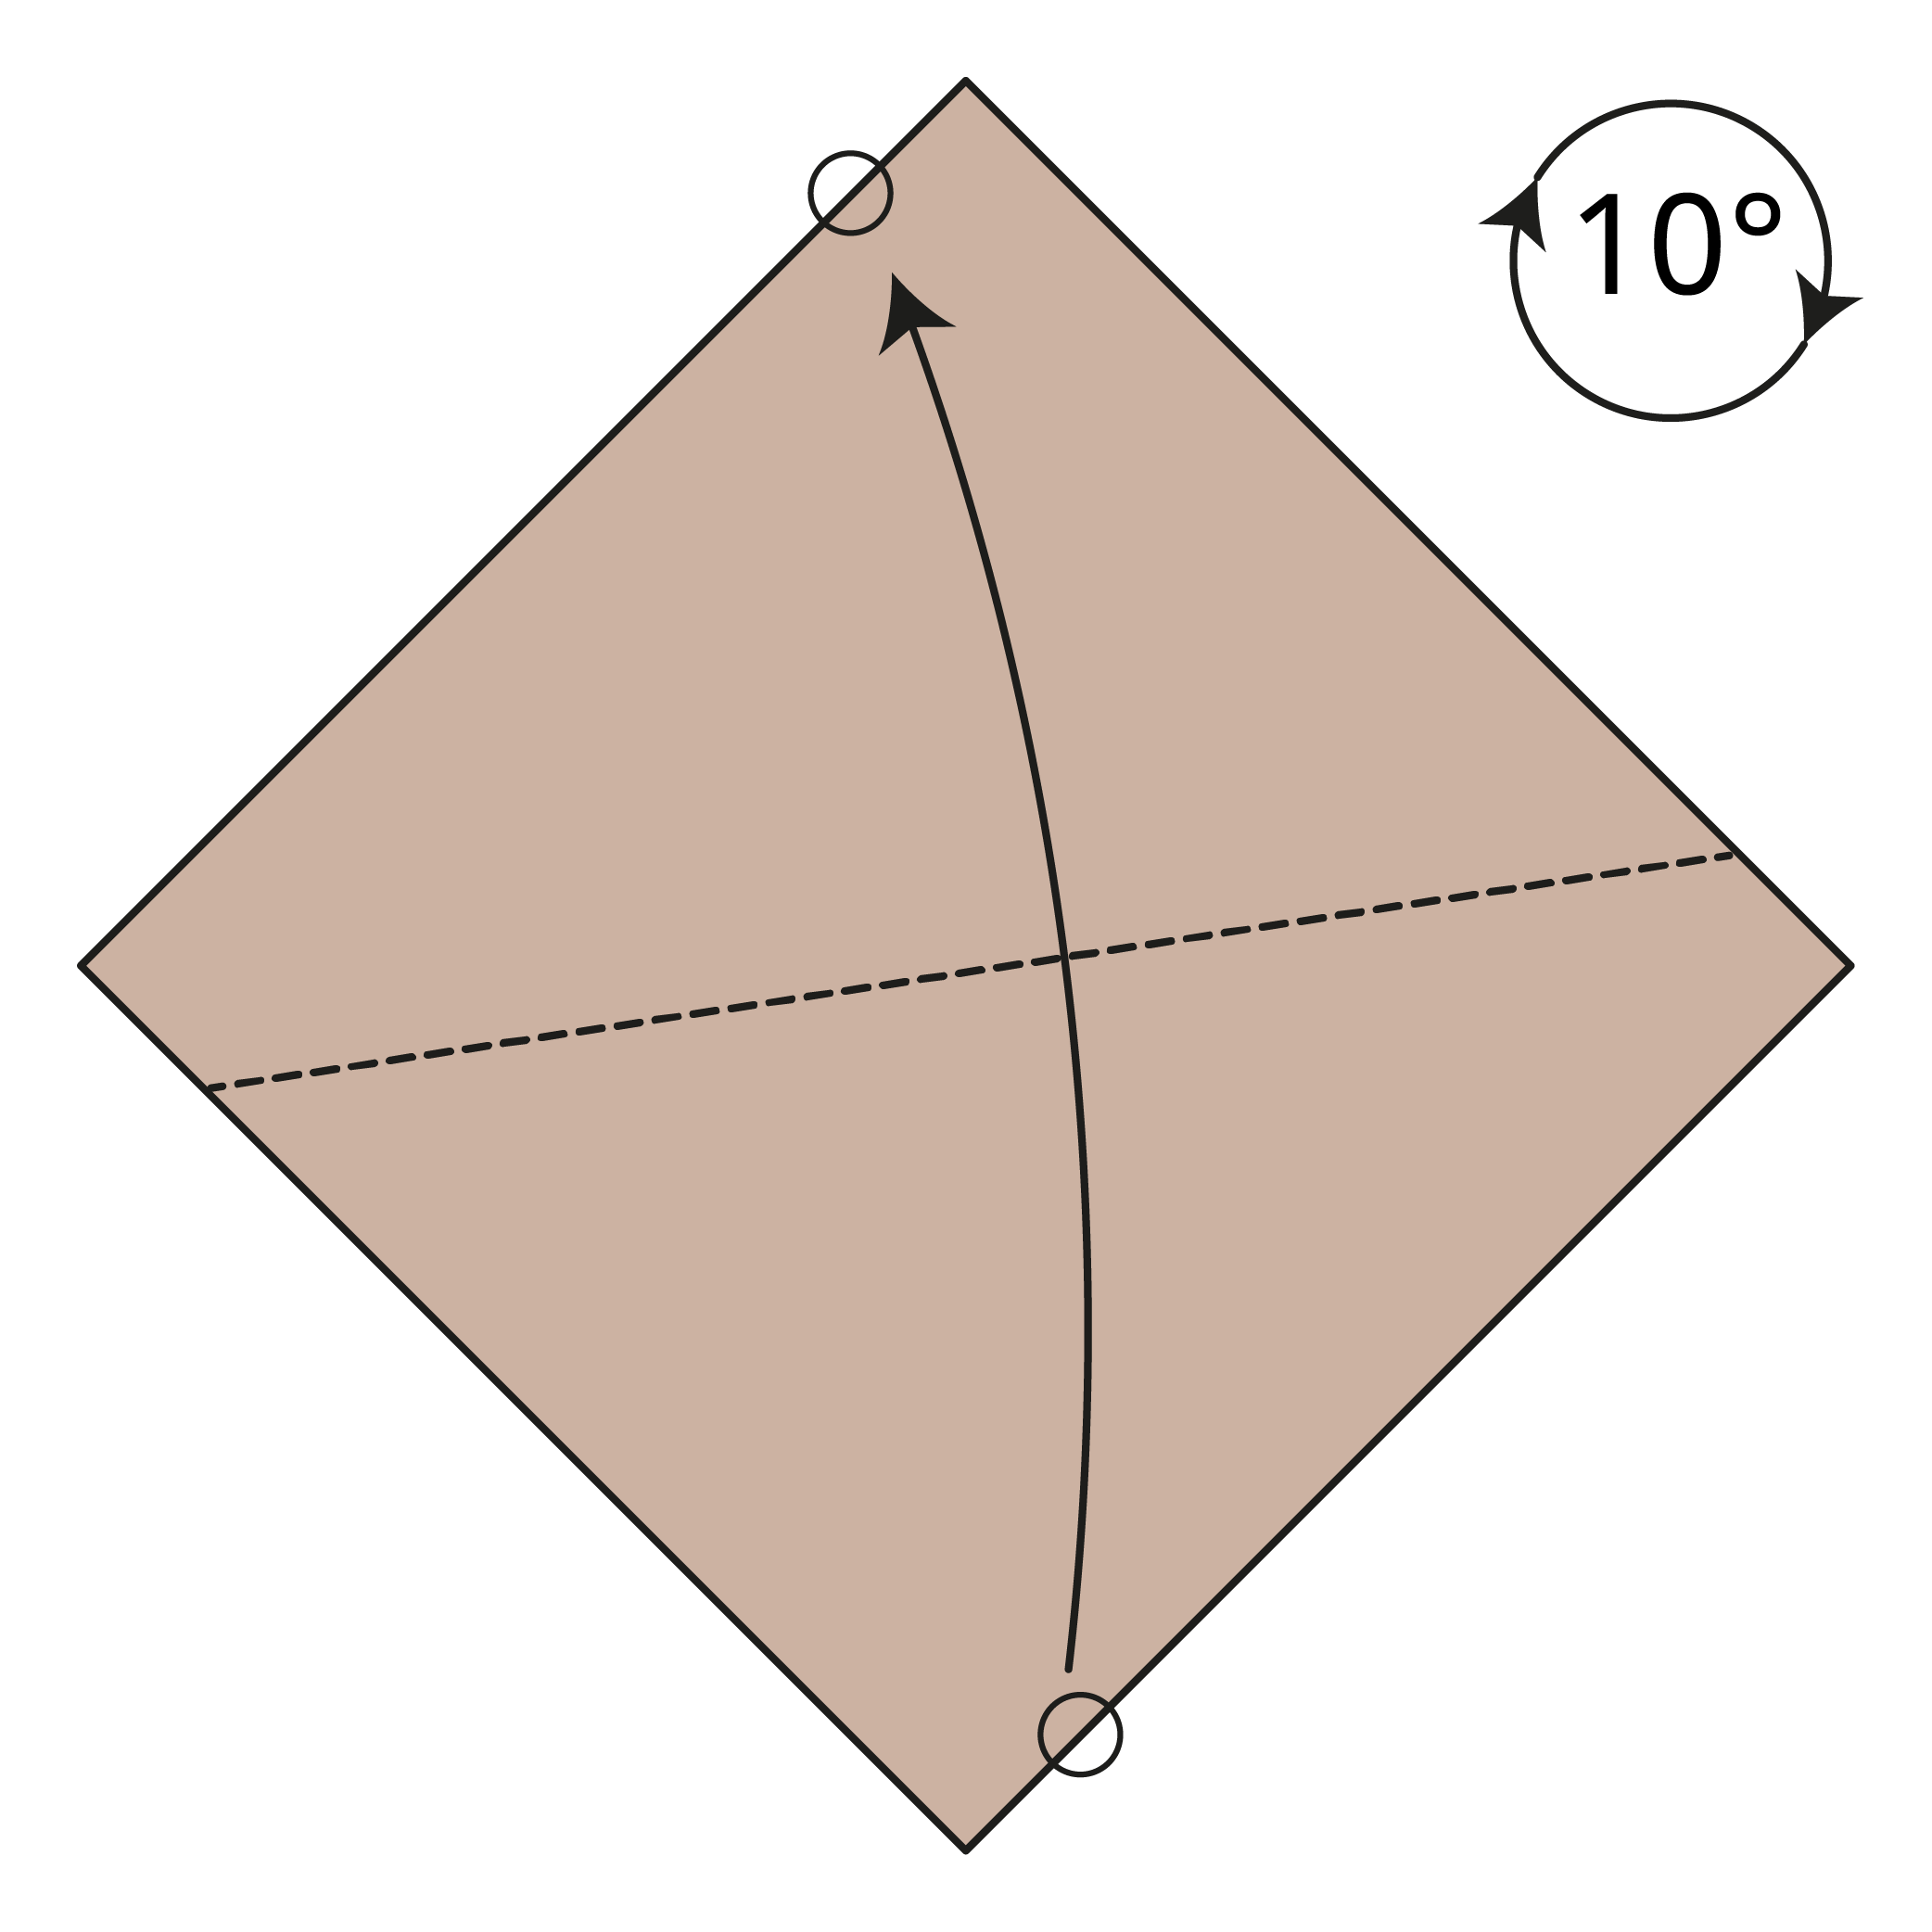
Start with the paper positioned like a diamond. Fold a “wrong diagonal”, along the dotted line.
🦇 Note: By “wrong diagonal” we mean to fold the paper loosely across the diagonal without aligning the top and bottom corners exactly. Instead, shift the bottom corner slightly to the left of the top corner. (These offset points will become the bat’s ears.)
Step 2
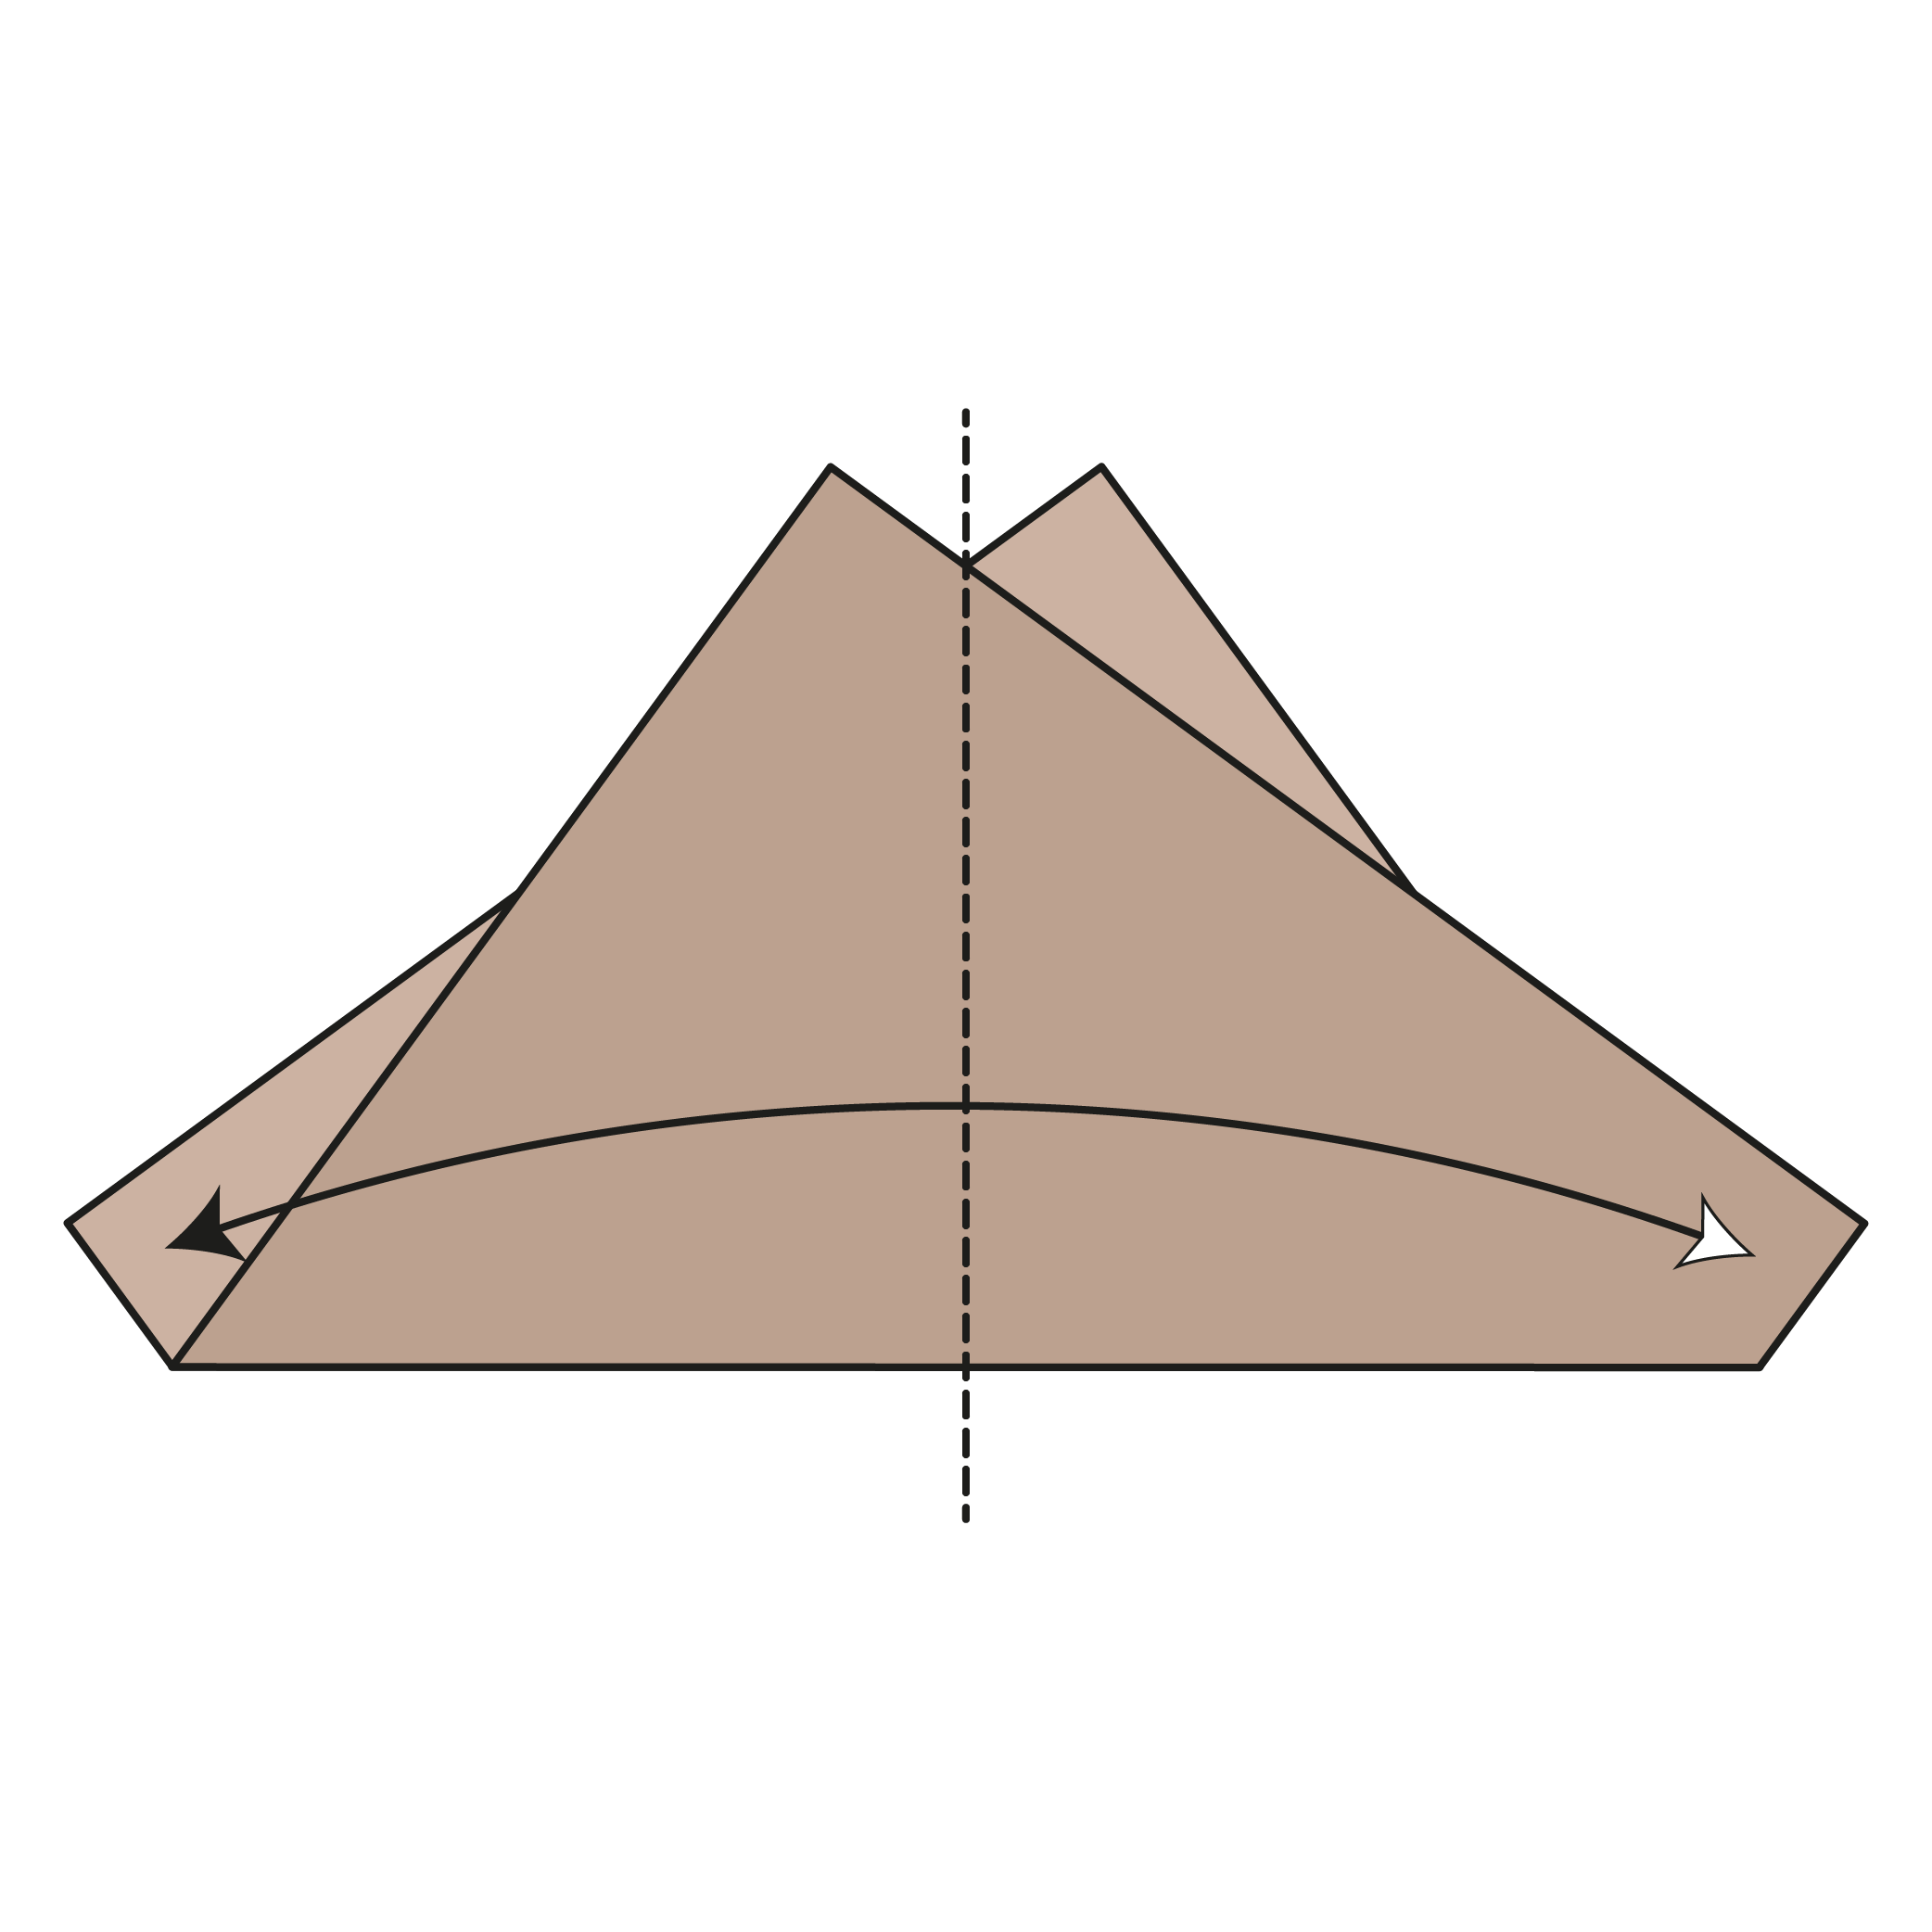
Fold the model in half vertically, then unfold.
Step 3
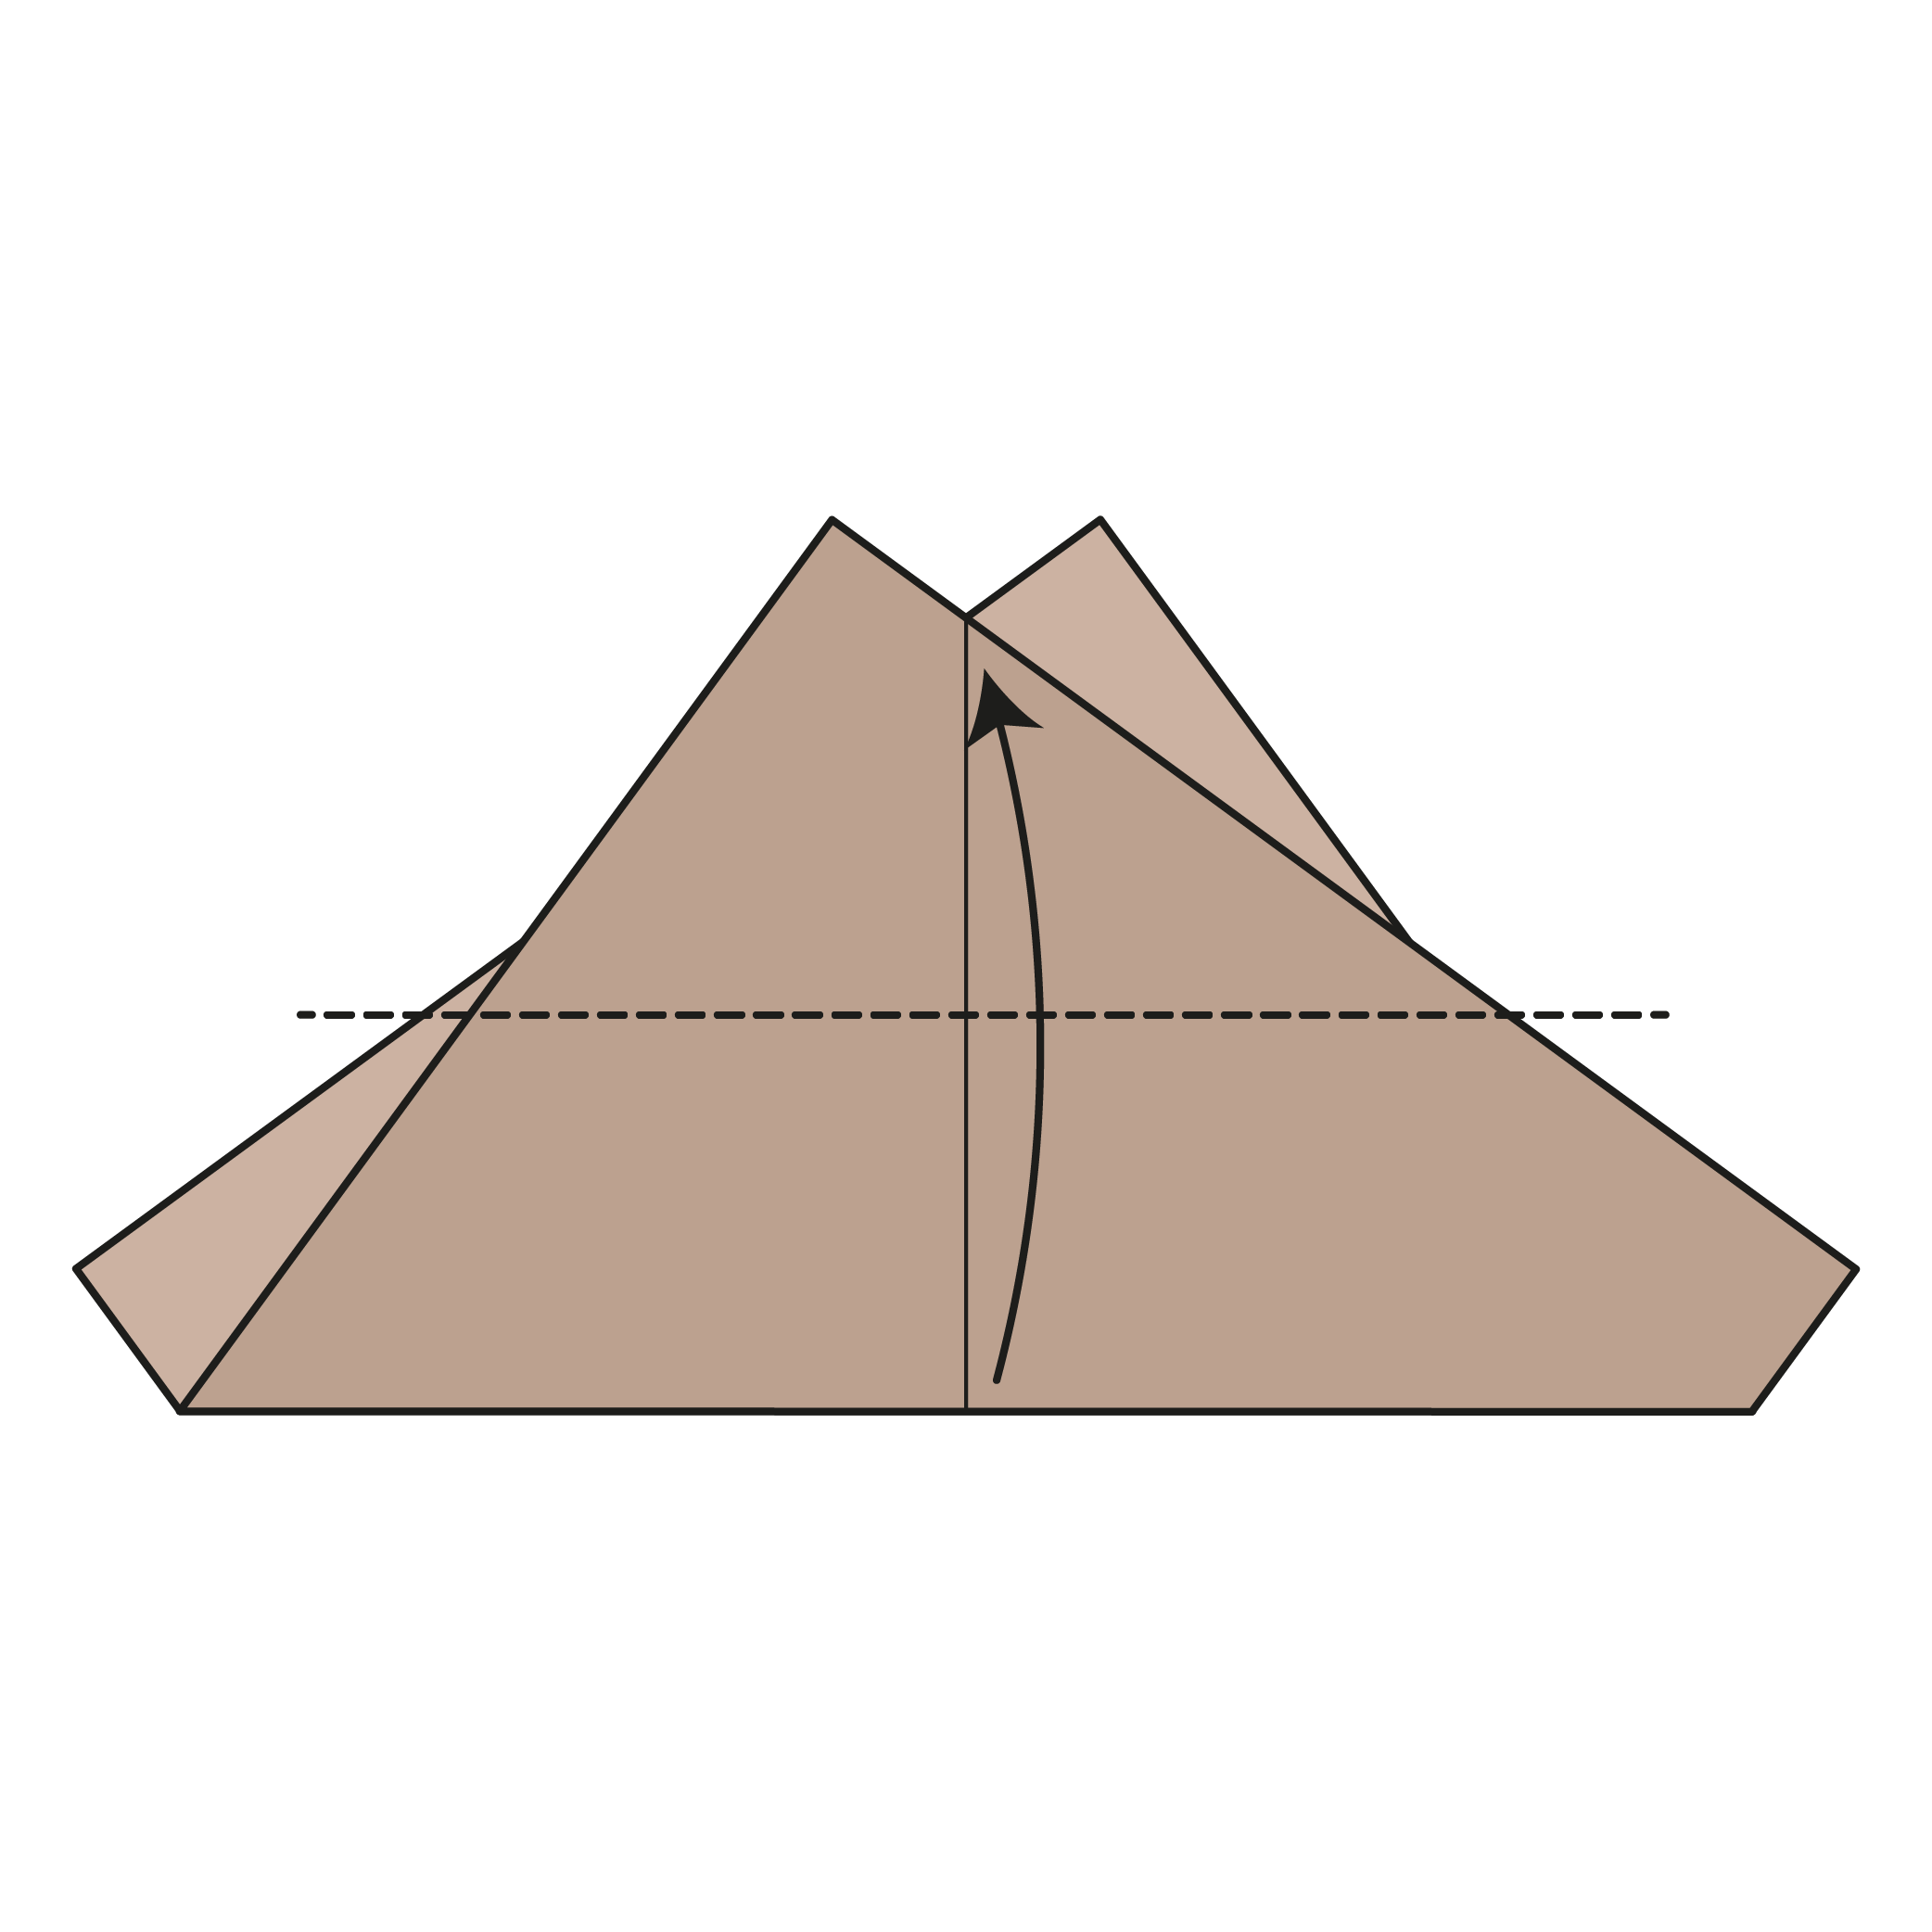
Fold the bottom edge up to meet the point where the two ears intersect.
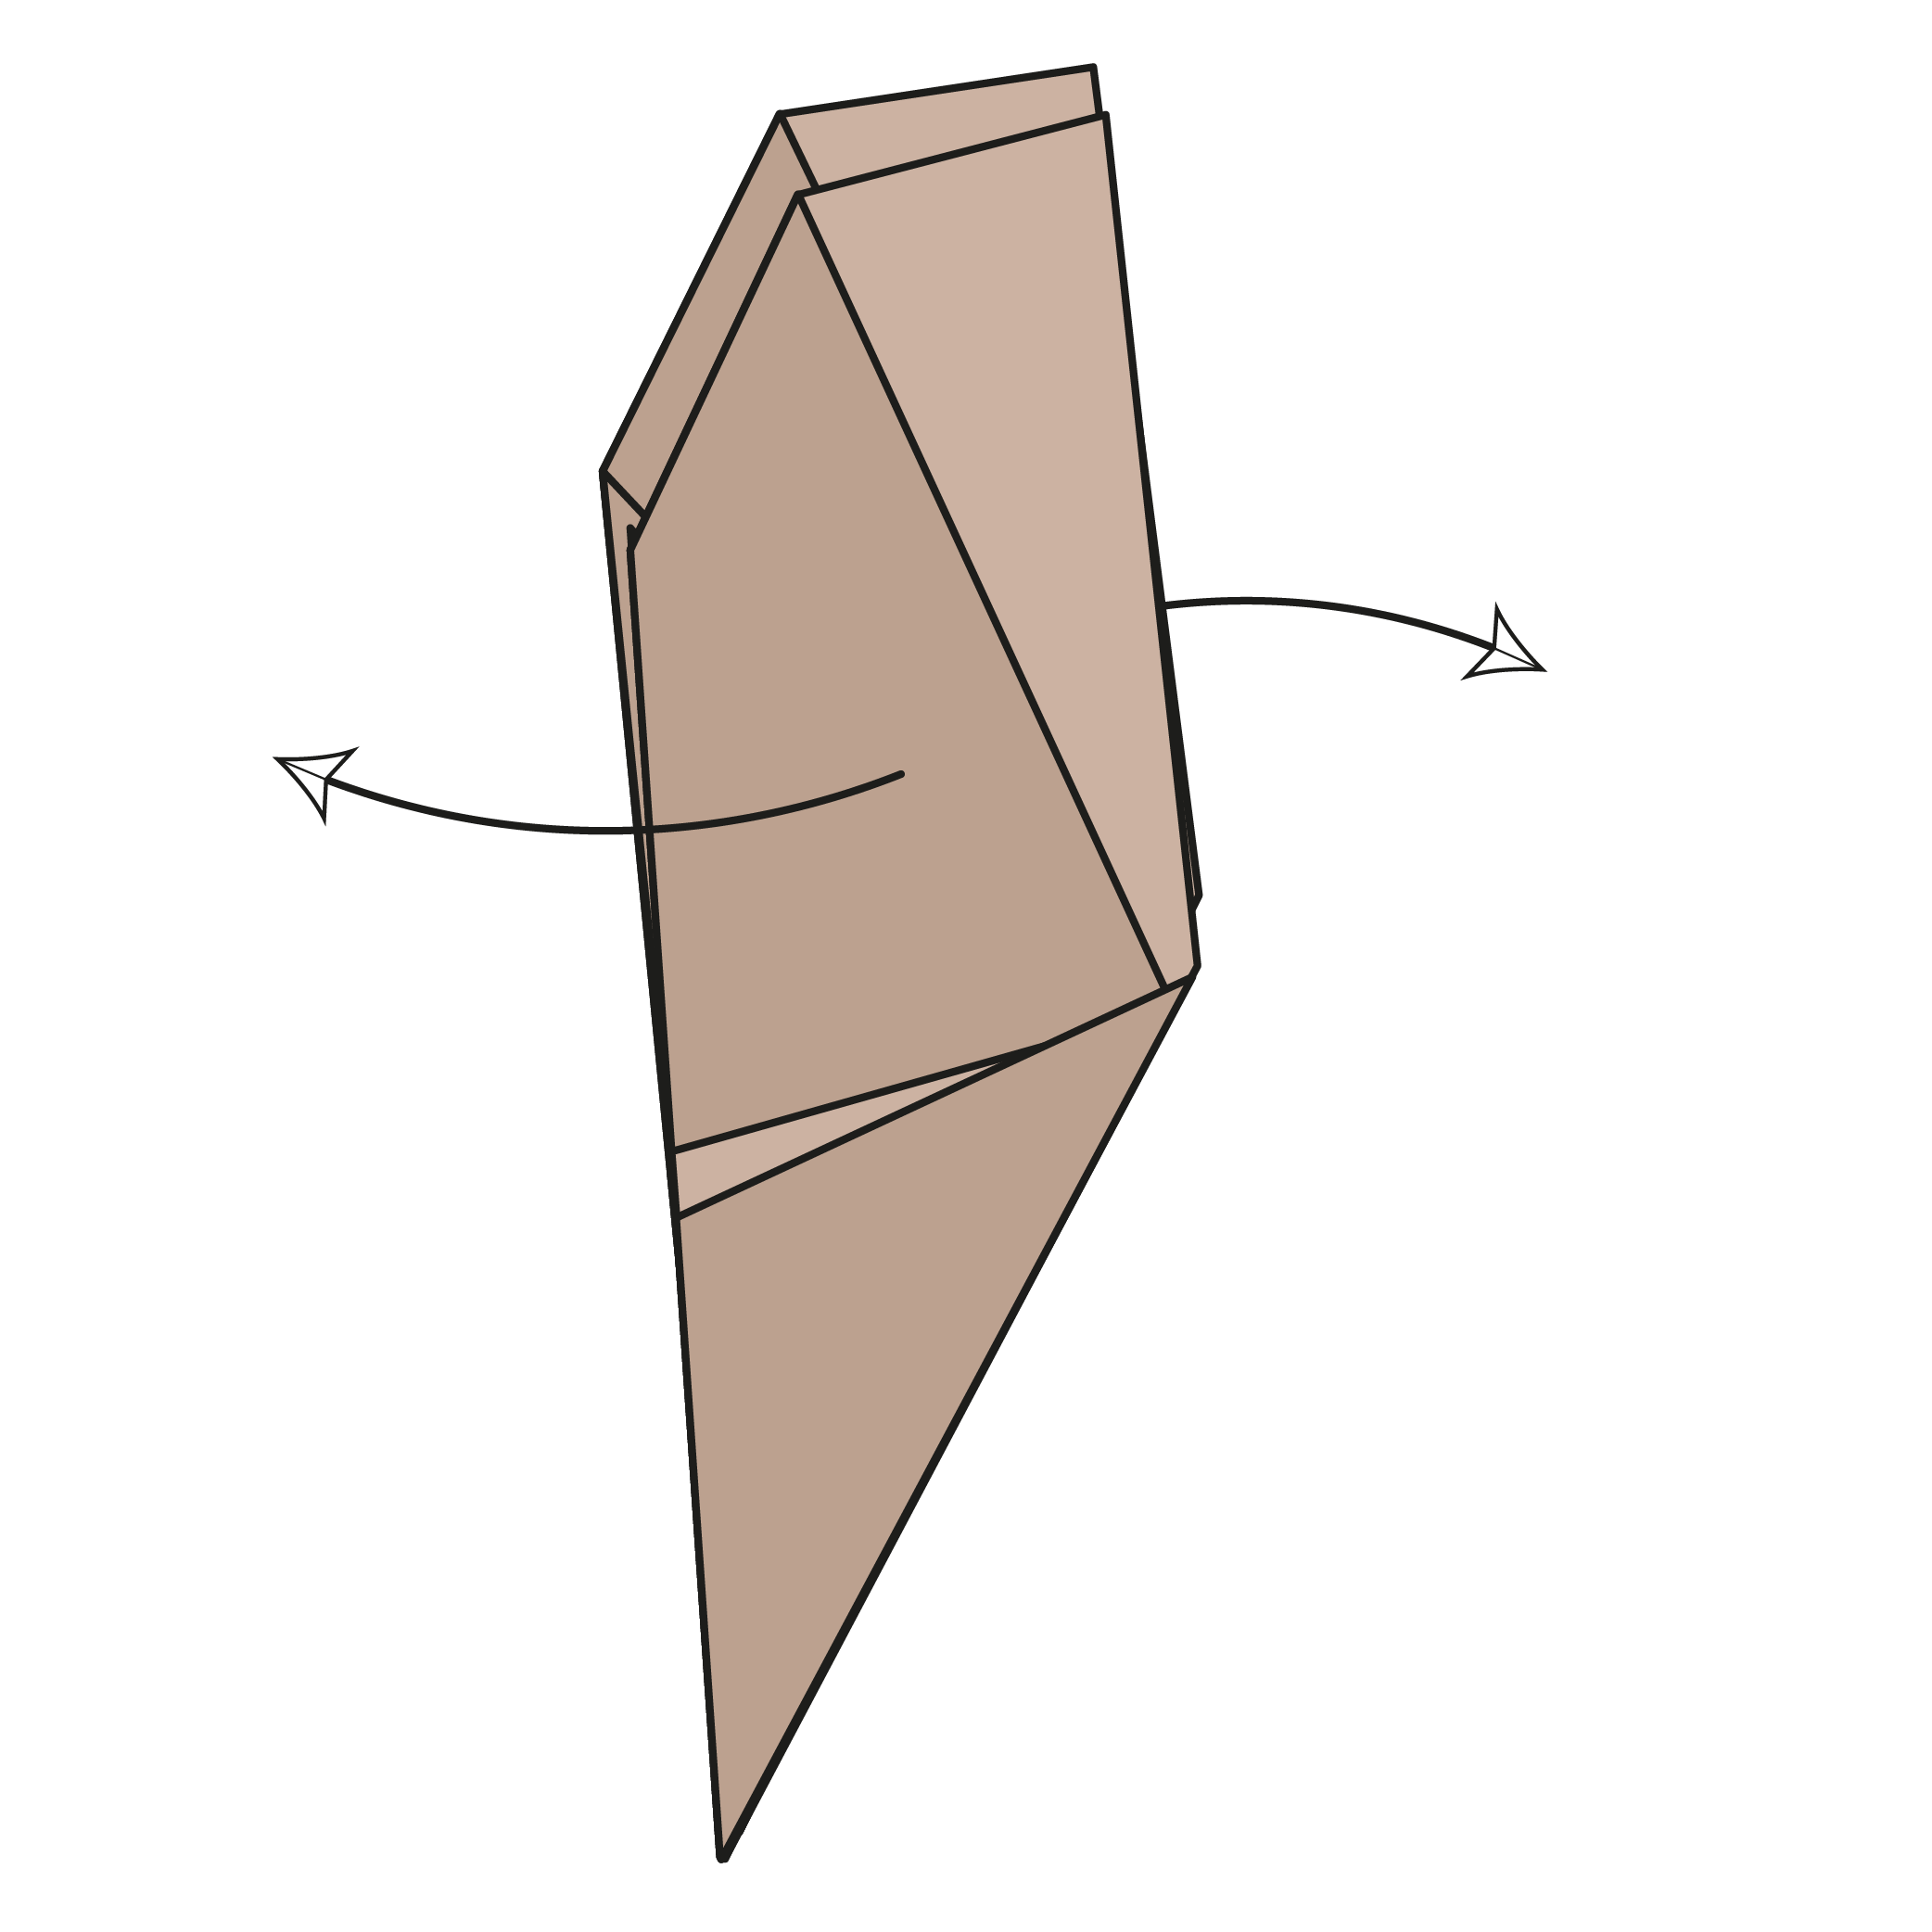
Step 4
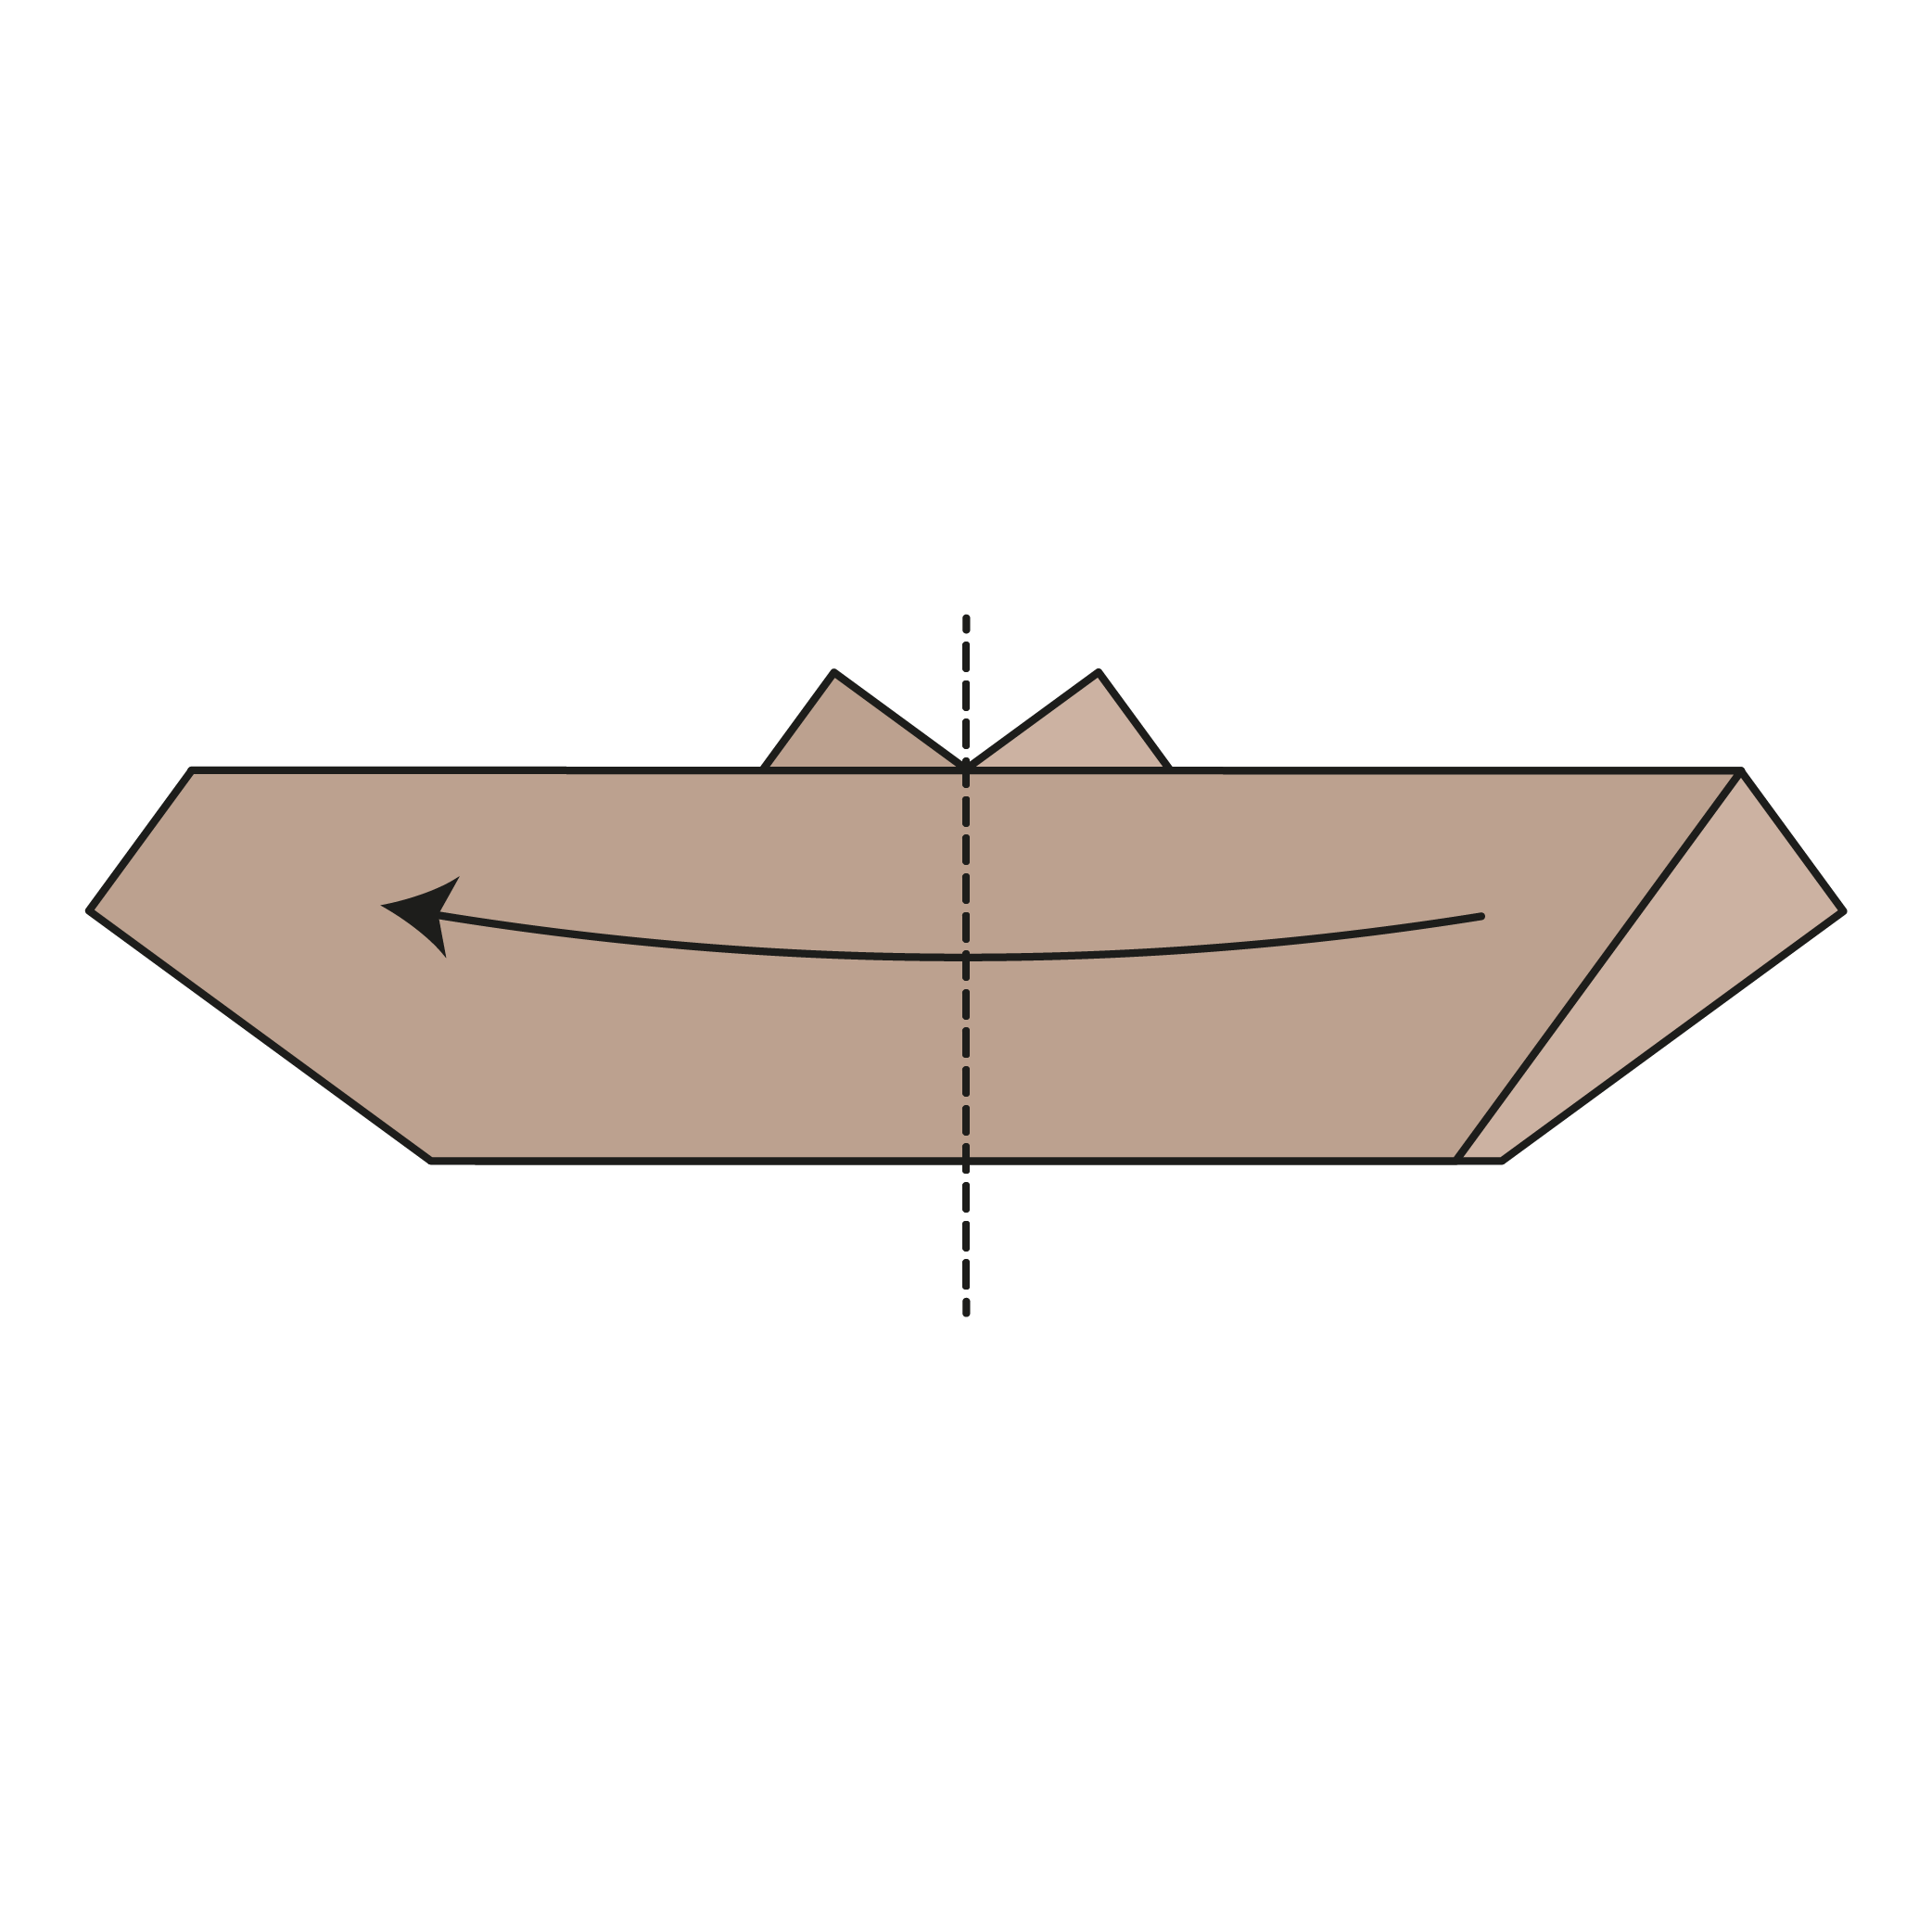
Fold the paper in half vertically, from right to left, using the existing crease.
Step 5
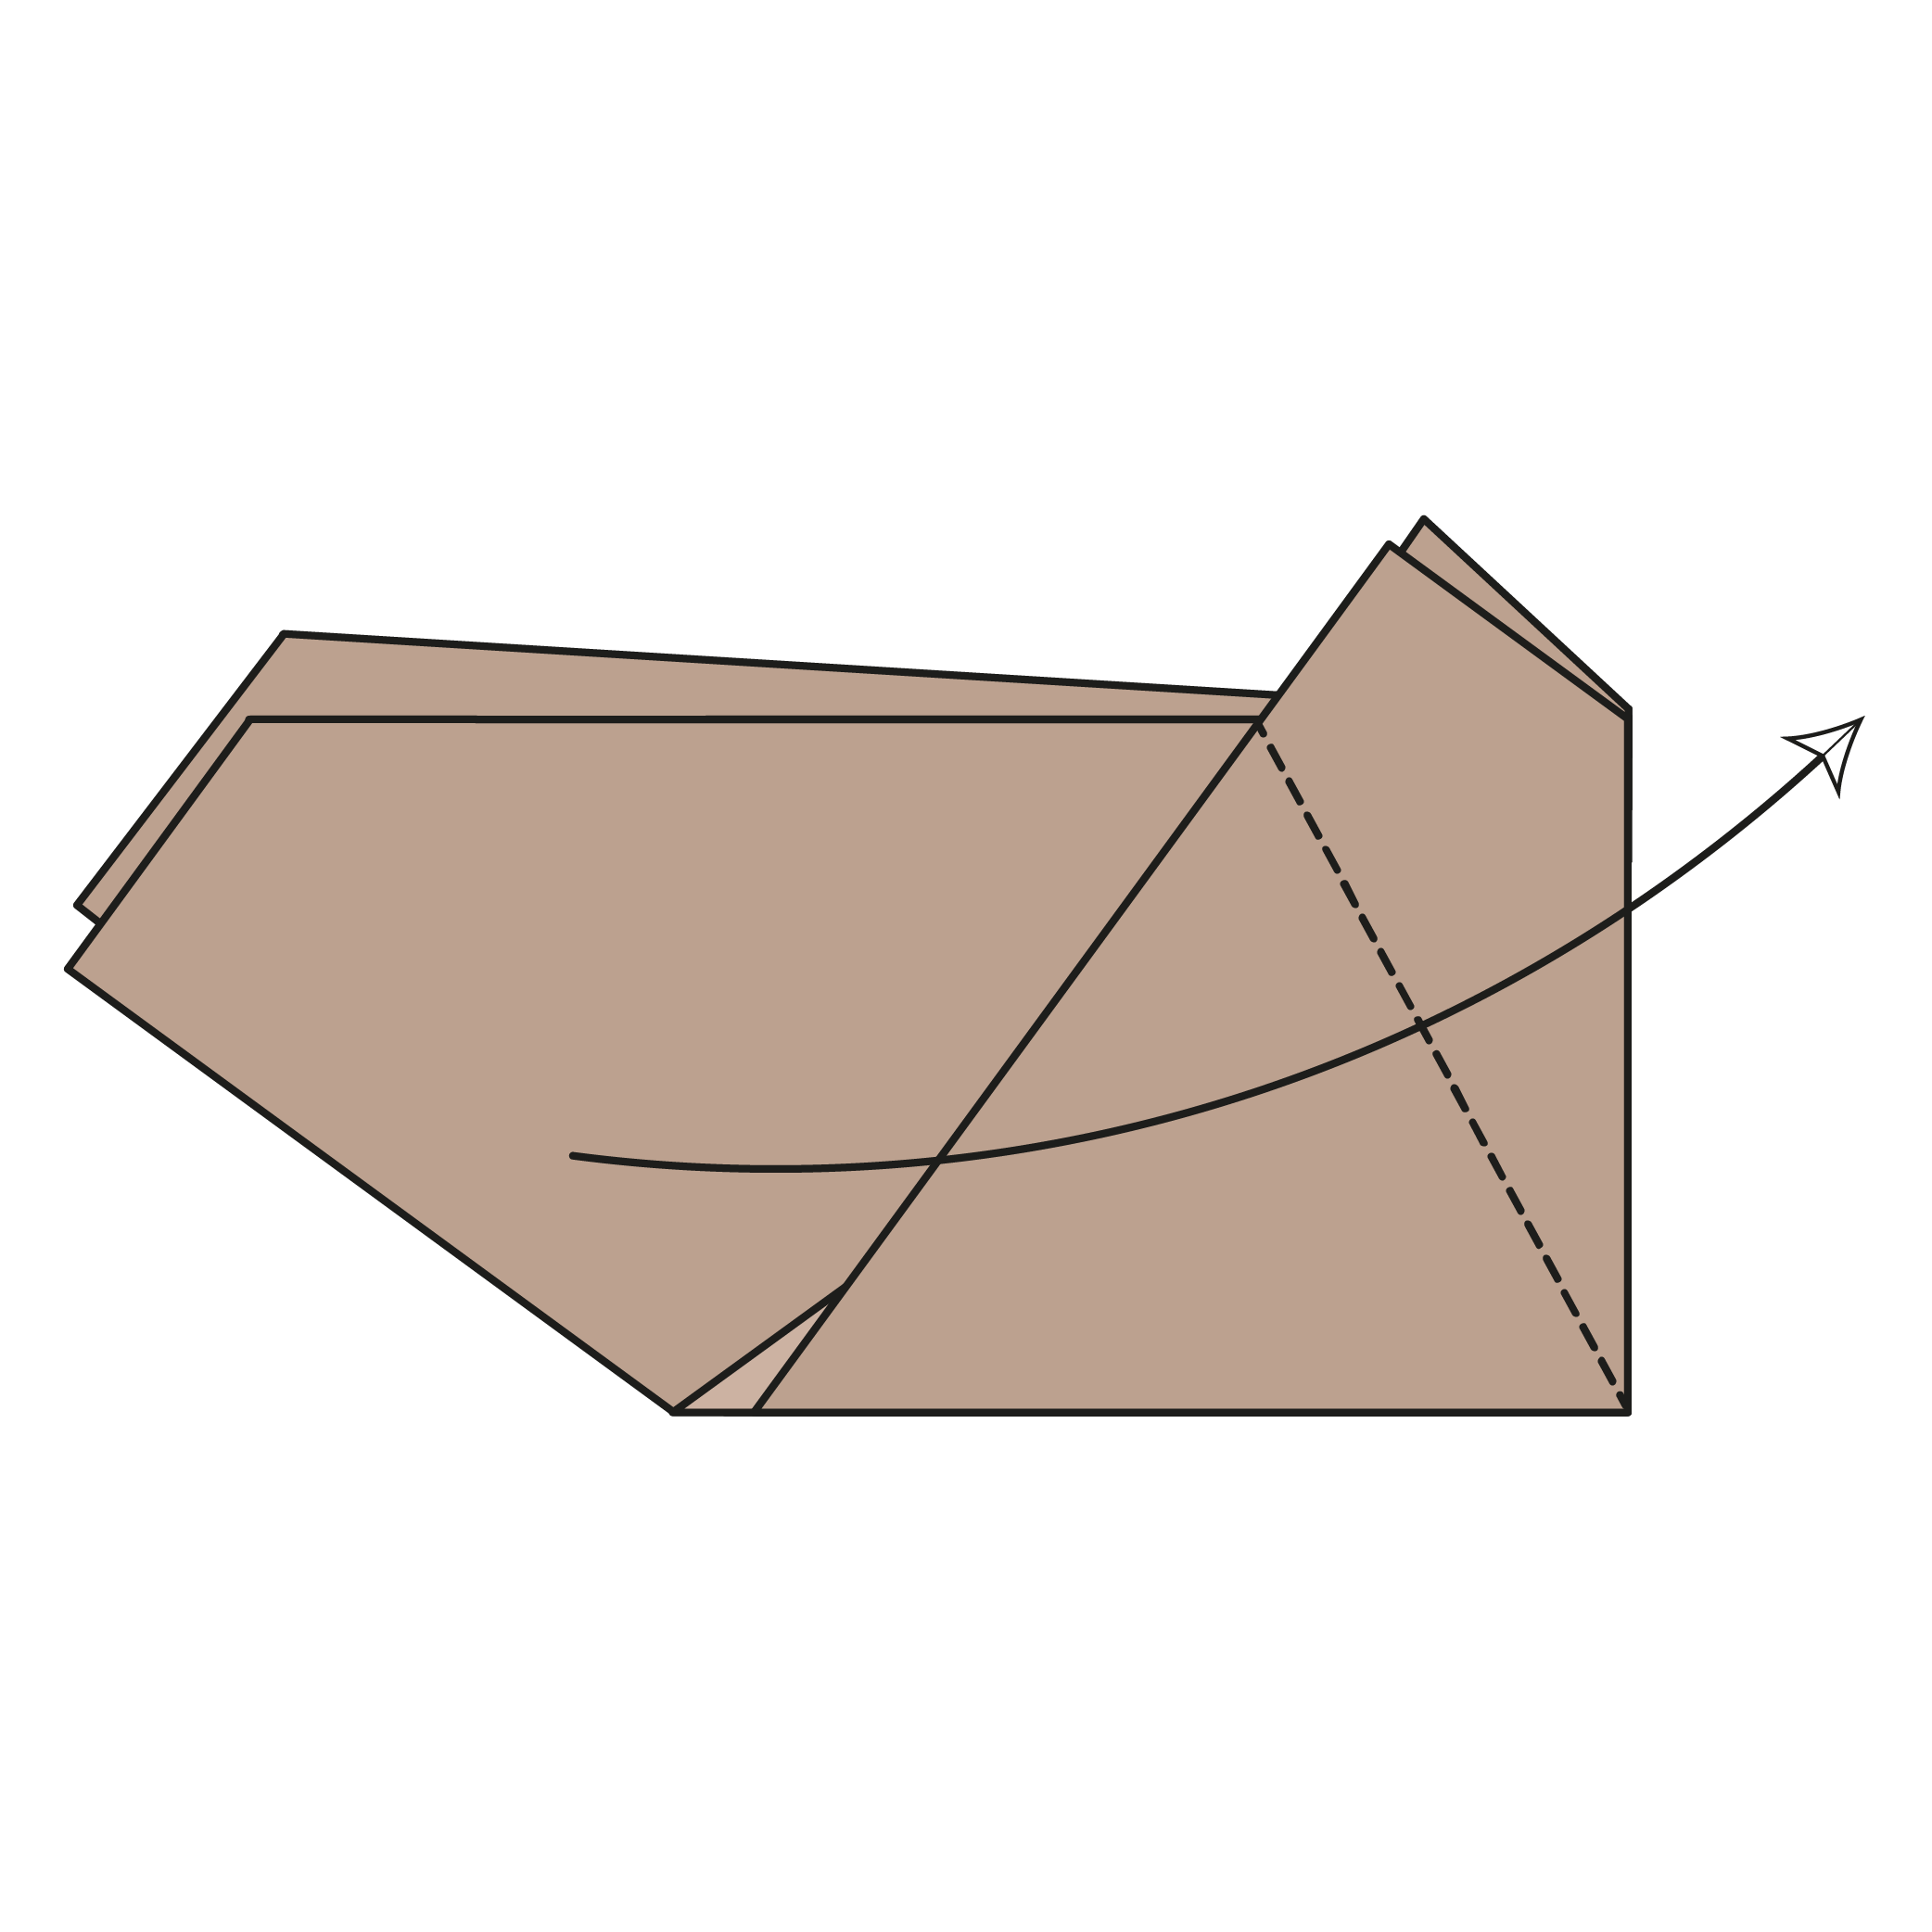
Fold the top flap up along the dotted line. The crease should run from the bottom right corner up to where the wing and ear meet.
Step 6
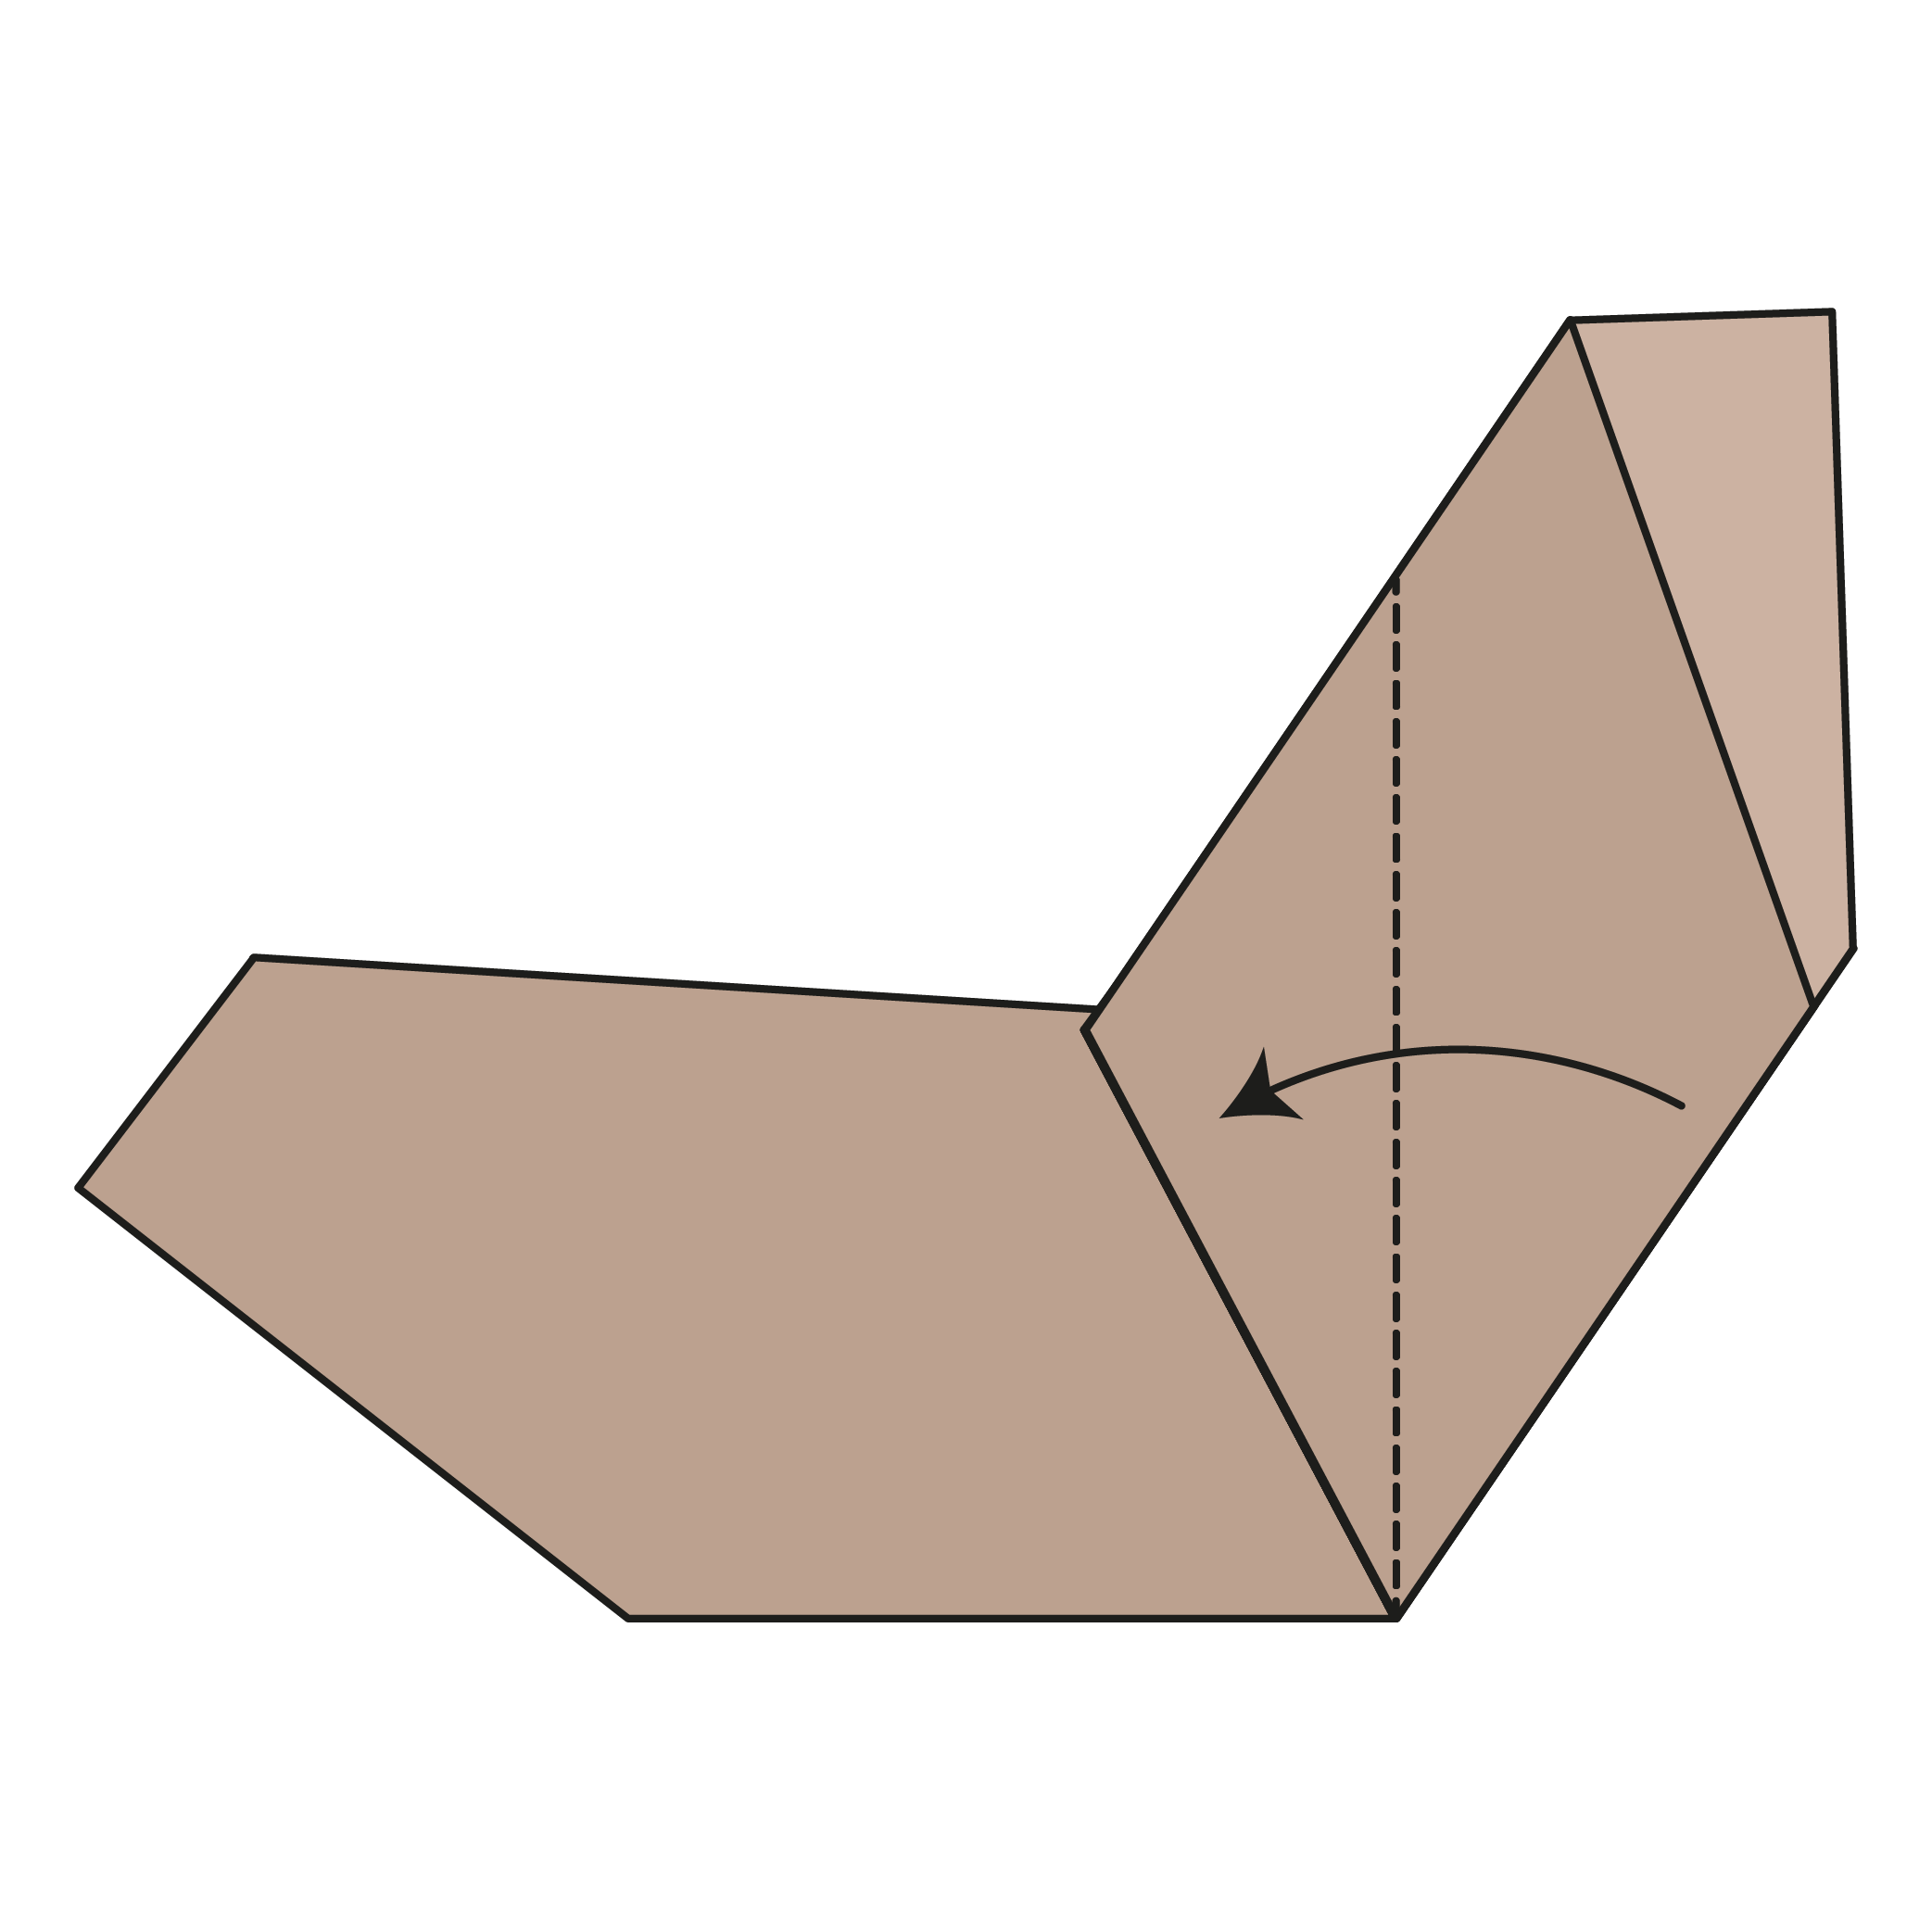
Fold the bottom edge of the right wing in toward the vertical centerline.
🦇 Folding tip: Folding the wings neatly now will make your bat look sharper later!
Step 7

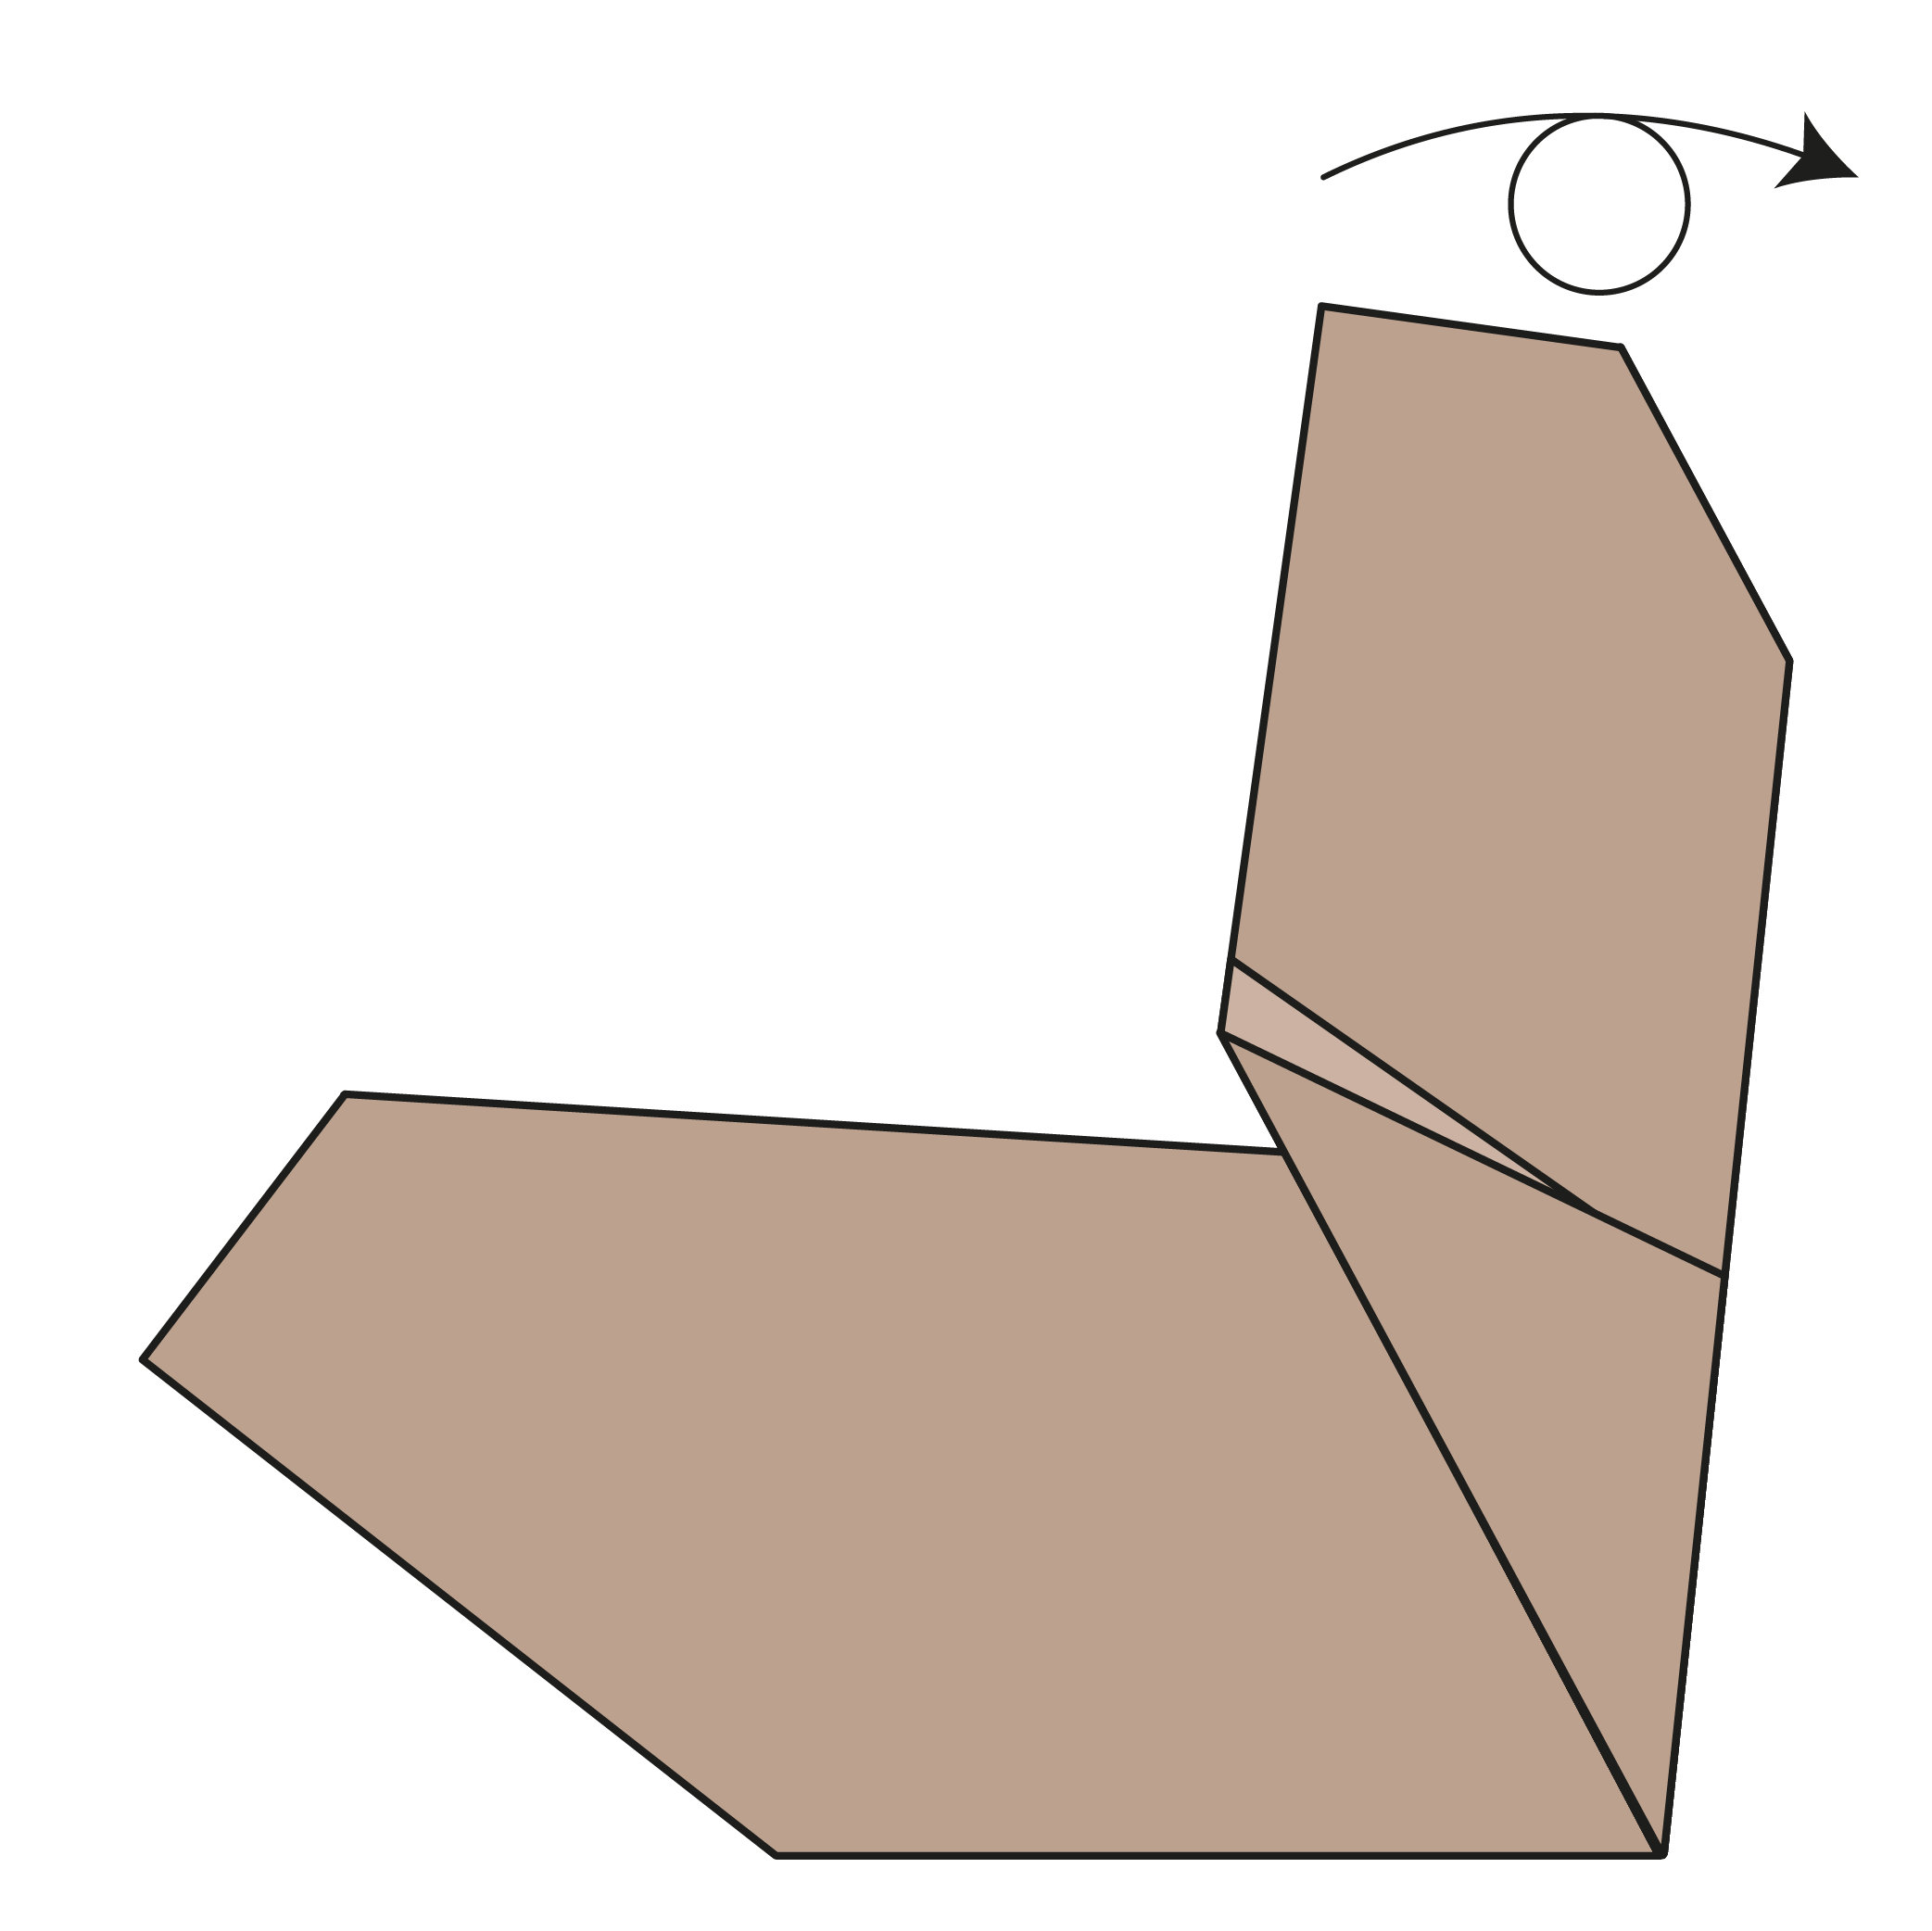
Turn the model over.
Step 8
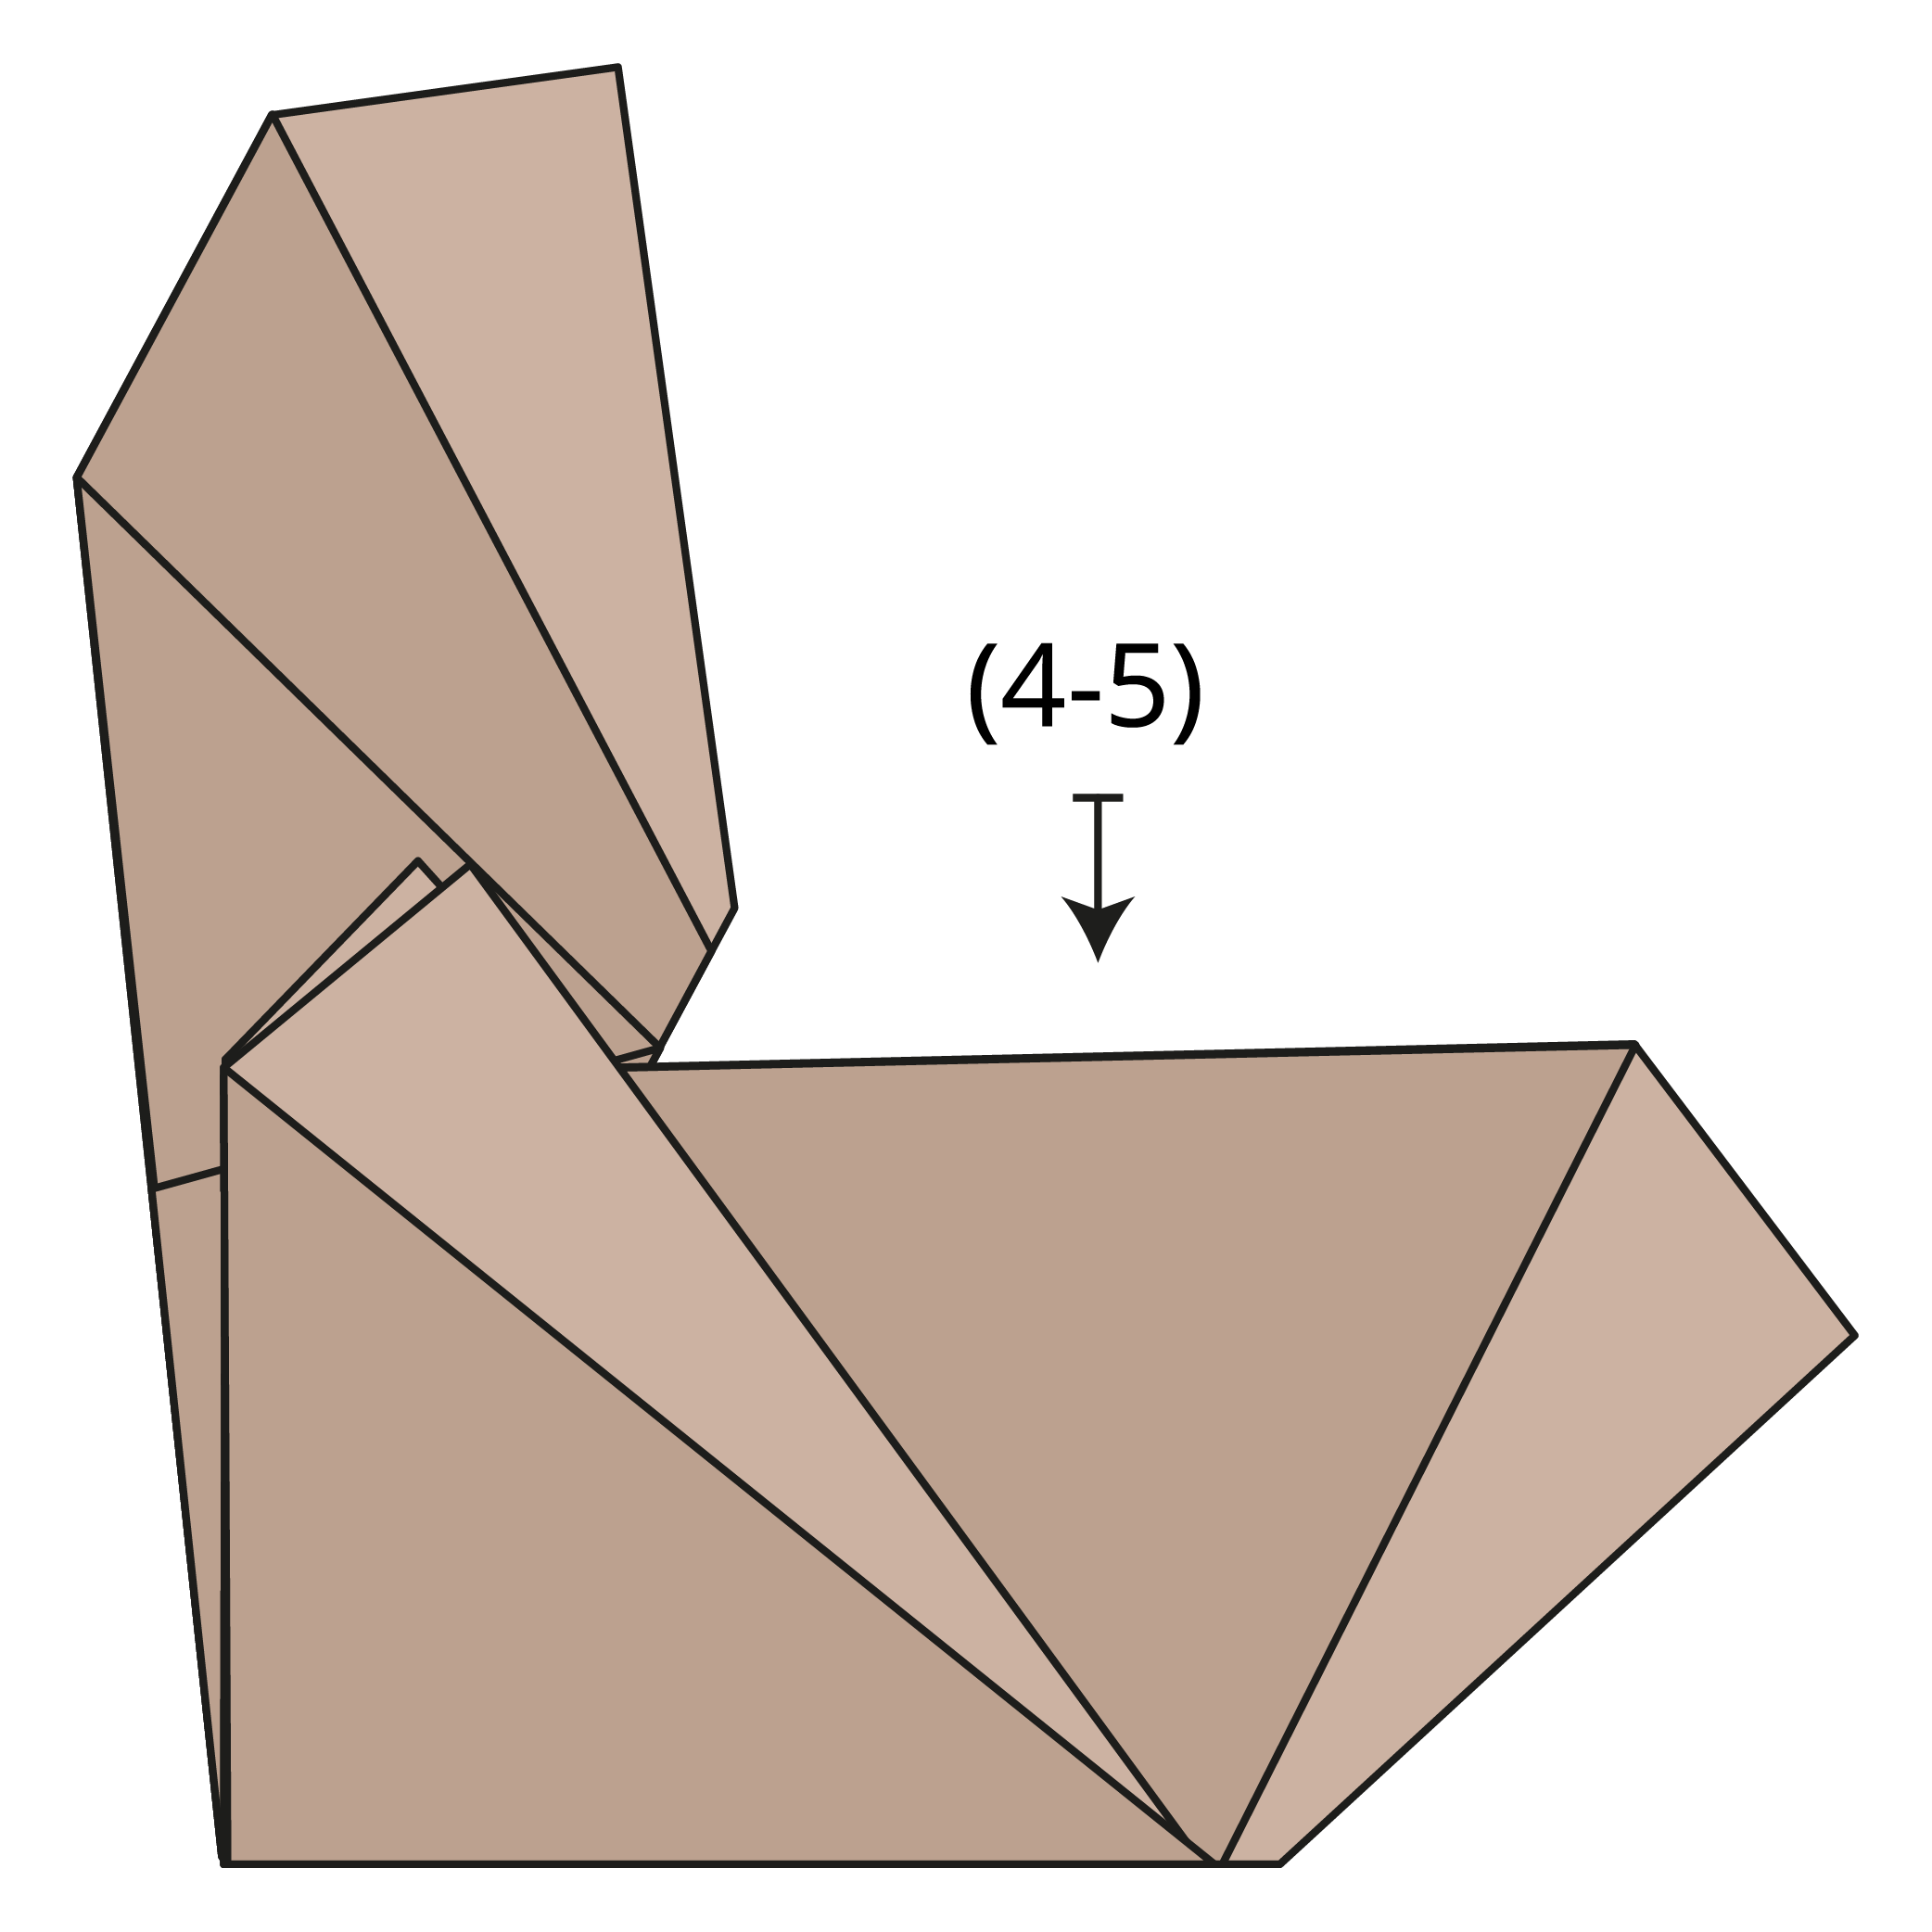
Repeat Steps 4 and 5 on the other bat’s wing.
Step 9
Gently open the model a little to reach the center.
Step 10
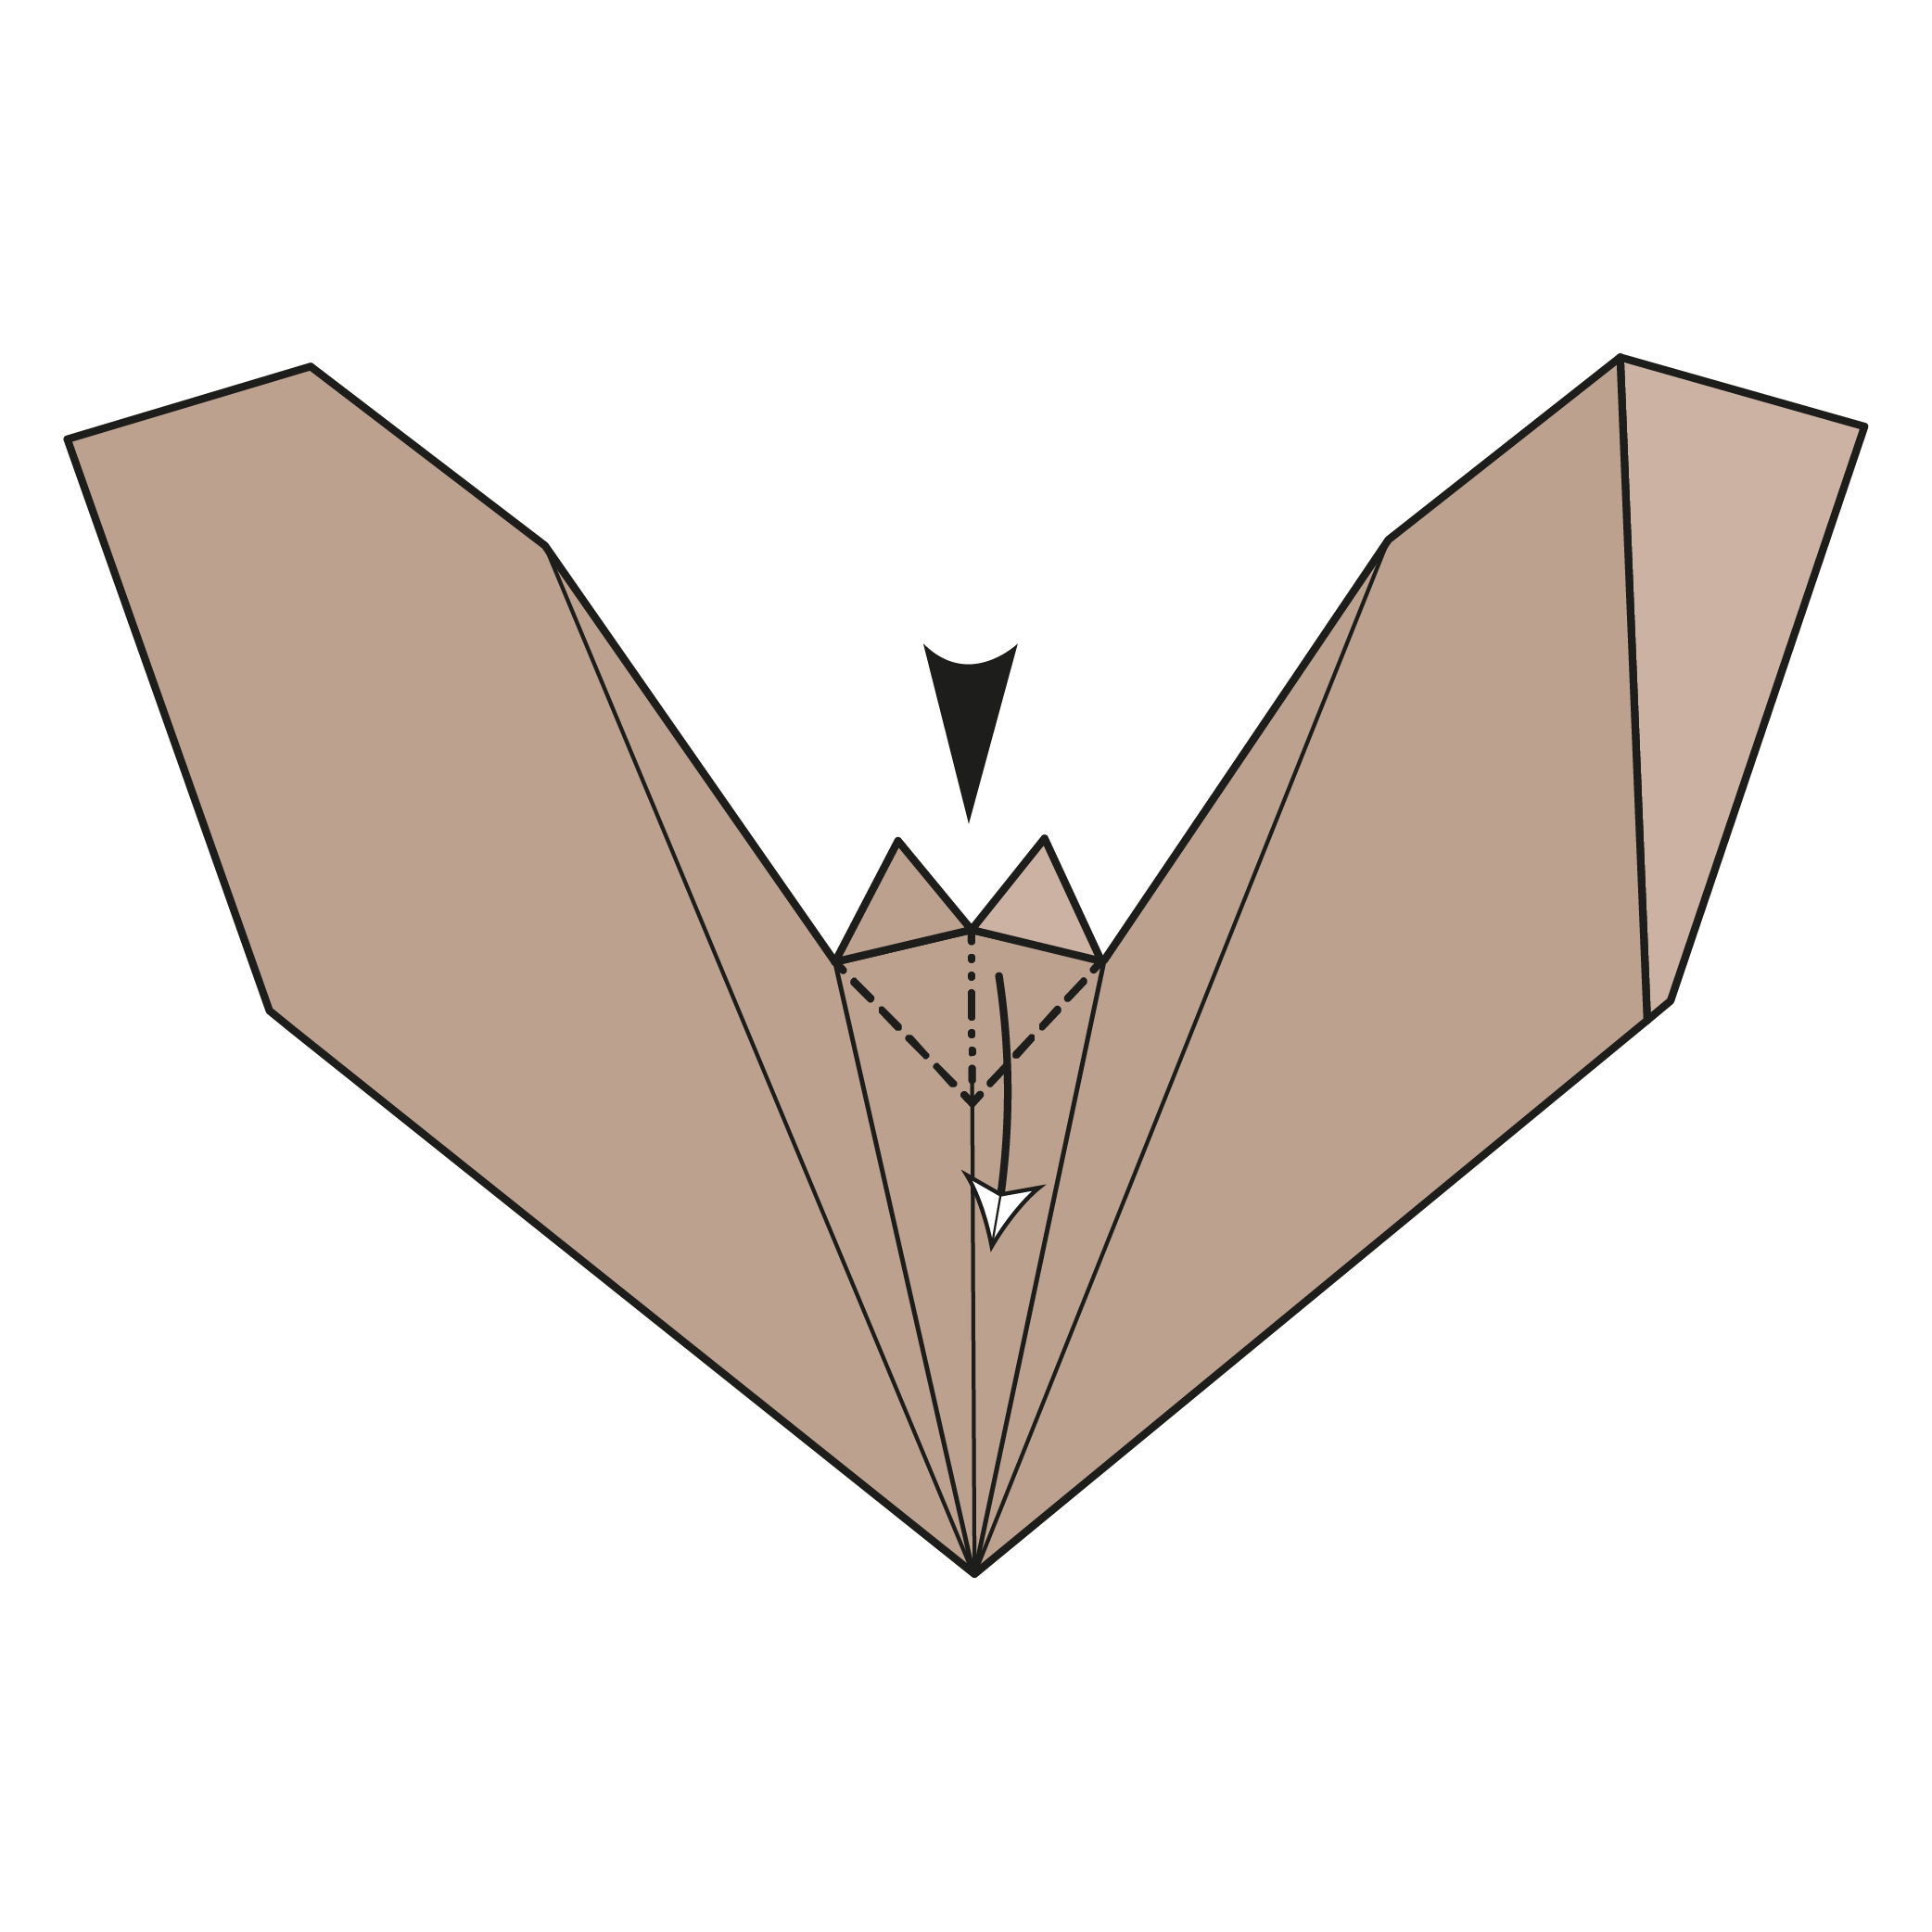
At the center, press the top layer down and fold along the dotted lines.
Step 11
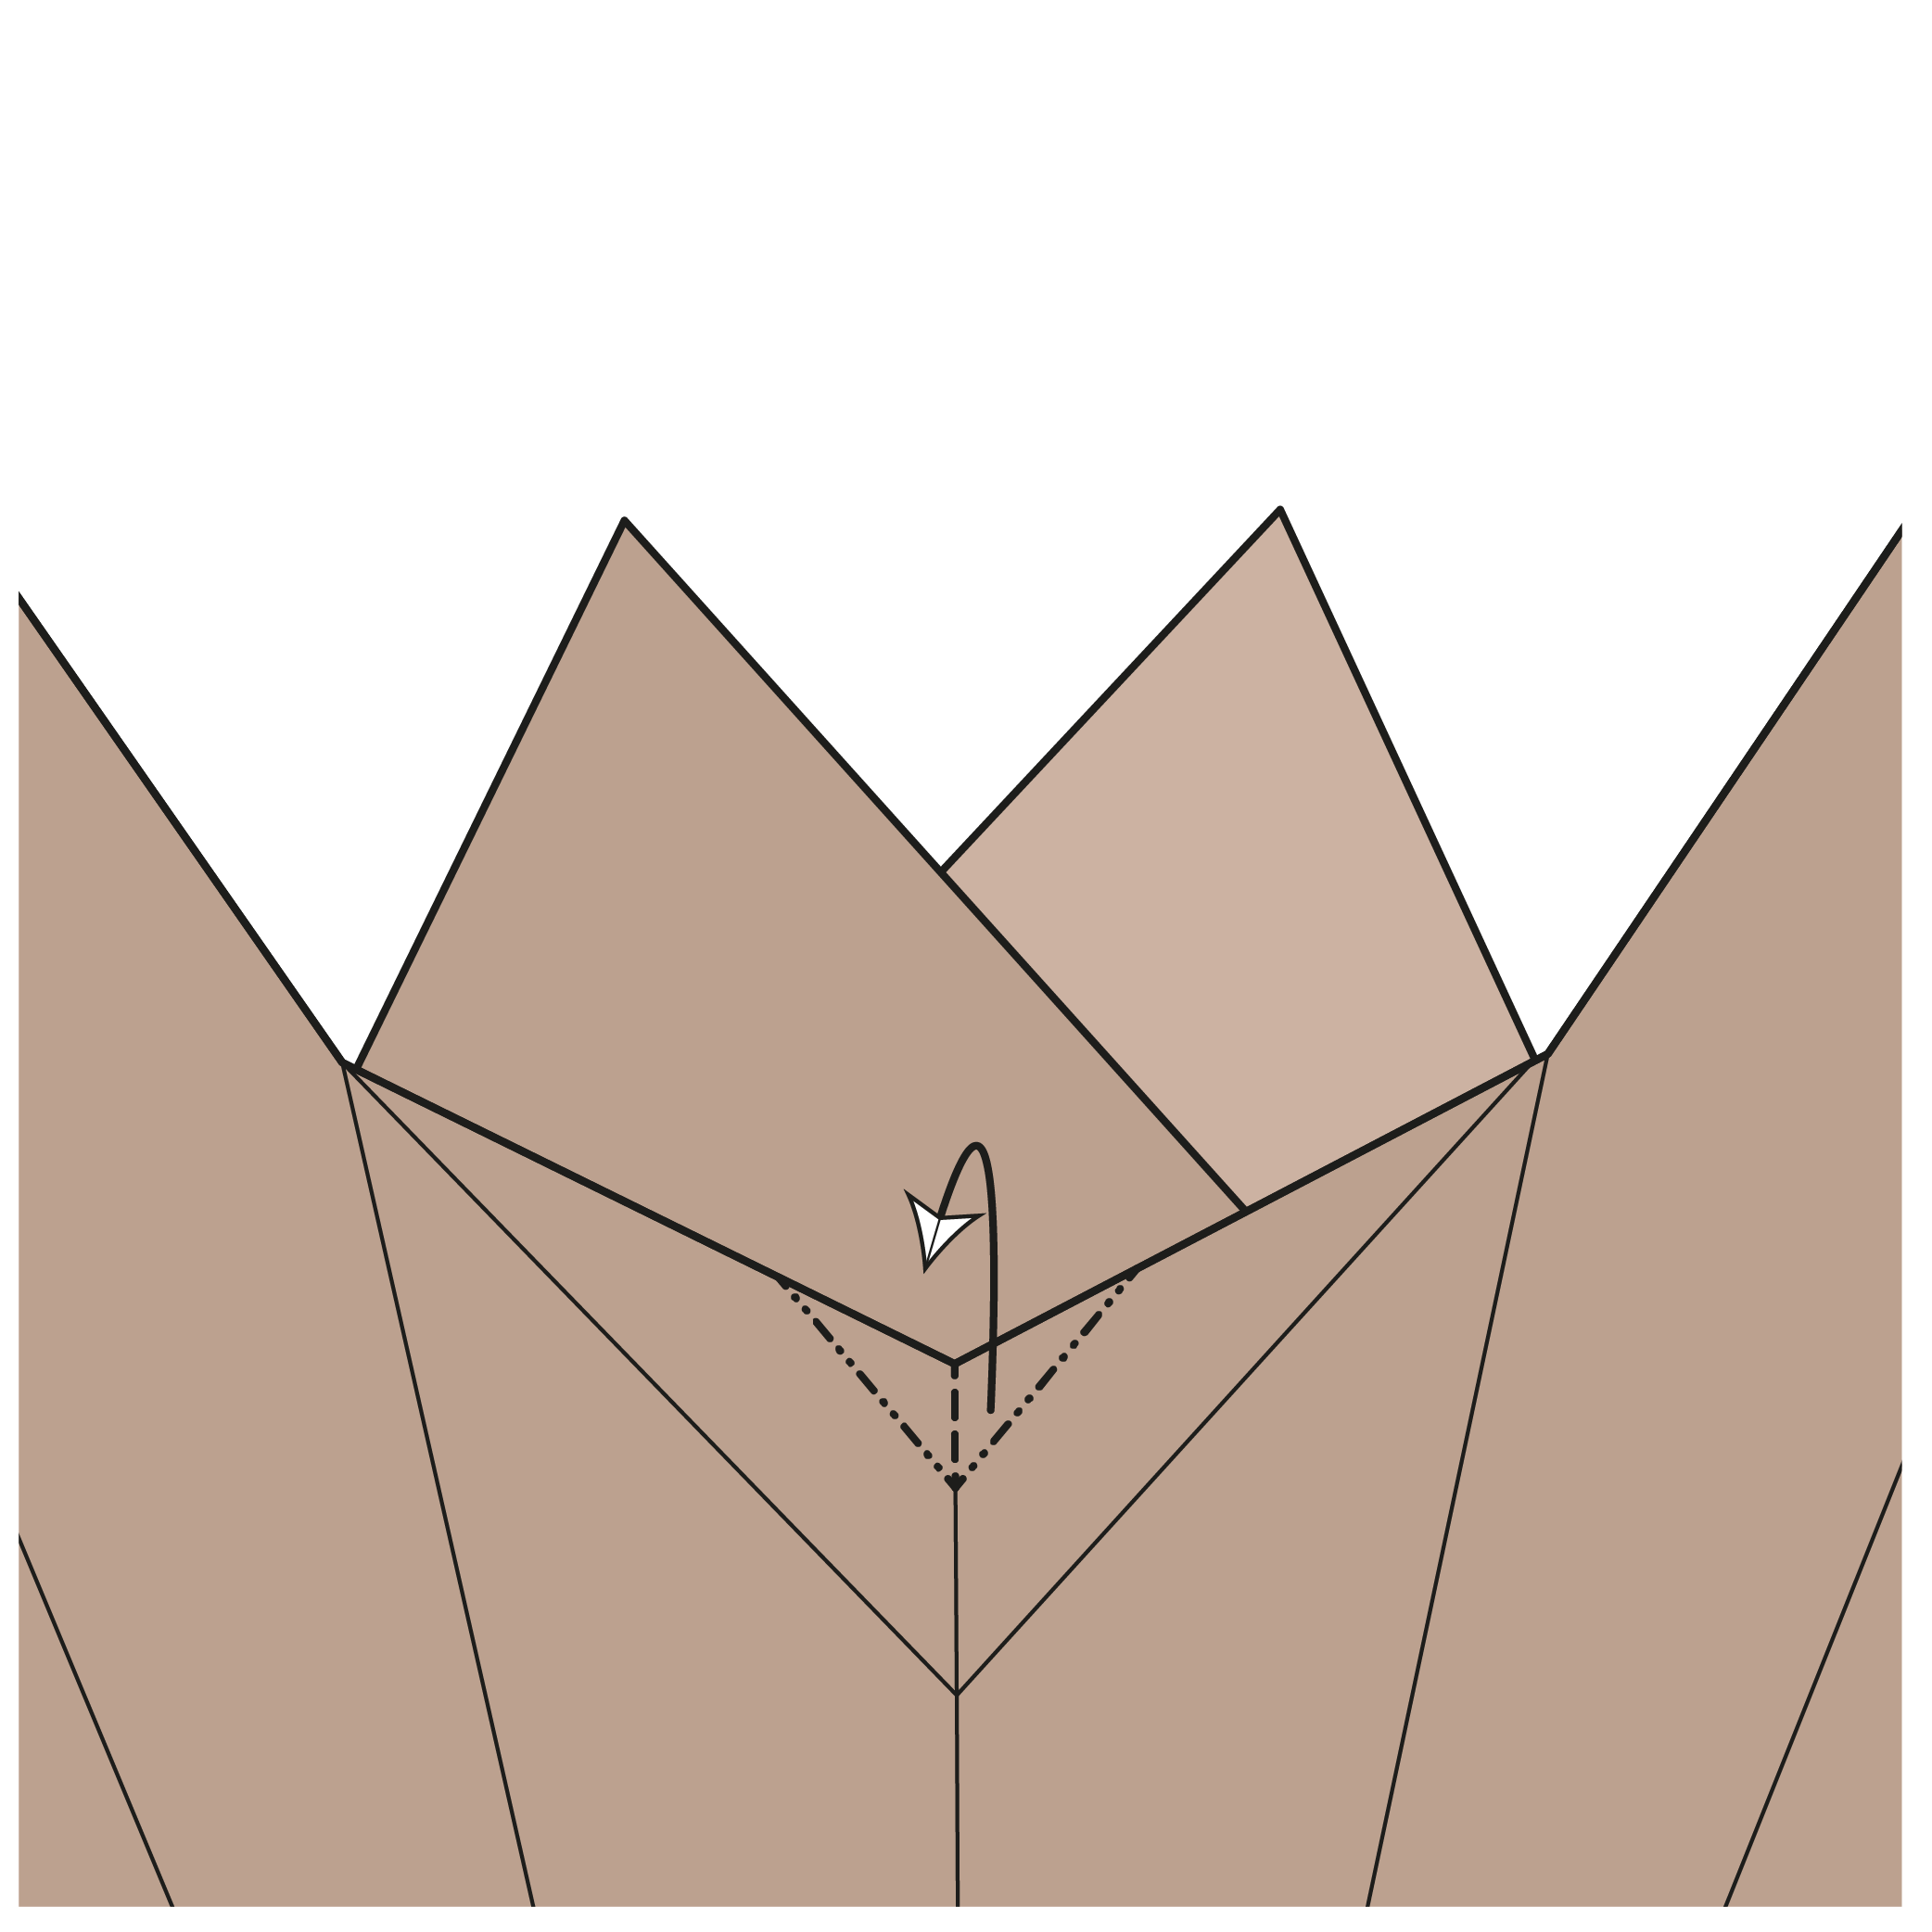
Push the tip of the flap you just made (in Step 9) upward.
Step 12
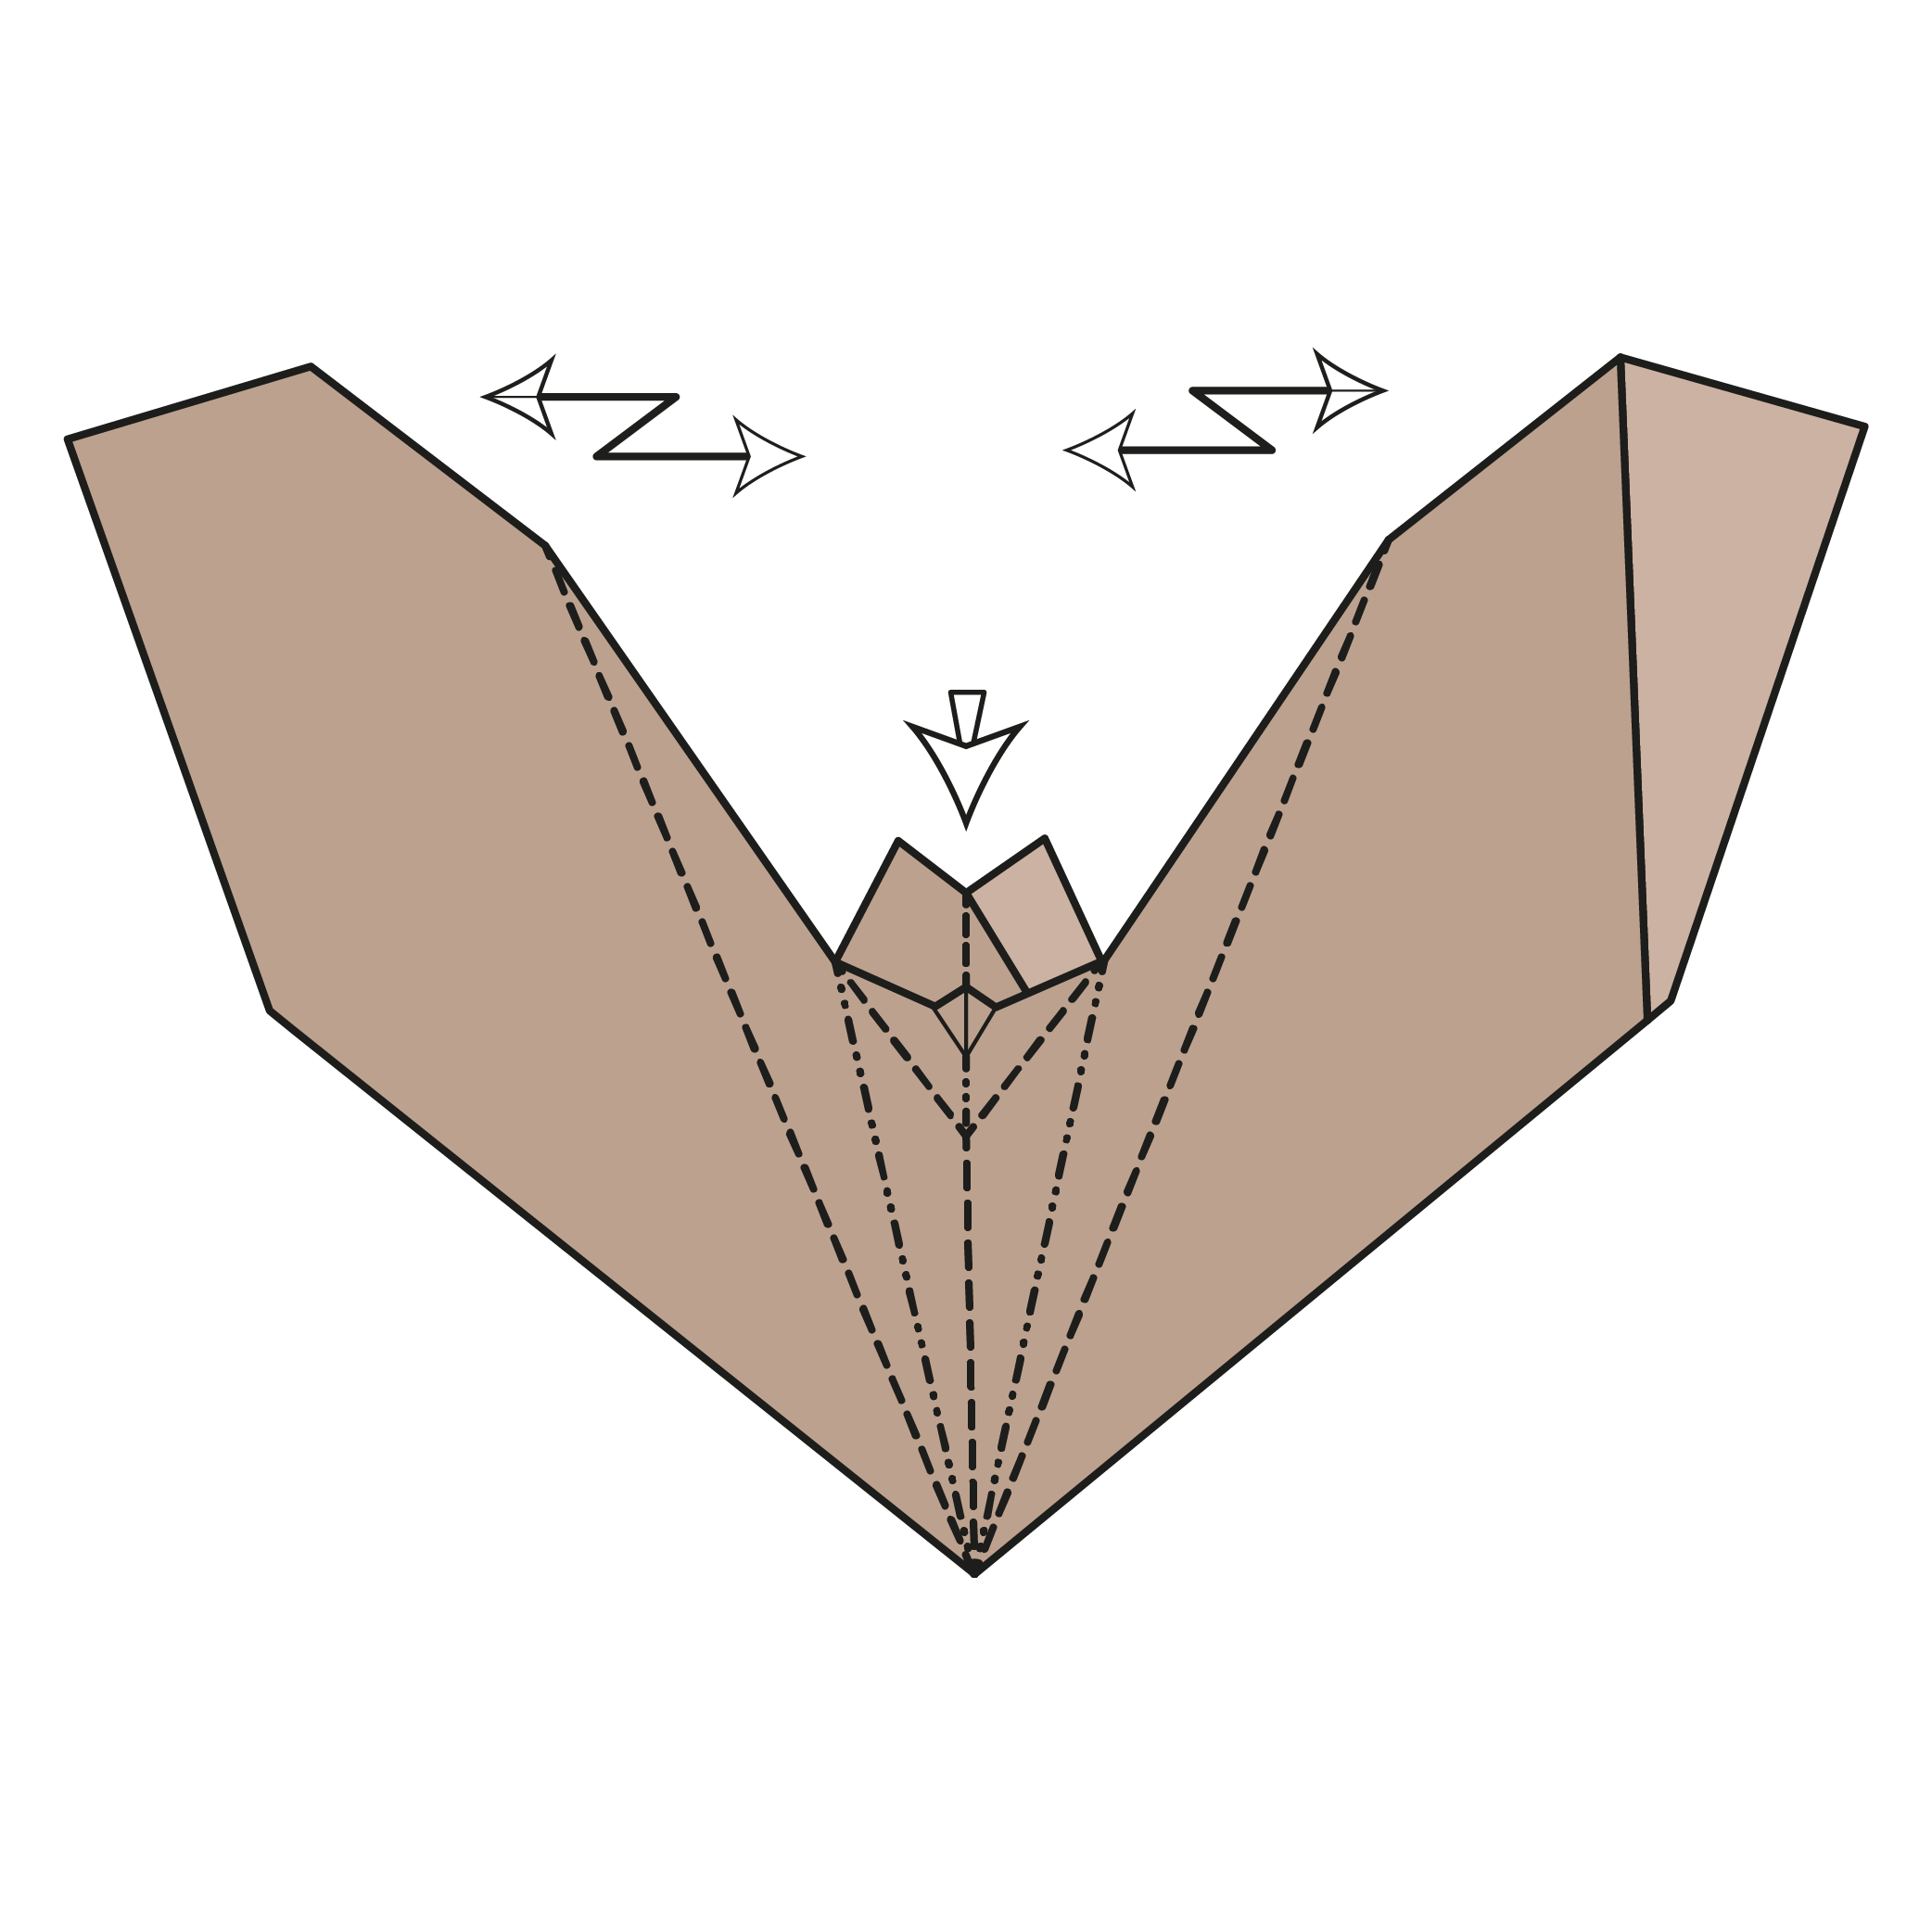
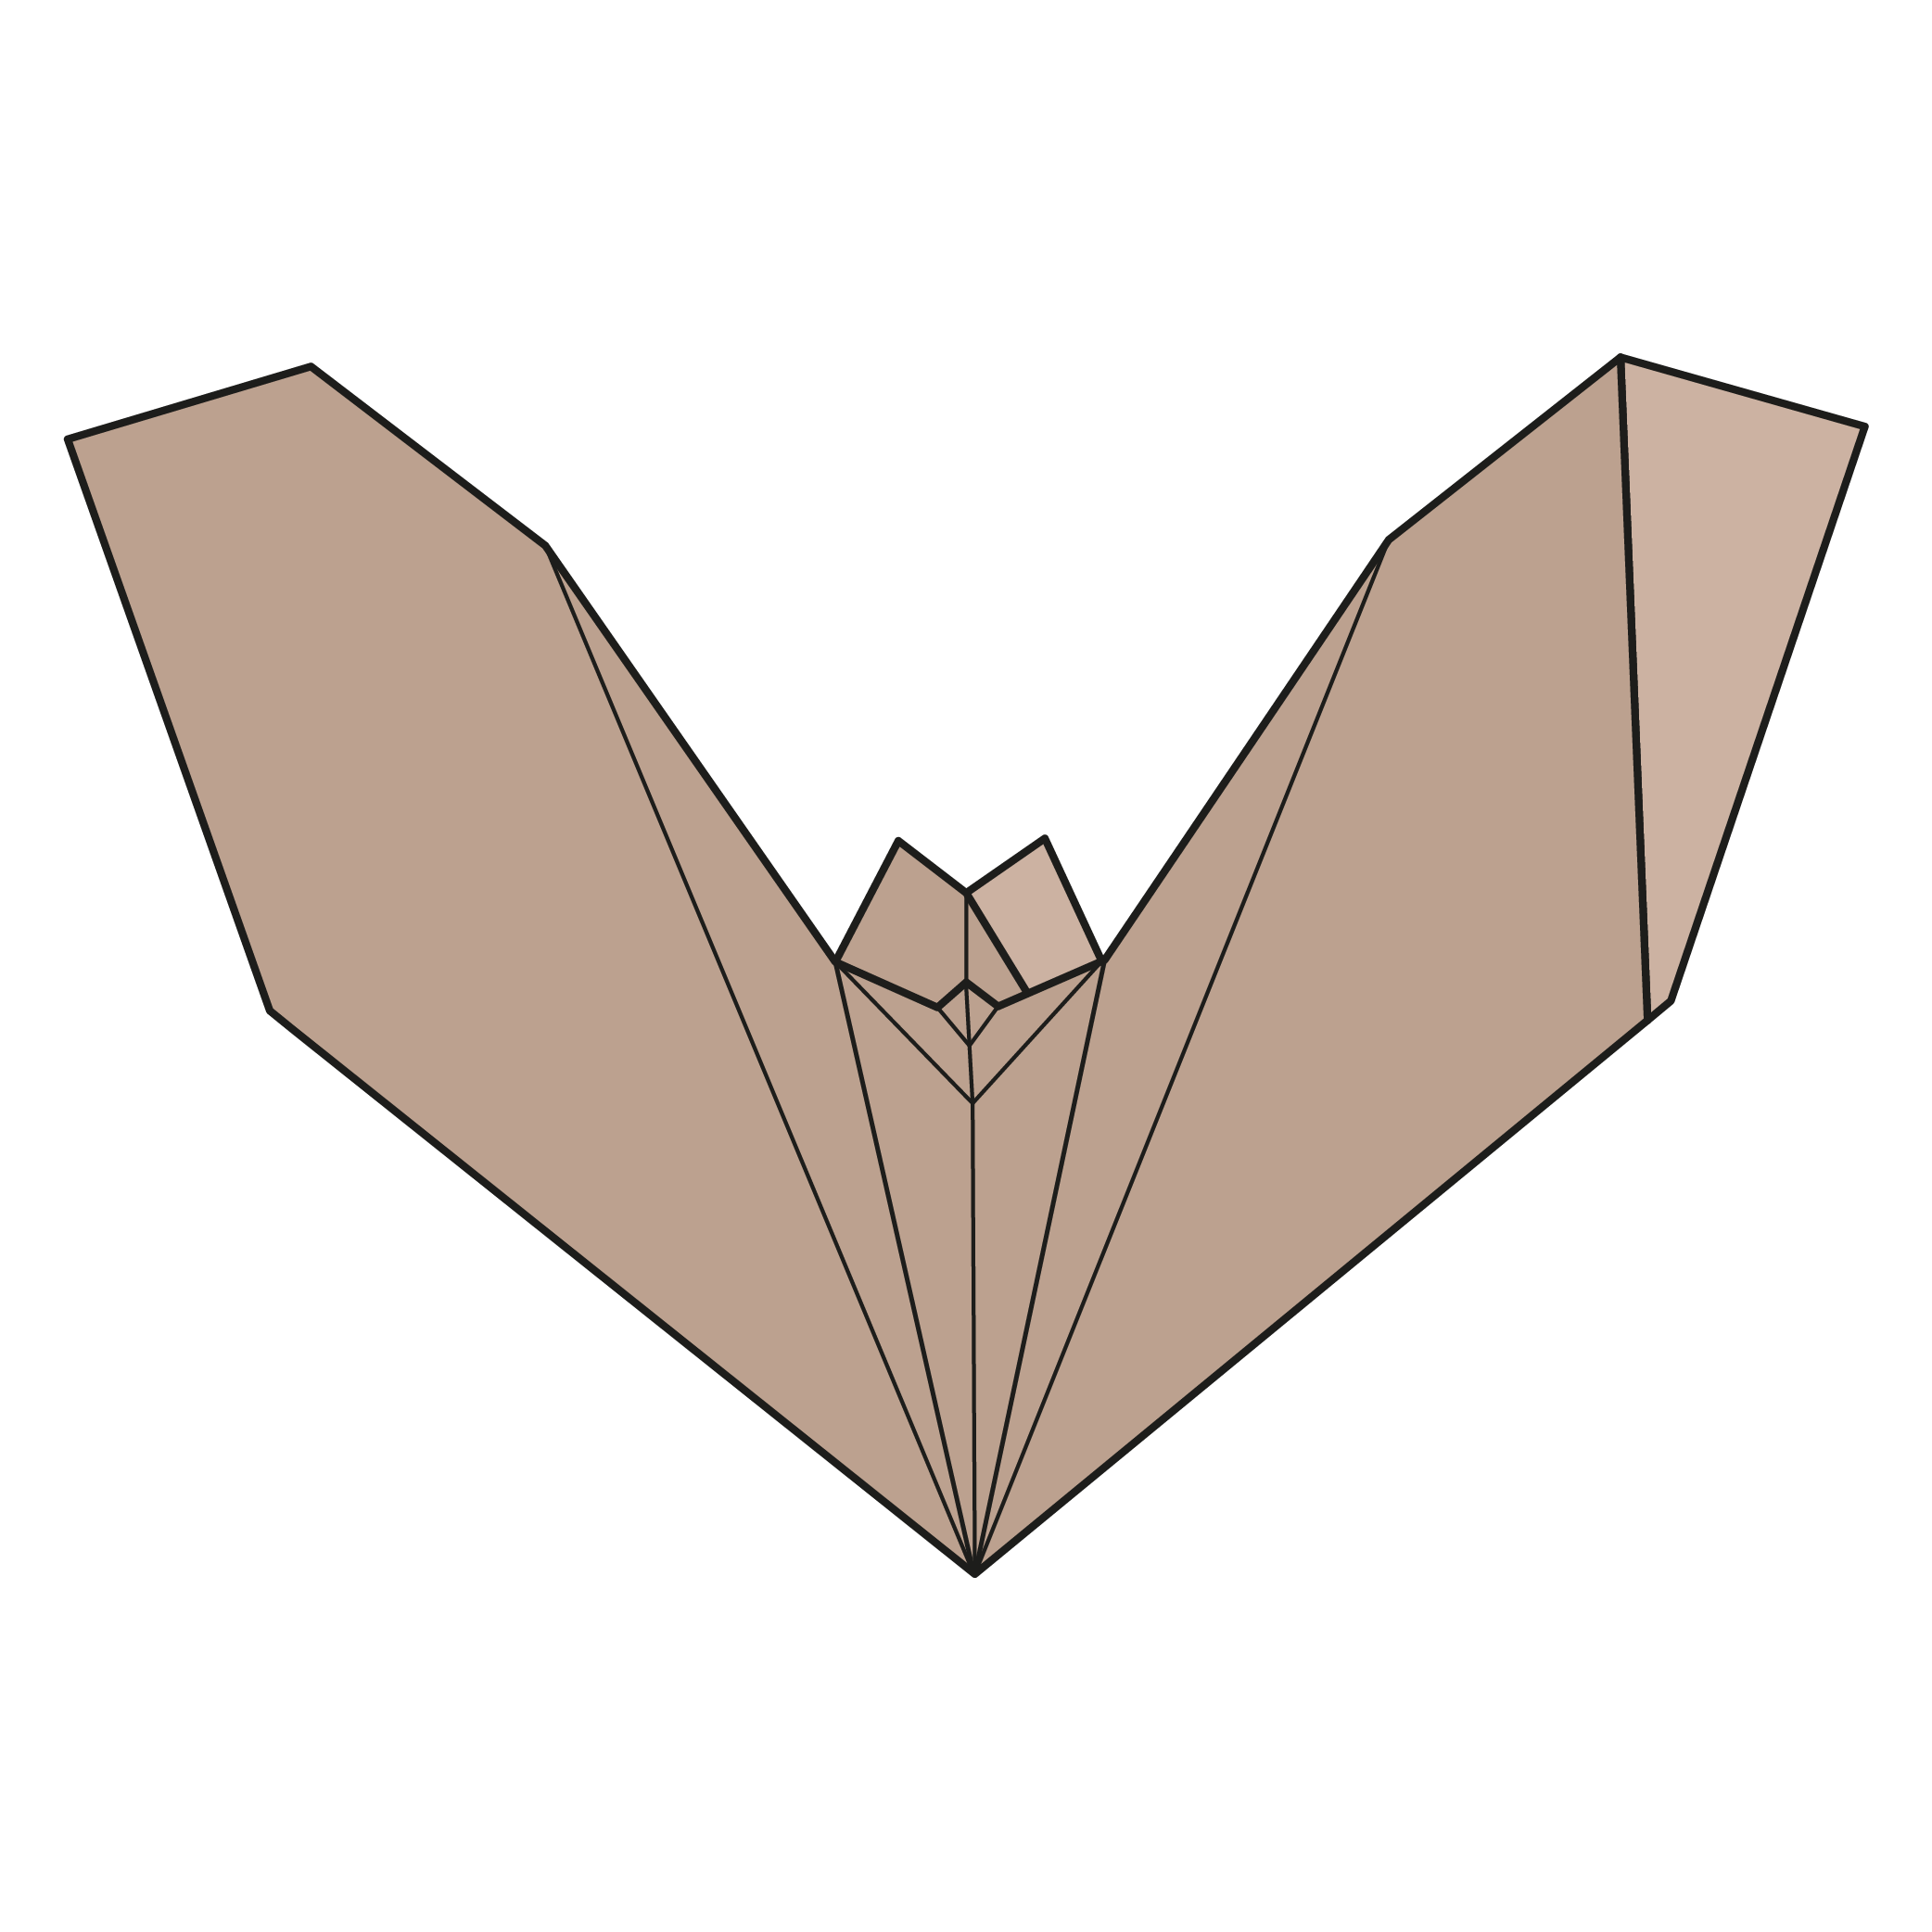
Close the model again and squash the new crease nicely. Then, open the model by gently spreading the wings.
Your origami bat is ready to fly! 🦇
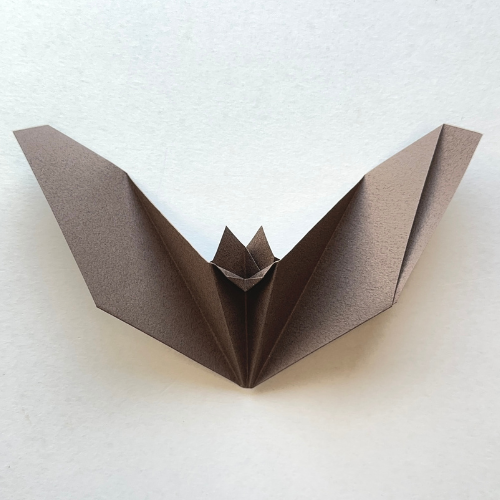
Well done on completing your origami bat!
It’s such a clever little model, quick to fold, with just enough surprise to keep it interesting. That first diagonal might feel a bit strange at first, but once the wings and ears come together, it all clicks.
If you had fun folding this, feel free to join our newsletter or subscribe to our YouTube channel for more. And if you share your bat online, don’t forget to tag us. We’d love to see how it turned out.
Download the Full Origami Bat Printable PDF Instructions

We’d love to keep you in the loop, so by sharing your email with us, you’ll be signed up for our mailing list. Don’t worry; we won’t bombard you with spammy emails, and your information is safe with us – we won’t share it with anyone else.
Watch the Origami Bat Video Tutorial
🌸 Enjoyed this tutorial? Subscribe to our YouTube channel for new inspiring origami videos every week!


cool