
How to Fold an Origami Floral Swirls
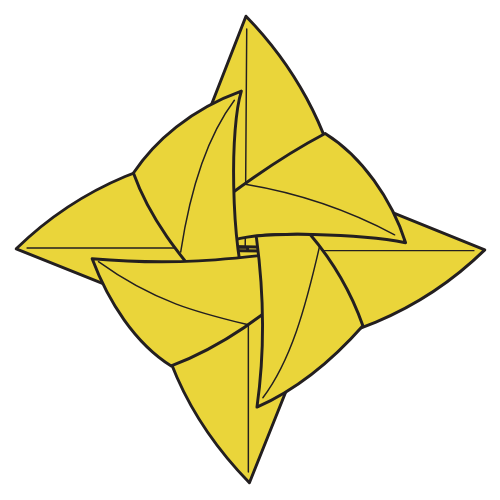
Floral Swirls is a modular origami model designed by Madhura Gupta. It’s built from just one circle of paper, divided into four units, which interlock to form this smooth, flowing, pinwheel-like flower.
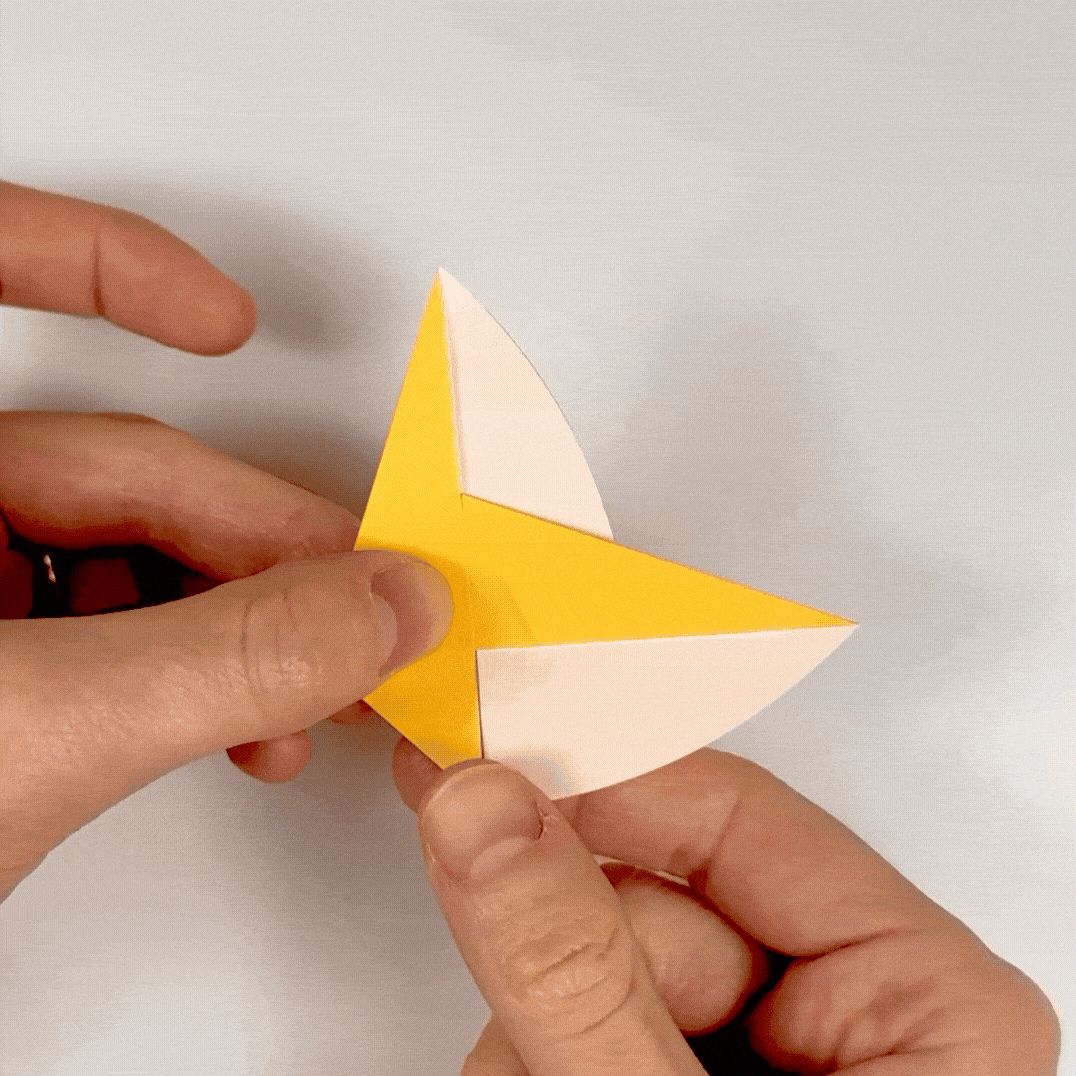
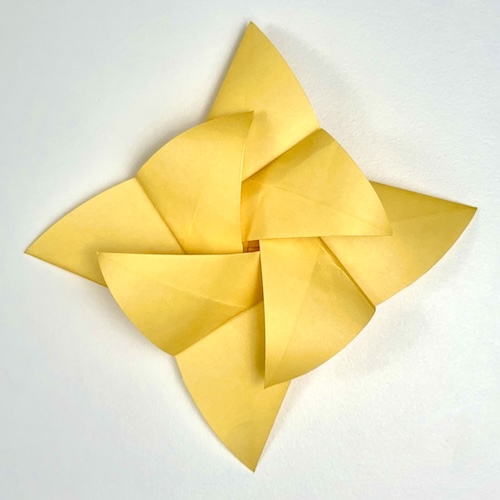
It’s a very easy and satisfying model to fold, and the final result is light, elegant, and surprisingly sturdy. As you can see in the photo, the curved petals tuck into one another in a gentle spiral that catches the light beautifully. It makes a lovely decoration for a gift, a table setting, or even a handmade card.
Origami Floral Swirls Step-by-Step Instructions
- Difficulty: Easy – Beginner level 2
- Folding time: 20 minutes
Recommended Paper
15×15 cm (6×6 in) Kami
Paper Preparation
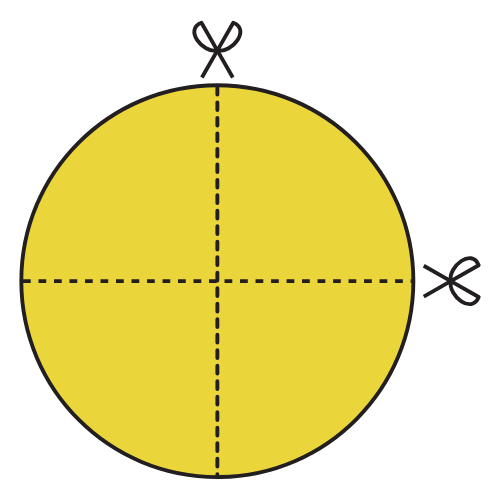
Step 1

Cut out a circle from a rectangular or square sheet of paper.
🌸 Folding tip: You can either draw a circle with a circular template, such as a plate or a pair of compasses, and then cut along the circle. You can also use a cutter compass as I do in the video.
Step 2
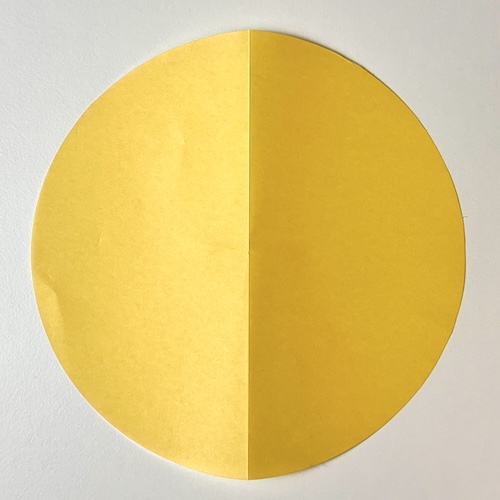
Fold the circle in half vertically, then unfold.
Step 3
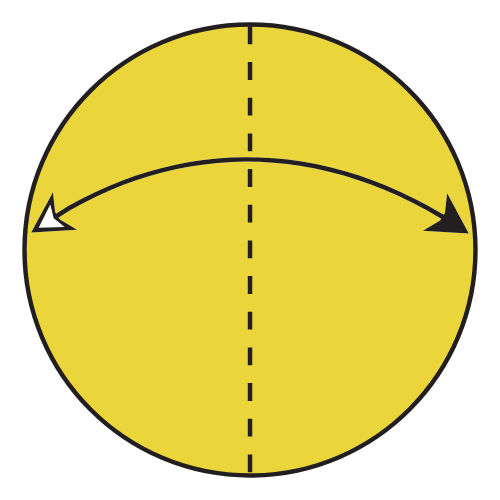
Fold the paper in half horizontally, then unfold.
Step 4
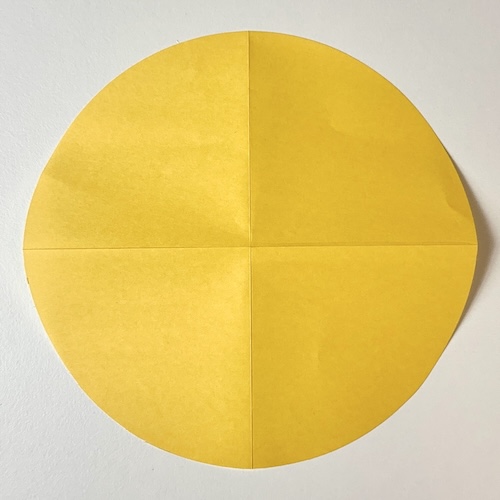
Cut along the creases you just made to divide the paper into four pieces.
Folding One Unit
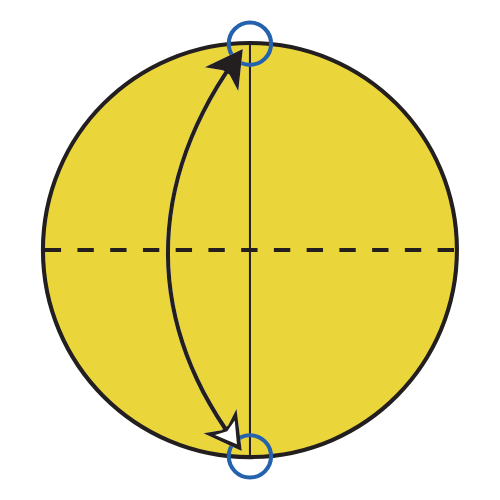
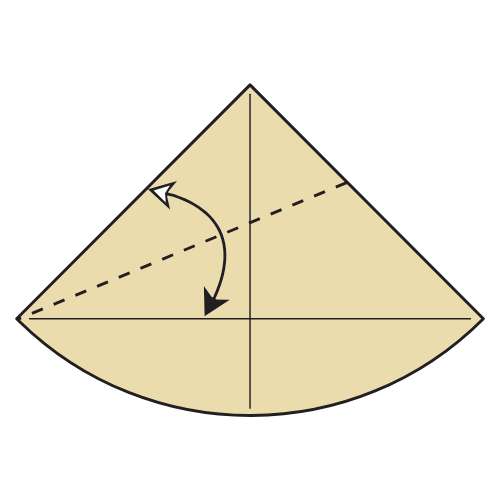
Step 1

Make a fold-line that connects the bottom left and right corners, then unfold.
Step 2

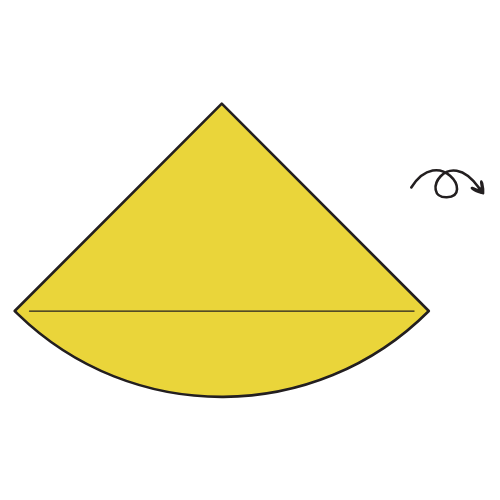
Turn the paper over.
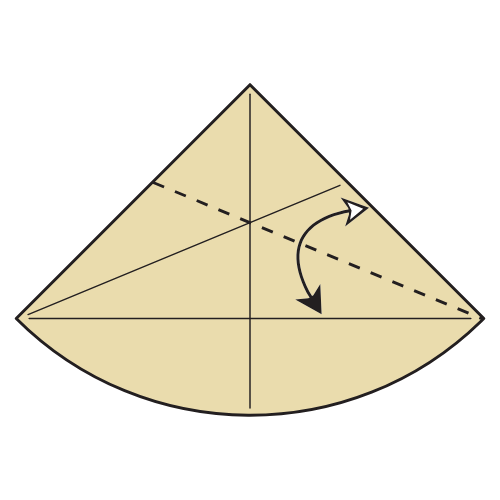
Step 3


Fold in half vertically, then unfold.
Step 4

Fold the left edge to the horizontal line. Then unfold.
Step 5

Fold the right edge to the horizontal line. Then unfold.
Step 6
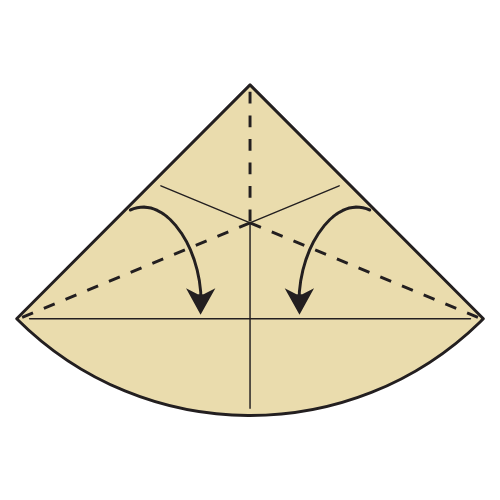

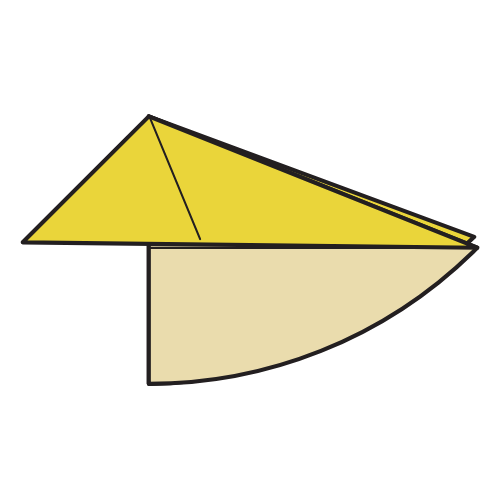
Begin to rabbit-ear fold the corner. Then, fold the left corner behind the right corner and flatten the paper.
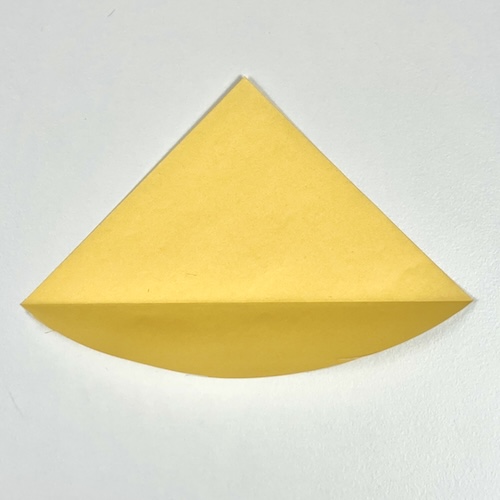
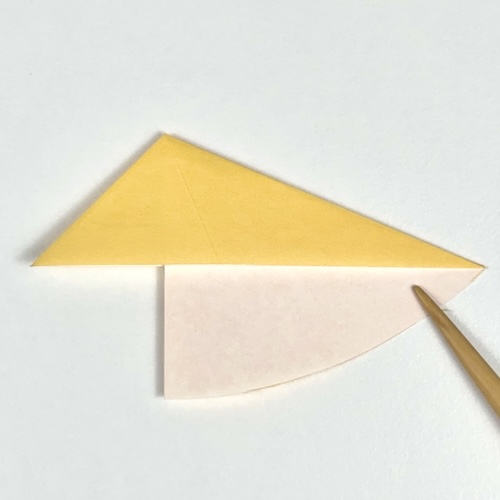
The Completed Unit
Assembly
Step 1

Take two units and rotate the left unit 90° counterclockwise.
Step 2


Slide the corner of the right unit under the edge of the left unit so that it touches the circled corner.
🌸 Folding tip: You can use paper clips to stop the units from moving. This will make the assembly and folding steps easier.
Step 3

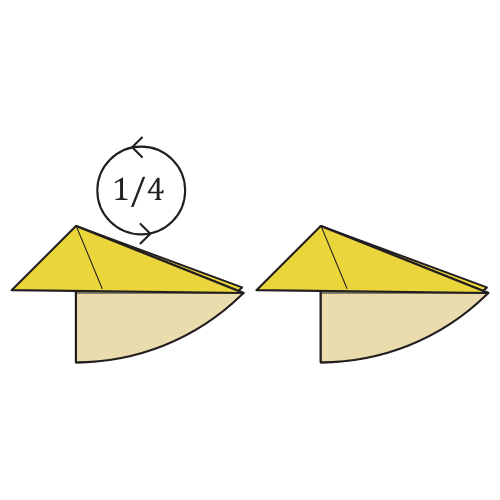
Rotate the units 90° counterclockwise.
Step 4

Take another unit and repeat Step 2. Make sure the circled point is above the new unit.
Step 5


Rotate the units 90° counterclockwise.
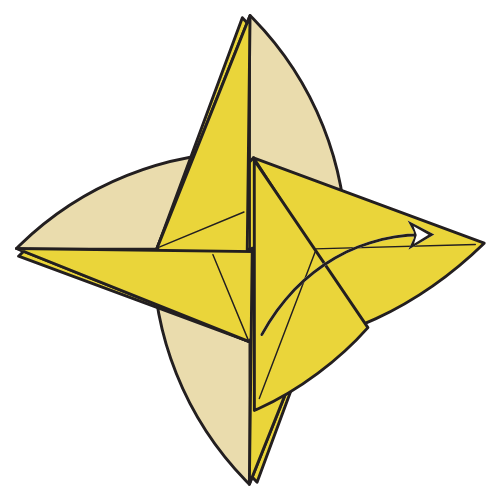
Step 6
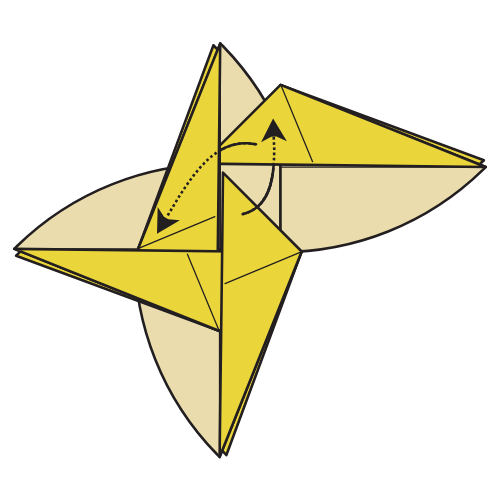
Take another unit and repeat step 2 twice simultaneously. The new unit slides into the pocket on the left and the corner of the first unit slides into the pocket of the new unit.
Step 7

Fold the right edge down to meet the vertical centerline (one layer only). Then unfold.
Step 8

Fold the top edge down to meet the horizontal centerline (one layer only).
Step 9

Fold the left edge down to meet the vertical centerline (one layer only).
Step 10
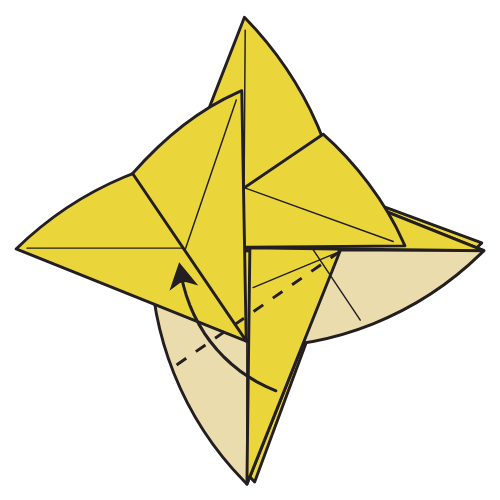
Fold the bottom edge down to meet the horizontal centerline (one layer only).
Step 11

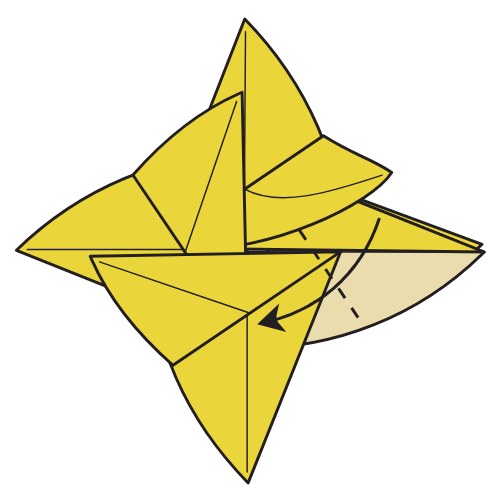
Lift the indicated flap slightly, then fold along existing creases made in Step 7.
Step 12

Curl the flaps slightly to make the model more three-dimensional.
The Completed Origami Floral Swirls
I hope you enjoyed folding this graceful design!
Don’t forget to check out Madhura’s work on her Instagram. And don’t hesitate to share your creations with her on socials and in the comments below.
If you’d like more relaxing models like this one, join our origami newsletter to get more beautiful models sent straight to your inbox.

Download the Complete Origami Floral Swirls Printable PDF Instructions
This printable PDF is part of our Origami Friends membership on Patreon. As a member, you get access to these diagrams, our full library of printable PDFs, and member-only content.
Watch the Origami Floral Swirls Video Tutorial
Enjoyed this tutorial?
Subscribe to our YouTube channel for new inspiring origami videos every week!


first