
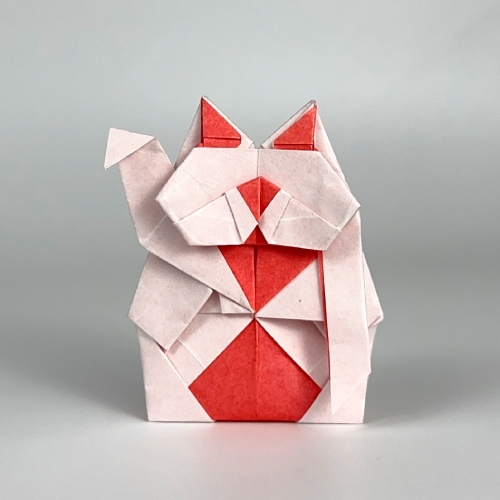
How to Fold an Origami Lucky Cat
Oriol Esteve’s Maneki Neko is one of those models that leaves a mark.
It’s fun to fold, full of detail, and instantly recognizable. No wonder it’s become a favorite in the origami community.
It’s a low-intermediate design, perfect for folders with a bit of experience under their belt.
Oriol originally created it as a tribute to Japanese culture, and it was later featured by Makoto Yamaguchi in a compilation book.
Since then, the folding sequence has been subtly refined, most recently with help from Japanese artist Kei Morisue, making it even smoother and more enjoyable to fold.
Origami Lucky Cat Step-by-Step Instructions
- Difficulty: Low-Intermediate
- Folding time: 20-30 minutes
Recommended Paper
15×15 cm (6×6 in) Kami or 24×24 cm (9.5×9.5 in) for display
Step 1
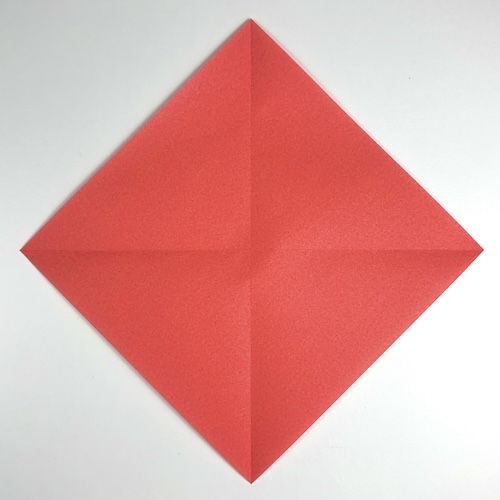

Start with the colored side facing up, in a diamond position. Fold both diagonals and unfold.
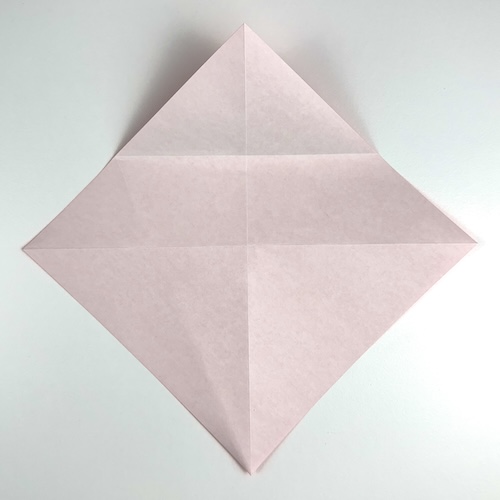
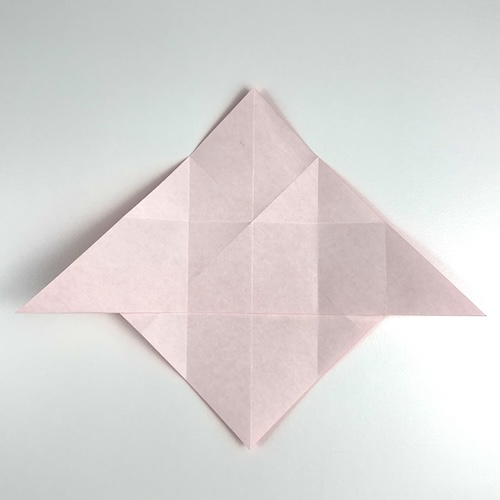
Step 2
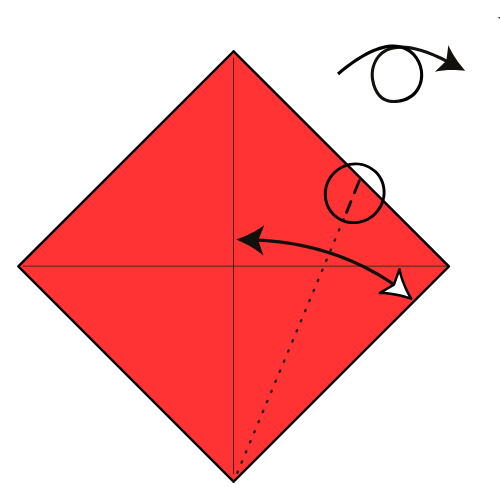
Fold the bottom right edge to the centerline, but only crease a small pinch at the top right edge level. Then, turn the paper over.
Step 3
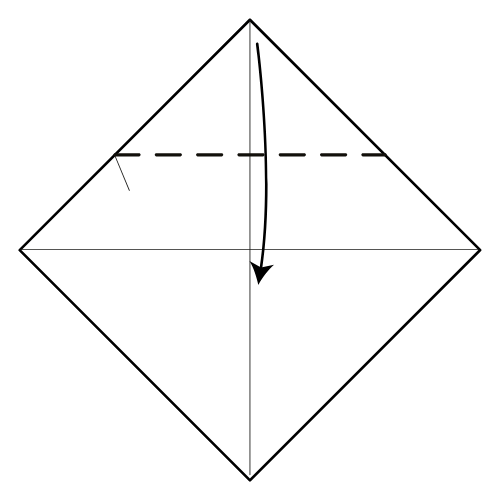
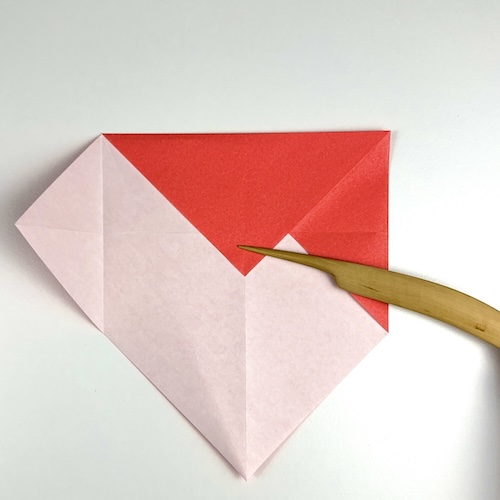
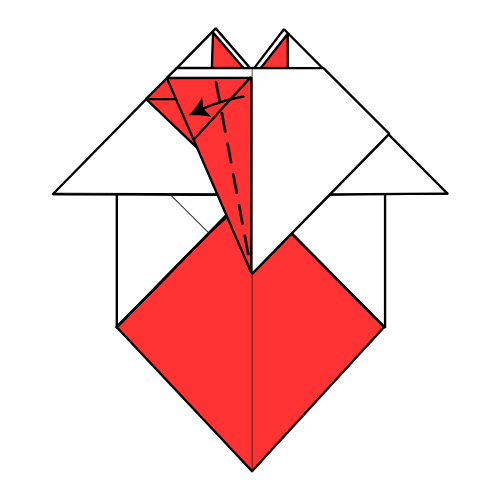
Use the pinch mark as a reference to fold the top corner down along the dashed line.
Step 4
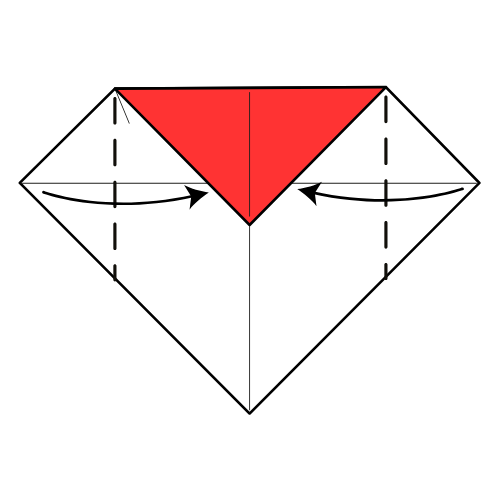
Fold the left and right corners inward so they touch the colored side of the paper.
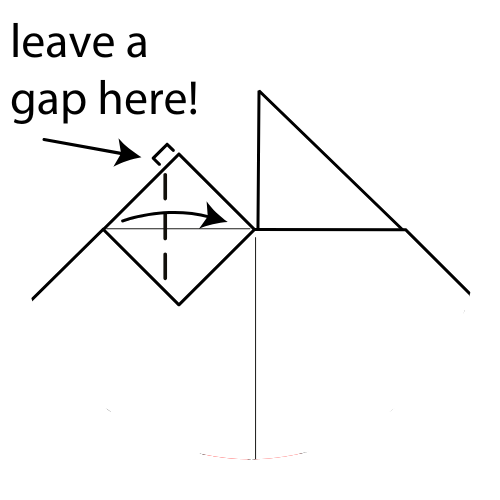
Step 5
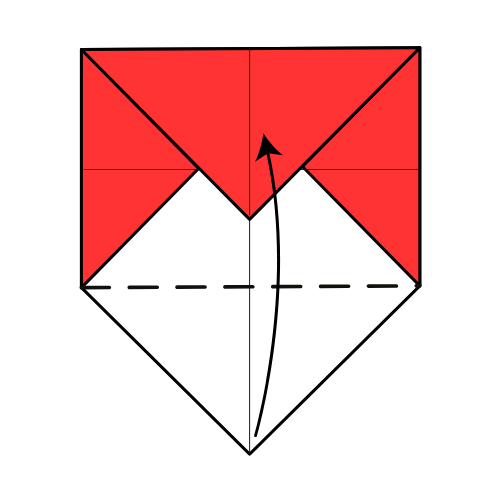
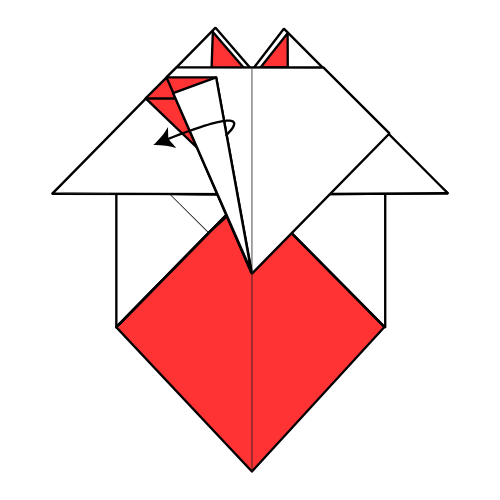
Fold the bottom corner up along the dashed line.
Step 6
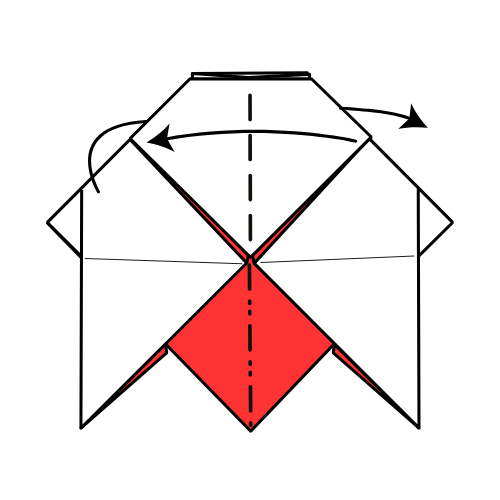
Unfold Steps 3 to 5.
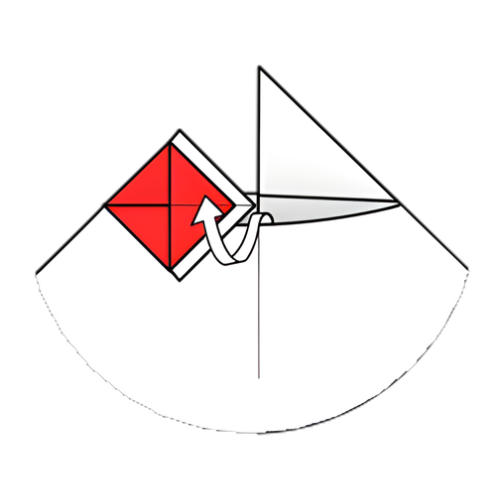
Step 7

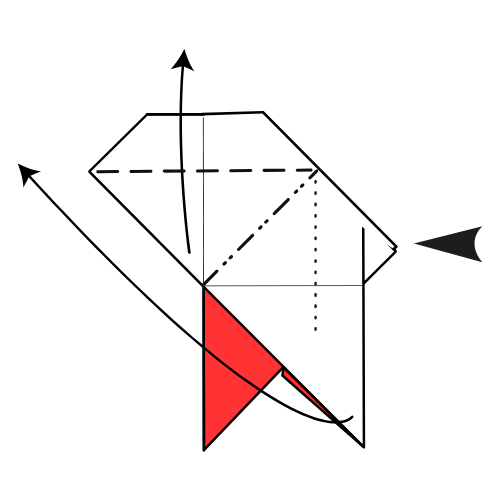
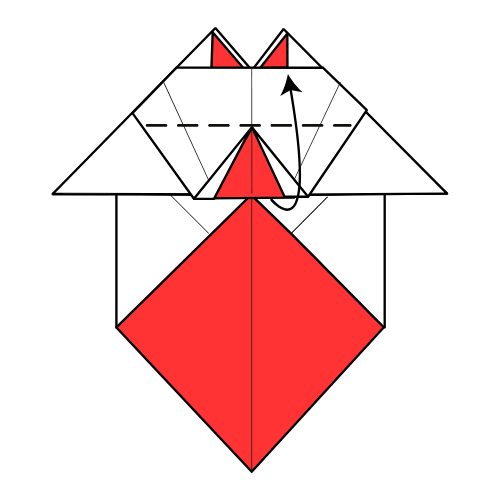
Fold the top horizontal line down to meet the horizontal diagonal.
Step 8
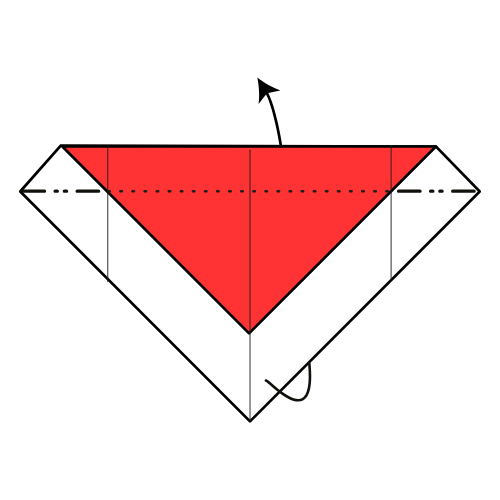
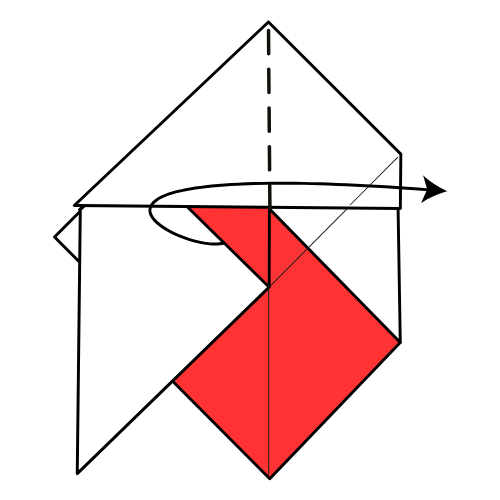
Mountain fold the bottom layer up along the horizontal diagonal.
Step 9
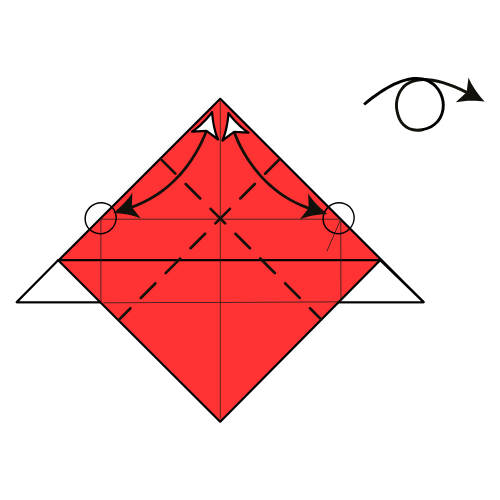
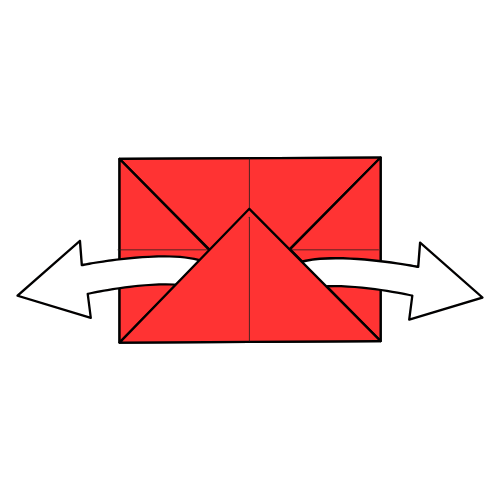
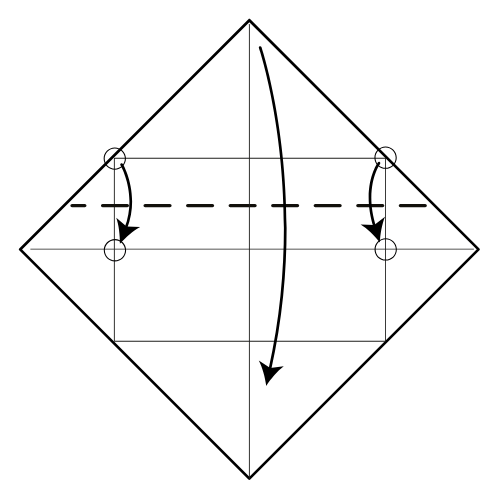
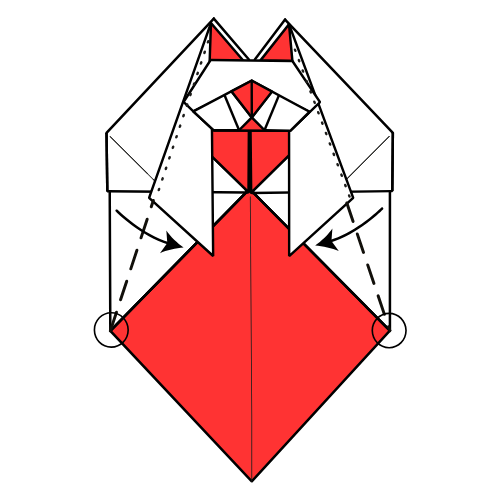
Fold and unfold the left edge to the circled point. Repeat for the right edge, then turn the paper over.
Step 10
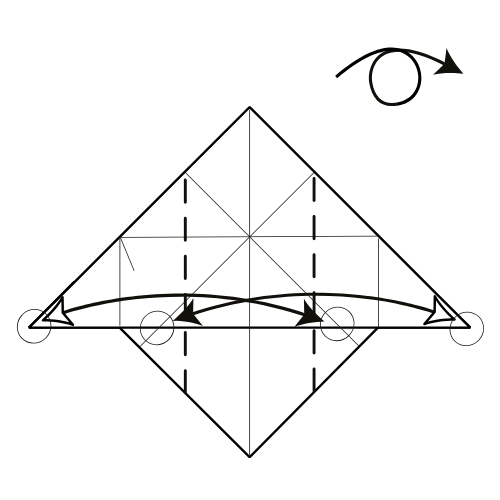
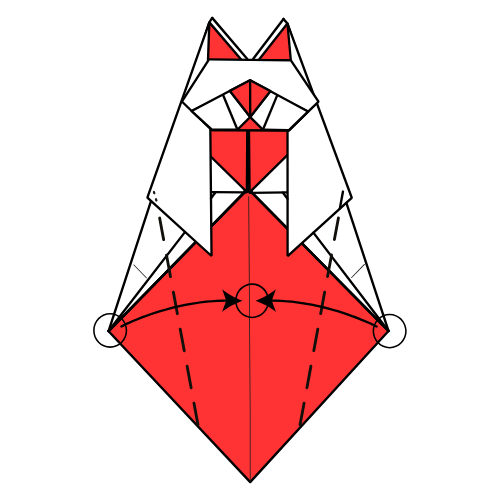
Fold and unfold the left corner to the circled point. Repeat for the right corner, then turn the paper over.
Step 11

Collapse the paper along the existing creases.
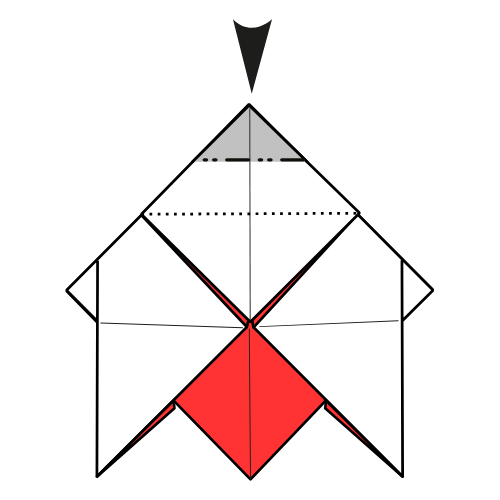
Step 12

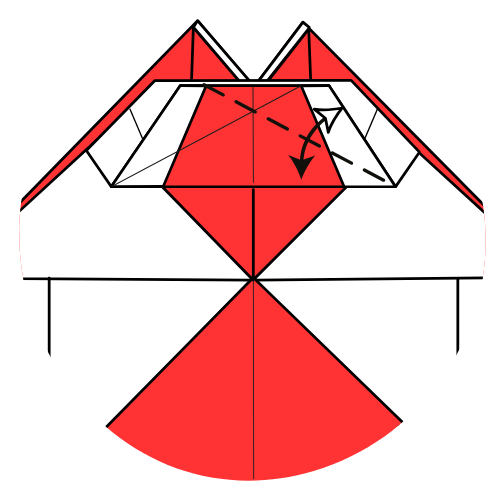
Fold the top corner to the center of the top square area. Crease well and unfold.
🐱 Folding tip: An easy way to find the center is to fold the bottom corner up to the top and make a small pinch at the midpoint of the vertical crease.
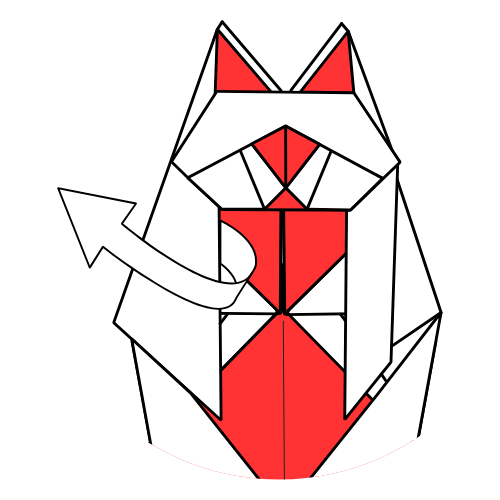
Step 13
Open sink the top area.
🐱 Folding tip: If sink folds are new to you, have a quick look at the video. It’s easier than it looks!
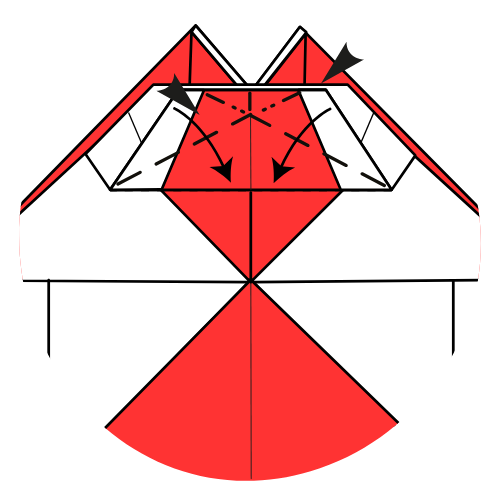
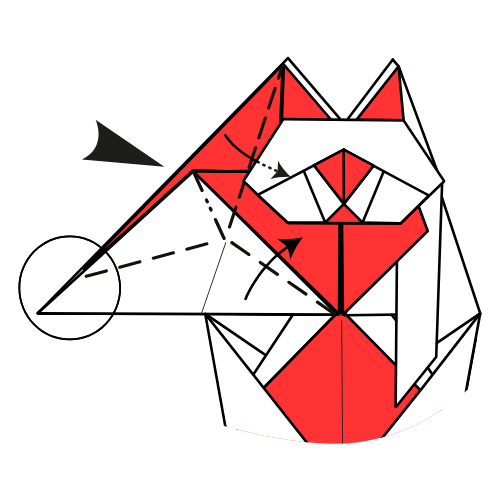
Step 14
Mountain fold the bottom left flap over to the right. Then, fold the top right flap over to the left.
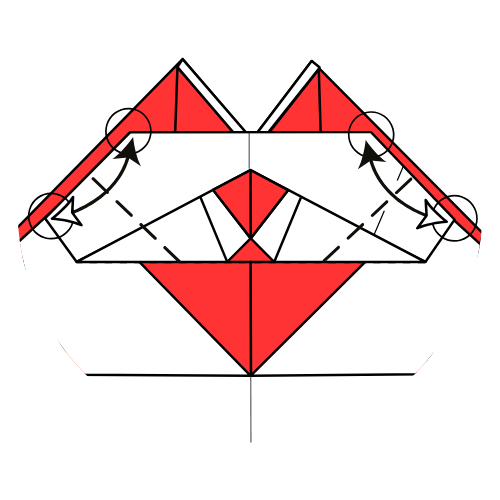
Step 15
Swivel fold the bottom right layer using the existing creases.
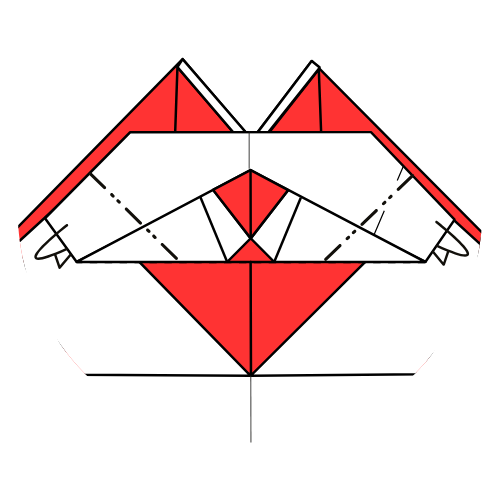
Step 16


Fold the bottom right flap to the left.
Step 17
Fold the top two left flap to the right.
Step 18

Repeat Steps 14 to 17 on the left side.
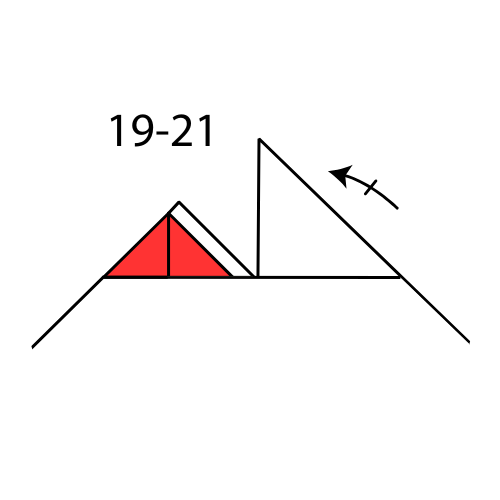
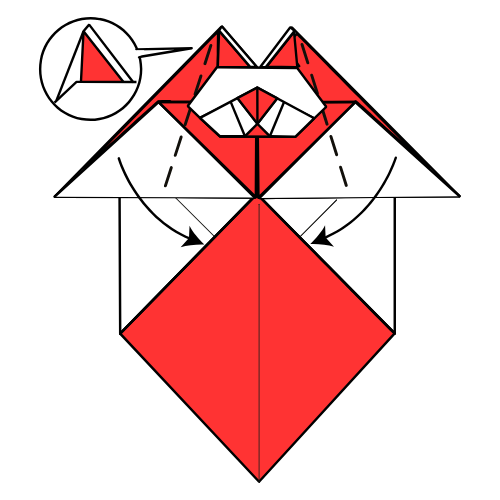
Step 19
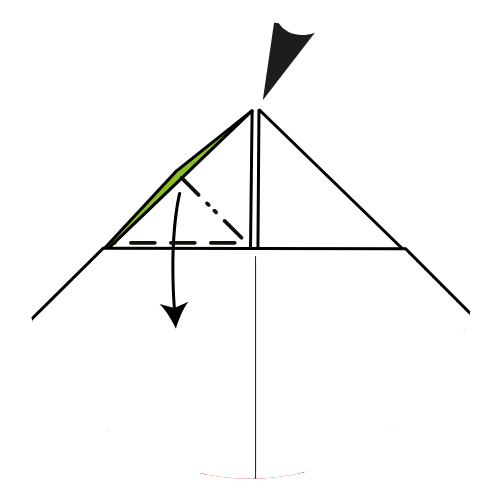
Squash fold the top left flap to form the ear.
🐱 Folding tip: Make sure the inner pocket shows the colored side of the paper.
Step 20
Fold the left corner over to the right. Leave a small gap!
Step 21
Tuck the bottom half of the ear into the pocket below.
Step 22
Repeat Steps 19 to 21 for the right ear.
Step 23
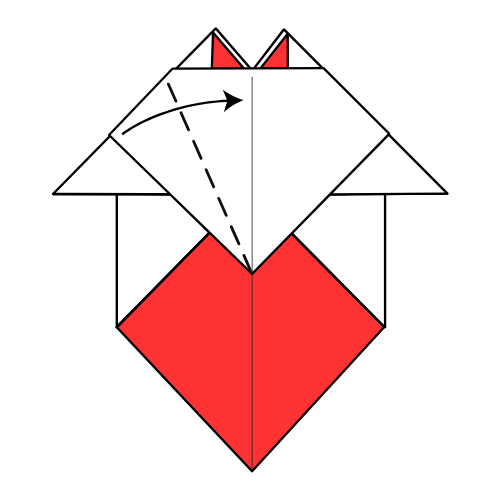
Fold the top flap’s left edge to the centerline.
Step 24
Fold the flap you just made in half.
Step 25
Unfold Step 23.
Step 26

Repeat Steps 23 to 25 on the right side.
Step 27

Find the bottom corner of the triangle flap under the top layer. Fold the top flap’s bottom corner to meet it.
Step 28
Fold the bottom edge of the top flap upward along the dashed line.
Step 29

Fold the top flap’s left edge down to meet the nearest horizontal line. Then, unfold.
Step 30
Repeat on the right side.
Step 31
Make a rabbit ear fold using the creases you just made. Tuck the central flap that sticks out underneath. Any side is ok!
Step 32
Fold the button’s left corner to the top left corner. Unfold, then repeat on the right.
Step 33
Mountain fold along the creases you just made.
Step 34

Mountain fold both the left and right edges inward.
Step 35
Fold the arms inward. Start the creases from the tips of the ears.
Step 36
Fold the left and right edges inward, using the circled points as a guide.
Step 37
Fold the left and right corners to meet the vertical centerline.
Step 38

Mountain fold the right side of the right arm. The arm’s left and right edges should stay parallel.
Step 39

Unfold the left arm.
Step 40
Make a rabbit ear-ish fold with the left arm, pointing it upward. Tuck the arm underneath the head.
🐱 Folding tip: Use the next diagram as your guide. First, position the arm upward and adjust the angle to your liking. Mark the bottom-right crease, unfold, then make the rabbit-ear fold. The video shows exactly how I do it.
Step 41
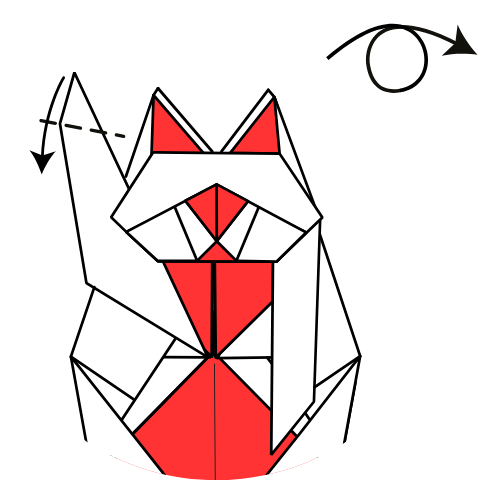
Fold the top corner of the left arm down to form the paw. Then, turn the model over.
🐱 Note: I slightly thinned the arm after the previous step because the paw felt a bit too big. Feel free to adjust the width to your liking!
Step 42
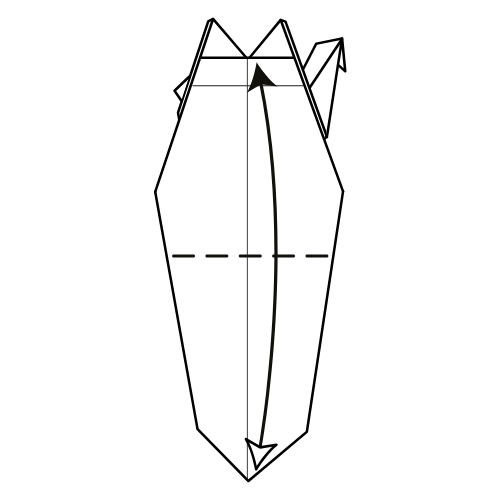
Fold the bottom corner up to the top horizontal line. Then, unfold.
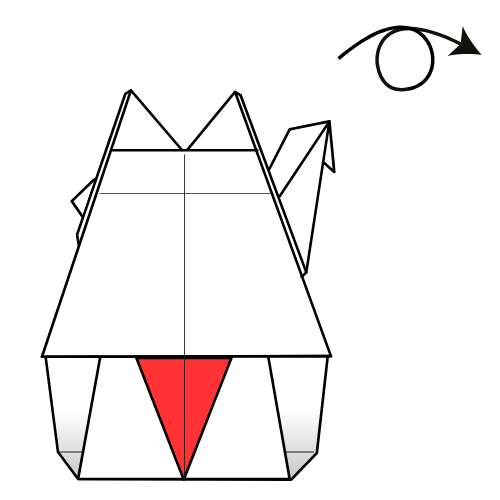
Step 43

Create a flat base with 90° angles so your lucky cat can stand upright.
Step 44

Tuck the top flap under the pocket to lock everything in place.
Step 45
Turn the model over.
Your origami Lucky Cat is folded and full of luck! 🐱💰

I hope you enjoyed folding this iconic figure of good luck.
And don’t worry if some steps felt a bit tricky. It’s one of those models that gets easier (and more rewarding) with each attempt.
For more models like this one, check out our origami YouTube channel and sign up for our newsletter. We share new tutorials, seasonal favorites, and origami stories every week.

Download the Full Origami Lucky Cat Printable PDF
Instructions
We’d love to keep you in the loop, so by sharing your email with us, you’ll be signed up for our mailing list. Don’t worry; we won’t bombard you with spammy emails, and your information is safe with us – we won’t share it with anyone else.
Watch the Origami Lucky Cat Video Tutorial
Enjoyed this tutorial?
Subscribe to our YouTube channel for new inspiring origami videos every week!


