
How to Fold an Origami Phoenix
The traditional origami phoenix is one of the more intricate models from the traditional repertoire.
With its long tail, sharp wings, and upright posture, this phoenix has a striking, almost regal presence.
The folding sequence is detailed and includes several small, precise steps, making it a great challenge for beginners who already have some experience and want to push their skills further.
Origami Phoenix Step-by-Step Instructions
- Difficulty: Easy – Beginner Level 5
- Folding time: 10-15 minutes
- Model designer: Traditional
- Paper: 15×15 cm (6×6 in) Kami
Step 1
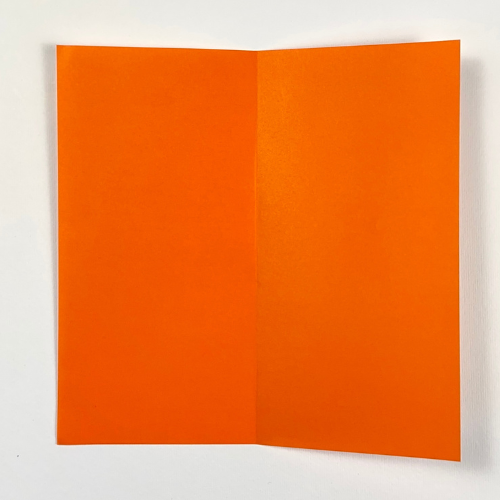
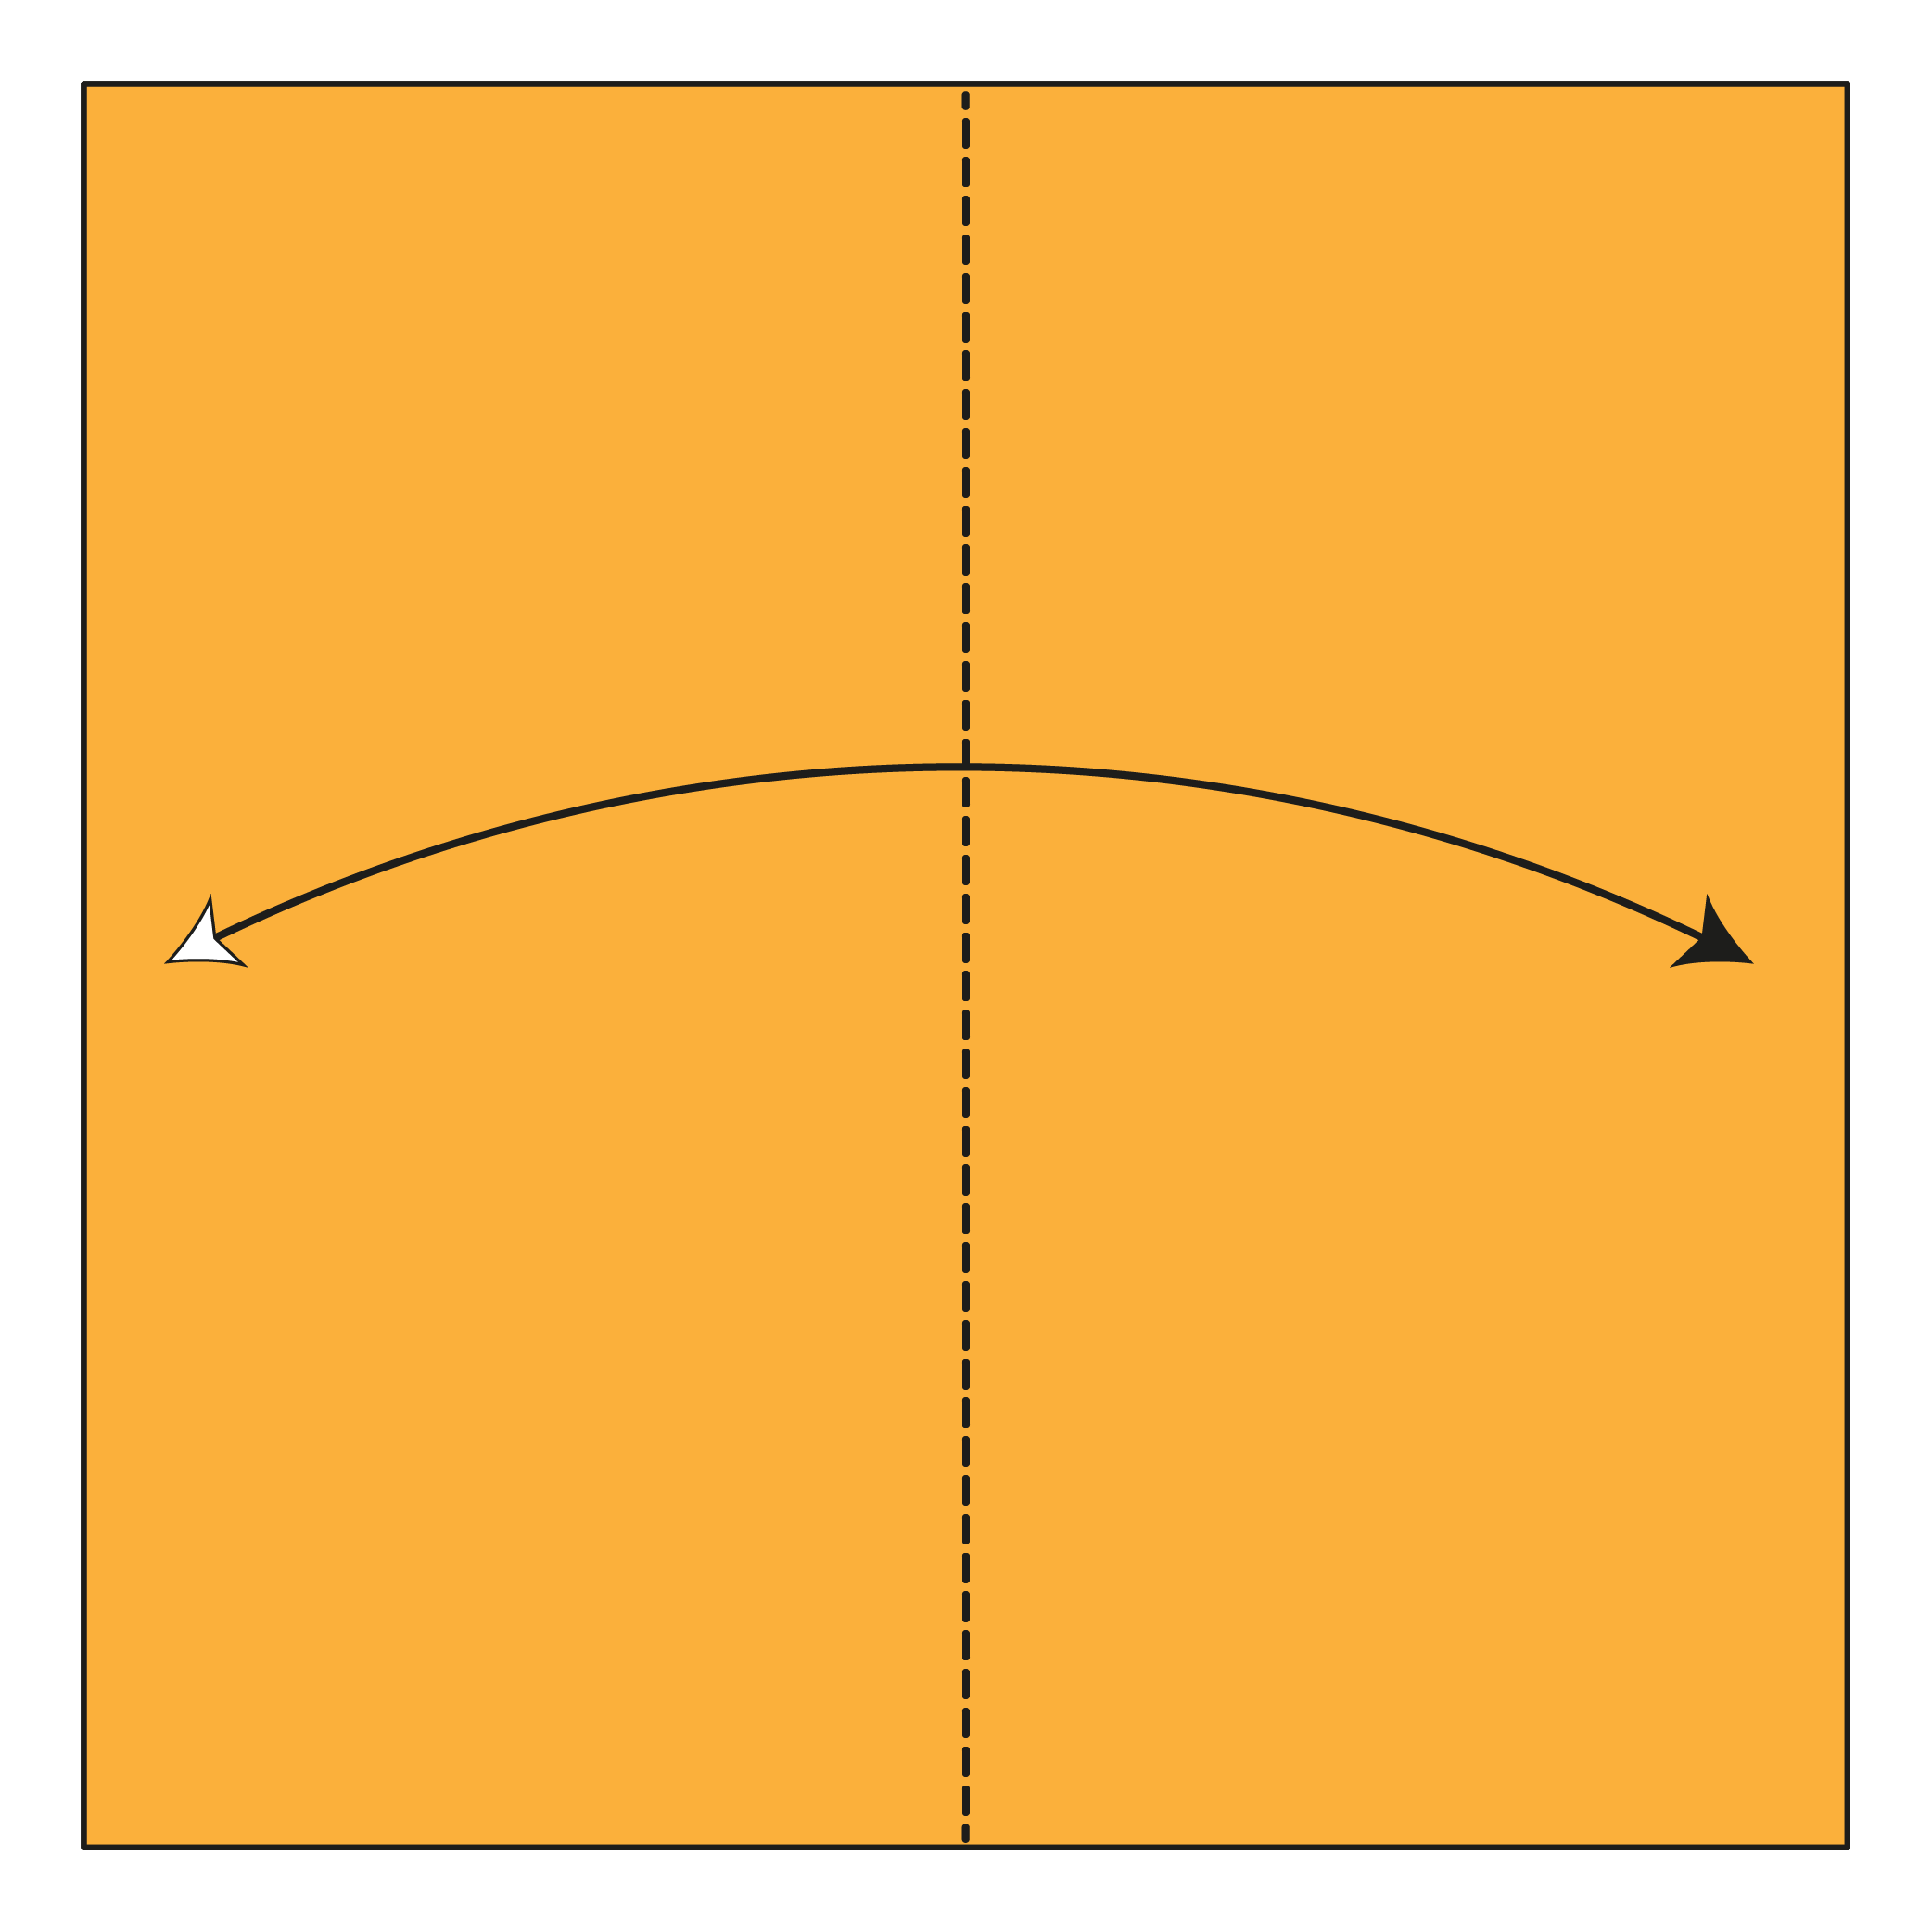
Start with the colored side up. Fold the paper in half vertically, then unfold.
Step 2
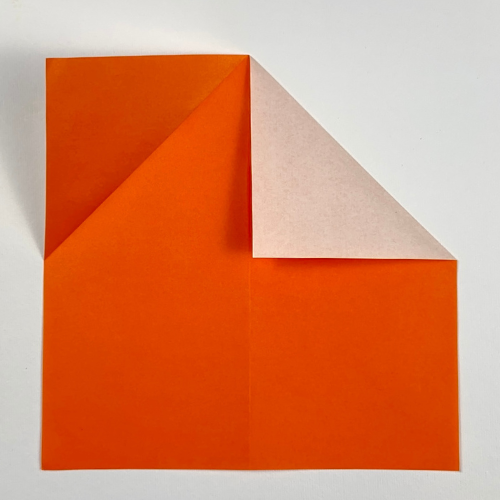
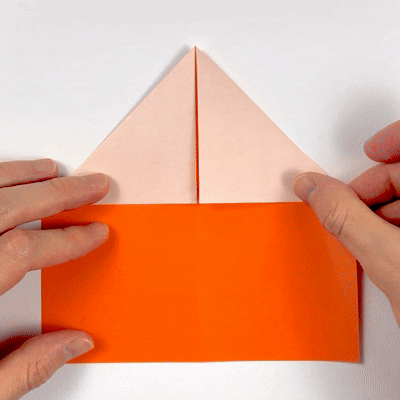
Fold the top edges inward to meet the centerline.
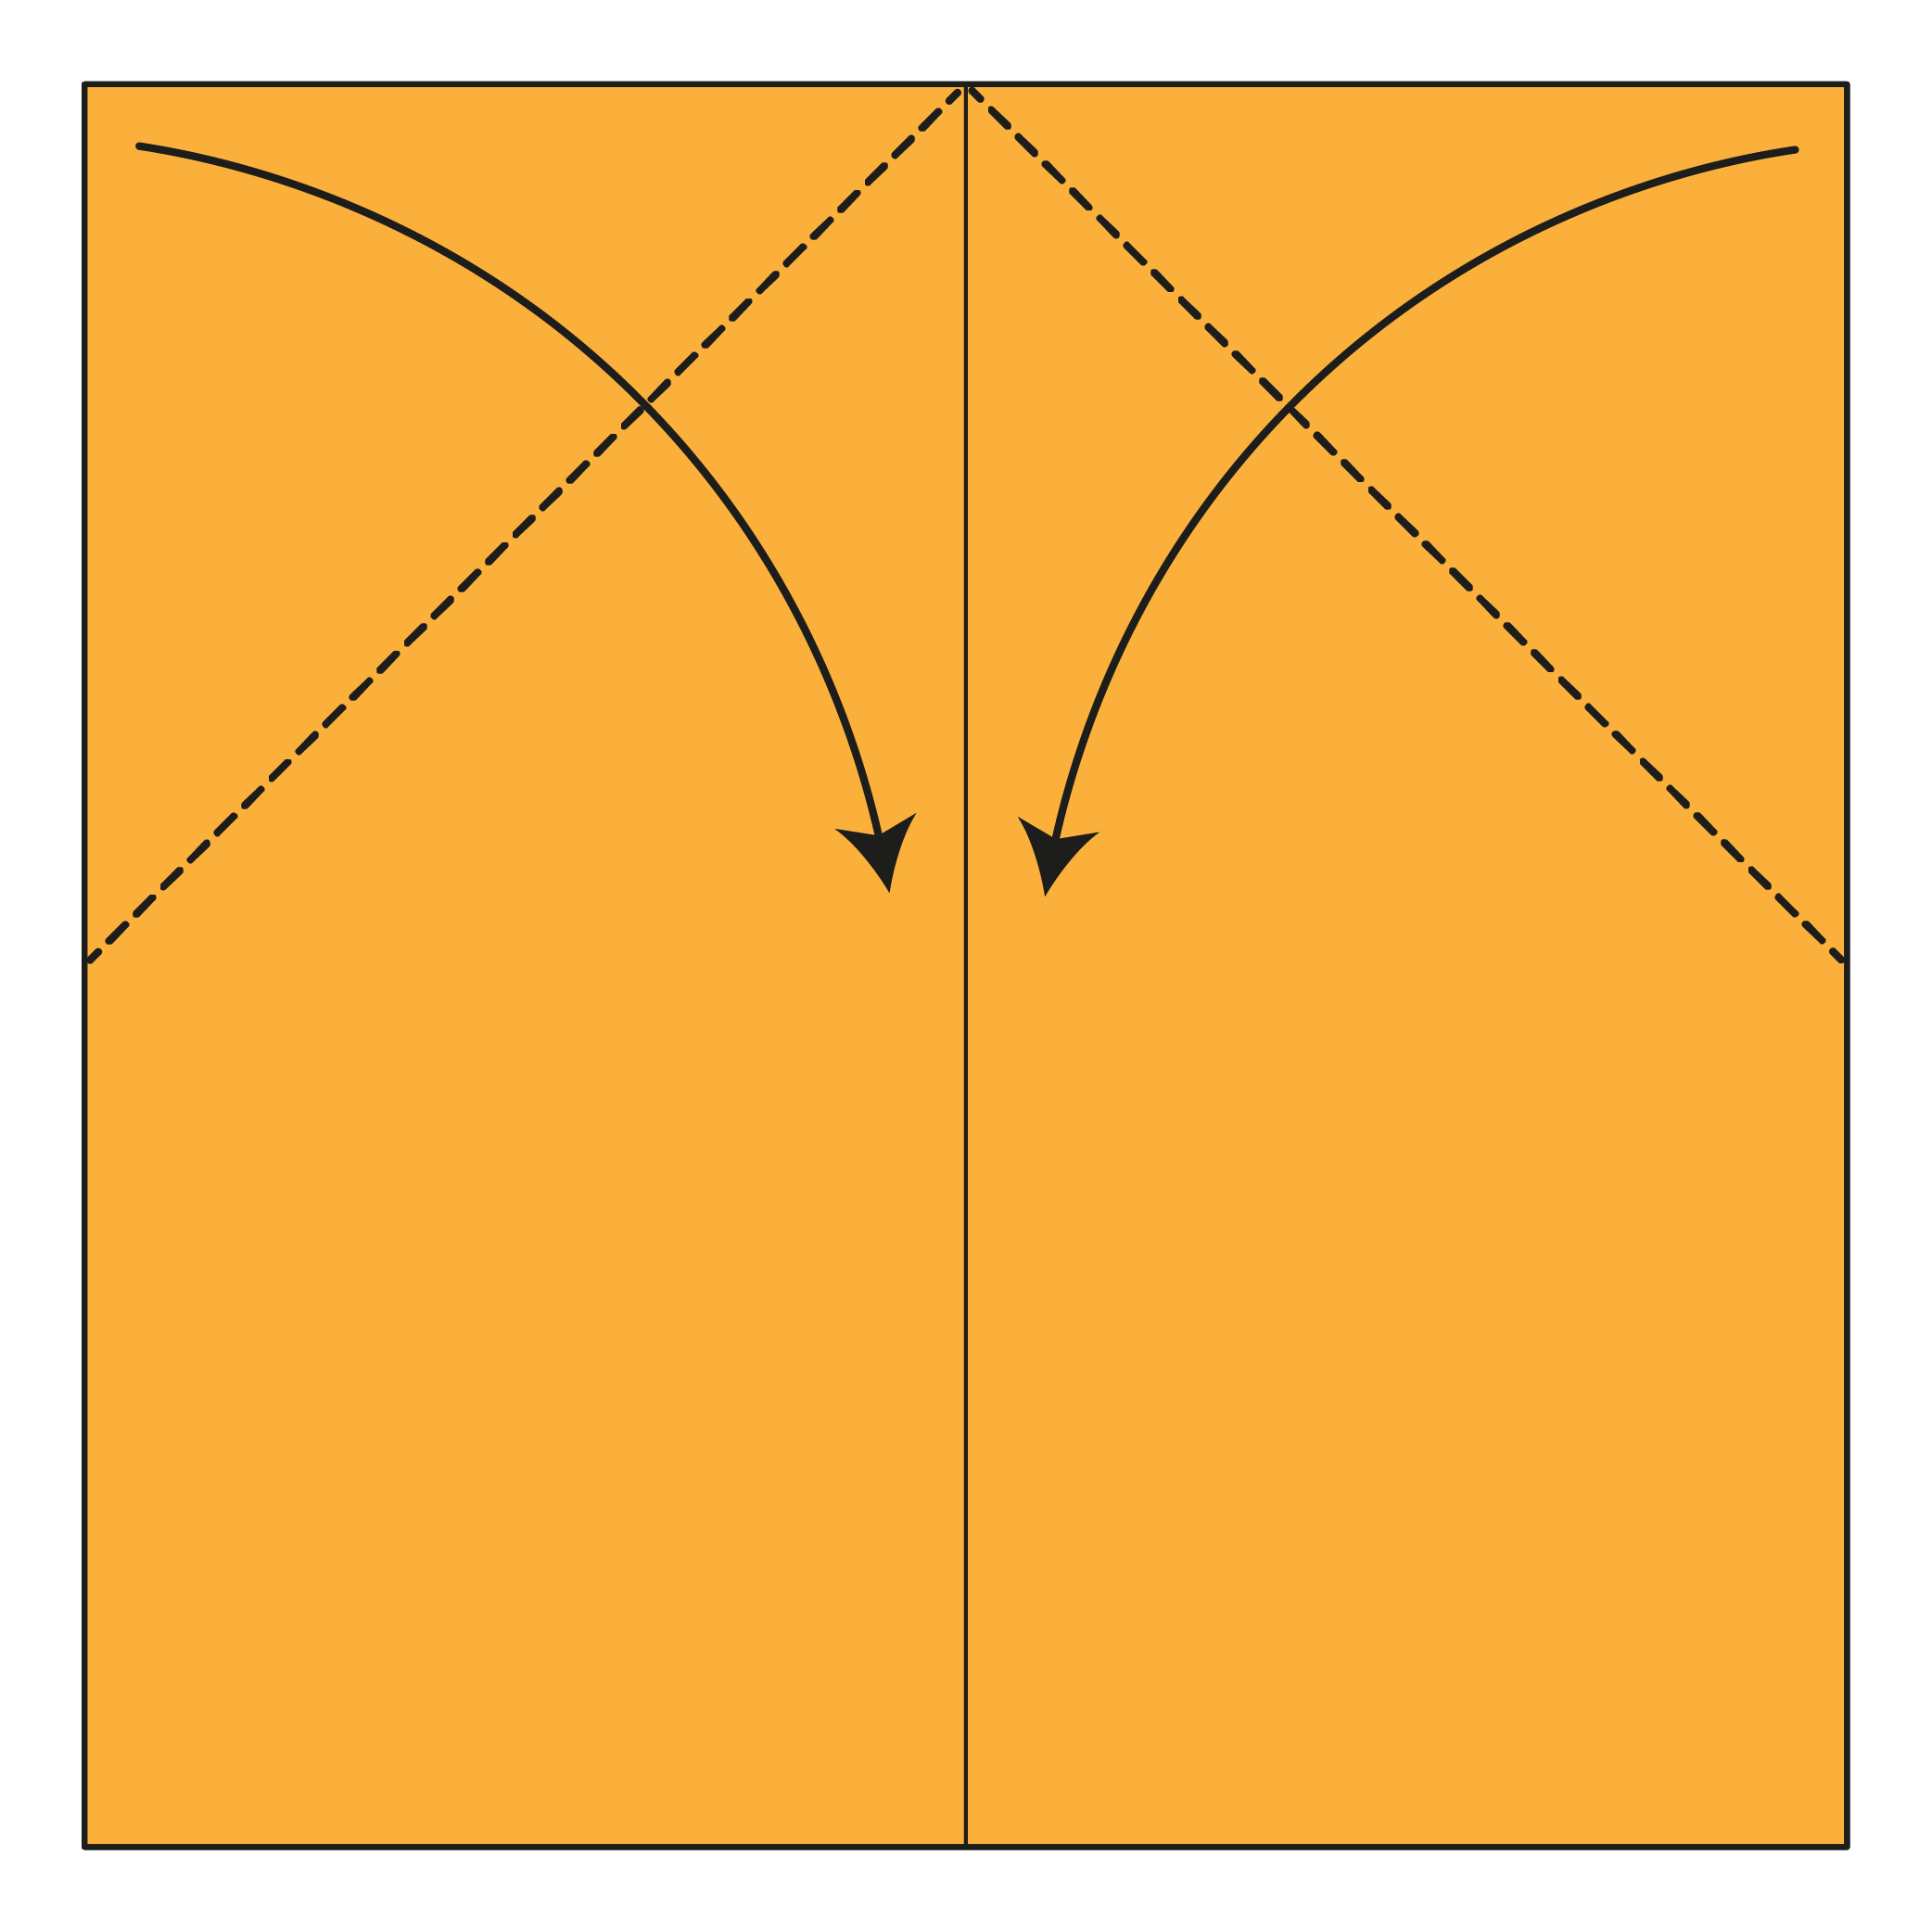
Step 3
Turn the paper over.
Step 4

Fold the top edges to the centerline on one layer only. Be careful not to crease the flaps from Step 2.
Step 5

Turn the paper over.
Step 6

Fold the left and right edges inward to the centerline.
Step 7

Again, fold the left and right edges to the centerline.
Step 8
Turn the paper over.
Step 9

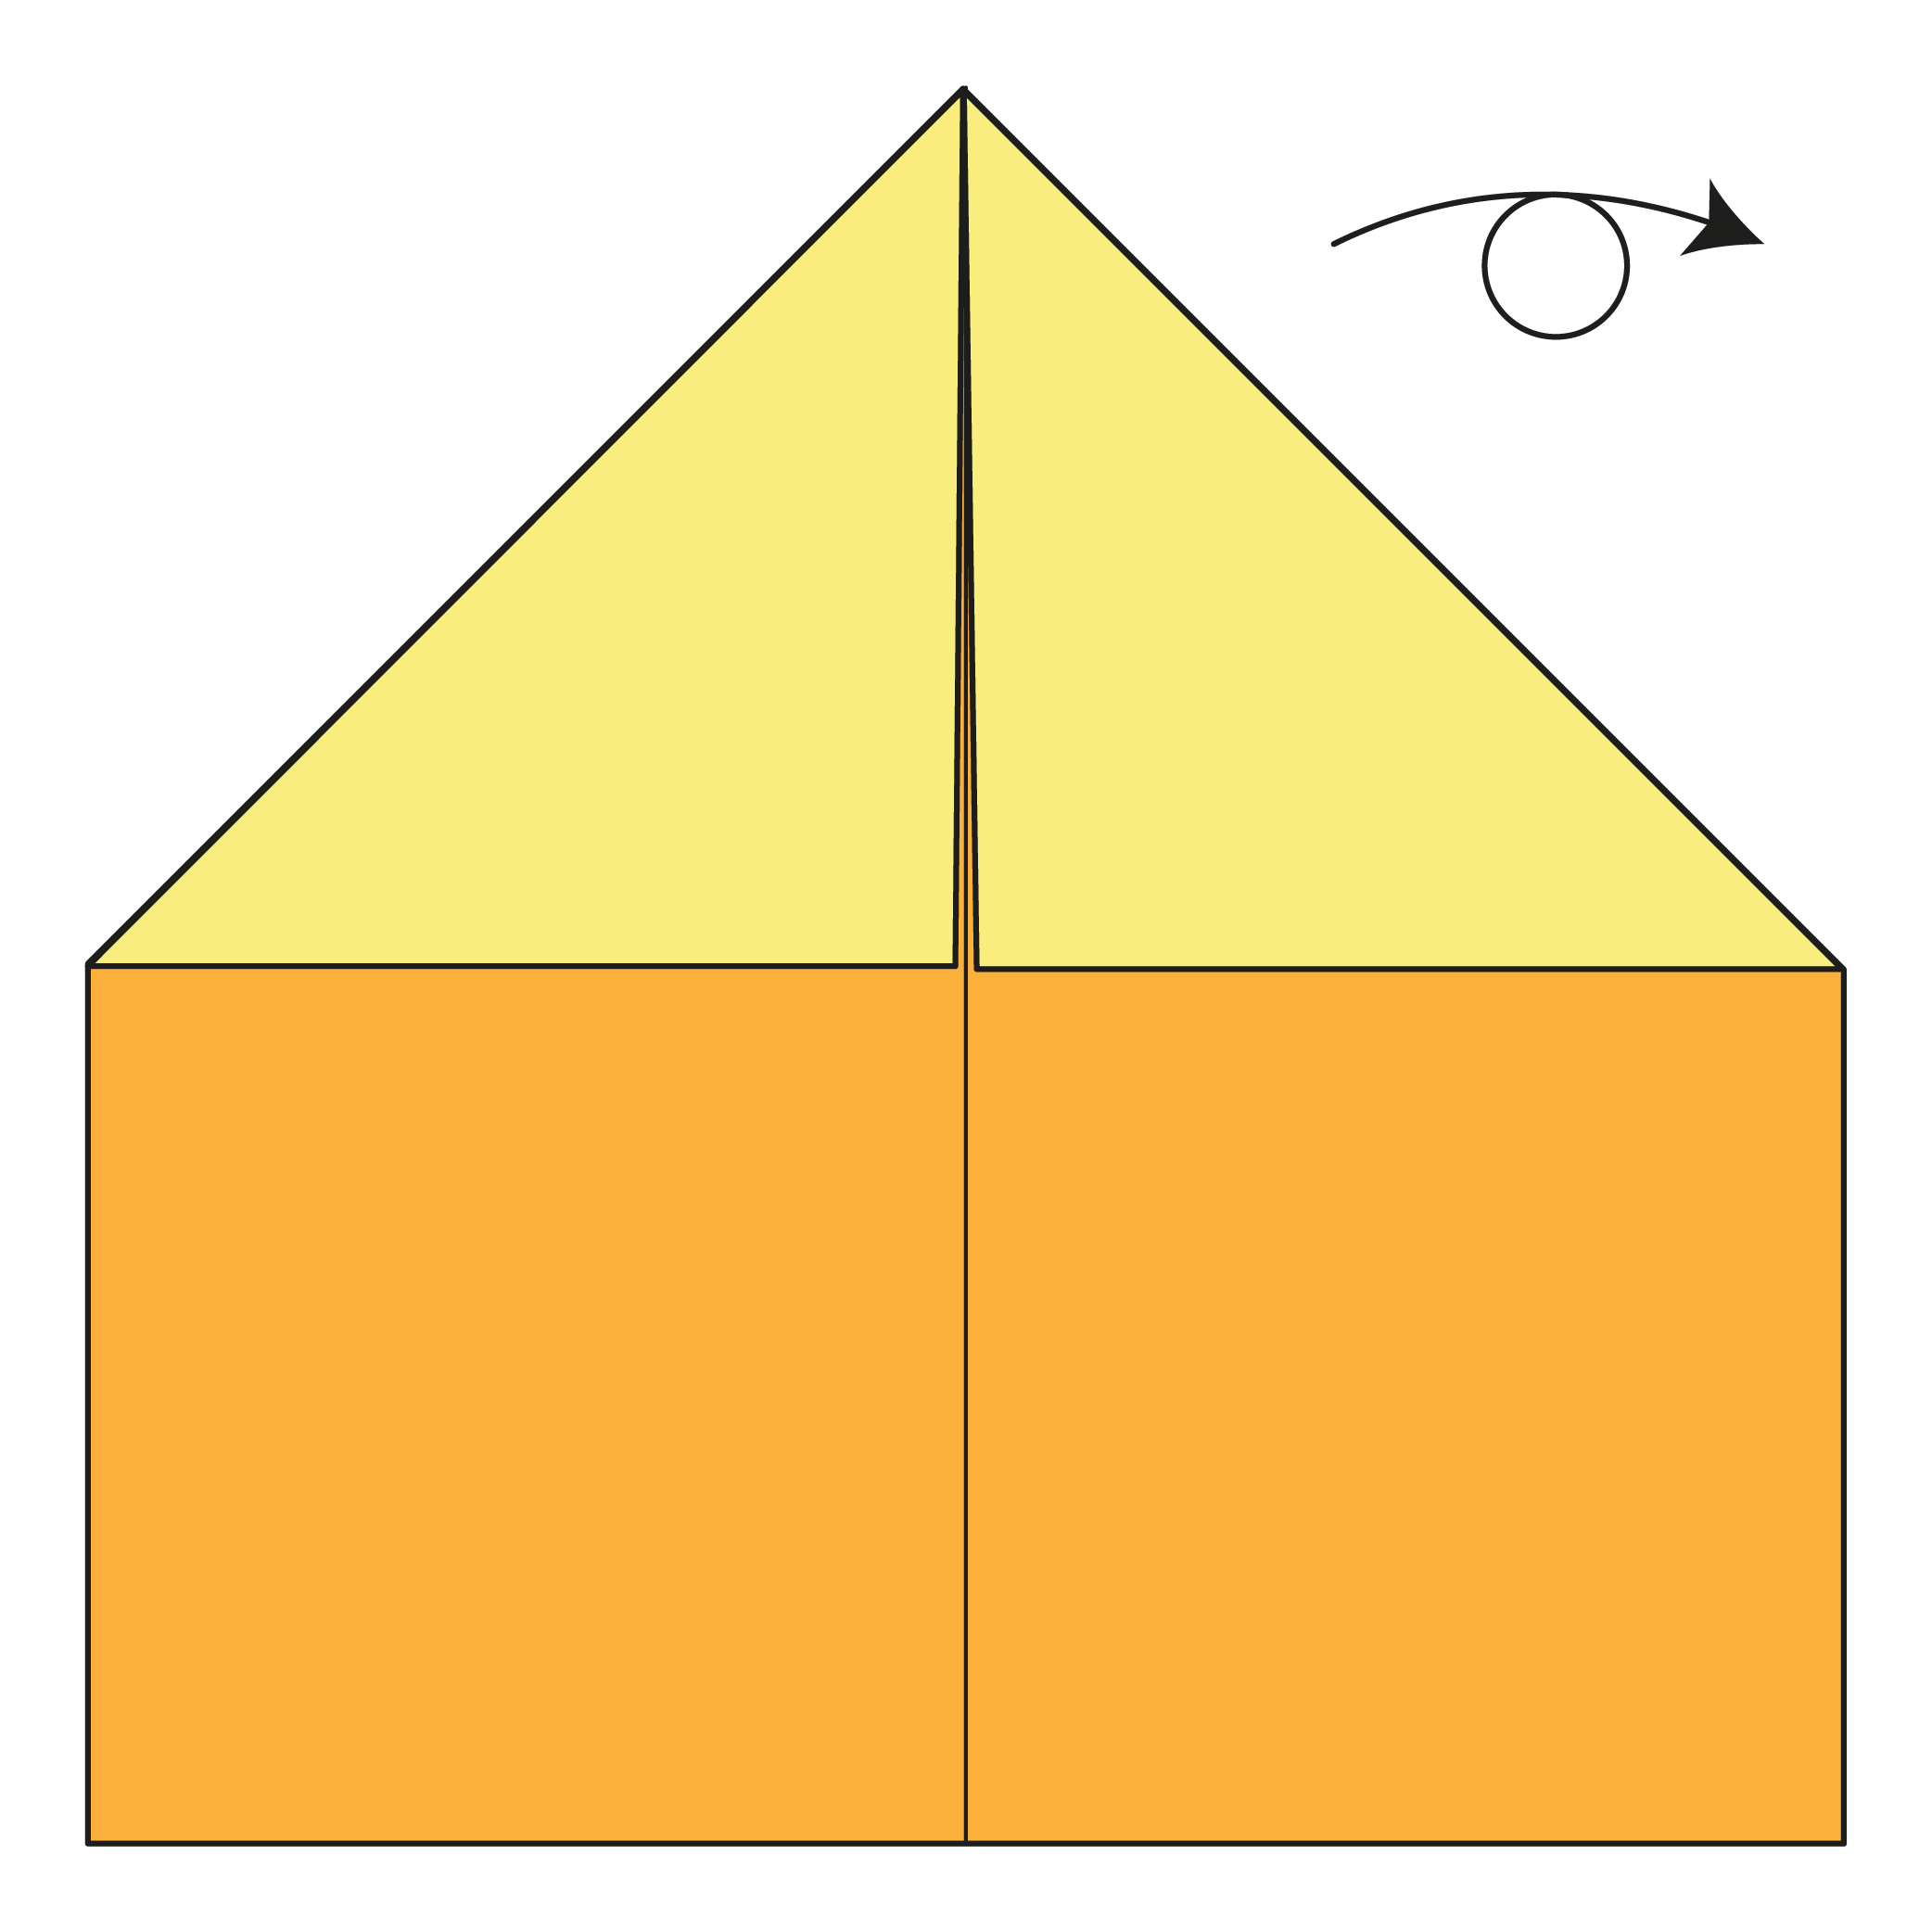
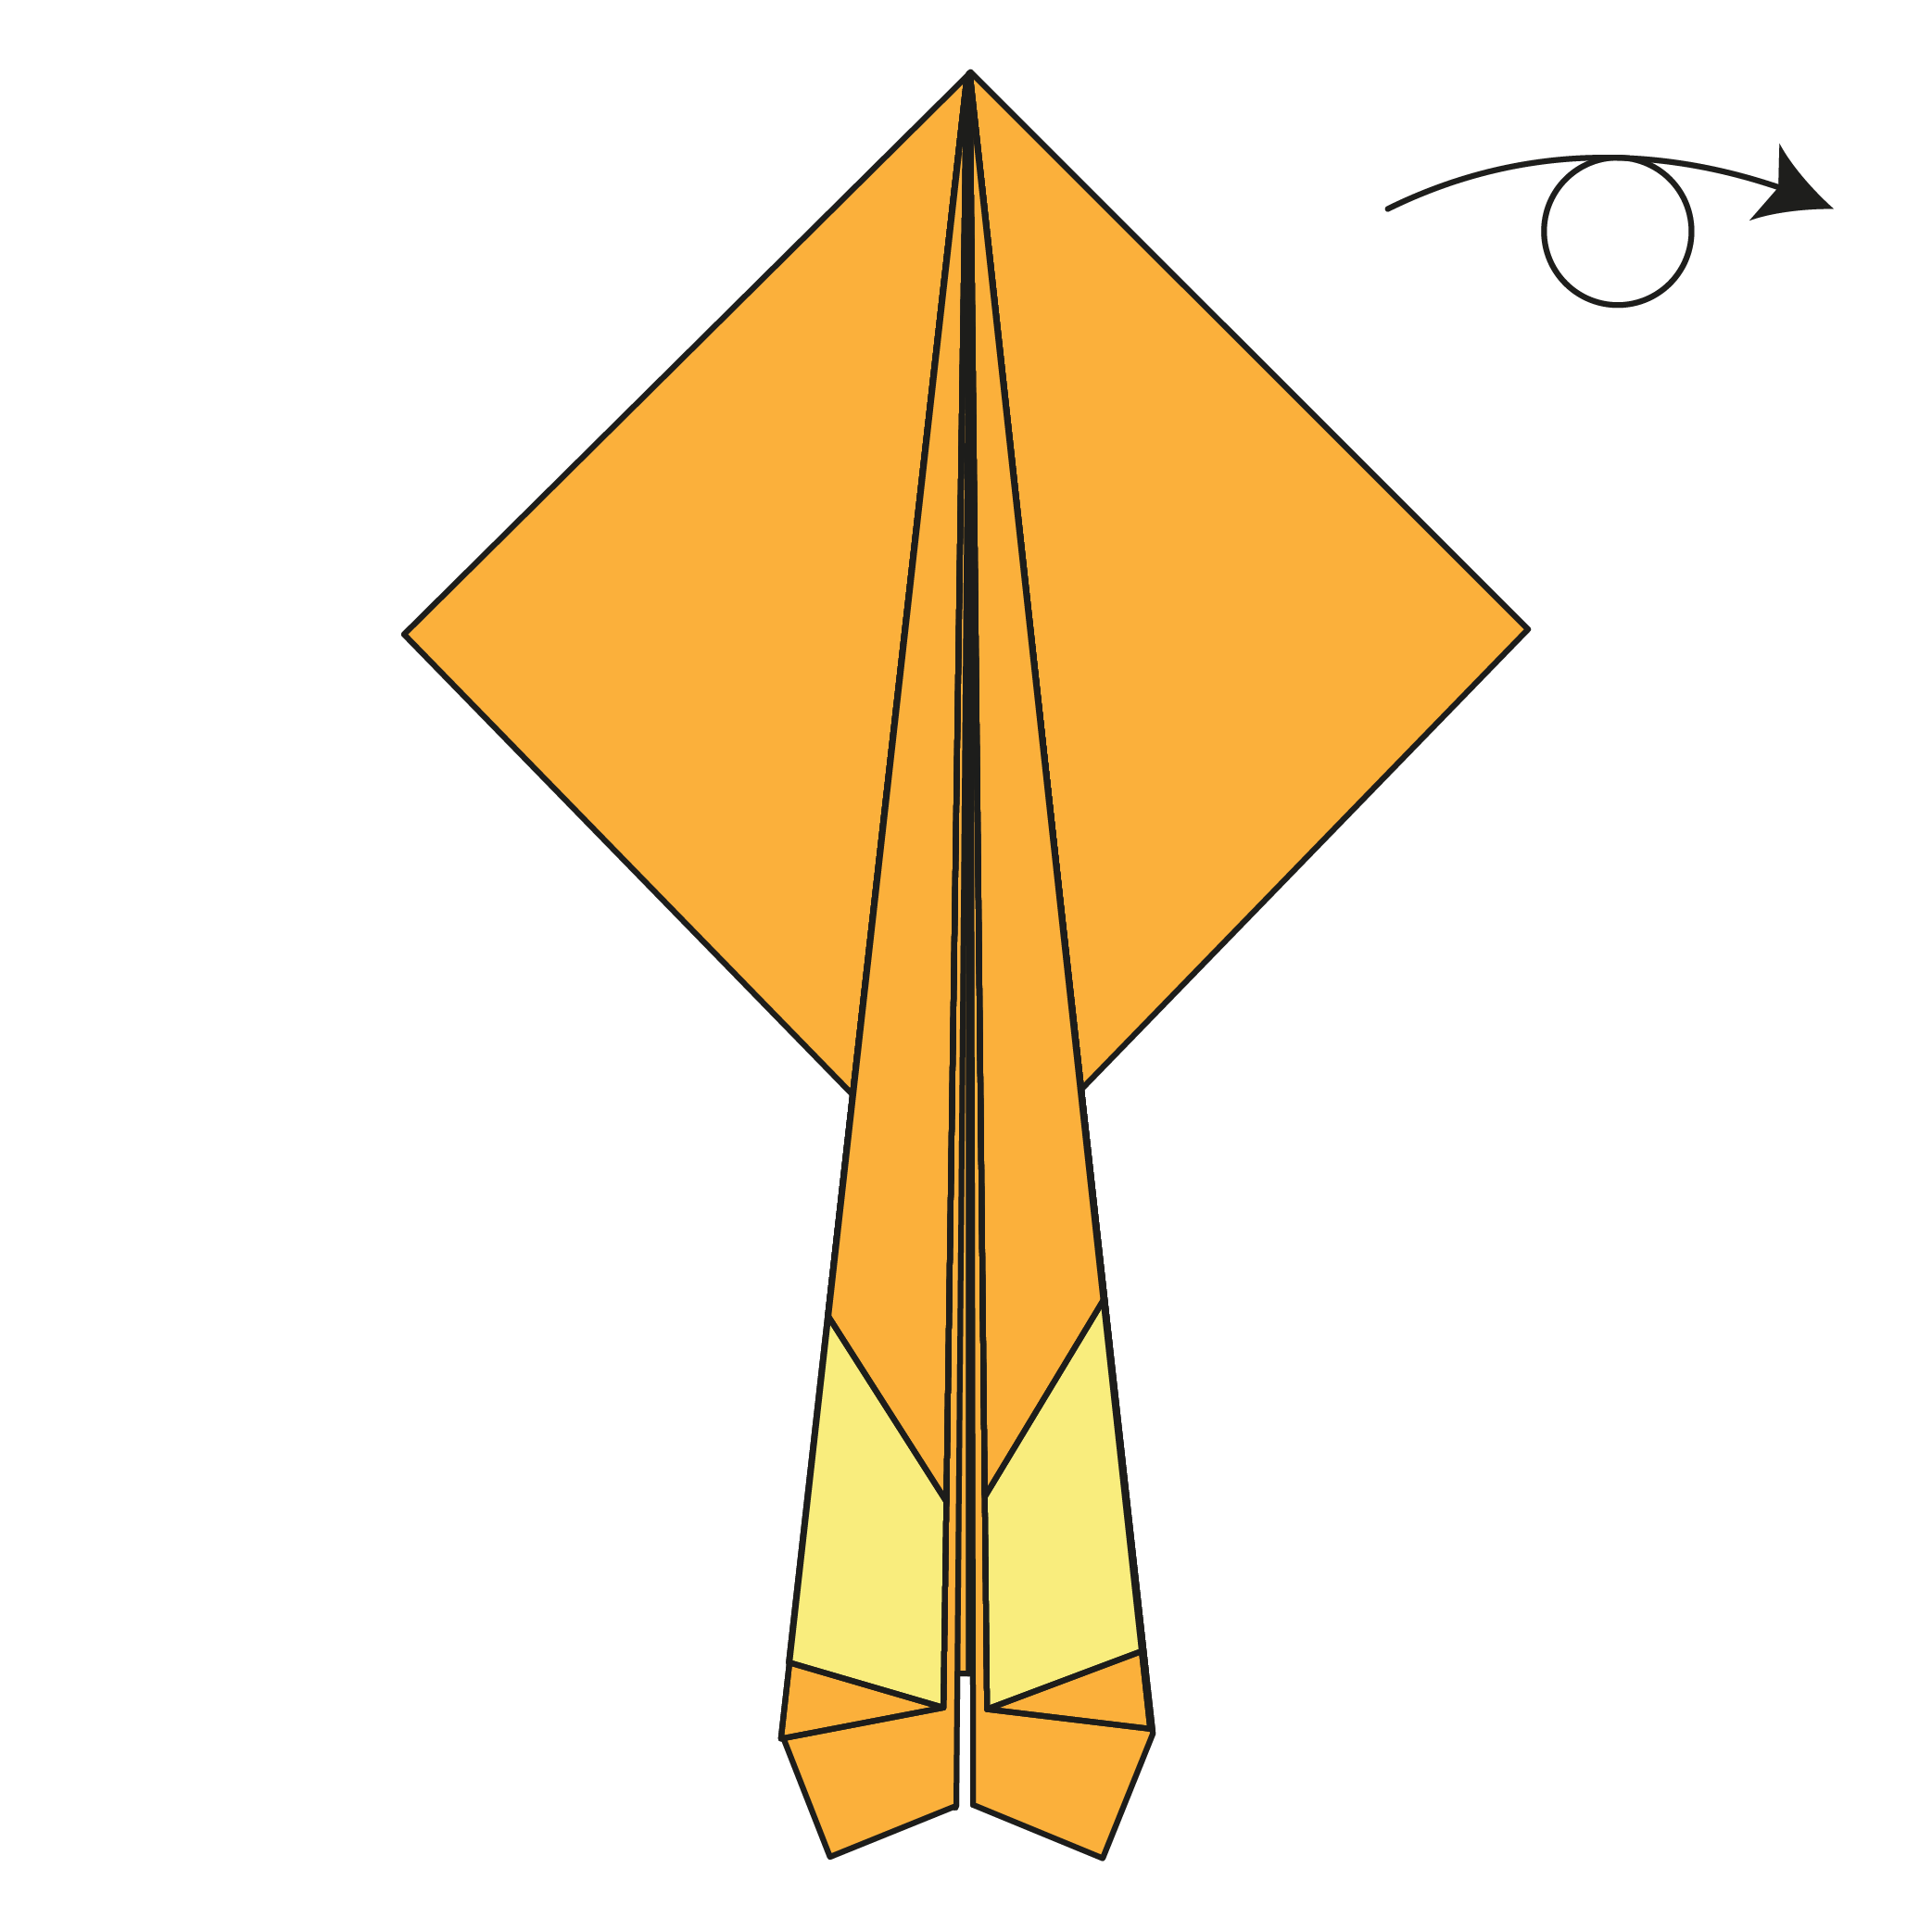
Fold the square part of the model along its horizontal diagonal. Crease firmly.
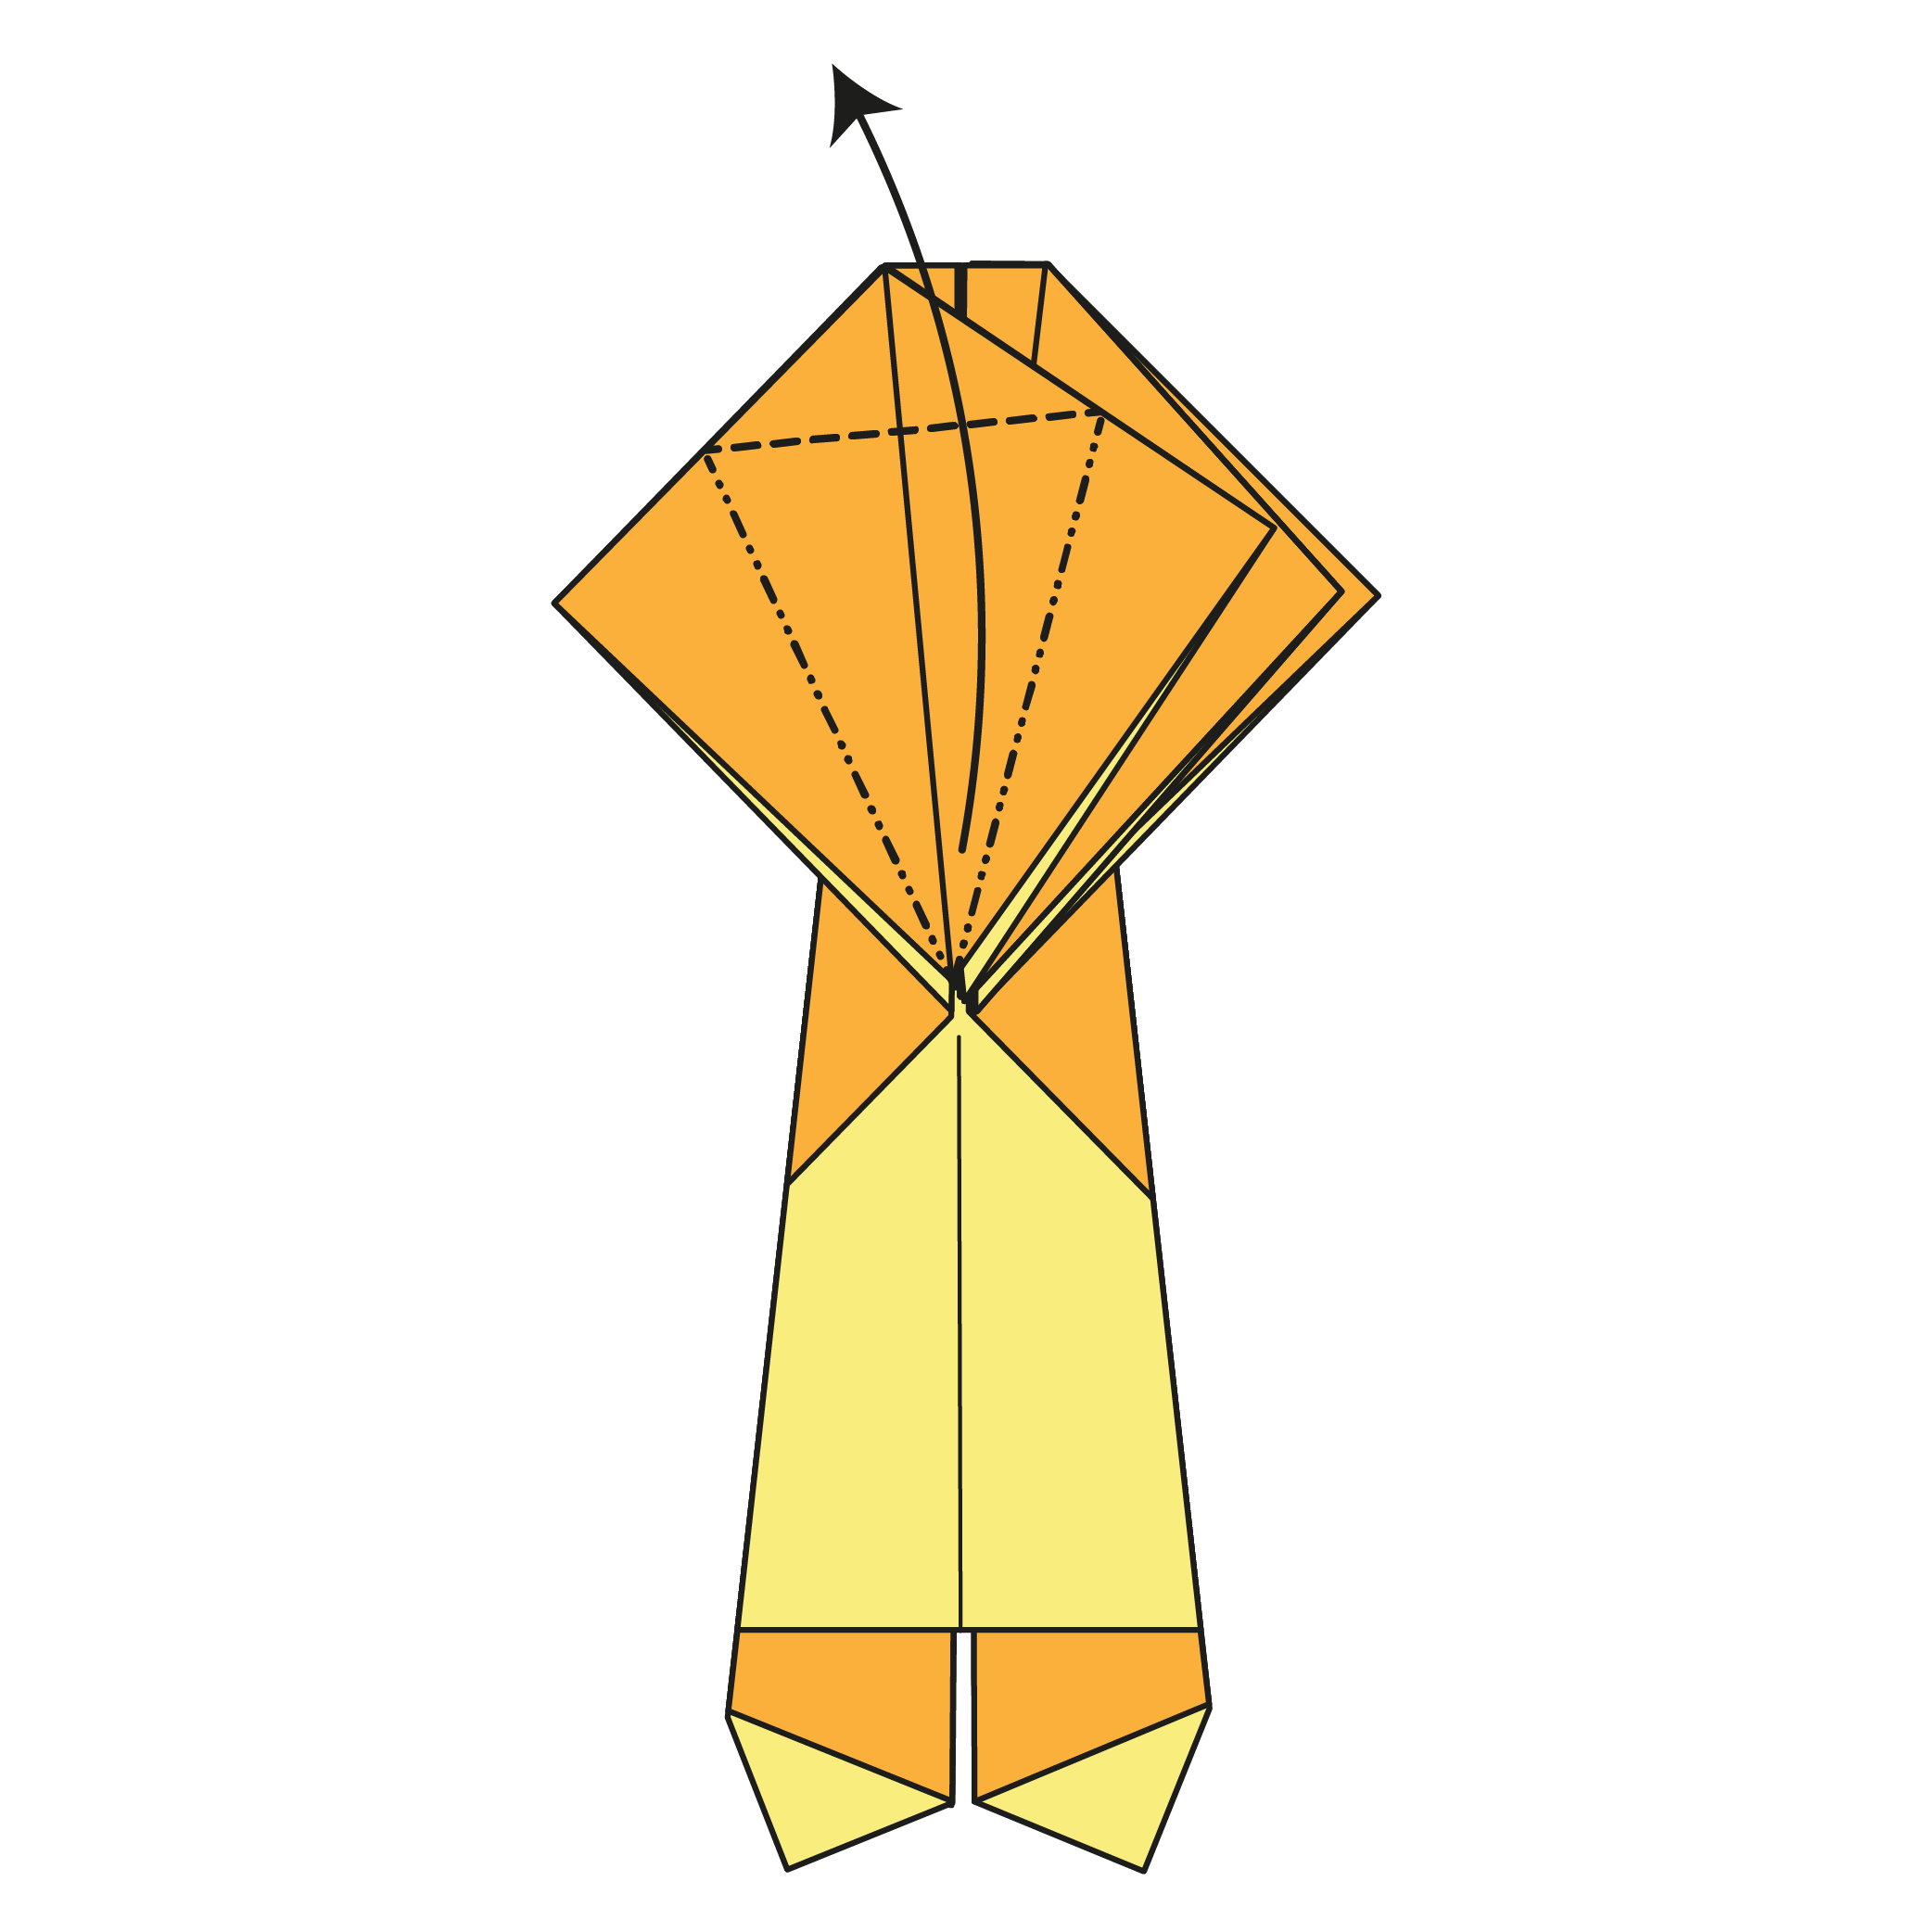
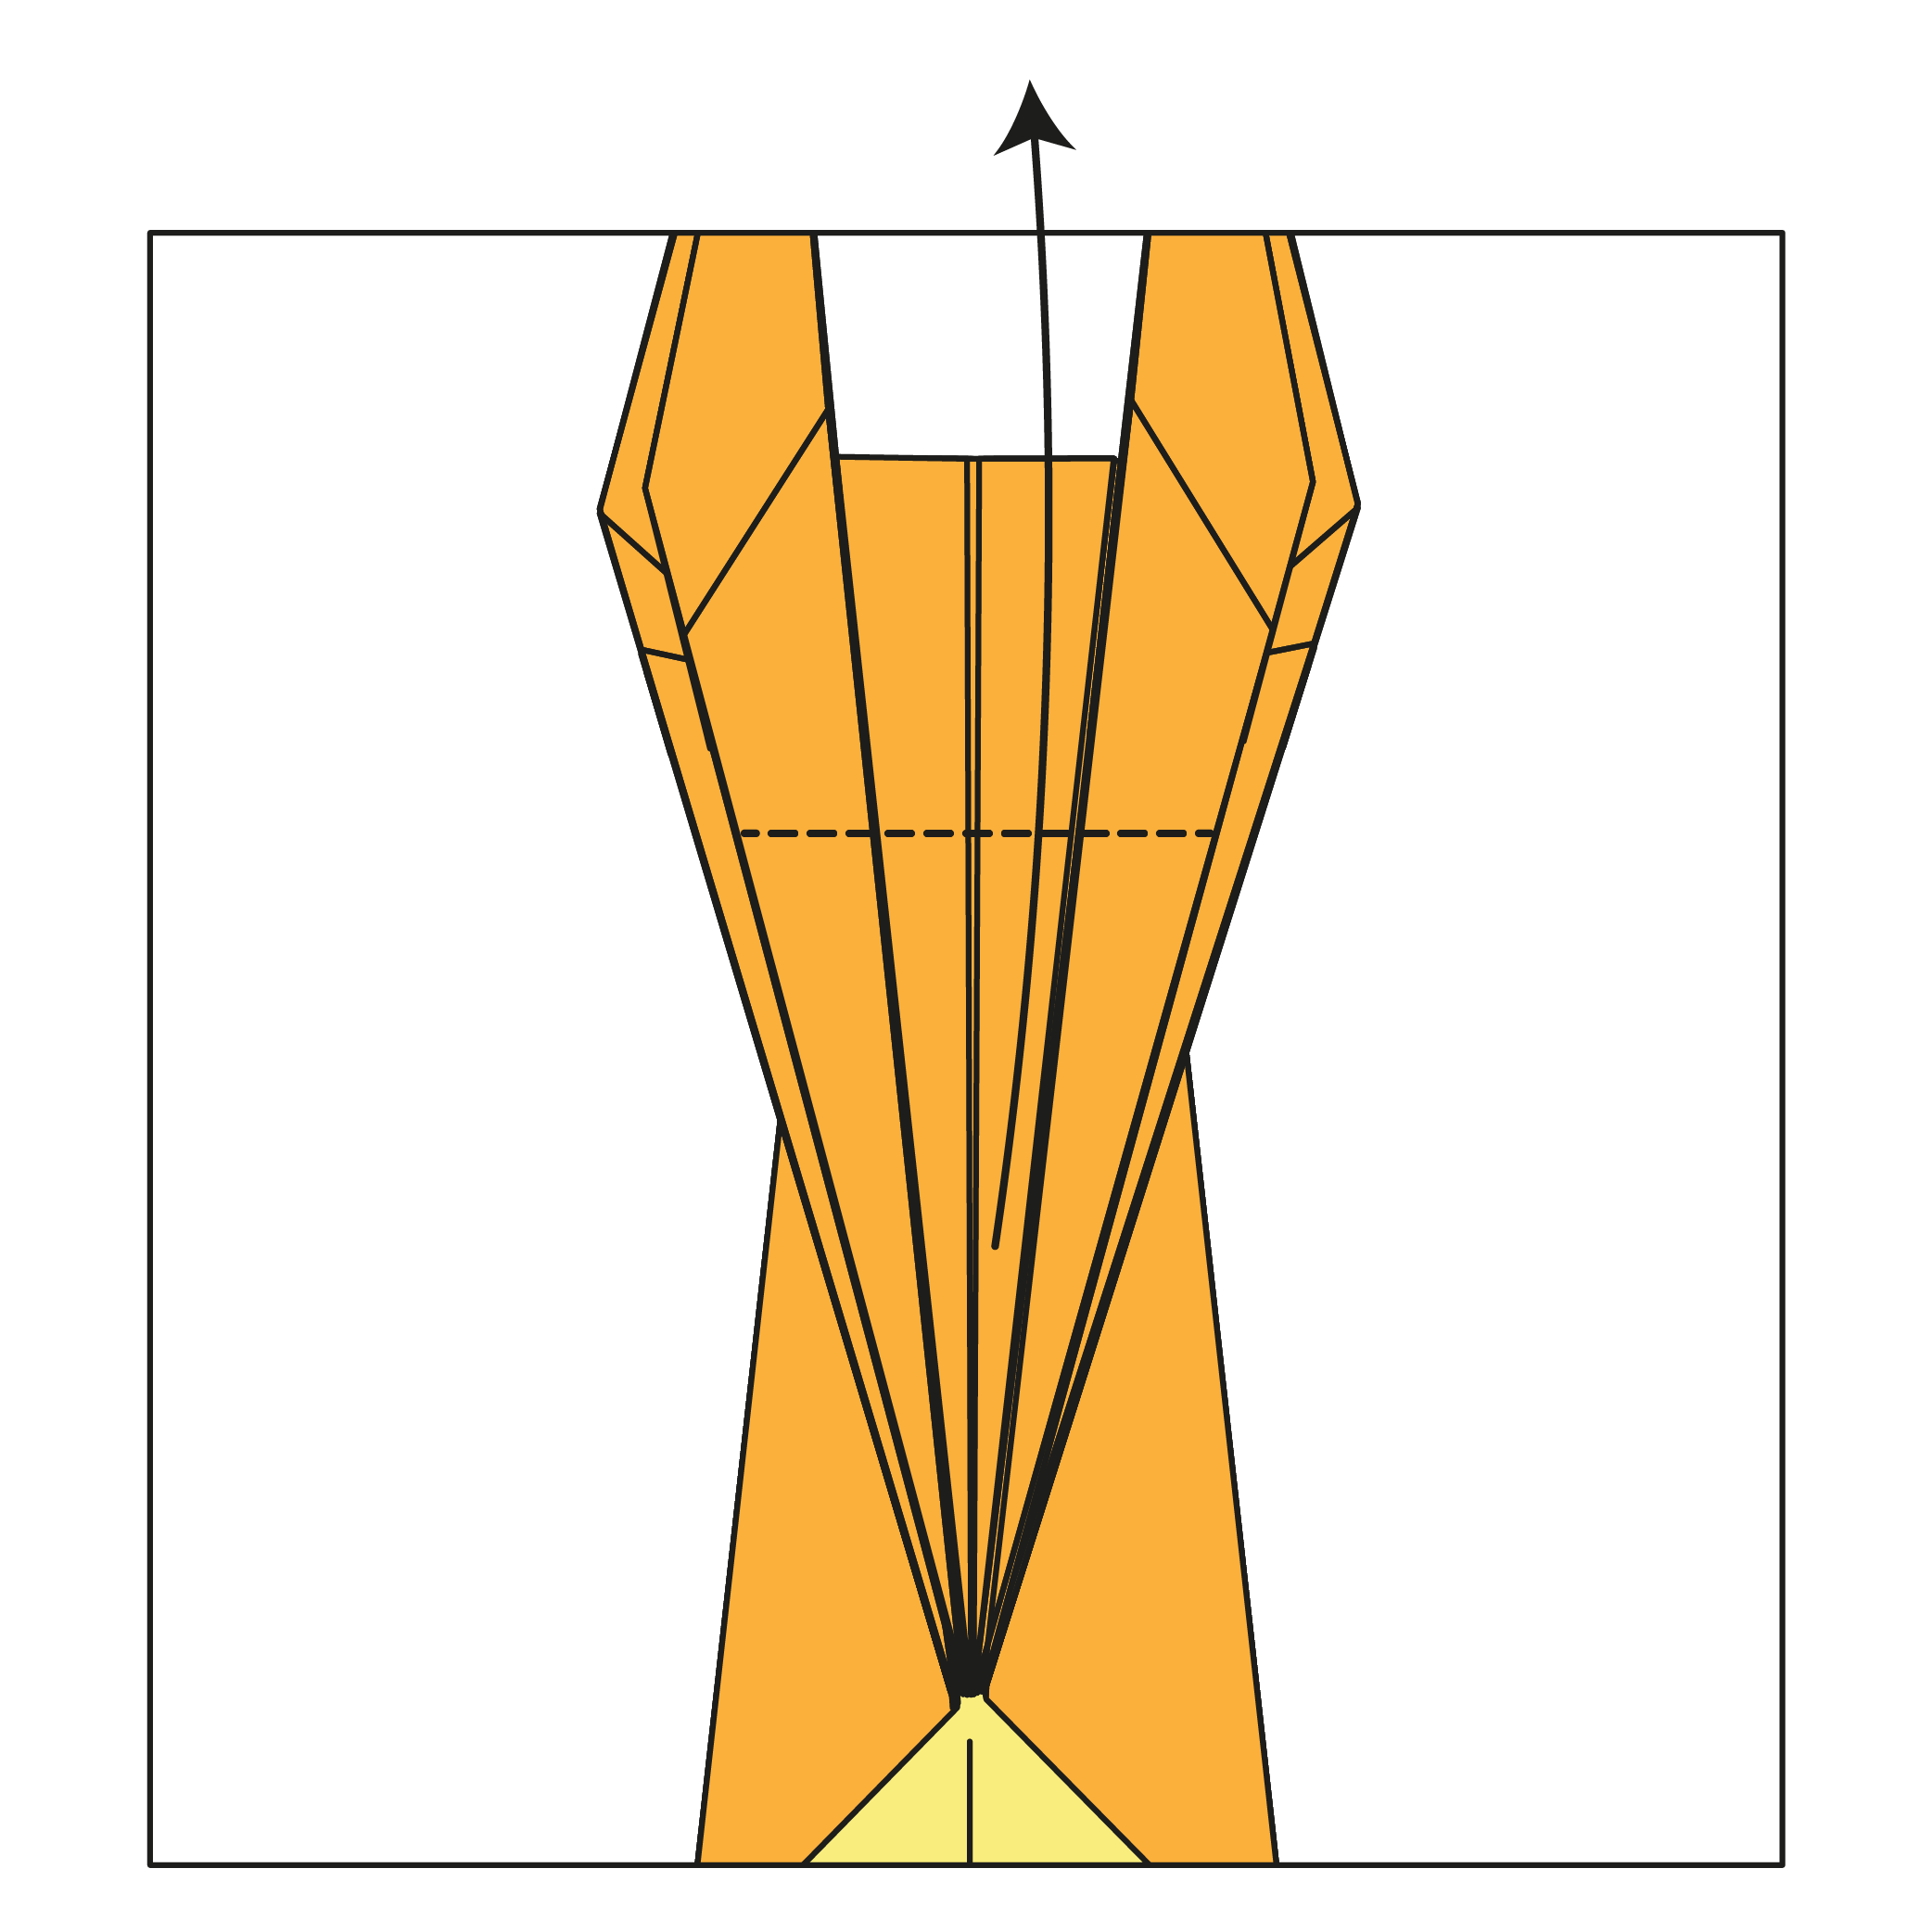
Step 10

Fold and unfold along the dotted lines. The top edges should stop just short of the center triangle, resting symmetrically on either side.
Step 11
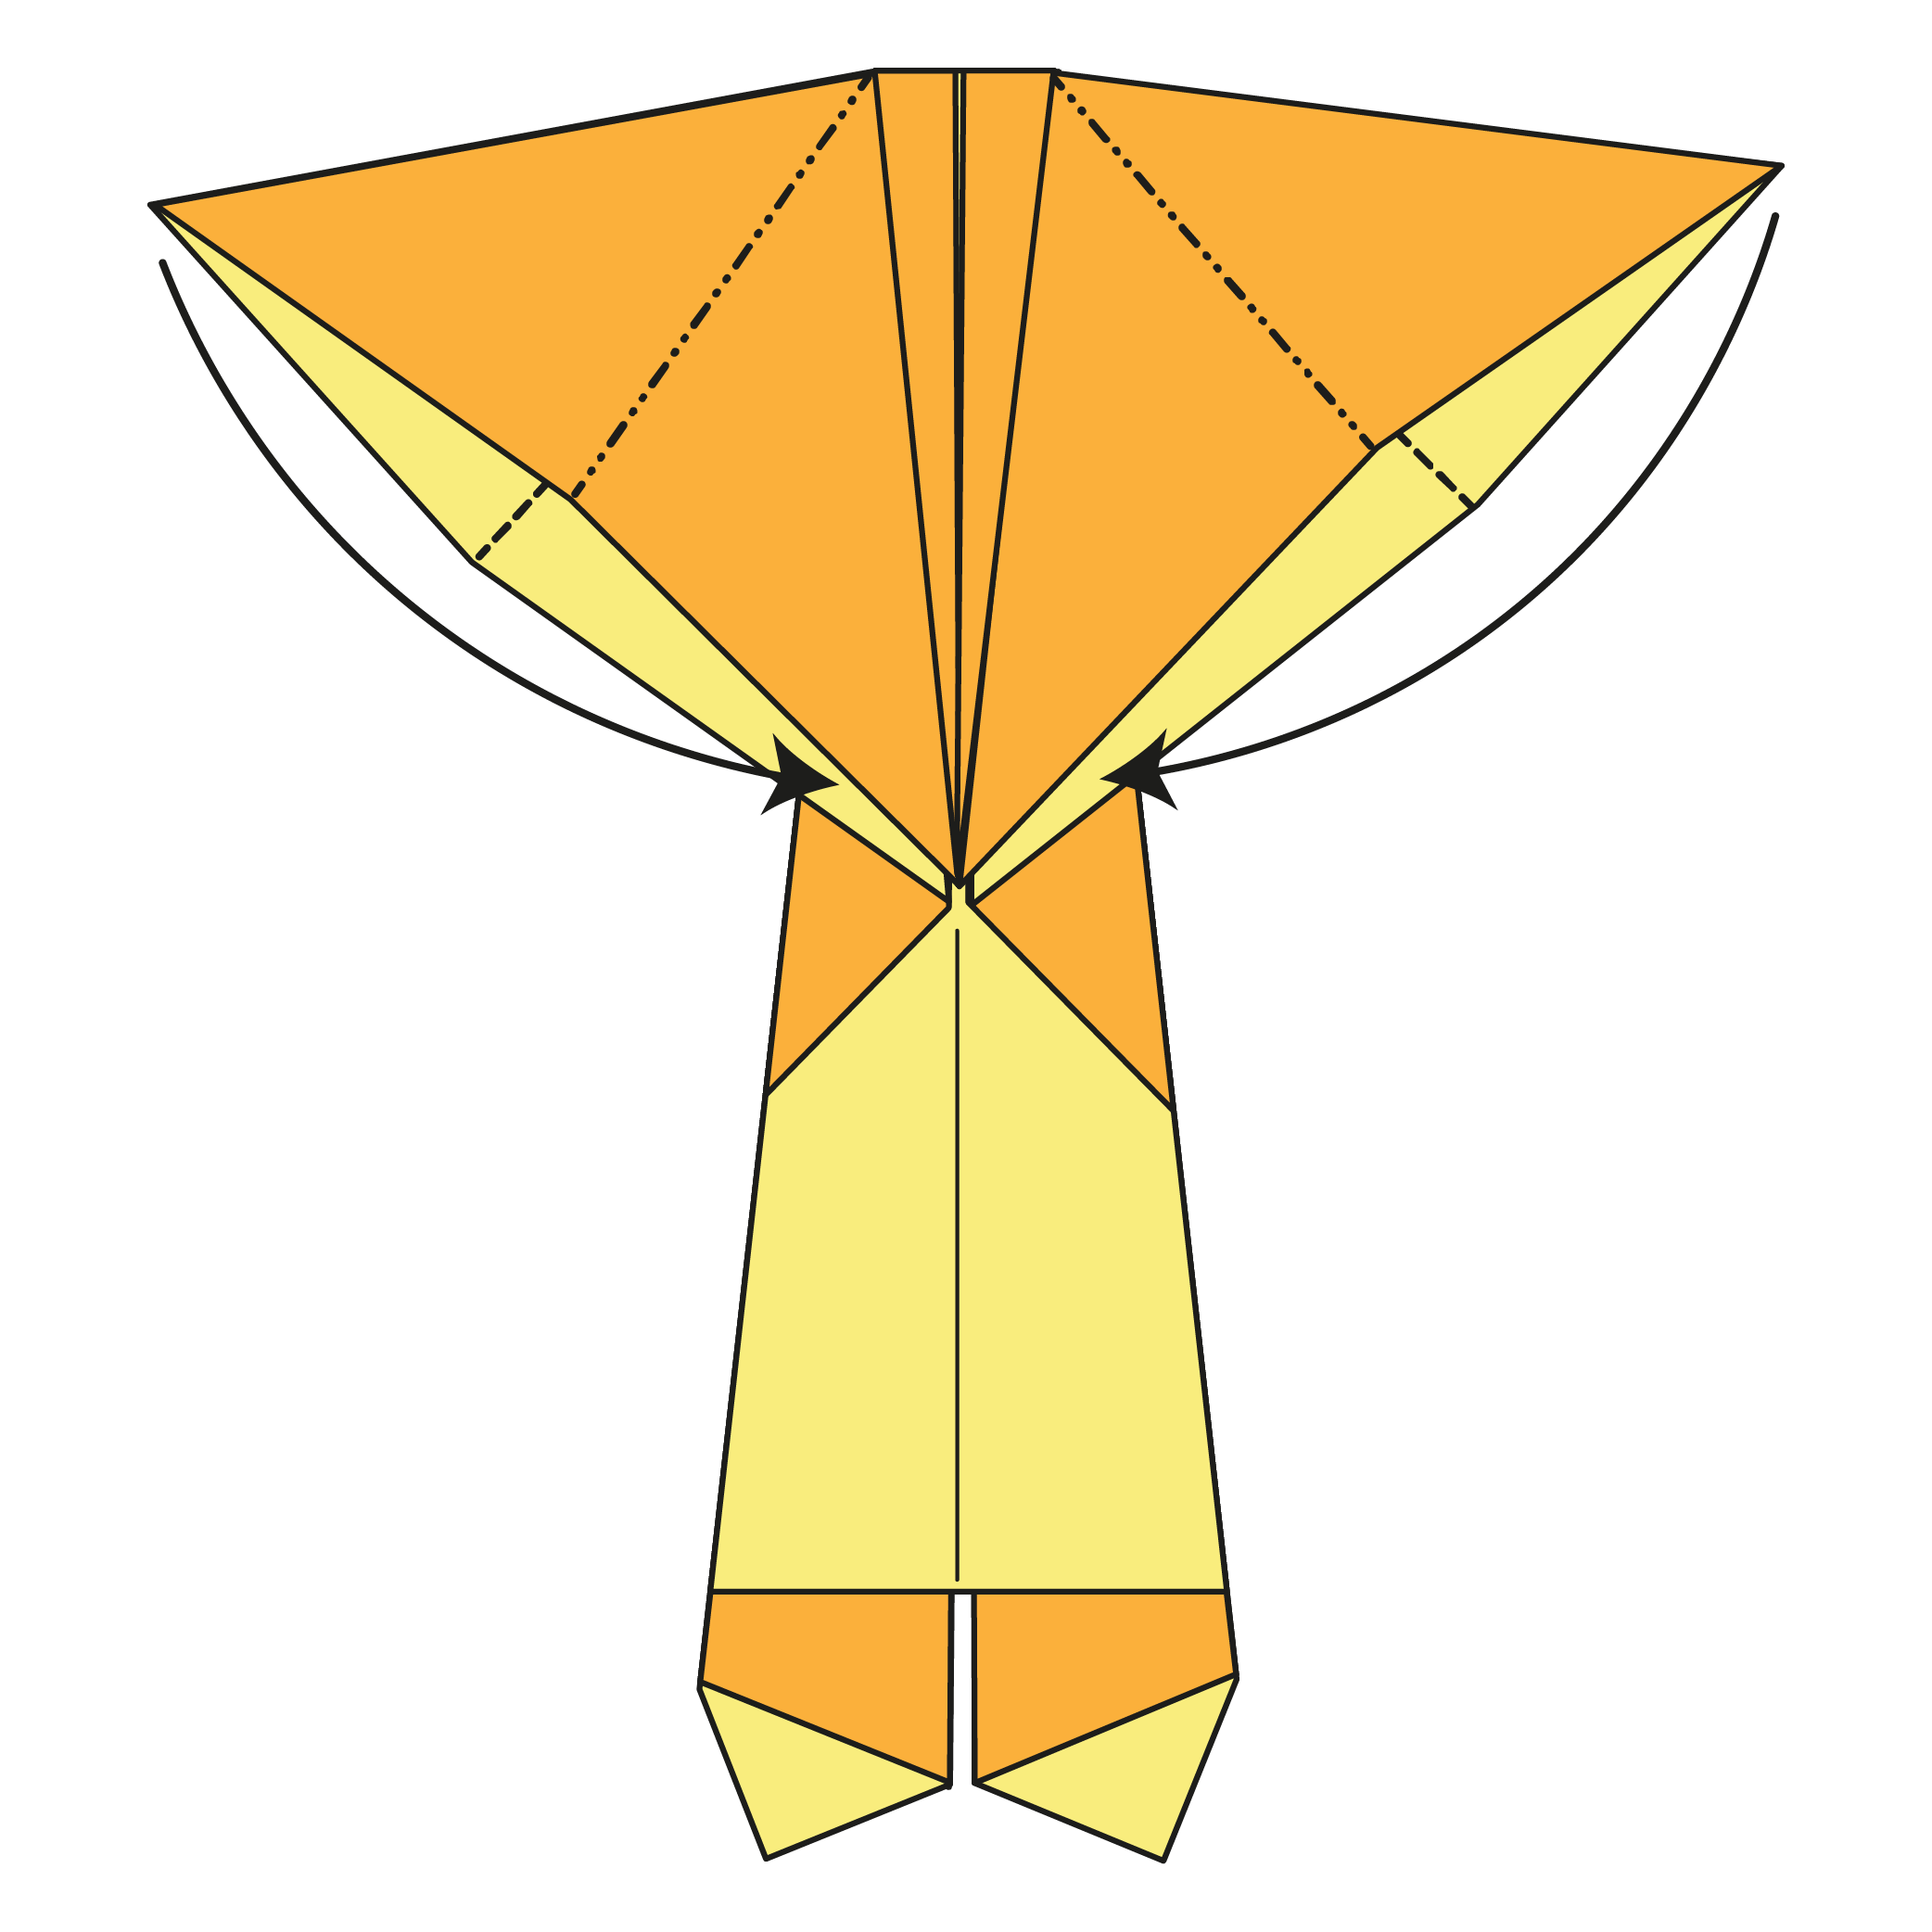
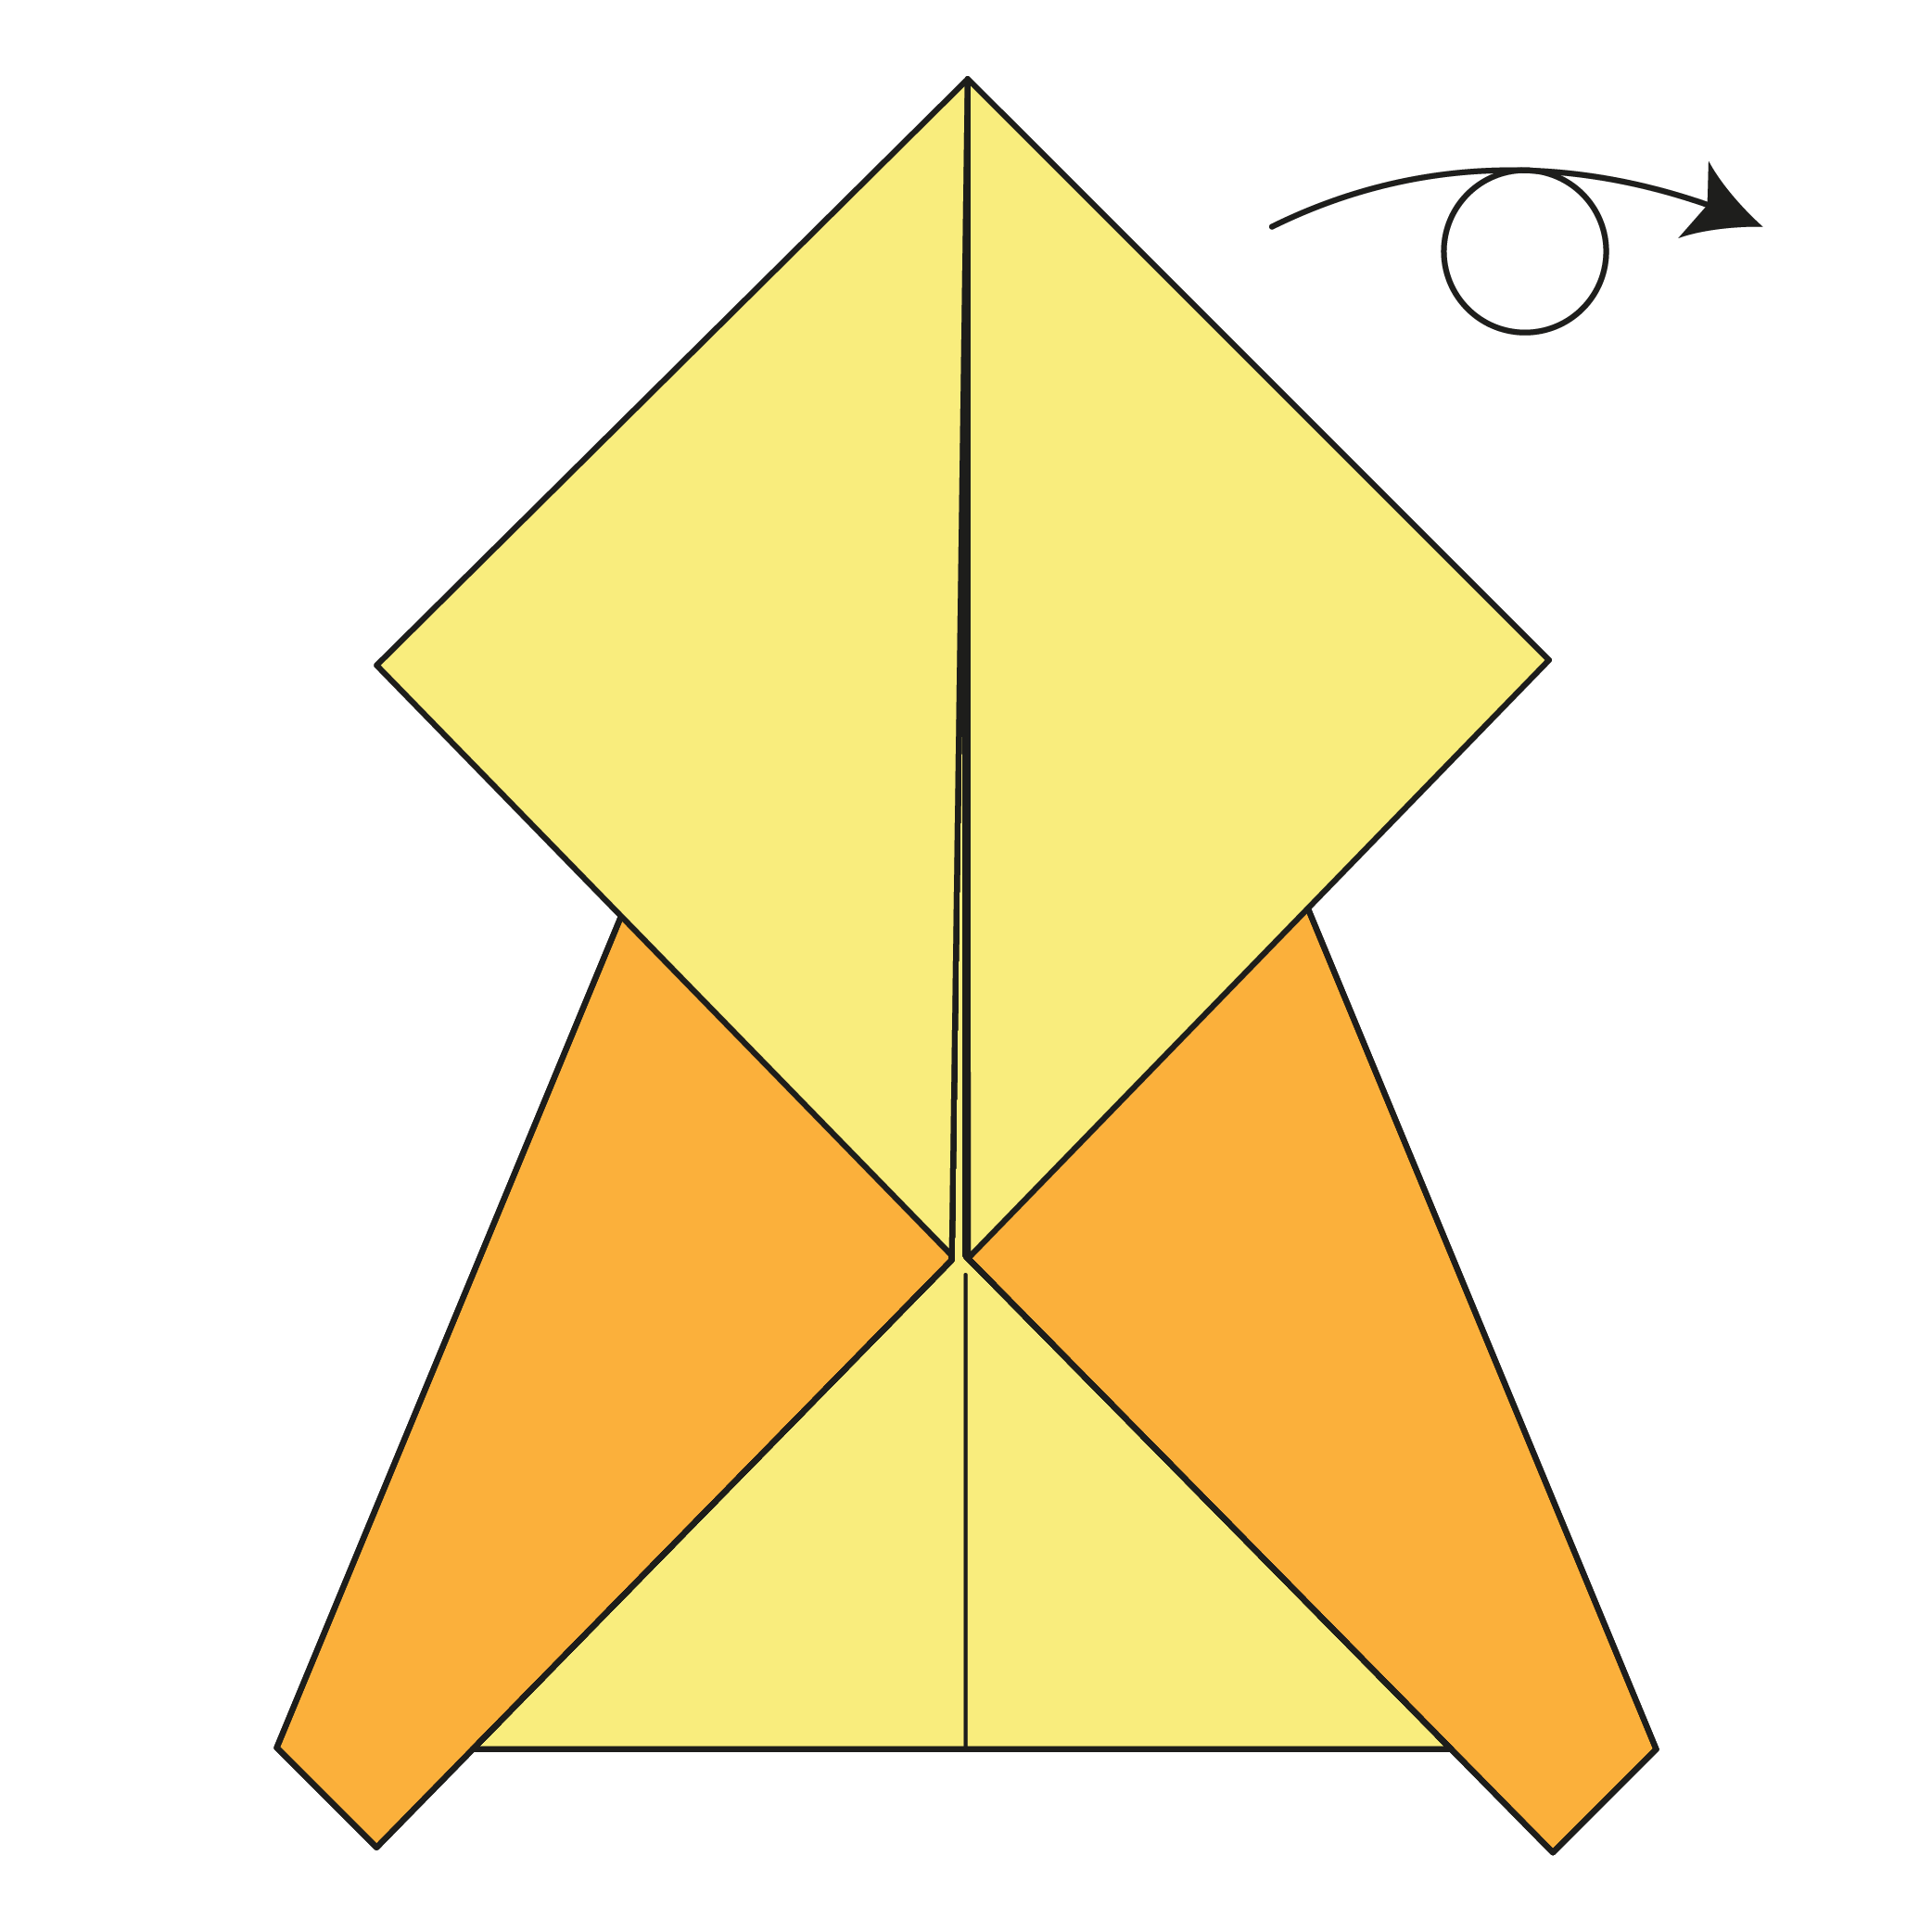
Use the creases from Step 10 to make an inside reverse fold on each side.
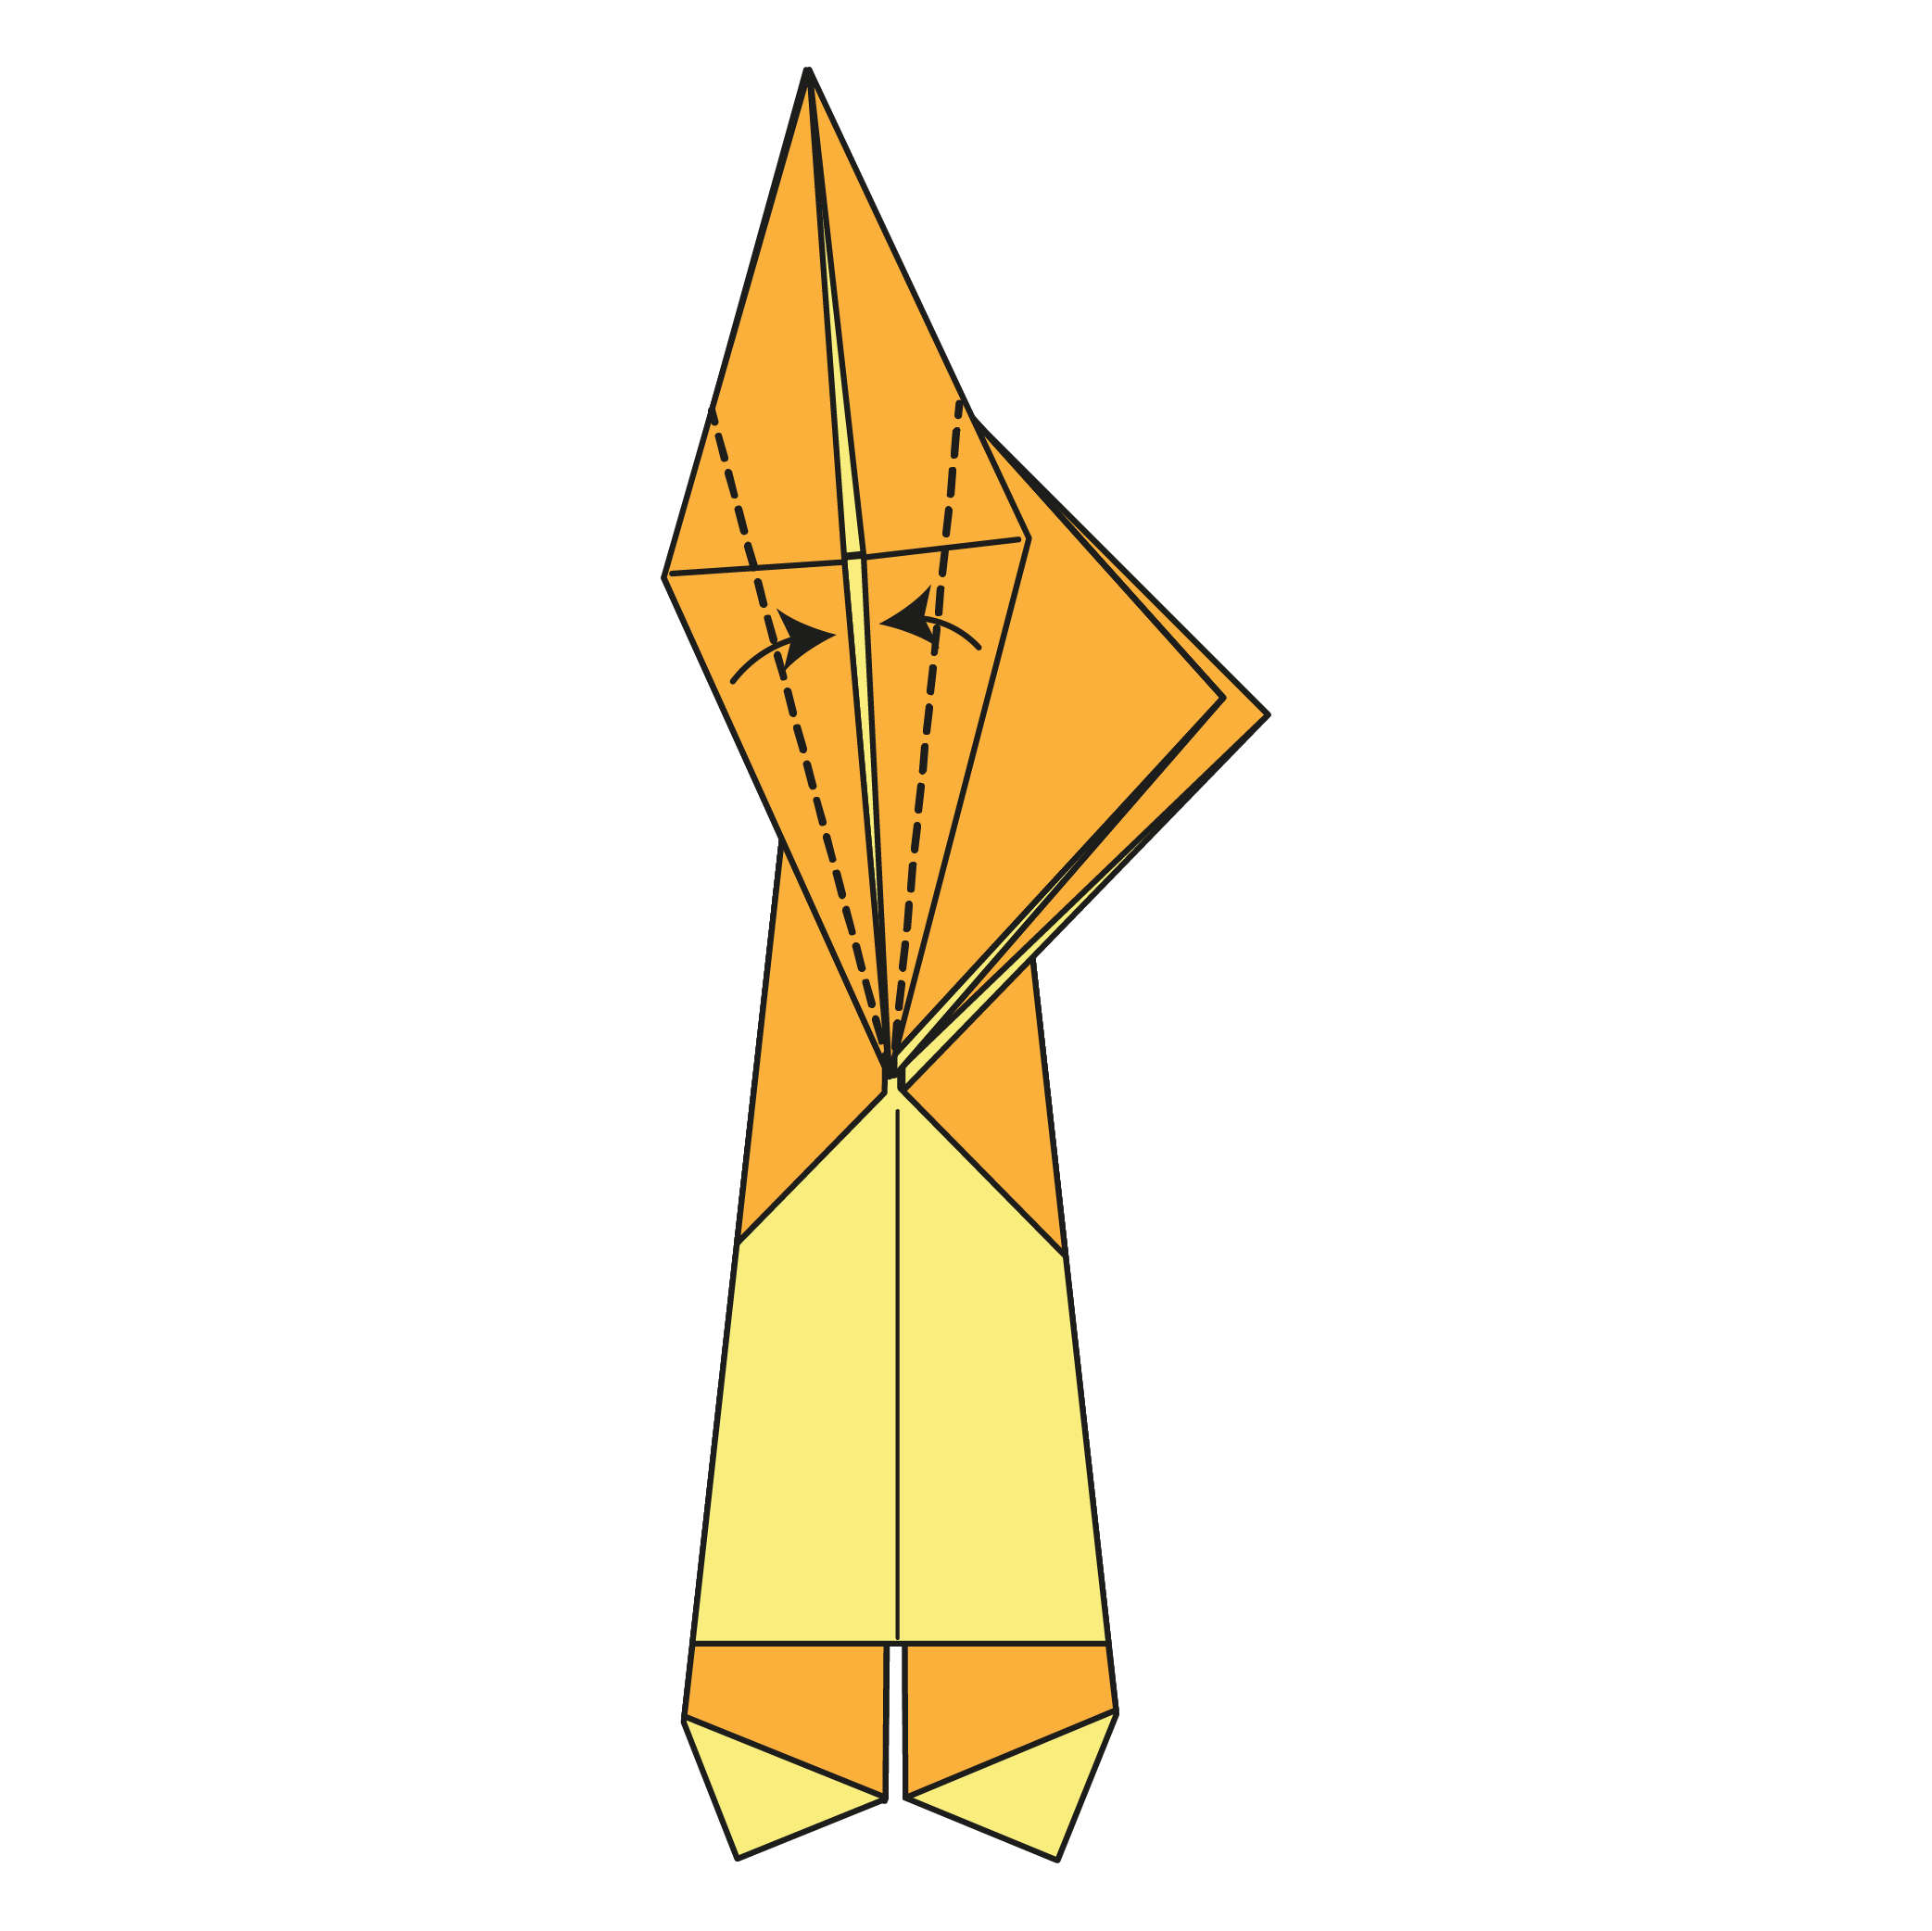
Step 12
Flip the top-left flap over to the right.
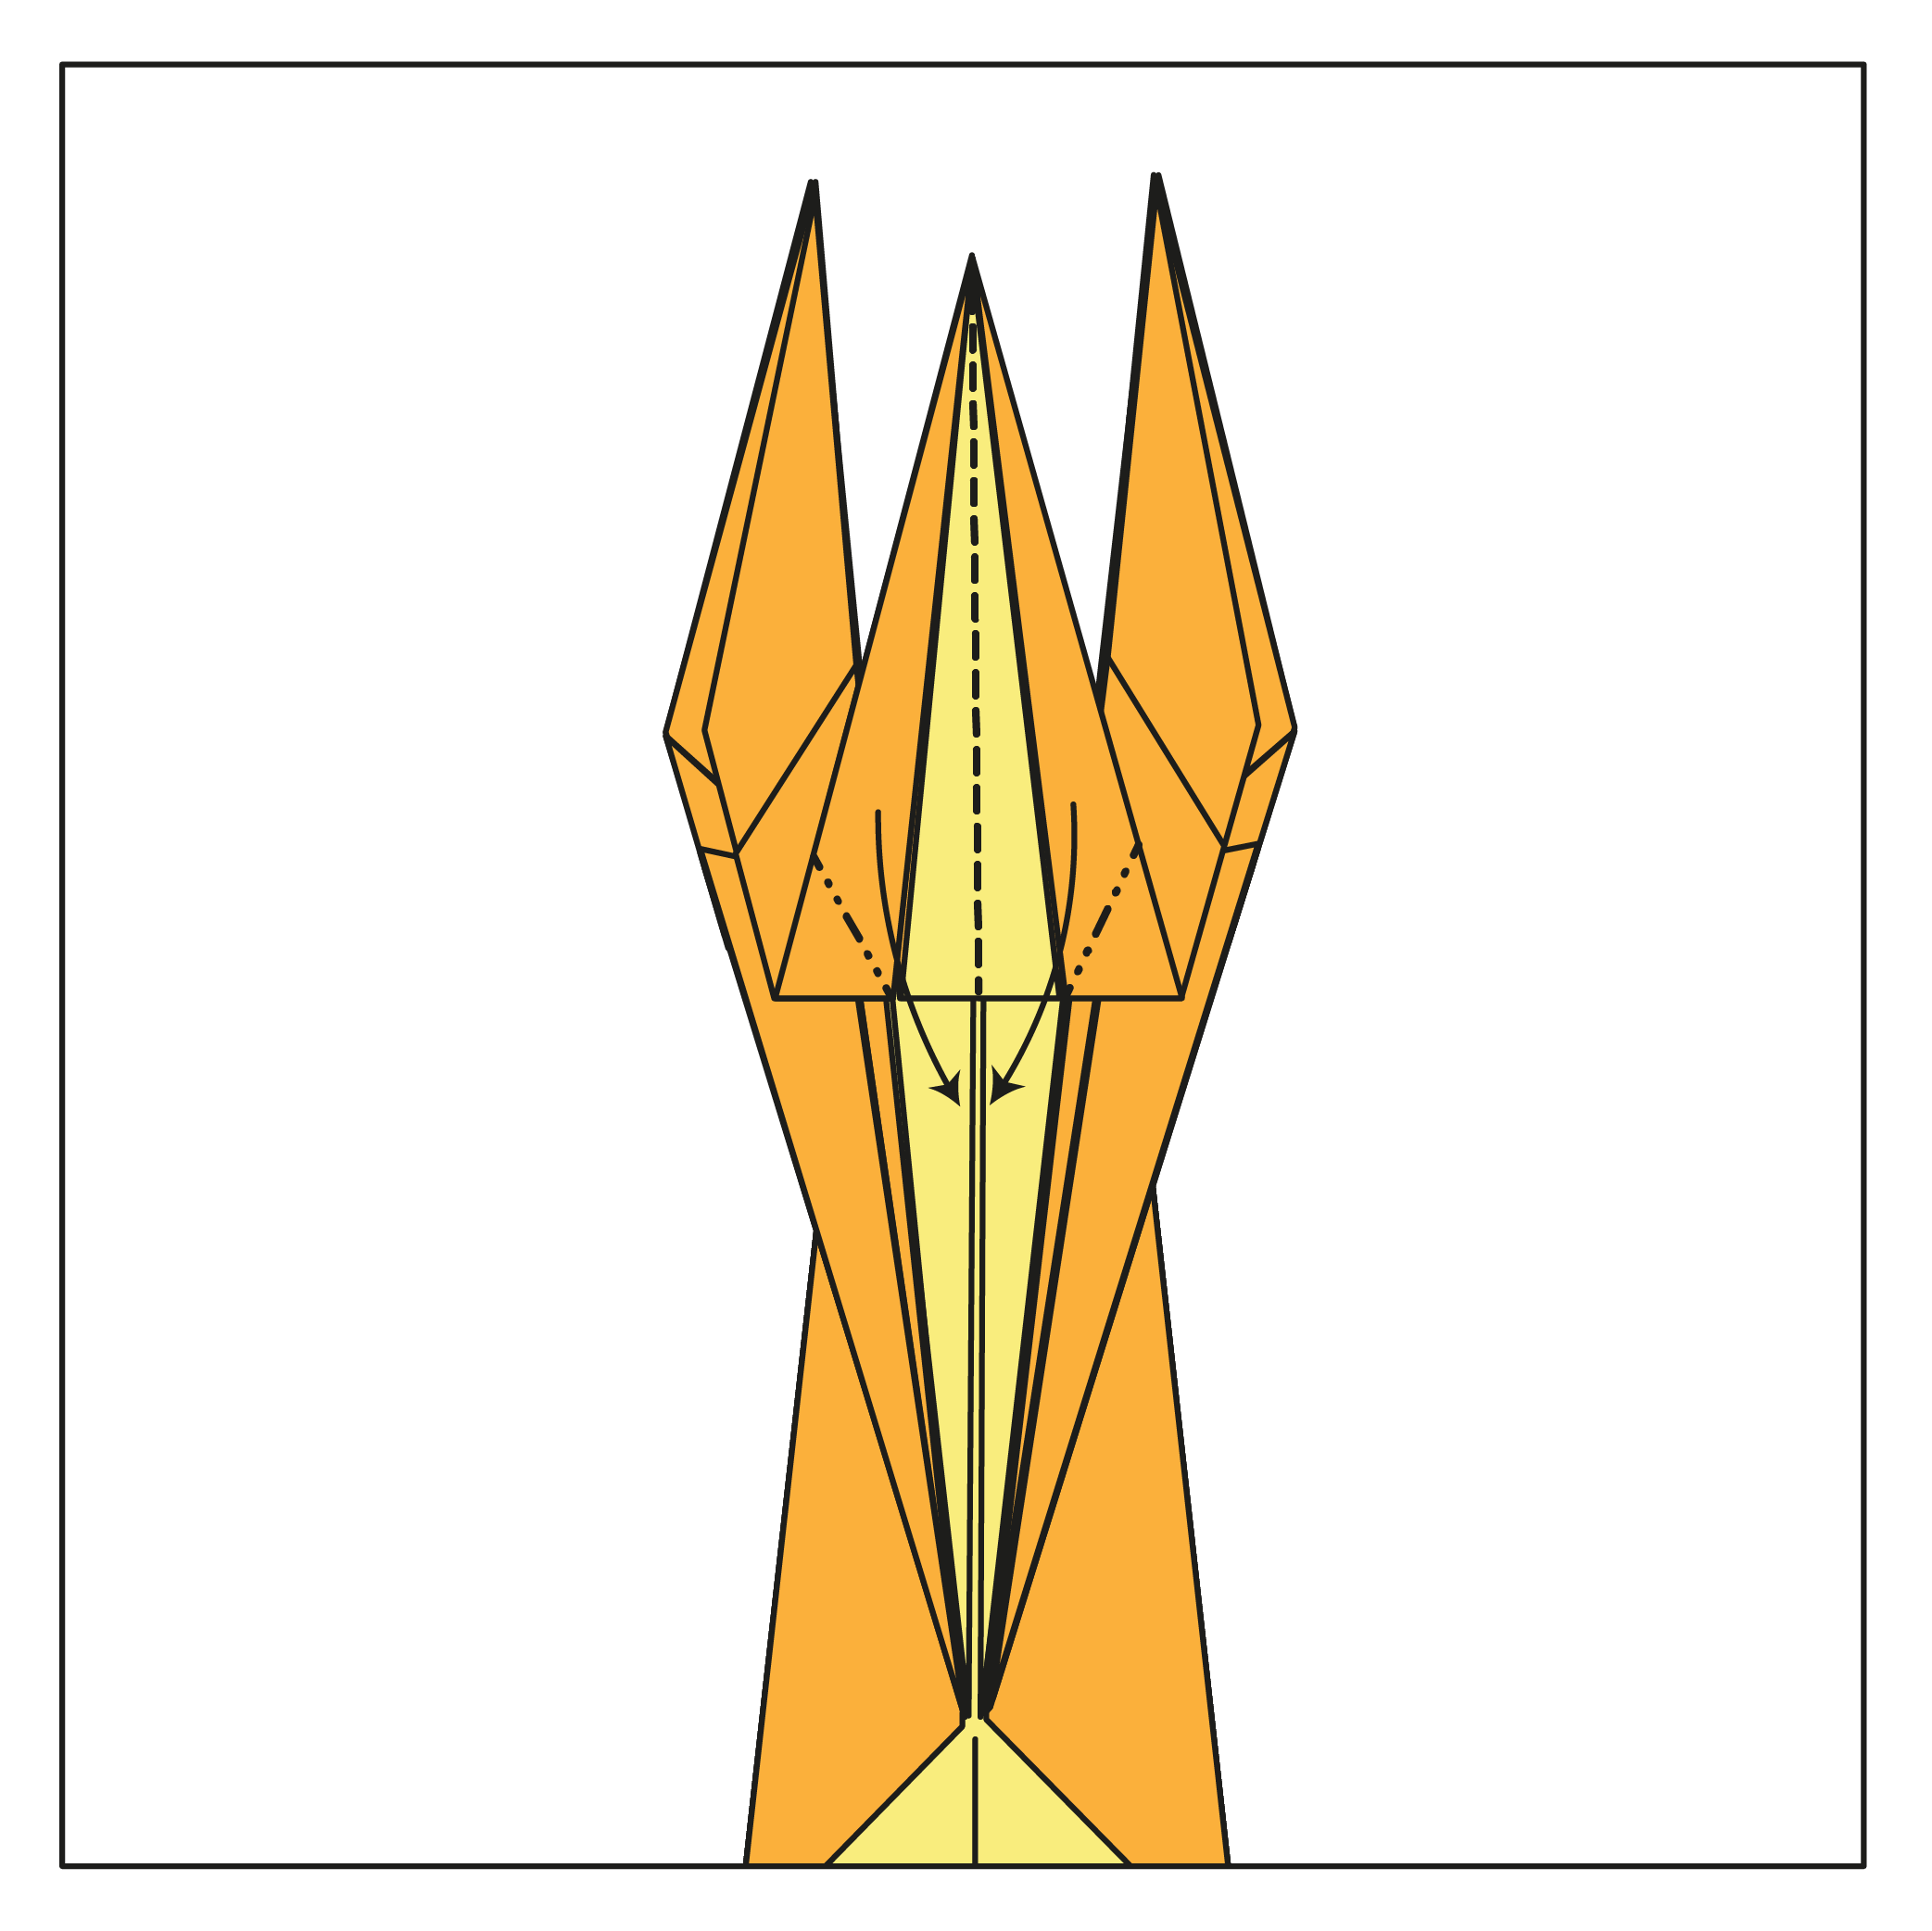
Step 13

Fold and unfold the top flap’s left and right edges to the center crease.
Step 14
Create a petal fold using the creases from Step 13.
🐦🔥 Folding tip: Adjust the creases from Step 13 as needed to form a clean petal fold.
Step 15
Fold the left and right edges of the top flap to the centerline.
Step 16
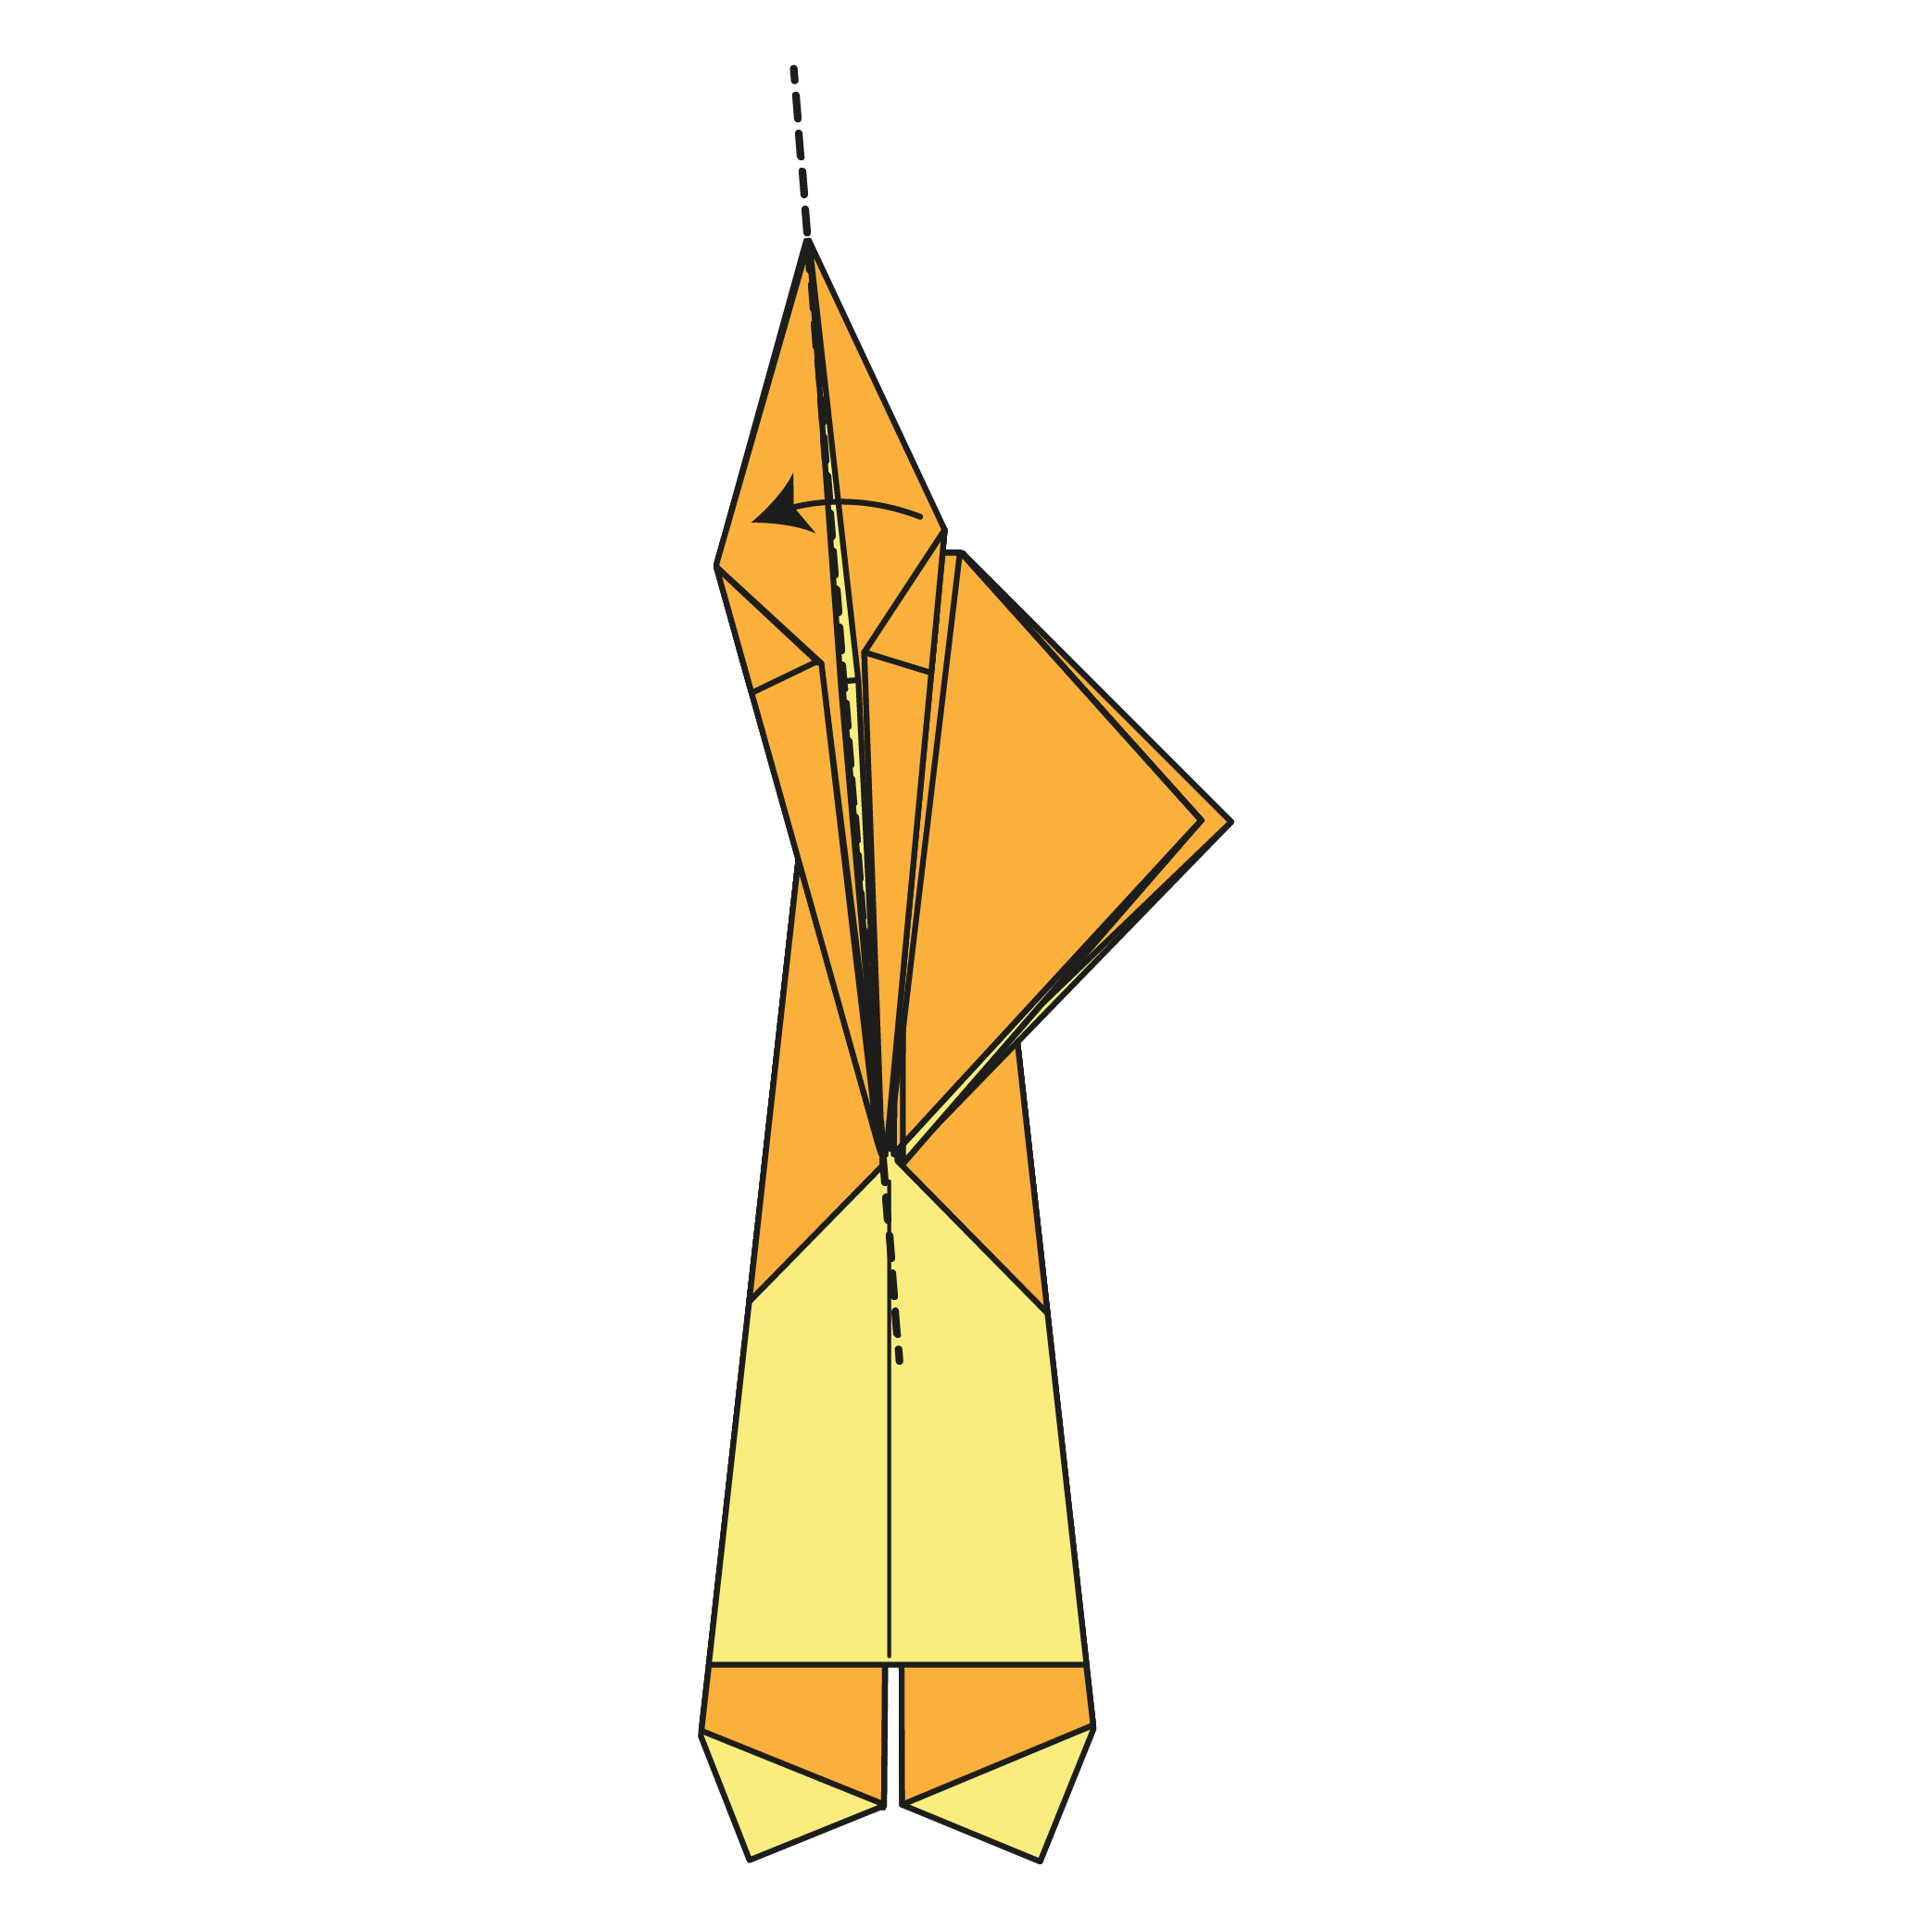
Flip the top-right flap over to the left.
Step 17

On the right side, flip the top flap over to the left.
Step 18

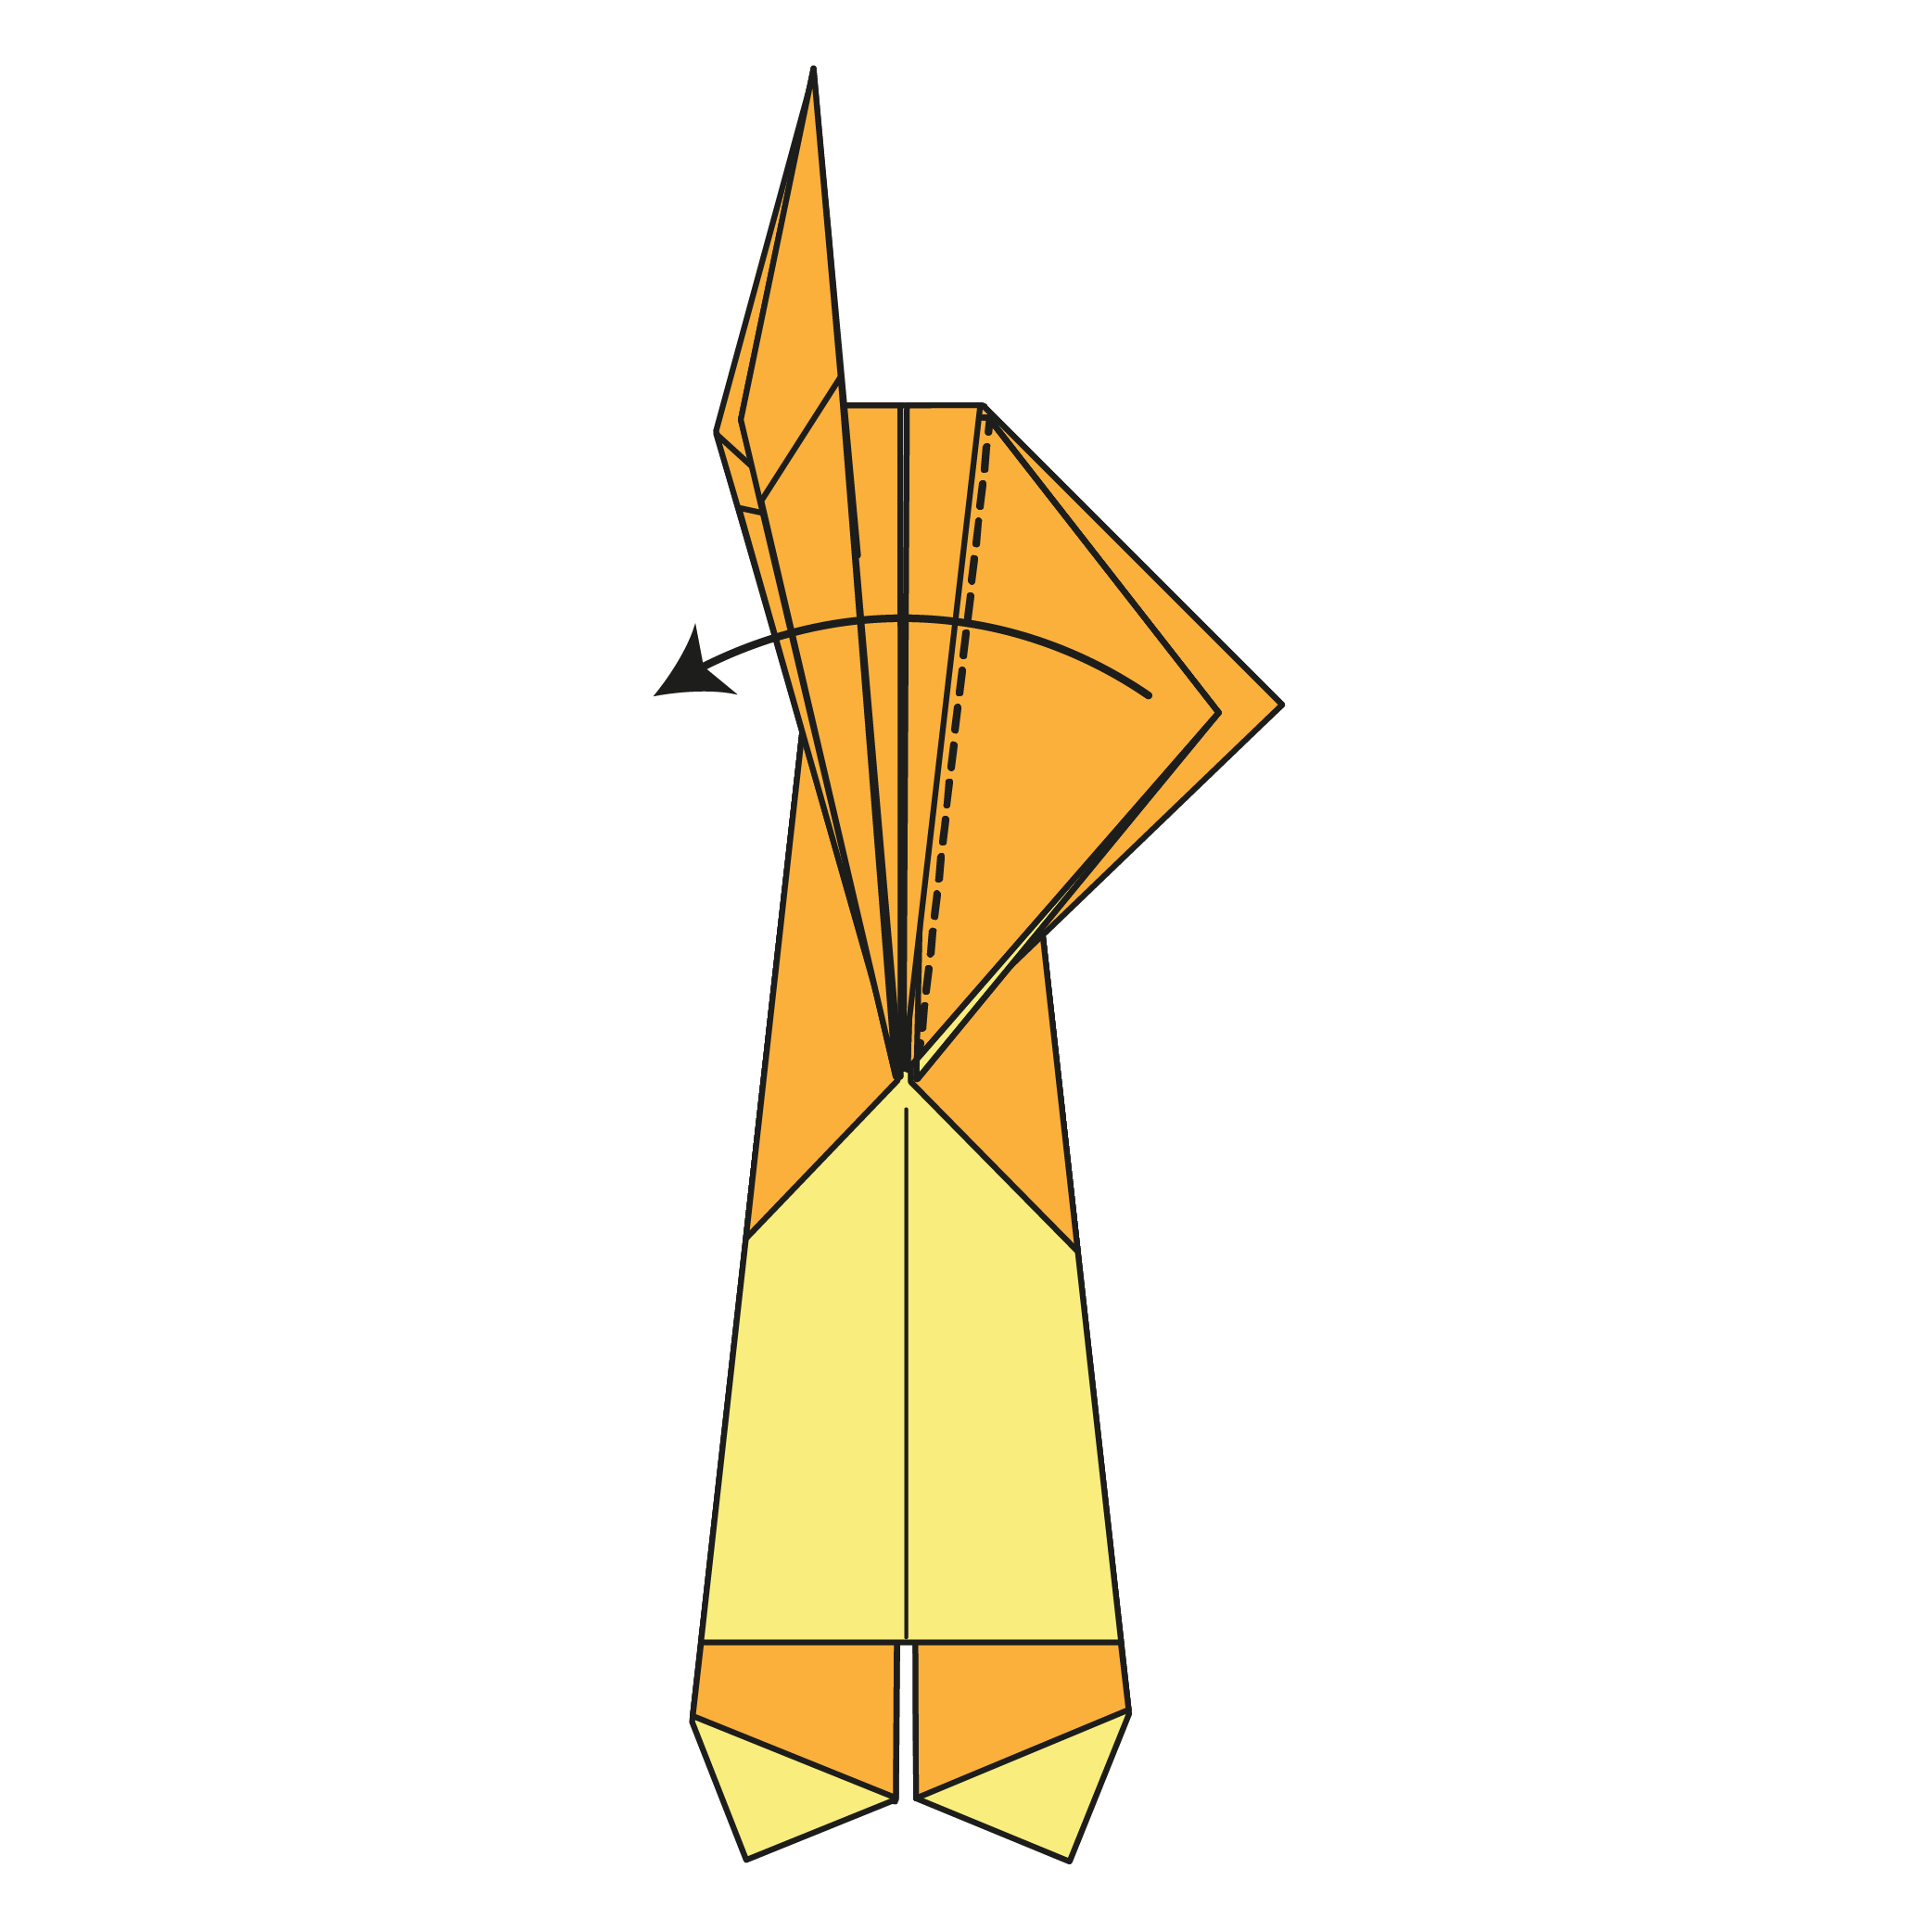
Repeat Steps 13–16 on the right side.
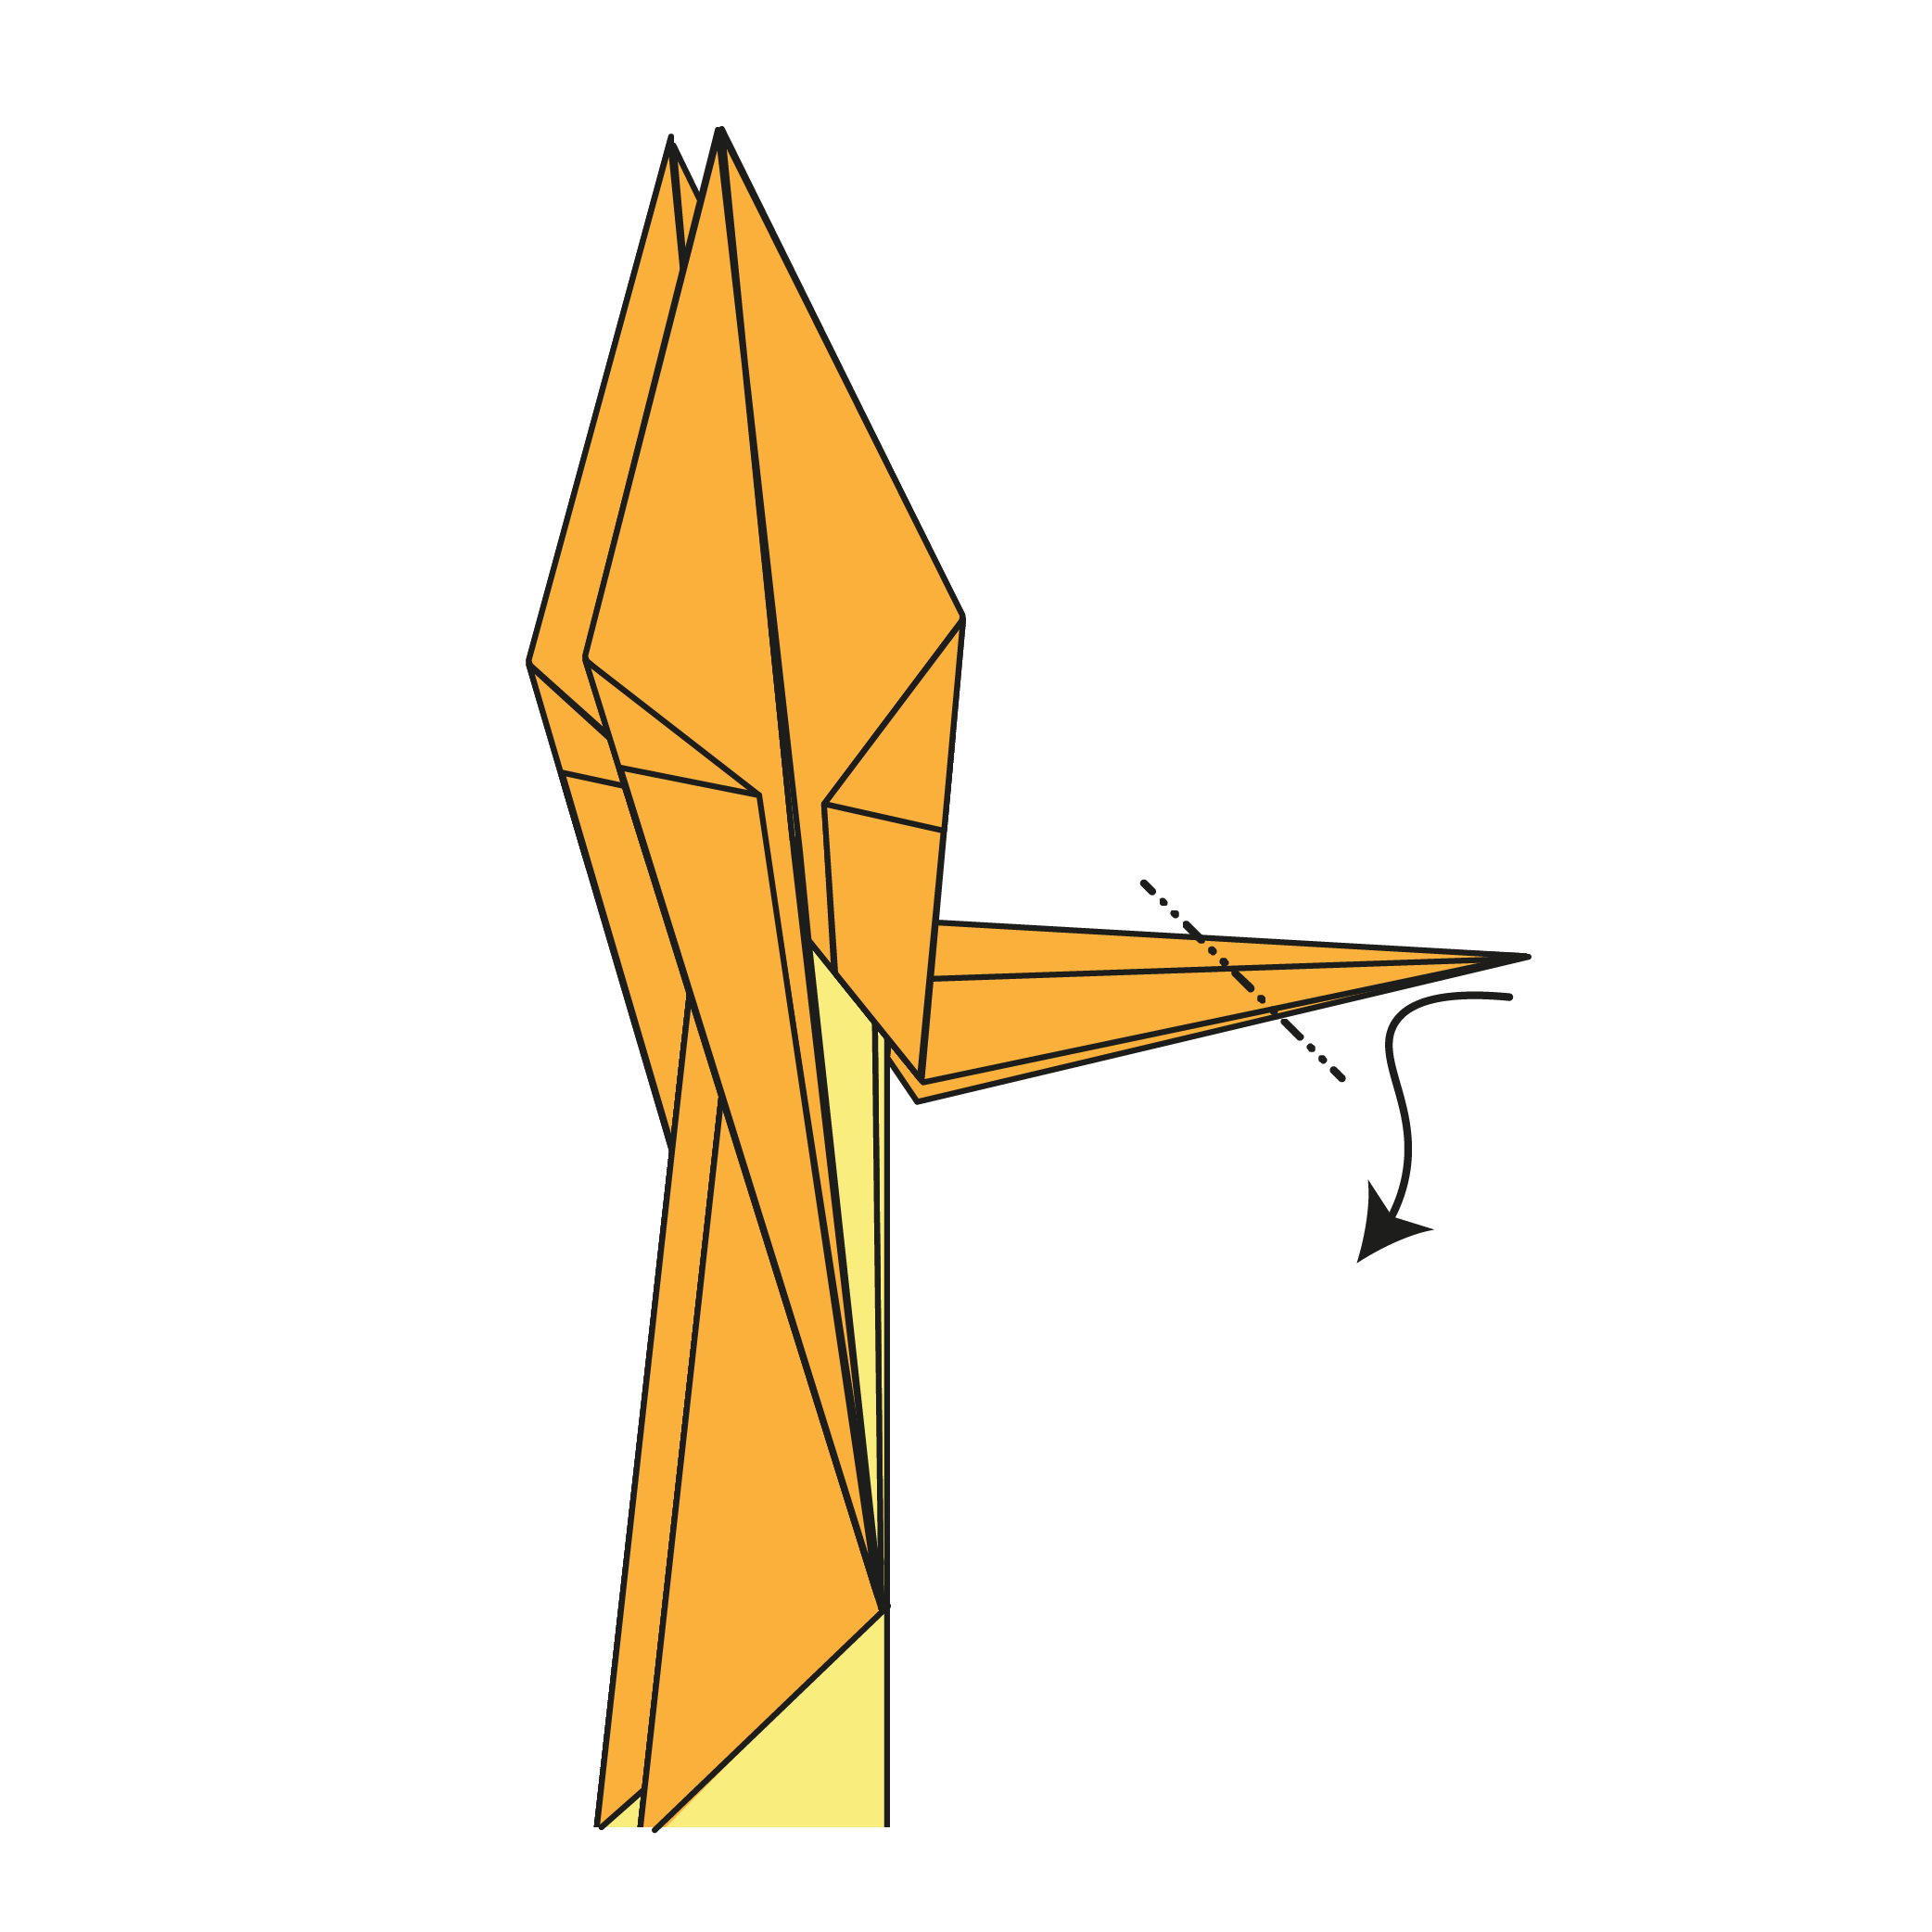
Step 19
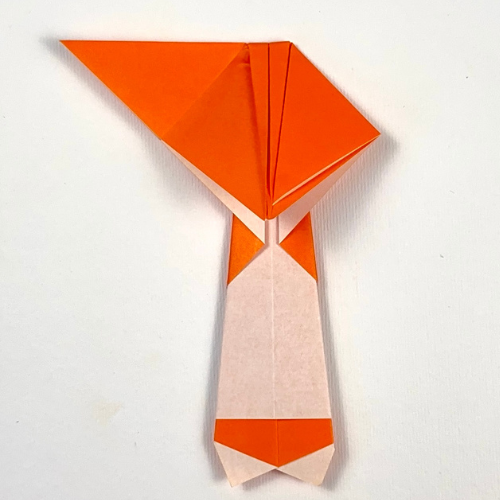
Fold the lower corner upward along the dotted line.
Step 20
Fold the flap from Step 19 in half. Position it at a 90° angle.
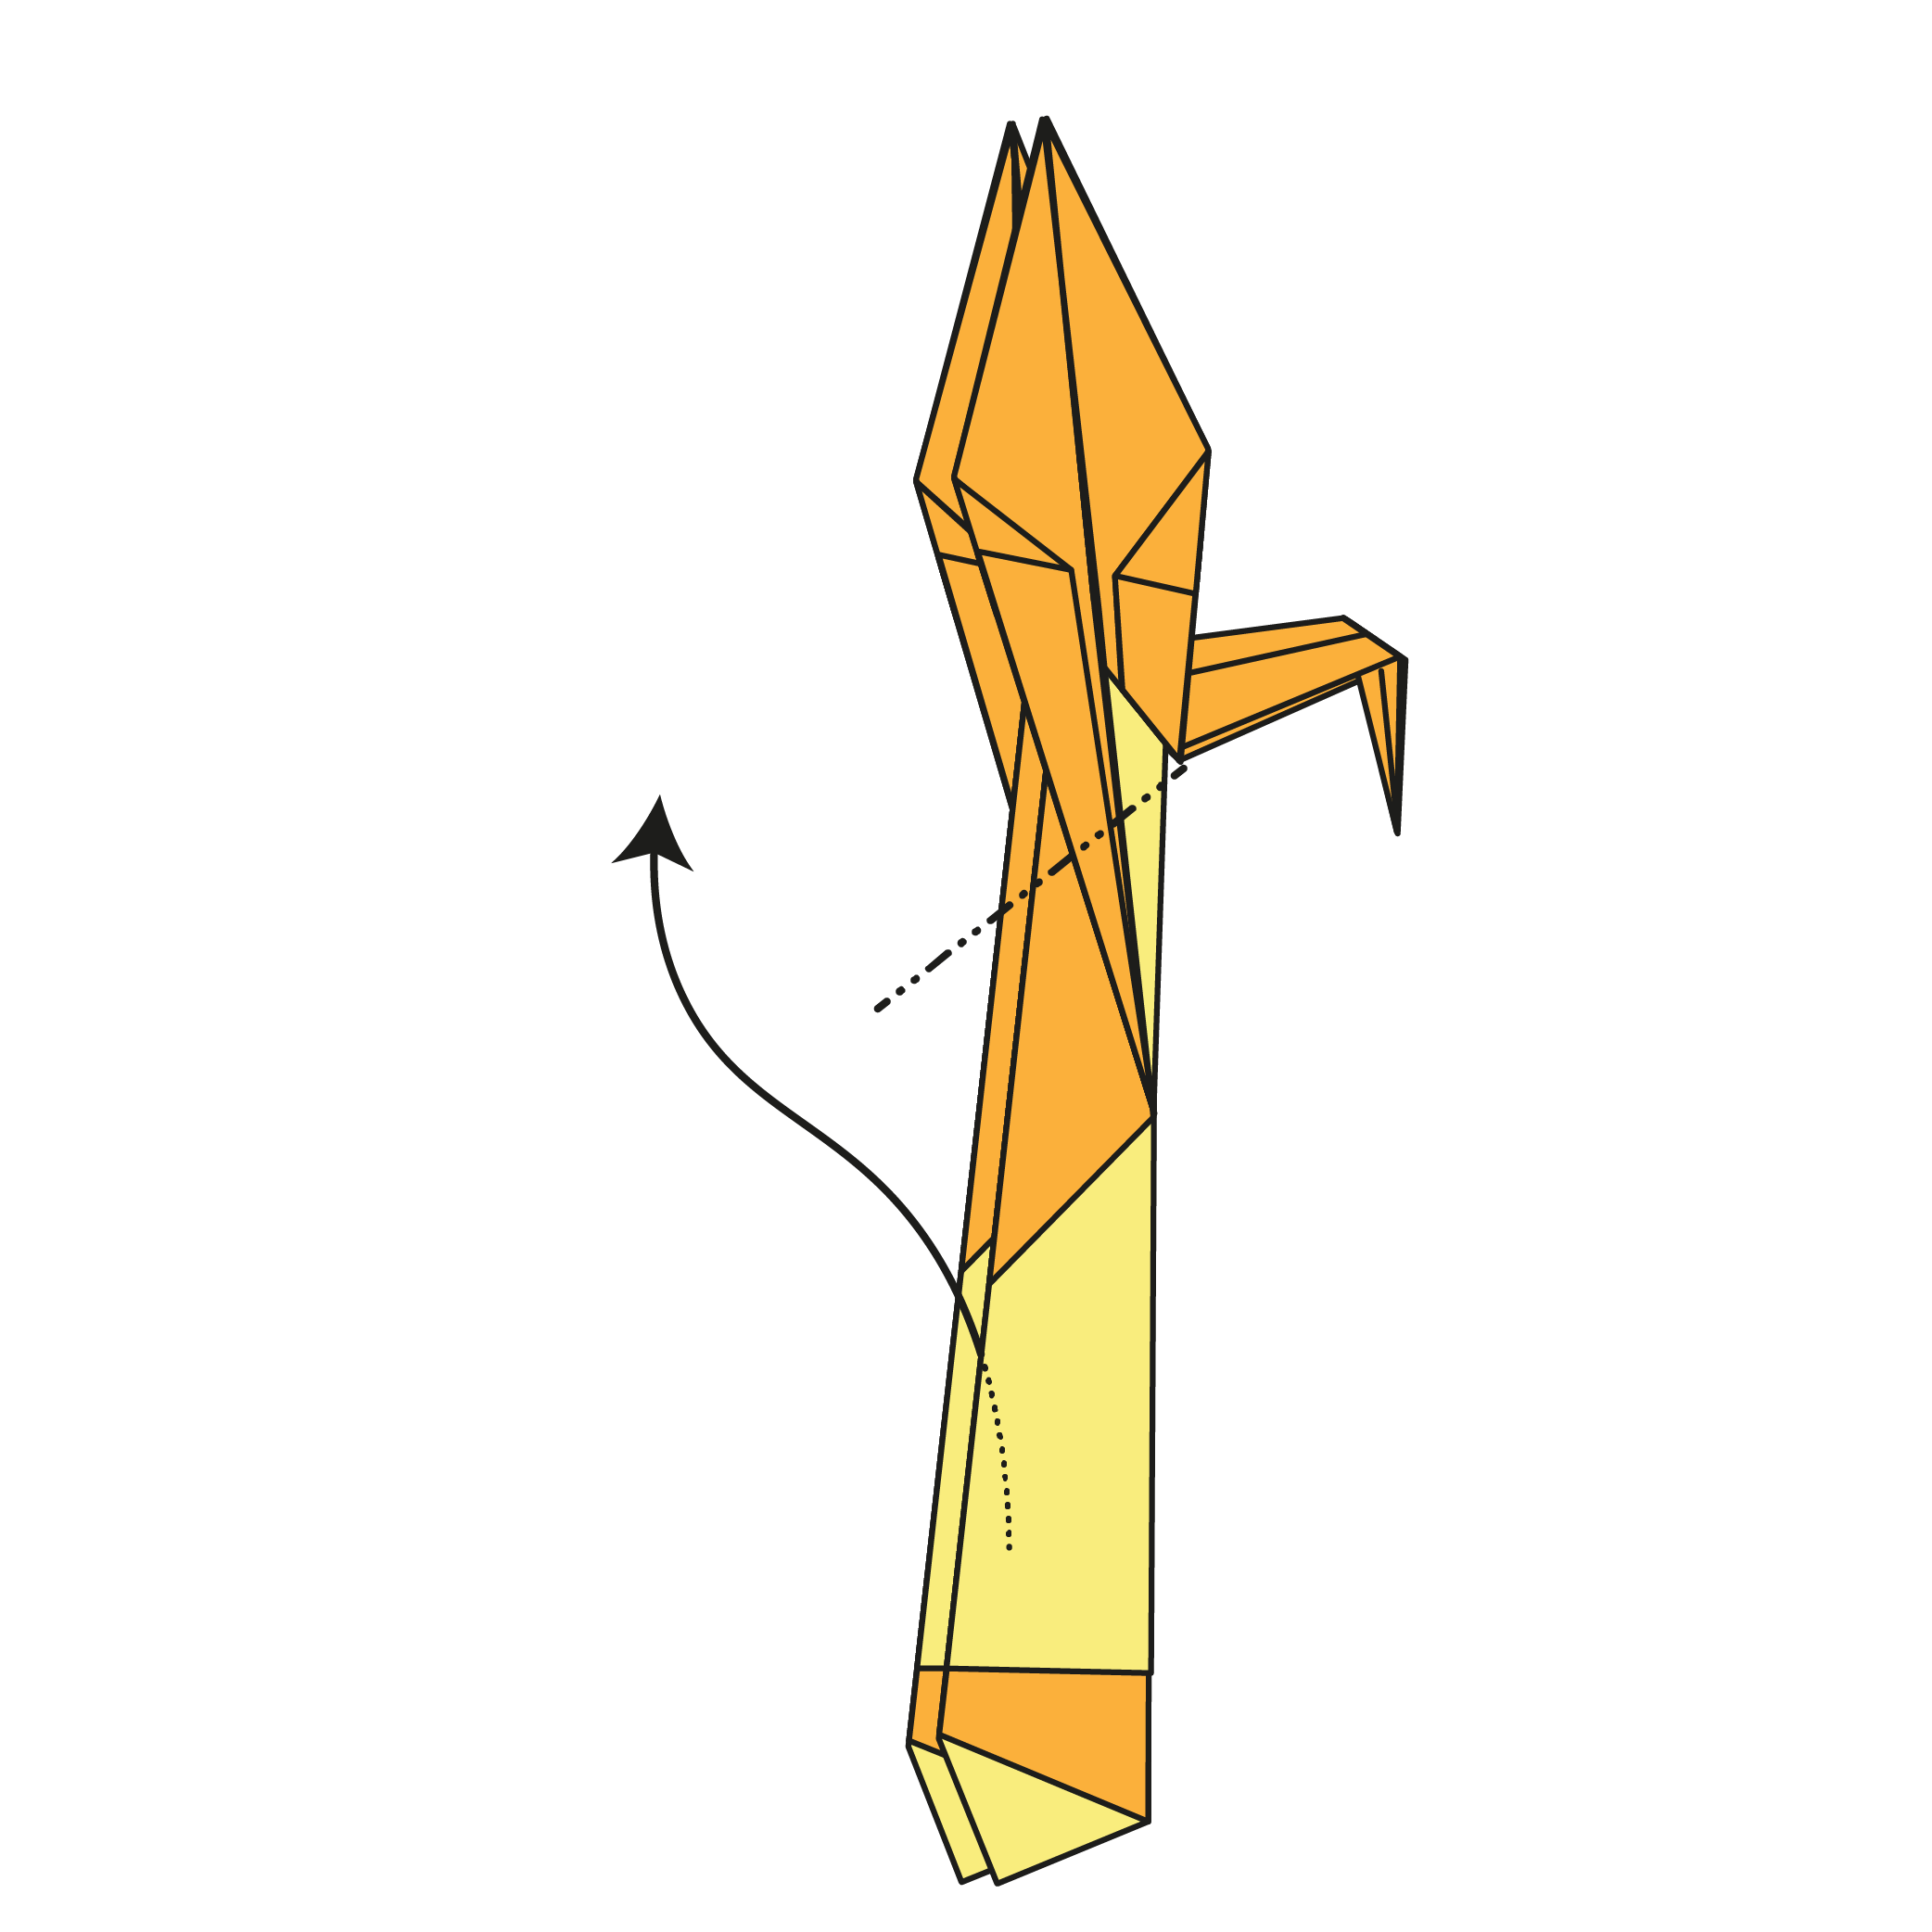
Step 21

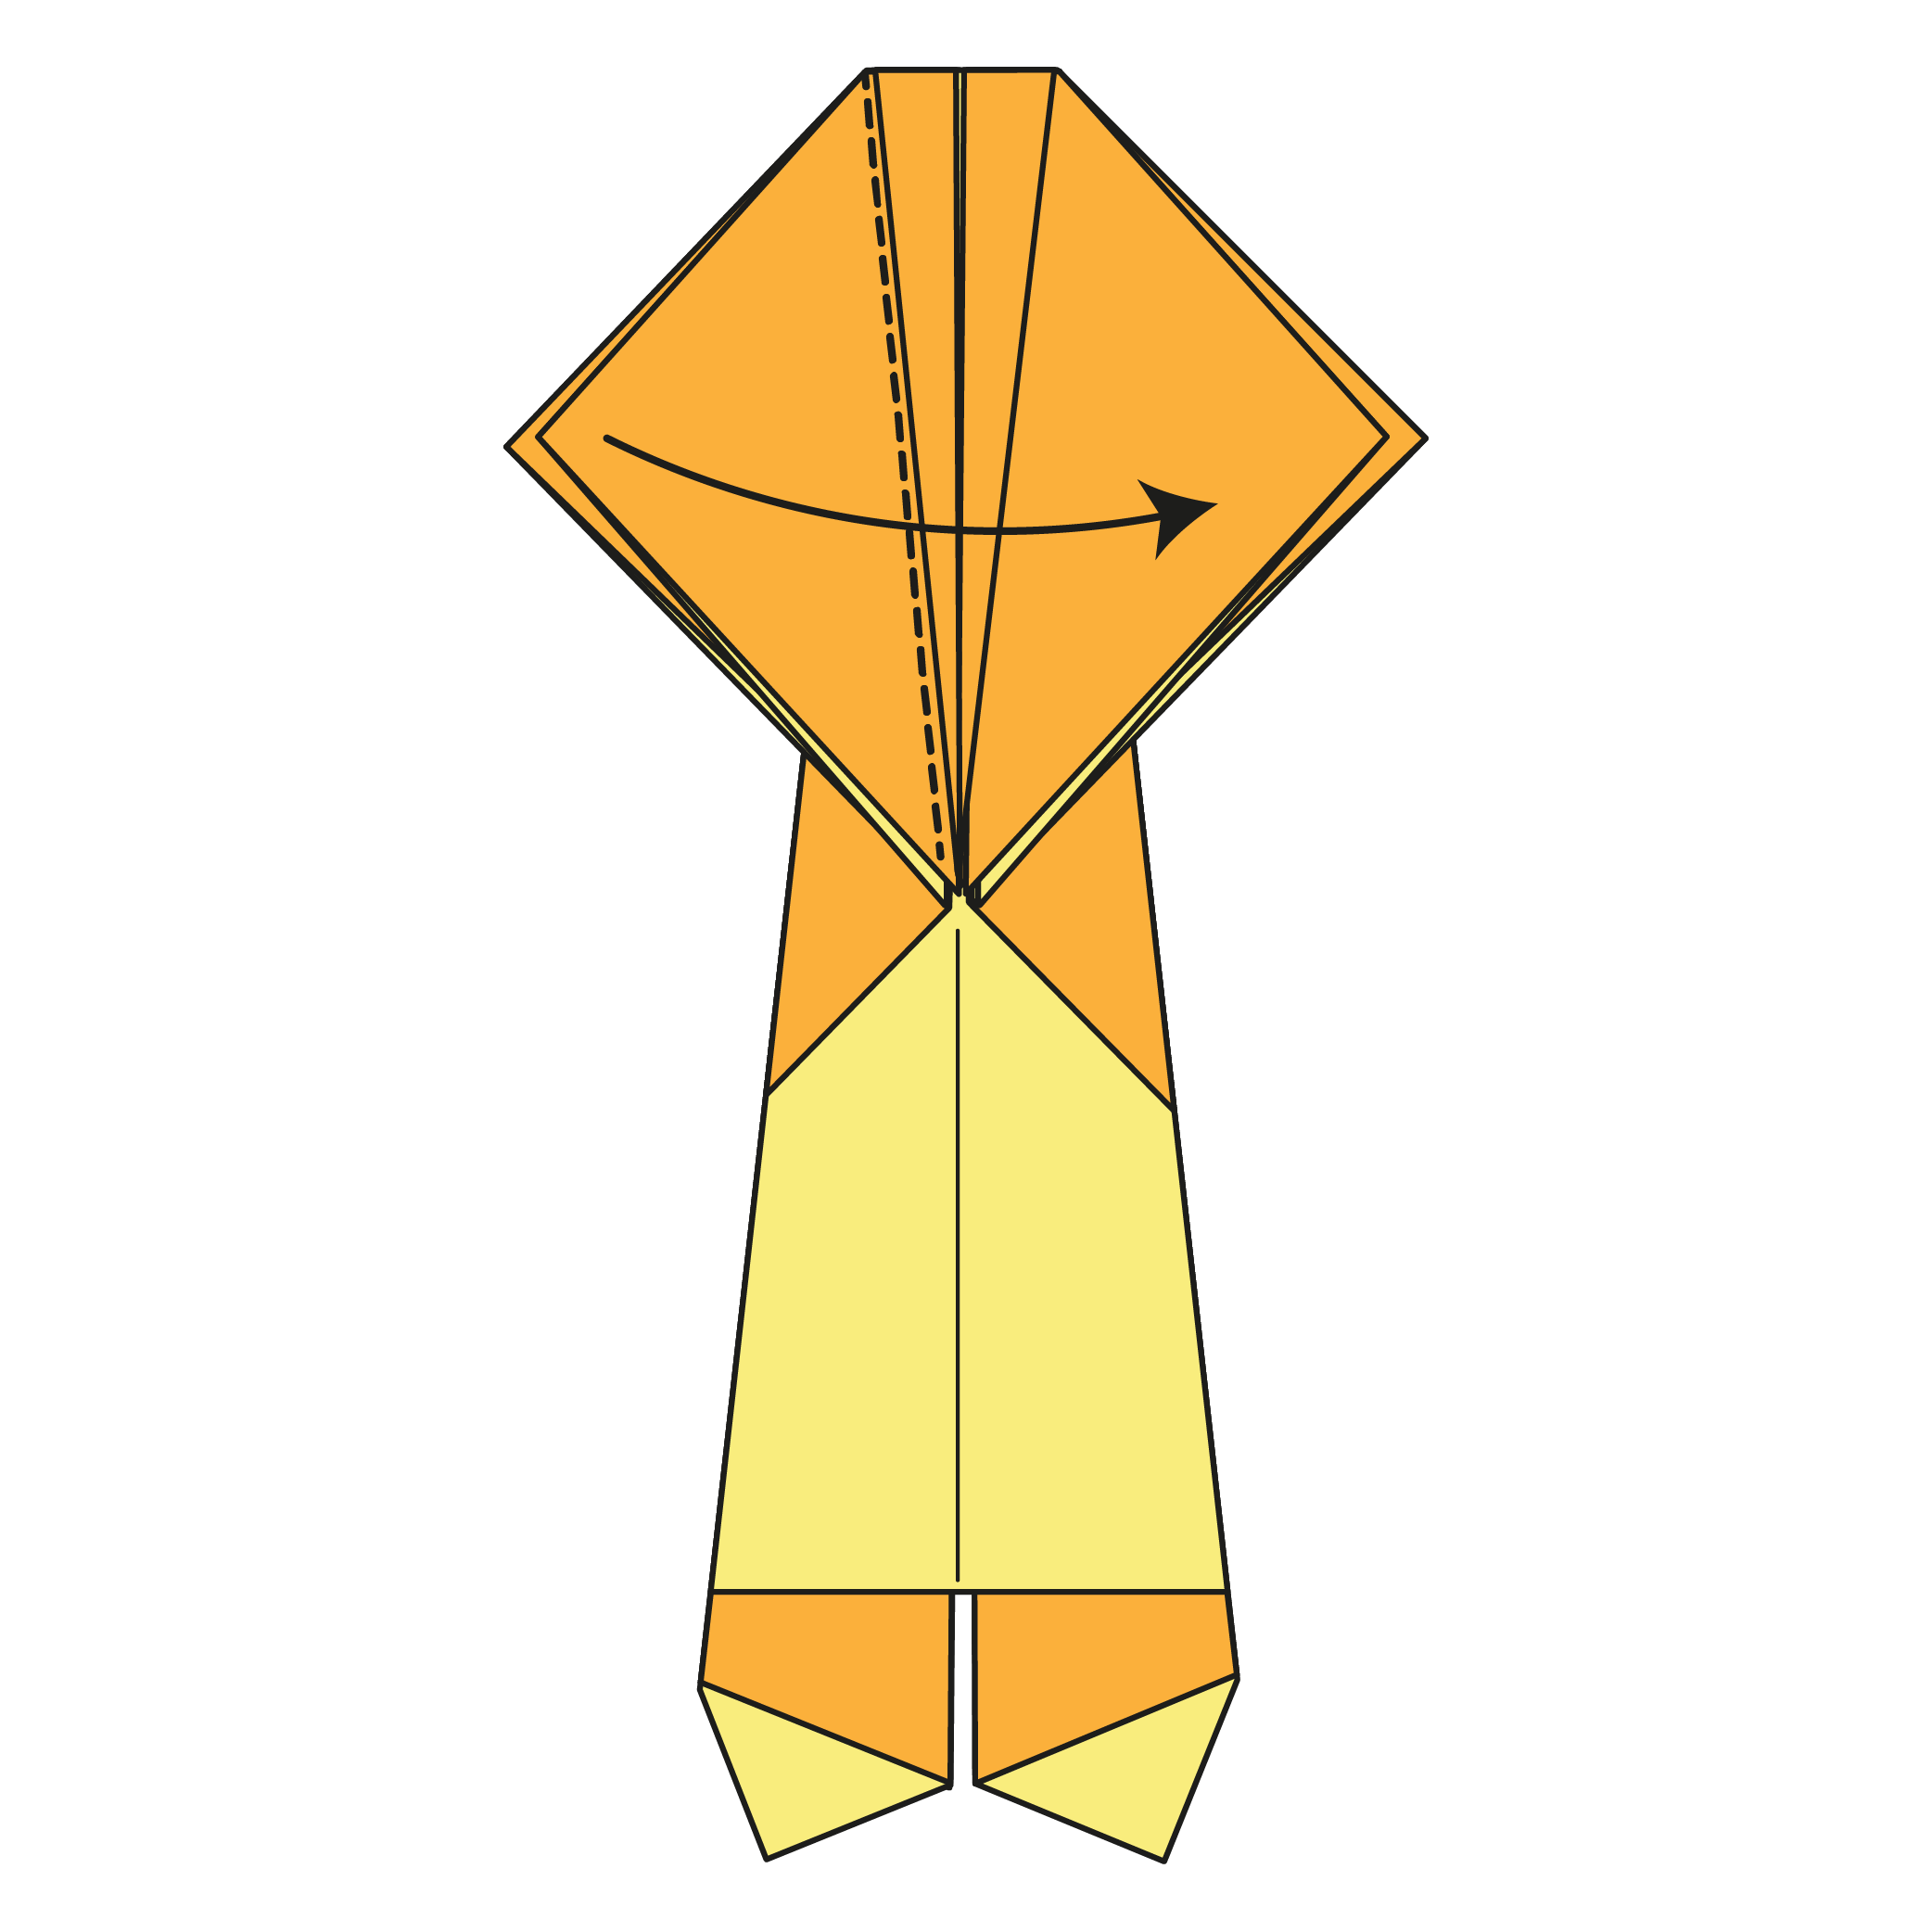
Mountain fold the model in half.
Step 22
Make an inside reverse fold to shape the phoenix’s head.
Step 23
Make an inside reverse fold to form the phoenix’s tail.
Step 24
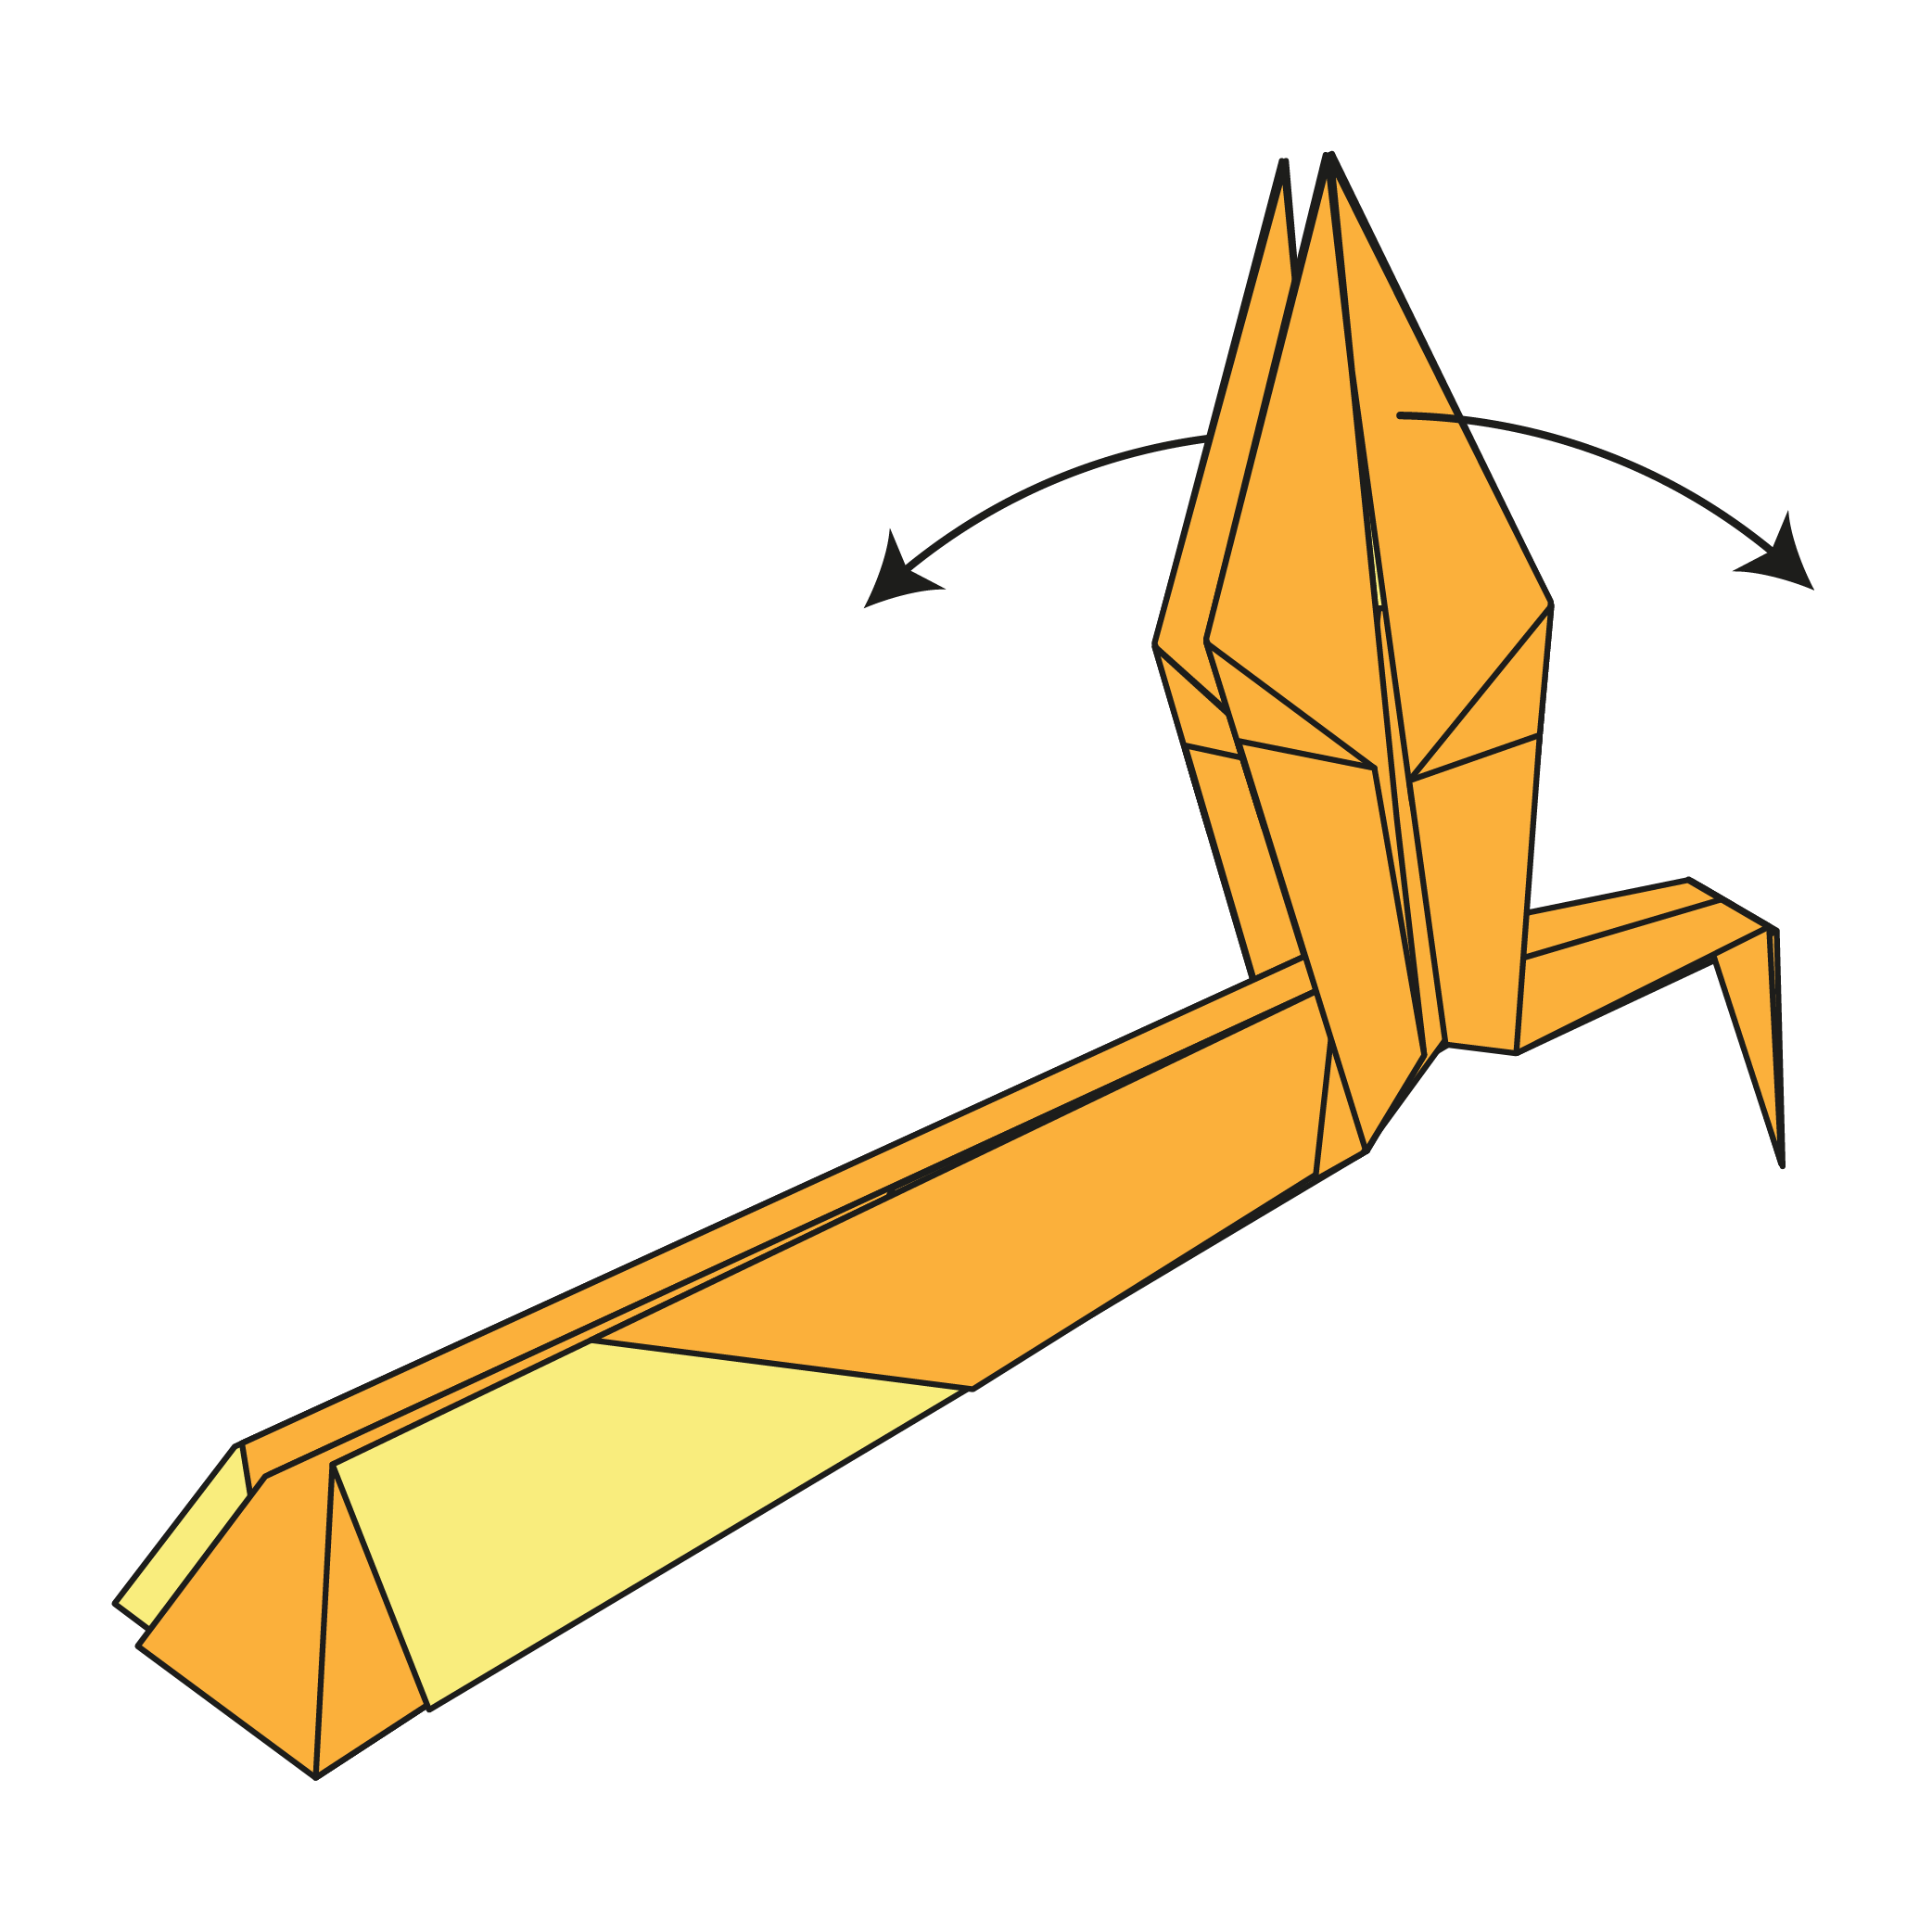
Open the wings by folding them downward.
Step 25
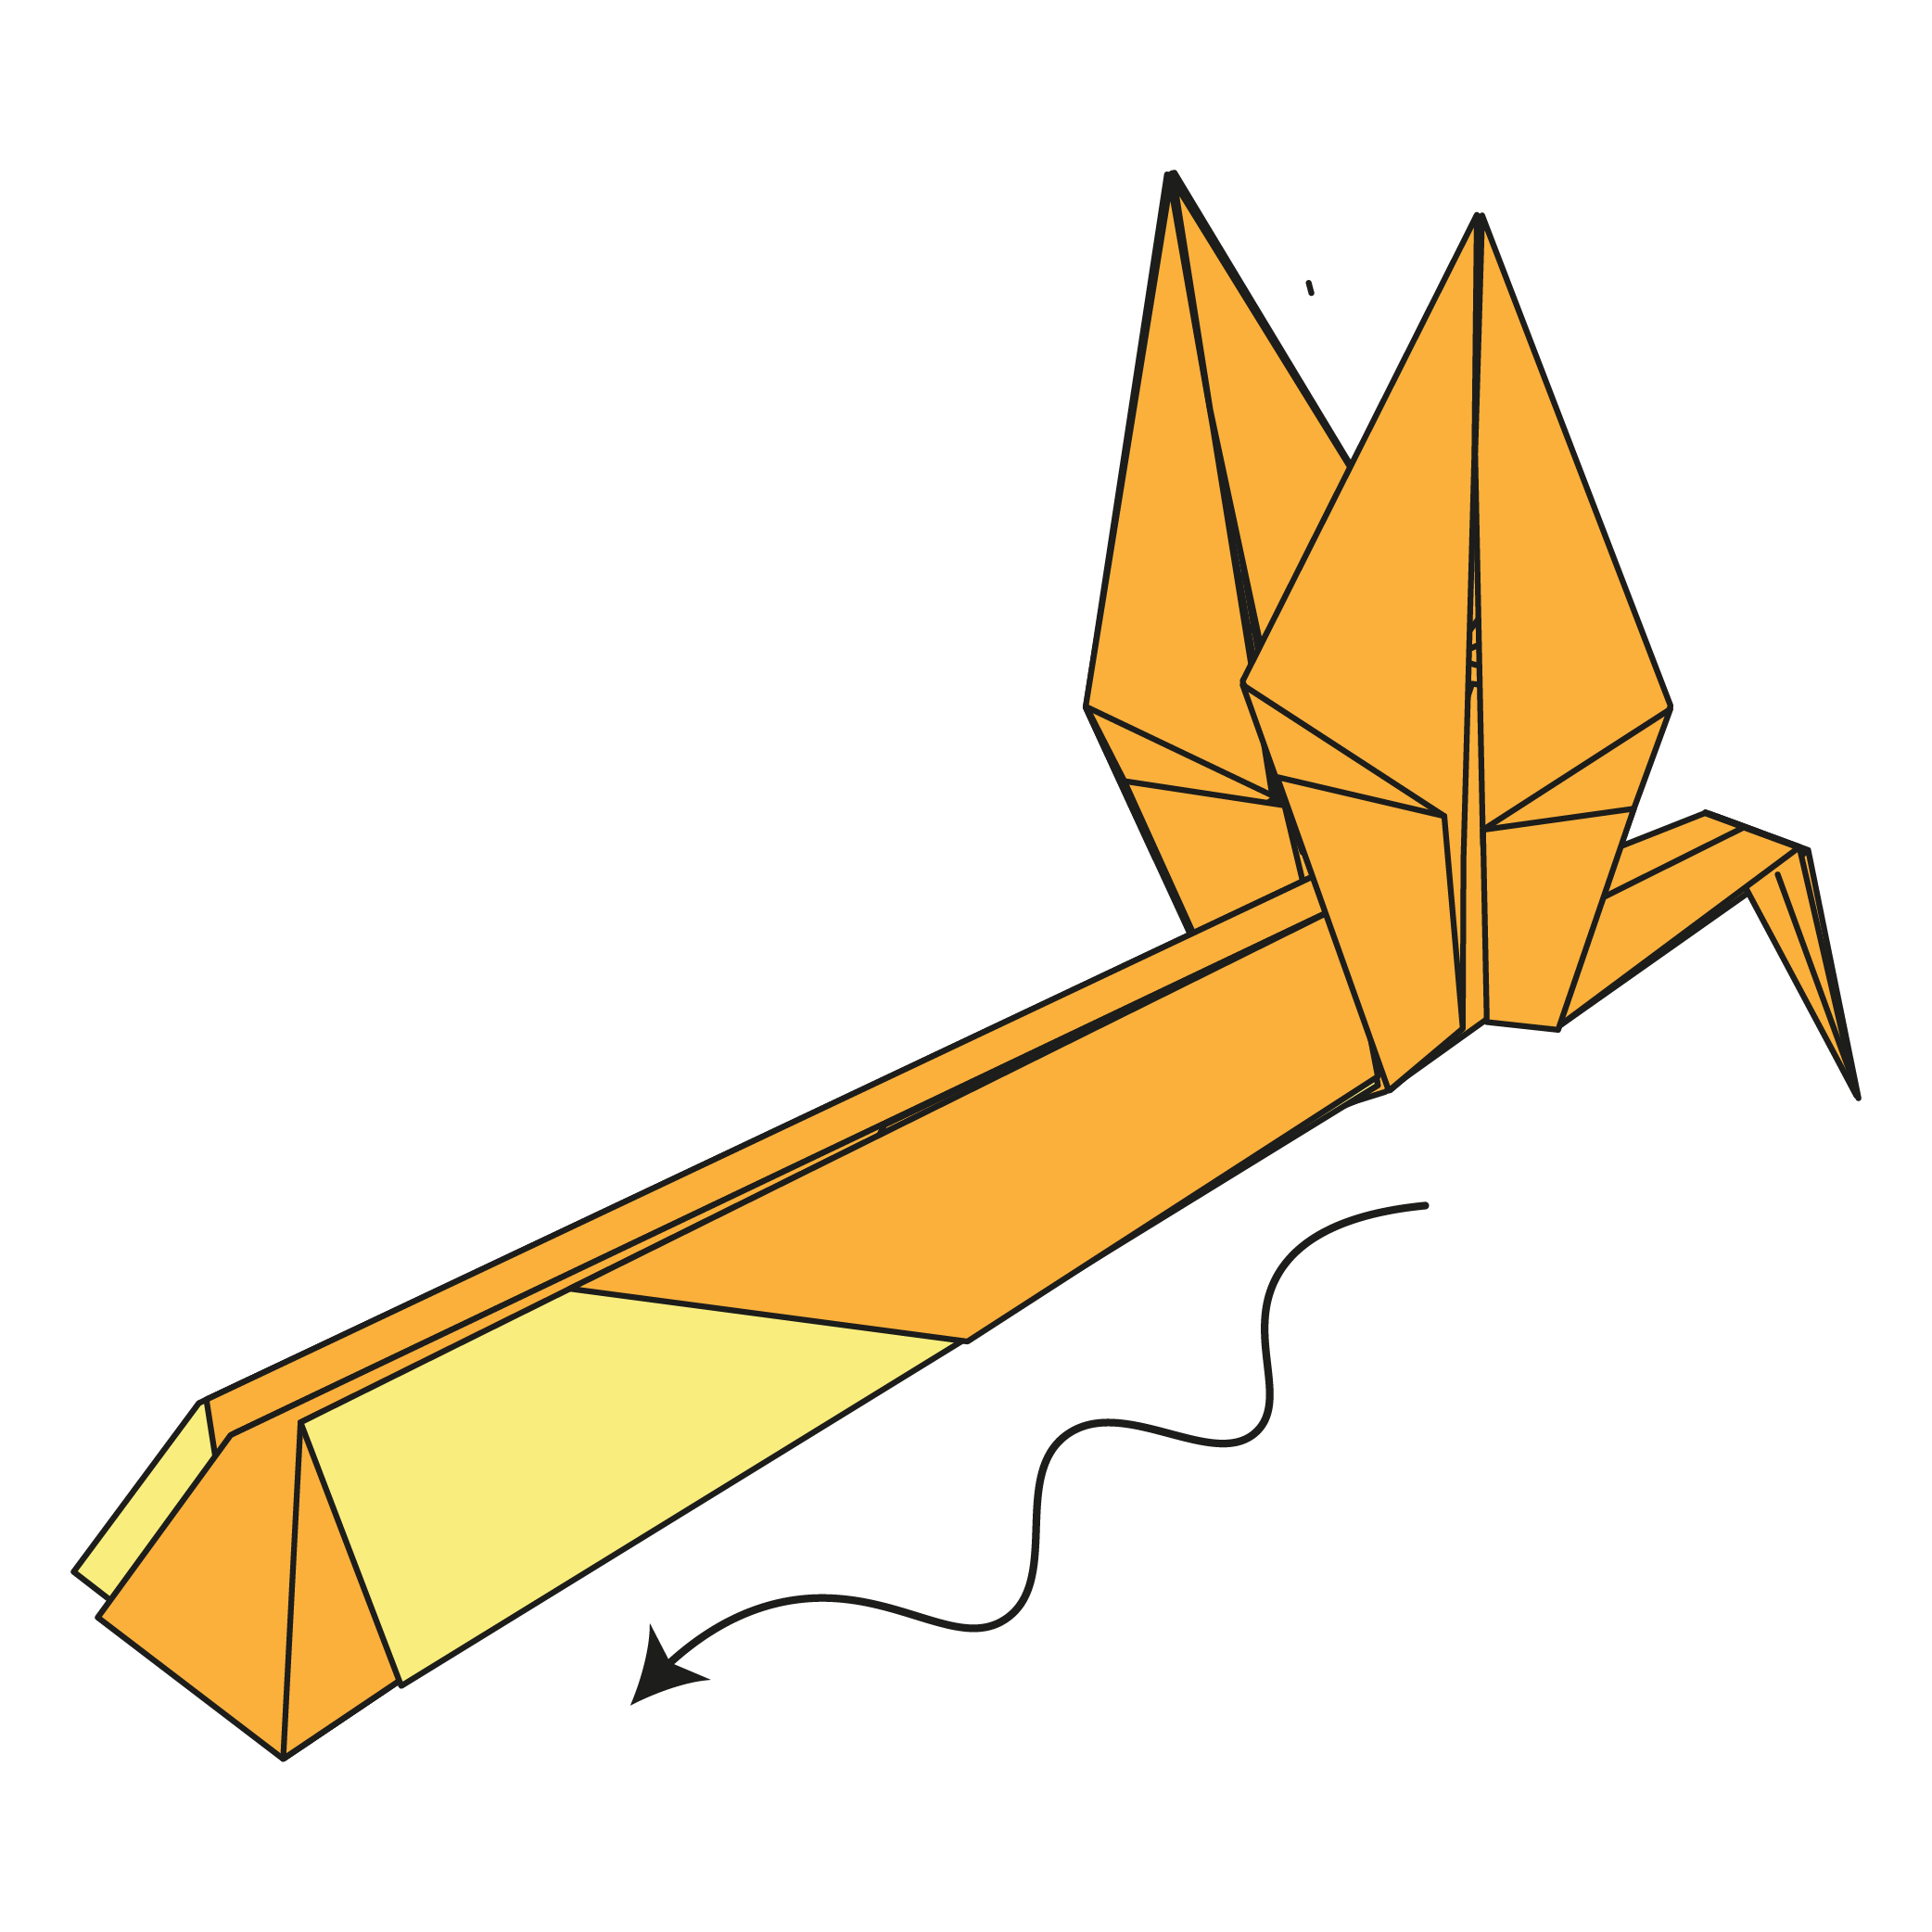
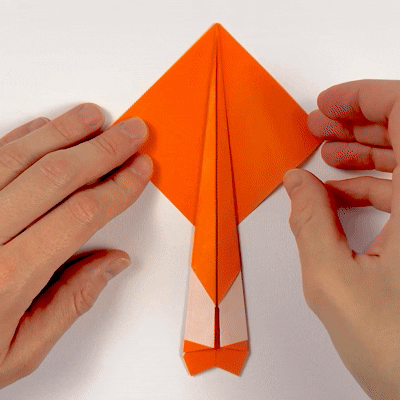
Gently curve the tail in several sections from top to bottom to create a flowing, wavy appearance.
Step 26
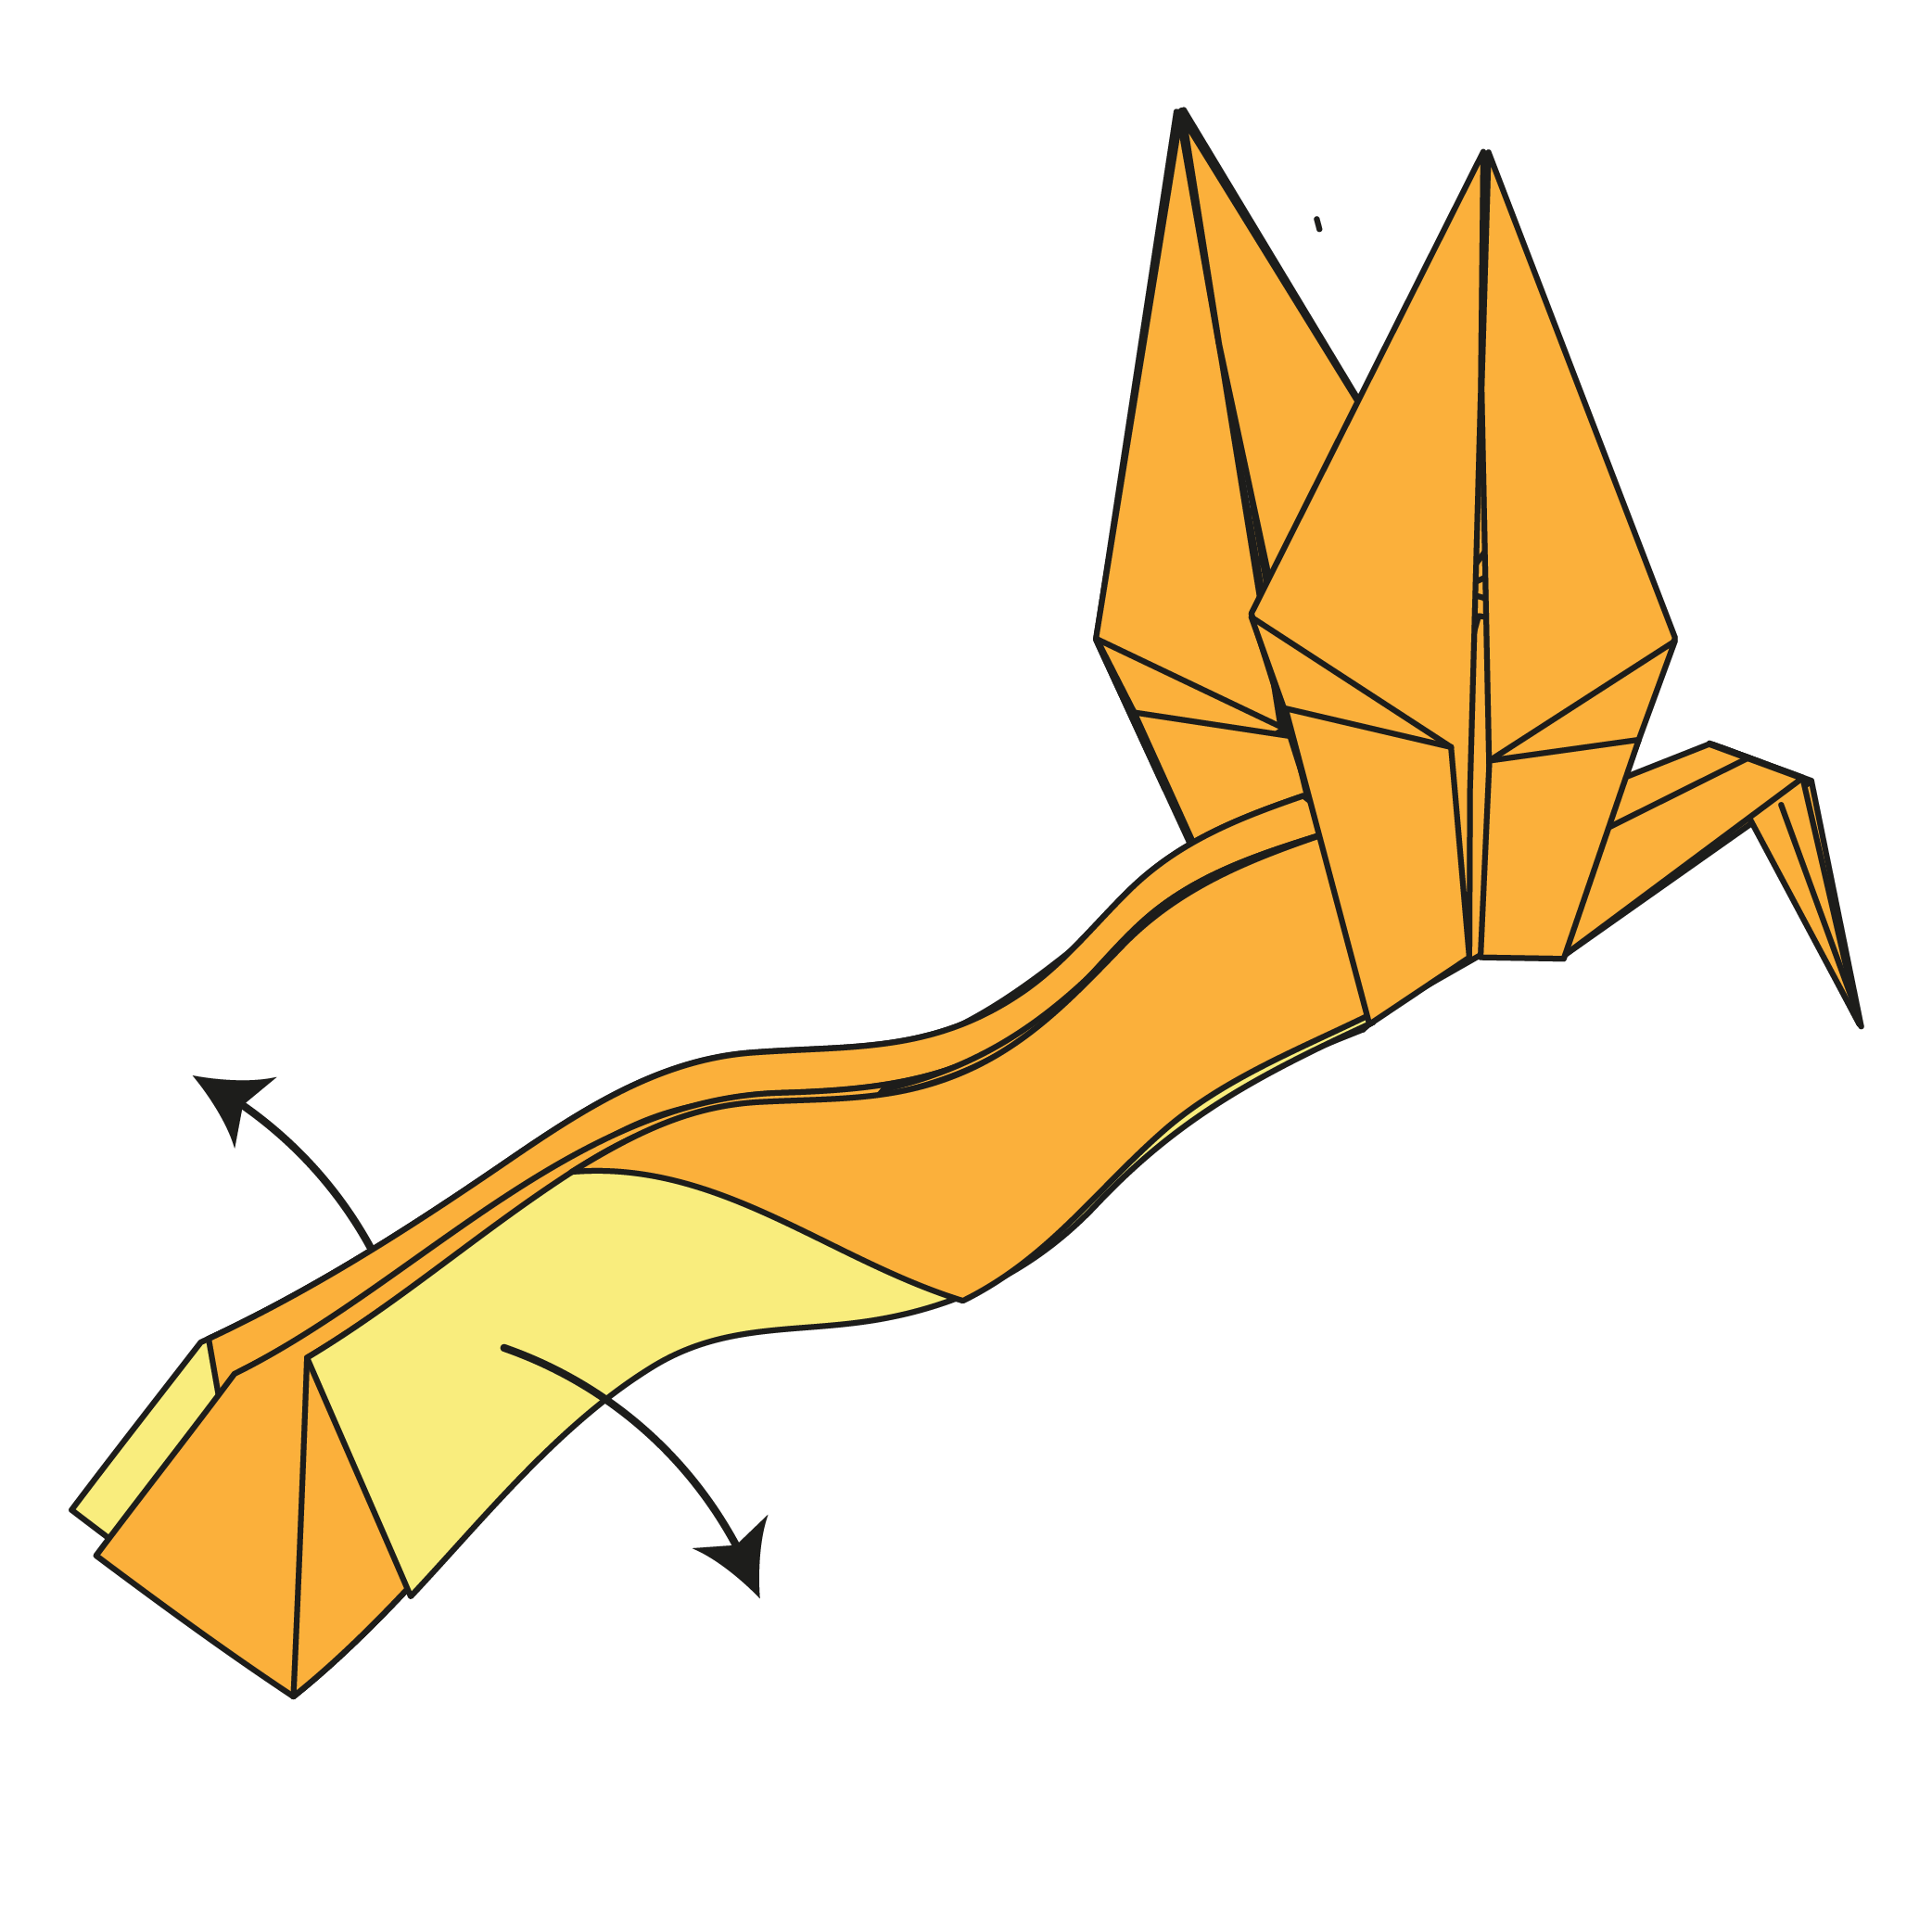
Gently spread the tail.
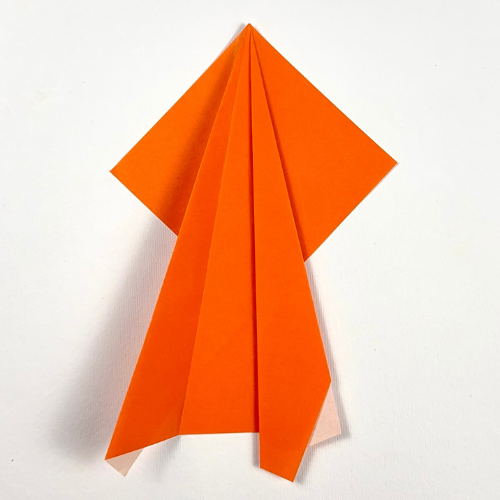
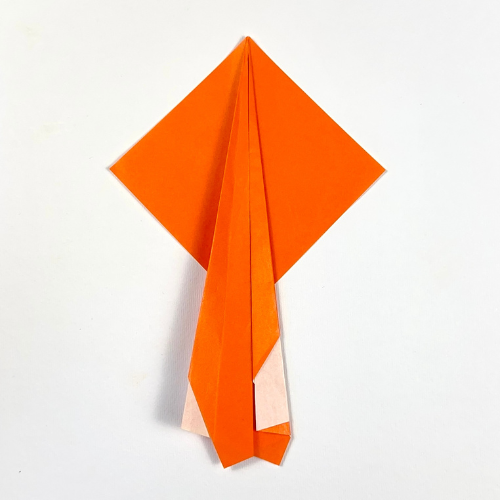
The Completed Origami Phoenix
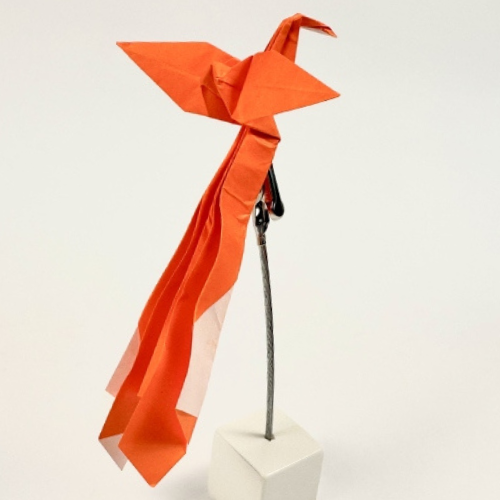
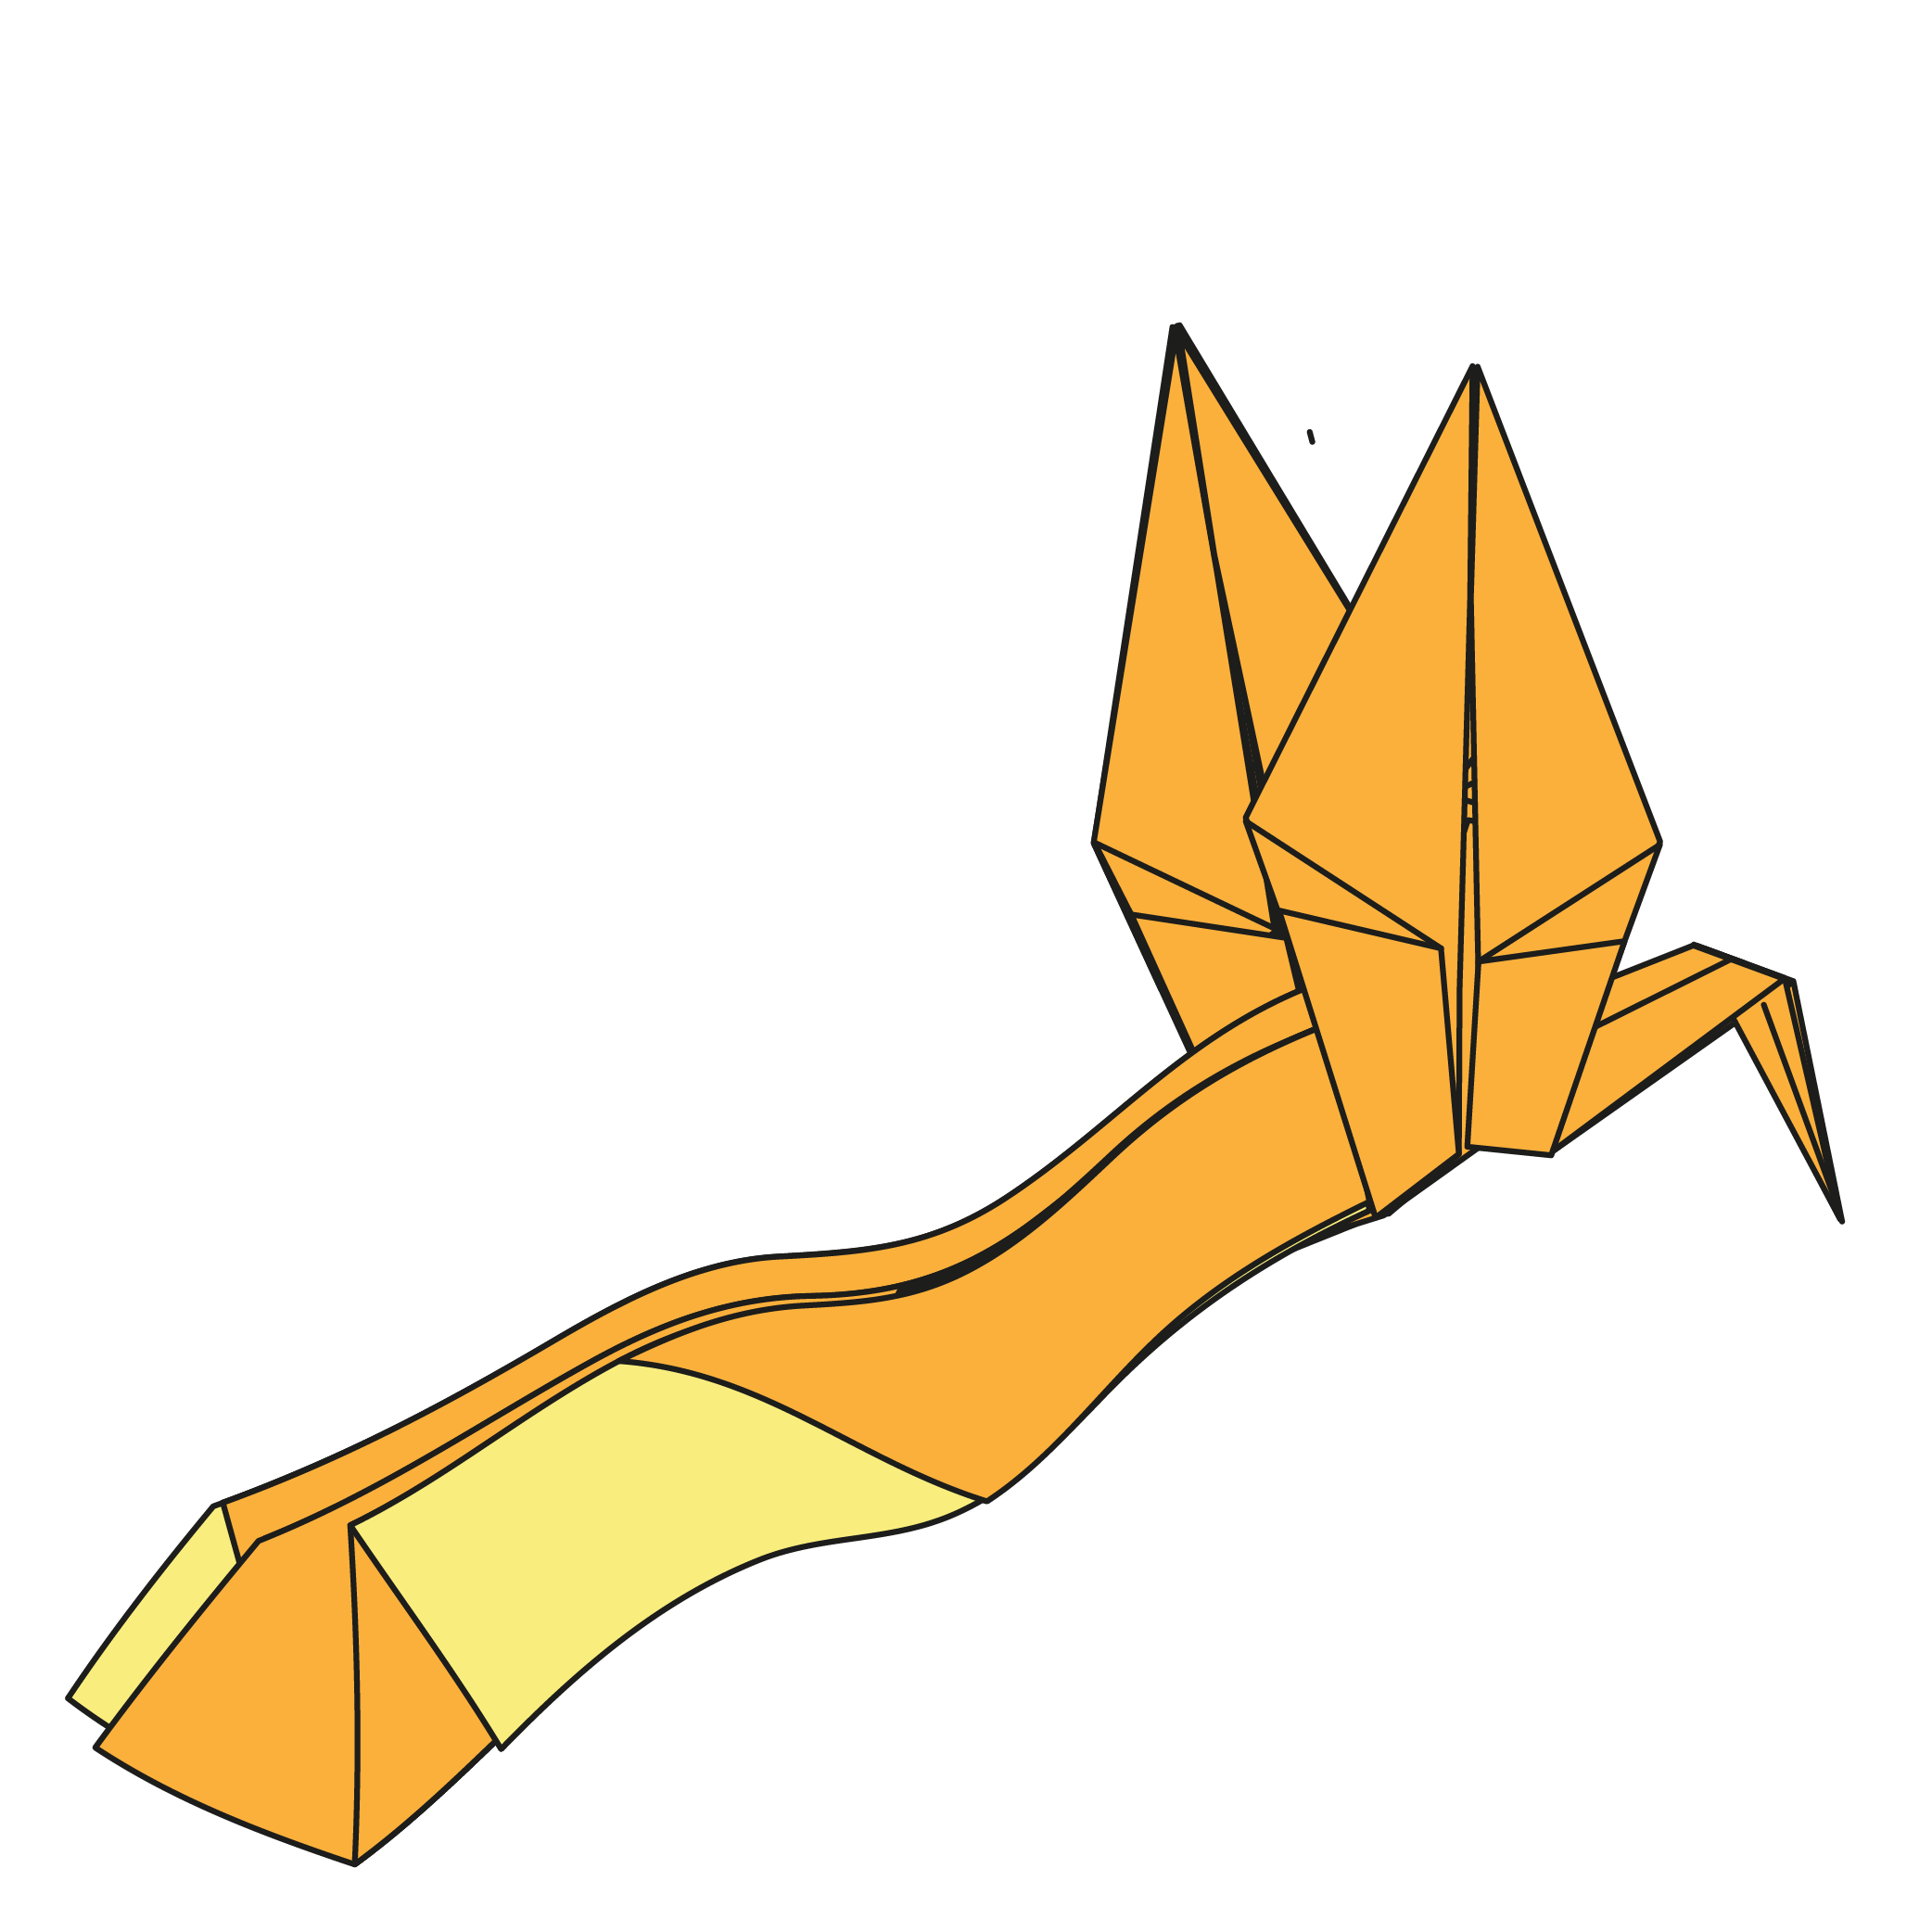
Your phoenix is complete. If you made it this far, well done. This is a challenging model.
It takes patience, precision, and a bit of determination, but the final shape feels graceful and full of character. Whether your folds came out crisp or a little rough, every attempt helps you improve.
If you want to keep practicing or explore more traditional designs, check out our other challenging tutorials or sign up for the newsletter. And if you share your phoenix online, we would love to see it. Just tag us or leave a comment.
Download the Full Origami Phoenix Printable PDF Instructions

We’d love to keep you in the loop, so by sharing your email with us, you’ll be signed up for our mailing list. Don’t worry; we won’t bombard you with spammy emails, and your information is safe with us – we won’t share it with anyone else.


Was it hard? Yes.
Was it worth it? 100%
I can’t capture it, but I think in real life, it presents itself very elegantly on my shelf, making it one of my favourite pieces I’ve fold!!!
It’s definitely a tricky one to capture in photos (and even to display) but such a beautiful model. I was happy with the picture I used for the featured image, though I also thought about displaying it on an origami box or cube since the angle underneath the phoenix matches nicely. It won’t balance too well on its own, so a little glue or even a sewing pin can help keep it steady.
helpppppppppppp
I’m here to help!