How to Fold an Easy Origami Rabbit
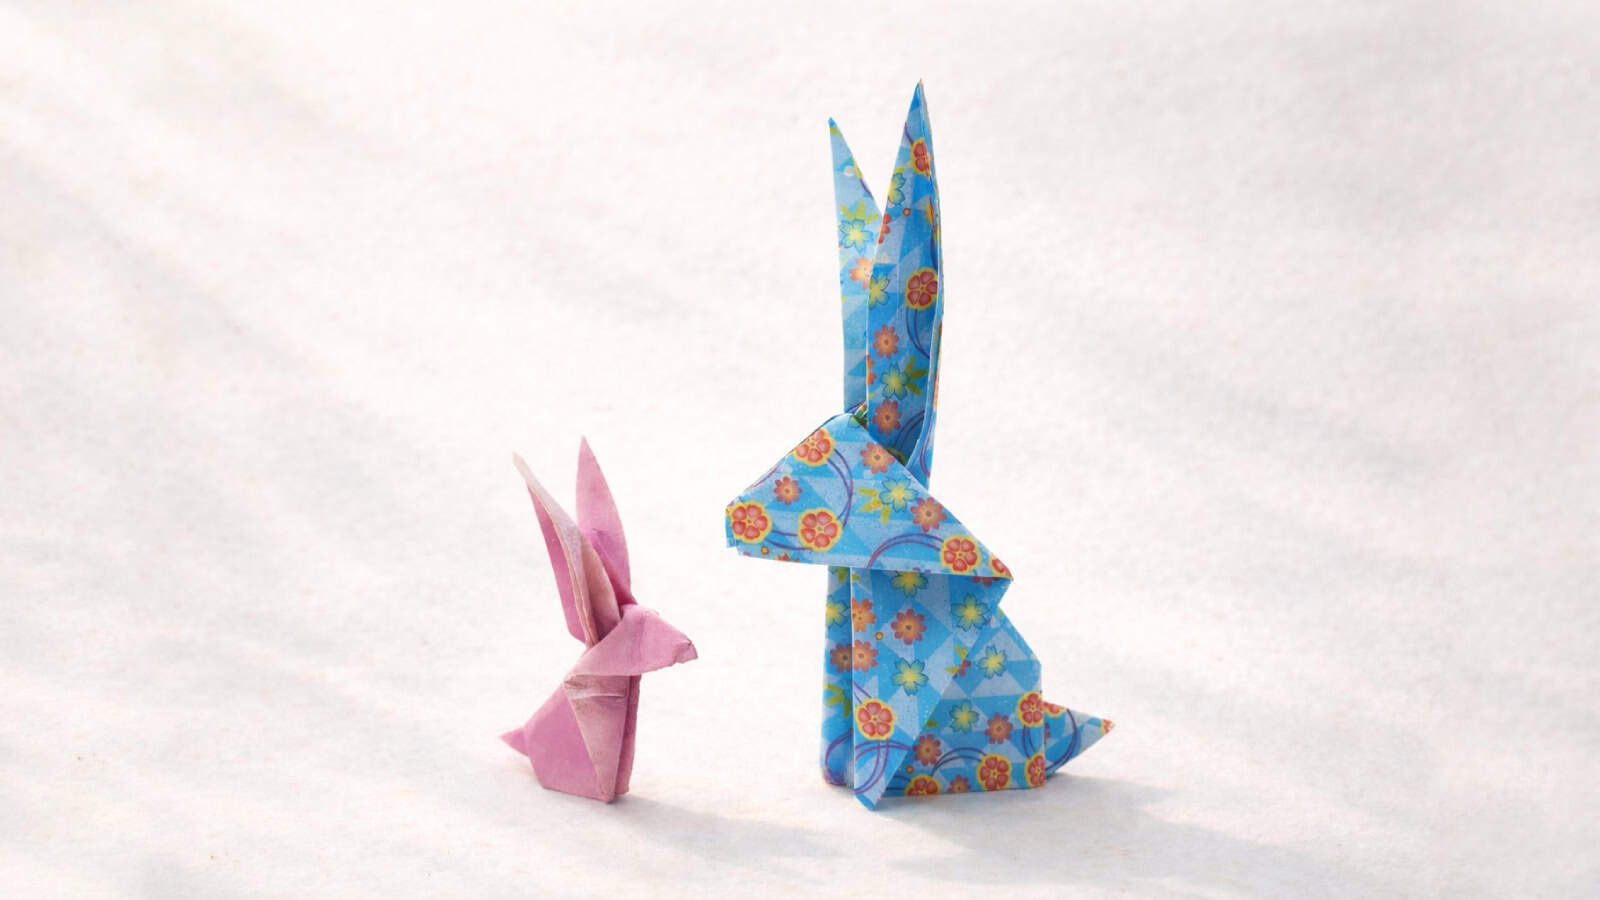
Let’s learn how to fold this cute origami rabbit, a model that works especially well for Easter decorations, spring crafts, or small handmade gifts.
In Japanese culture, rabbits are often linked to cleverness and good fortune. They also appear in folklore connected to Tsukimi, the Moon Viewing festival, where the rabbit is said to live on the moon and spend its time pounding mochi.
This model works well for folders with a little experience. A few steps require careful shaping and are a good opportunity to practice squash folds and reverse folds while creating a lively rabbit shape.
Origami Rabbit Step-by-Step Instructions
- Difficulty: Easy – Beginner Level 4
- Folding time: 10 minutes
Recommended Paper
15×15 cm (6×6 in) Kami
This tutorial was updated in March 2026 with clearer instructions and improved visuals.
Step 1
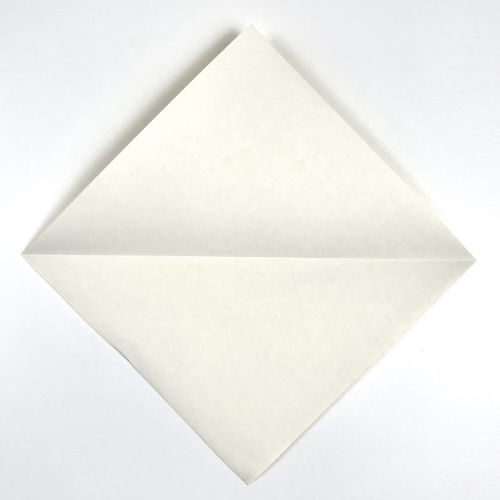

Start with the white side of the paper facing up in a diamond position. Fold the top corner down to meet the bottom corner, making a horizontal diagonal crease.
Step 2
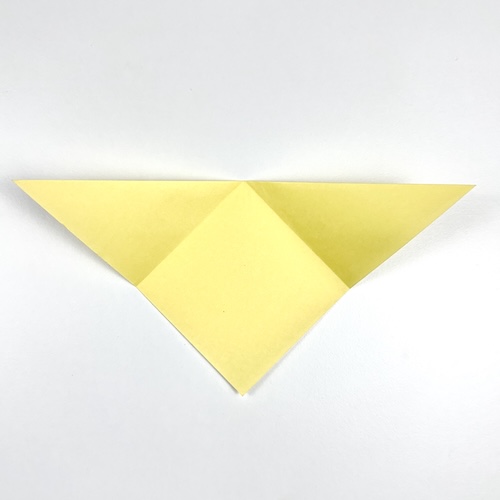

Fold both top left and right corners down to meet the bottom corner.
Step 3

Fold the bottom left and right edges in to meet the centerline.
Step 4

Open the top-right flap and squash it down. Line up the diagonal edge with the centerline as you flatten it.
Step 5

Repeat Step 4 on the left side.
Step 6

Fold the model in half by bringing the right side behind the left side.
Step 7

Rotate the model 30° counterclockwise.
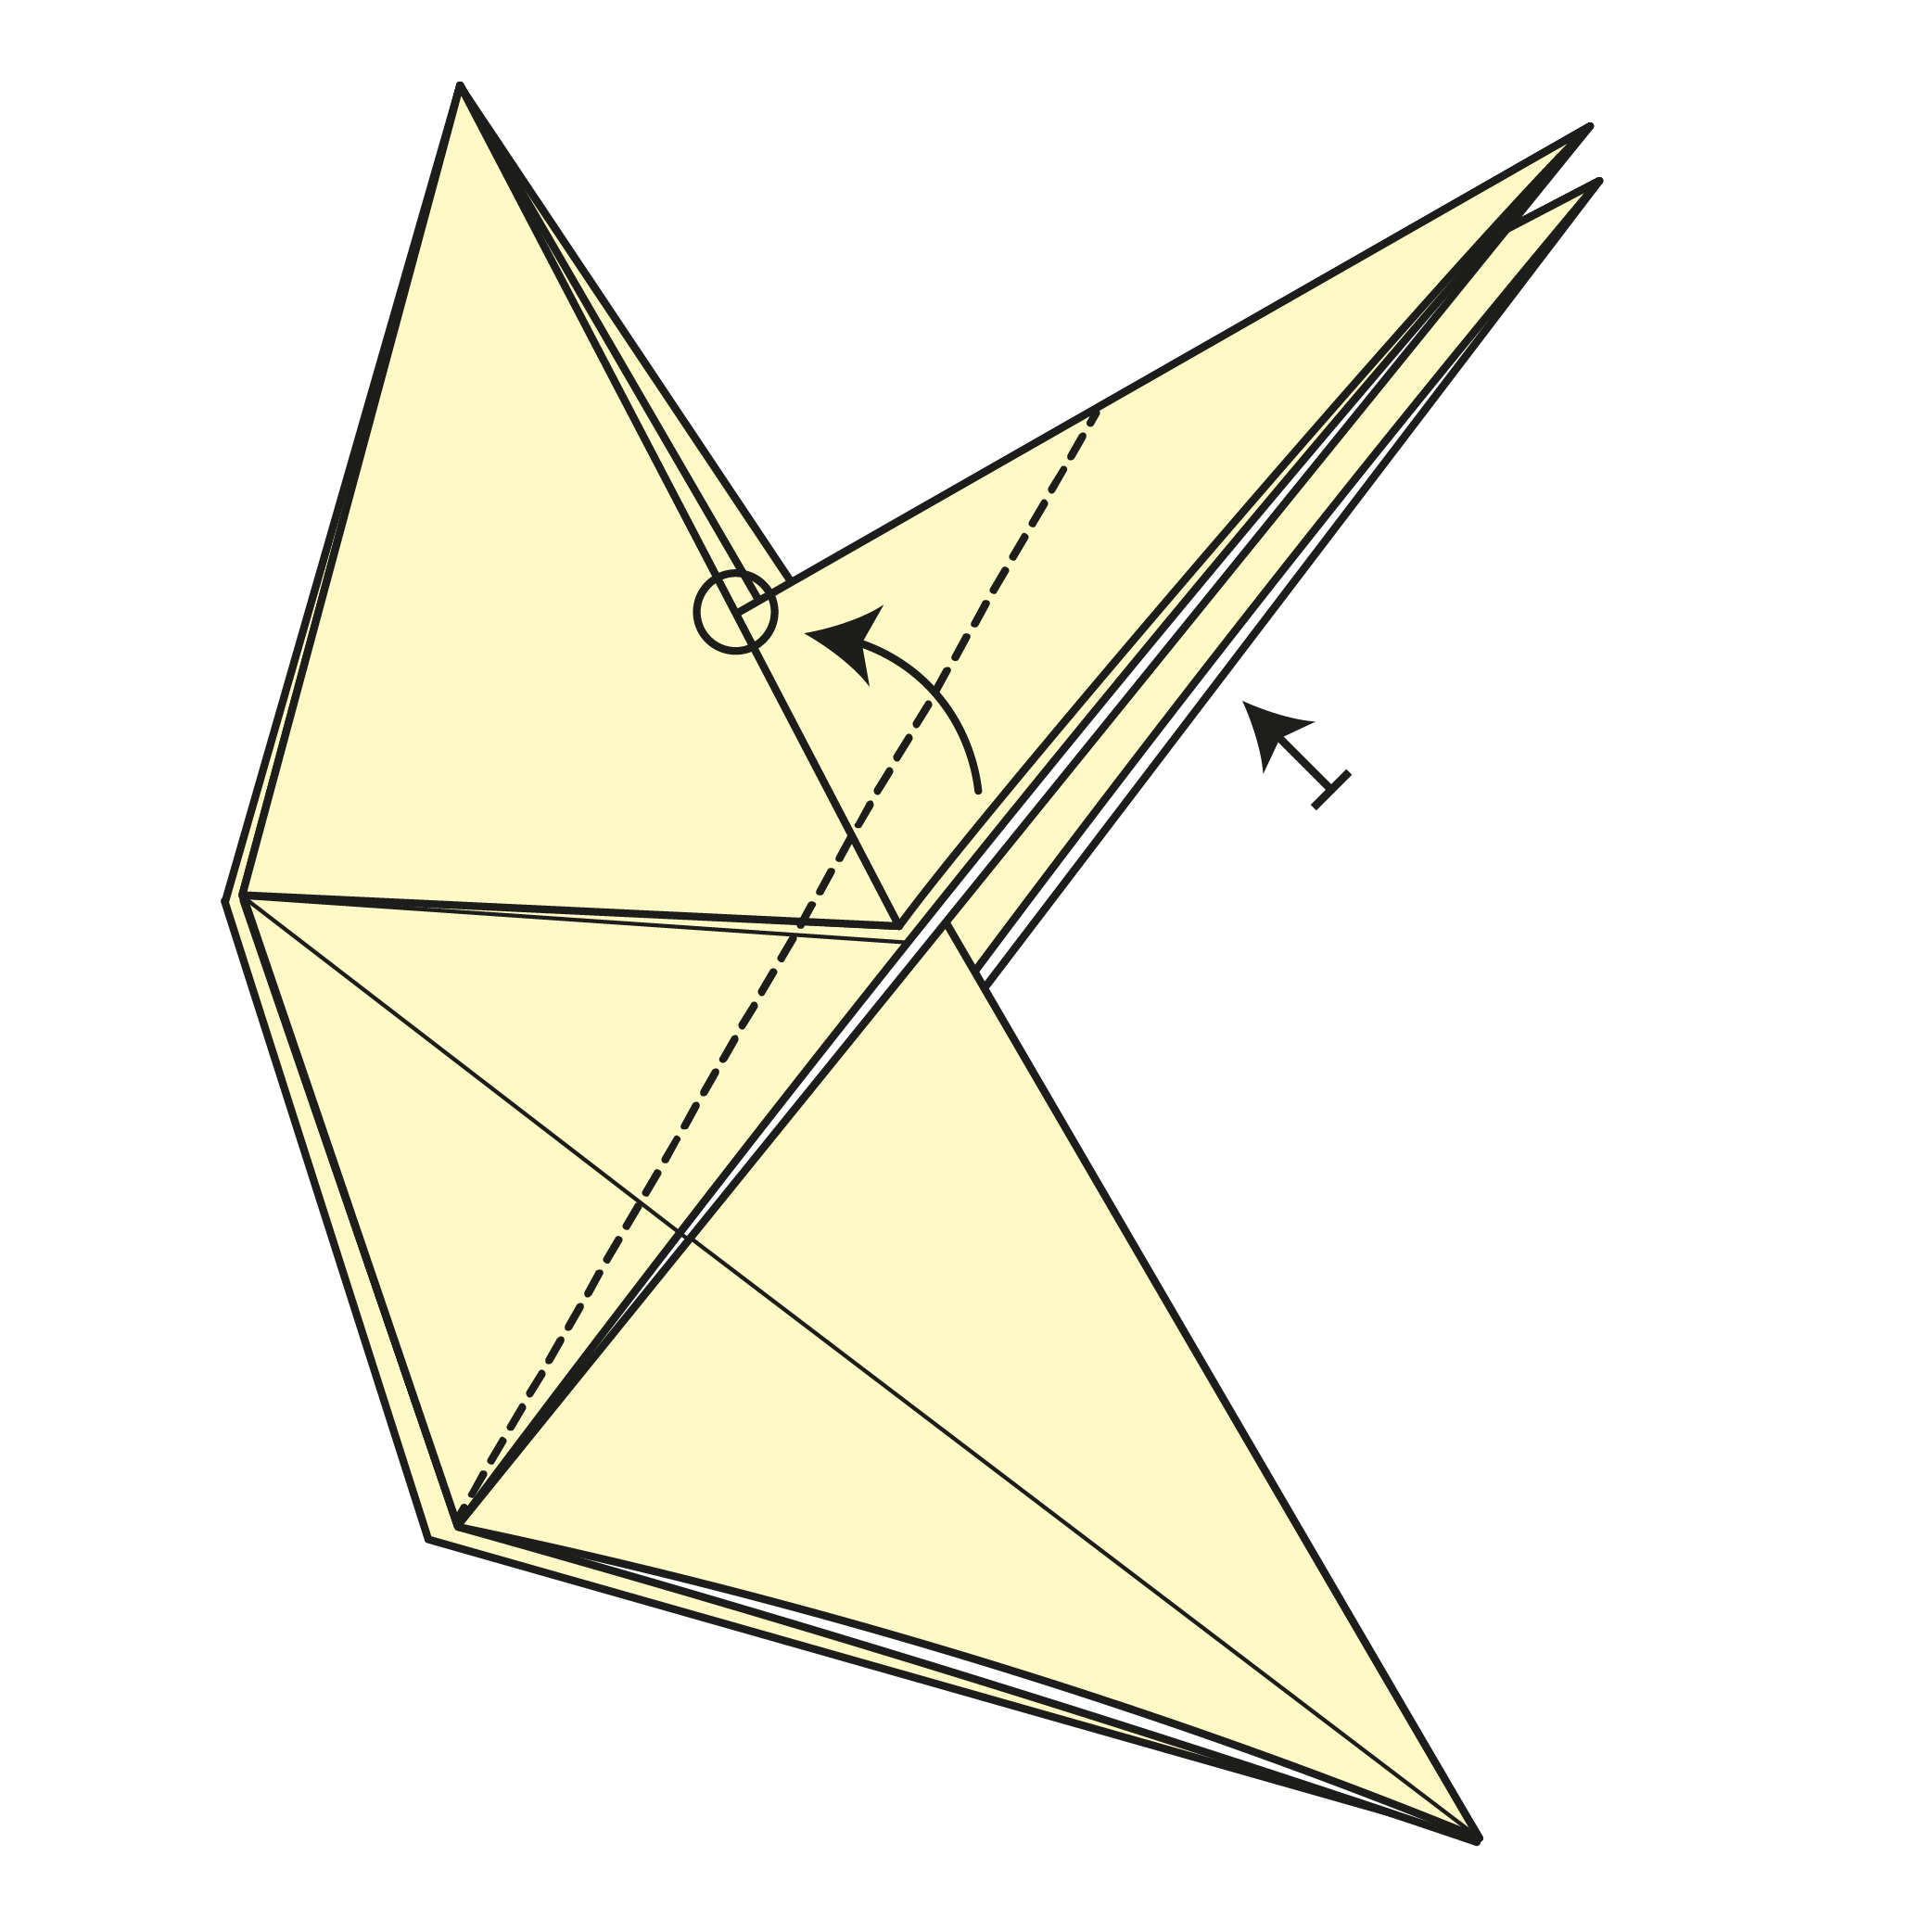
Step 8

Flip the top flap at the bottom upward along the dotted line to form the first origami rabbit’s ear.
Step 9

Repeat Step 8 on the other side.
Step 10
Fold the ear’s right edge inward to meet the point where the head and ear intersect. Then, repeat on the other side.
Step 11

Crimp fold the head over the ears by gently pushing down the top corner (the rabbit’s nose). Make sure the two reference points meet.
🐇 Folding tip: Don’t crease the fold all the way down to the rabbit’s legs. Keep it a little curved around the feet. That way, your origami rabbit will be able to stand up on its own!
Step 12

Make a small Crimp fold to form the rabbit’s tail. Start by making a Pleat fold along the dashed lines, then unfold. Slightly open the layers, then reverse fold the tail in and out to form the Crimp.
🐇 Folding Tip: This is the most challenging fold in the model. If it feels tricky, watch the video to see exactly how the Crimp fold is formed.
🐇 Folding Tip: Once your Crimp fold is done, you can tweak it to make the tail shorter or longer. Play with the angle until the tail looks just right.
Step 13

Reverse fold the tip of the nose along the dotted line to shape the rabbit’s face.
Step 14

Gently open up the ears to give them a fuller shape.
Your Origami Bunny is Ready to Hop!


I hope you enjoyed folding this little paper rabbit. It’s a simple model, but the shape comes together nicely during the last steps.
If you fold one, feel free to share a photo in the comments. It’s always nice to see the different papers and colors folders choose.
If you’d like to keep folding, you might also enjoy exploring our Easter origami collection or browsing more origami animals on the site.
If you’d like more folding ideas and new tutorials, you can join our newsletter. You can also follow along with our video tutorials on YouTube.

Download the Complete Origami Rabbit Printable PDF Instructions
This printable PDF is part of our Origami Friends membership on Patreon. As a member, you get access to these diagrams, our full library of printable PDFs, and member-only content.
Watch the Origami Rabbit Video Tutorial
Enjoyed this tutorial?
Subscribe to our YouTube channel for new inspiring origami videos every week!


My absolutely favourite thing I’ve folded this far. I think the ears look so satisfying with its clean, sharp edges ☆
This rabbit has such a pleasant folding sequence, and the result is stunning indeed. Yoshizawa’s designs always have that special touch.
Transition from 15 to 16 is very unclear.
It’s an Inside Reverse Fold. The Beginner’s Guide has more information about this kind of fold here: https://origami.me/beginners-guide/
Do you mind if I quote a few of your posts as long as I provide credit and sources
back to your site? My blog site is in the very same niche as
yours and my users would really benefit from some of the information you provide here.
Please let me know if this ok with you. Many thanks!
Sure, no worries, just yeah, provide credit and sources especially if you use some of the images.