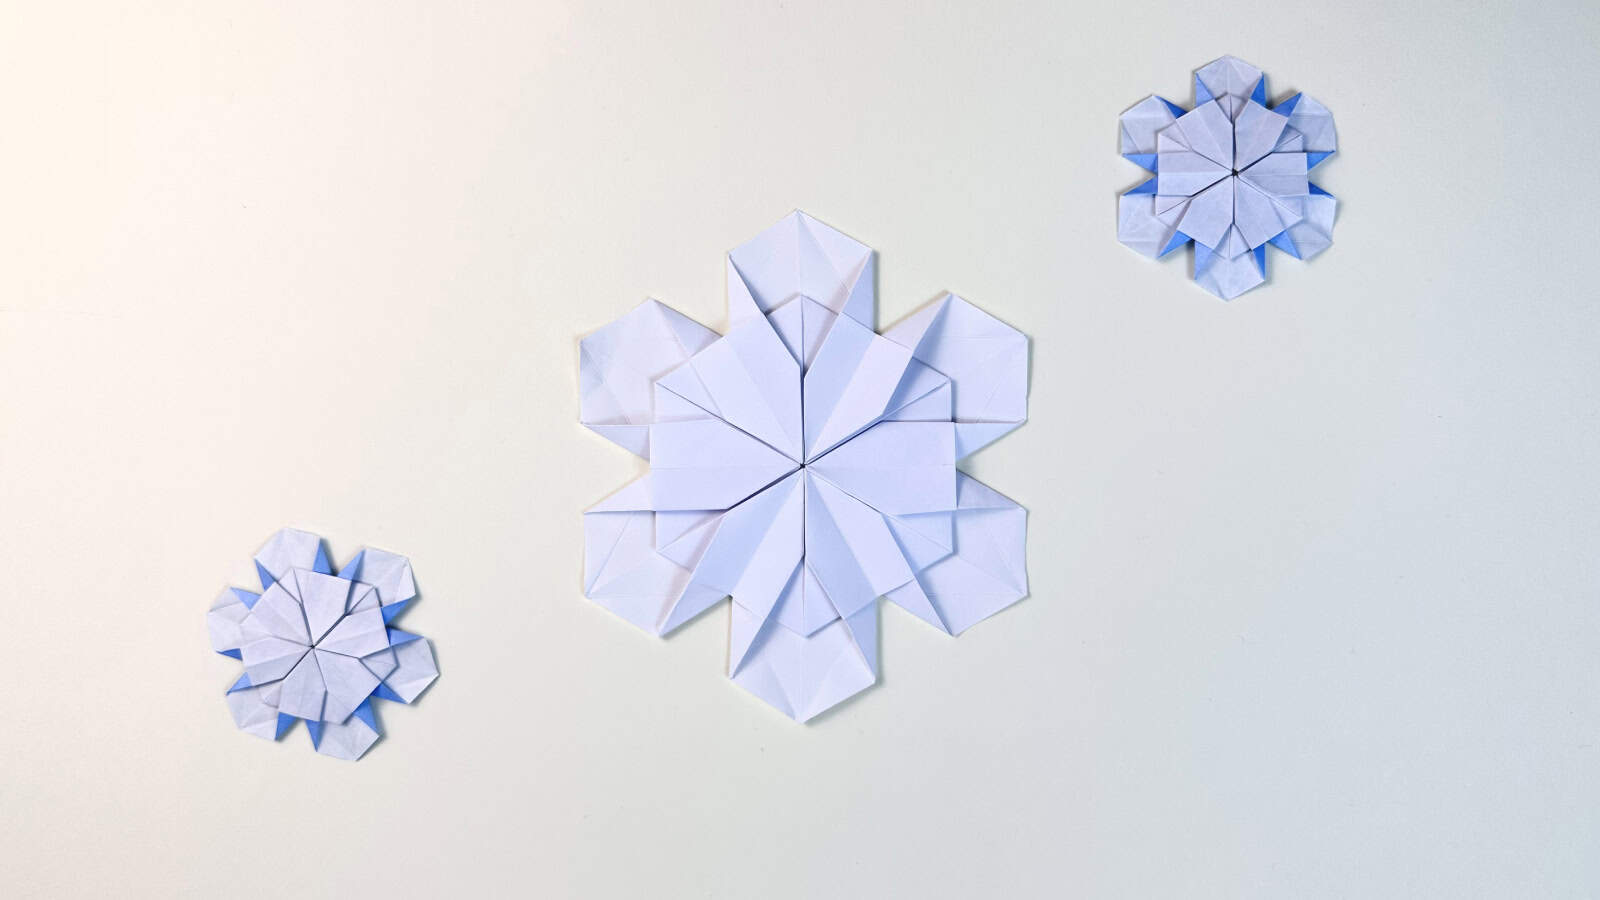
How to Fold an Origami Snowflake
This beautiful origami snowflake was designed by Shuzo Fujimoto, one of the most influential origami masters from Japan.
It’s folded from a hexagon, and while it might seem intricate at first, it’s totally doable for beginners with a bit of folding experience.
The most delicate part is getting a clean hexagon, but don’t worry, we show you how to make one from either rectangular paper or square paper in our tutorials.
Try it with white, translucent, or duo-colored paper to highlight its elegant symmetry.
Take your time with the folds and enjoy the process. It’s a great project for slowing down and focusing.
Origami Snowflake Step-by-Step Instructions
- Difficulty: Easy – Beginner Level 5
- Folding time: 20 minutes
- Model designer: Shuzo Fujimoto
- Paper: Hexagonal Kami or printing paper
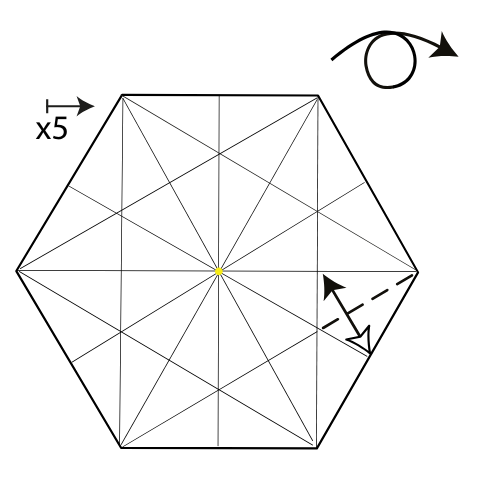
Step 1

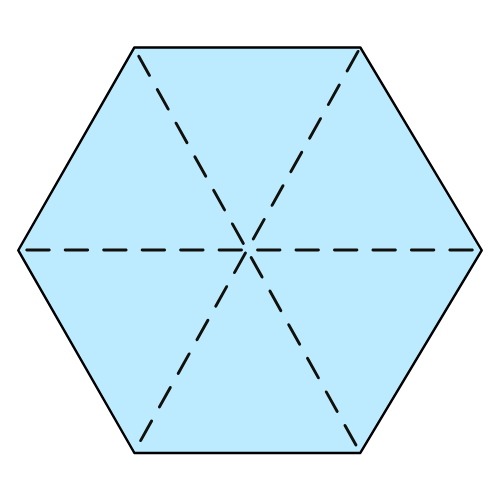
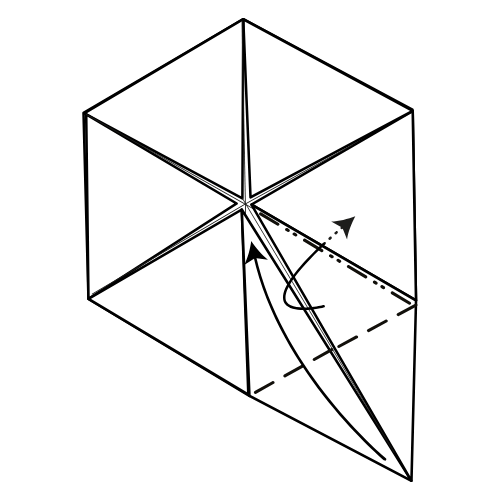
Fold and unfold the three diagonal lines from corner to opposite corner.
Step 2

Fold and unfold the three center lines from one edge to the opposite edge.
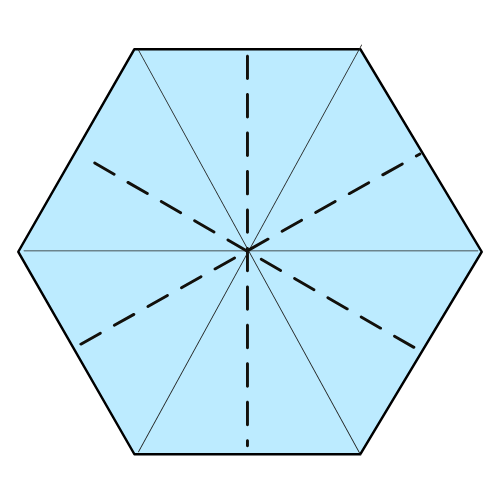
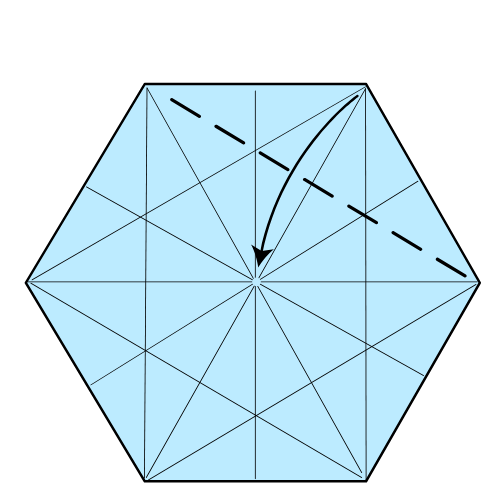
Step 3
Fold each corner to the center point, then unfold. Then, turn the paper over.
❄️ Folding tip: Make sure your fold line runs exactly from corner to corner.
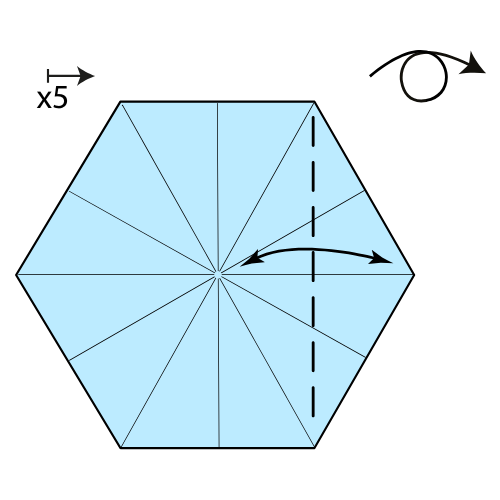
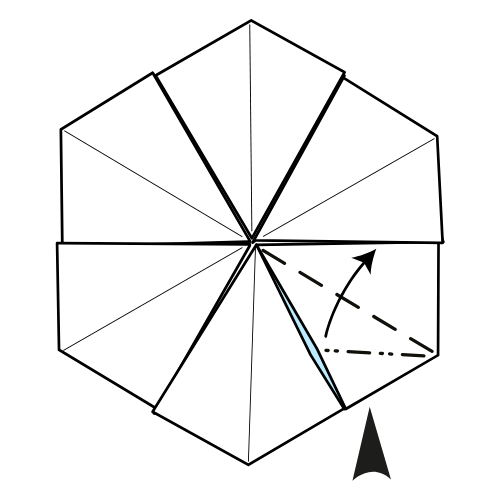
Step 4
Reverse fold along the dashed crease. Repeat for the five remaining corners, then turn the paper over.
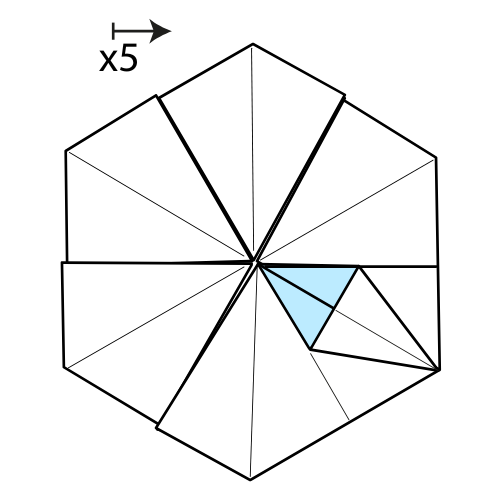
Step 5

Fold the top right corner to the center point.
Step 6

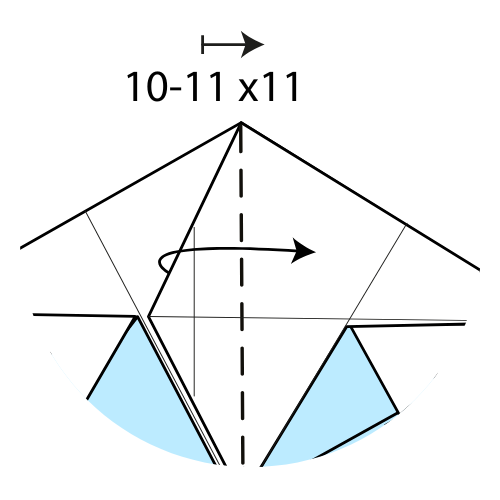
Swivel fold along the existing creases.
Step 7

Repeat Step 6 for the five remaining corners.
Step 8
Squash fold one of the top flaps created in Step 7.
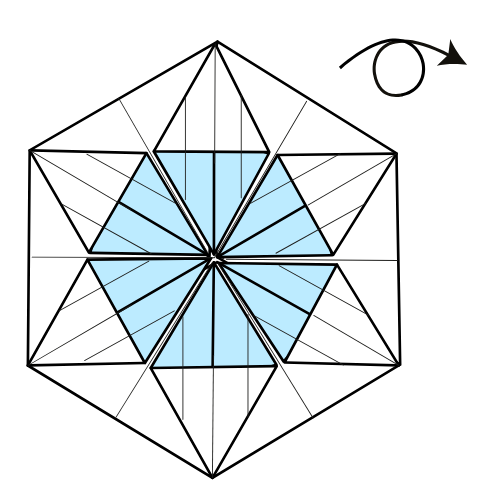
Step 9
Squash fold the remaining five flaps.
Step 10


Fold the right flap over to the left.
Step 11

Fold the left corners of the two flaps to the center point, then unfold.
Step 12
Repeat Steps 10 and 11 for all remaining flaps.
Step 13

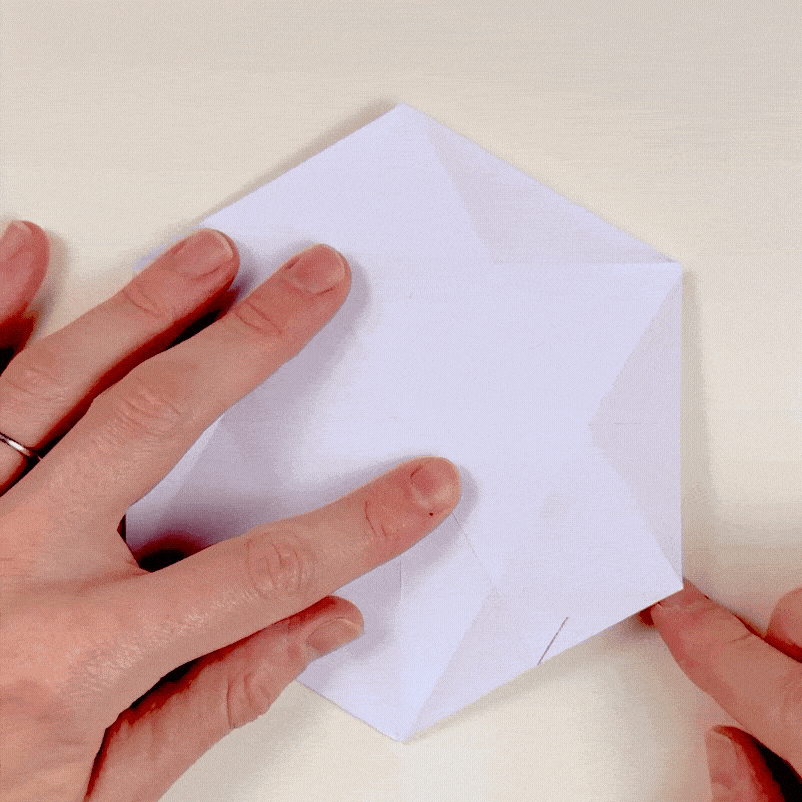
Turn the model over.
Step 14

Fold and unfold each corner to the center point.
❄️ Folding tip: Again, check that your fold lines go neatly from corner to corner.
Step 15

Fold the bottom right corner to the center point.
Step 16
Repeat Step 15 four more times, moving counterclockwise.
Step 17

Fold and unfold the bottom corner to the center, using the existing crease.
Step 18
Swivel fold as shown. Tuck the right area under the nearest triangle.
Step 19

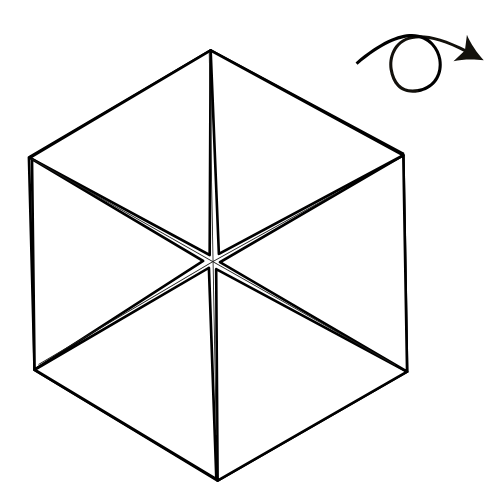
Turn the model over.
Step 20
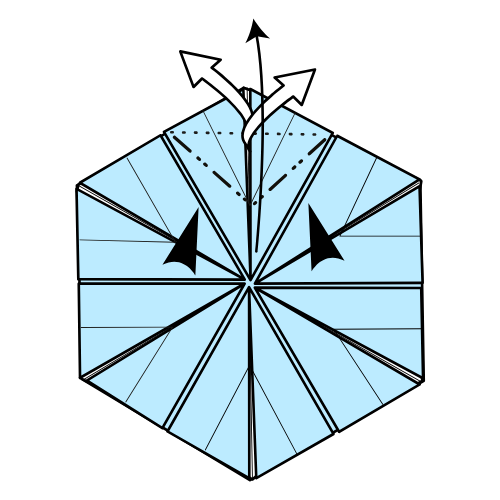
Lift up the flap, open the top layers, and squash fold them down.
Step 21

Repeat Step 20 five more times for the remaining flaps.
Step 22


Turn the model over.
Step 23

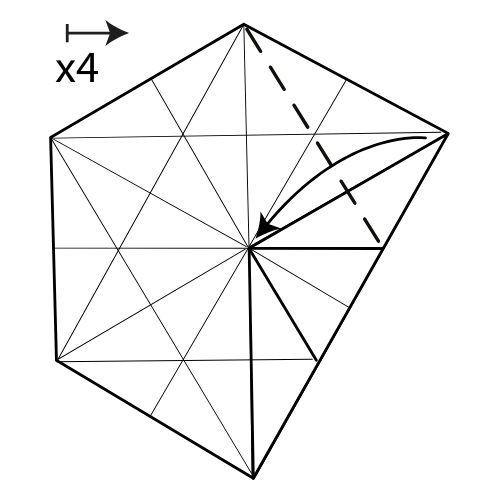
Mountain fold as shown. Repeat this 11 more times for each remaining flap.
The Completed Origami Snowflake! ❄️


I hope you enjoyed folding this one as much as I did, and that you’ll find the perfect spot to display your snowflake — on a window, your Christmas tree, or as part of your holiday decor.
And if you haven’t yet, check out our YouTube channel for more tutorials, or join our newsletter to get beautiful models like this one sent straight to your inbox.

Download the Complete Origami Snowflake Printable PDF Instructions
This printable PDF is part of our Origami Friends membership on Patreon. As a member, you get access to these diagrams, our full library of printable PDFs, and member-only content.


there seems to be a missing video in step 23. It seems to be misaligned as well.
Everything seems correct to me. In Step 23, we mountain fold the creases made in Step 11.
Oh now i see and thats what i had realized as well after writing my comment. Heres mine: