
How to Fold an Origami Vase
This elegant origami vase is a low-intermediate project that starts from a 6×6 grid and opens into a striking, geometrical vase. The design is often referred to as Verdi’s Vase, named after origami teacher Verdi Adams, who was known for teaching it often.
According to the original 1989 diagram notes, it’s a traditional Chinese model collected by Philip Shen, though its exact origins remain a mystery.
Folding it doesn’t require advanced skills, but shaping the final form takes a bit of care and patience.
It’s a beautiful piece for displaying dry or paper flowers, and a great next step for beginner folders looking for a challenge.
Origami Vase Step-by-Step Instructions
- Difficulty: Low-Intermediate
- Folding time: 20 minutes
- Model designer: Traditional
Recommended Paper
24×24 cm (9×9 in) 65 g/m² paper – I used Luminous Thai for the model on the featured image. The final origami vase is 6 cm tall (about 2.5 in).
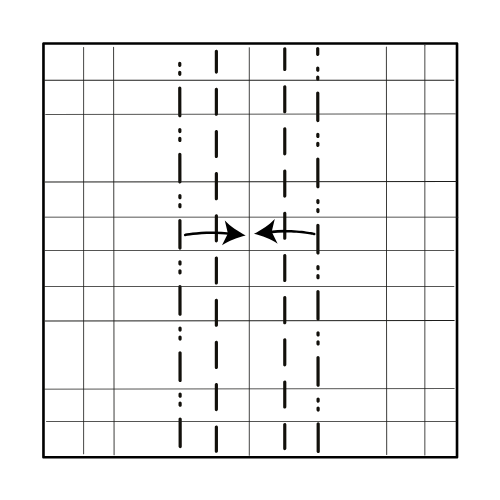
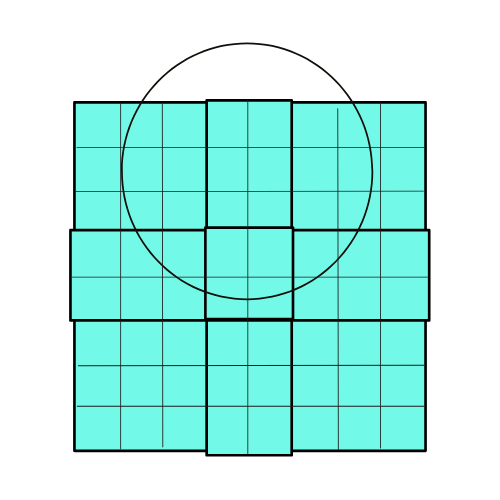
Step 1
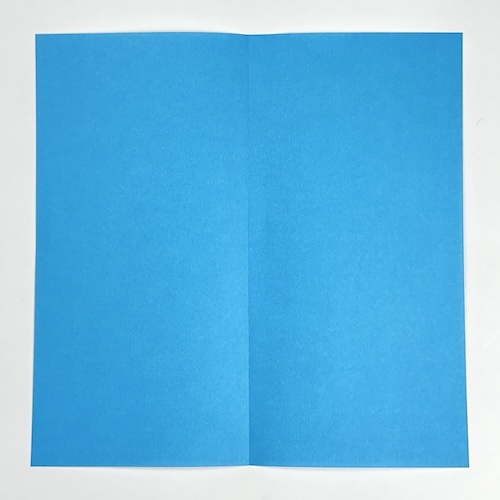
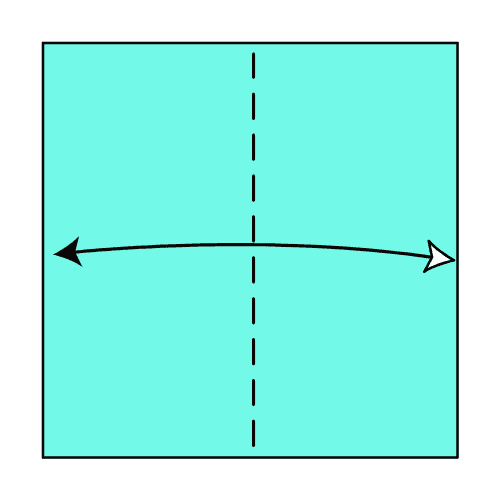
Start with the colored side of the paper facing up. Fold the paper in half vertically, then unfold.
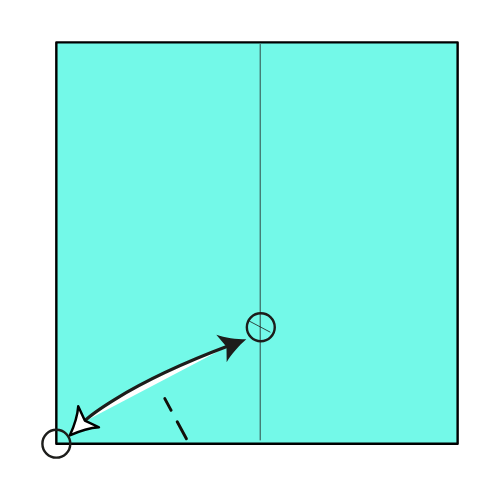
Step 2
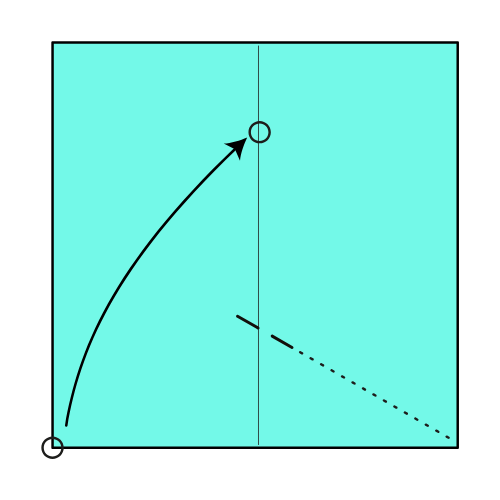
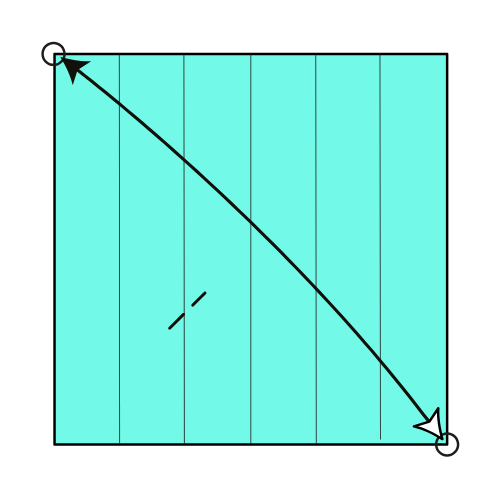
Fold the bottom left corner to the circled point. Start the fold from the bottom right corner. Only crease at the vertical centerline to make a pinch mark. Then, unfold.
Step 3
Fold the bottom left corner to the pinch mark from Step 2. Crease only at the bottom edge to mark another pinch, then unfold.
Step 4
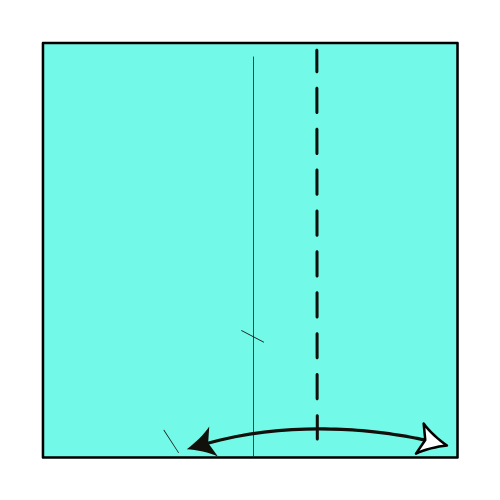
Fold the right edge to the pinch mark you made in Step 3. Then, unfold.
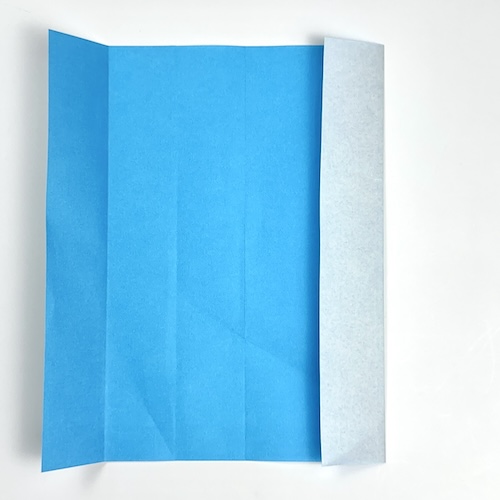
Step 5

Fold the left edge to the crease you made in Step 3.
Step 6
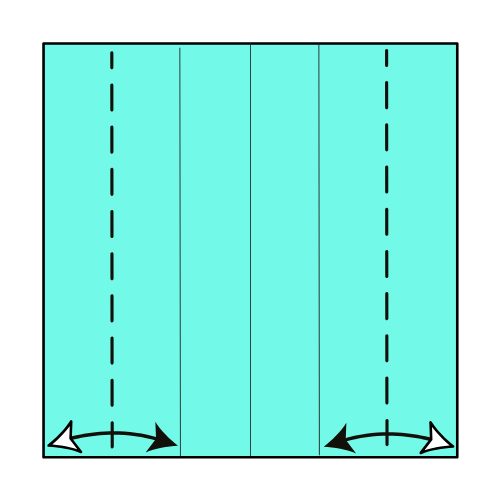
Fold both the left and right edges to the nearest crease line.
Step 7
Fold the bottom right corner to meet the top left corner. Pinch where it crosses the second crease line from the left edge. Then, unfold.
Step 8
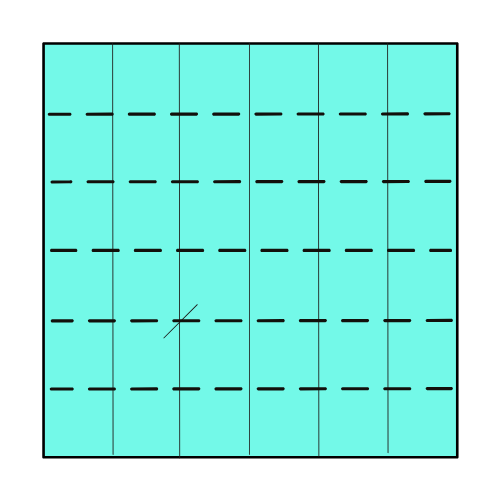
Using the pinch mark from Step 7, divide the paper into 6 equal horizontal sections by folding and unfolding, just like you did in Steps 4 to 6.
Step 9
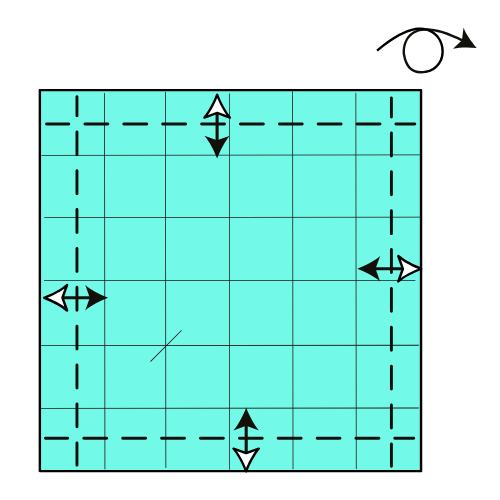
Fold and unfold each raw edge to the nearest crease line. Then, turn the paper over.
Step 10
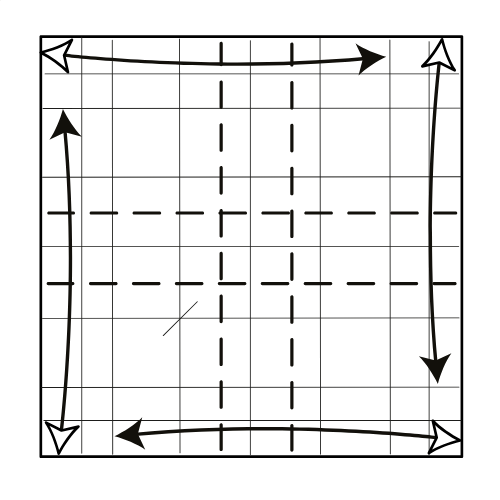
Fold and unfold each raw edge again, as shown in the diagram.
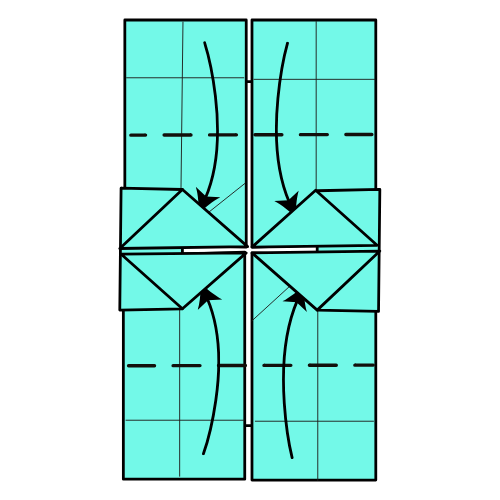
Step 11
On both sides of the vertical centerline, pleat fold using the two nearest existing creases.
Step 12
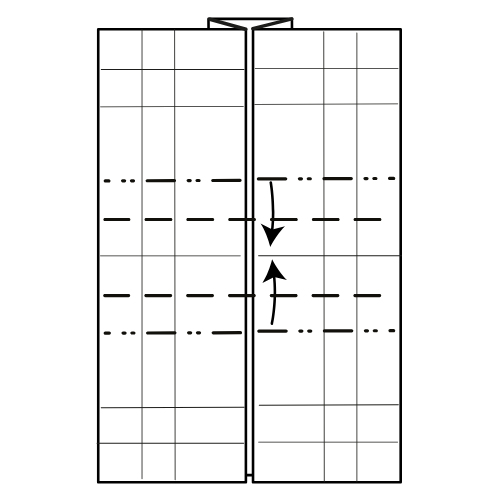
Repeat Step 11 at the horizontal centerline level.
Step 13
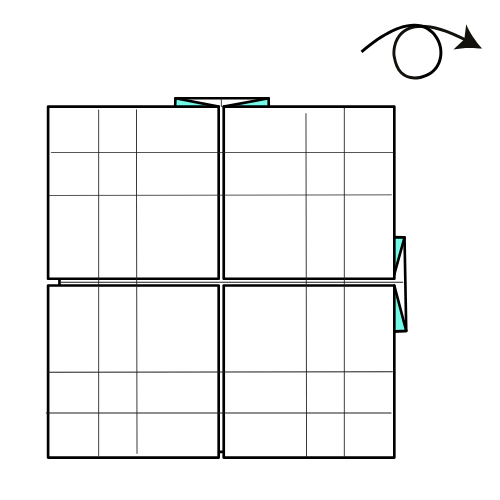
Turn the model over.
Step 14

Fold and unfold the top left and top right edges to the vertical centerline.
Step 15
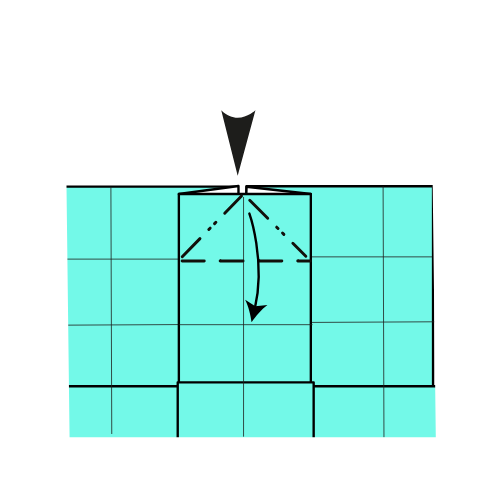
Petal fold downward using the creases from Step 14.
Step 16
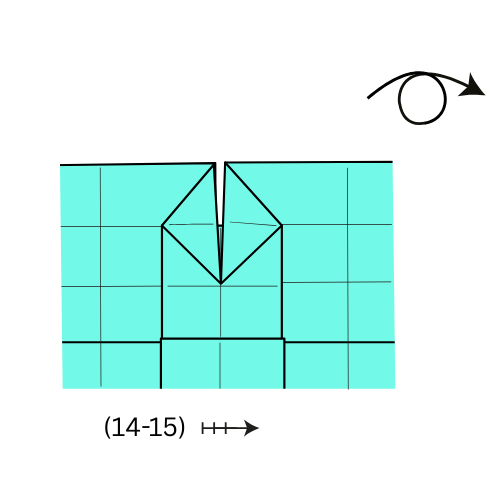
Repeat Steps 14 and 15 on the remaining sides. Then, turn the model over.
Step 17

Fold and unfold the top left and right edges to the nearest horizontal crease line. Repeat on the other sides.
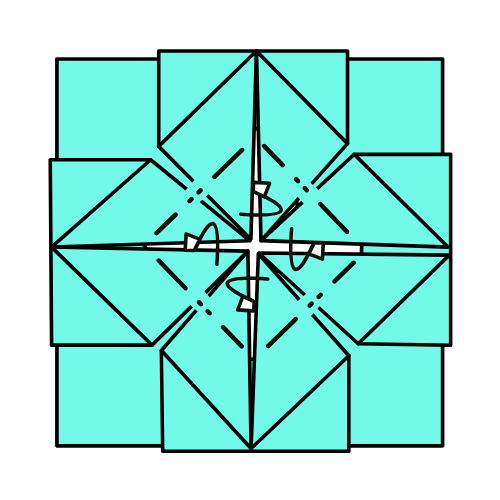
Step 18
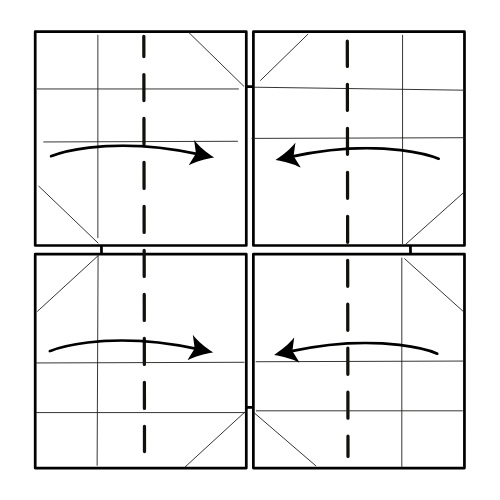
Fold the left and right edges to the vertical centerline.
Step 19
Fold the top and bottom edges to the horizontal centerline. Tuck these flaps into the pockets.
Step 20
Fold each corner around the center point inward, along existing creases.
Step 21
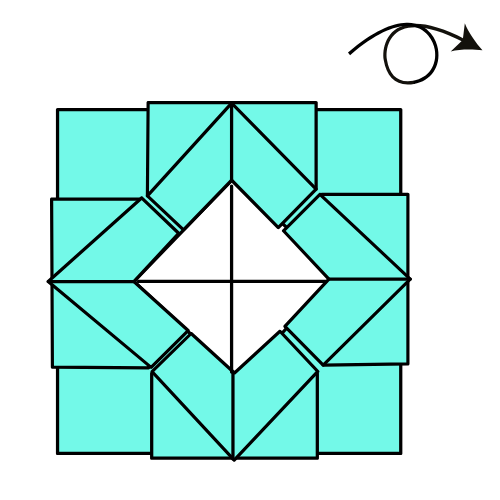
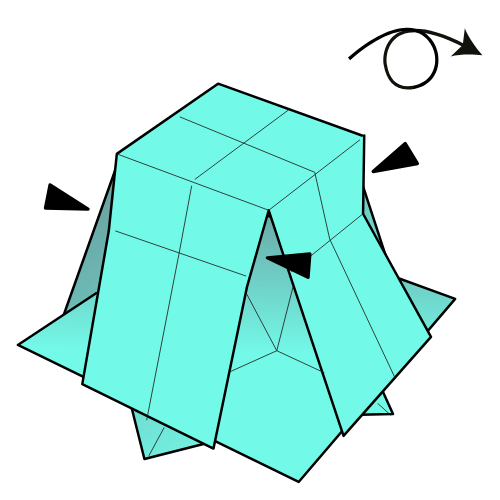
Turn the model over.
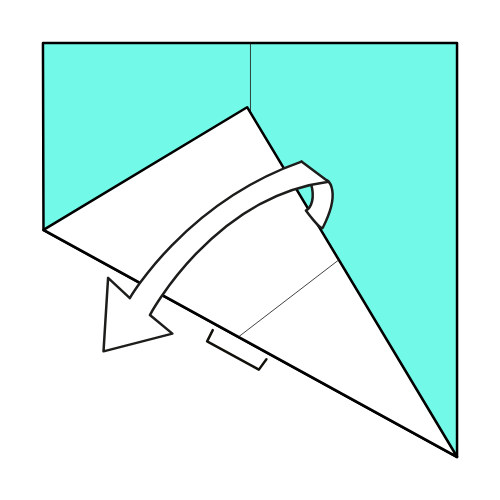
Step 22

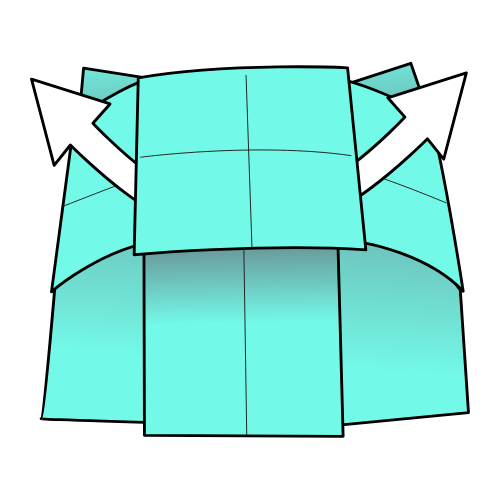
Place two fingers under the top flaps and gently open the model.
Then, gently push the angles inward to shape the vase.
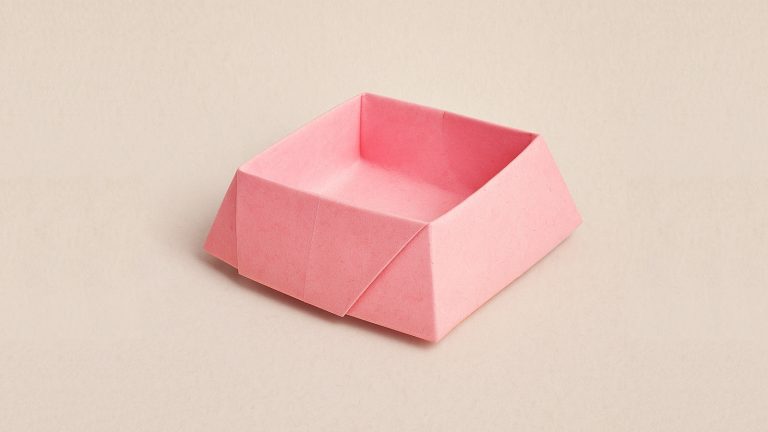
The Completed Origami Vase!
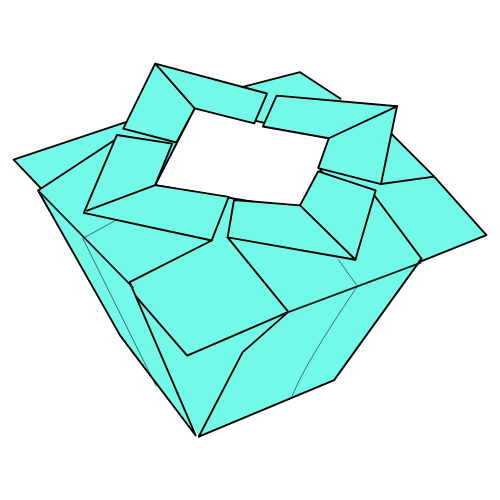
🏺 Folding tip: Use thicker and larger paper if you want a sturdier, usable vase. Just don’t put water inside 😉
I hope you enjoyed folding this beautiful vase and that it now holds something special on your desk or shelf.
If you’re into functional origami or want to explore more traditional models, check out our origami YouTube channel and join our newsletter for new tutorials every week.
Let me know how your vase turned out, and what you decided to put inside it in the comments below!

Download the Complete Origami Vase Printable PDF Instructions
This printable PDF is part of our Origami Friends membership on Patreon. As a member, you get access to these diagrams, our full library of printable PDFs, and member-only content.


I really enjoy making this and I love it.
So I can make this, but i can’t make a lucky star?!
If you can make this, you can make a lucky star. It’s way easier 🙂 I’ll publish a video to explain how to succeed making lucky stars because I get a lot of messages about it. Likely in April when I launch our new Facebook page.