
How to Fold an Origami Koi
This graceful origami koi was designed by Riccardo Foschi, a talented Italian artist known for his unique and easily recognisable style.
Folded from a rectangle, this model brings out the flowing beauty of a koi fish with a striking color change at the tail.
What makes this design particularly fun is how well it works with colored or pre-painted paper. A bold red, gold, or patterned sheet can really evoke the markings of real koi.
In this tutorial, I’ll show you two tail variations: a simpler one and a more natural, fin-like shape.
It’s a calm and rewarding project, with no complex folds, just a few steps that call for a bit of precision. And since you can make two koi from a single square, you might find yourself folding a whole pondful in no time.
Origami Koi Step-by-Step Instructions
- Difficulty: Easy – Beginner Level 5
- Folding time: 5-10 minutes
Recommended Paper
15×15 cm (6×6 in) Kami or Chiyogami
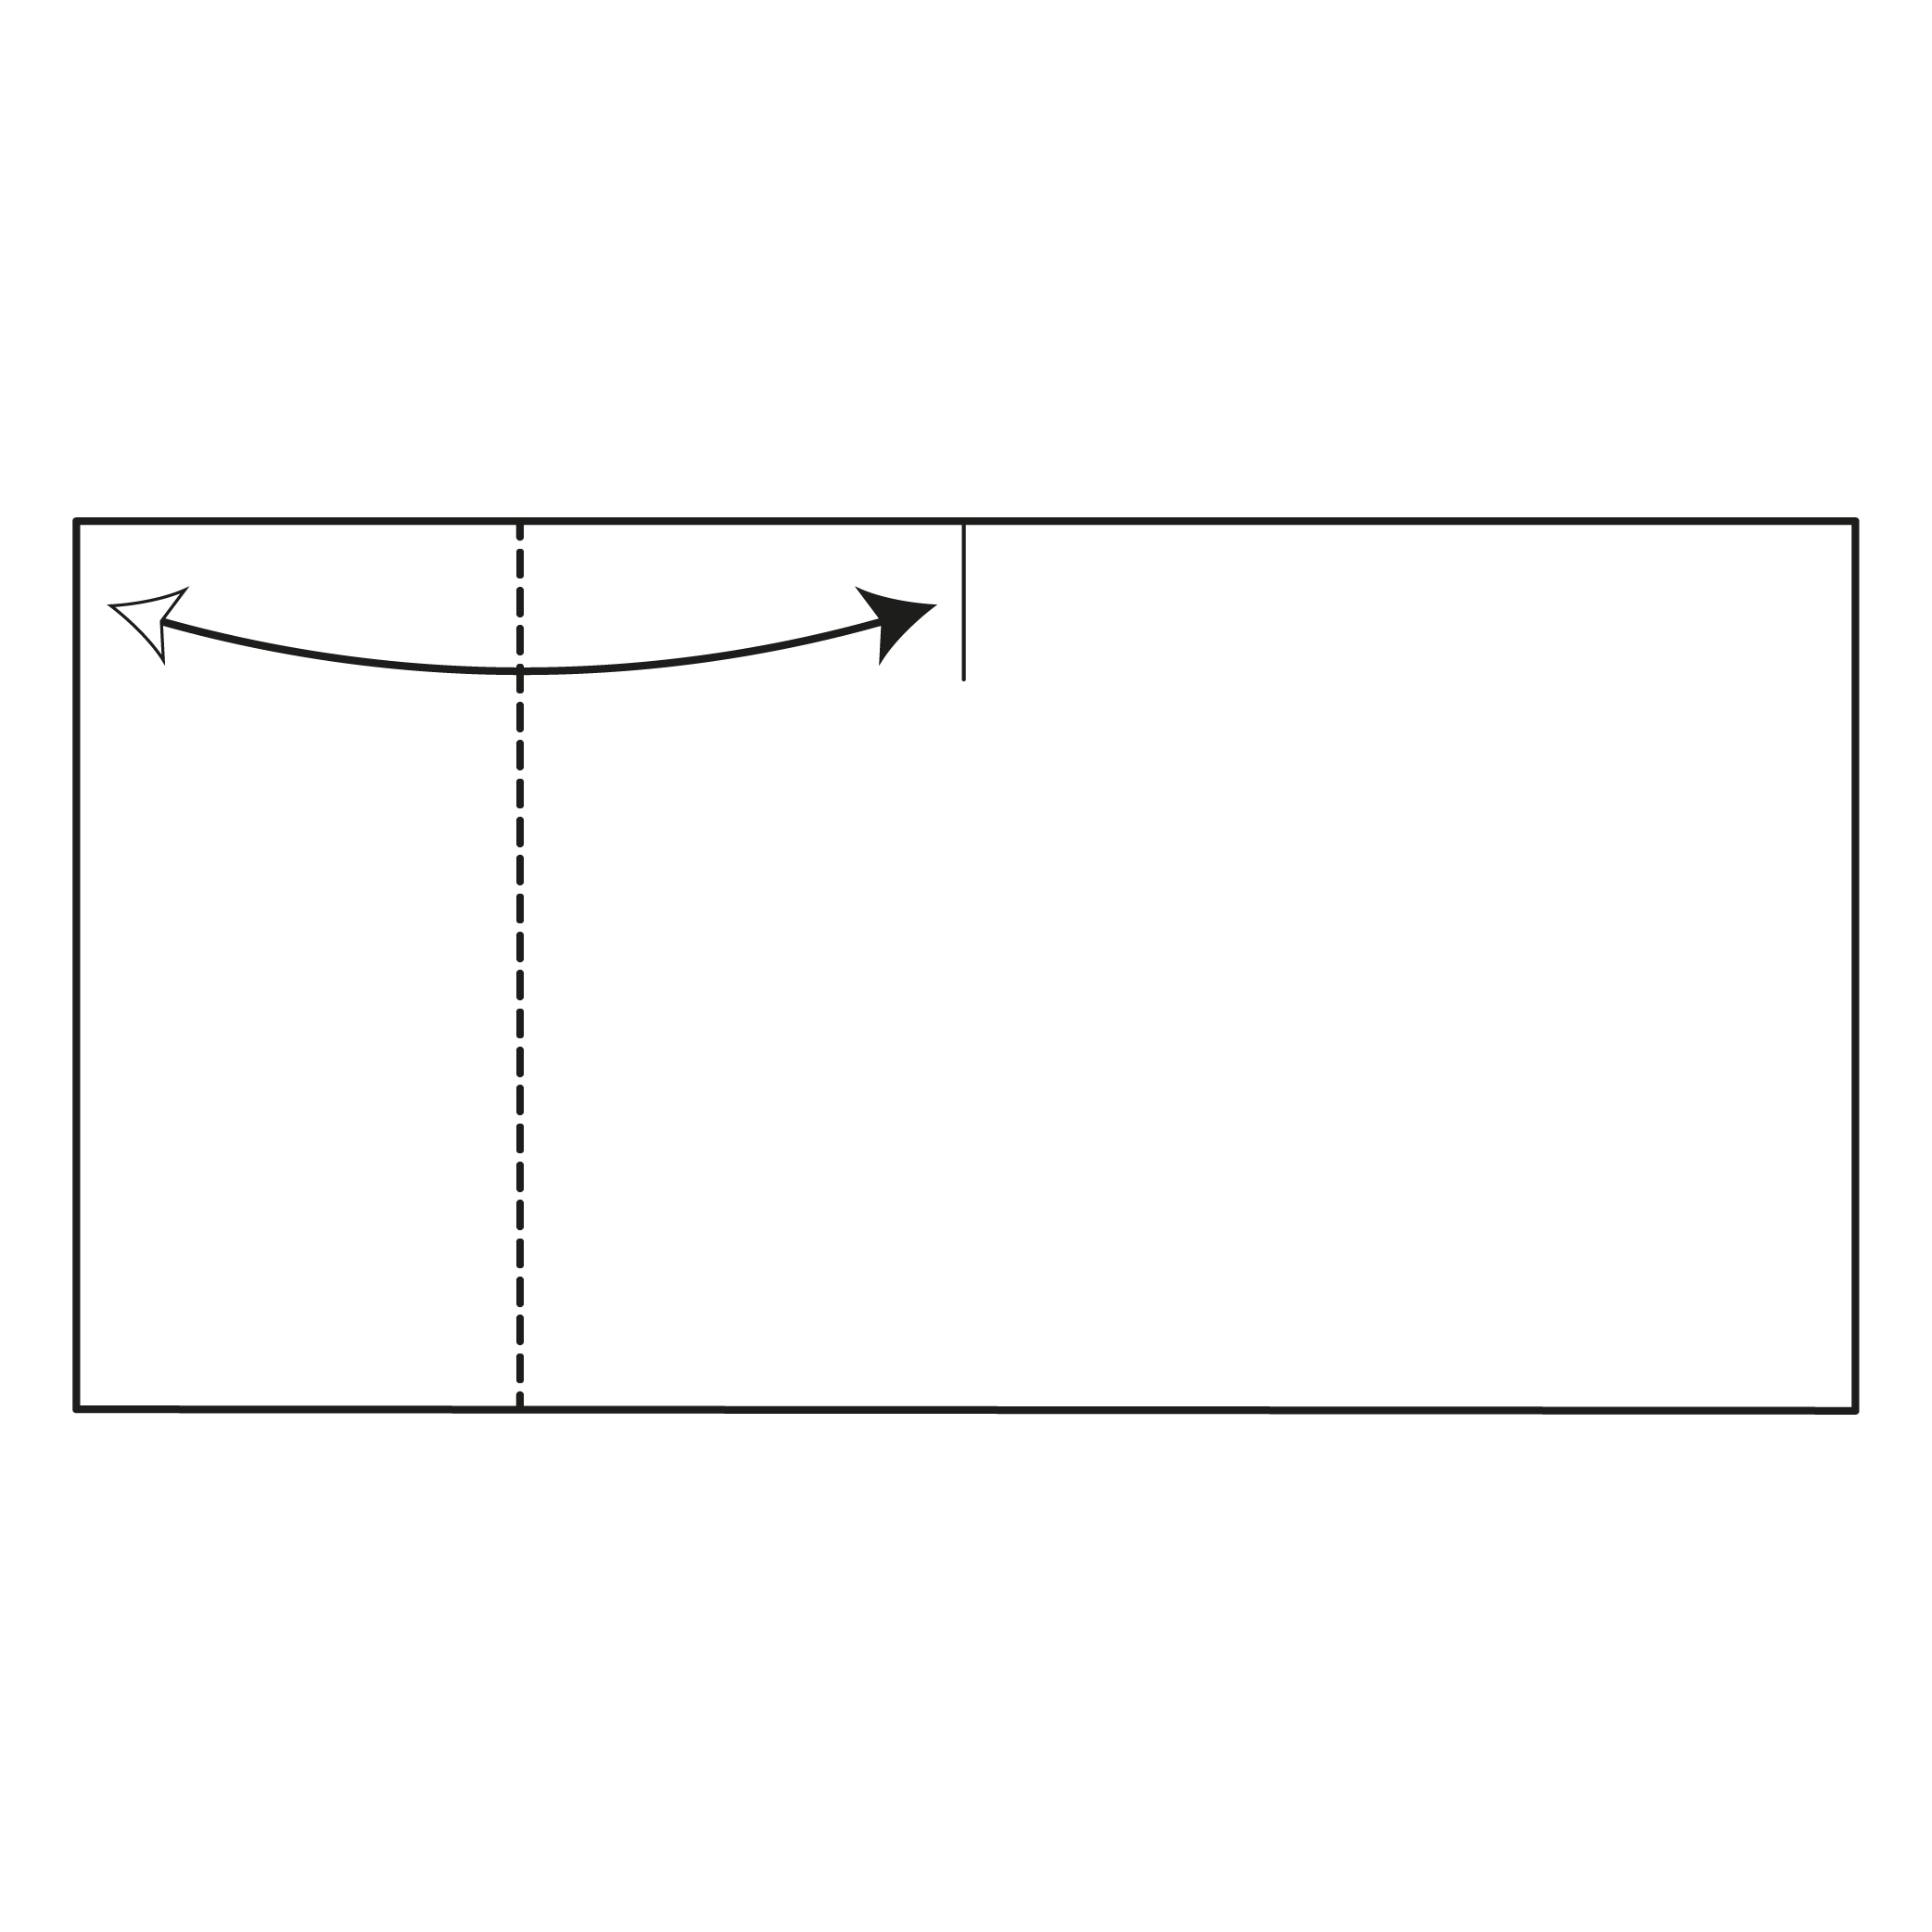
Step 1: Getting Your Paper Ready
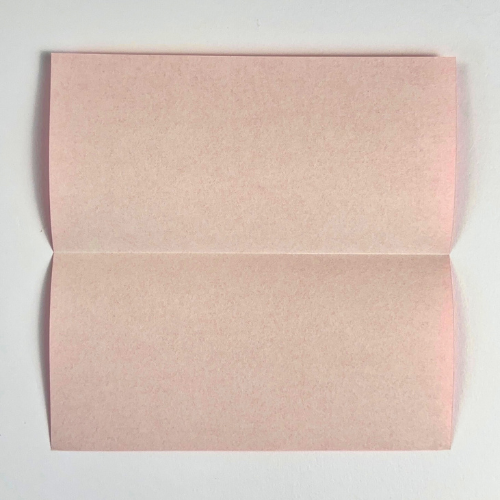
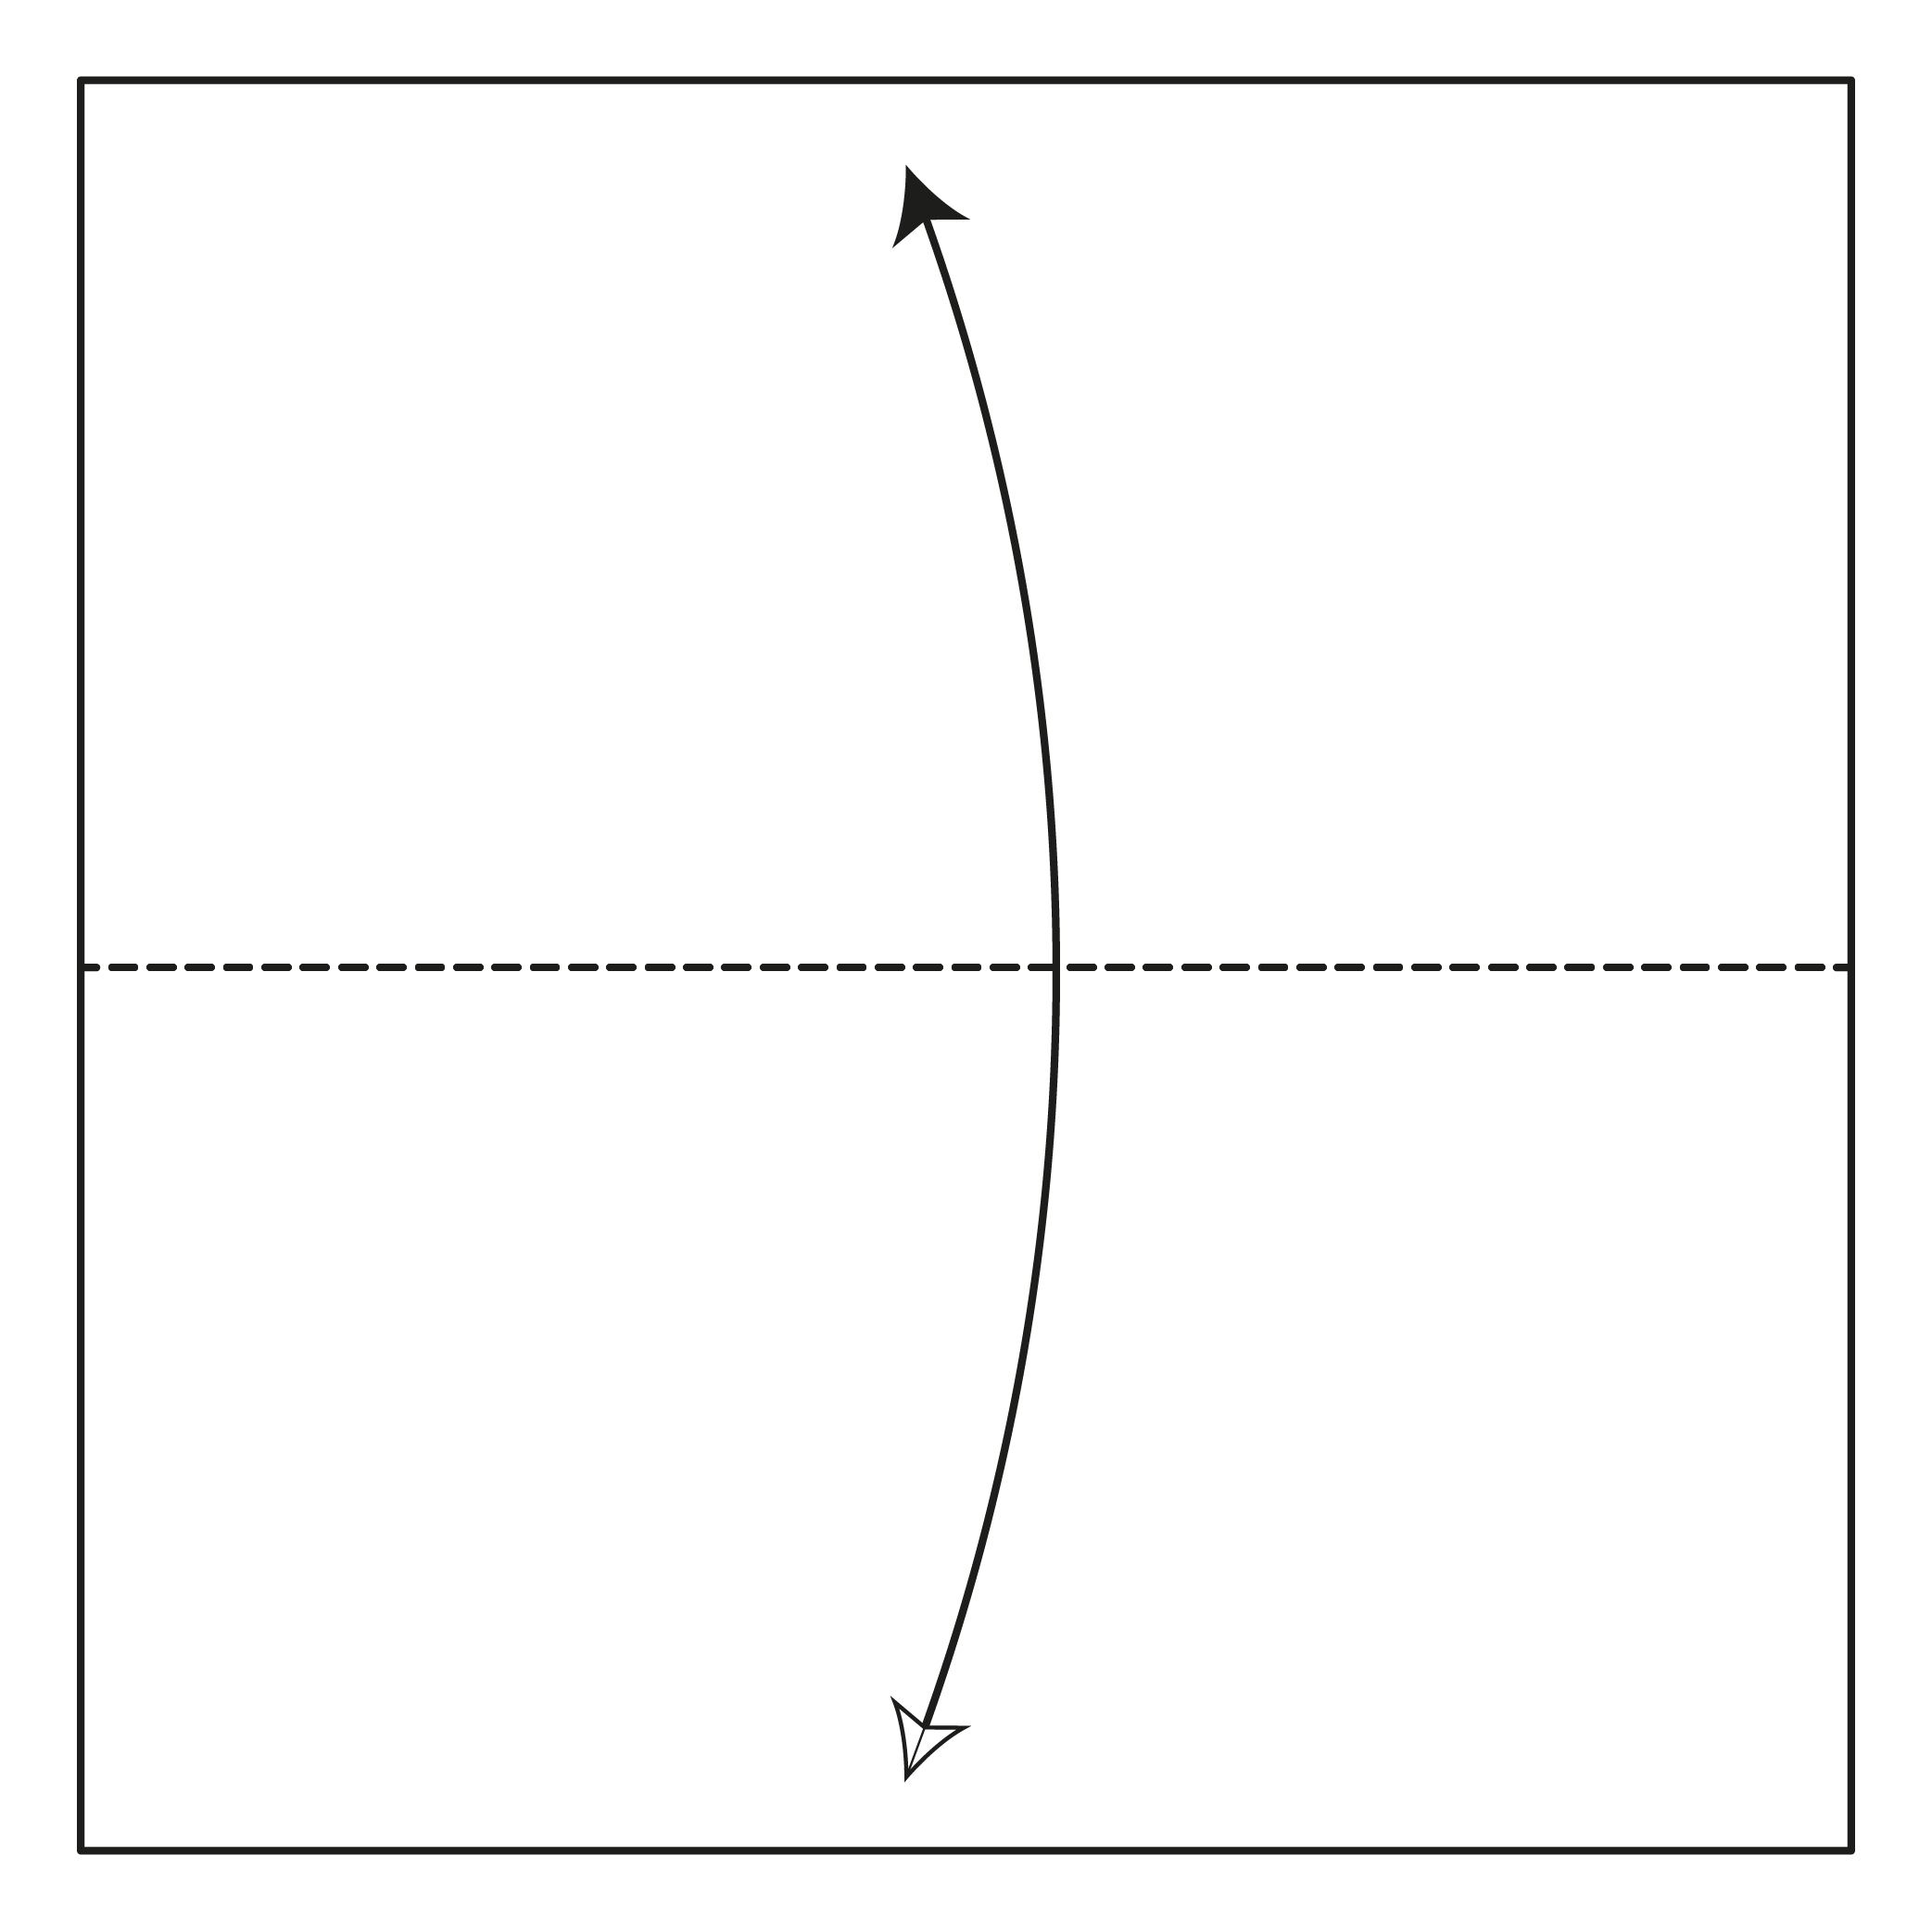
Start with the white side of the paper facing up. Fold it in half horizontally, then unfold.
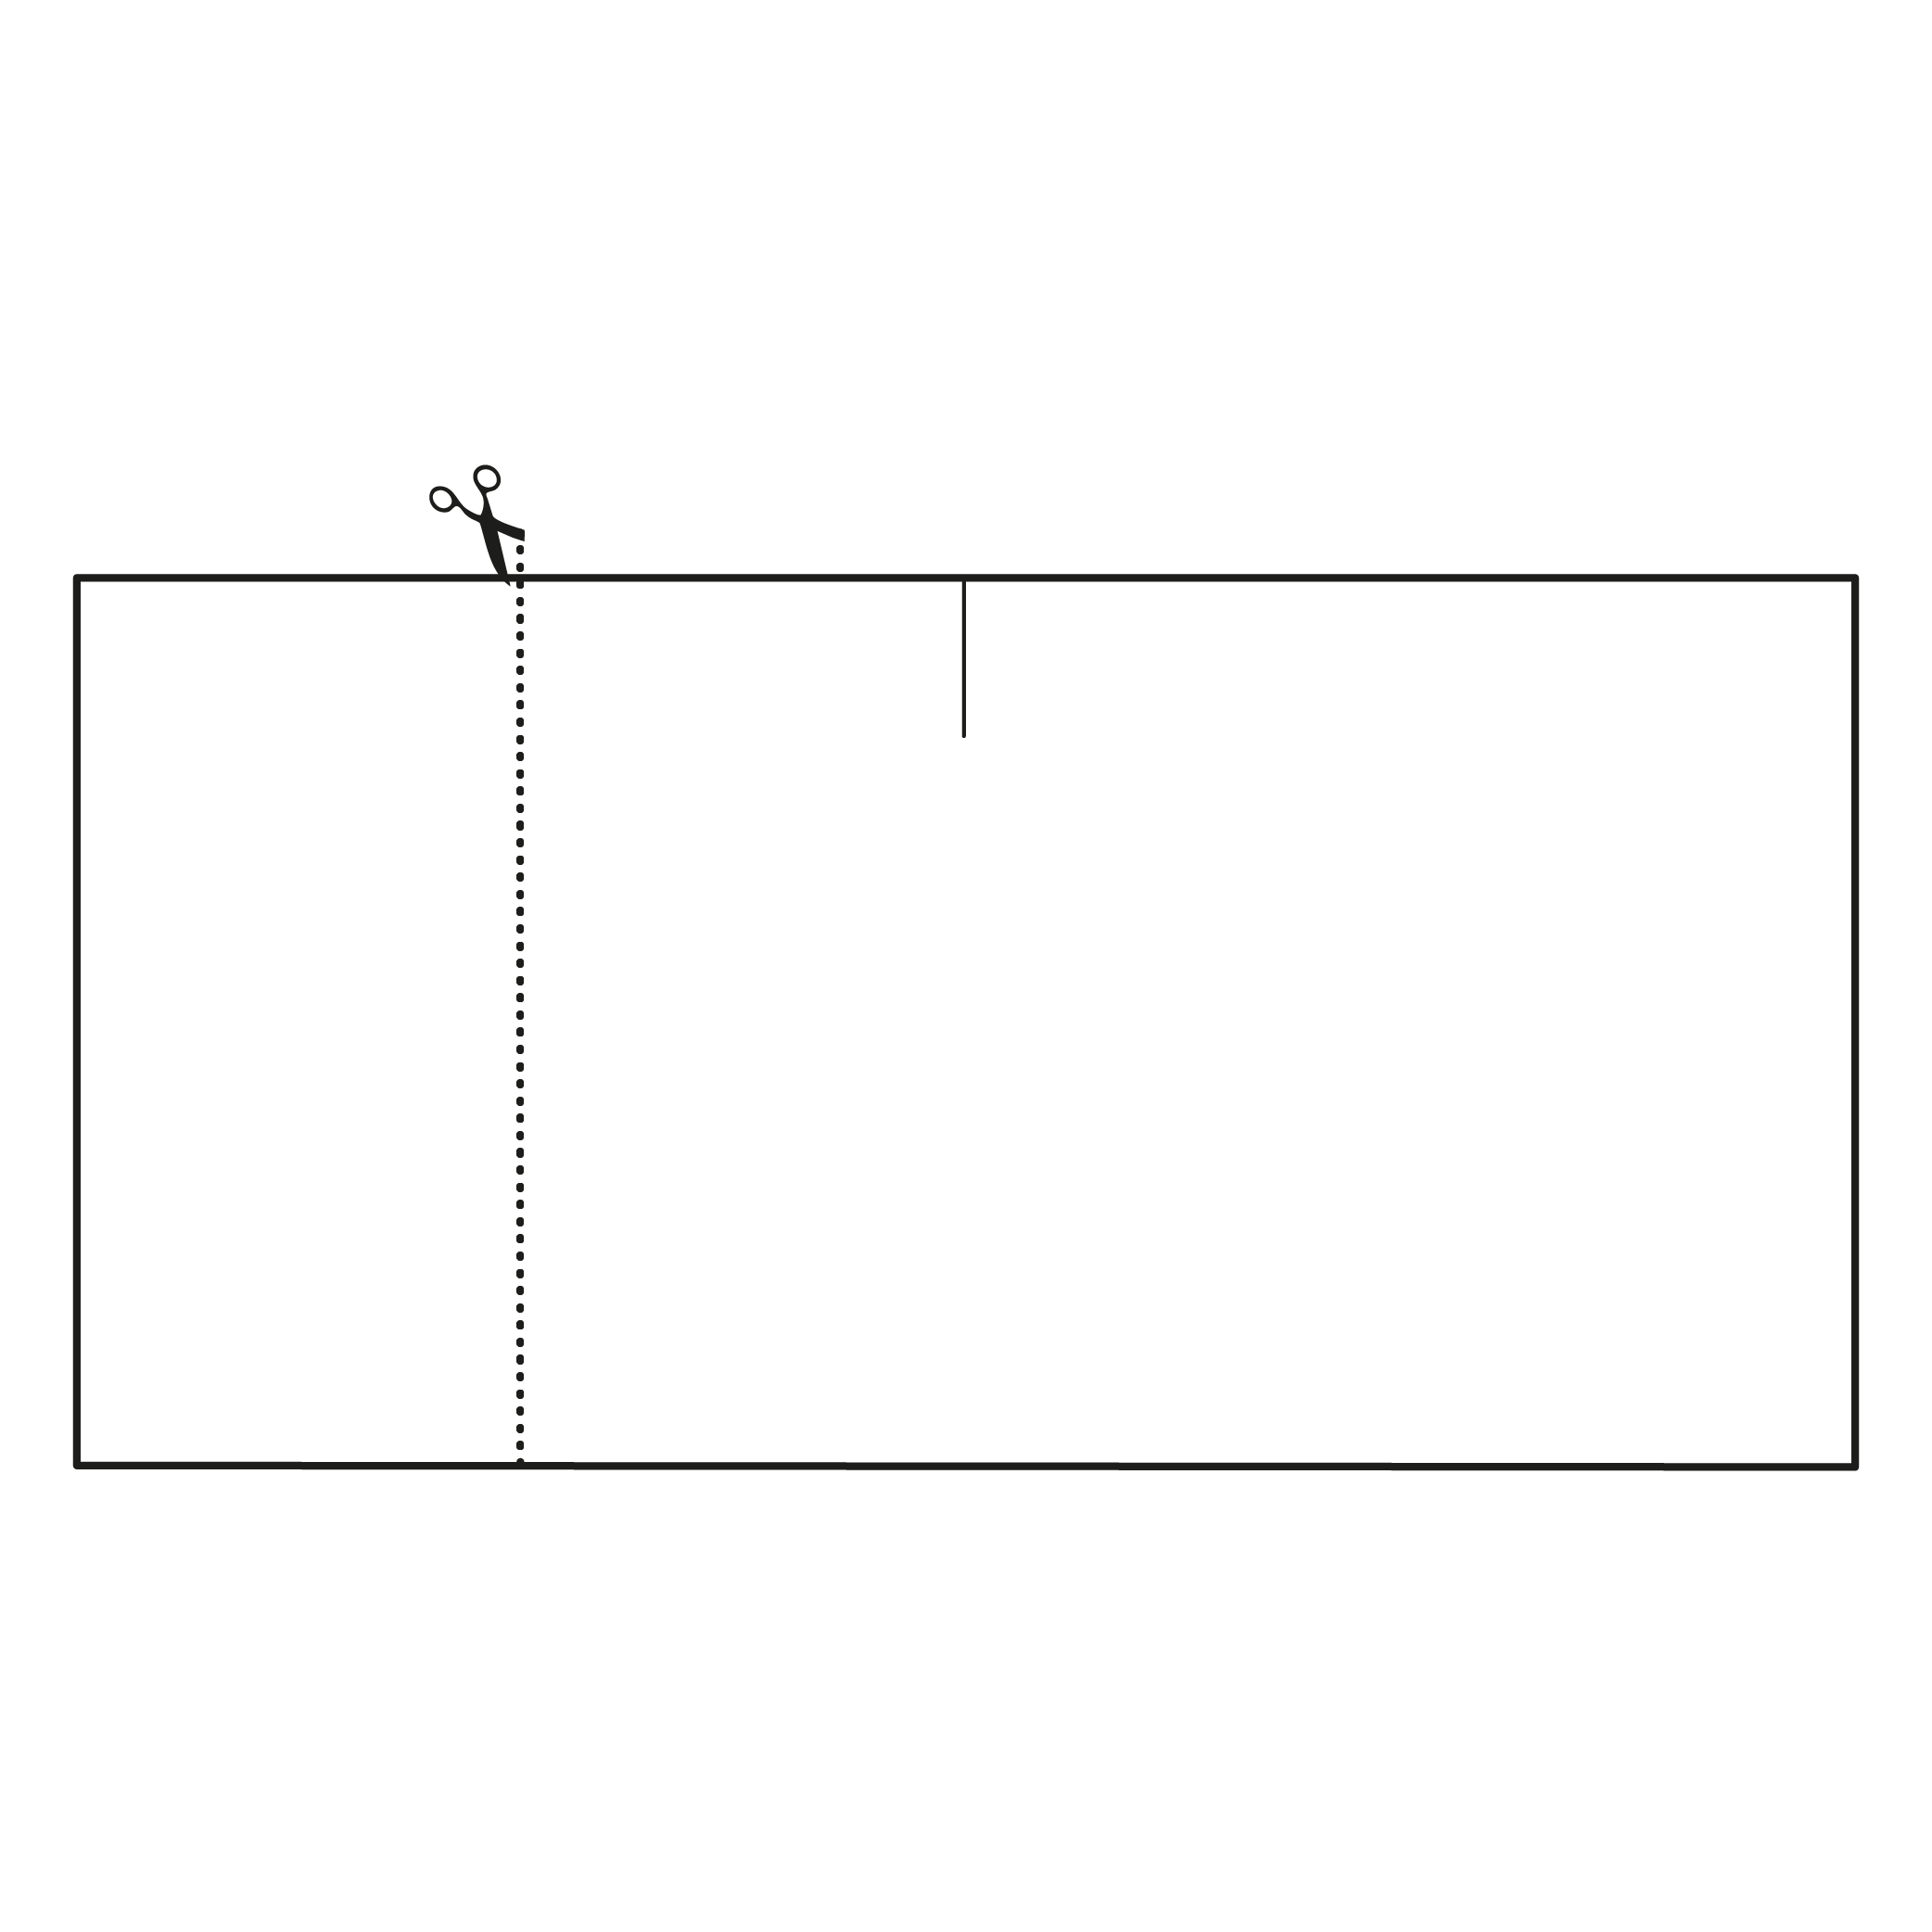
Step 2
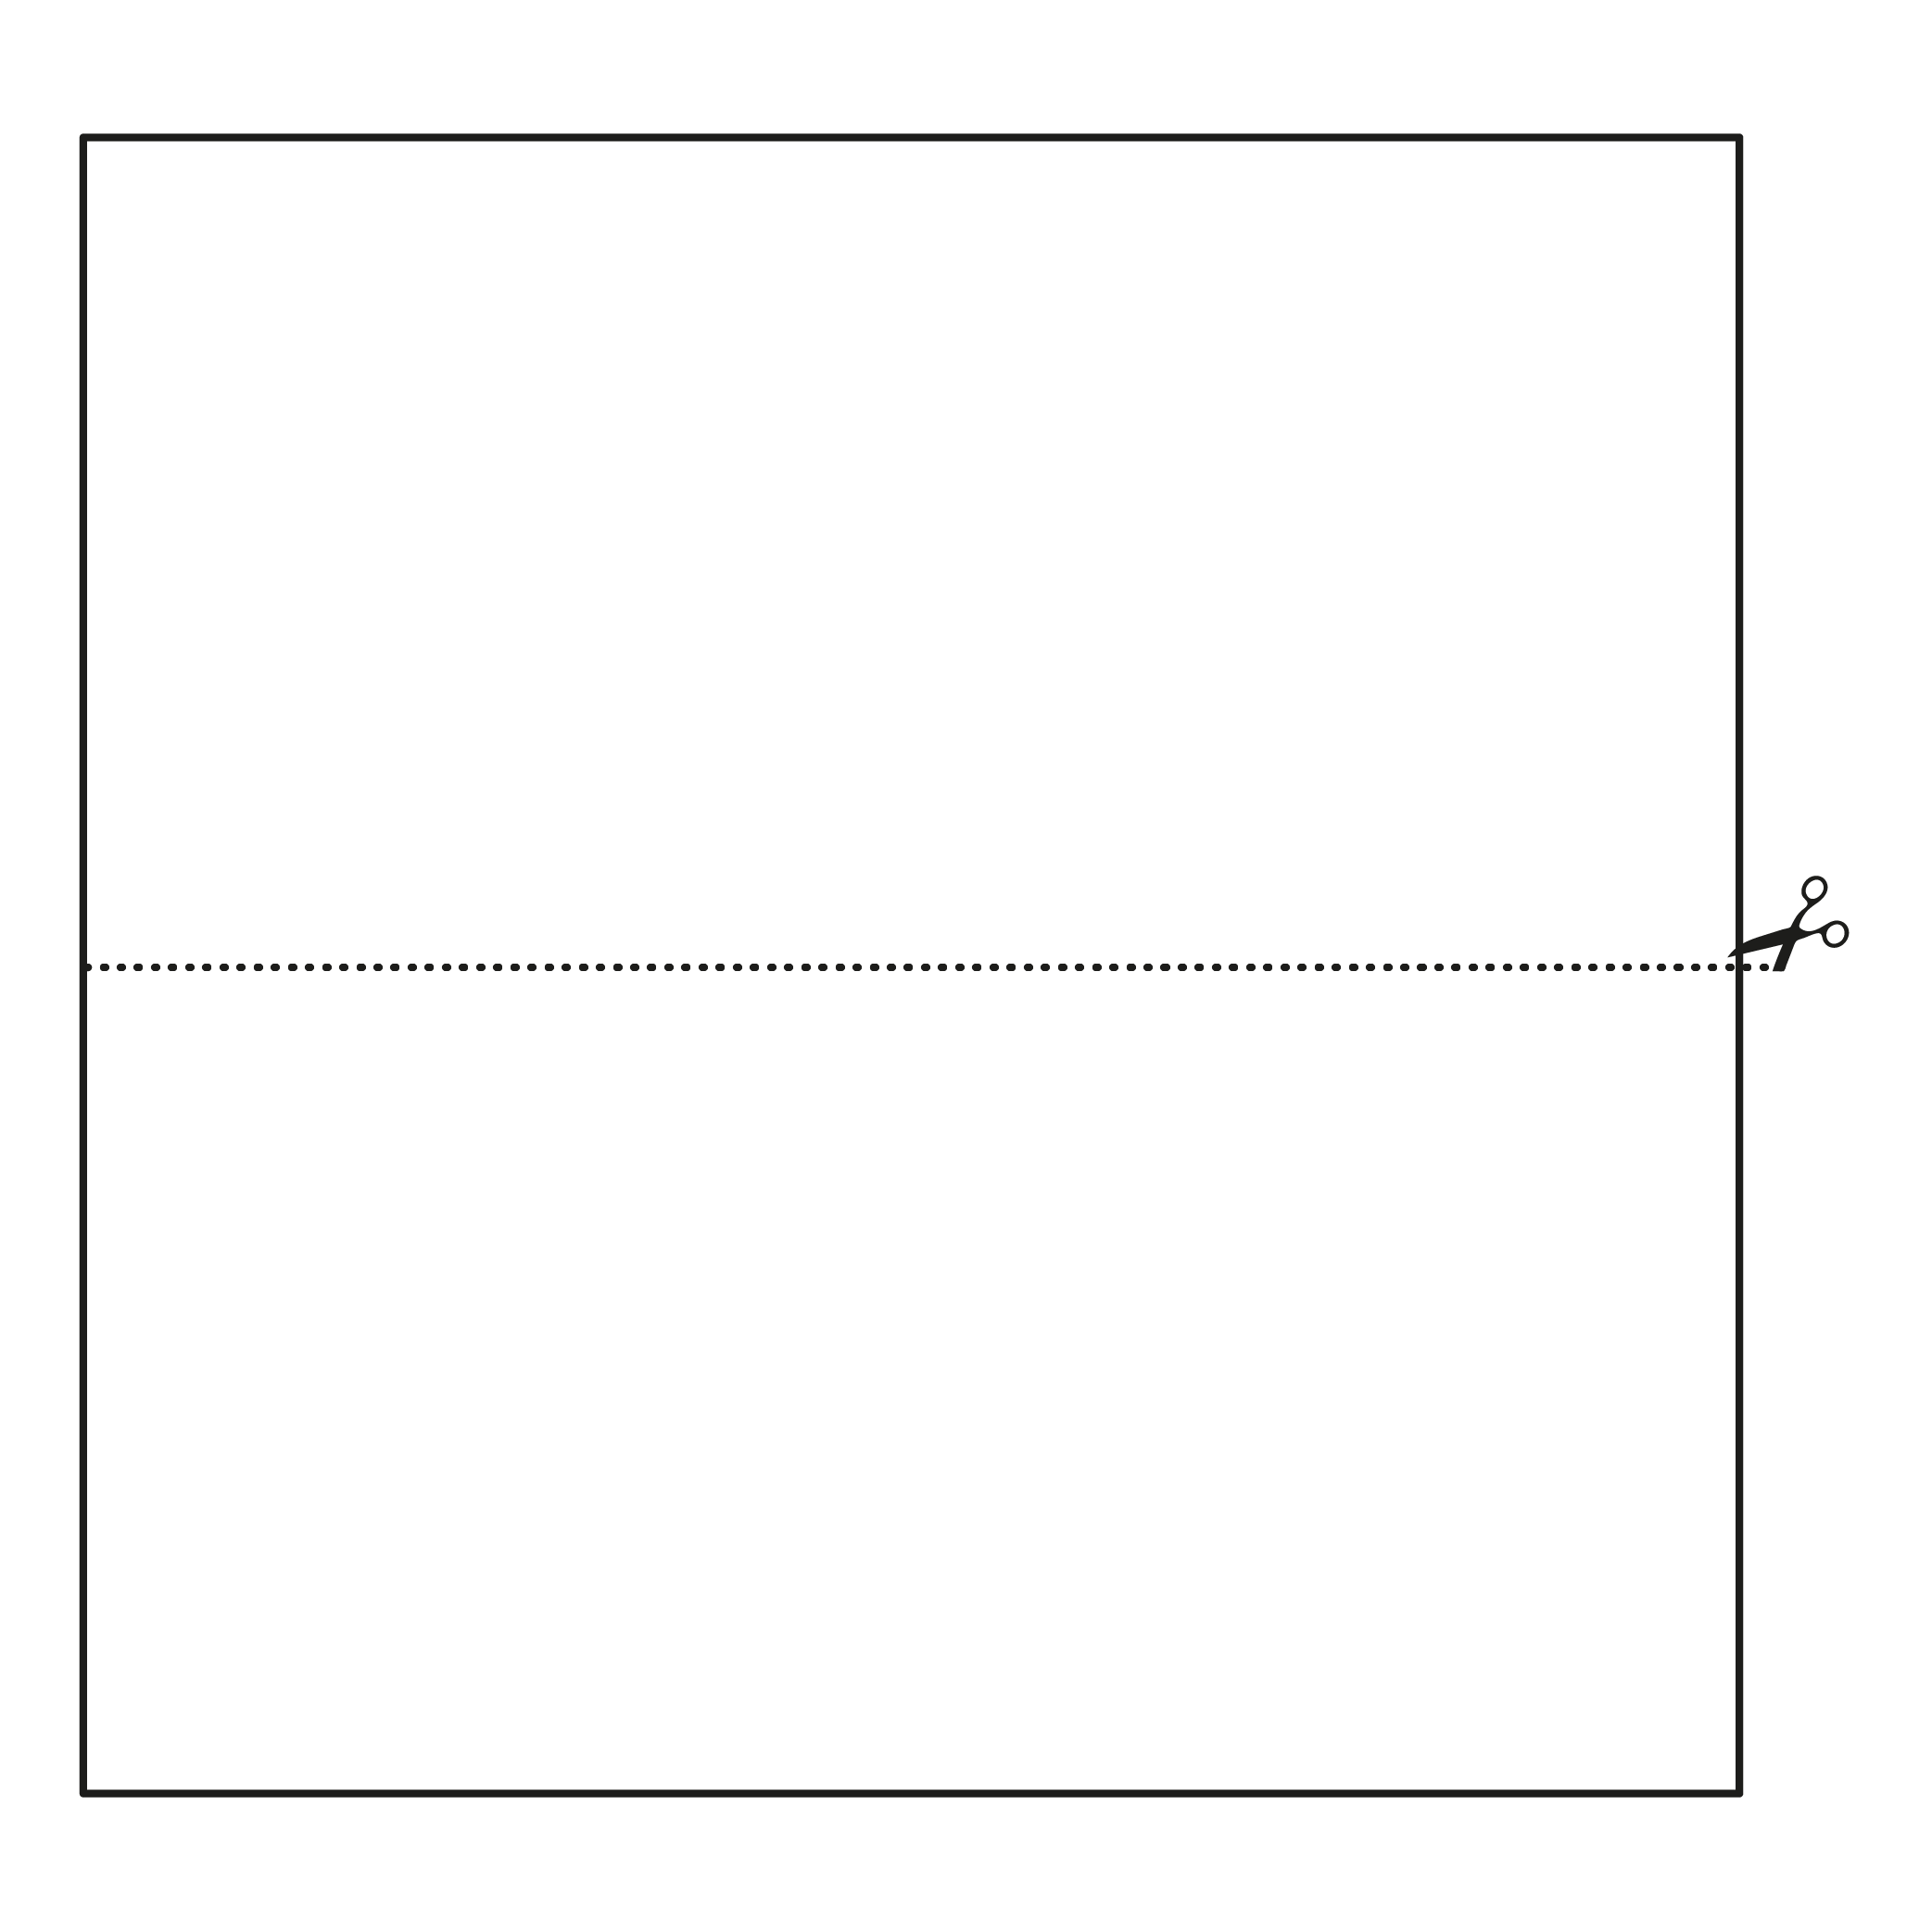
Cut the paper in half along the crease you just made.
Step 3
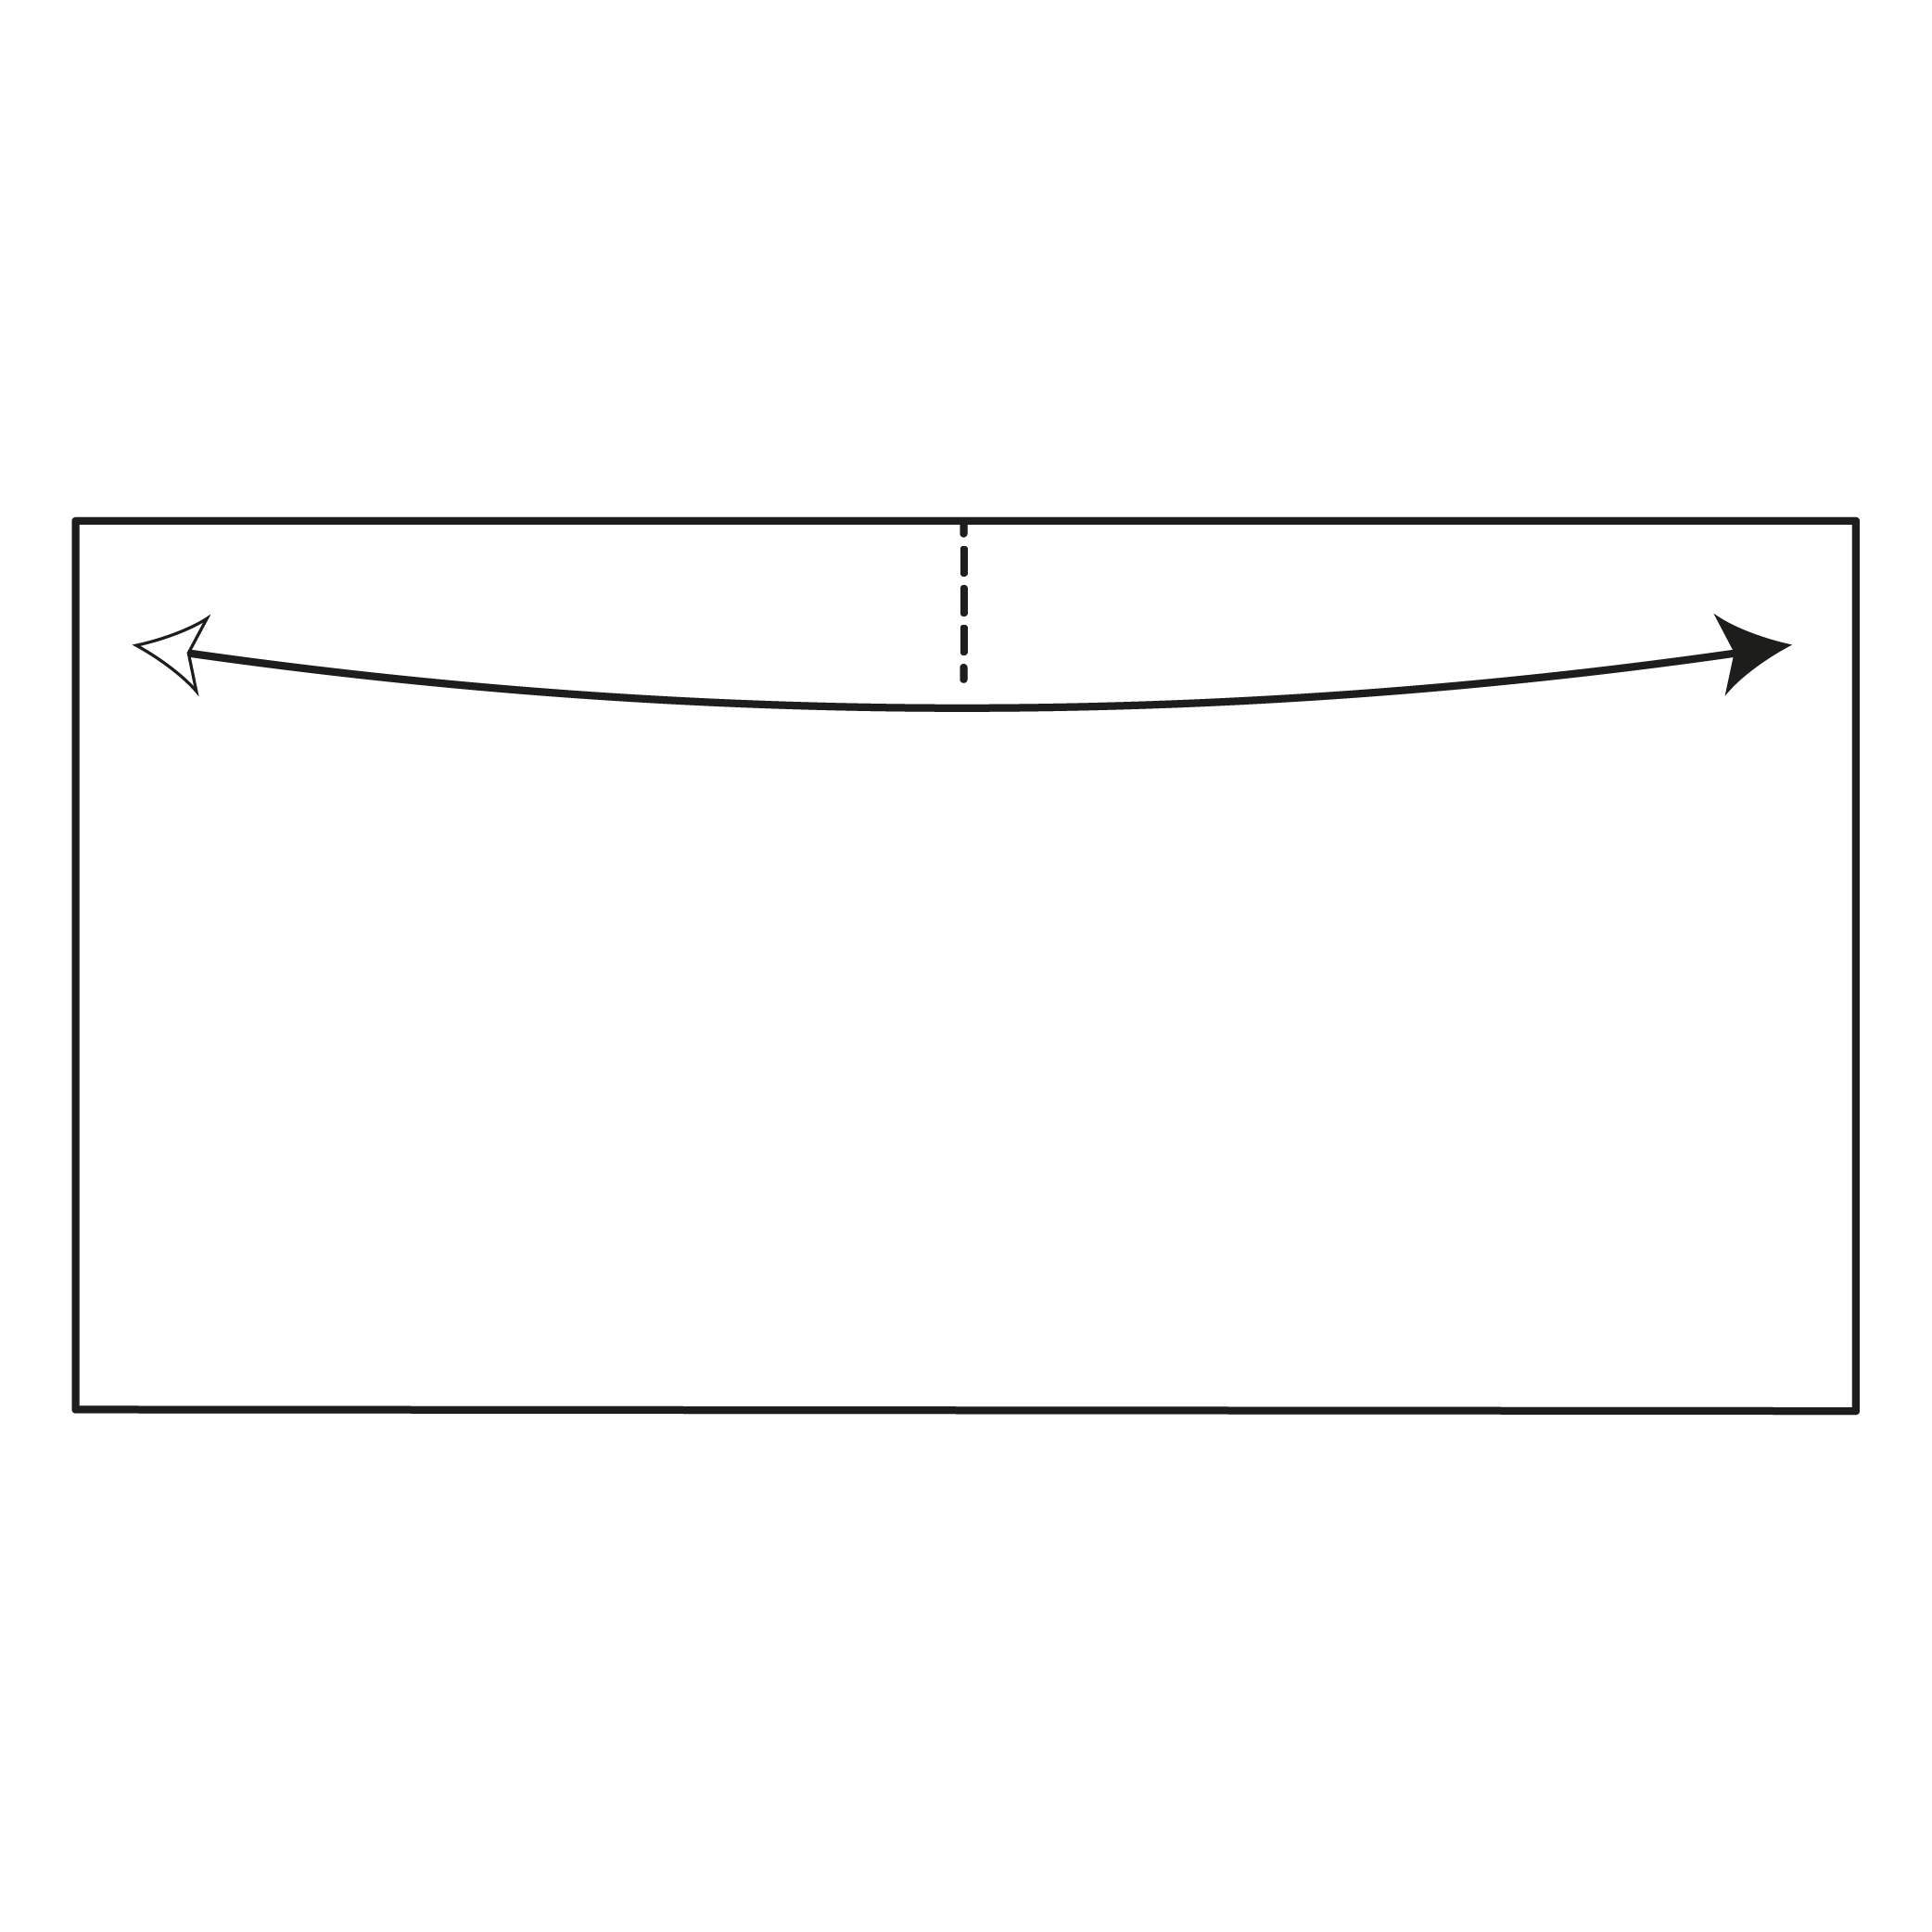
Fold in half horizontally again and make a small pinch mark at the top edge. Then, unfold.
Step 4
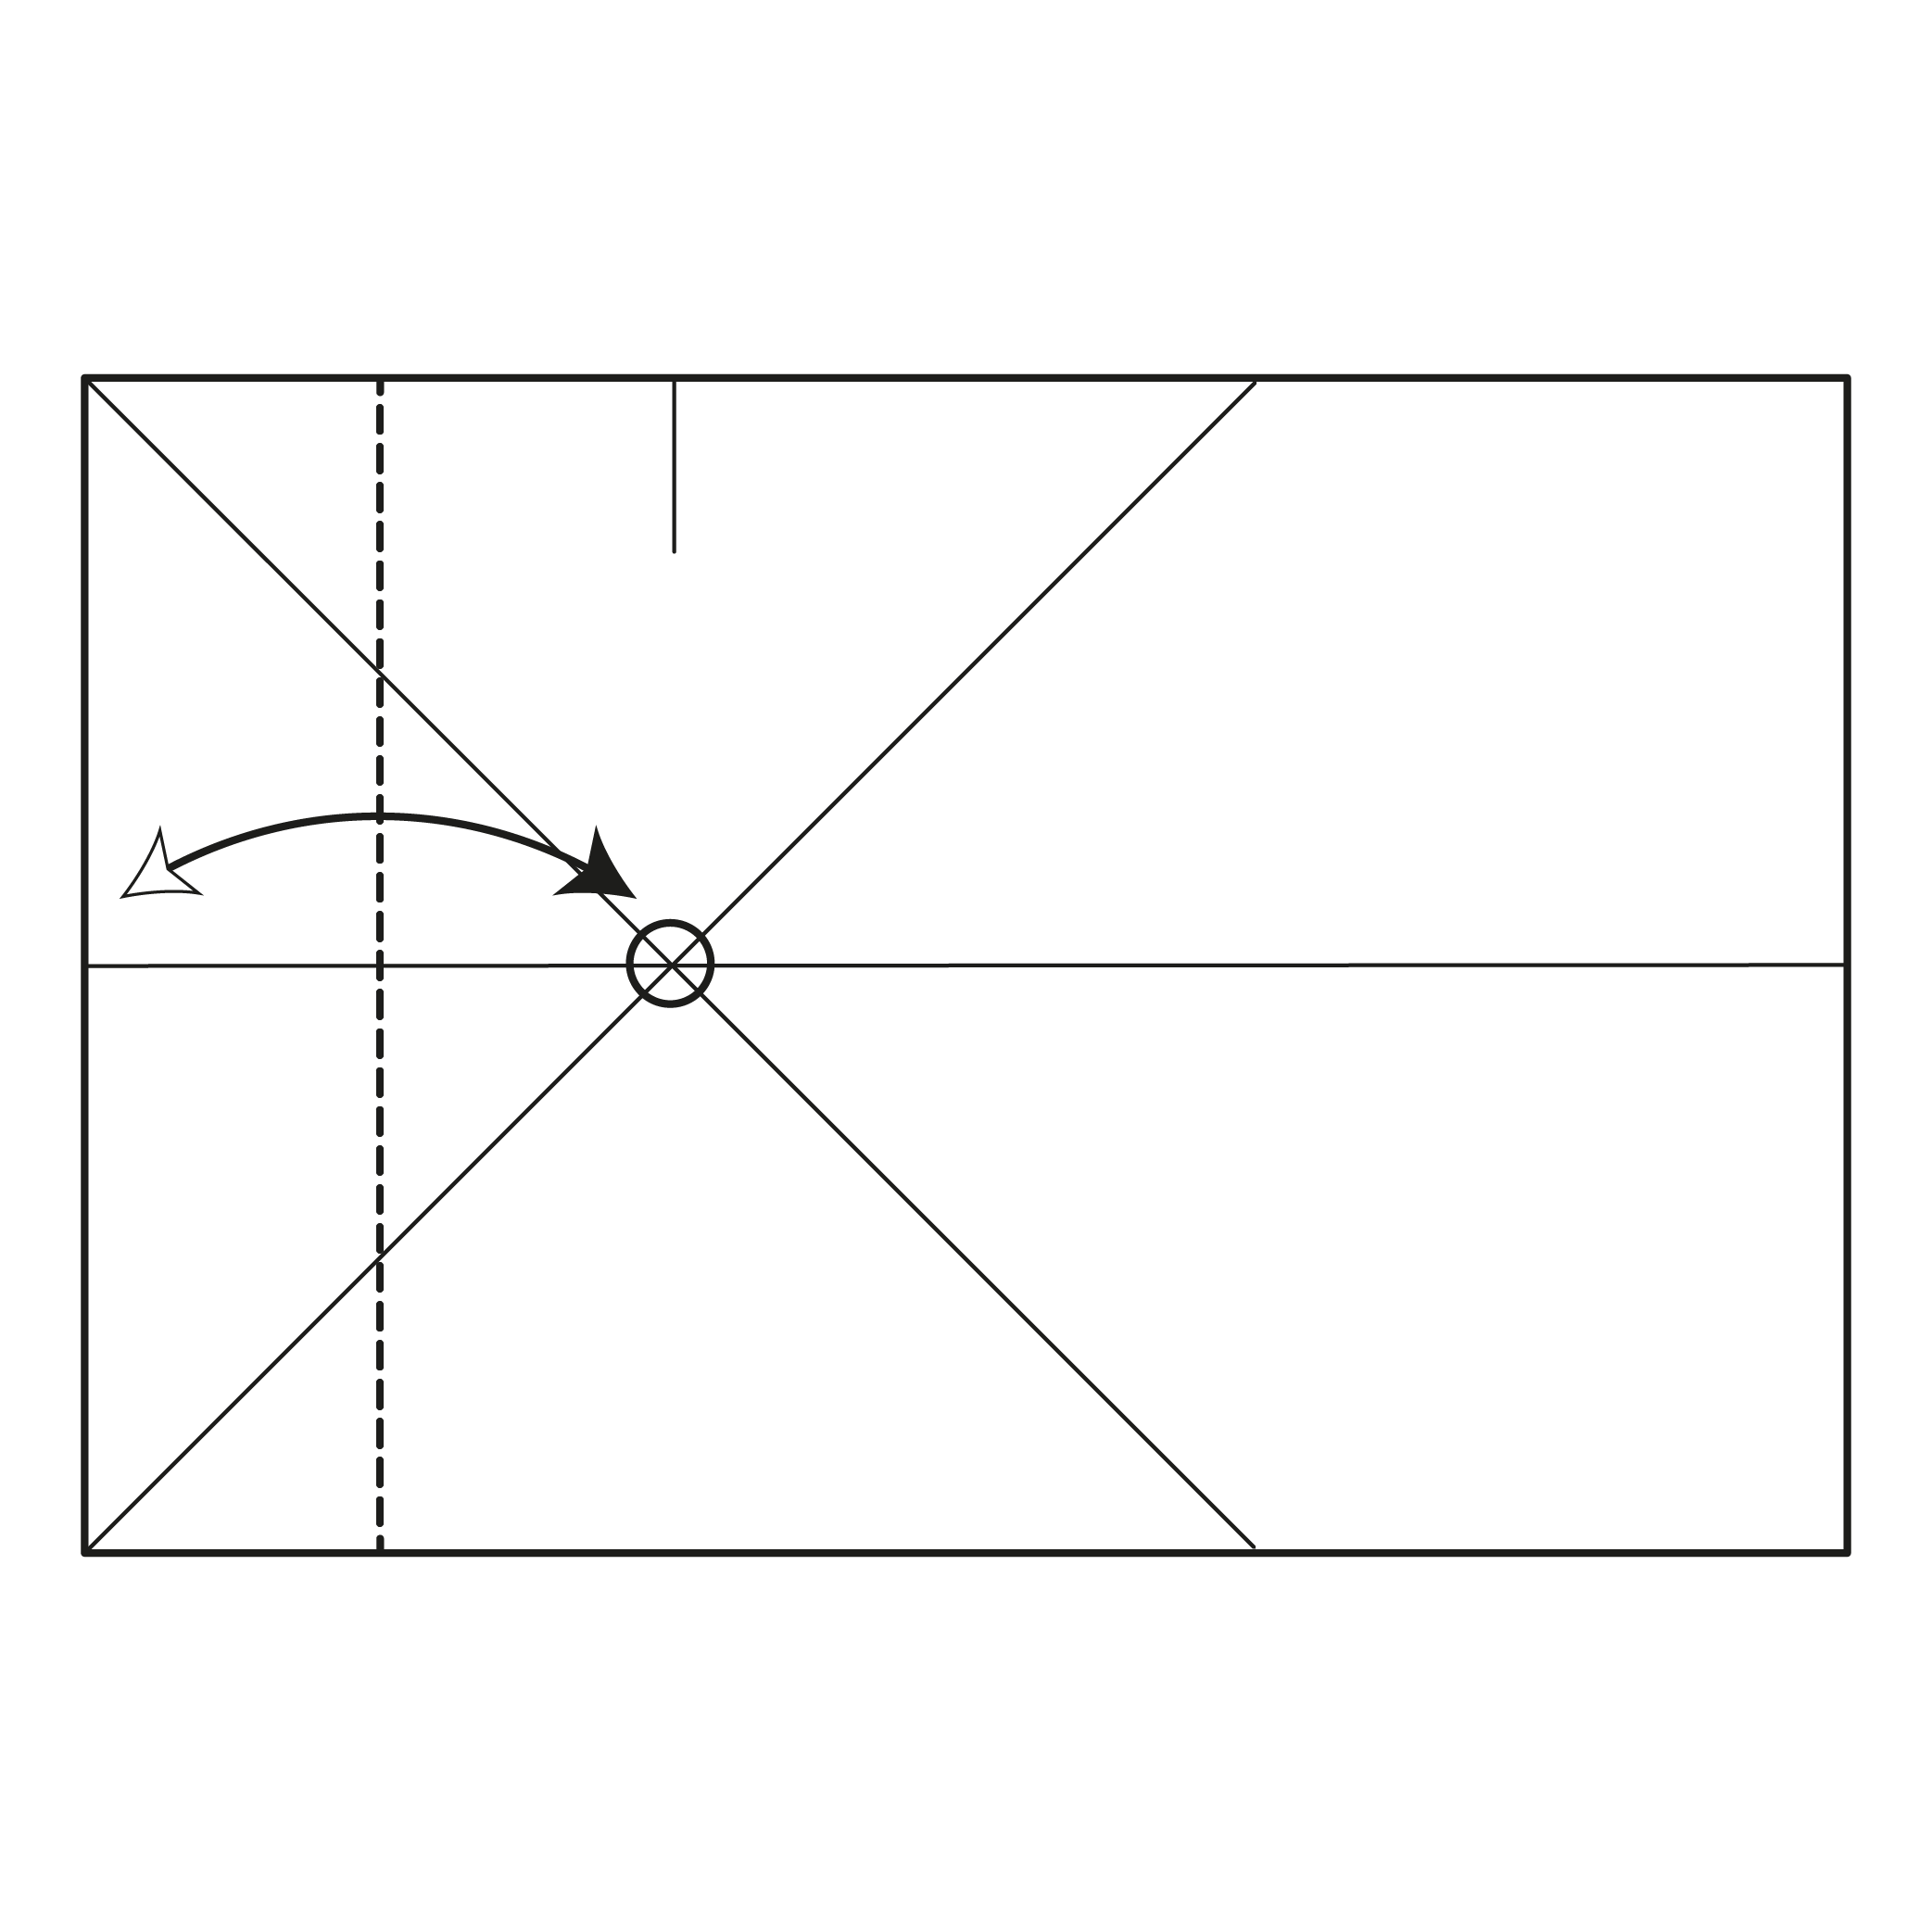
Fold the left edge to meet the pinch mark. Then, unfold.
Step 5: Let’s Fold the Koi
Cut the paper along the crease you just made.
Step 6

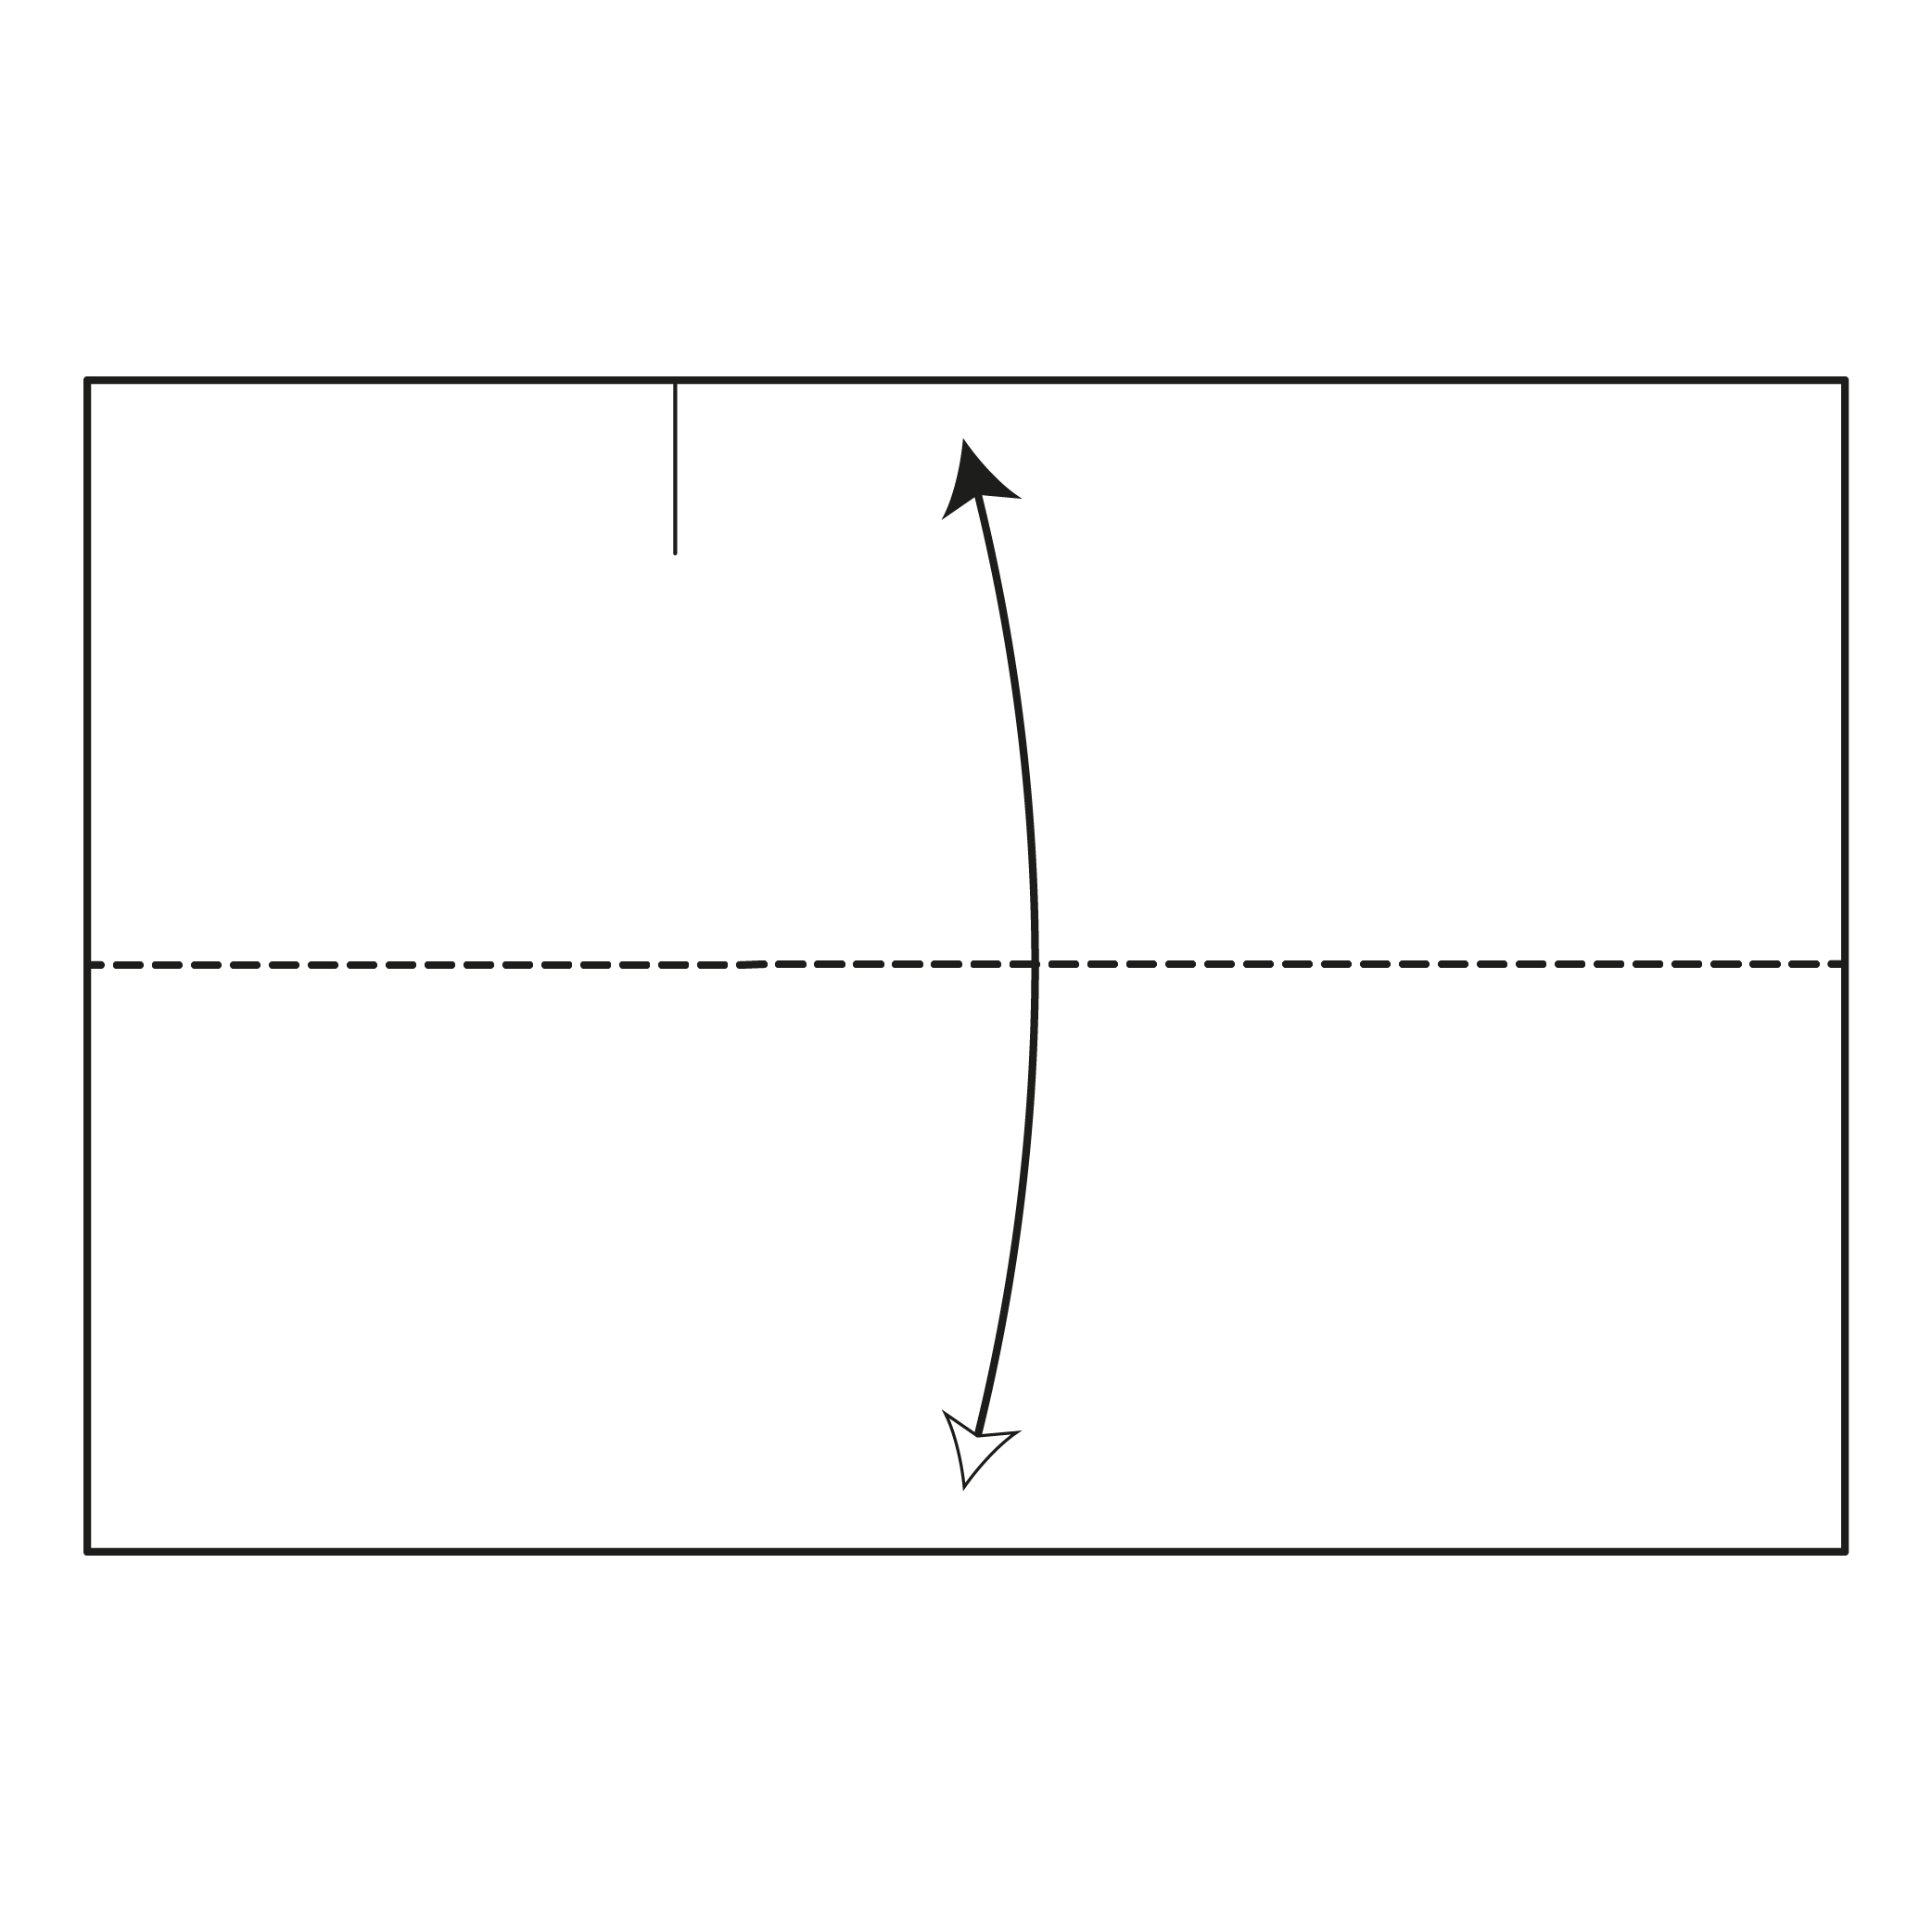
Fold the paper in half horizontally, then unfold.
Step 7
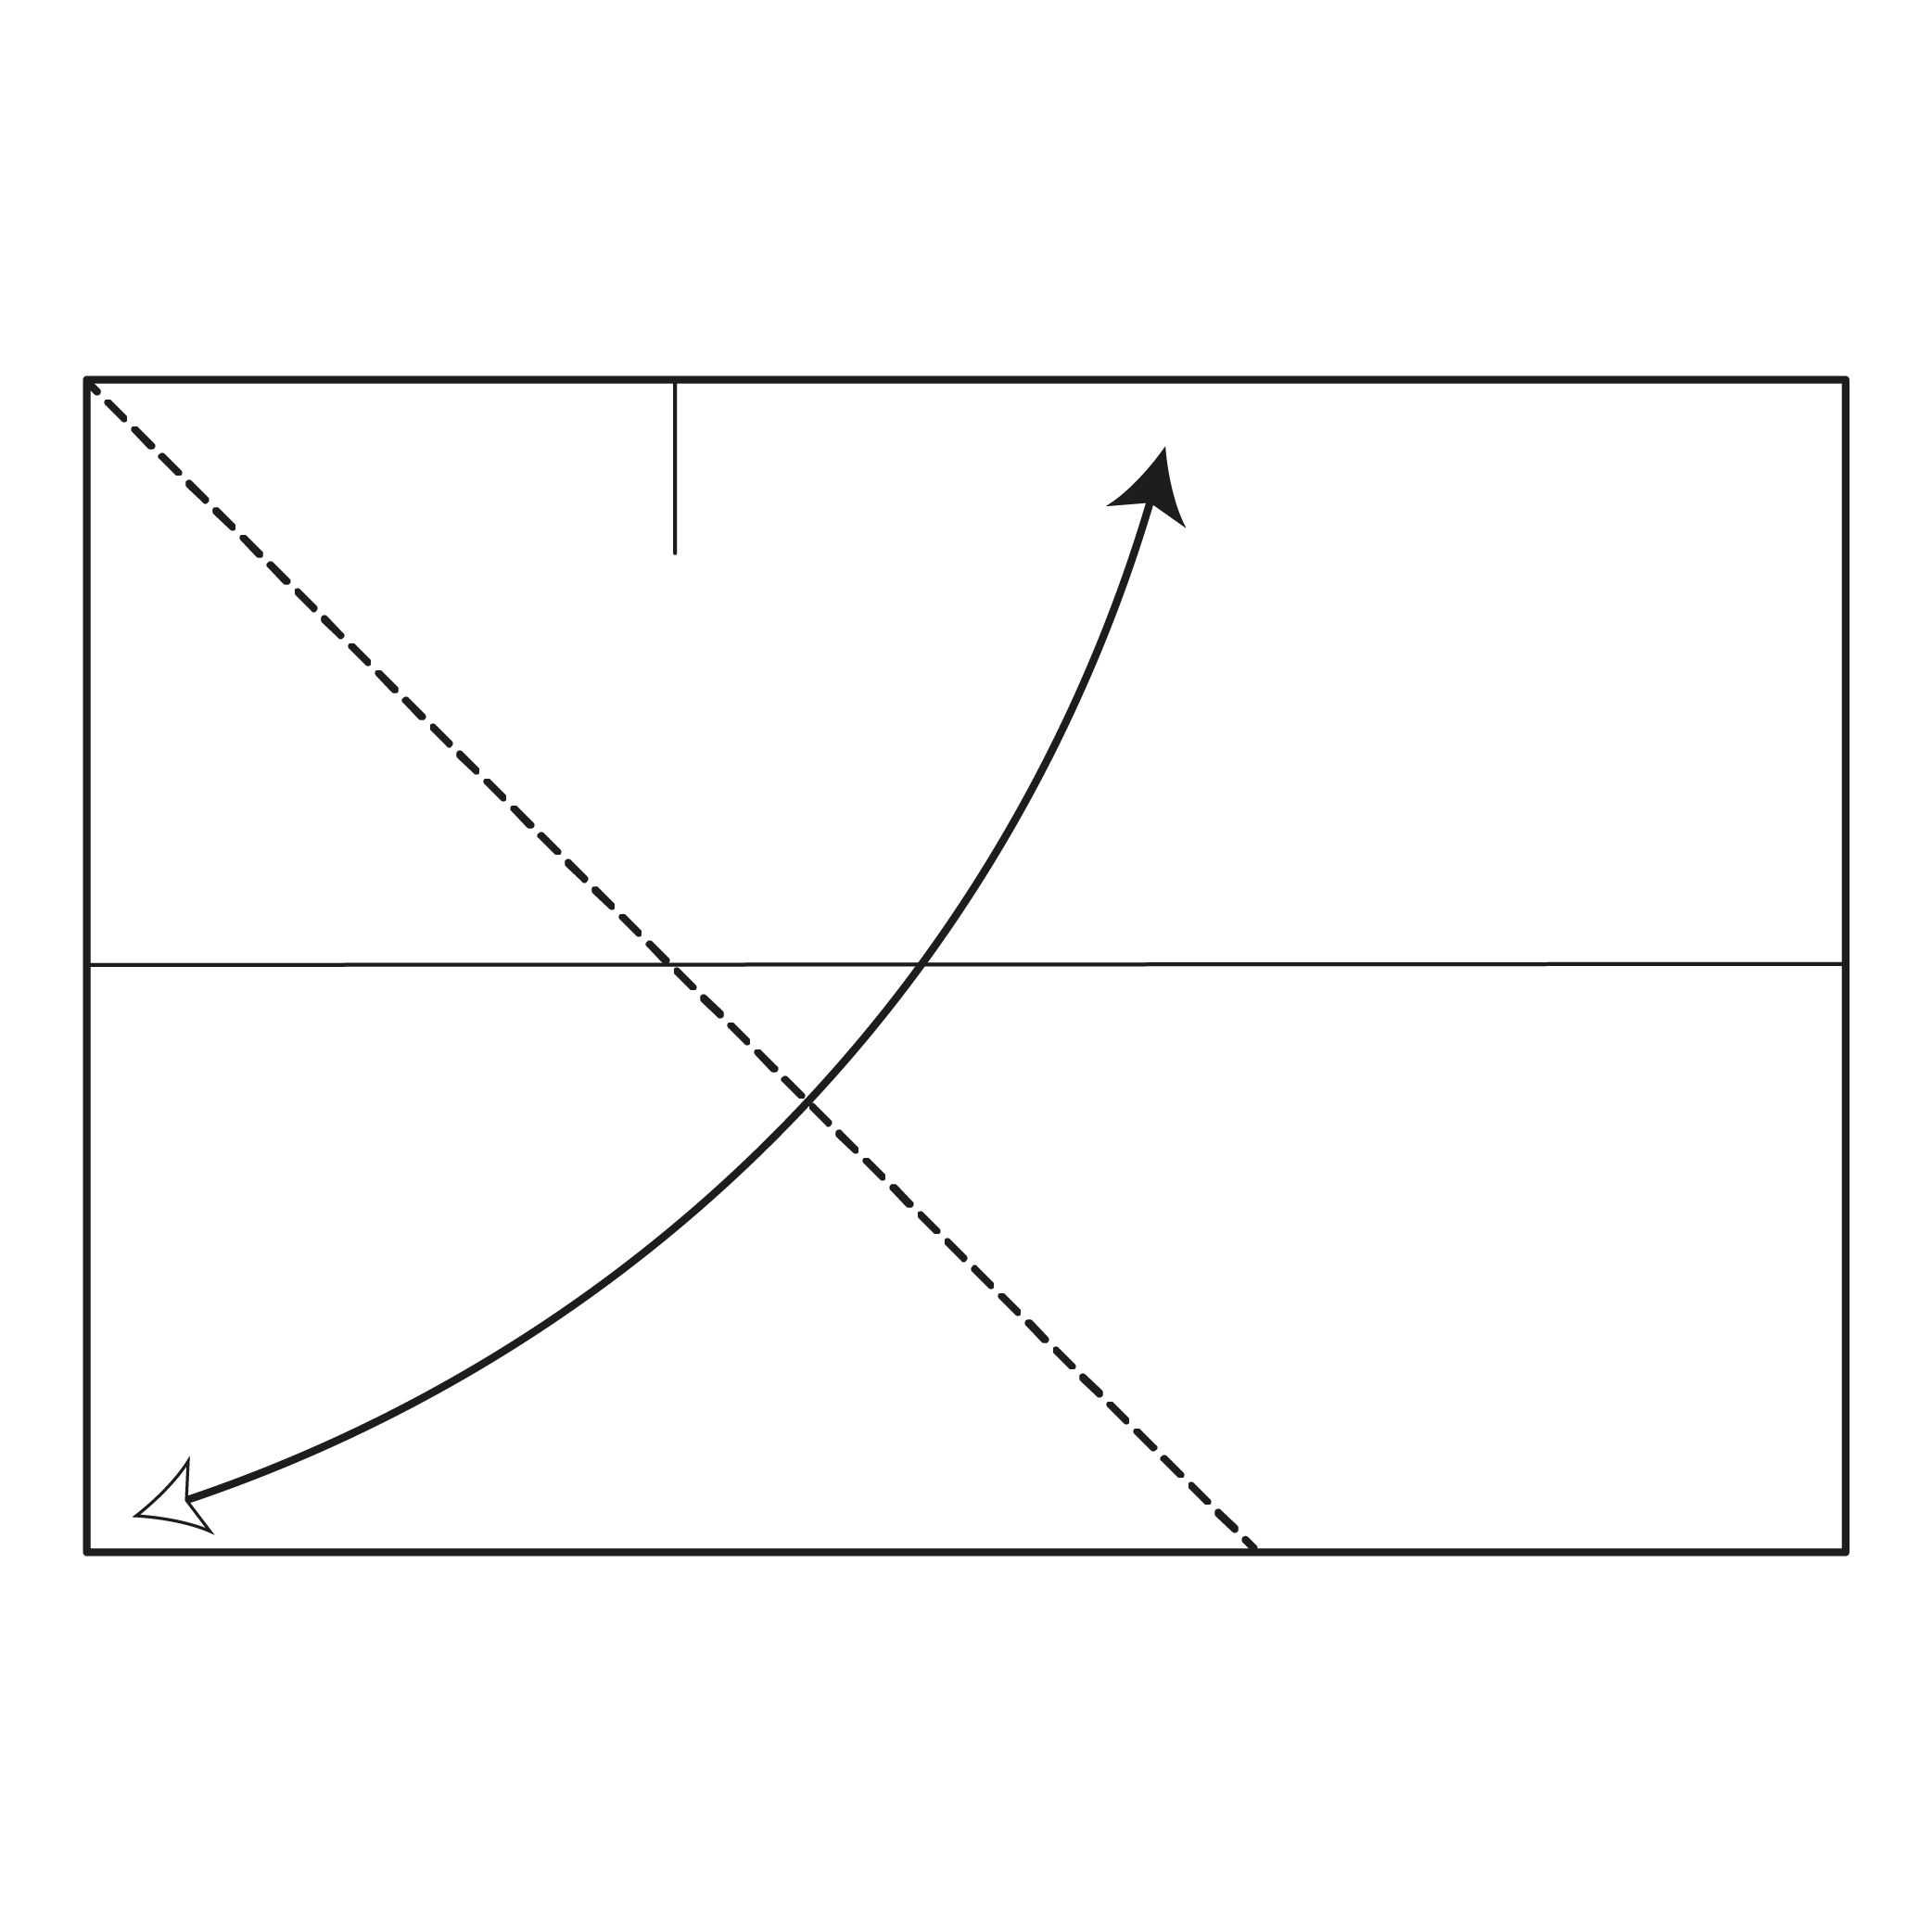
Fold the left edge to the top edge, starting your crease from the top-left corner. Then, unfold.
Step 8
Fold the left edge to the bottom edge, starting your crease from the bottom-left corner. Then, unfold.
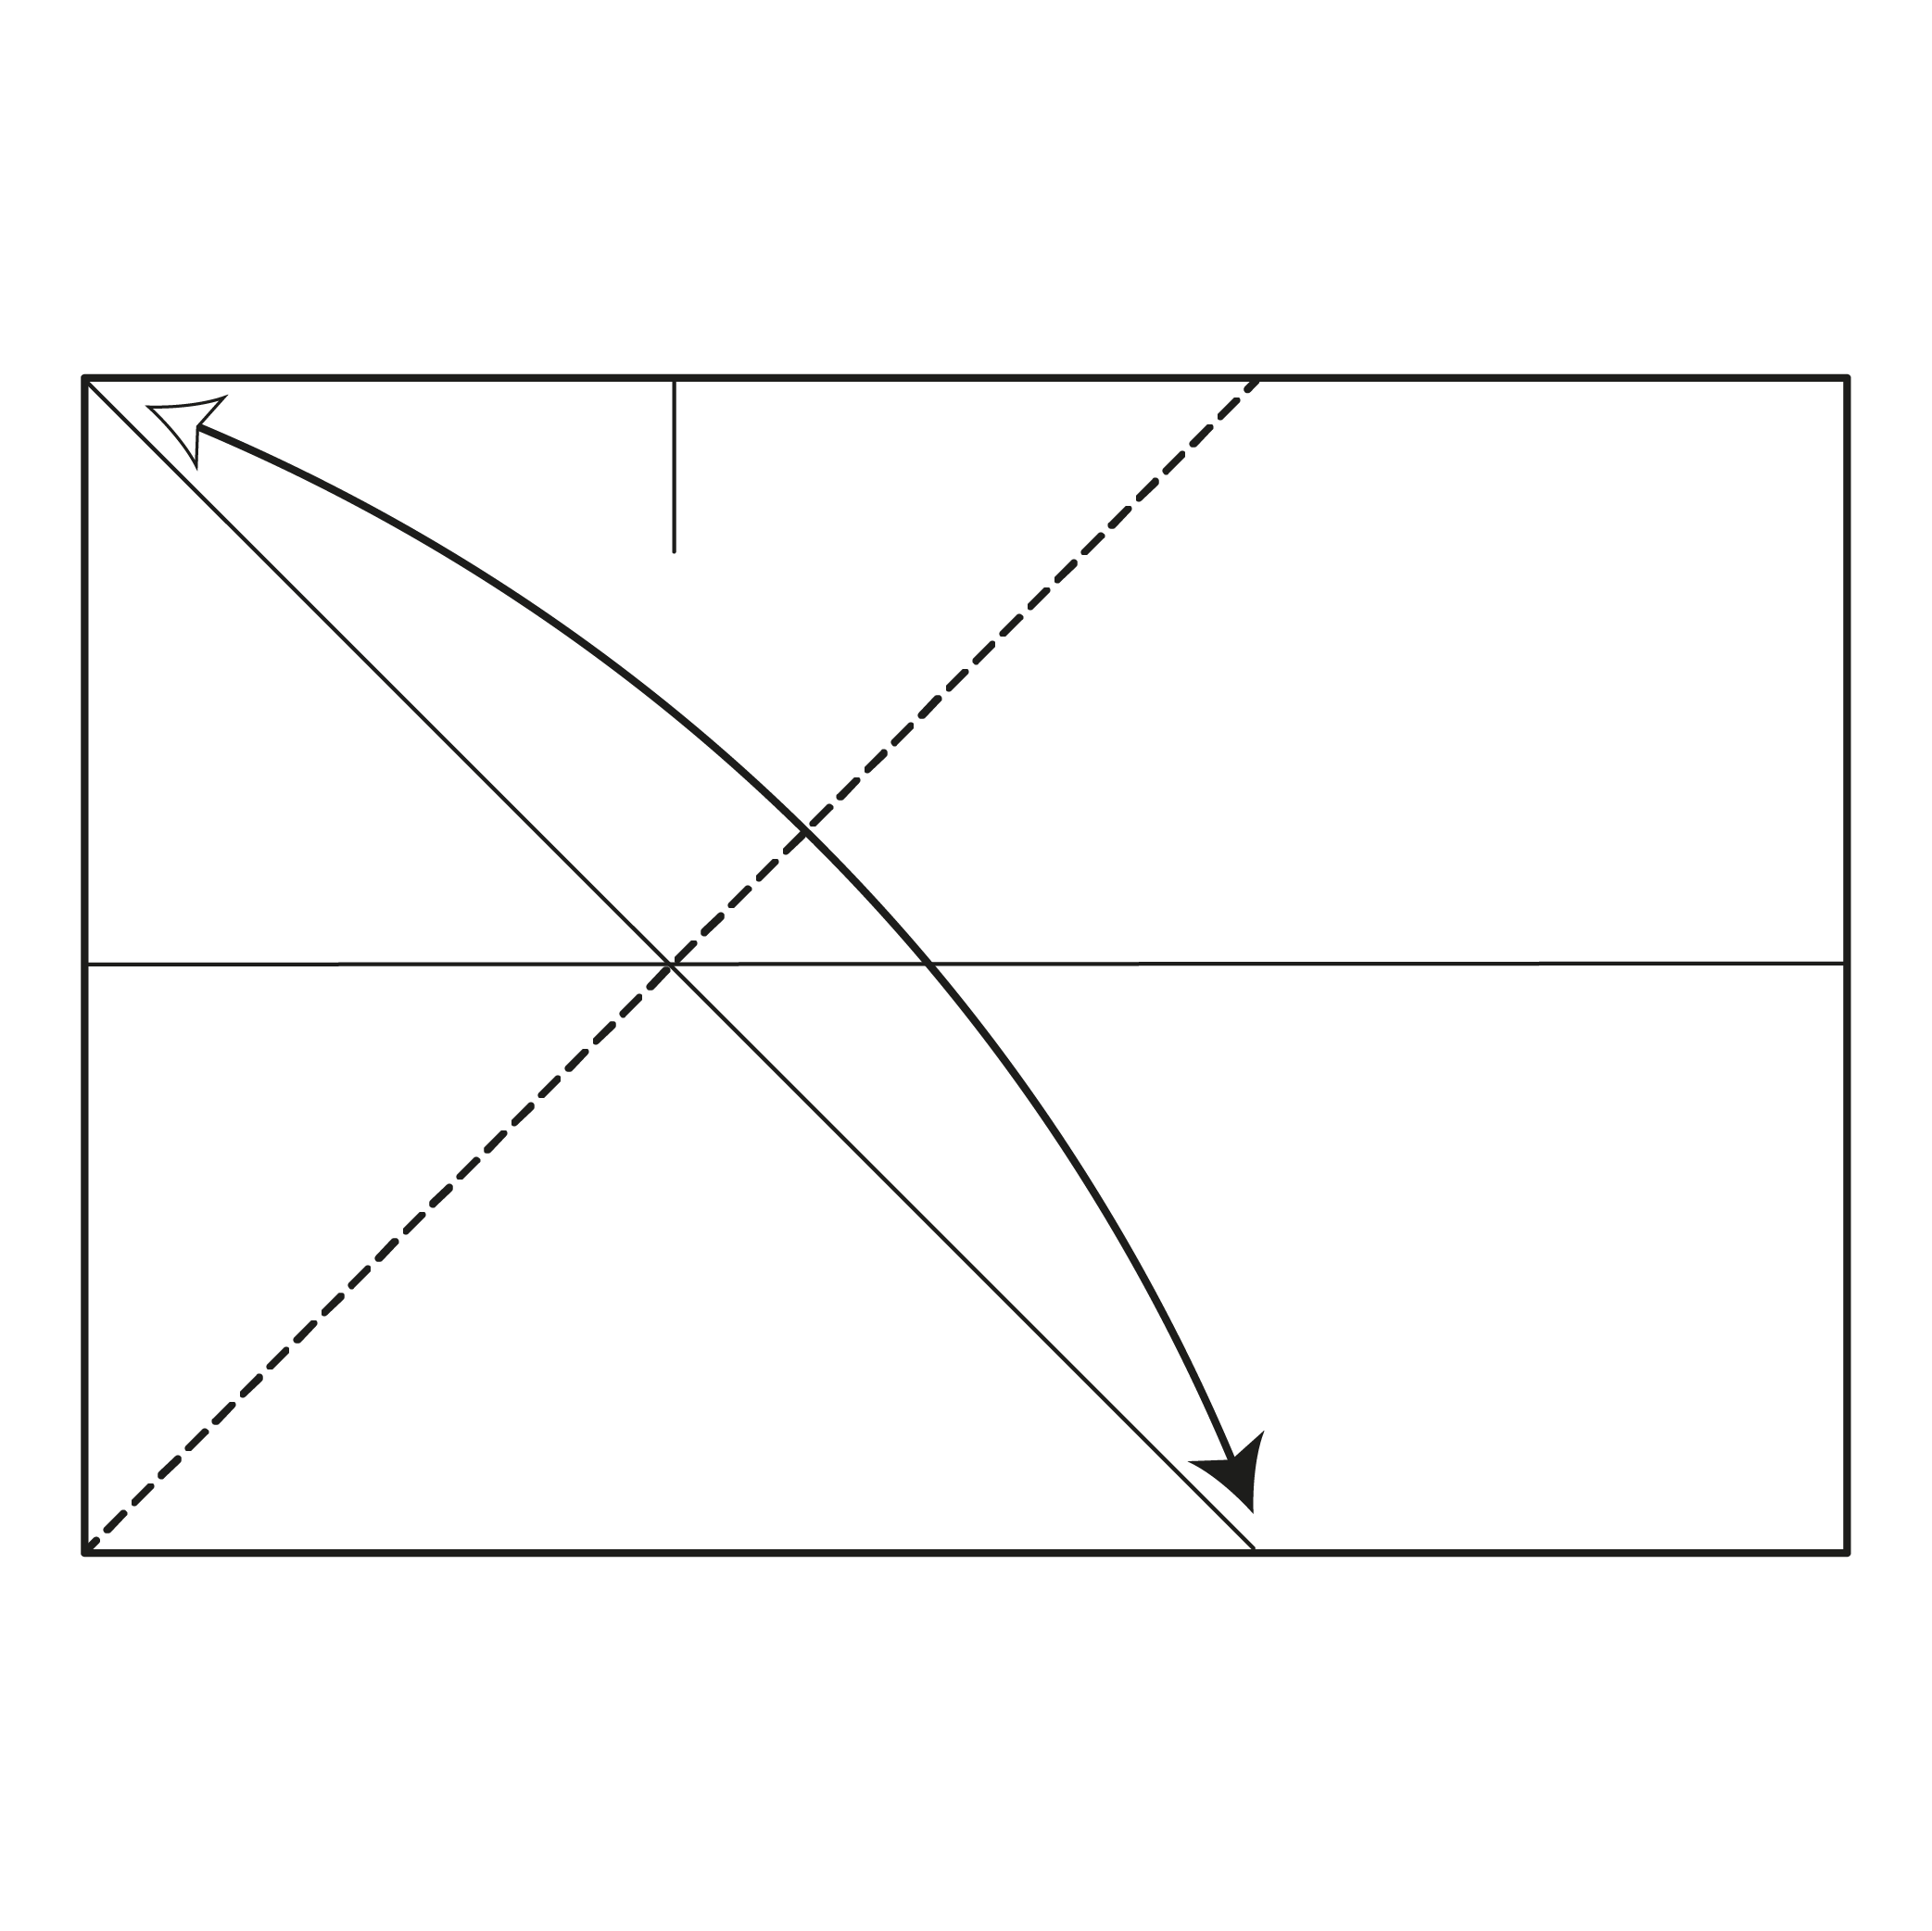
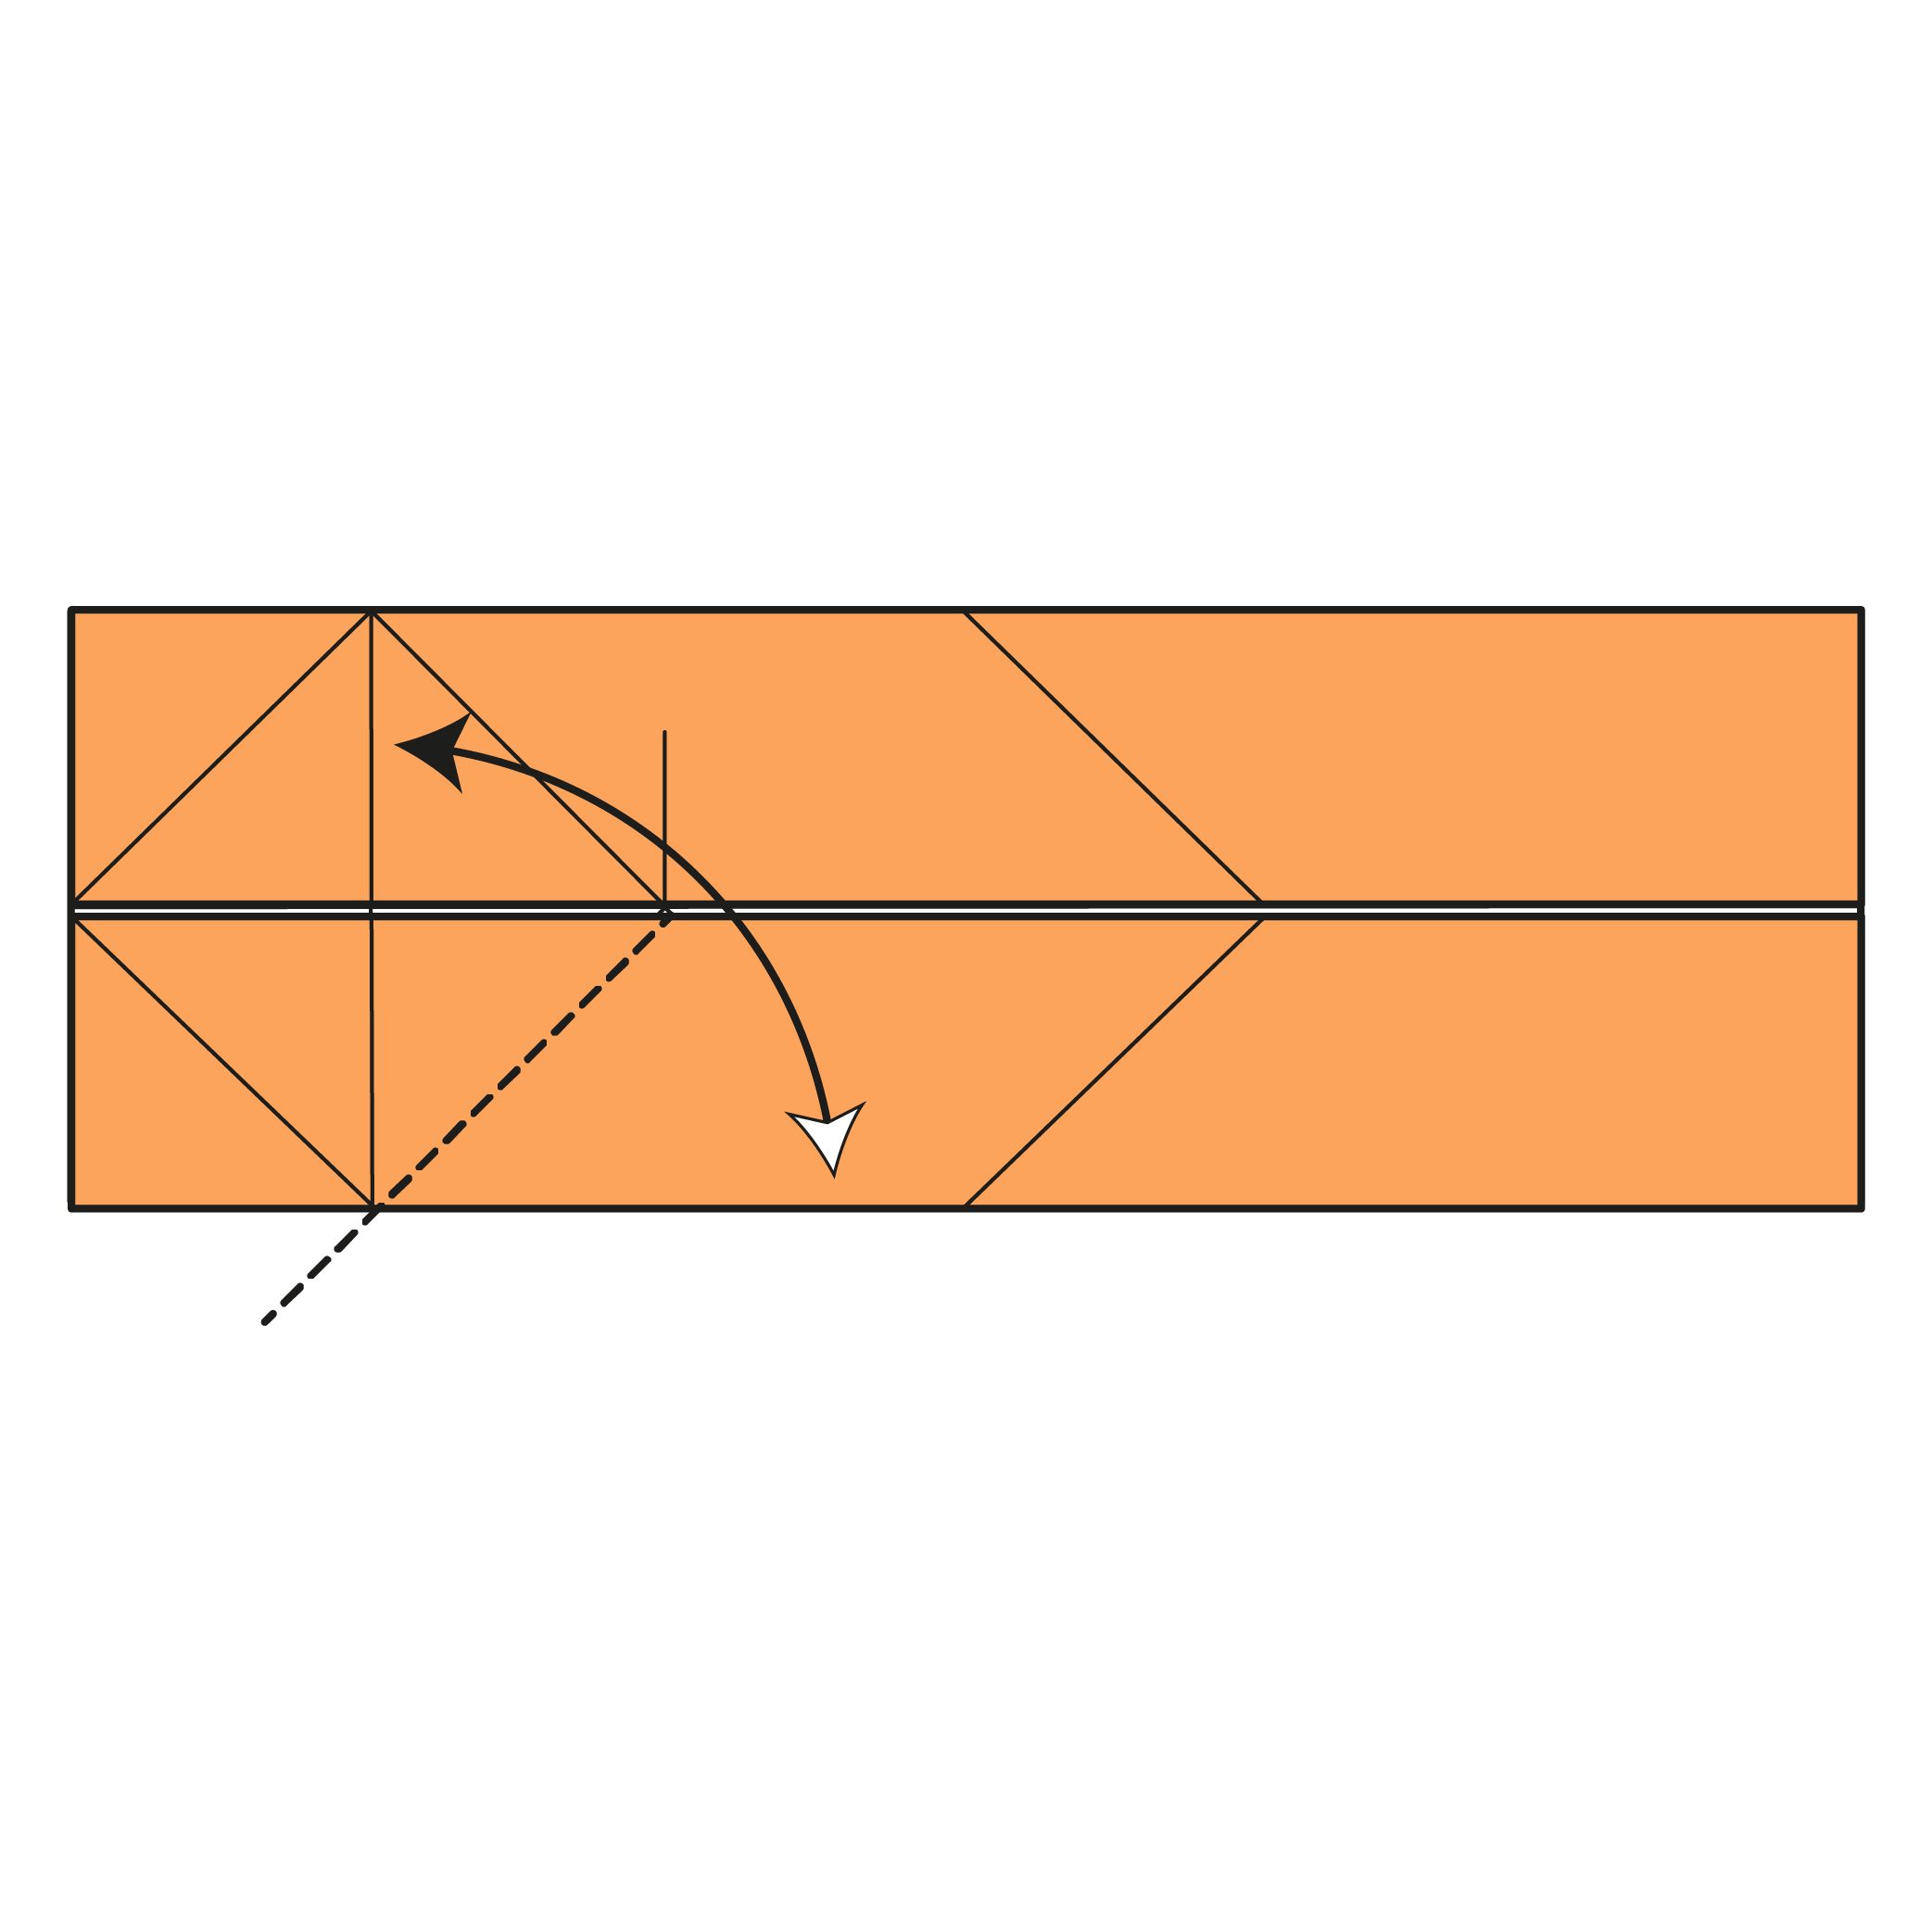
Step 9
Fold the left edge to the point where the creases from Steps 7 and 8 intersect. Then, unfold.
Step 10
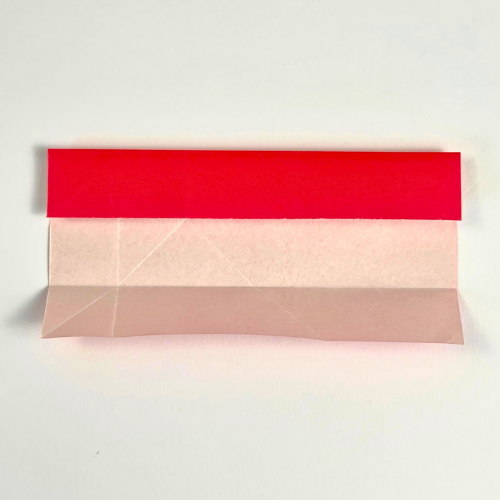
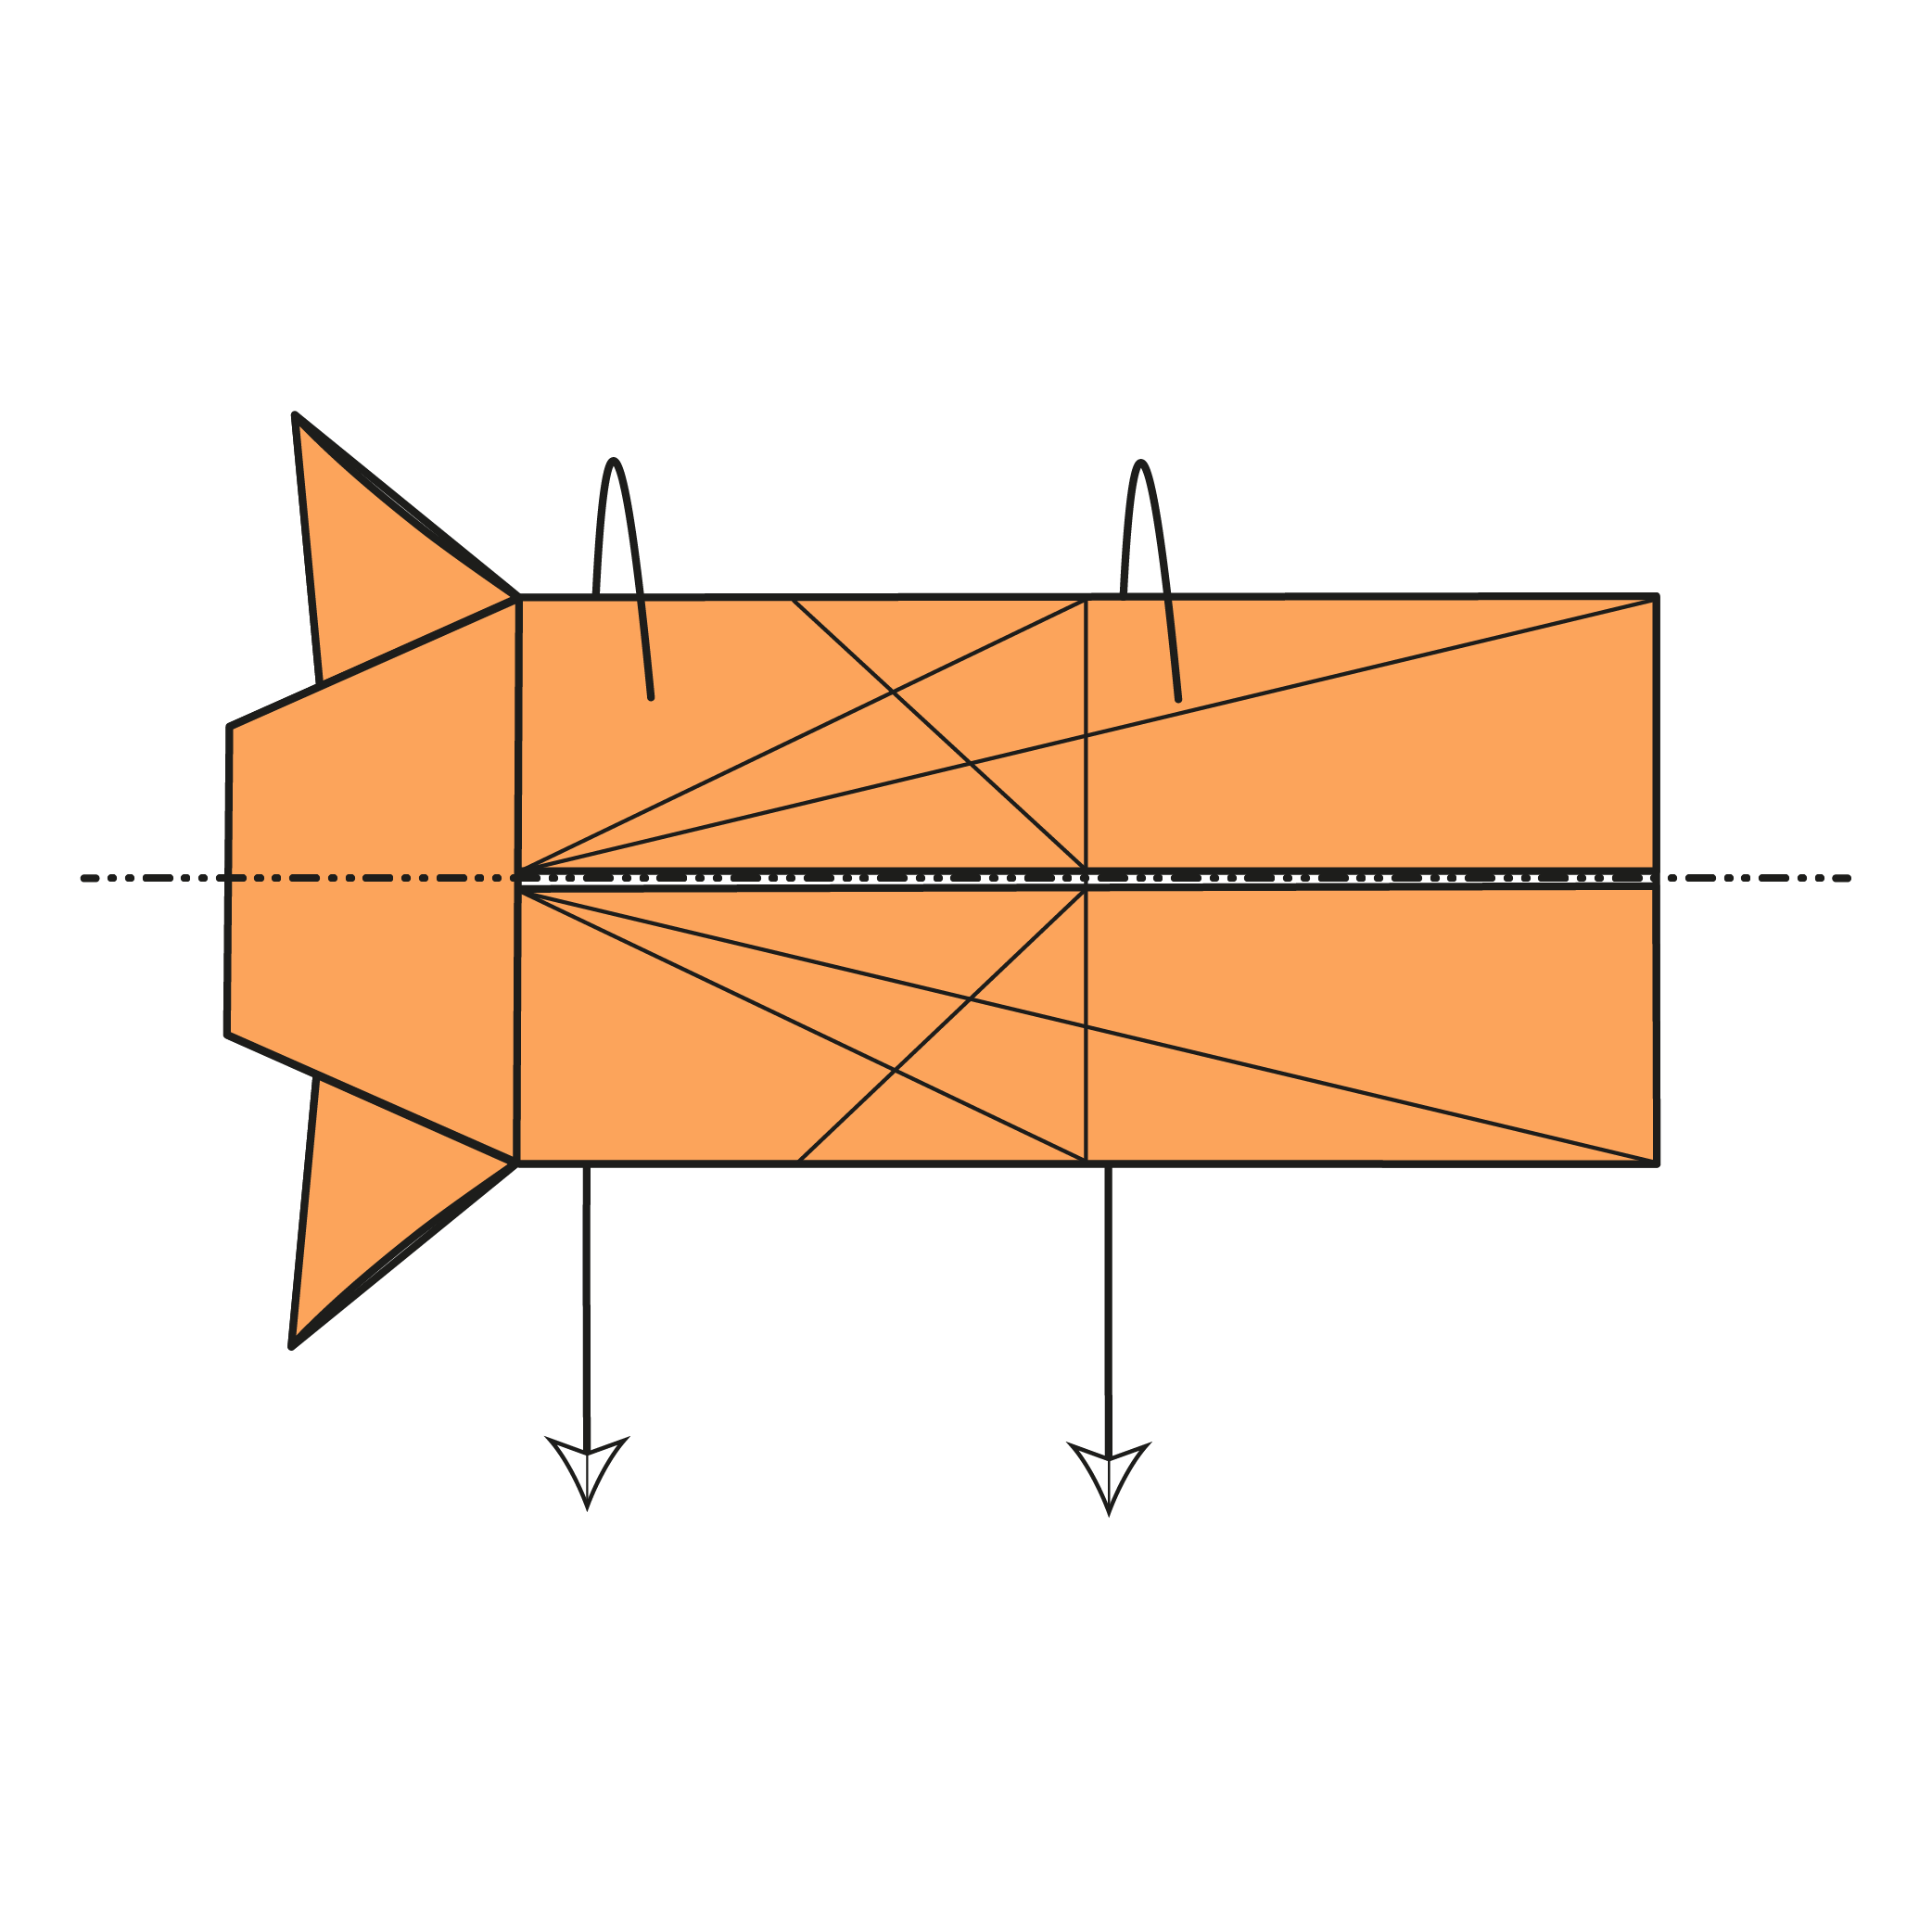
Fold the top and bottom edges to meet the centerline.
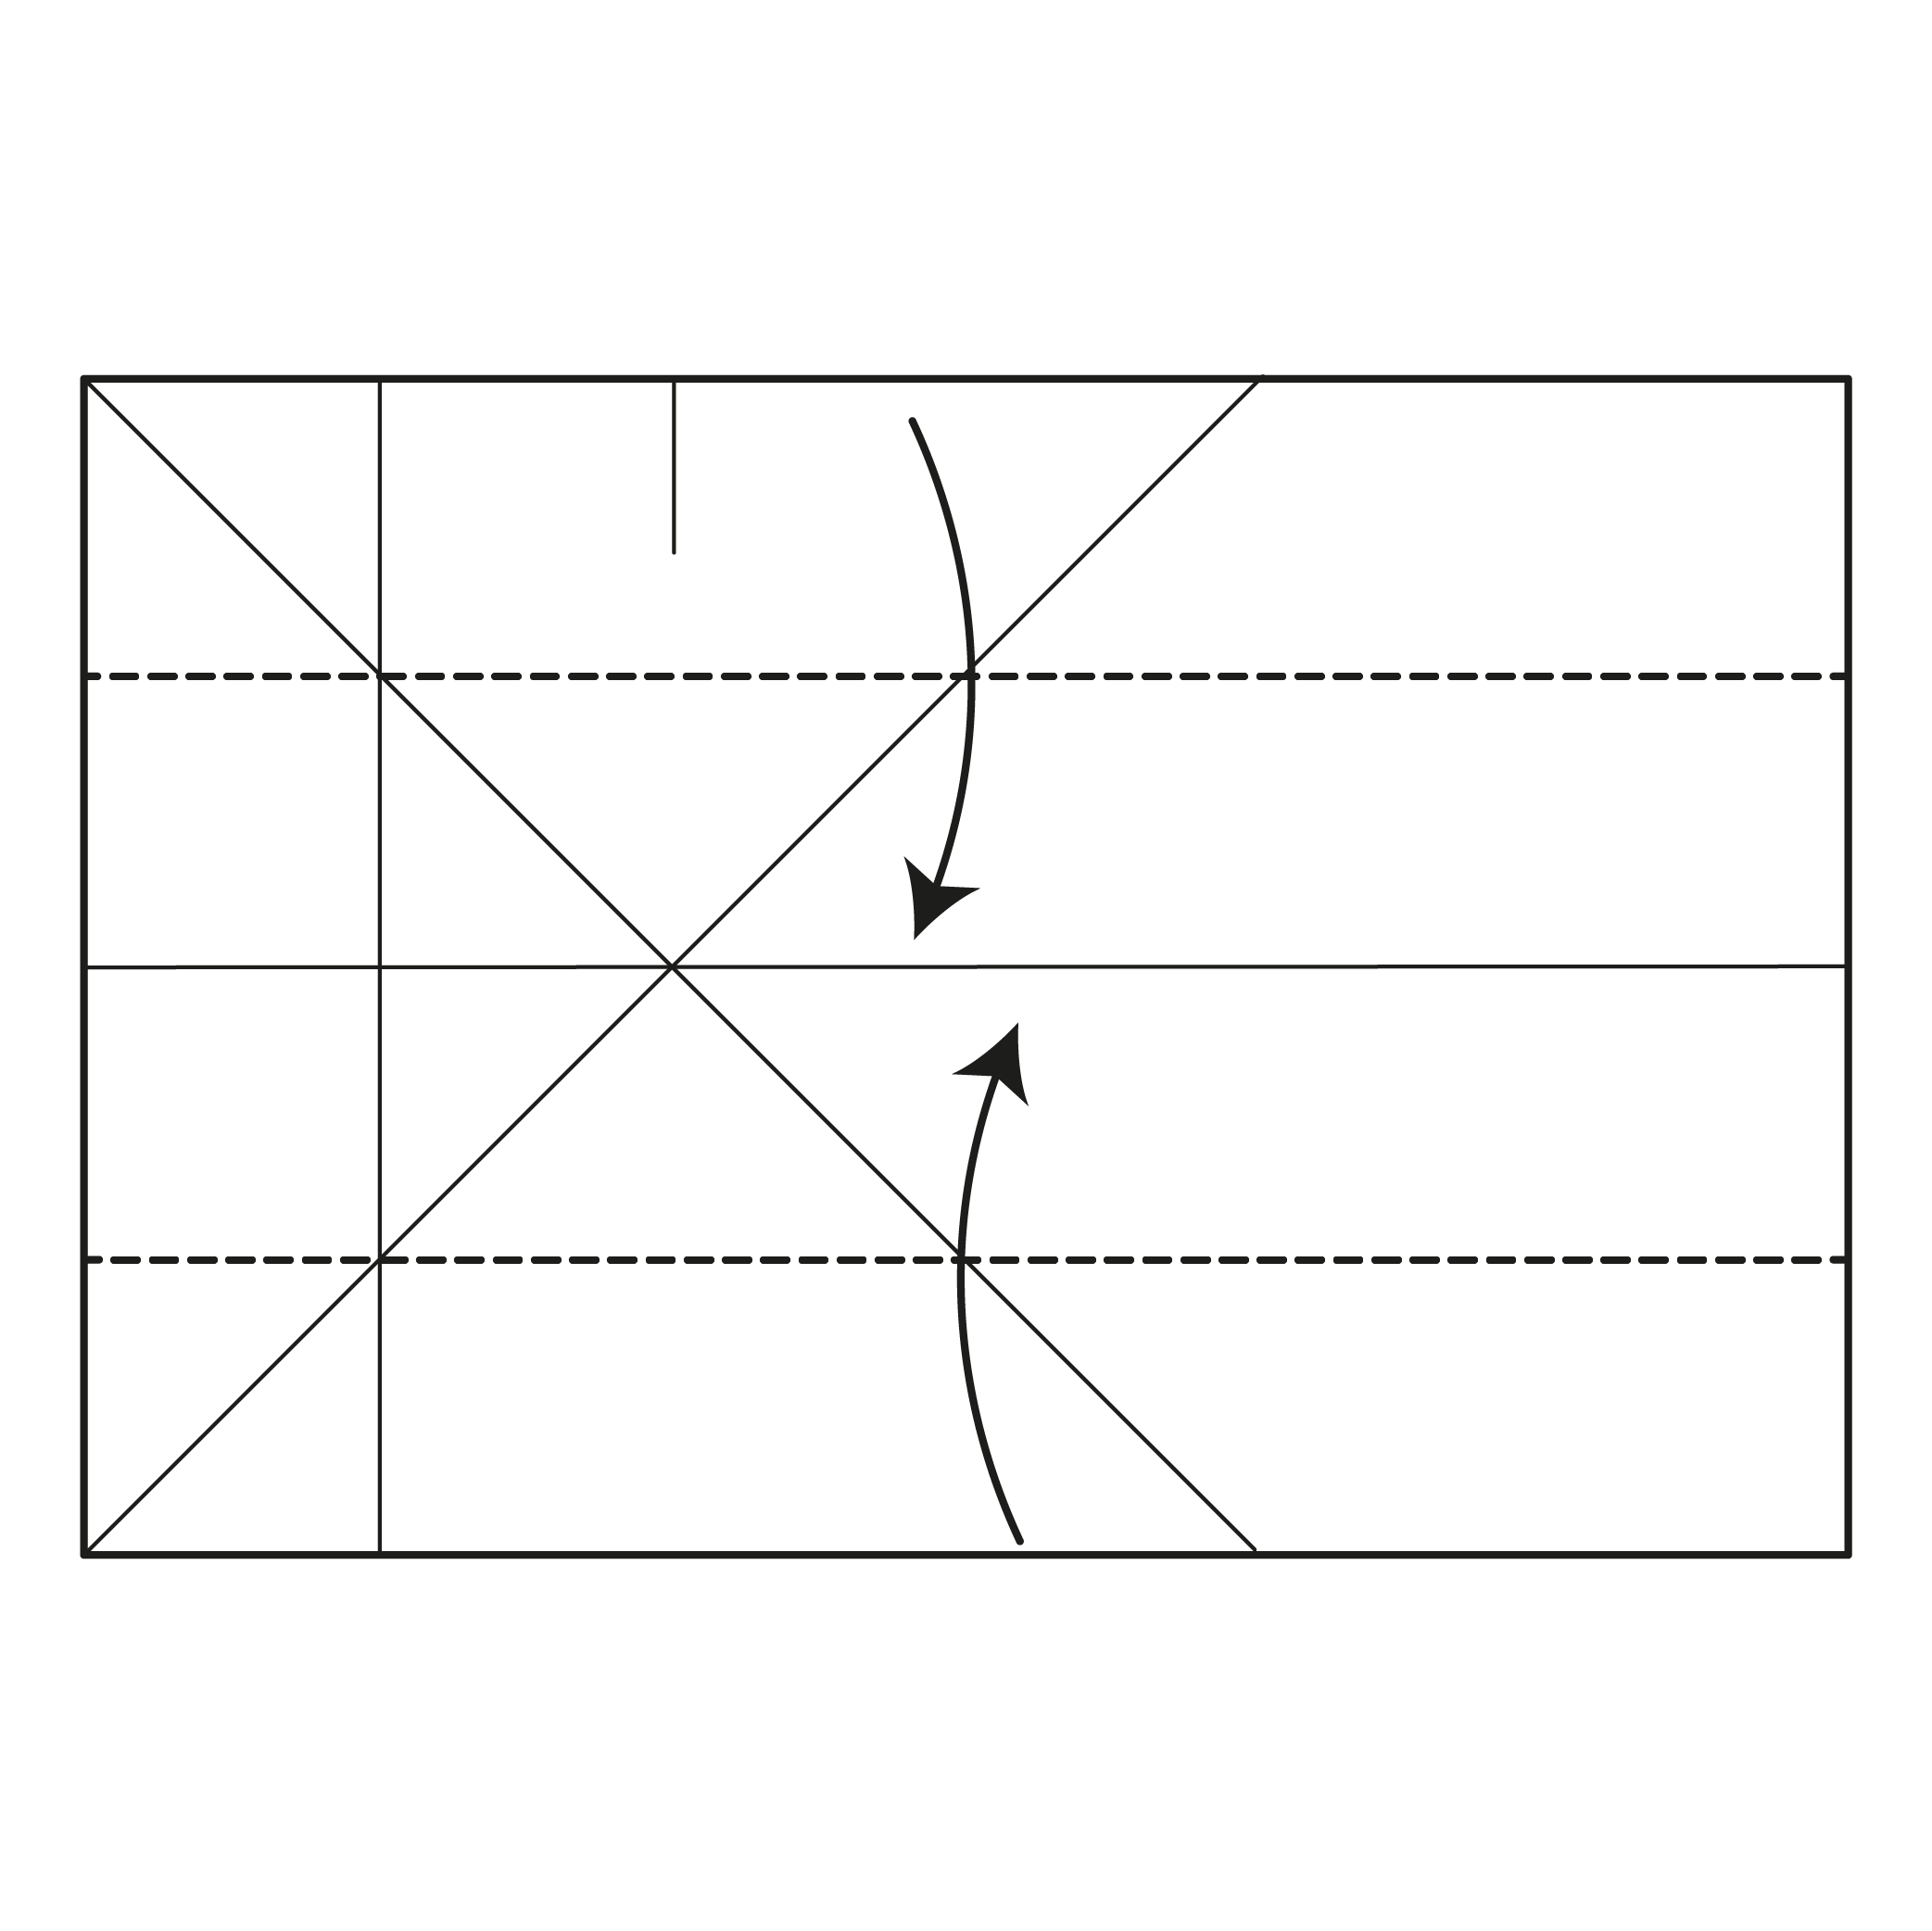
Step 11
Bring the top edge to the nearest vertical crease. Use the existing crease on the back as a guide and crease only the top half.
Step 12
Repeat on the bottom half.
Step 13
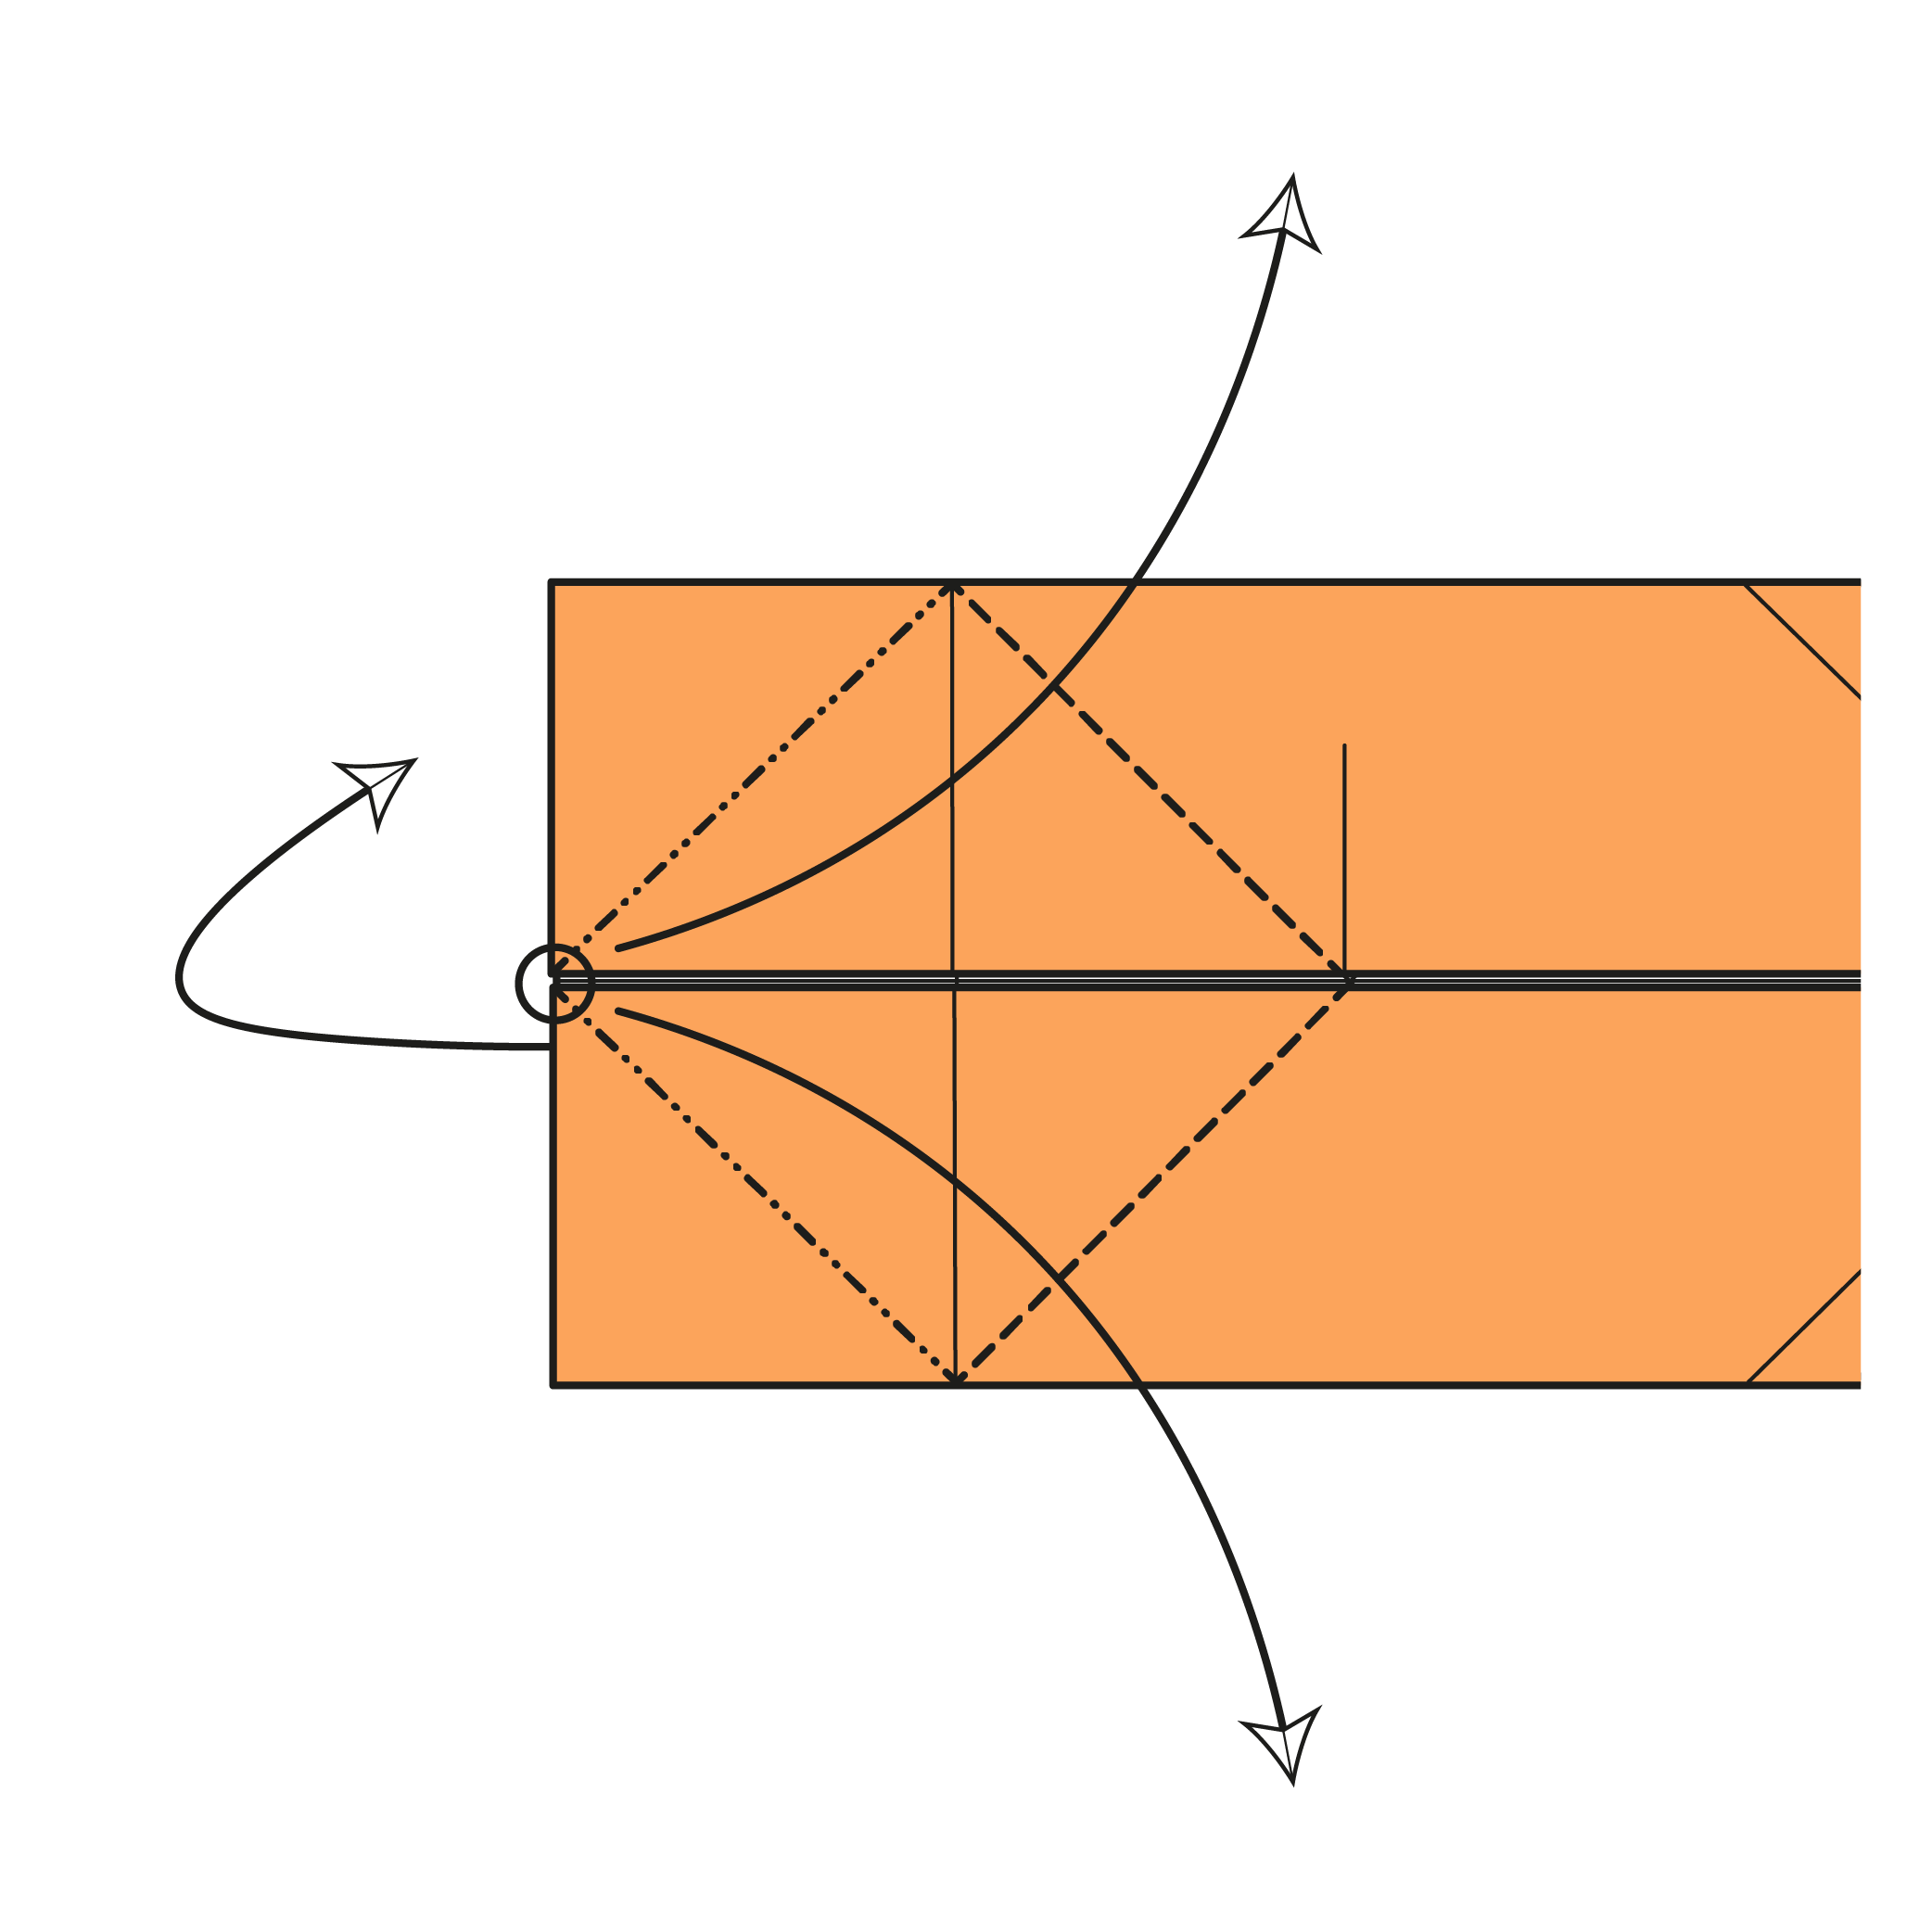
Collapse along the existing creases.
Step 14

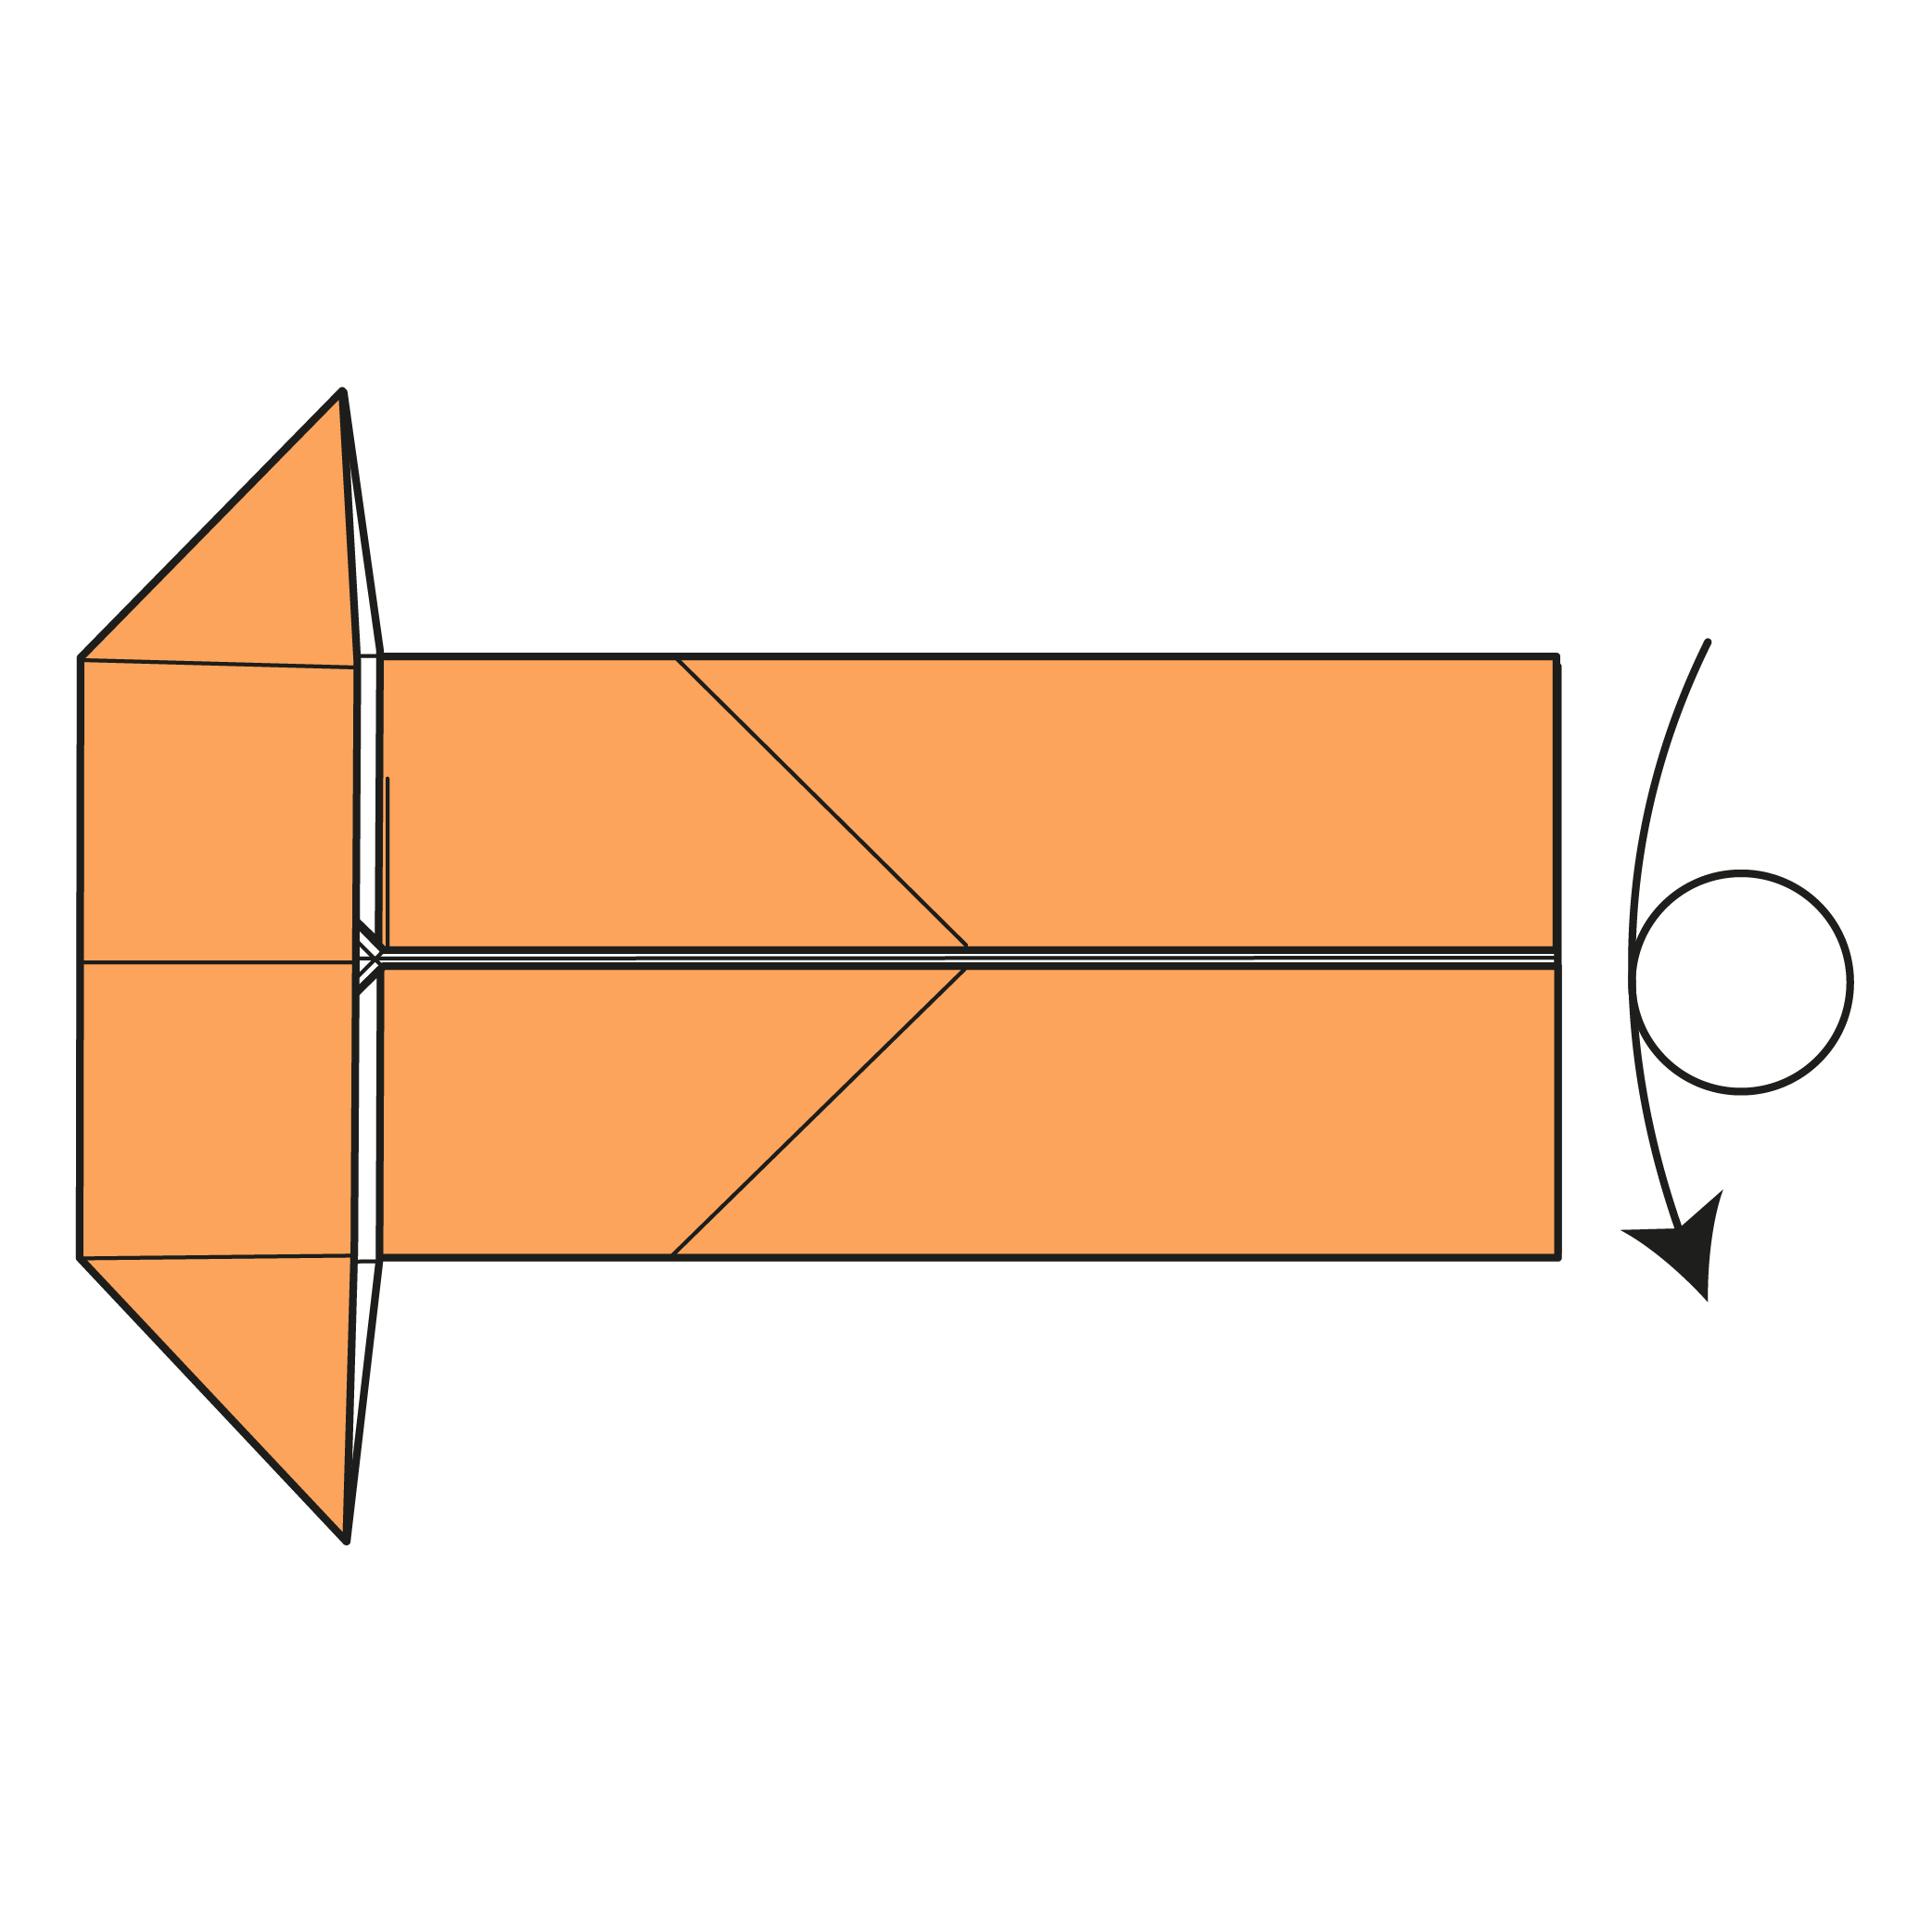
Turn the model over, from top to bottom.
Step 15
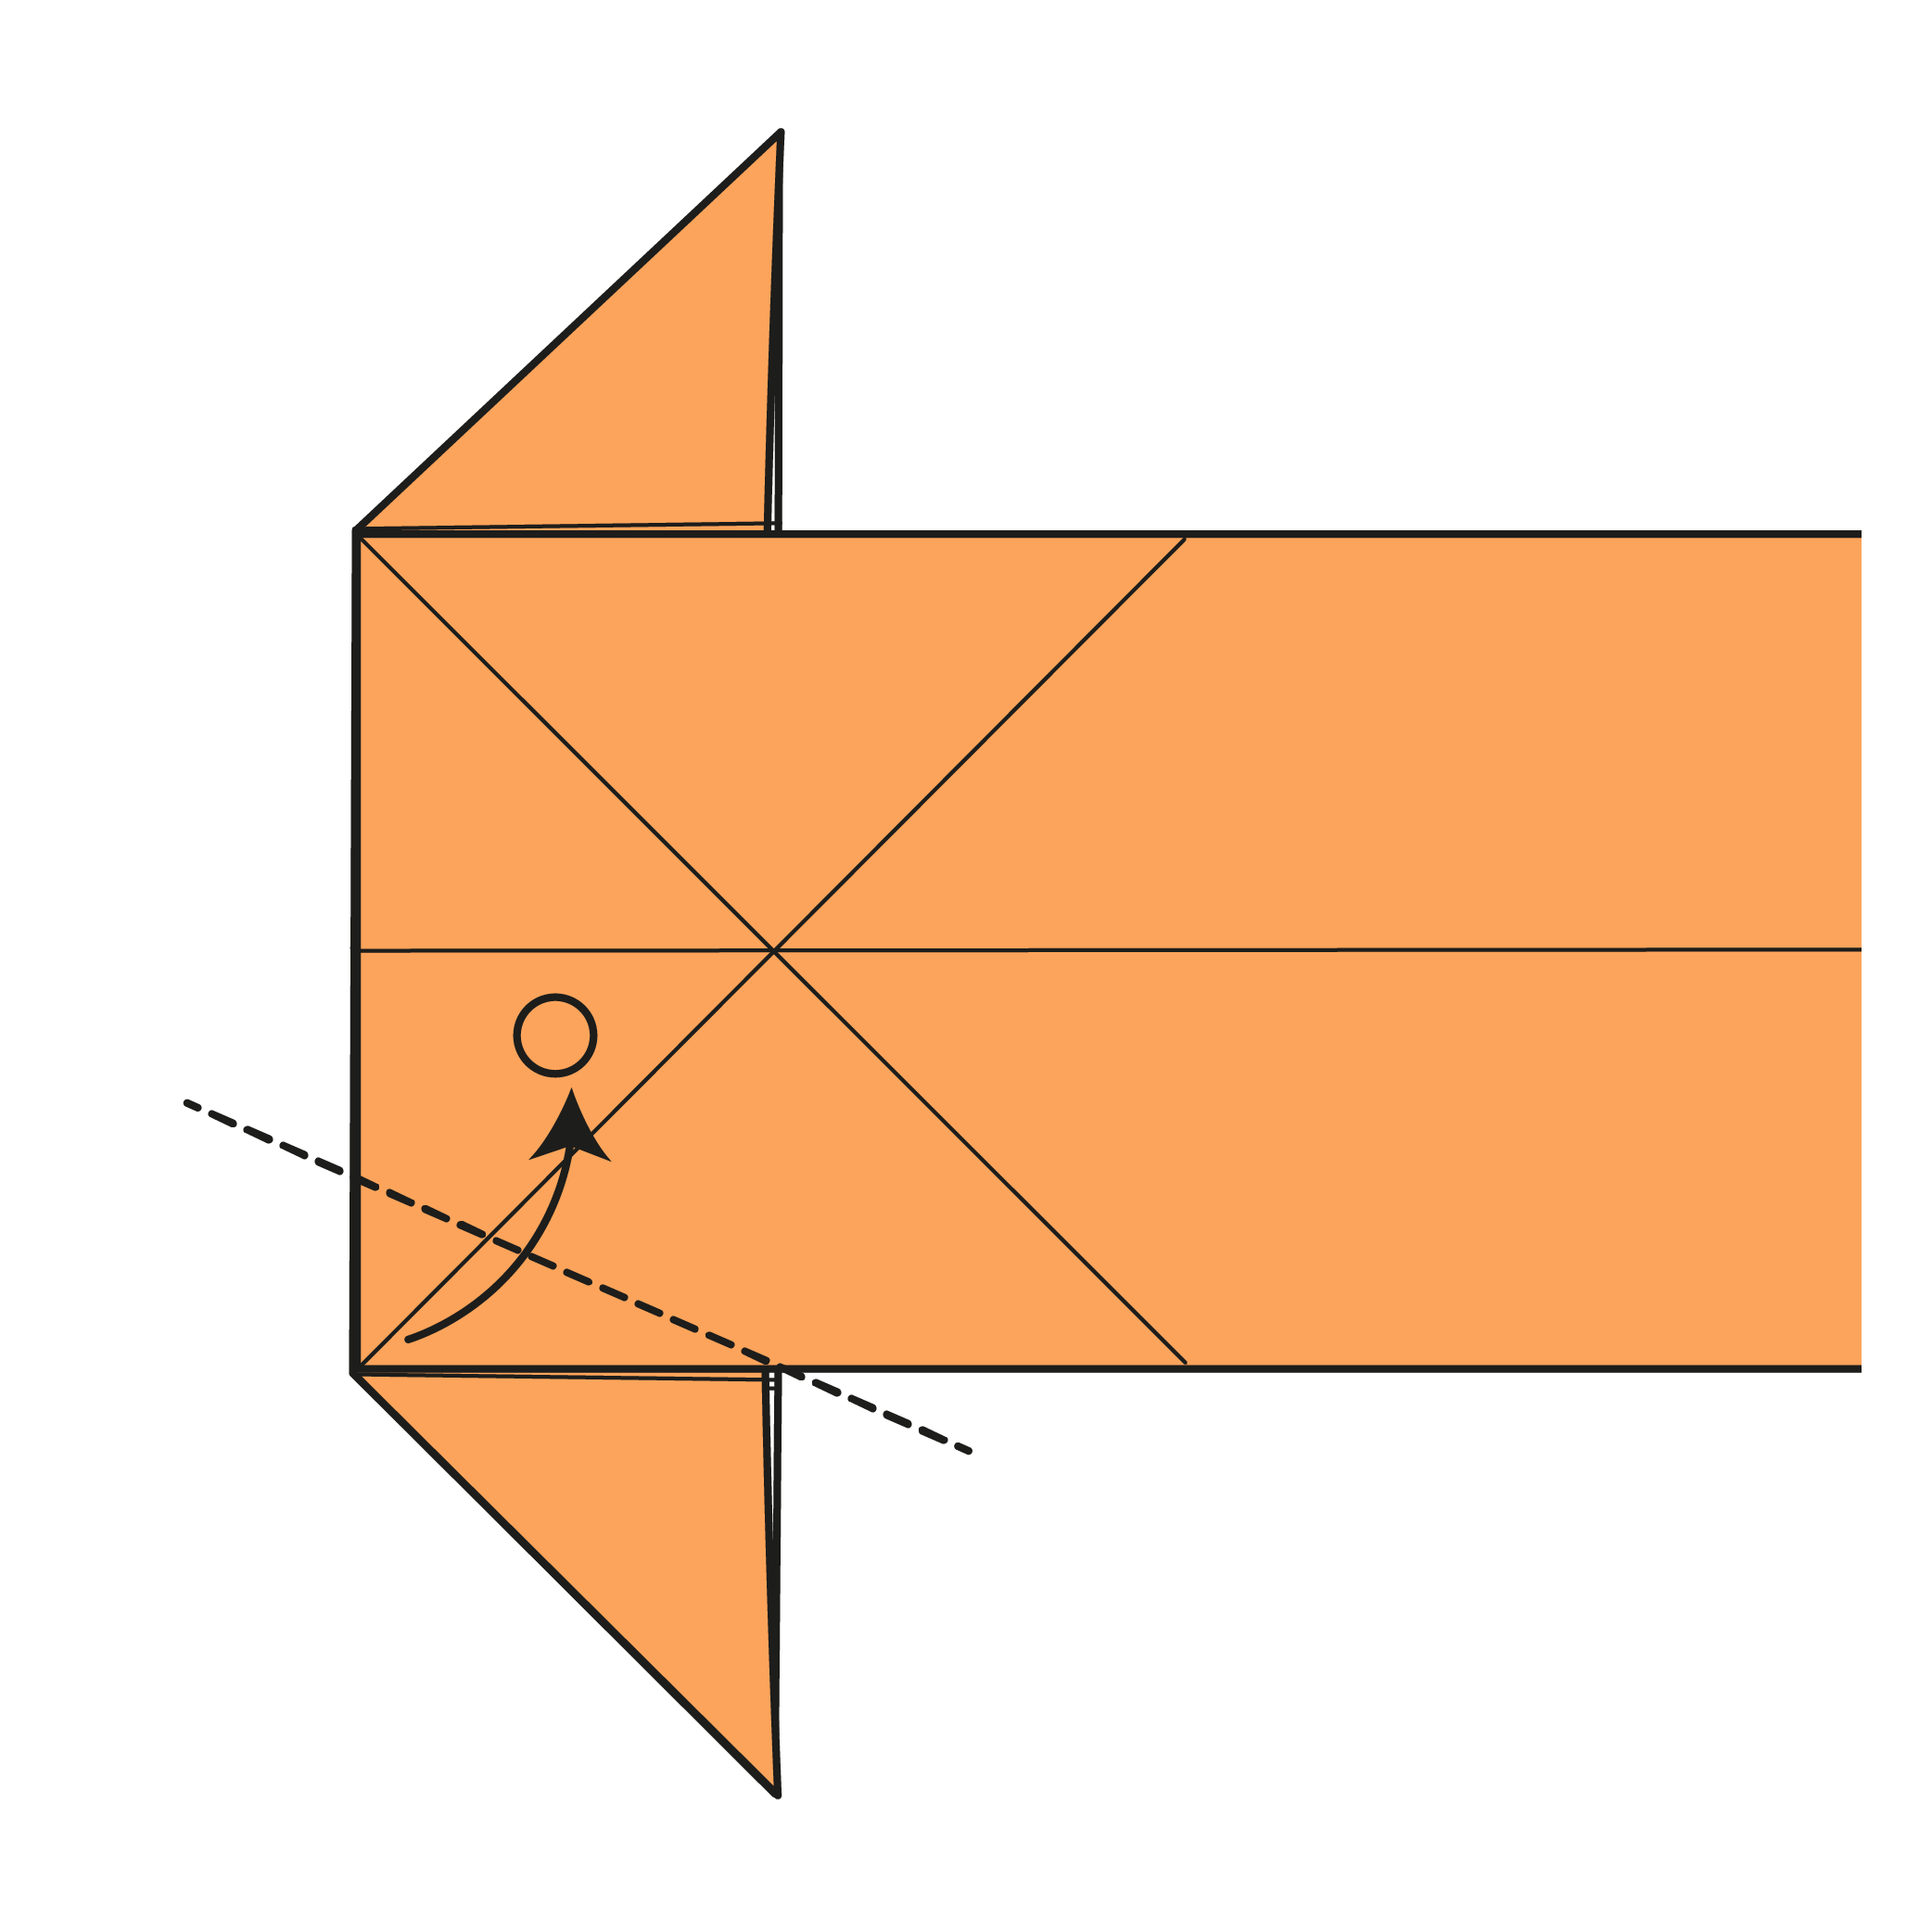
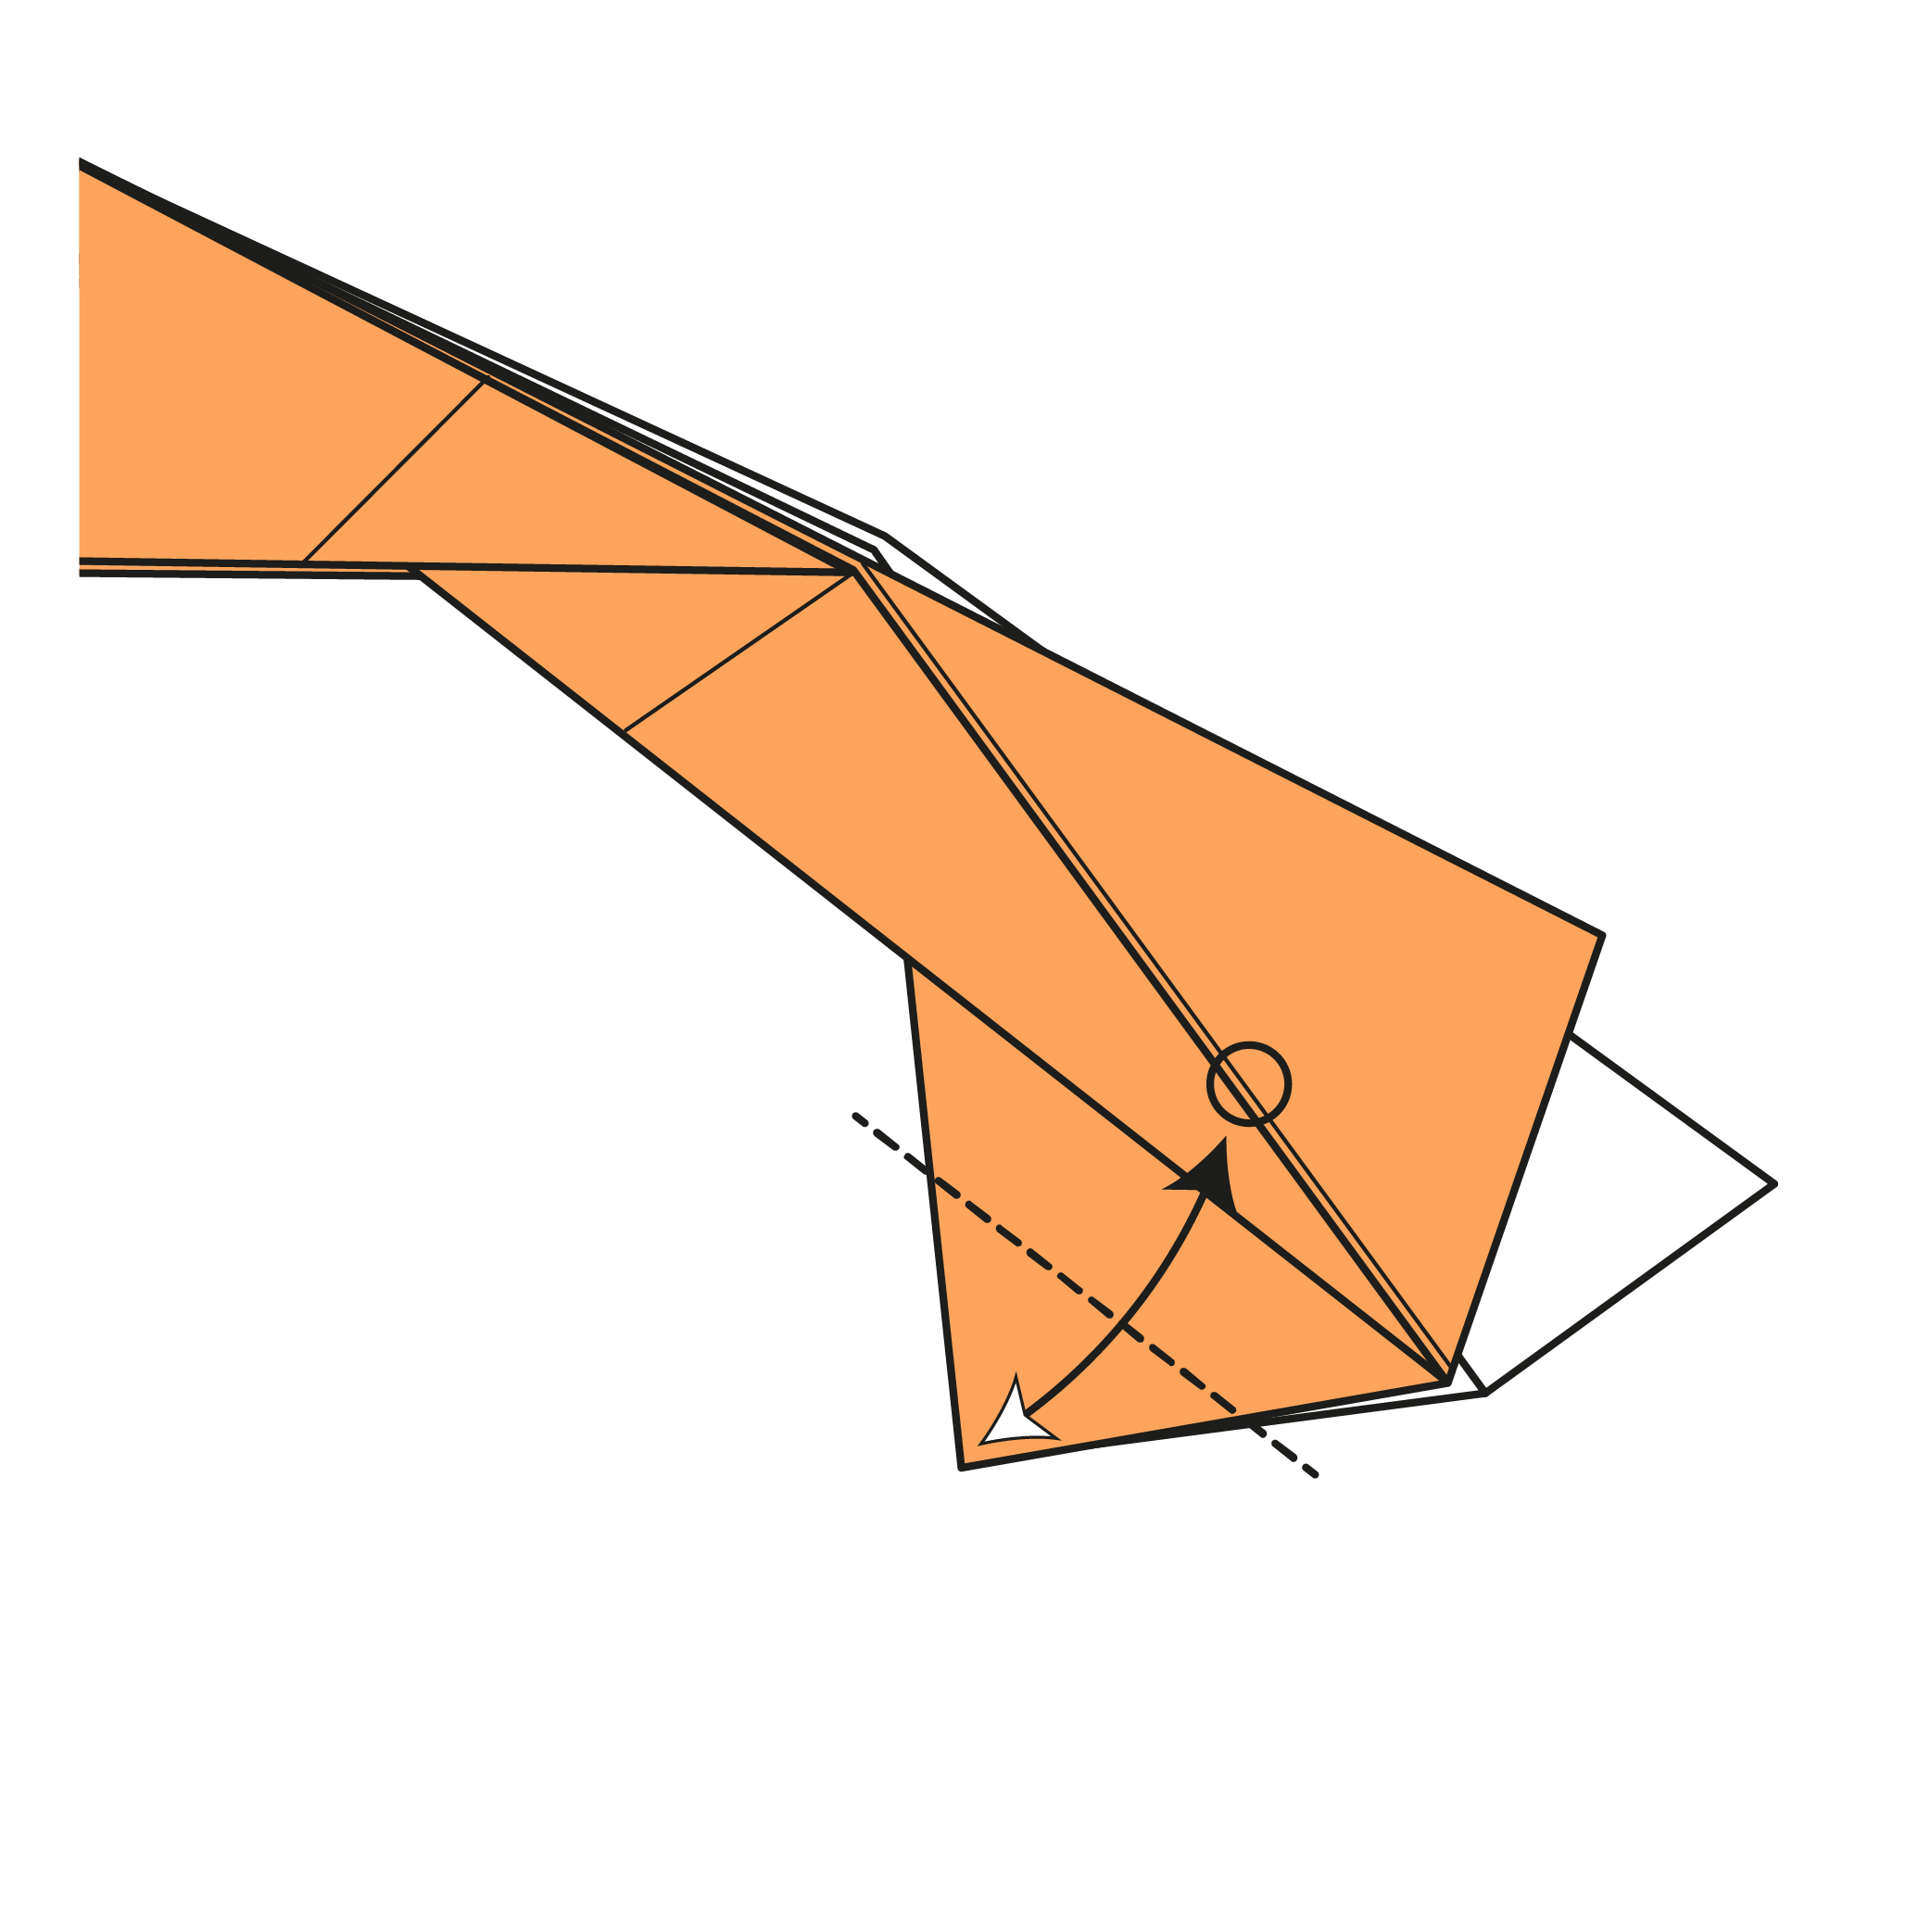
Bring the bottom-left corner up and fold along the dashed line. The corner won’t reach the horizontal crease.
Step 16

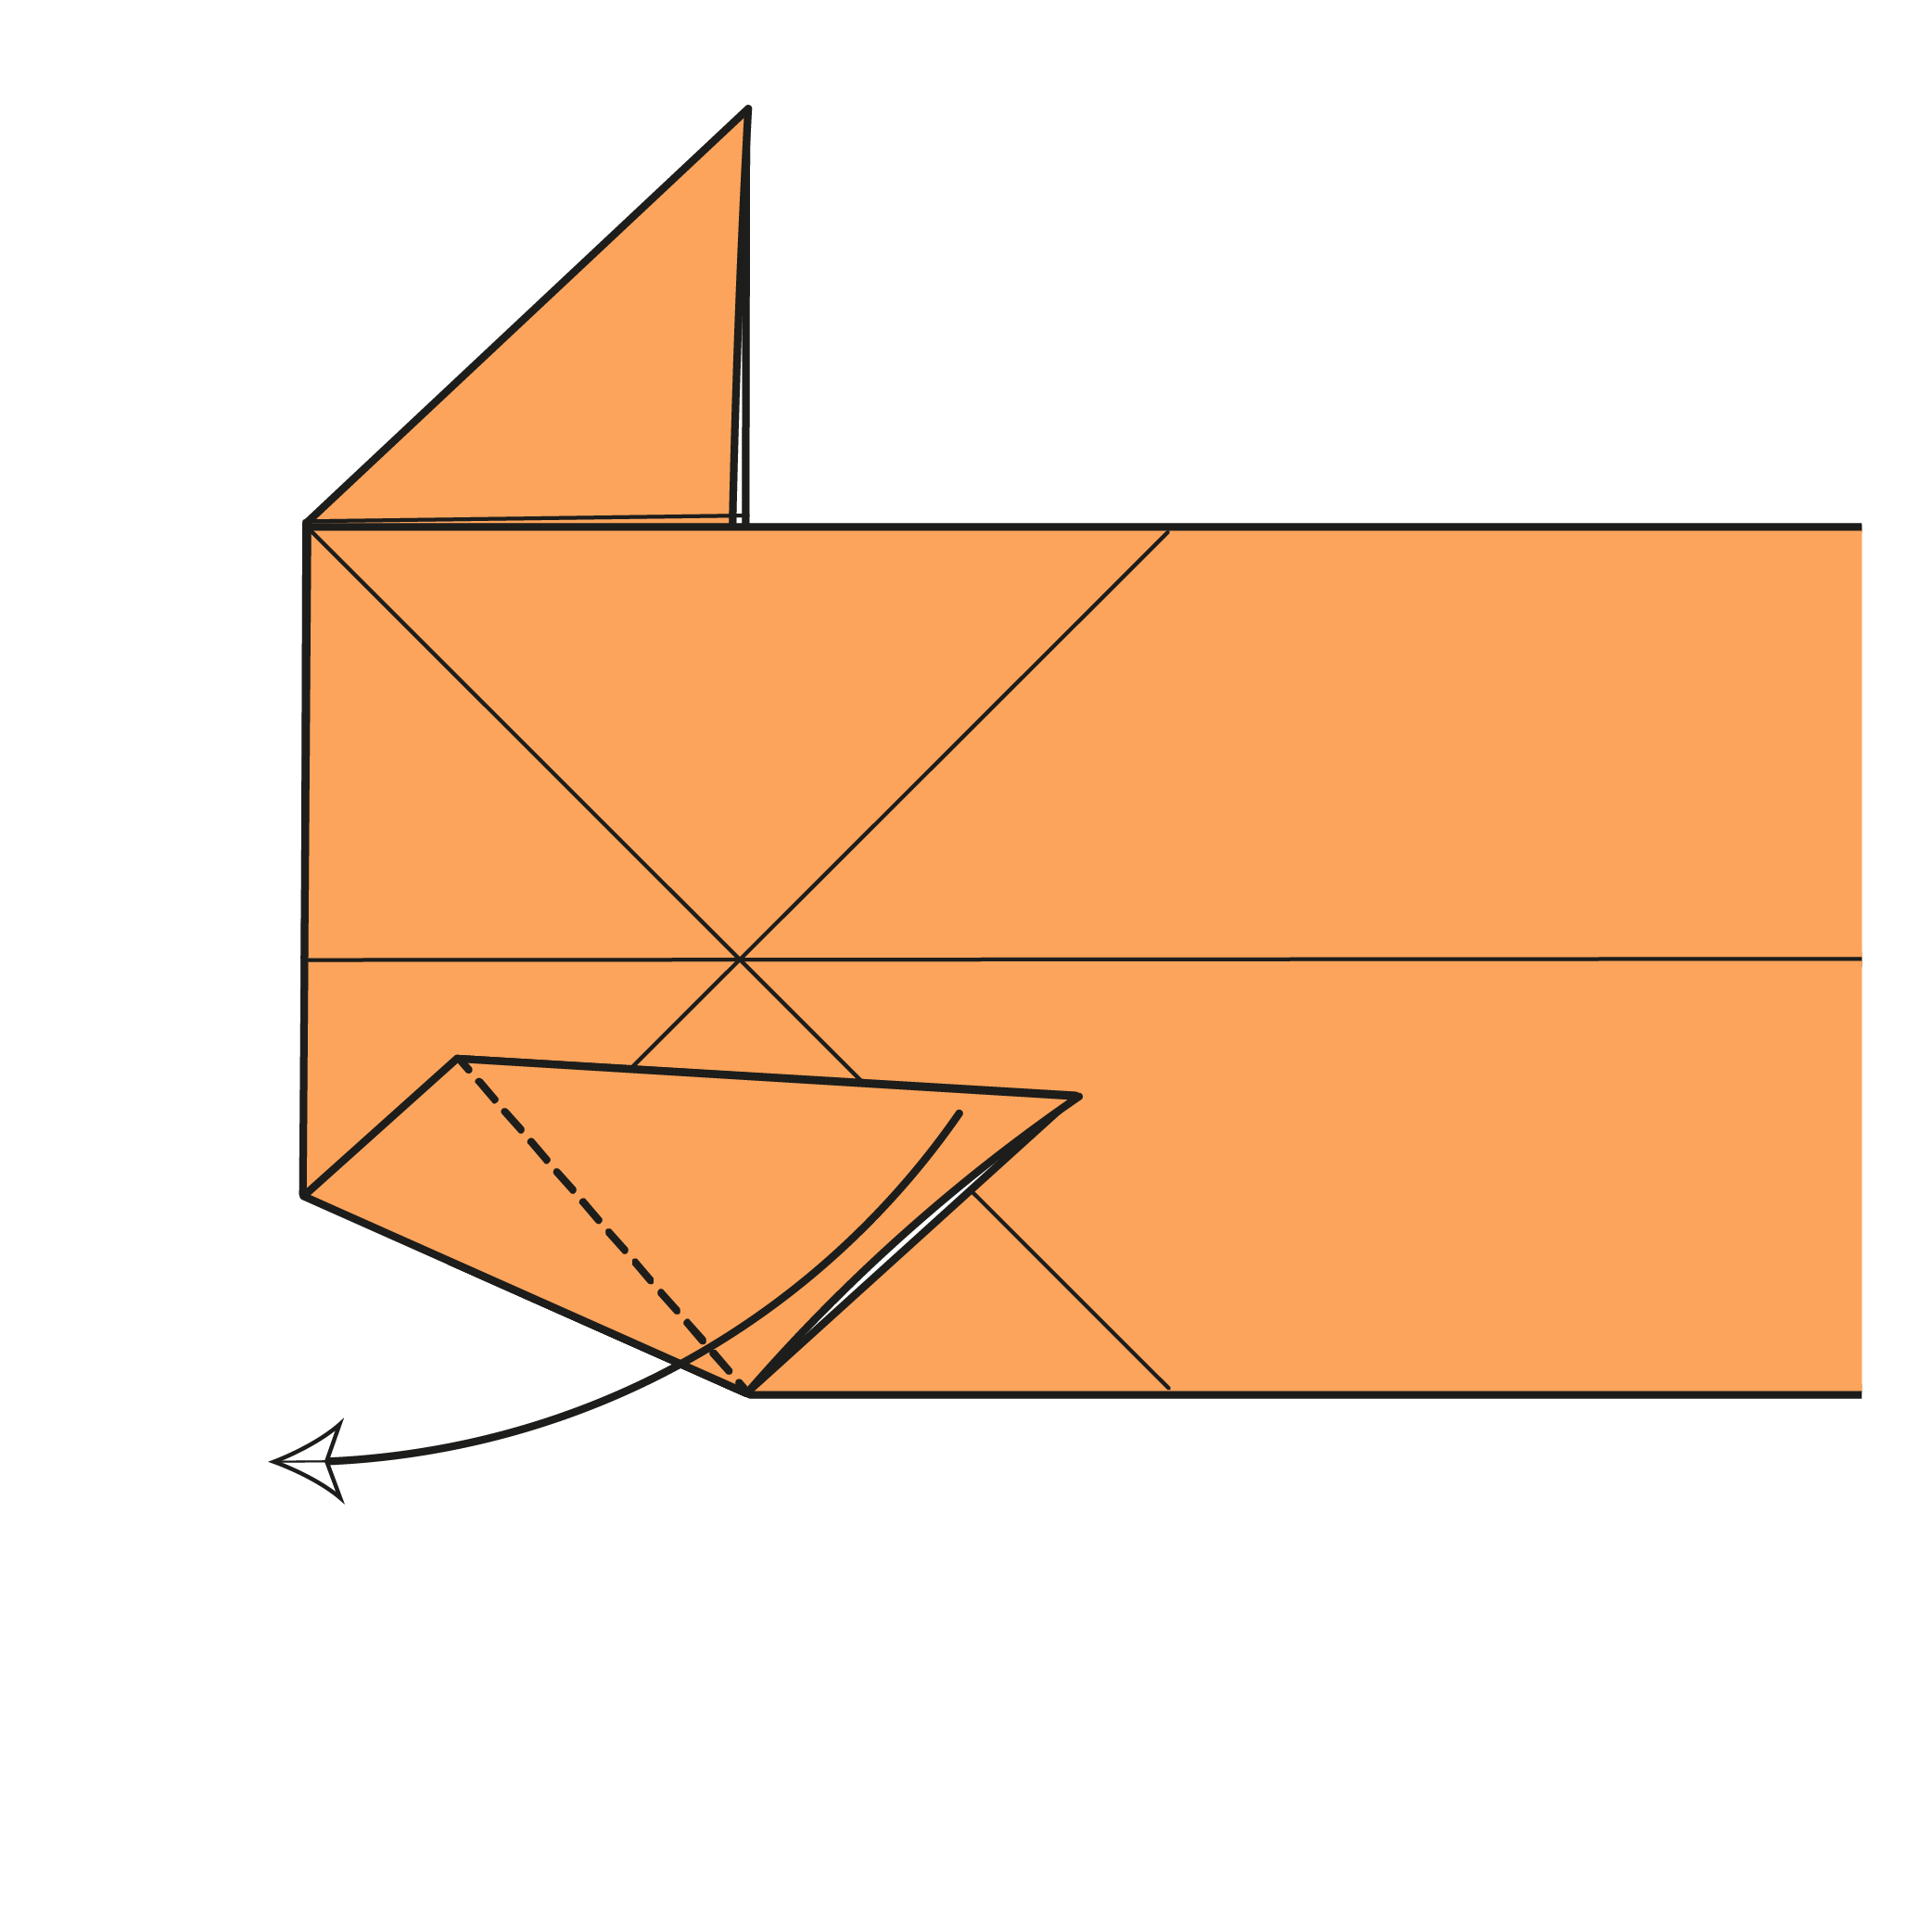
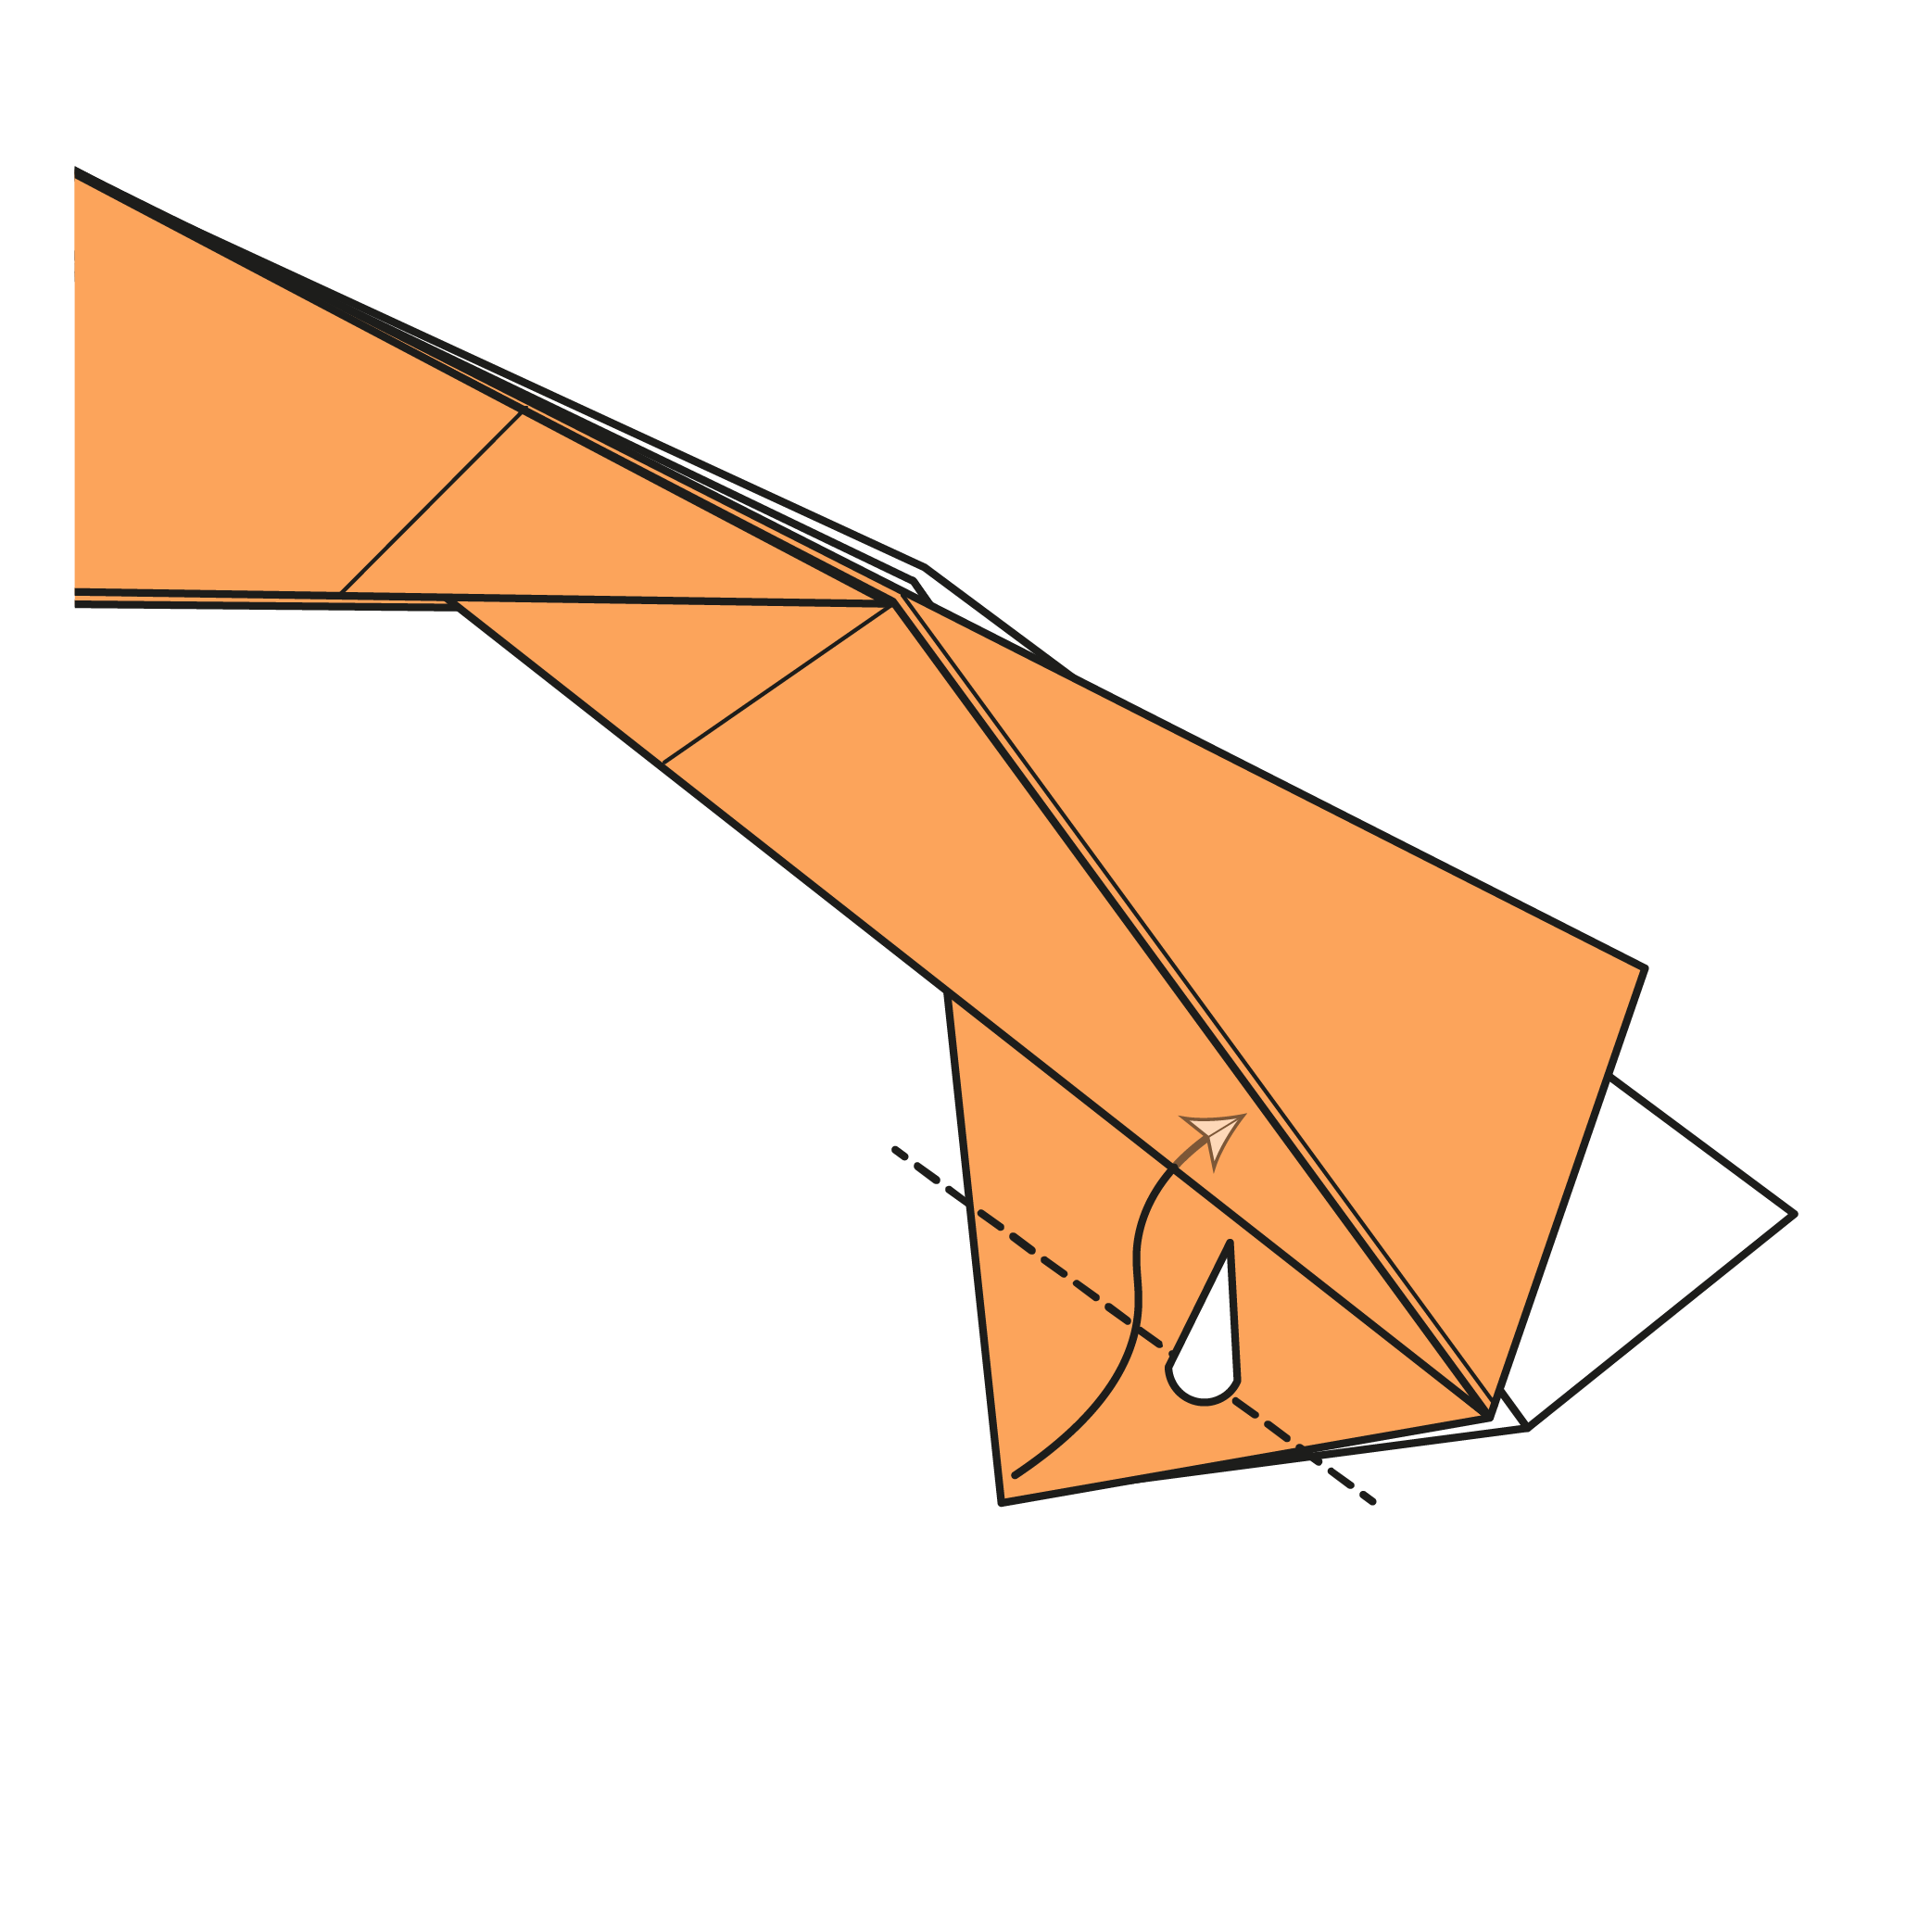
Fold the bottom fin down along the existing crease.
Step 17
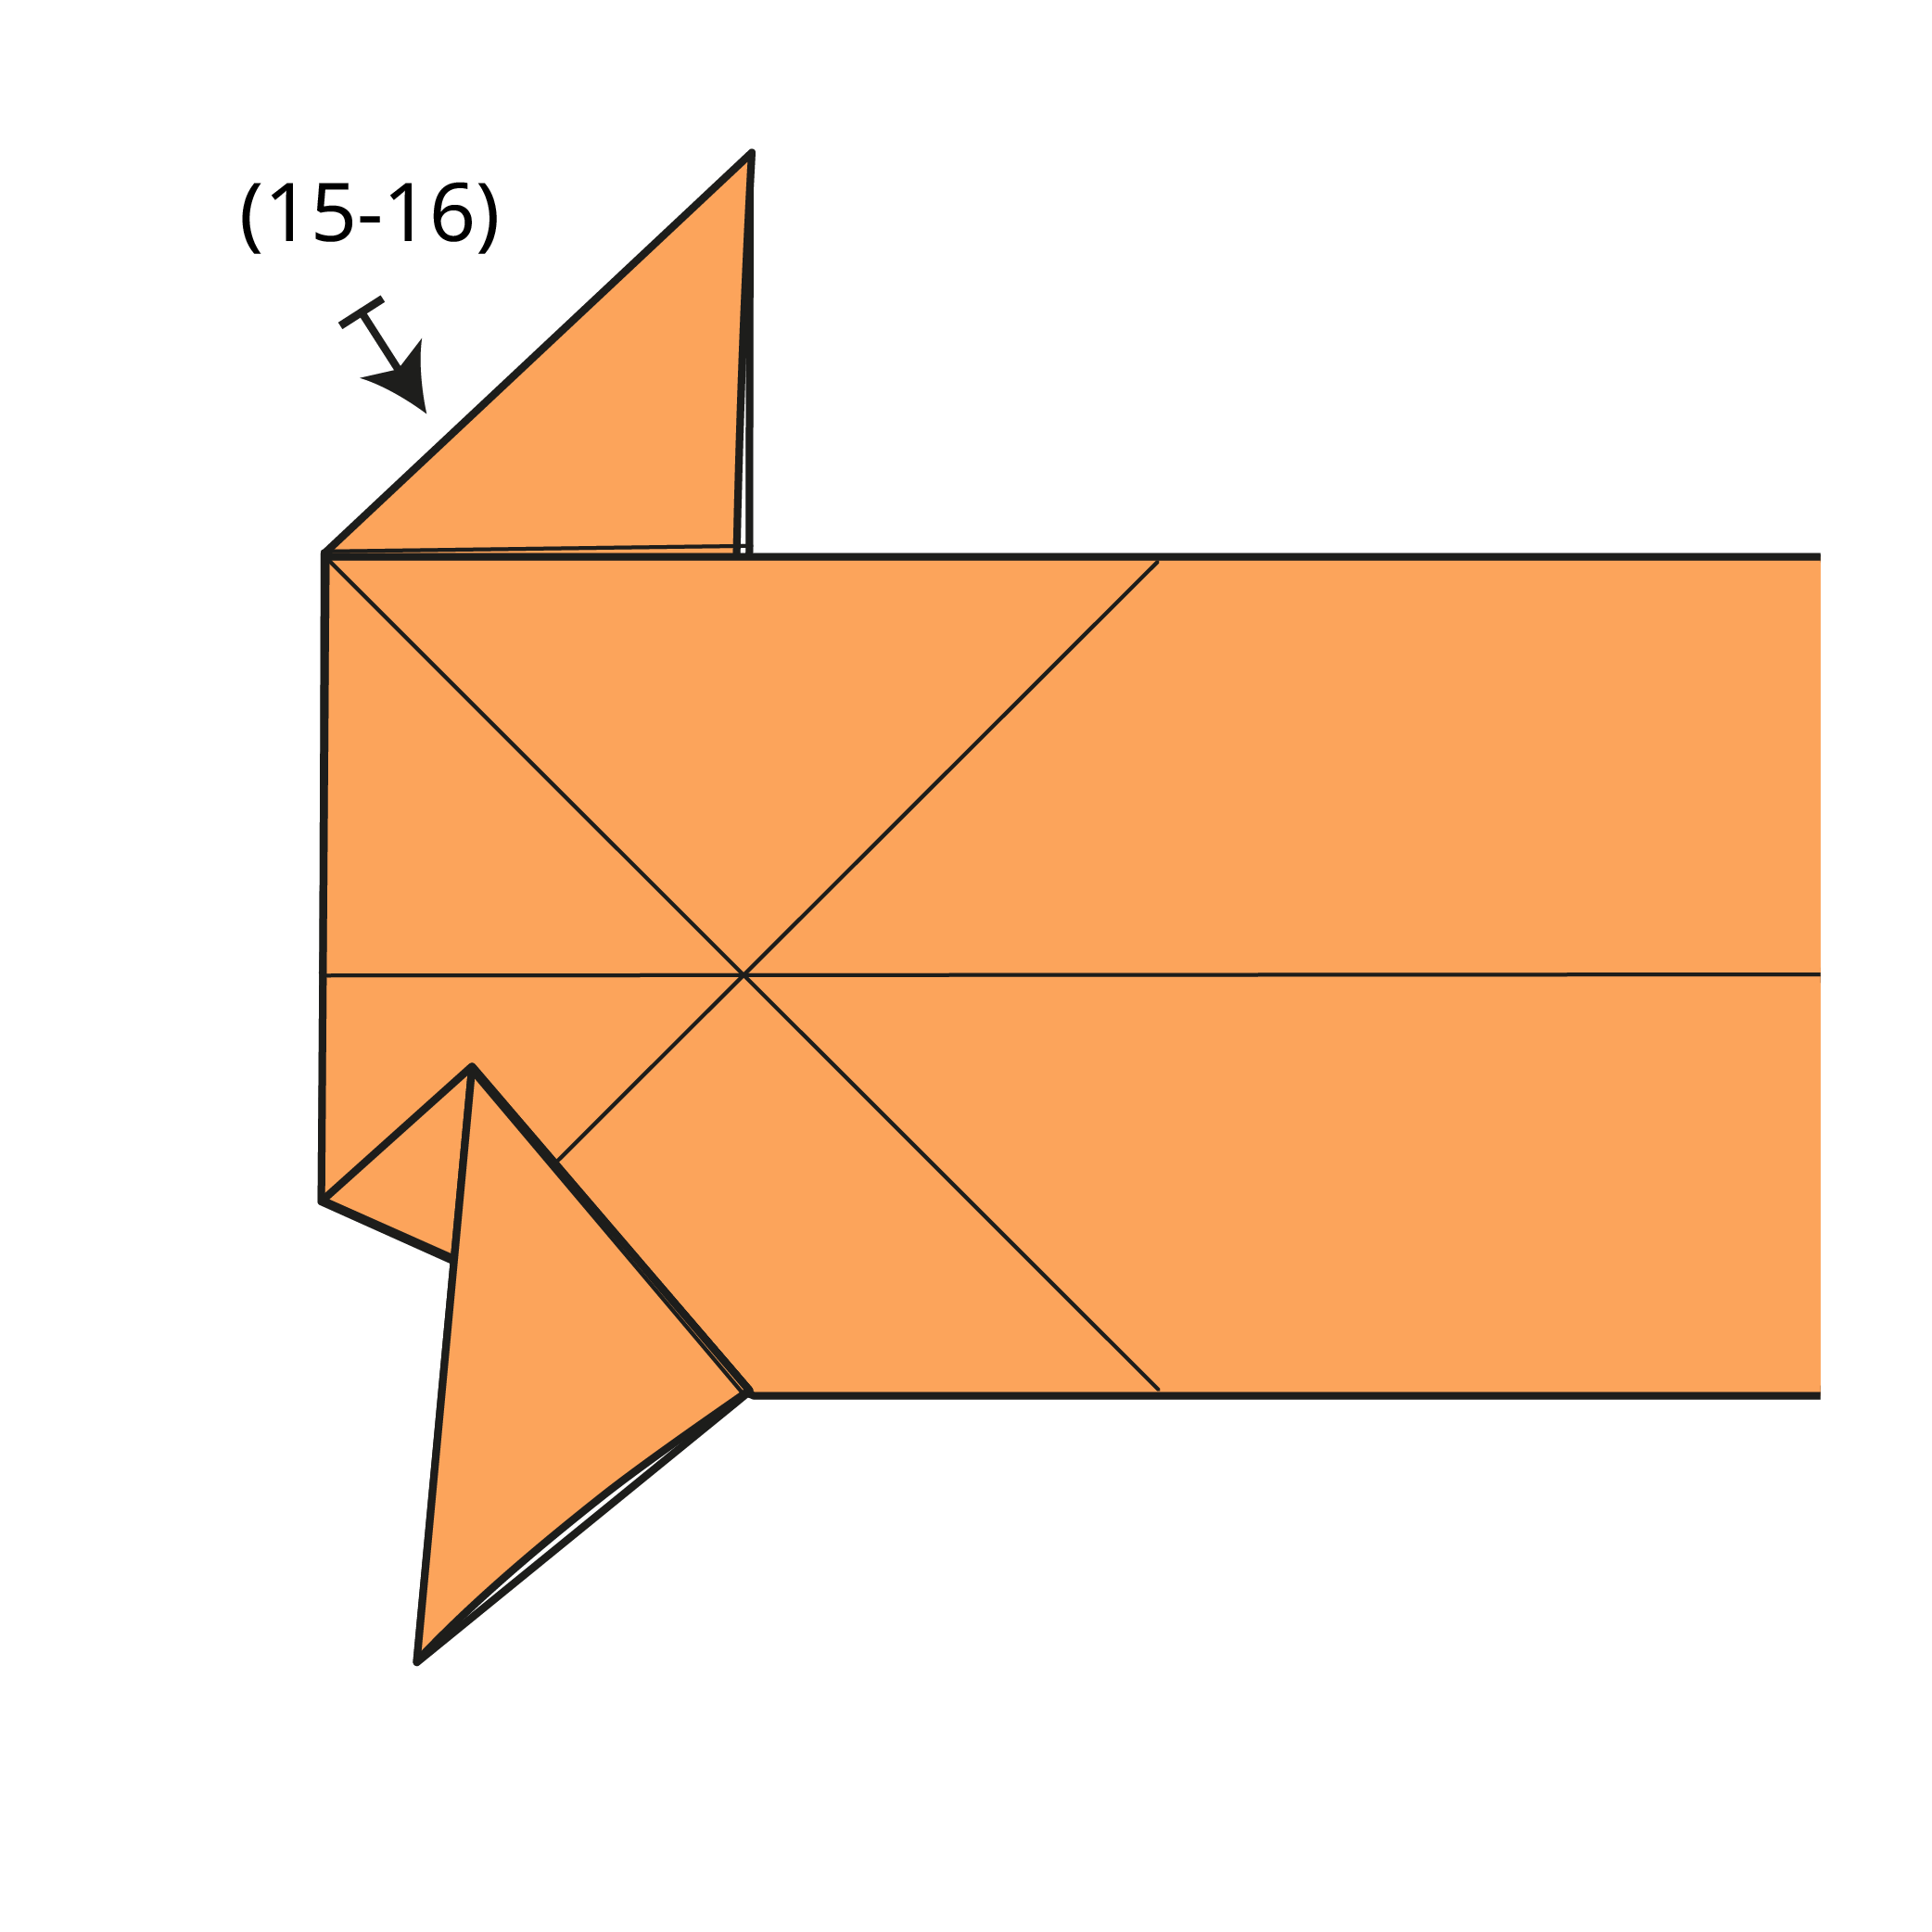
Repeat Steps 15 and 16 on the top section.
Step 18
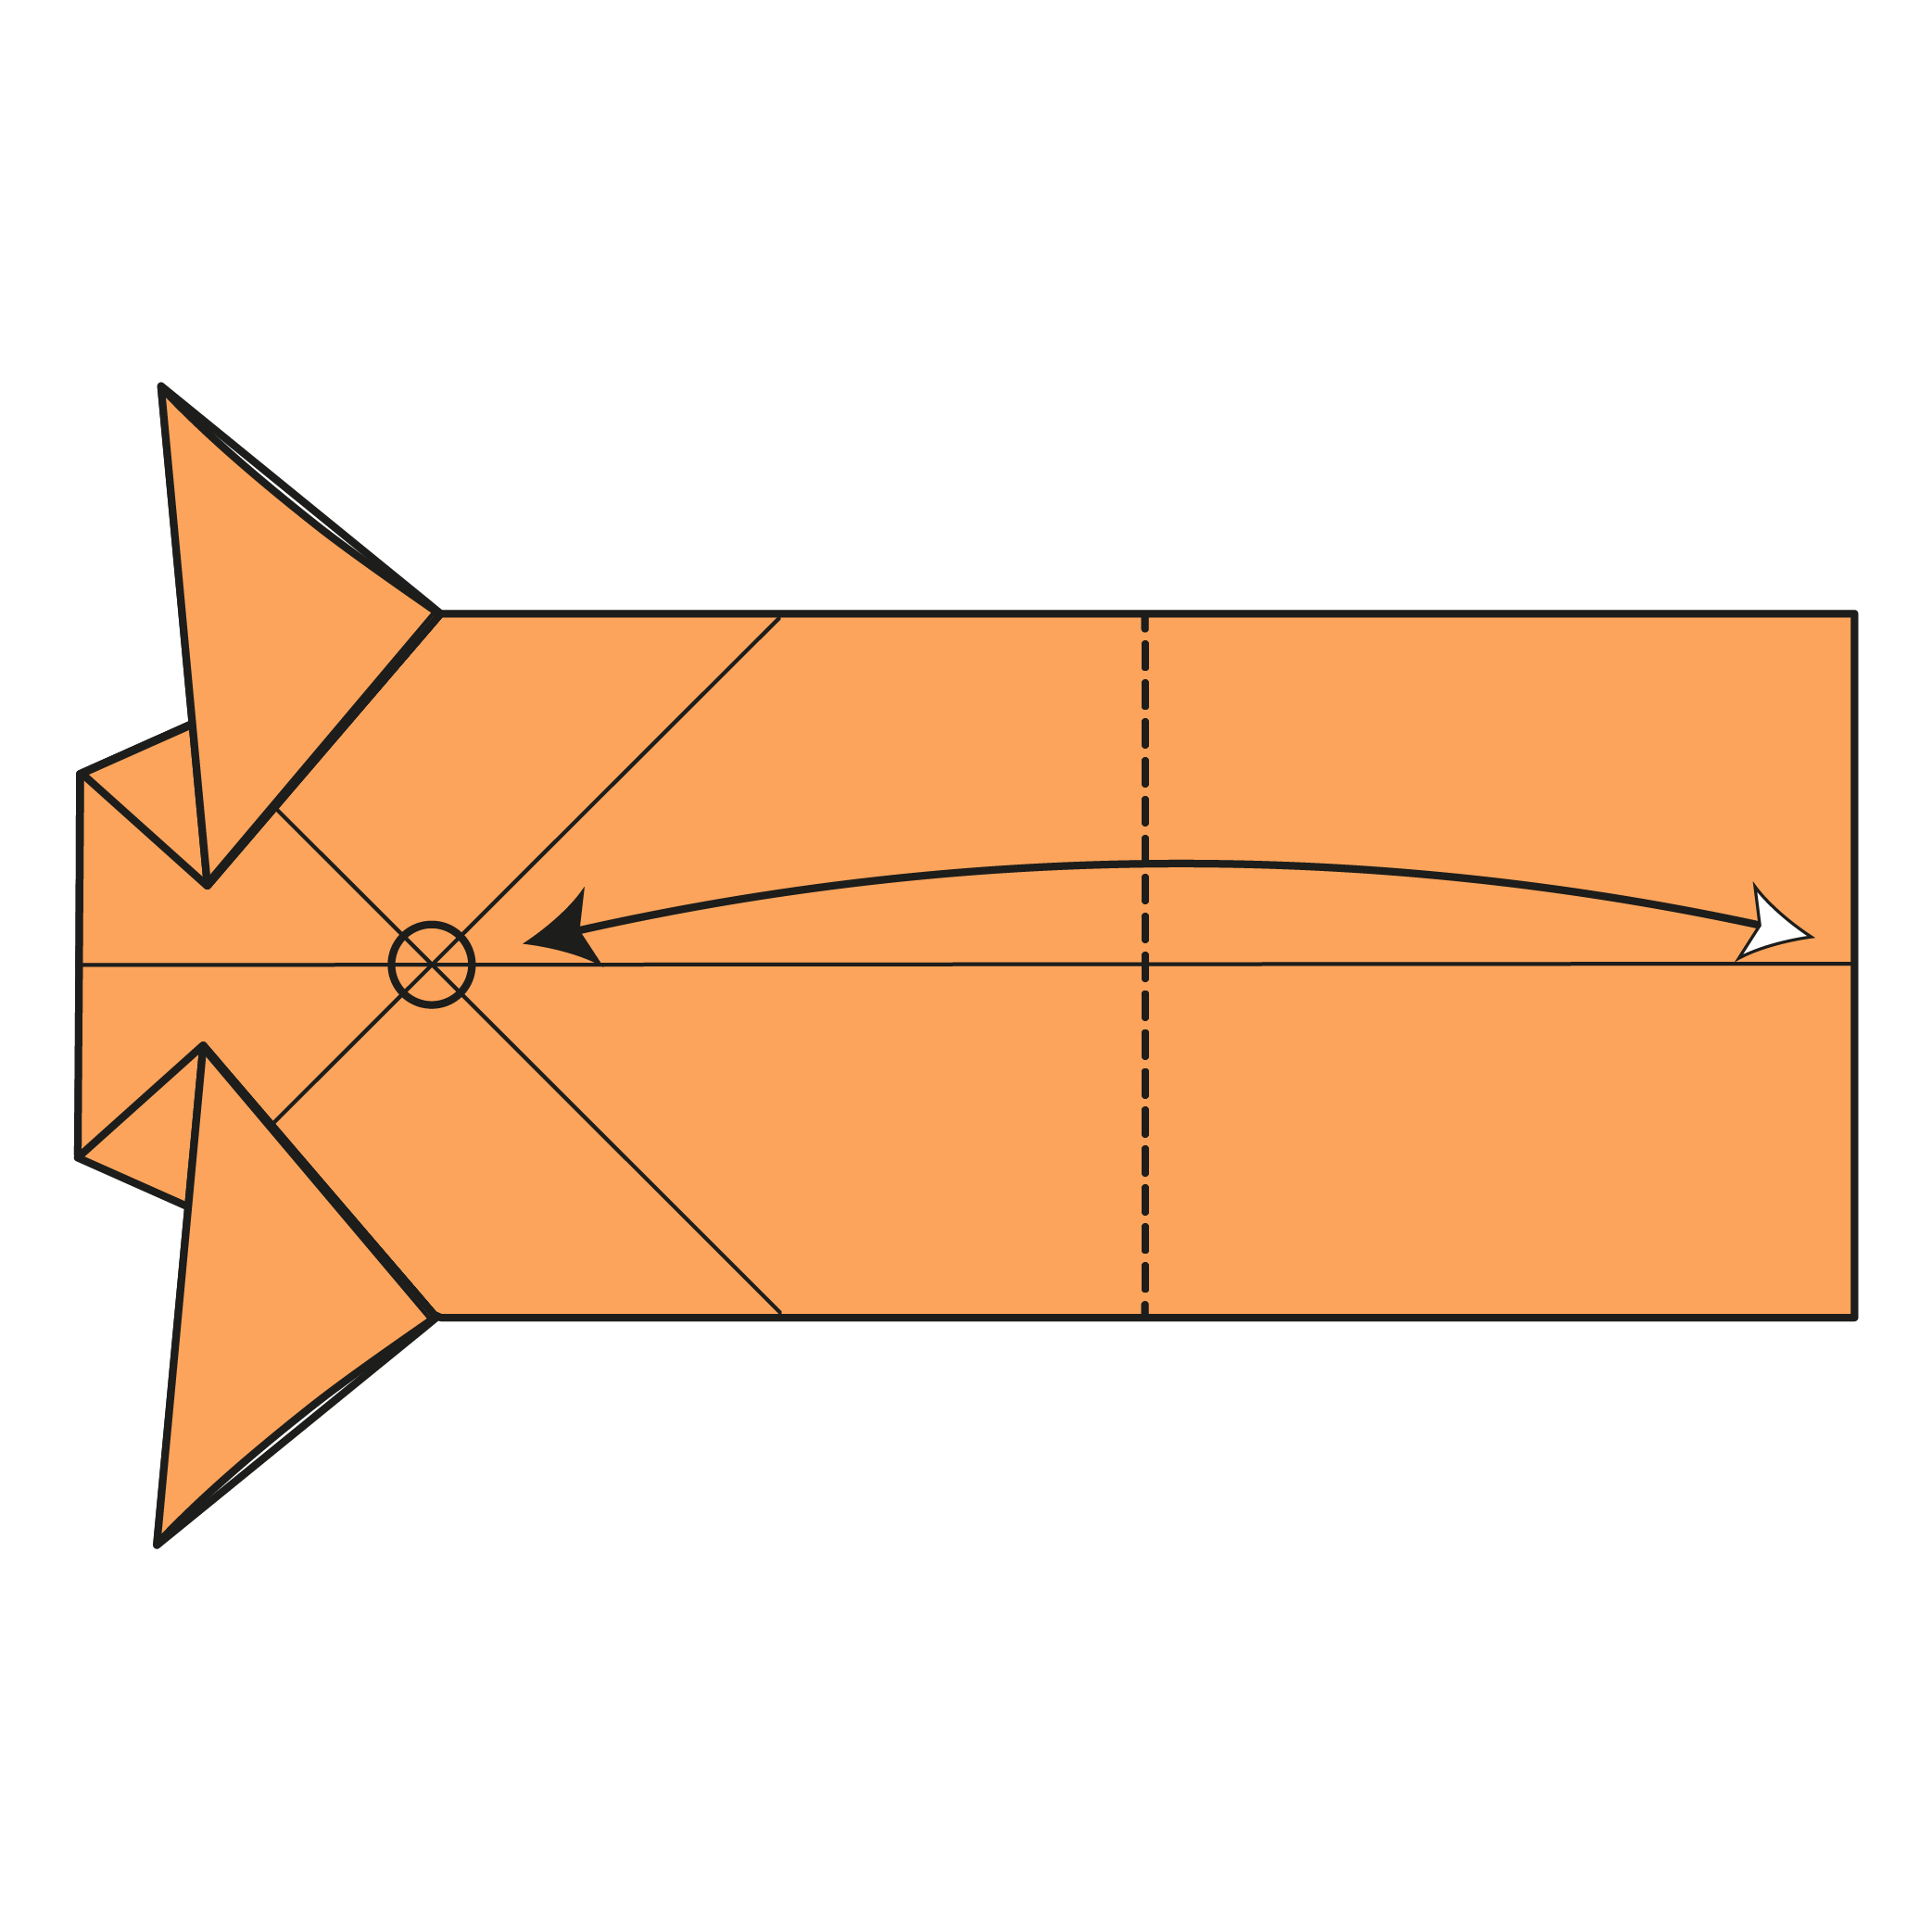
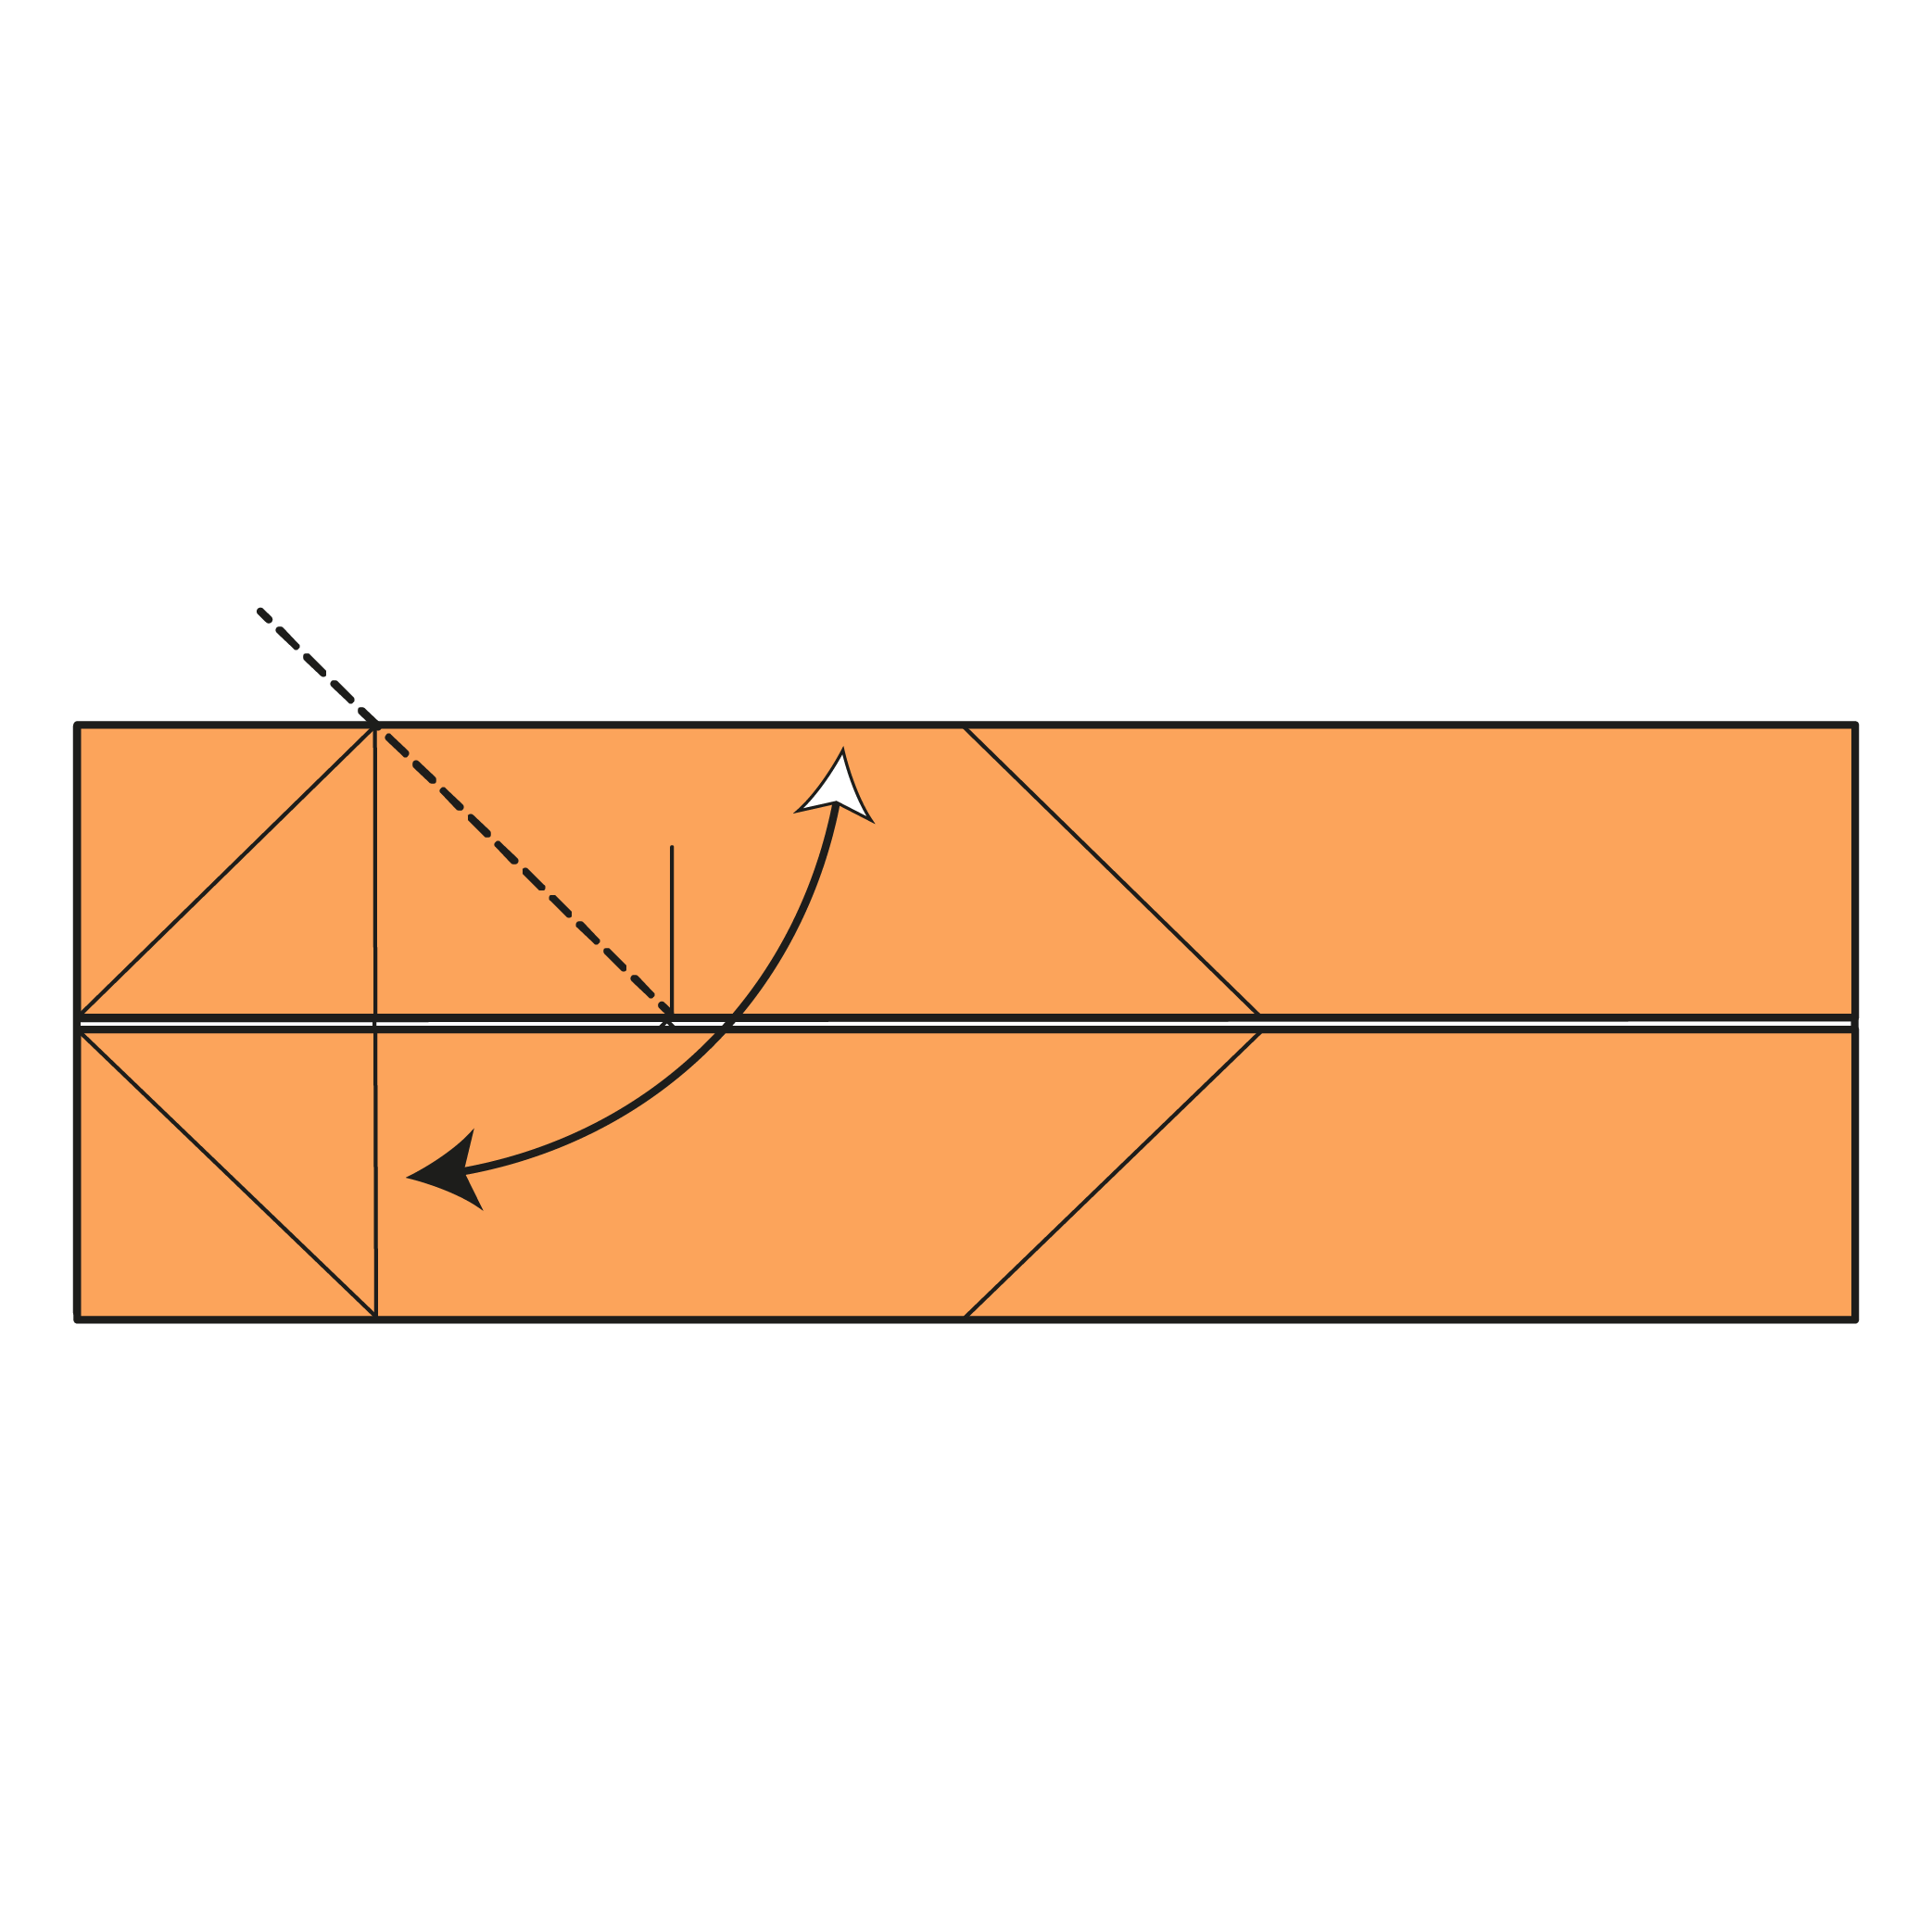
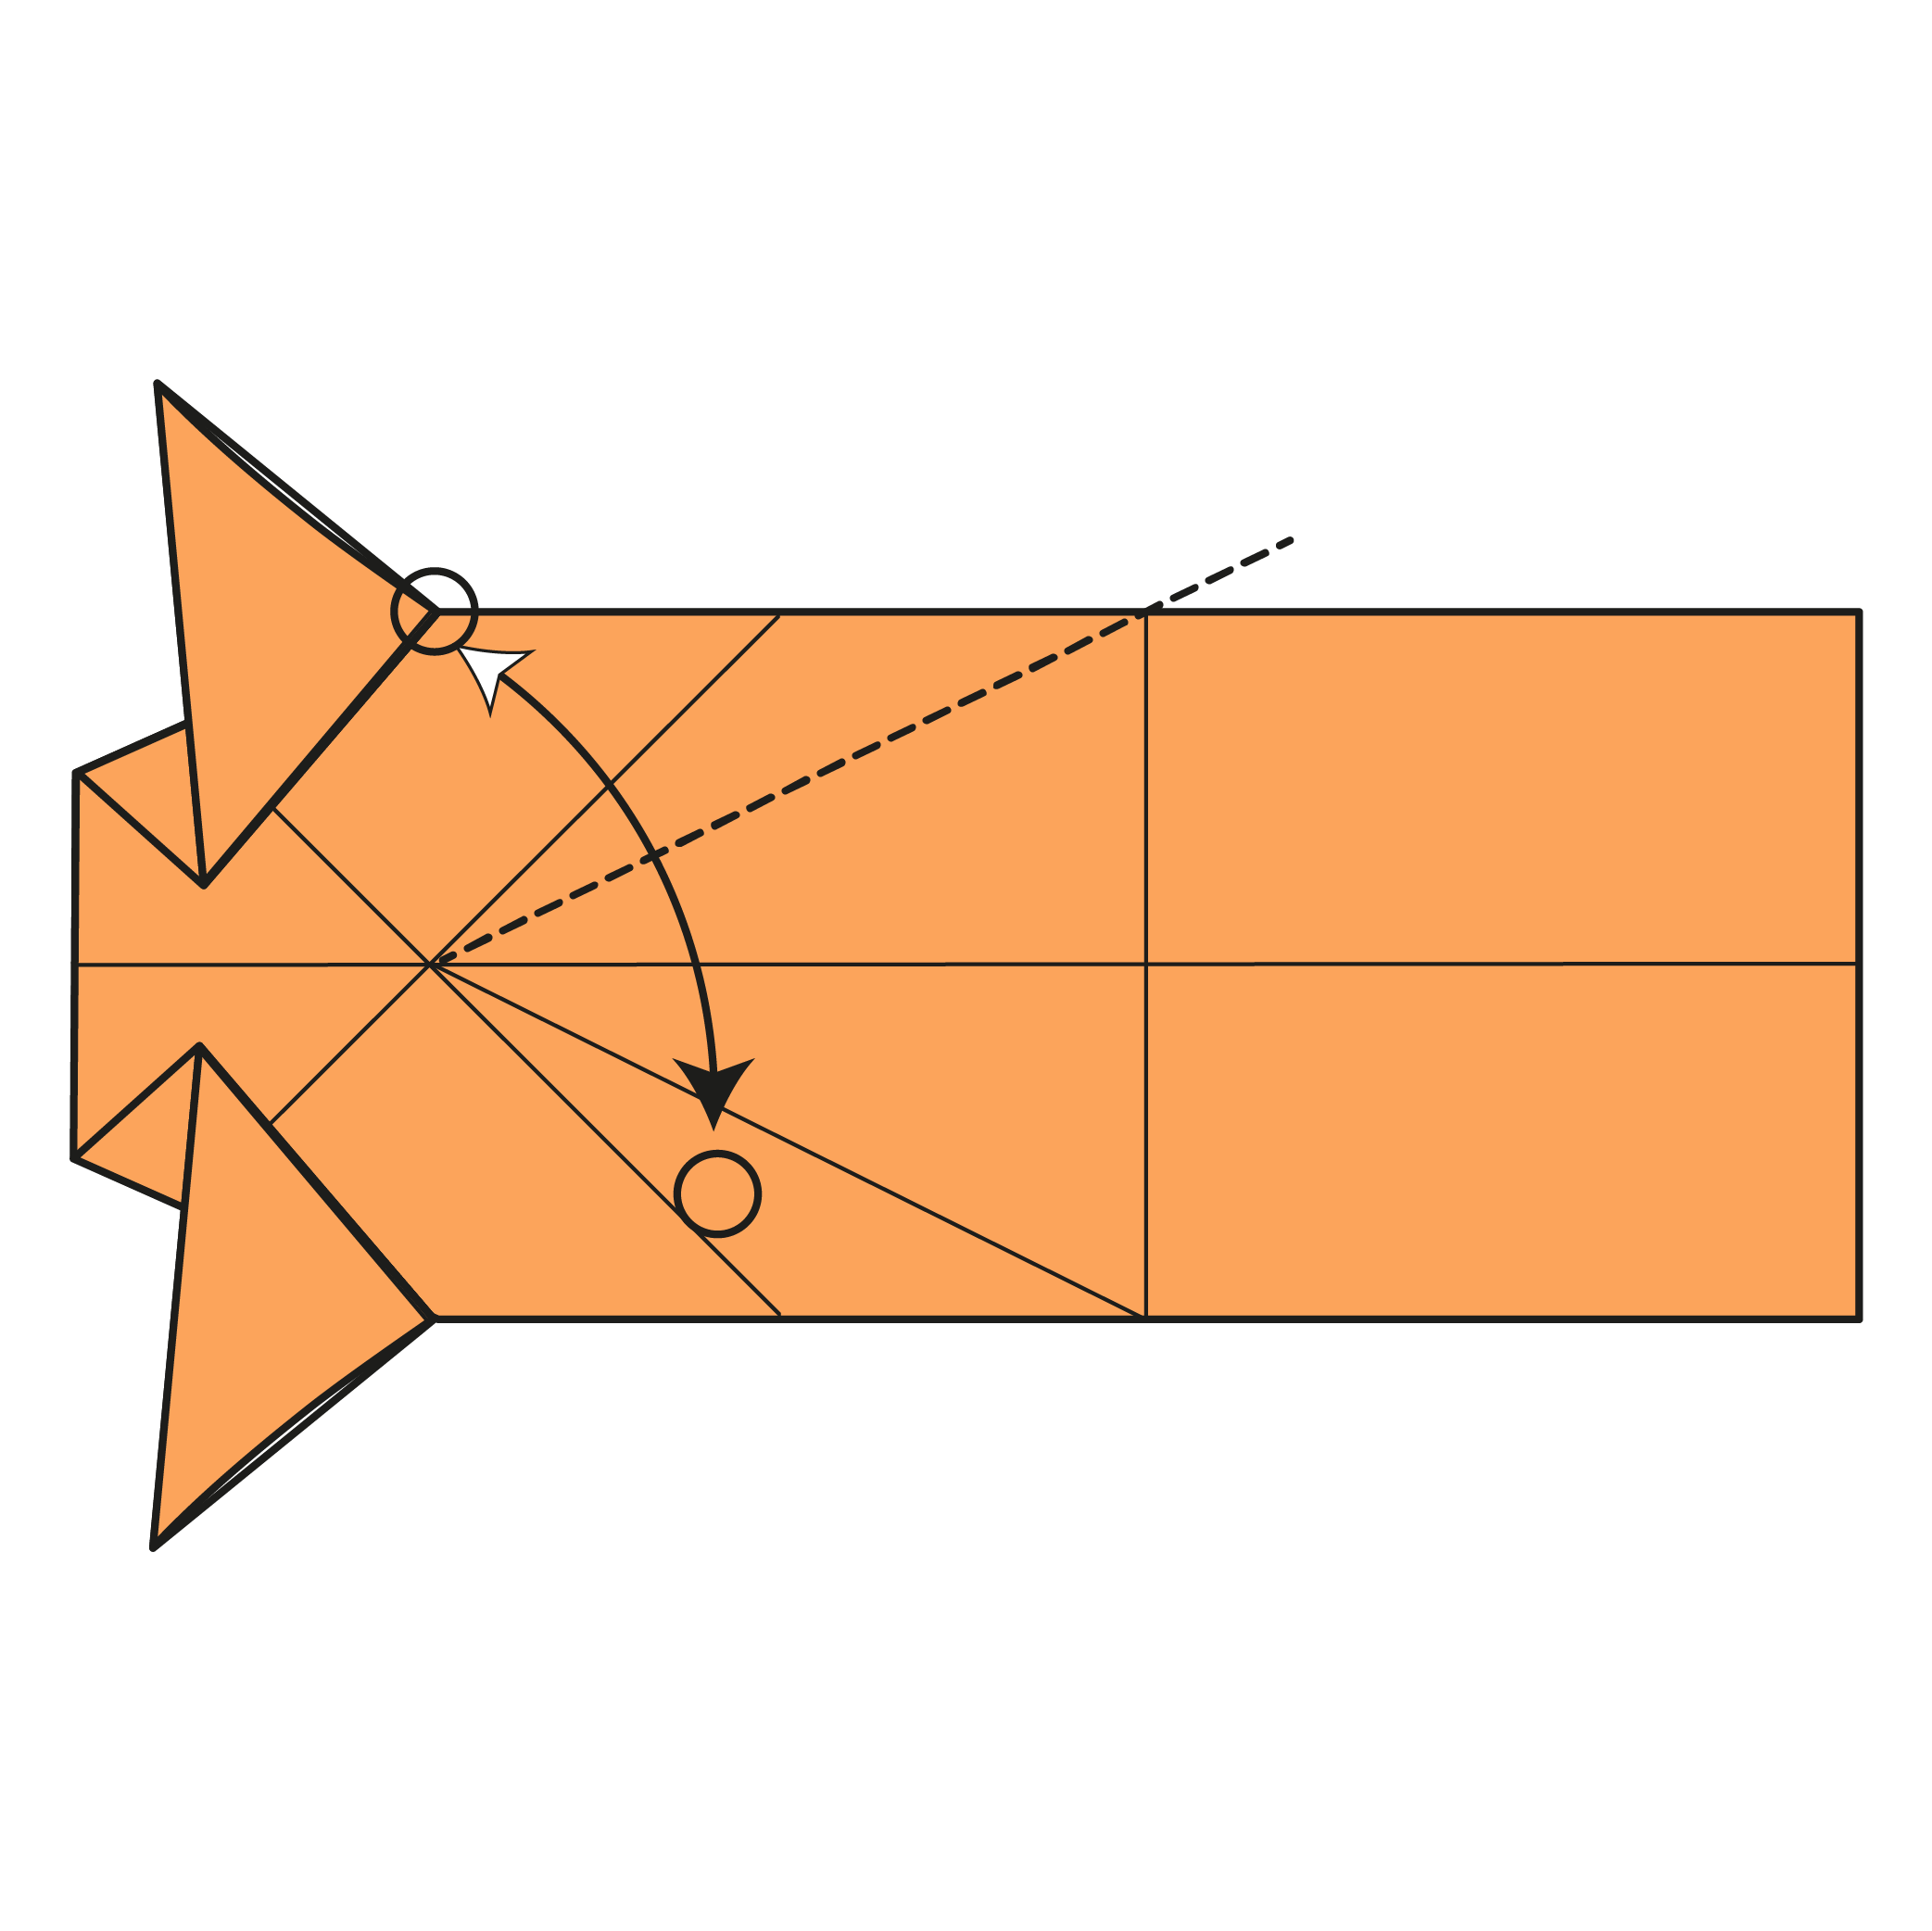
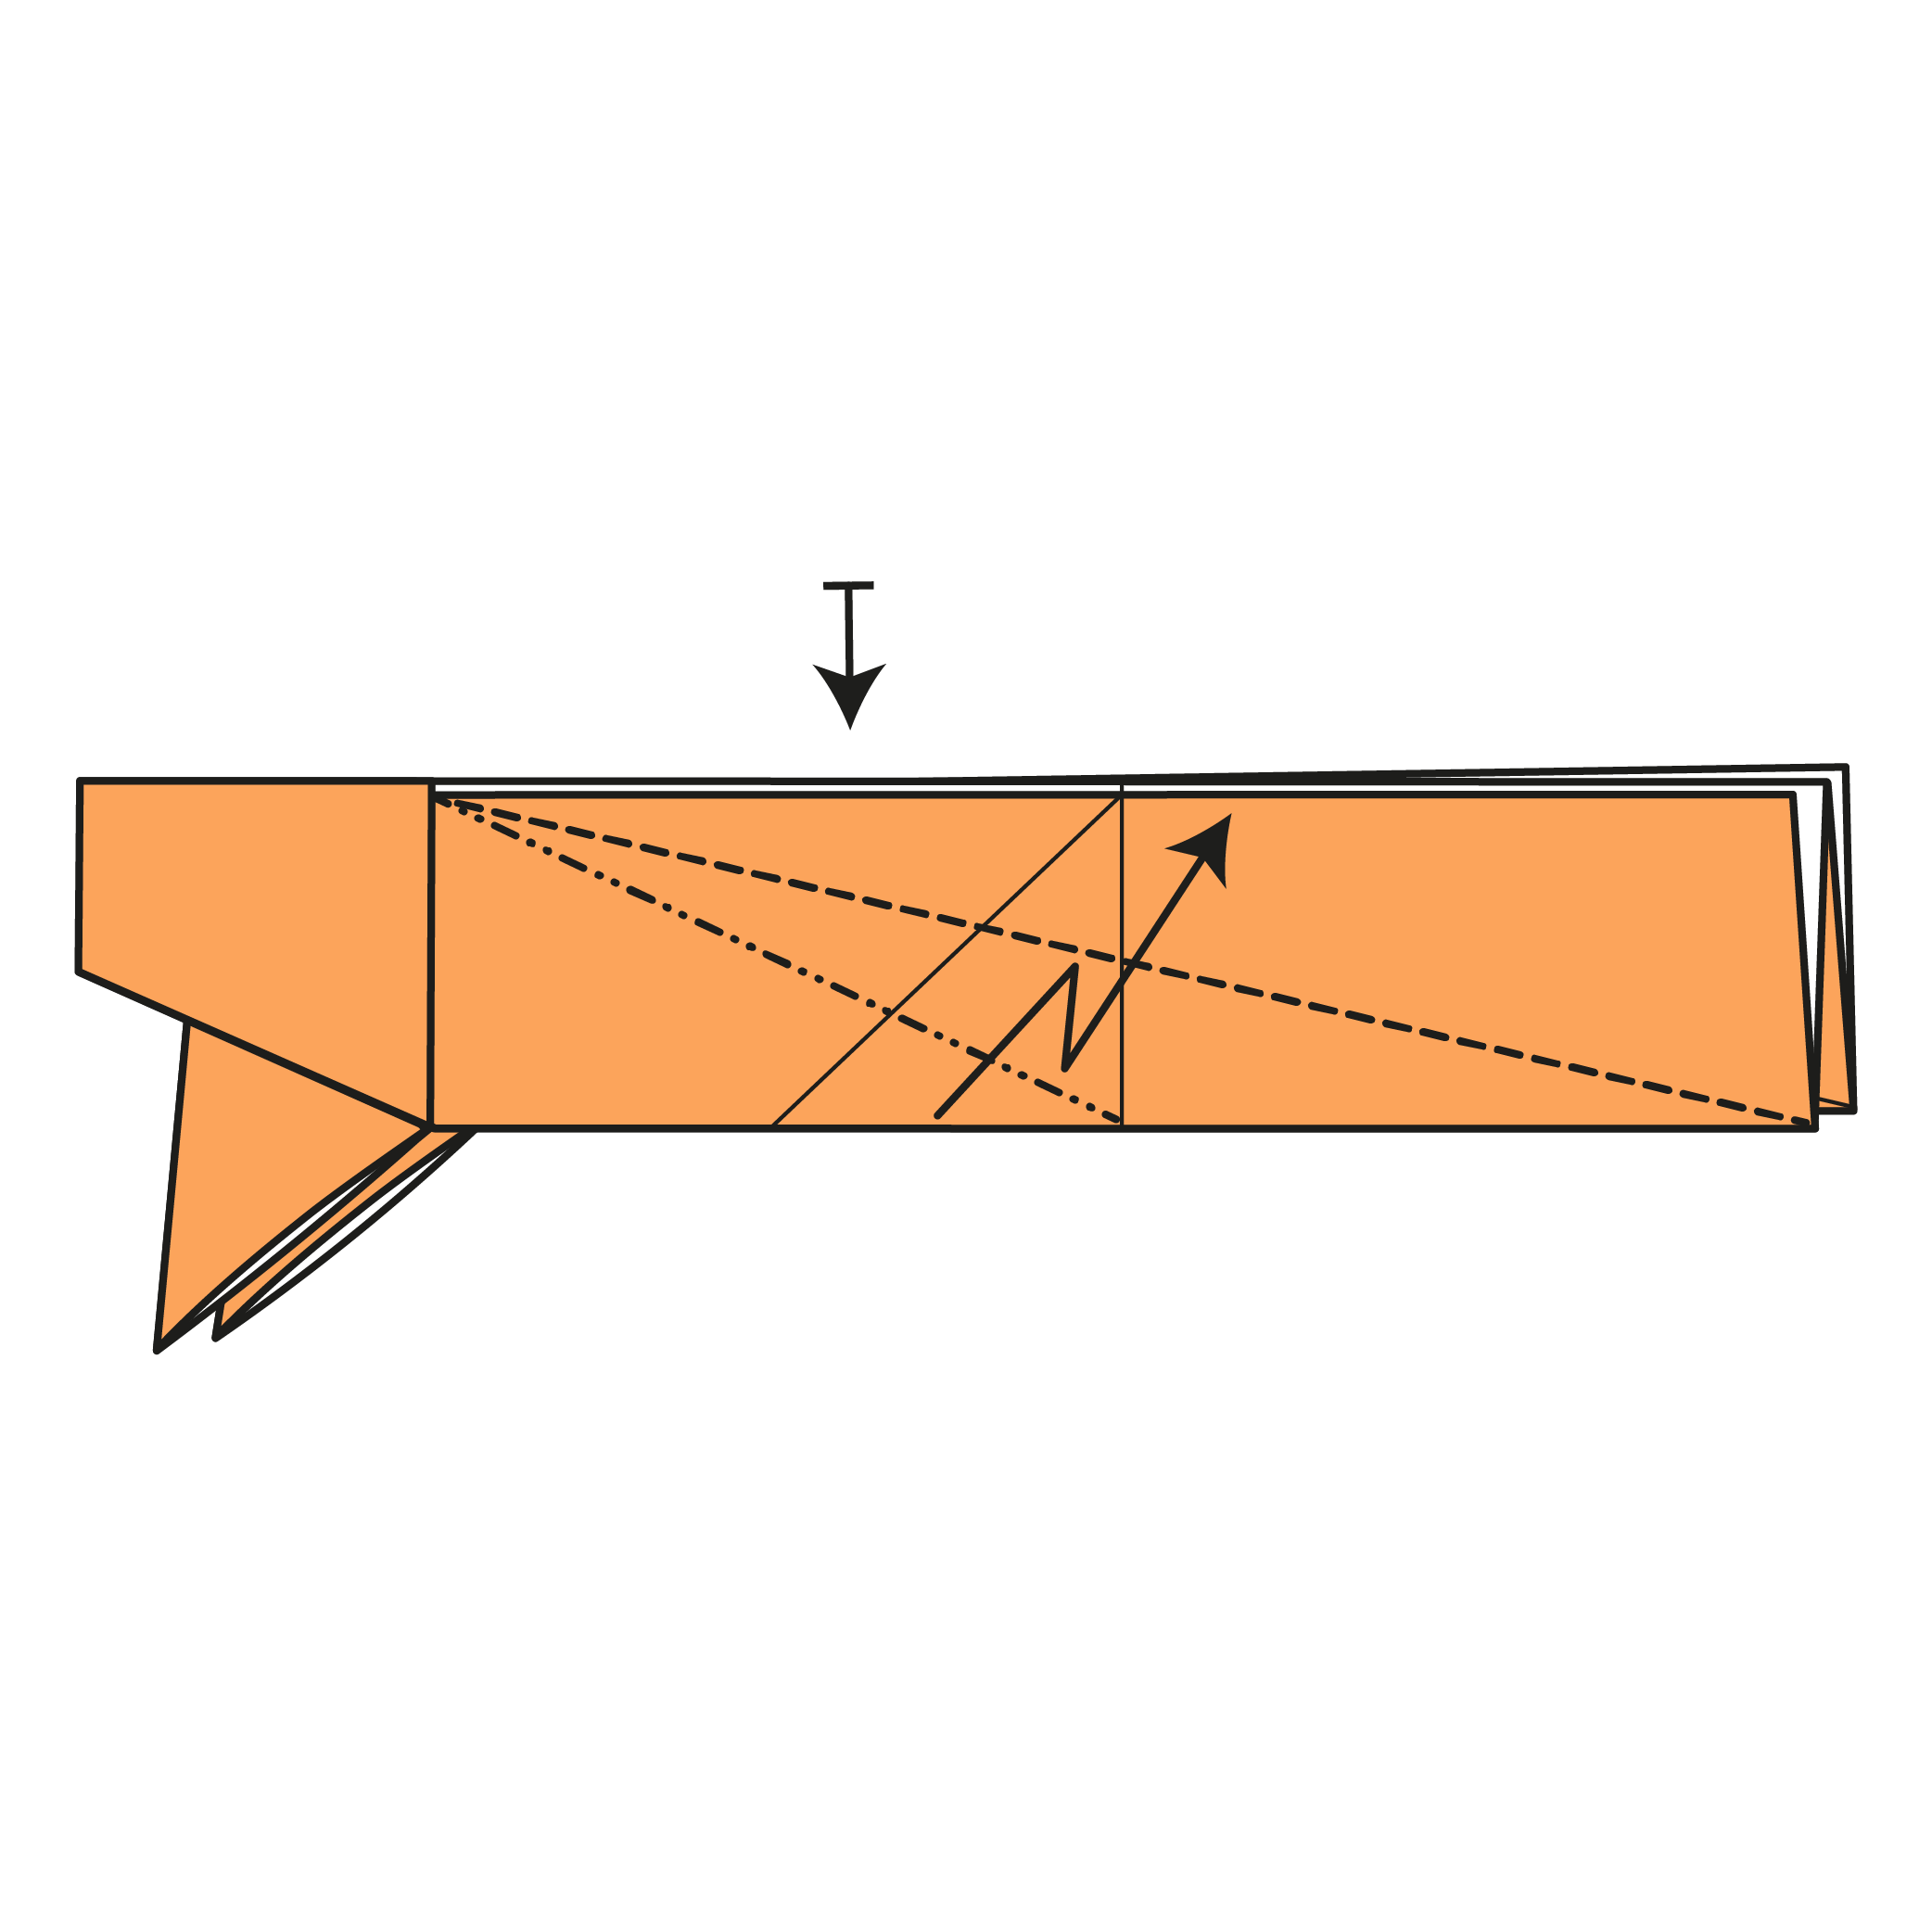
Fold the right edge to the reference point where the diagonals intersect. Then, unfold.
Step 19
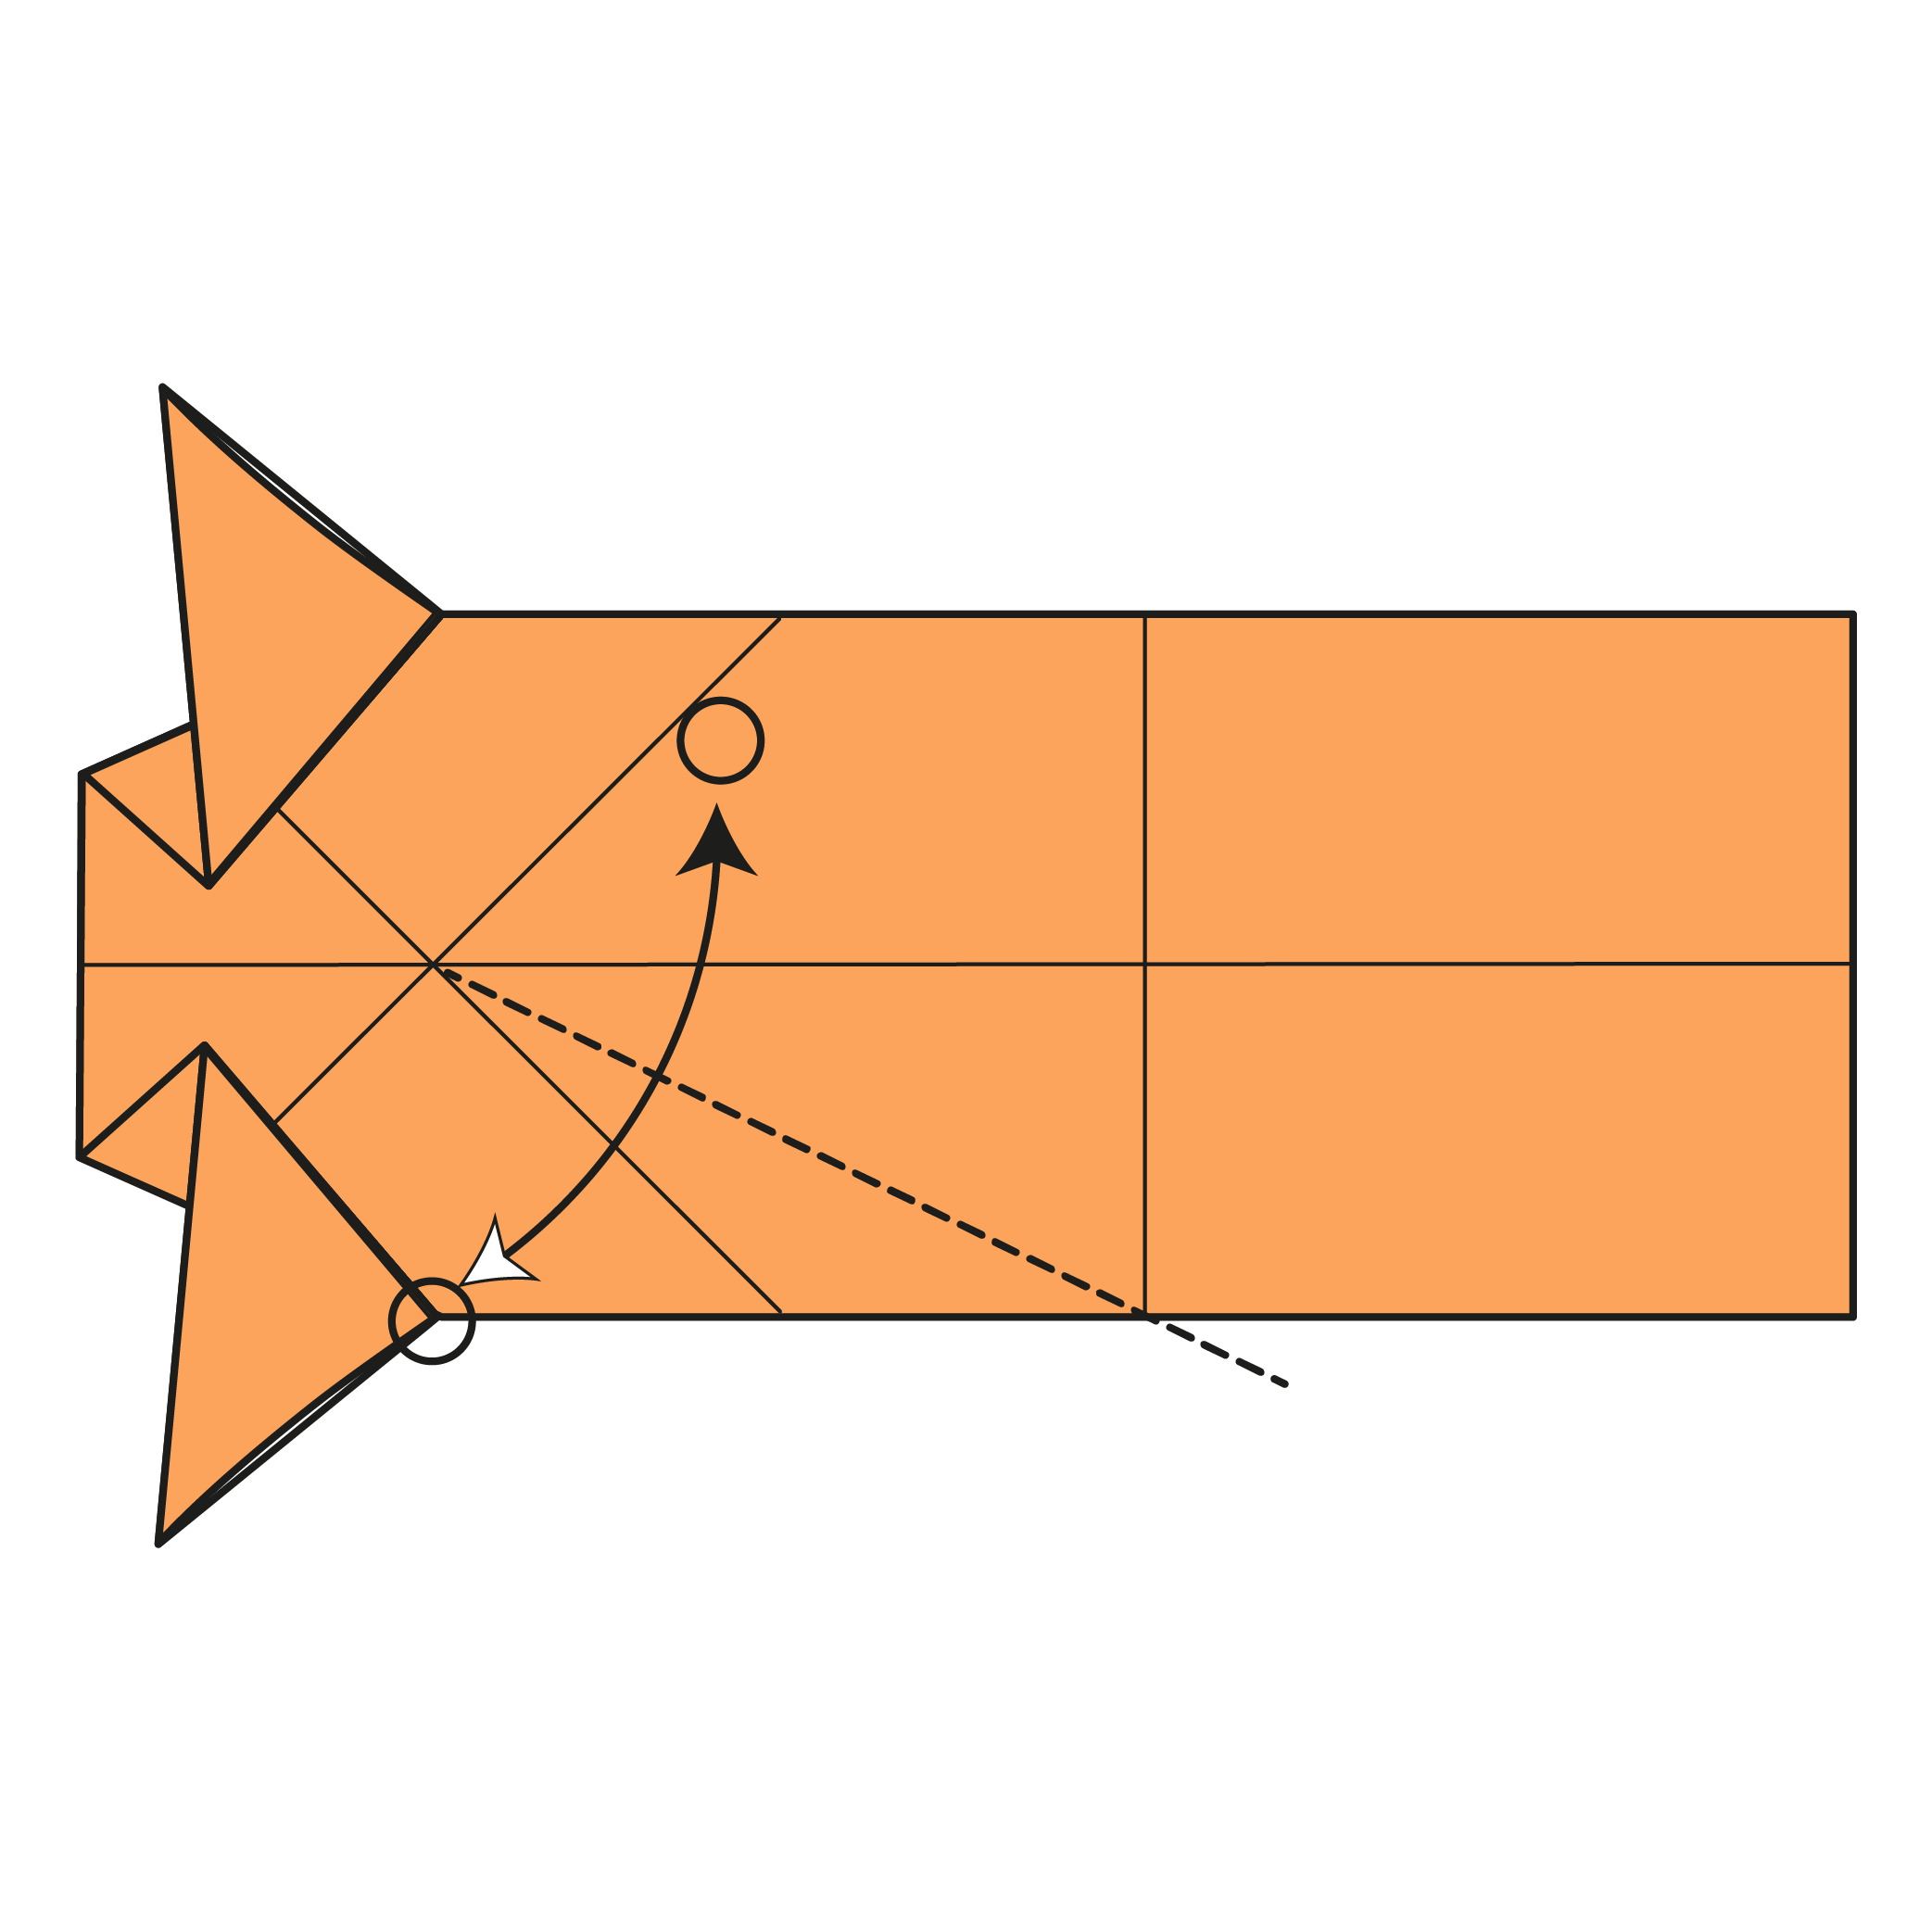
Fold along the dashed line. Use the reference points and existing creases as guides.
🎏 Folding tip: Fold the model in half at the left intersection. Then pivot the paper until your fold lines up with the horizontal crease.
Step 20
Repeat on the top half.
Step 21

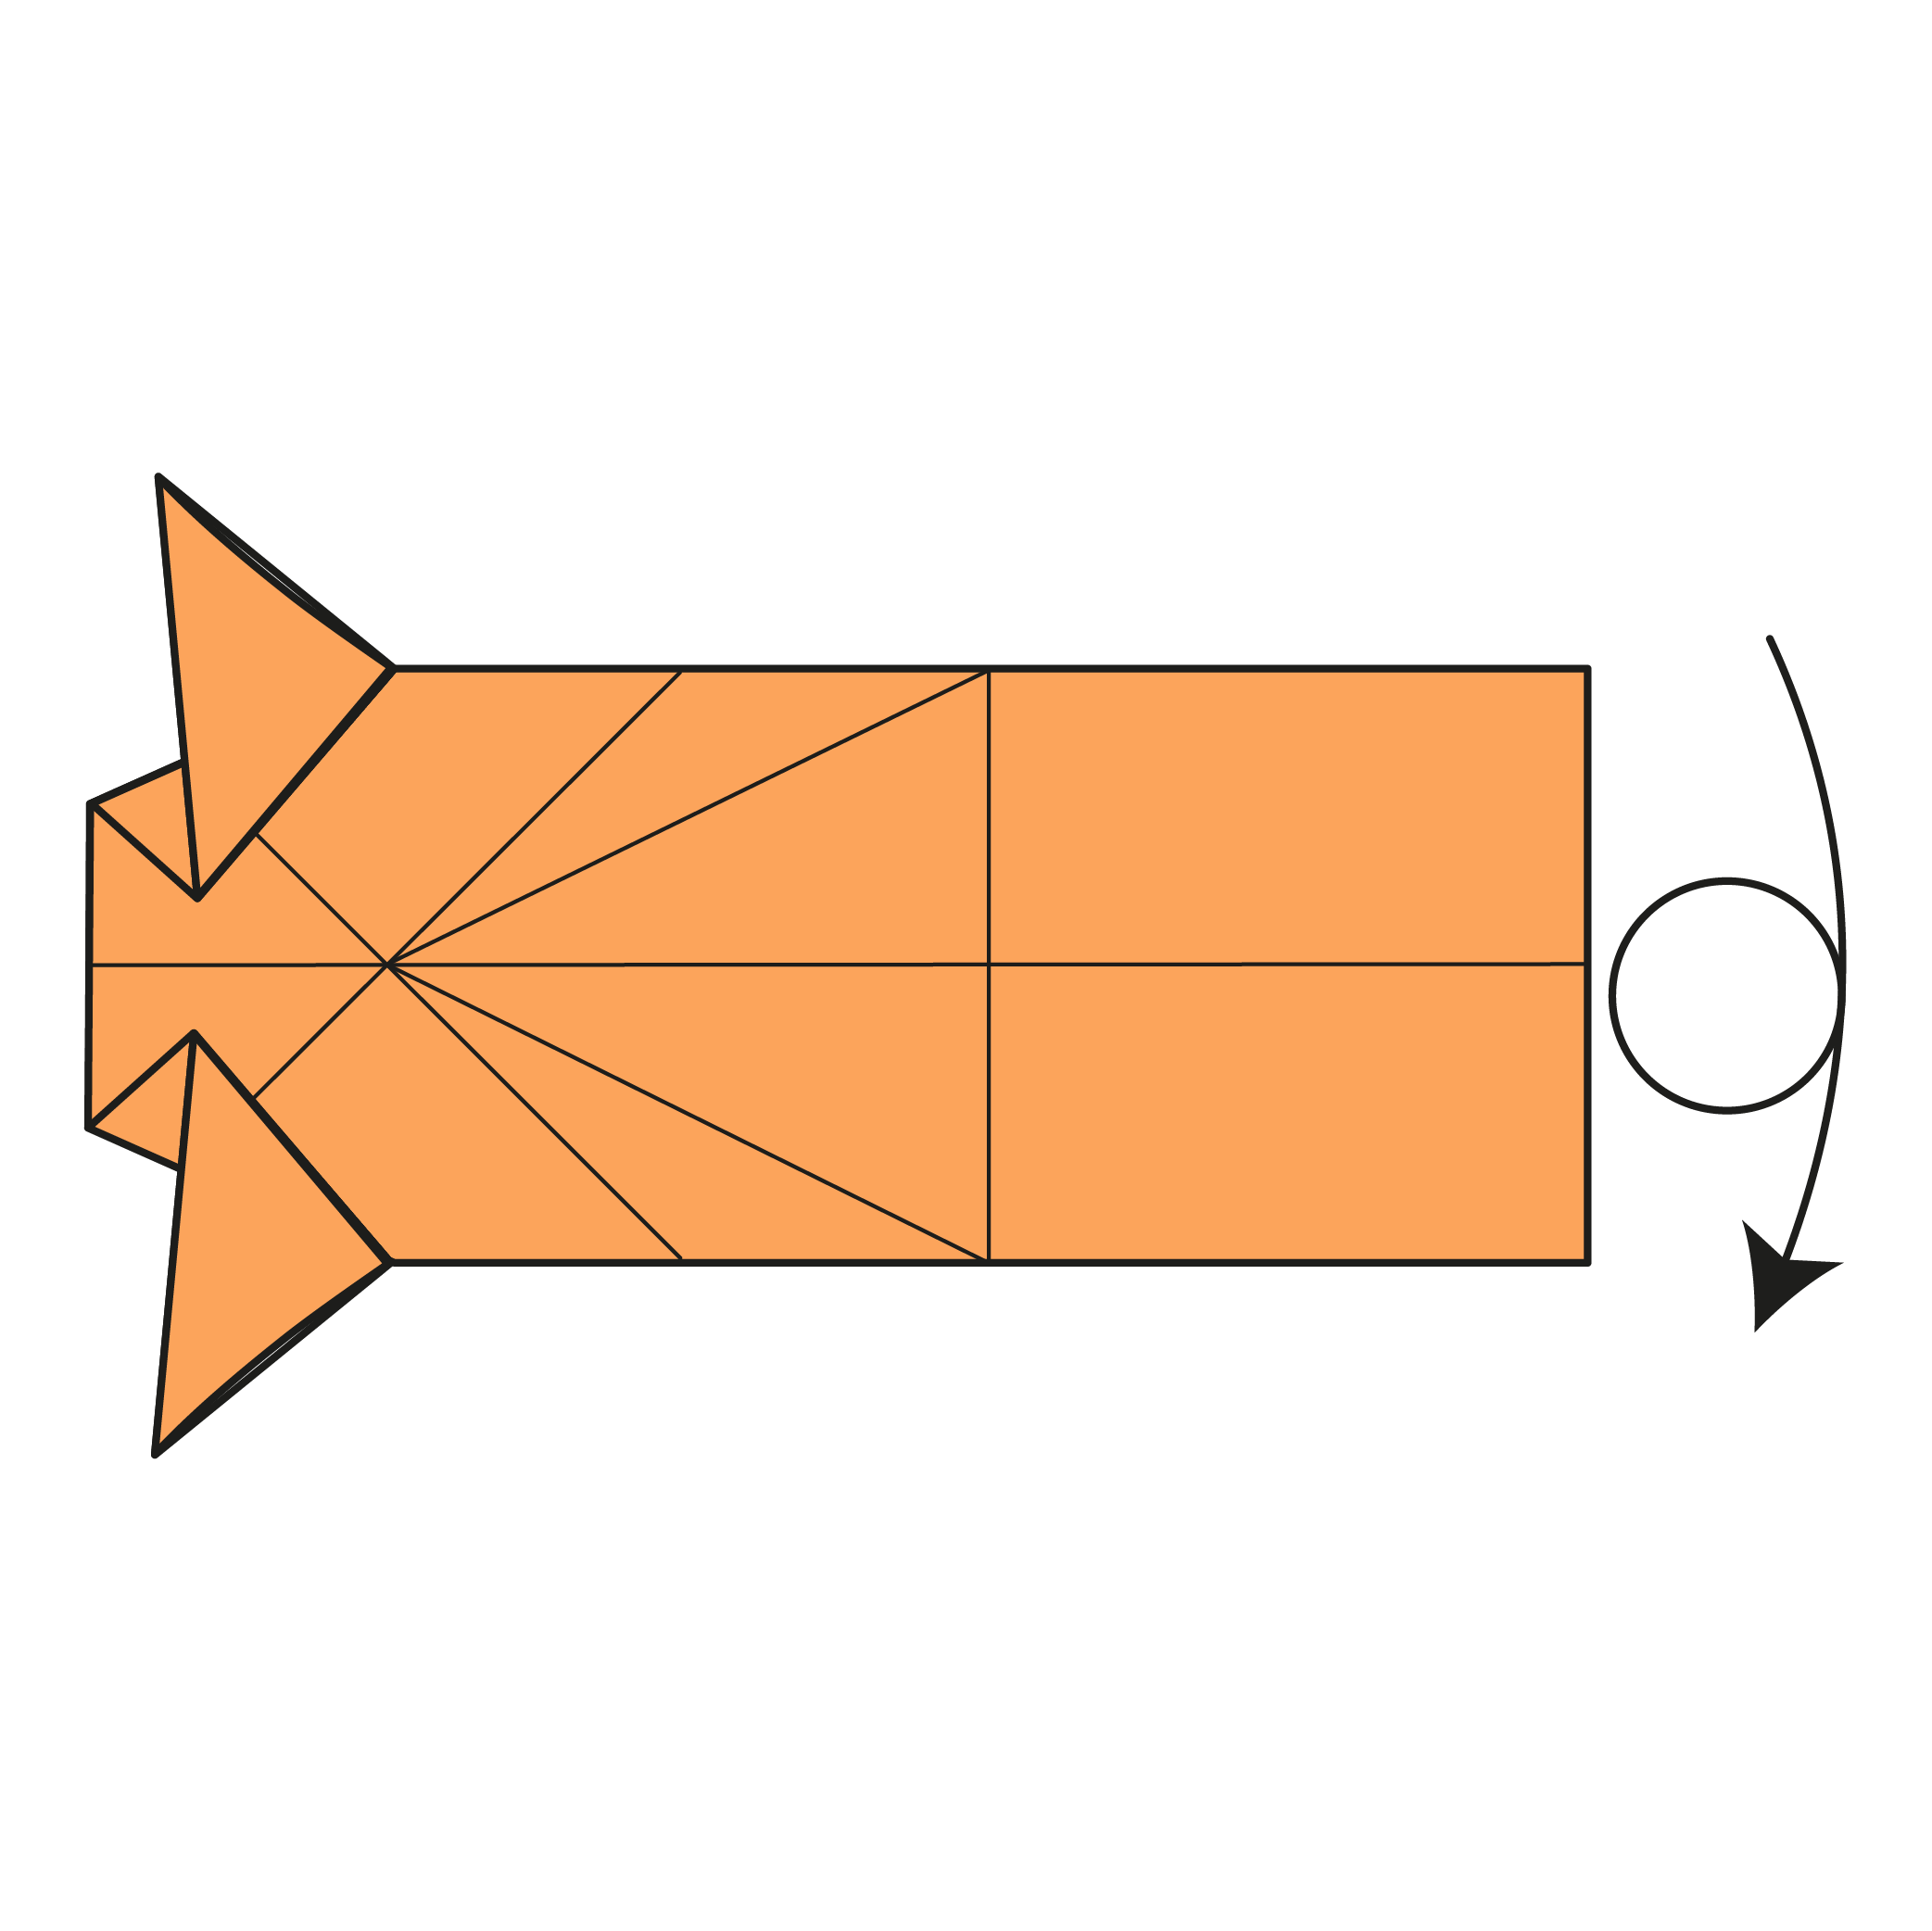
Turn the model over, from top to bottom.
Step 22
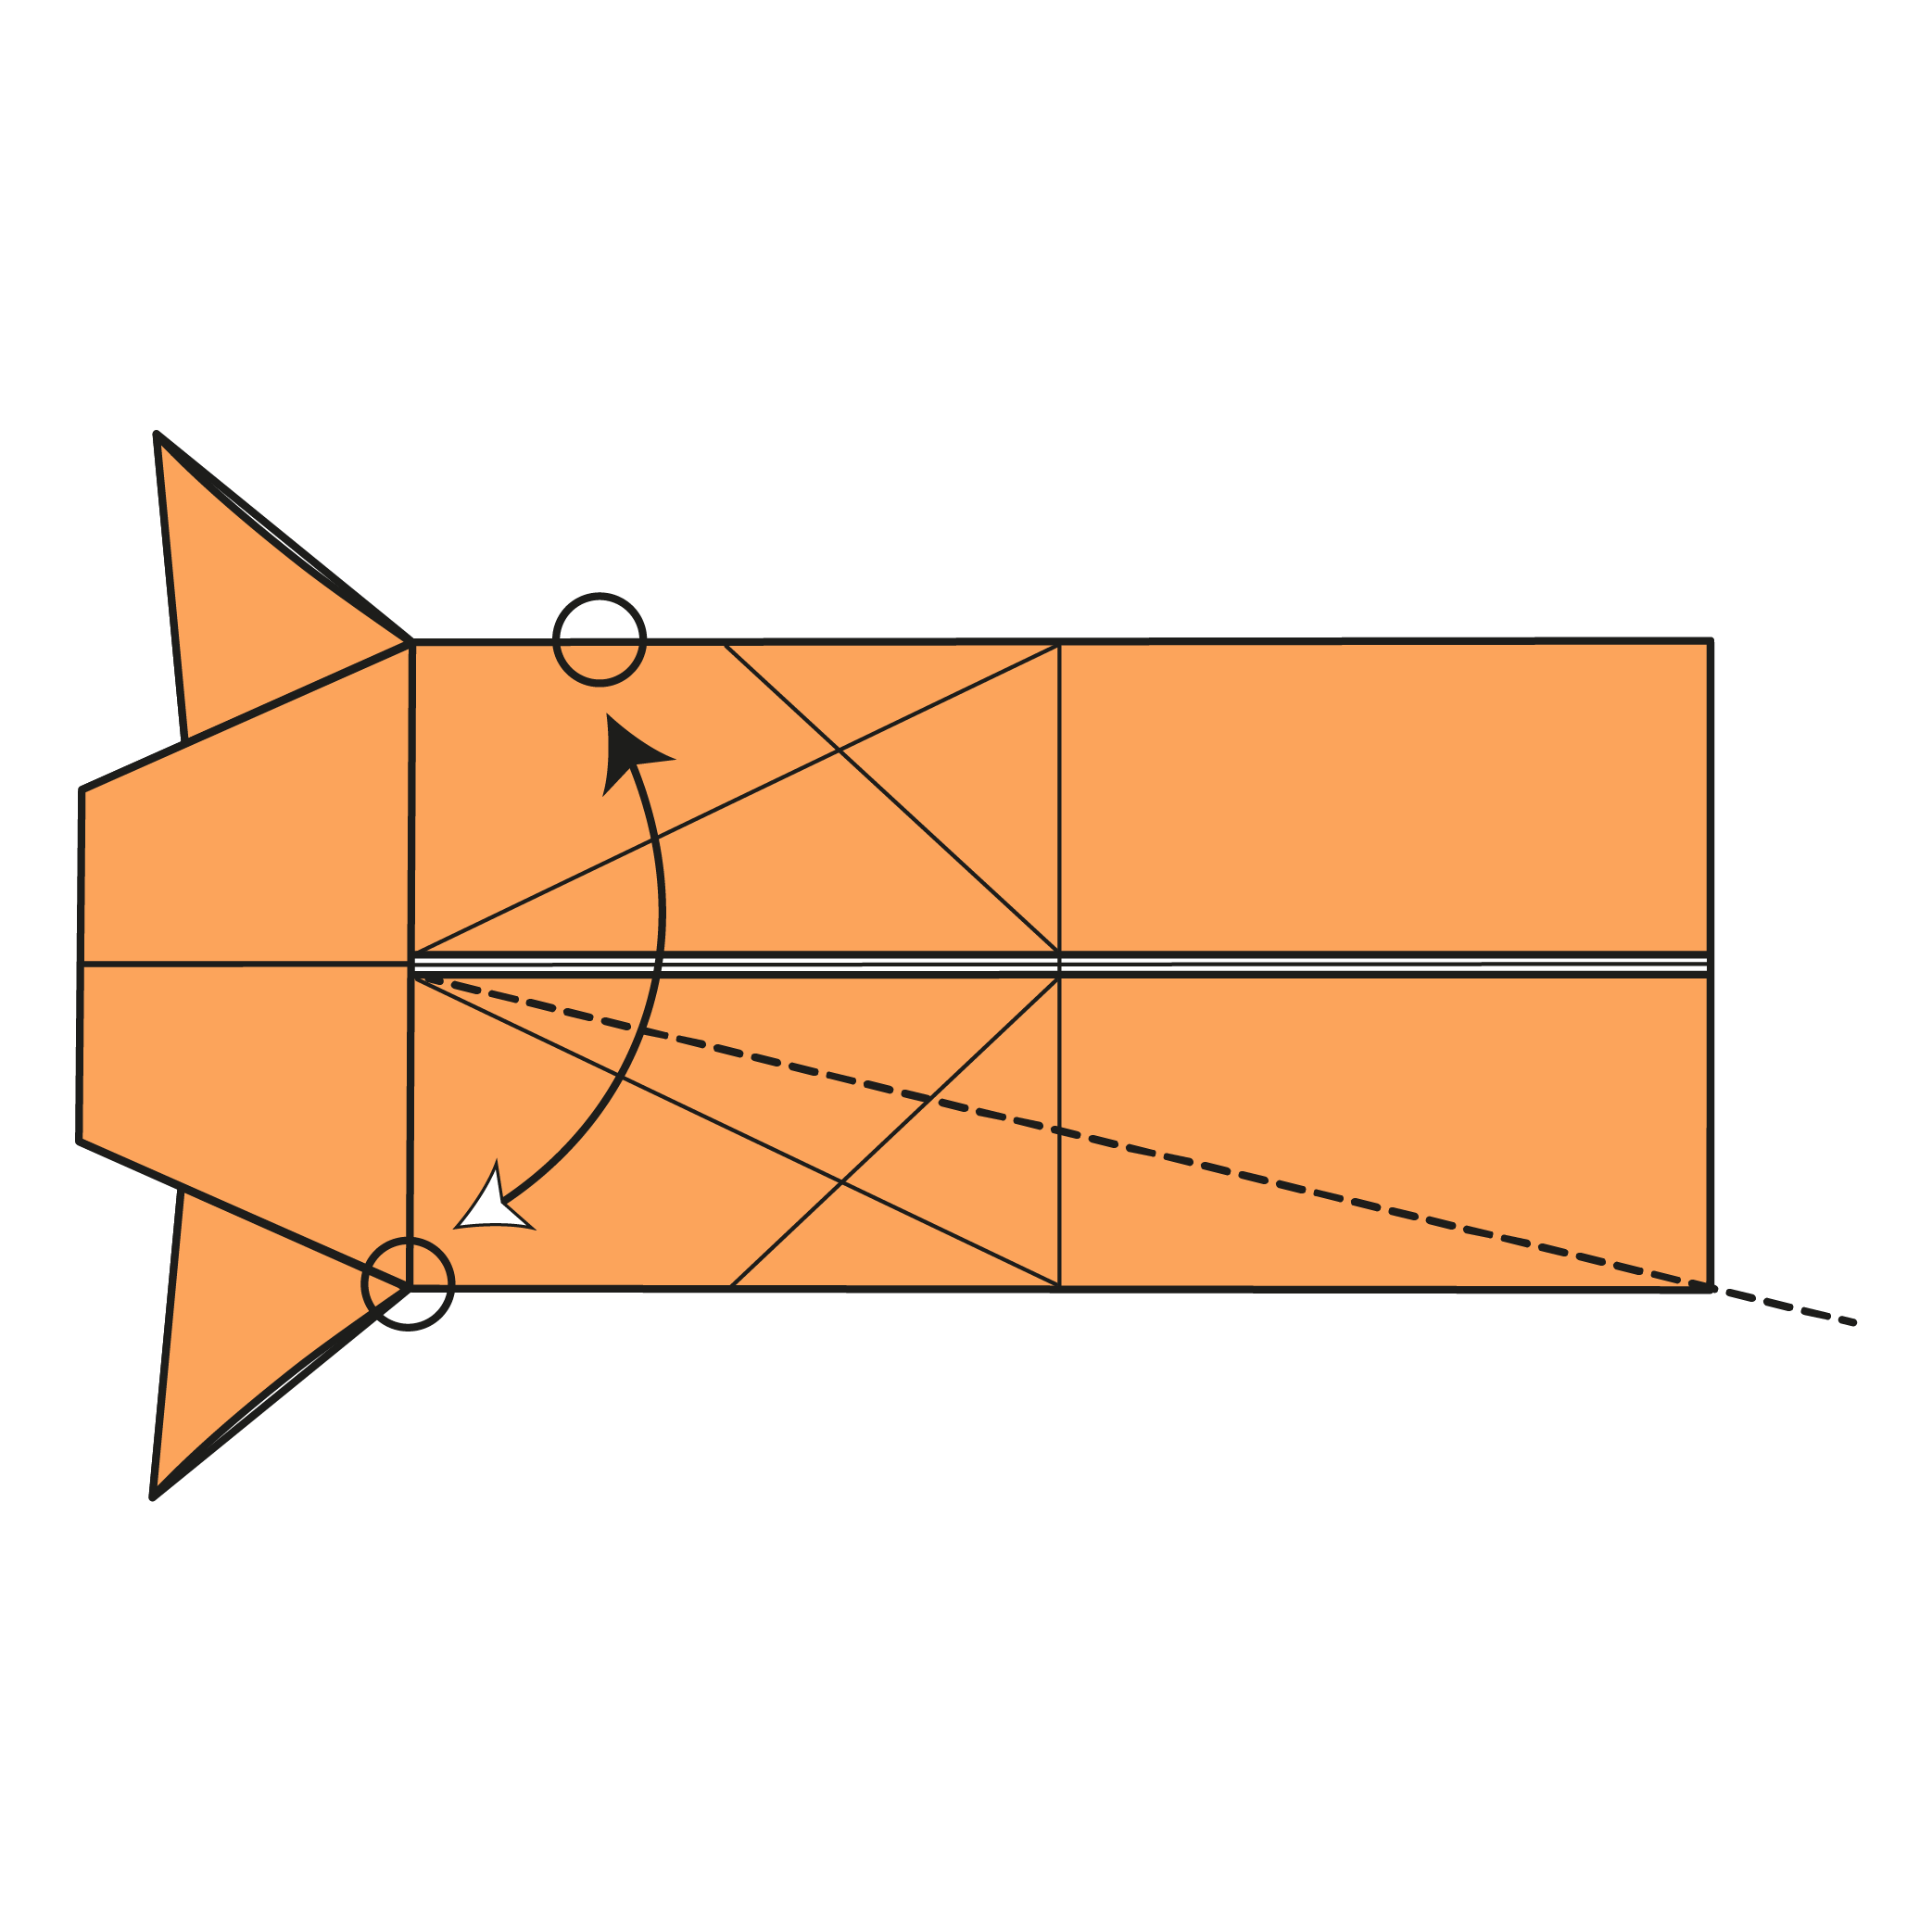
Fold along the dashed line. Use the reference points and existing creases as guides.
🎏 Folding tip: You can use the same pivot technique from the previous step here too.
Step 23
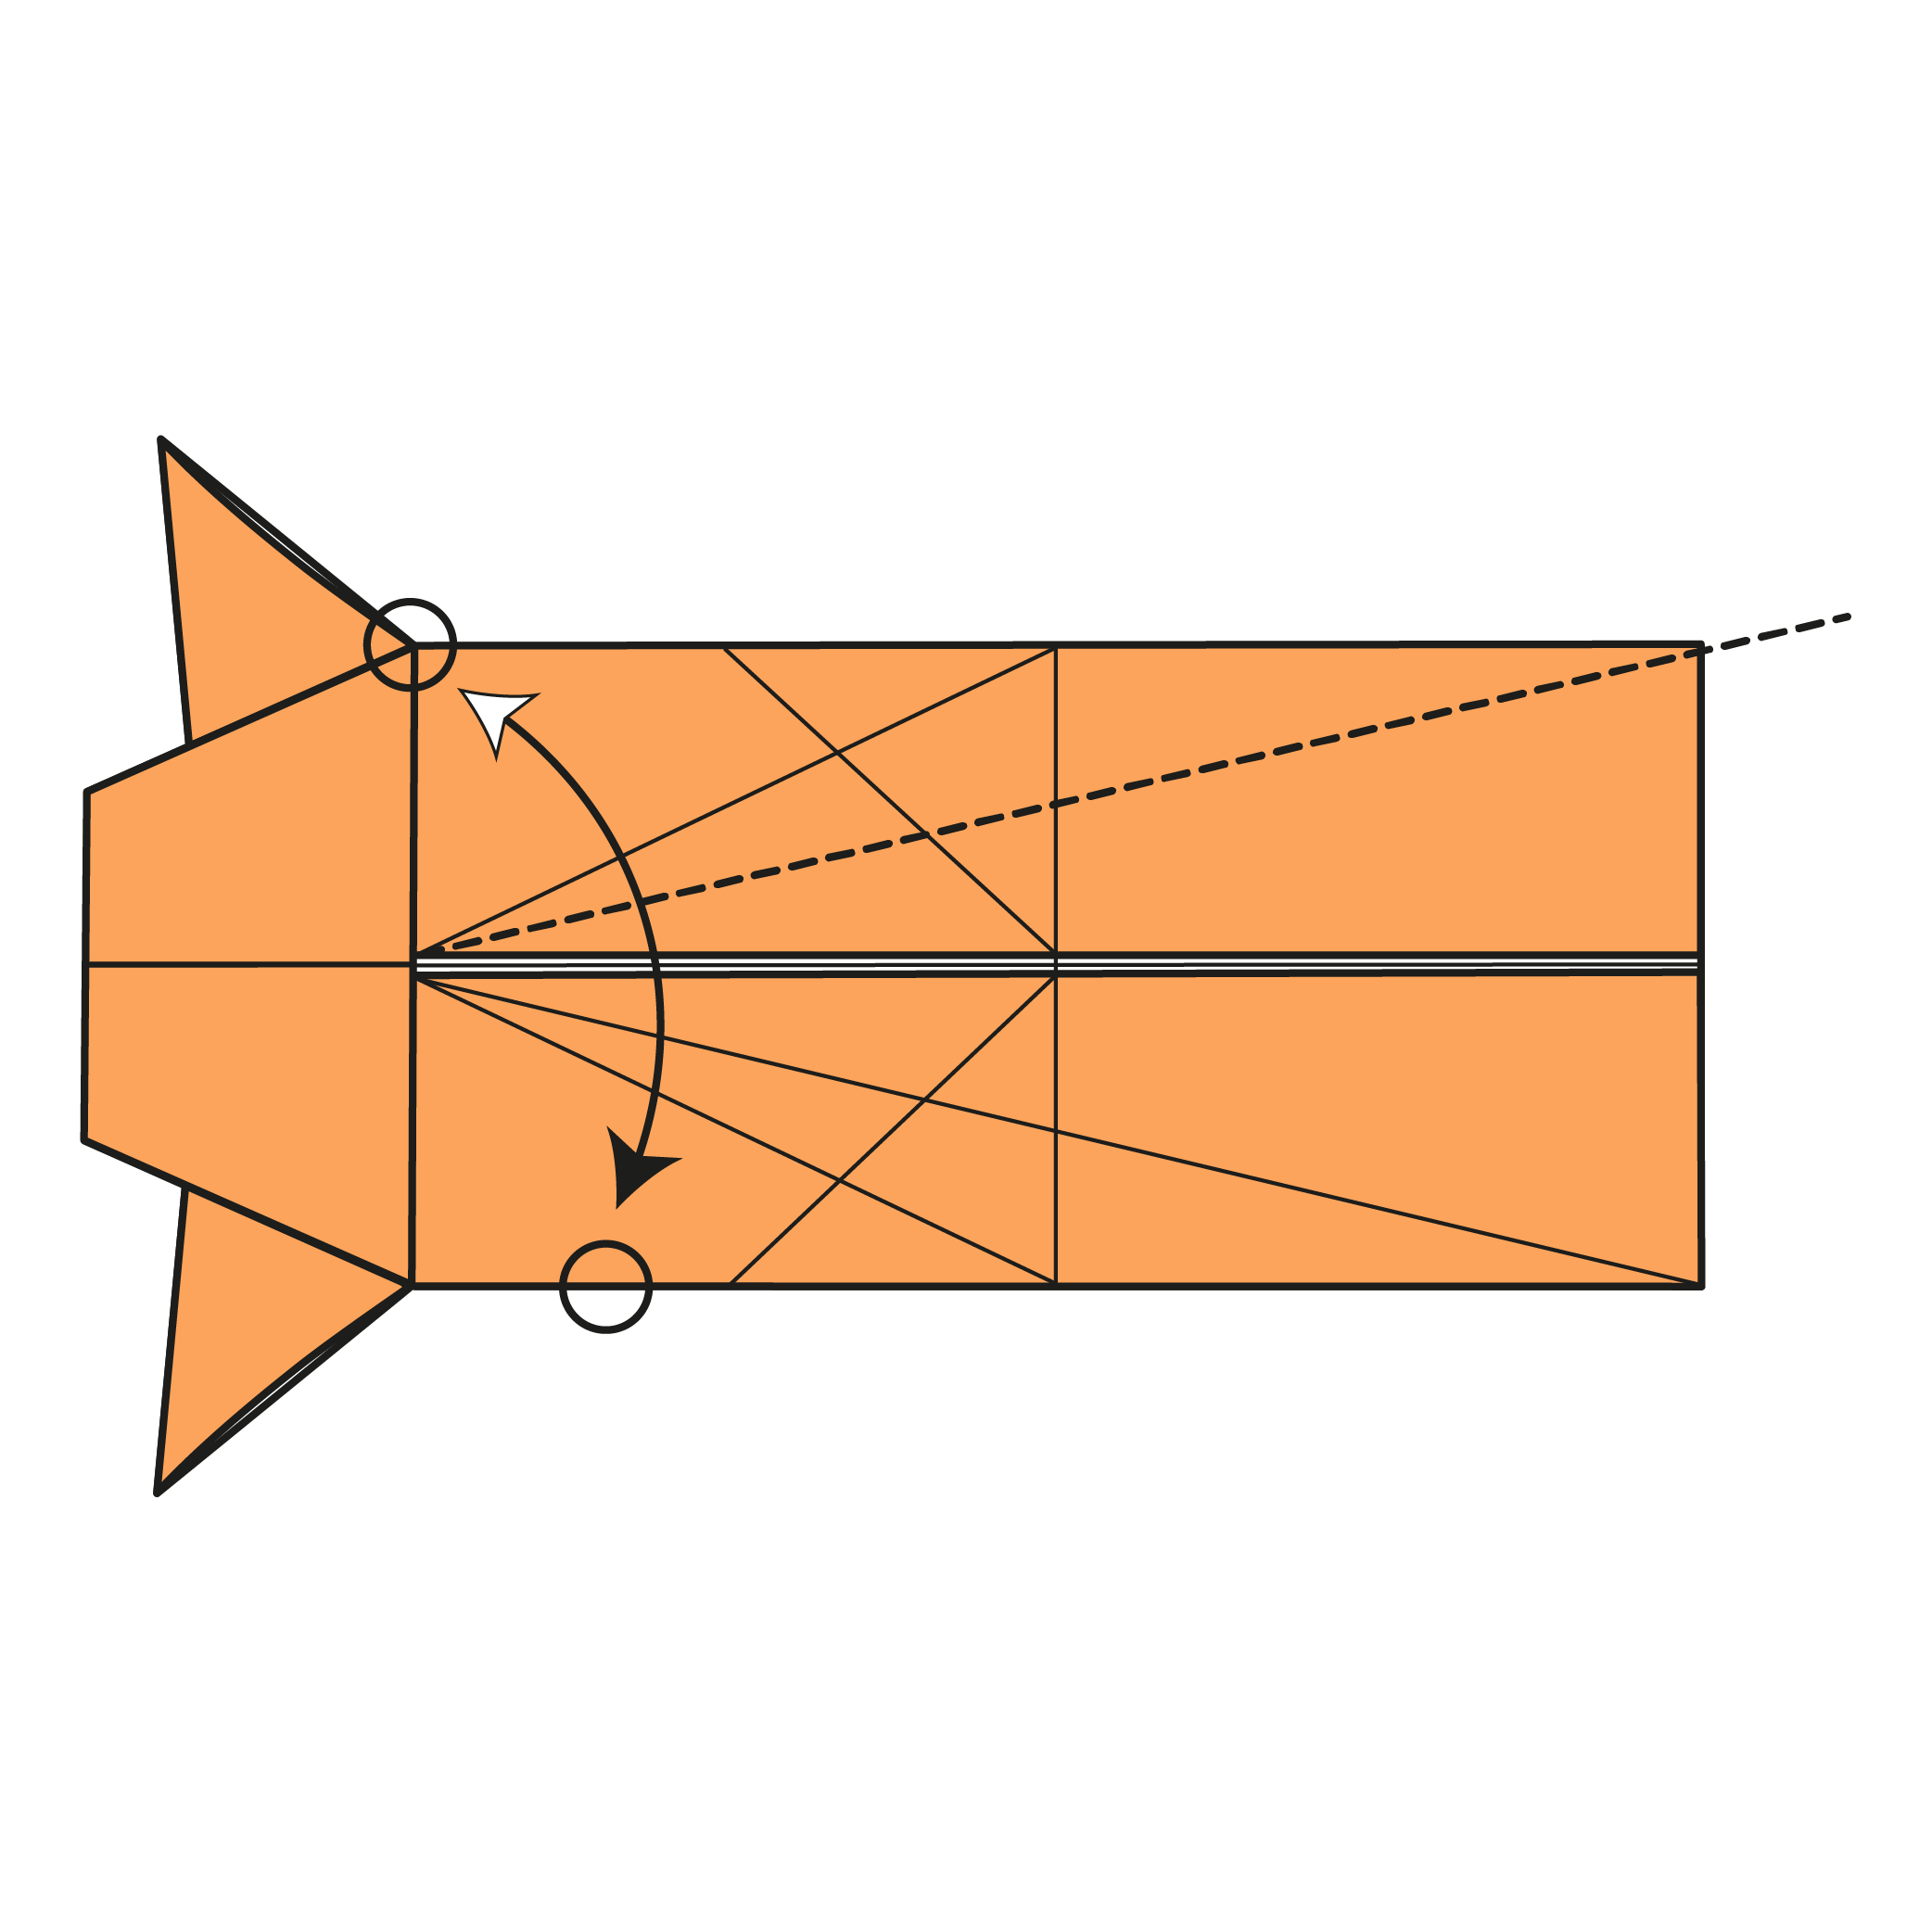
Repeat on the top half.
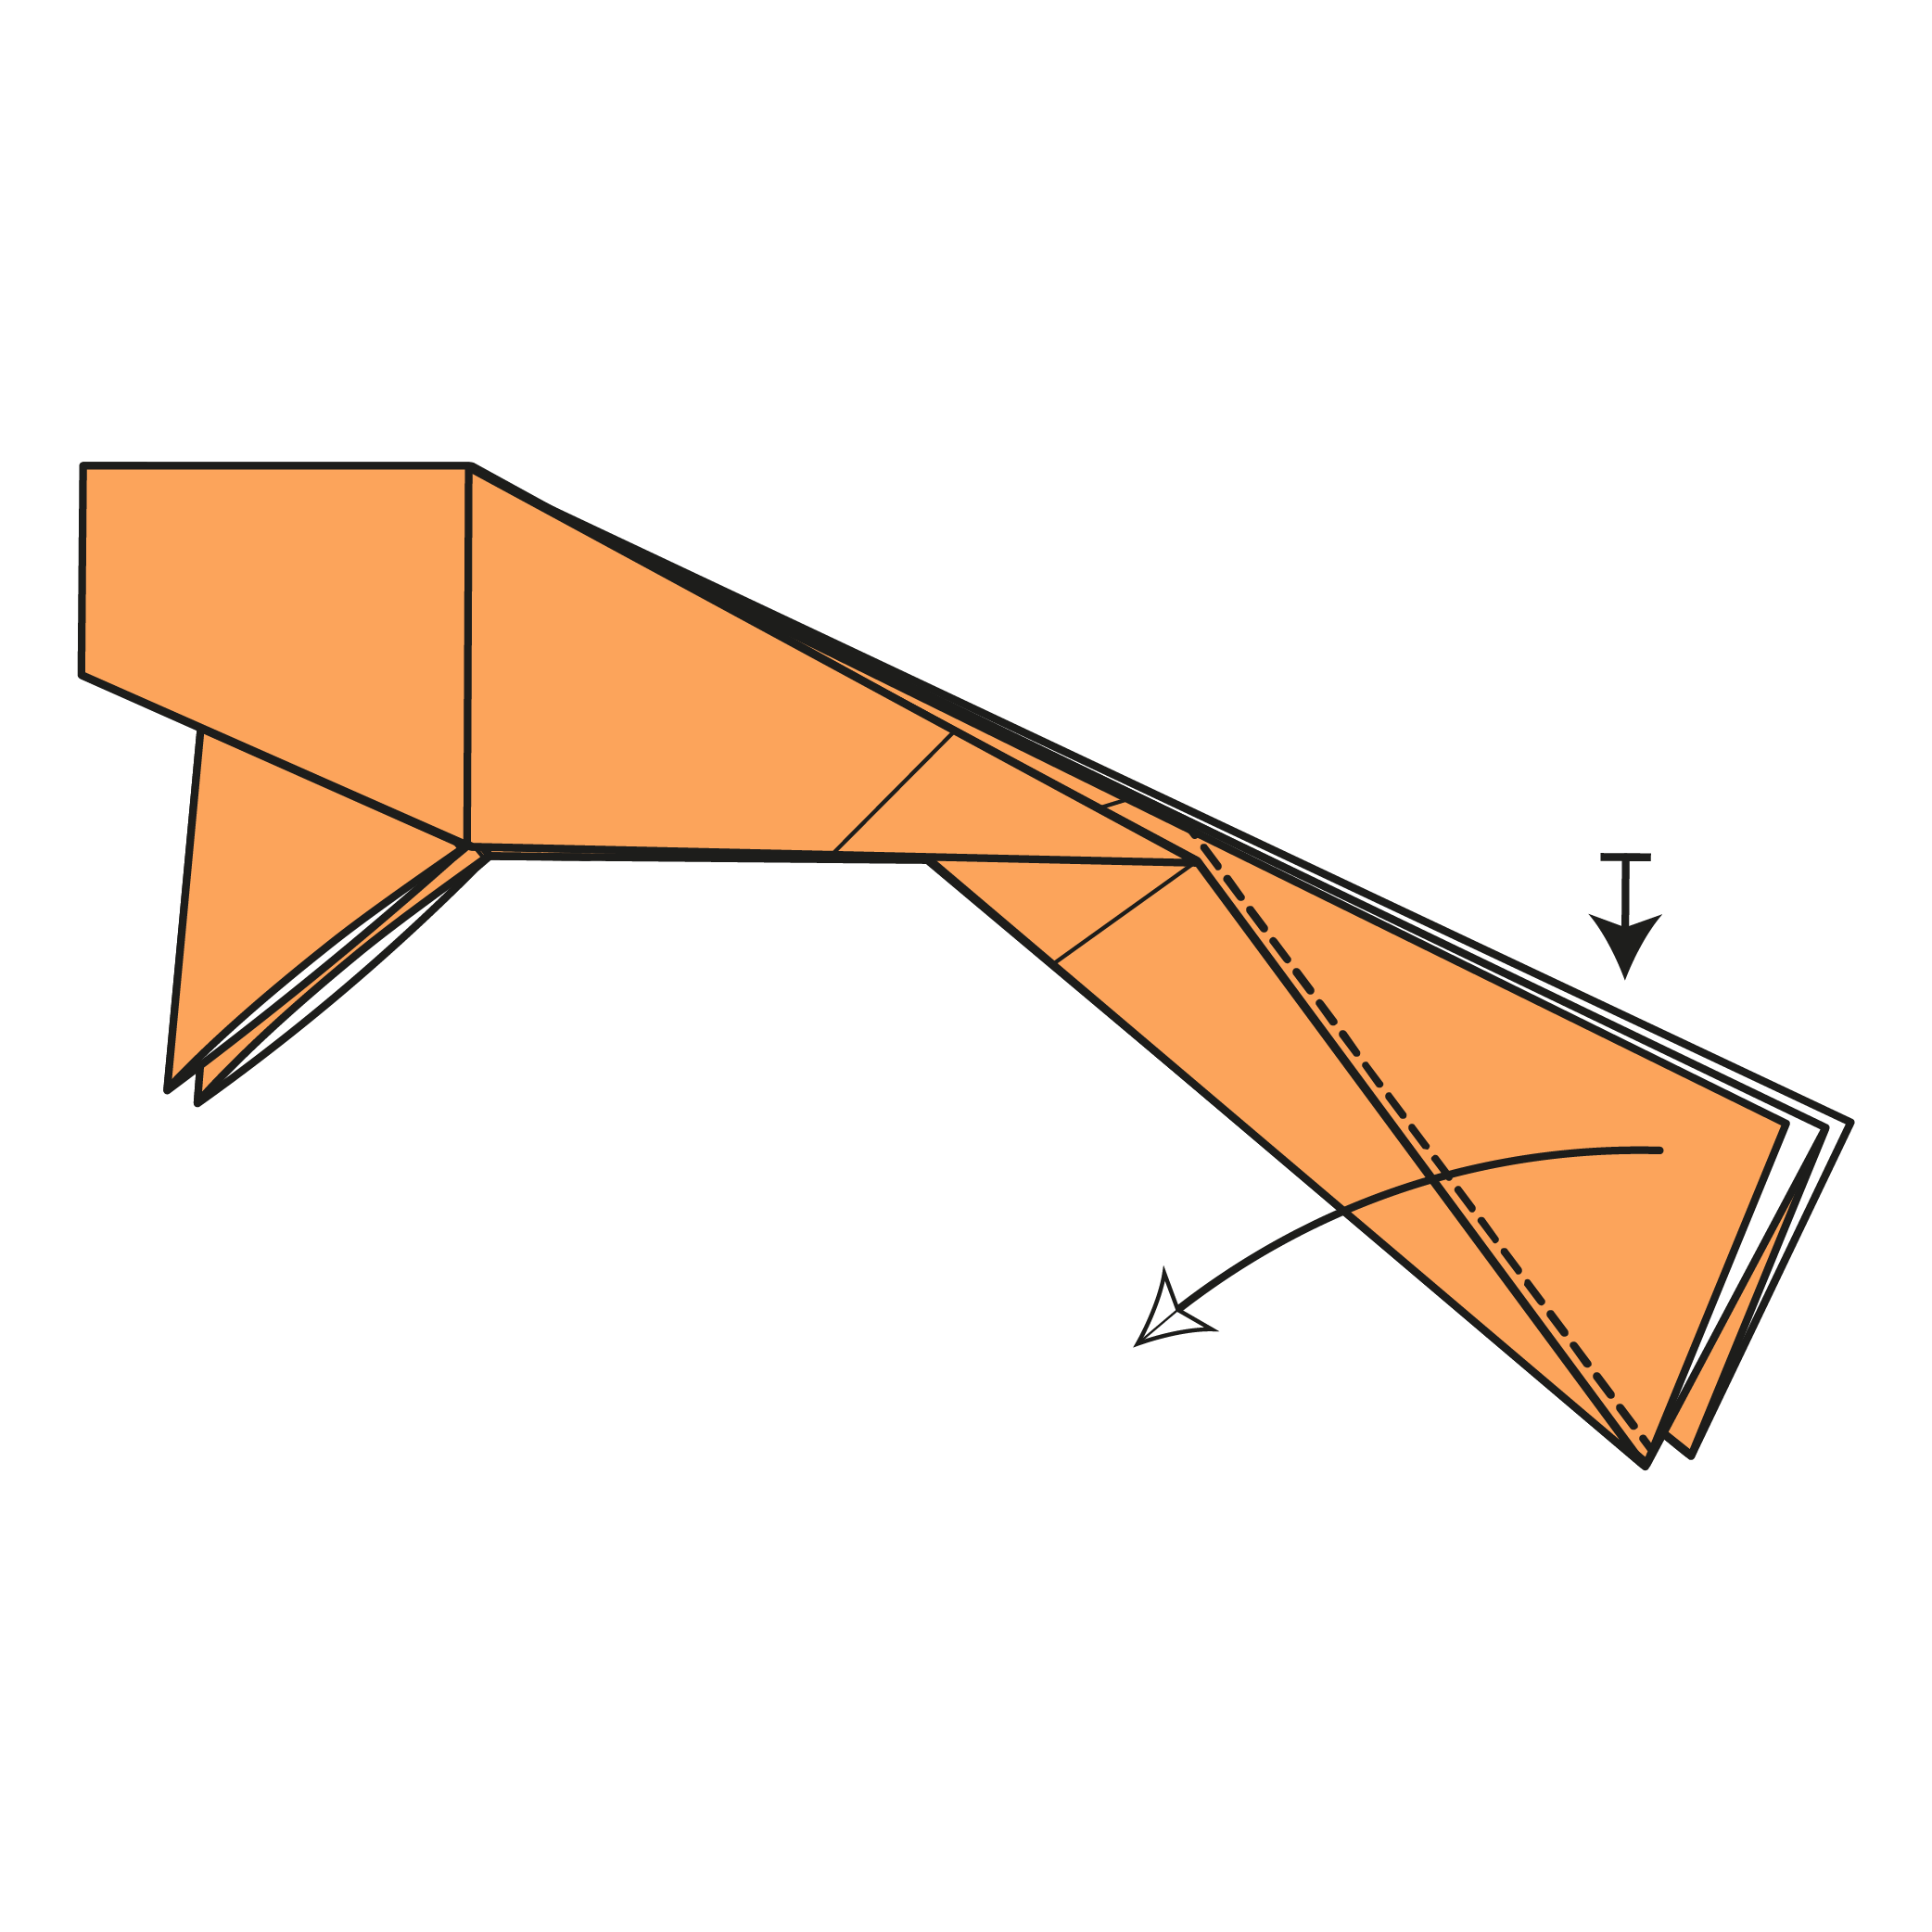
Step 24

Mountain fold the model in half, from top to bottom.
Step 25
Crimp fold using the existing creases.
🎏 Folding tip: You can crimp in two parts by inside reverse folding the tail twice.
If all the edges don’t align, you can adjust your folds during this step like I did on the video.
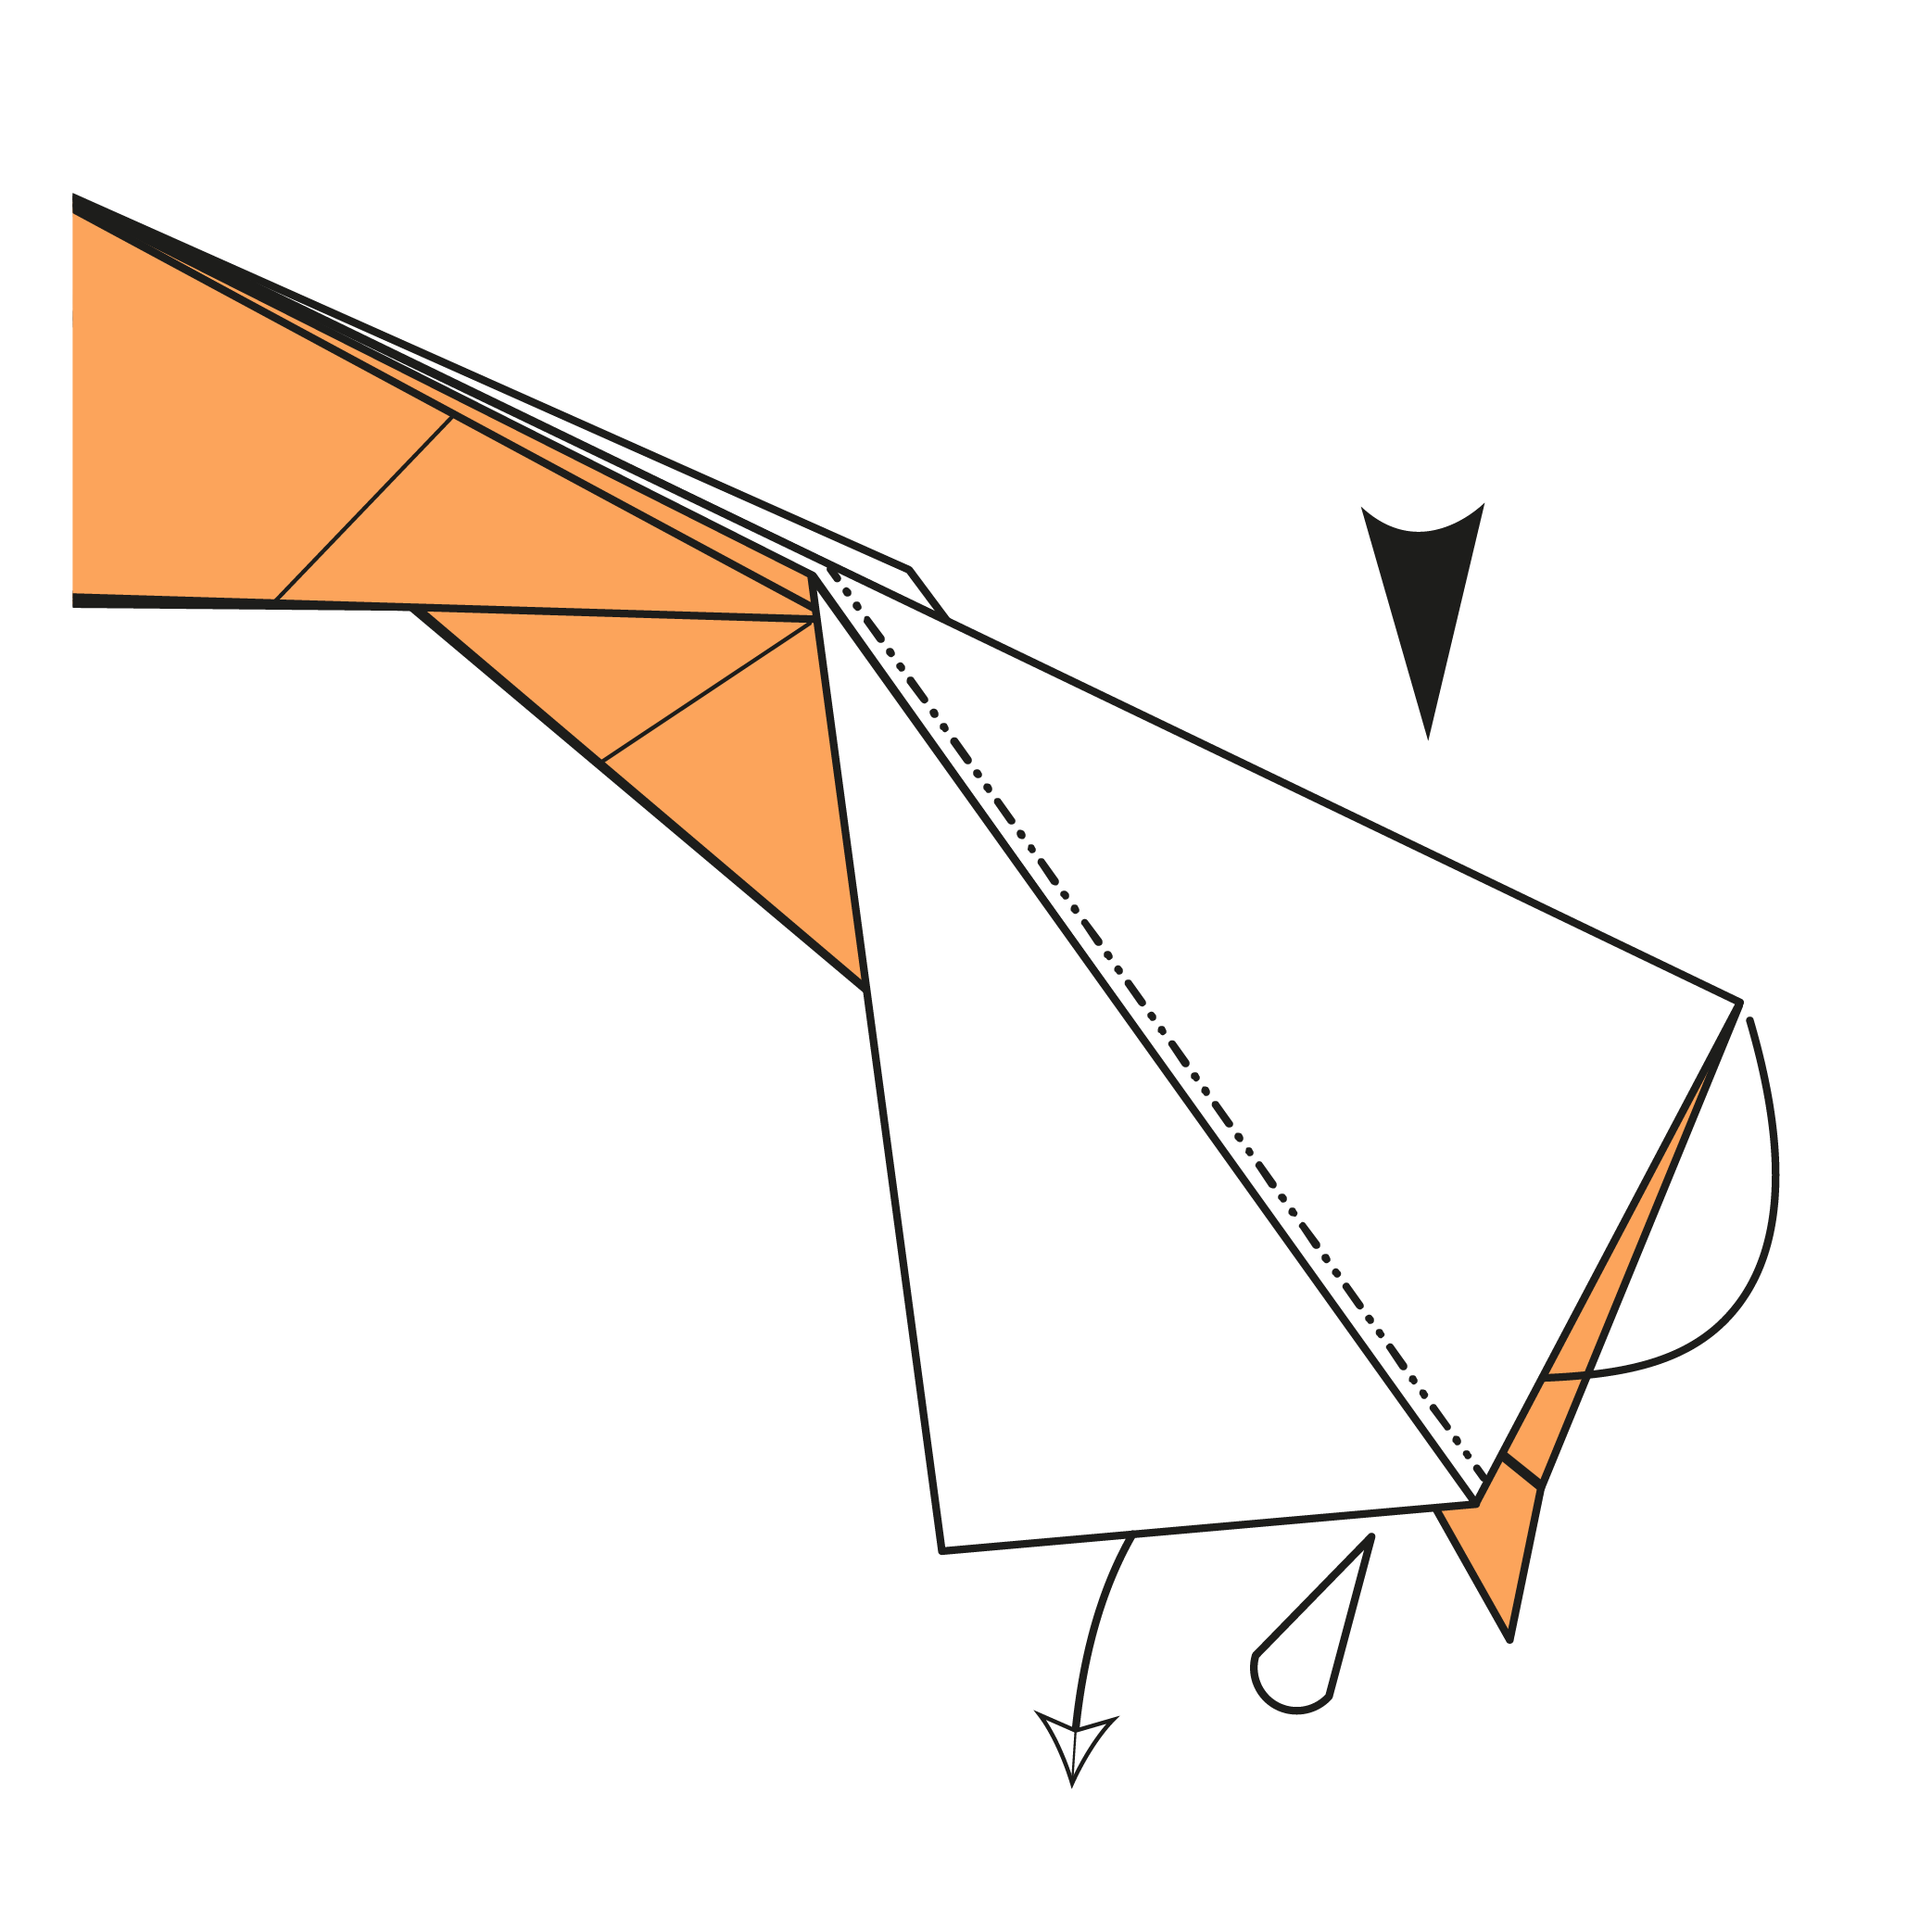
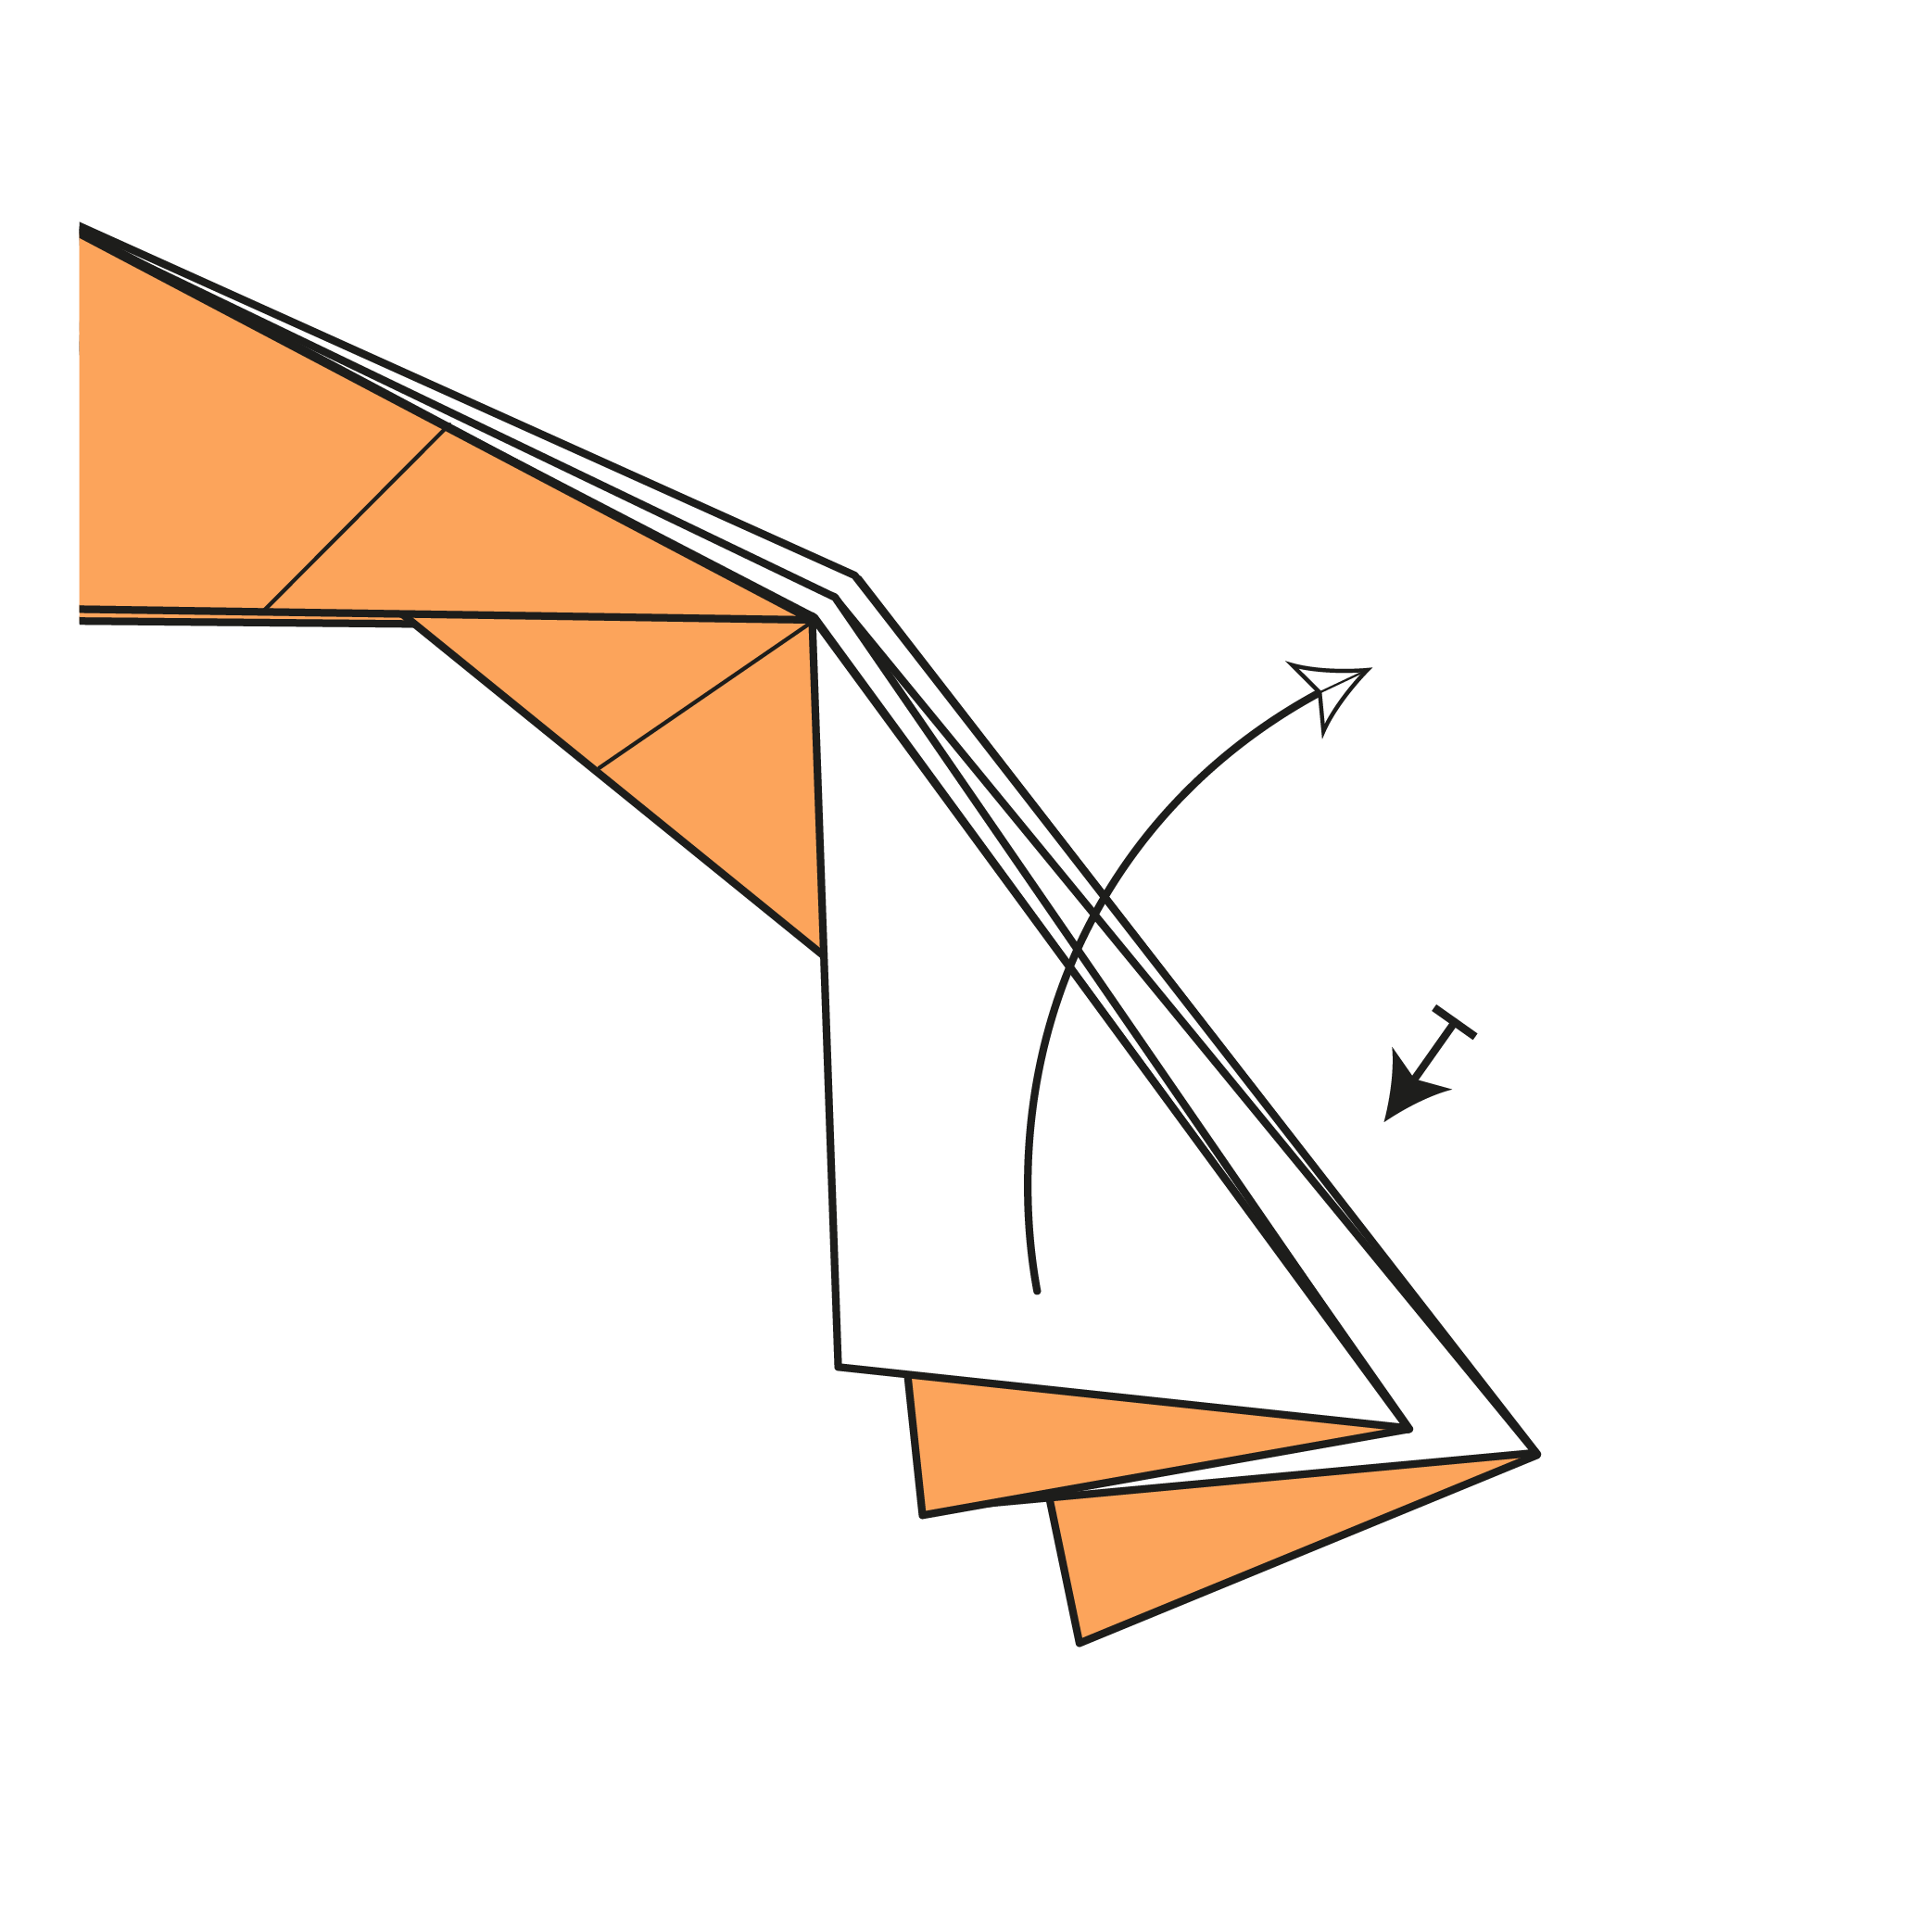
Step 26
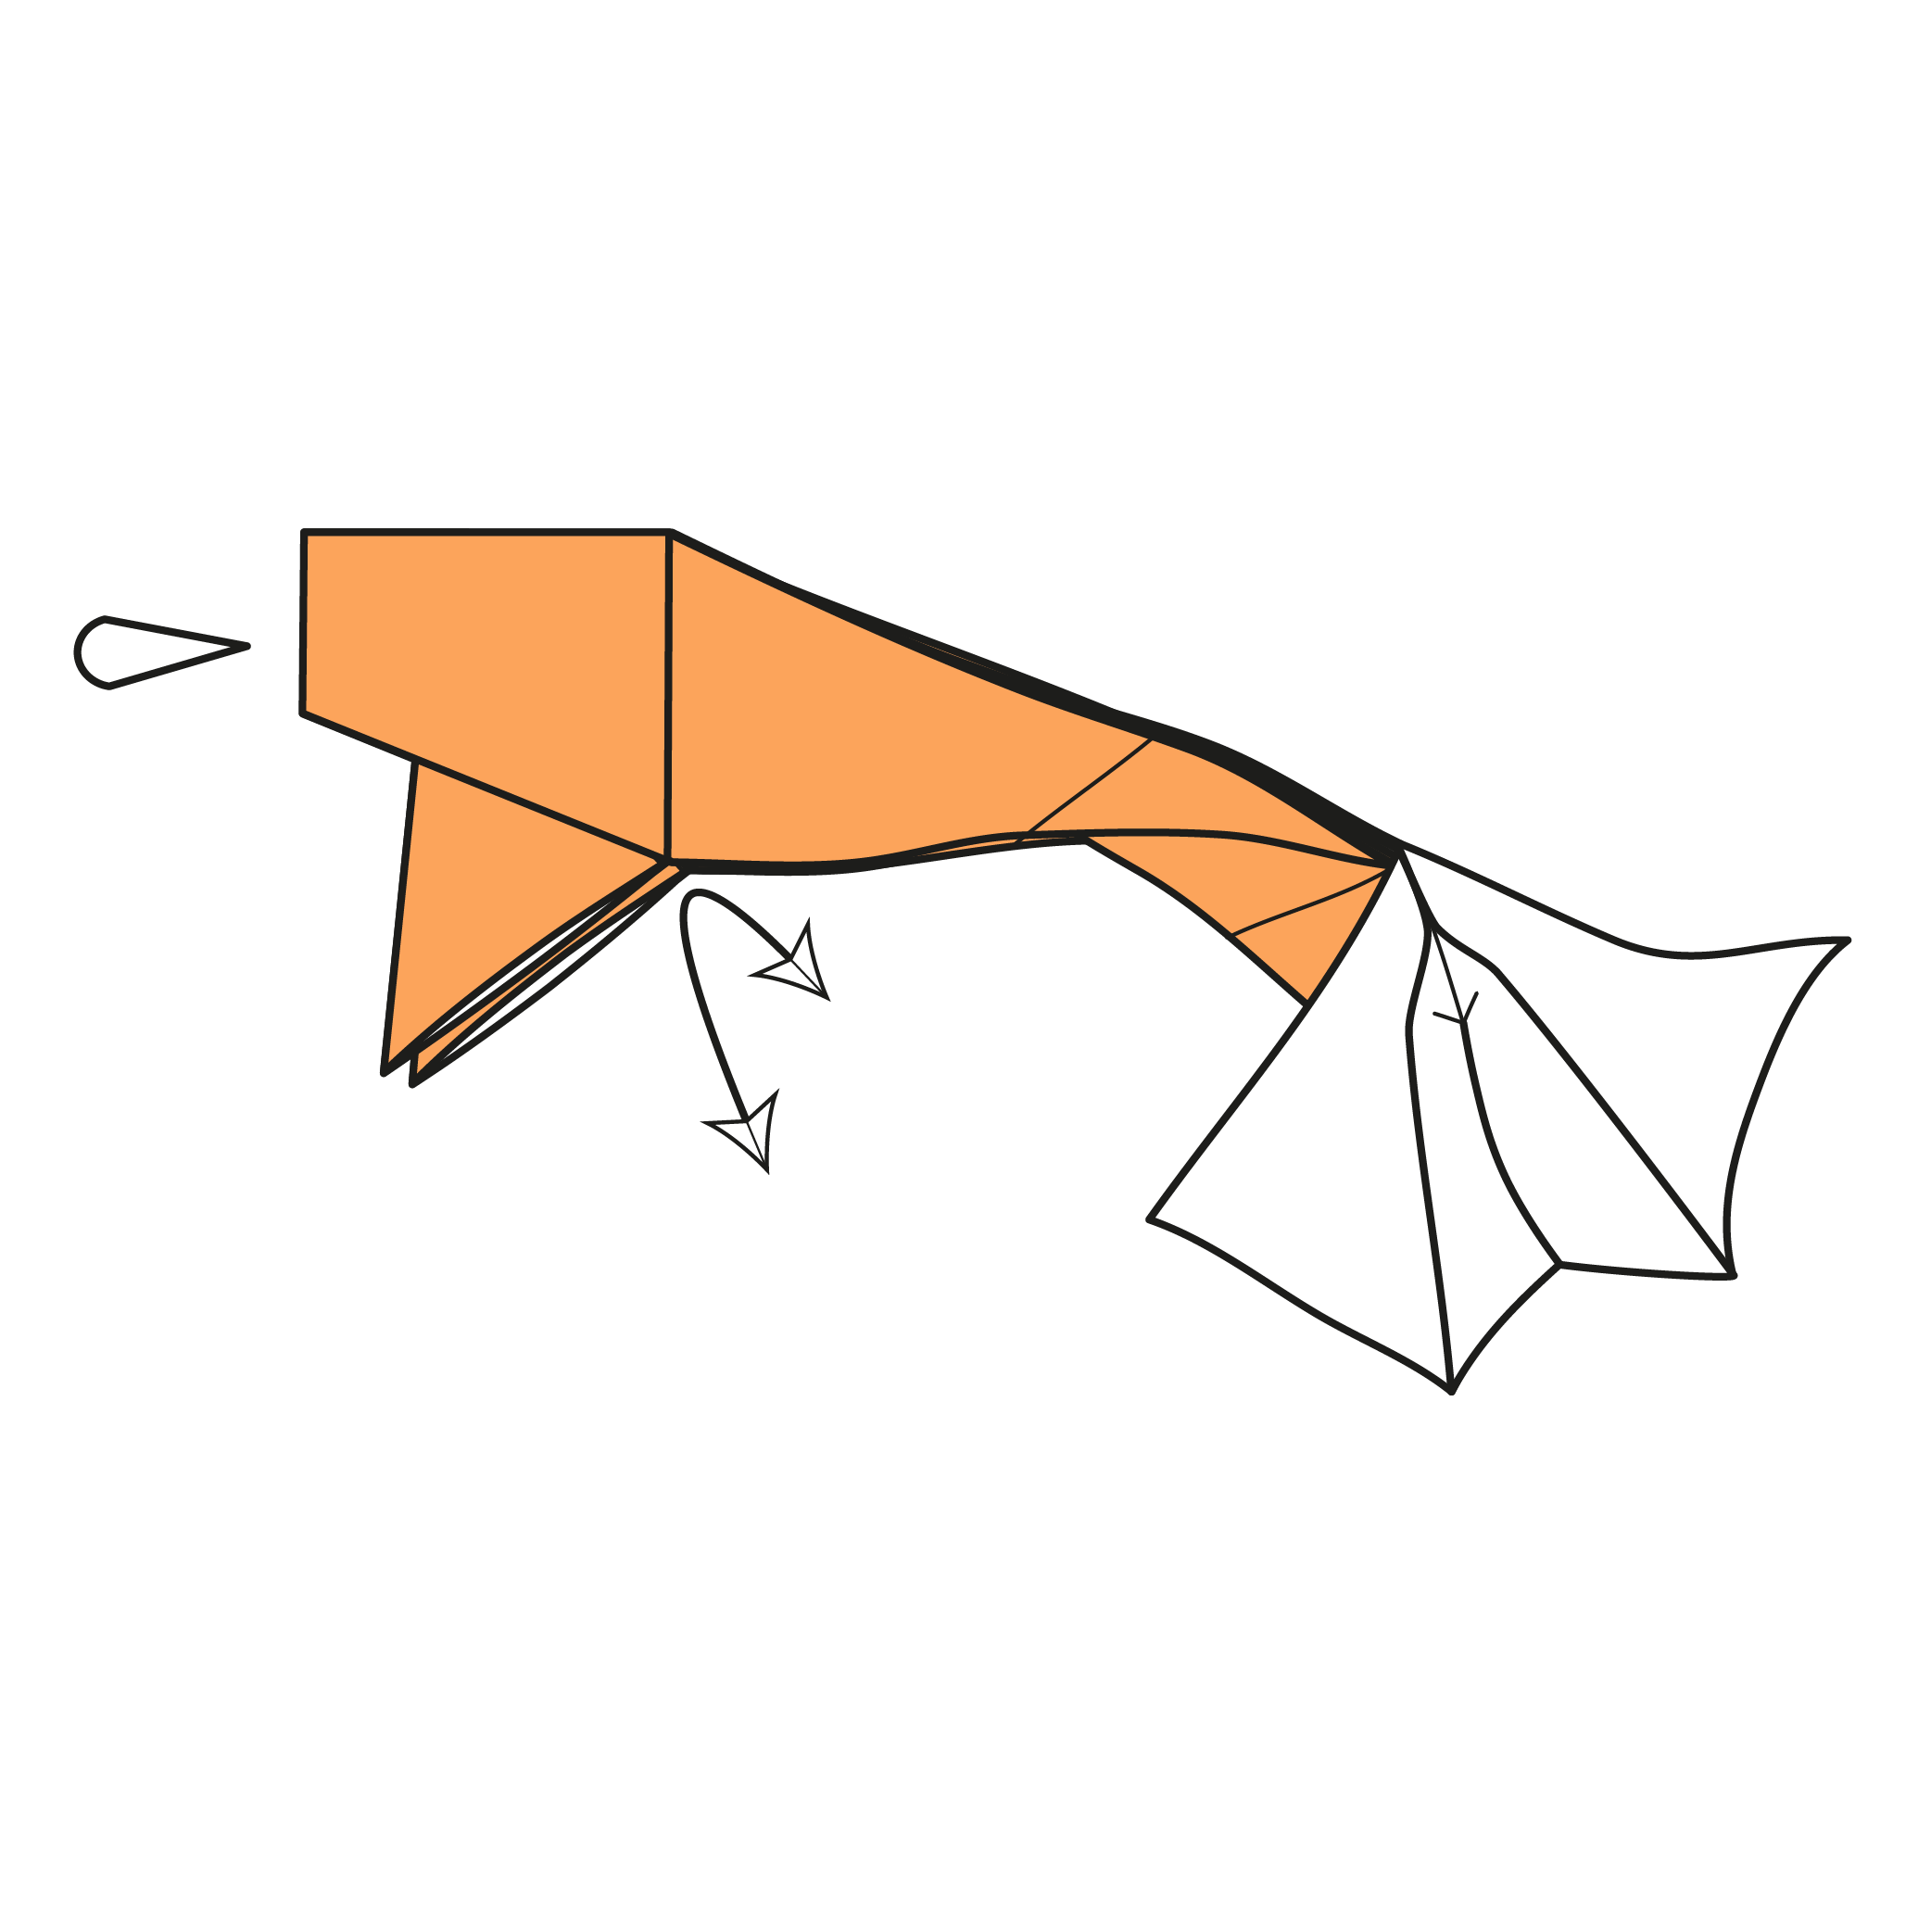
Fold the tail’s top layer along the dashed line. Then repeat on the other side.
Step 27
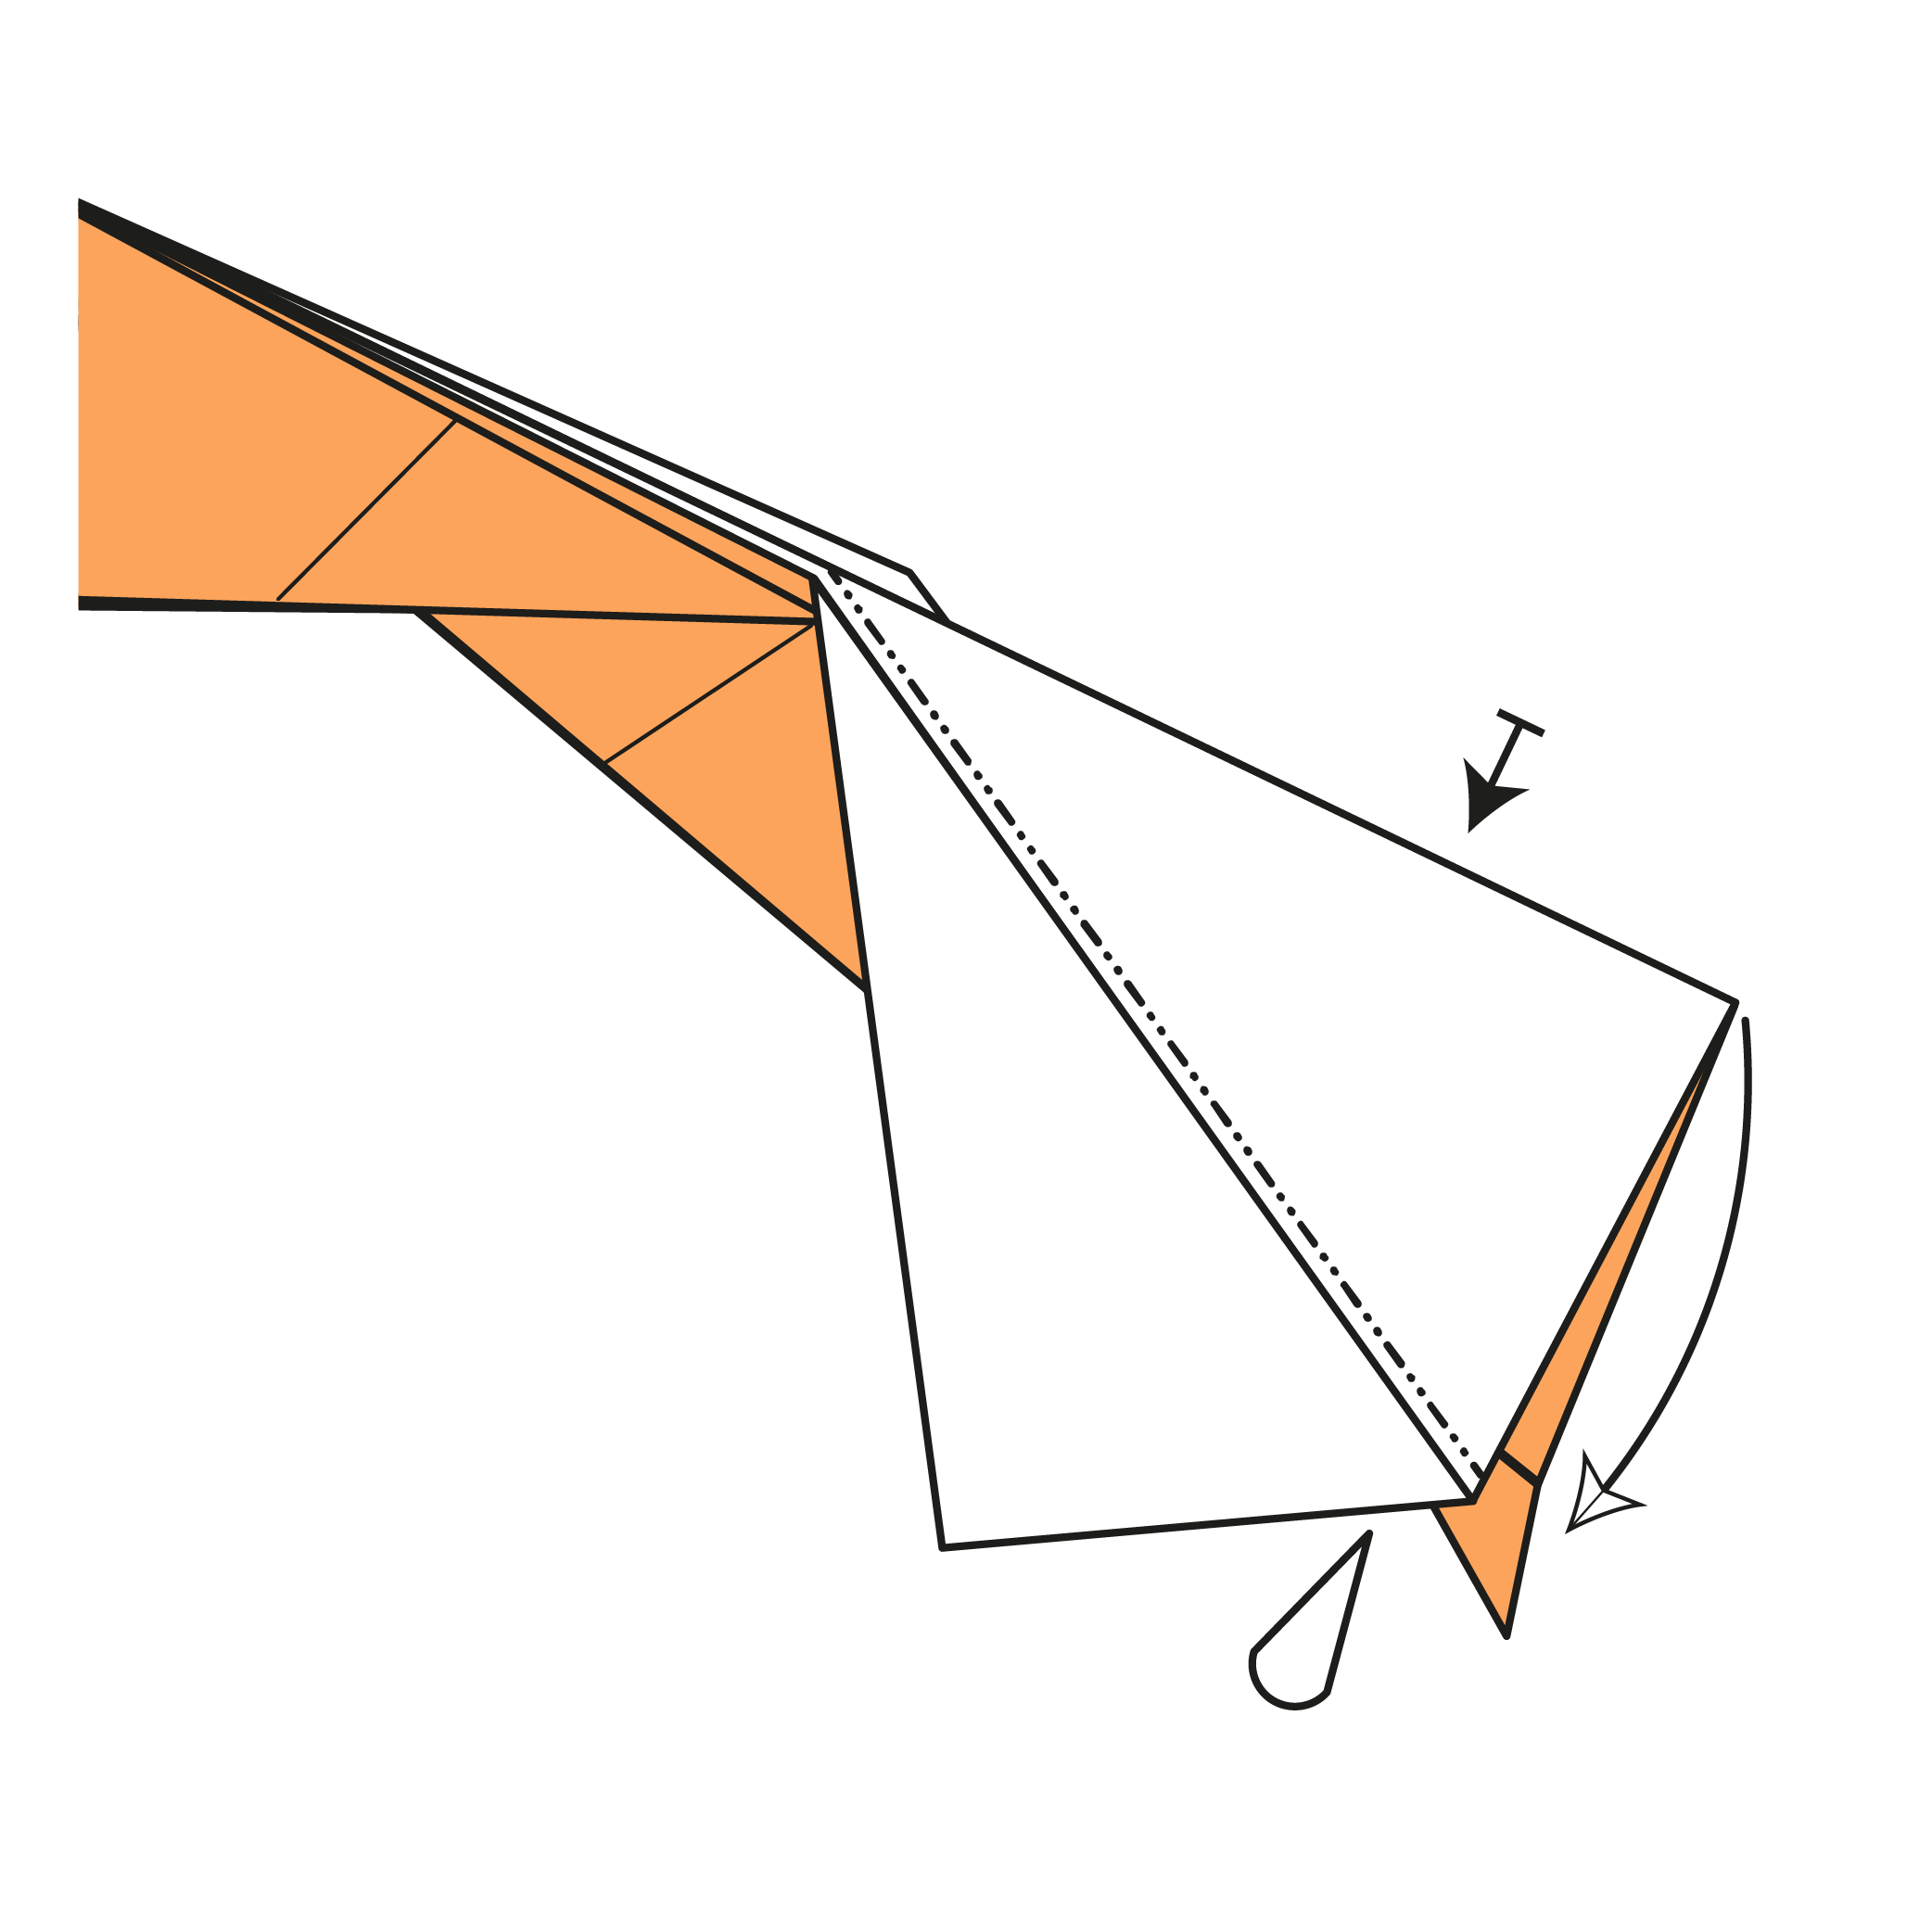
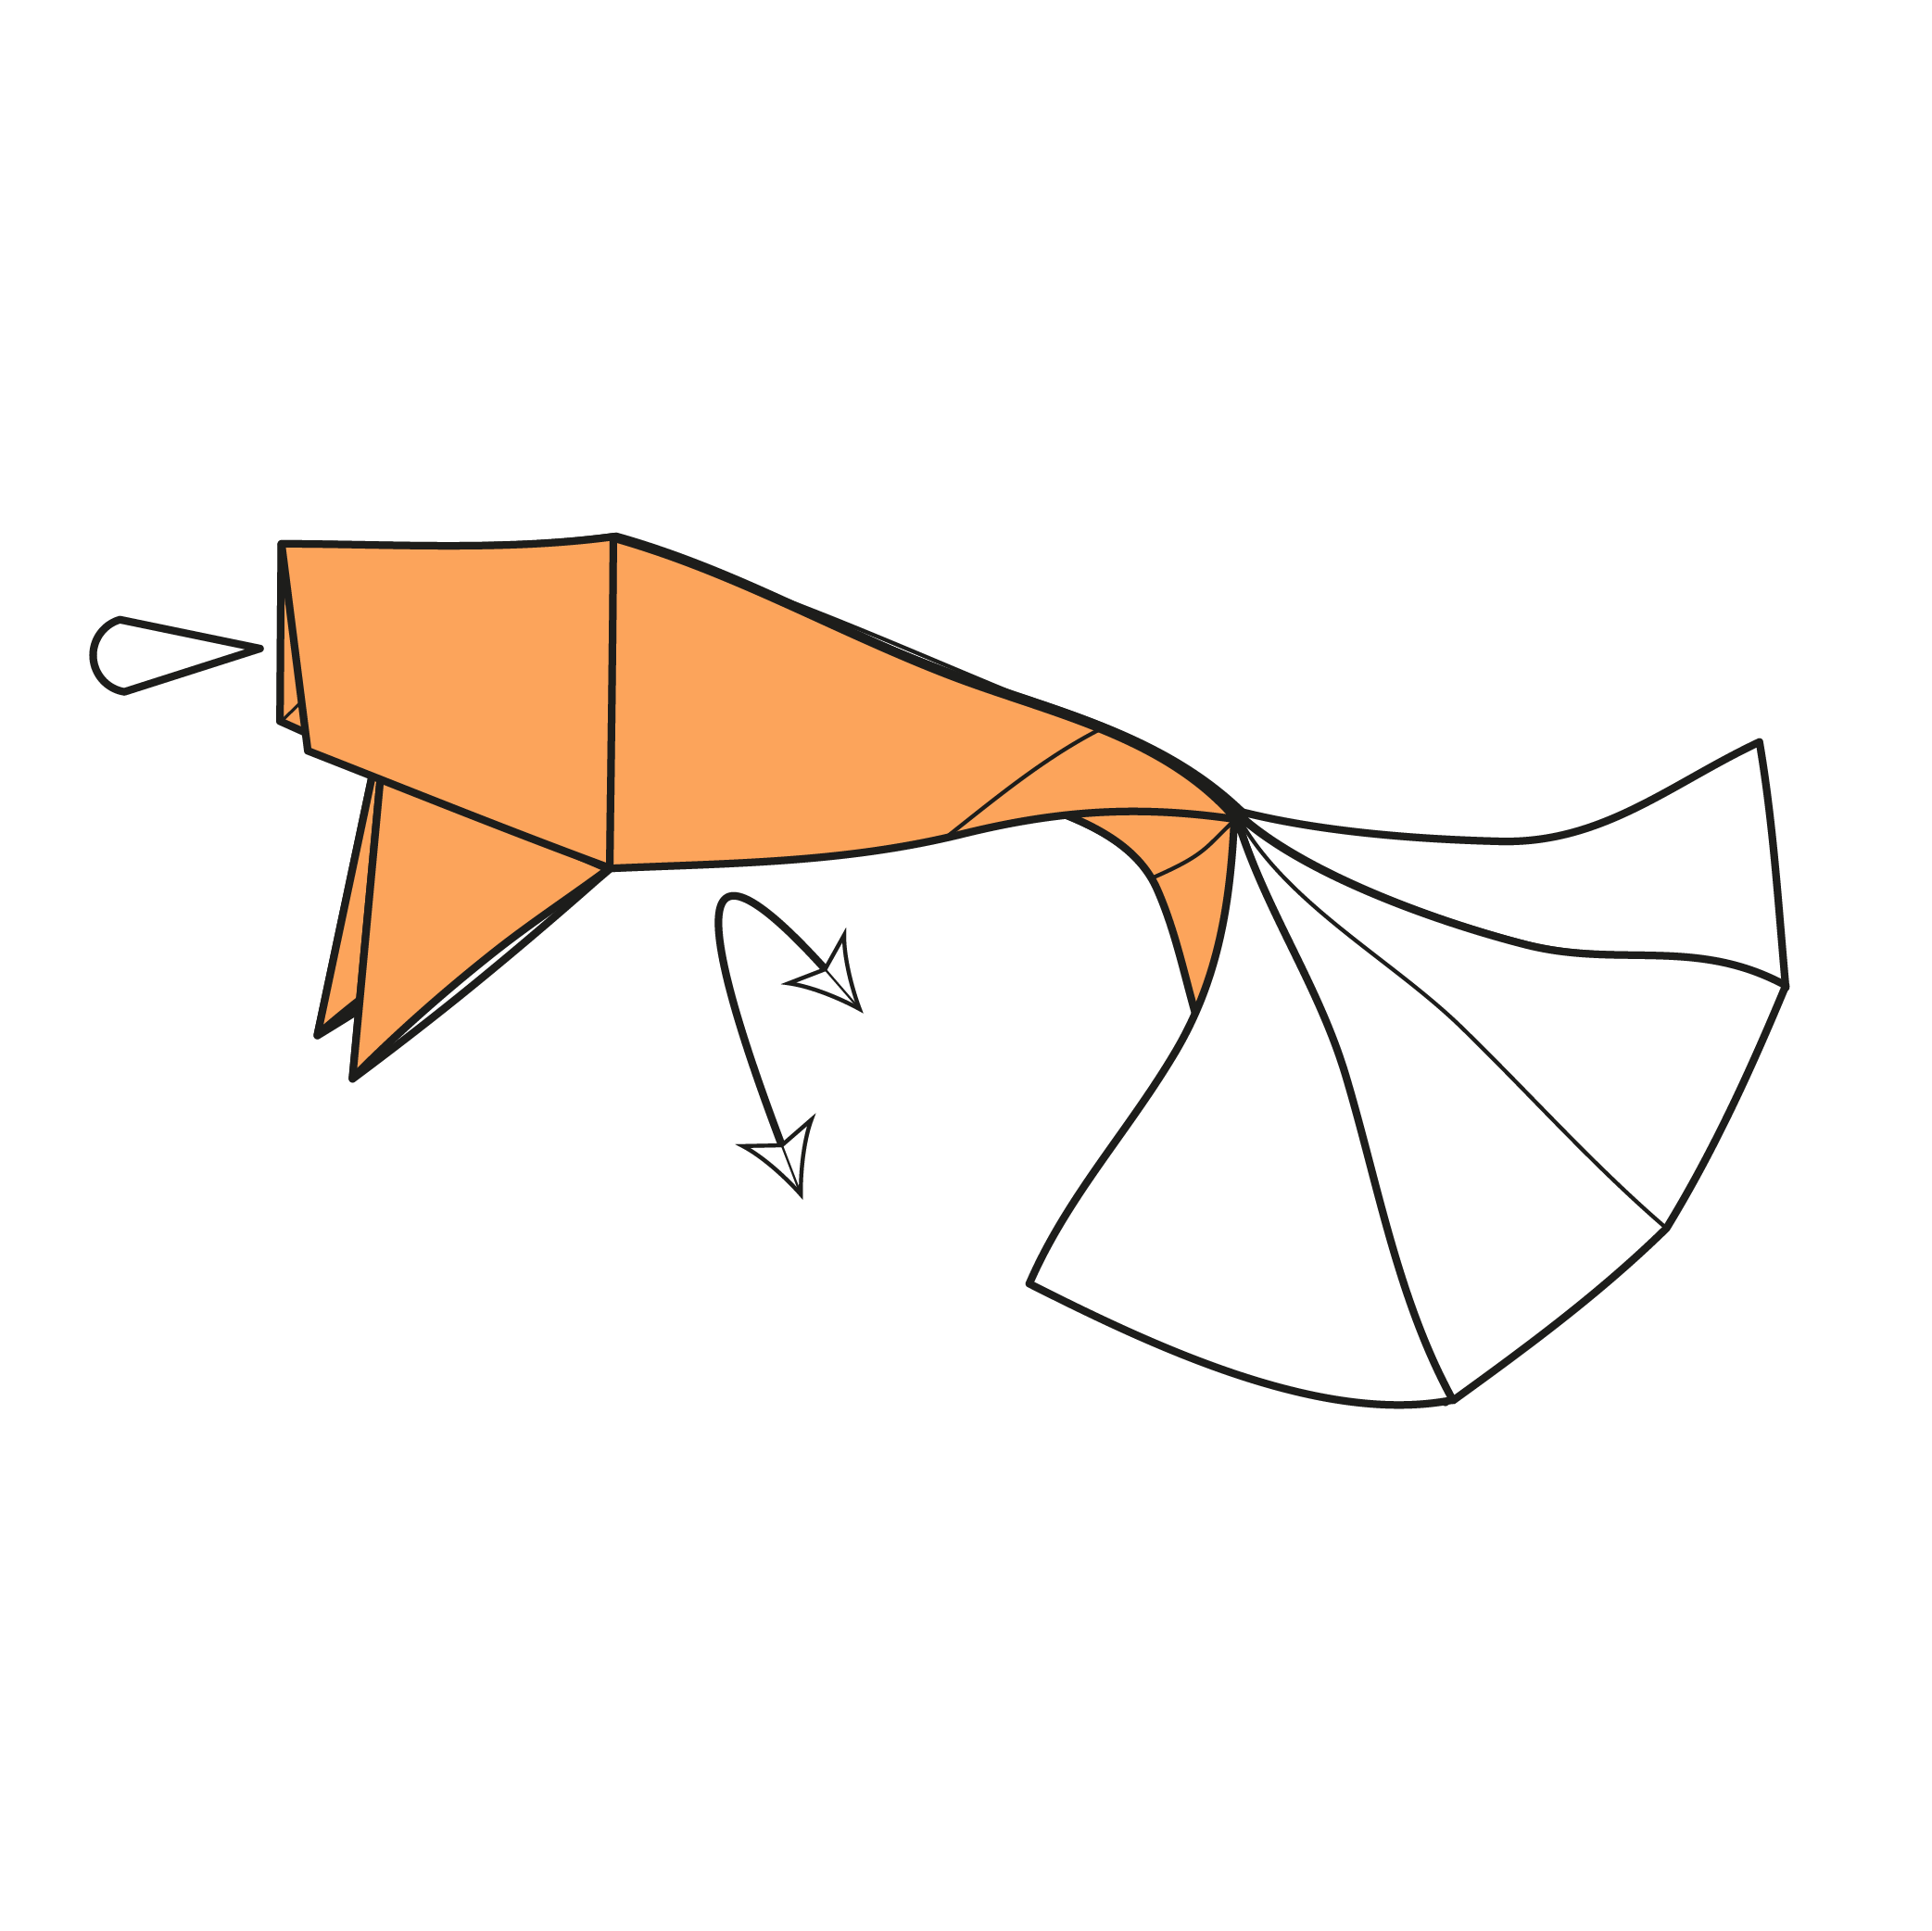
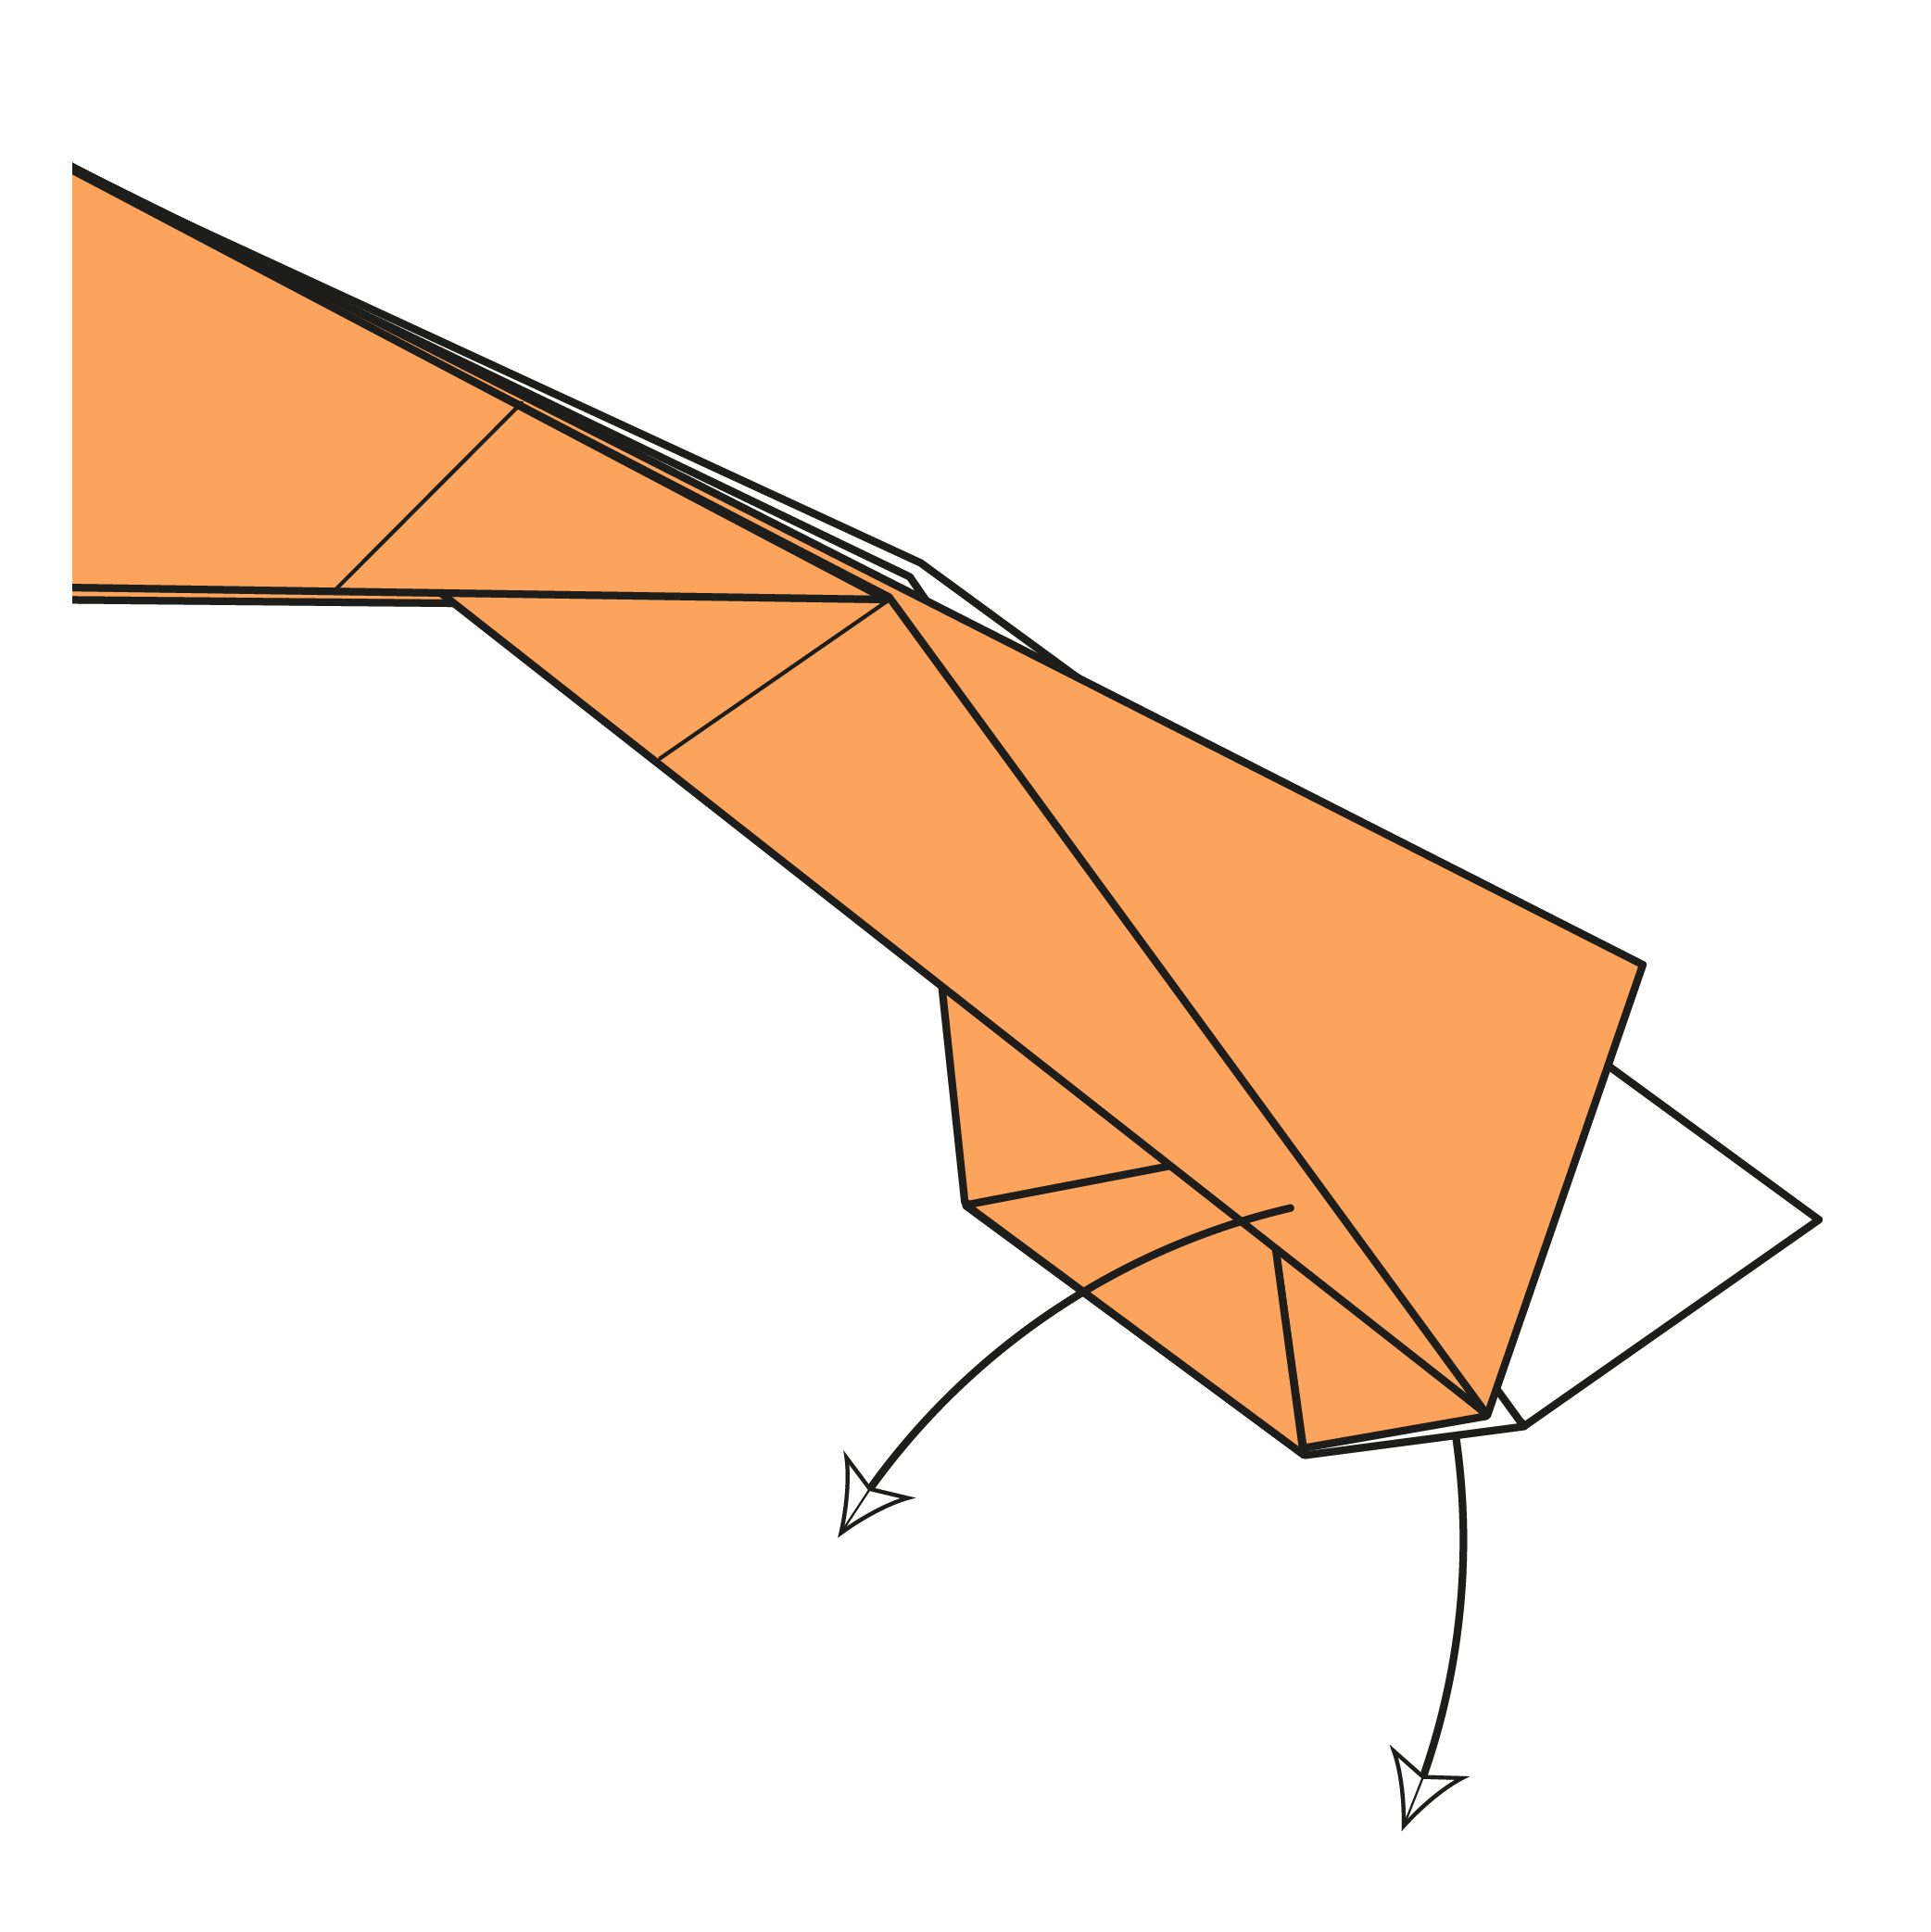
Open the tail by making two mountain folds along the dashed lines. Stop halfway to keep the tail flat.
Step 28

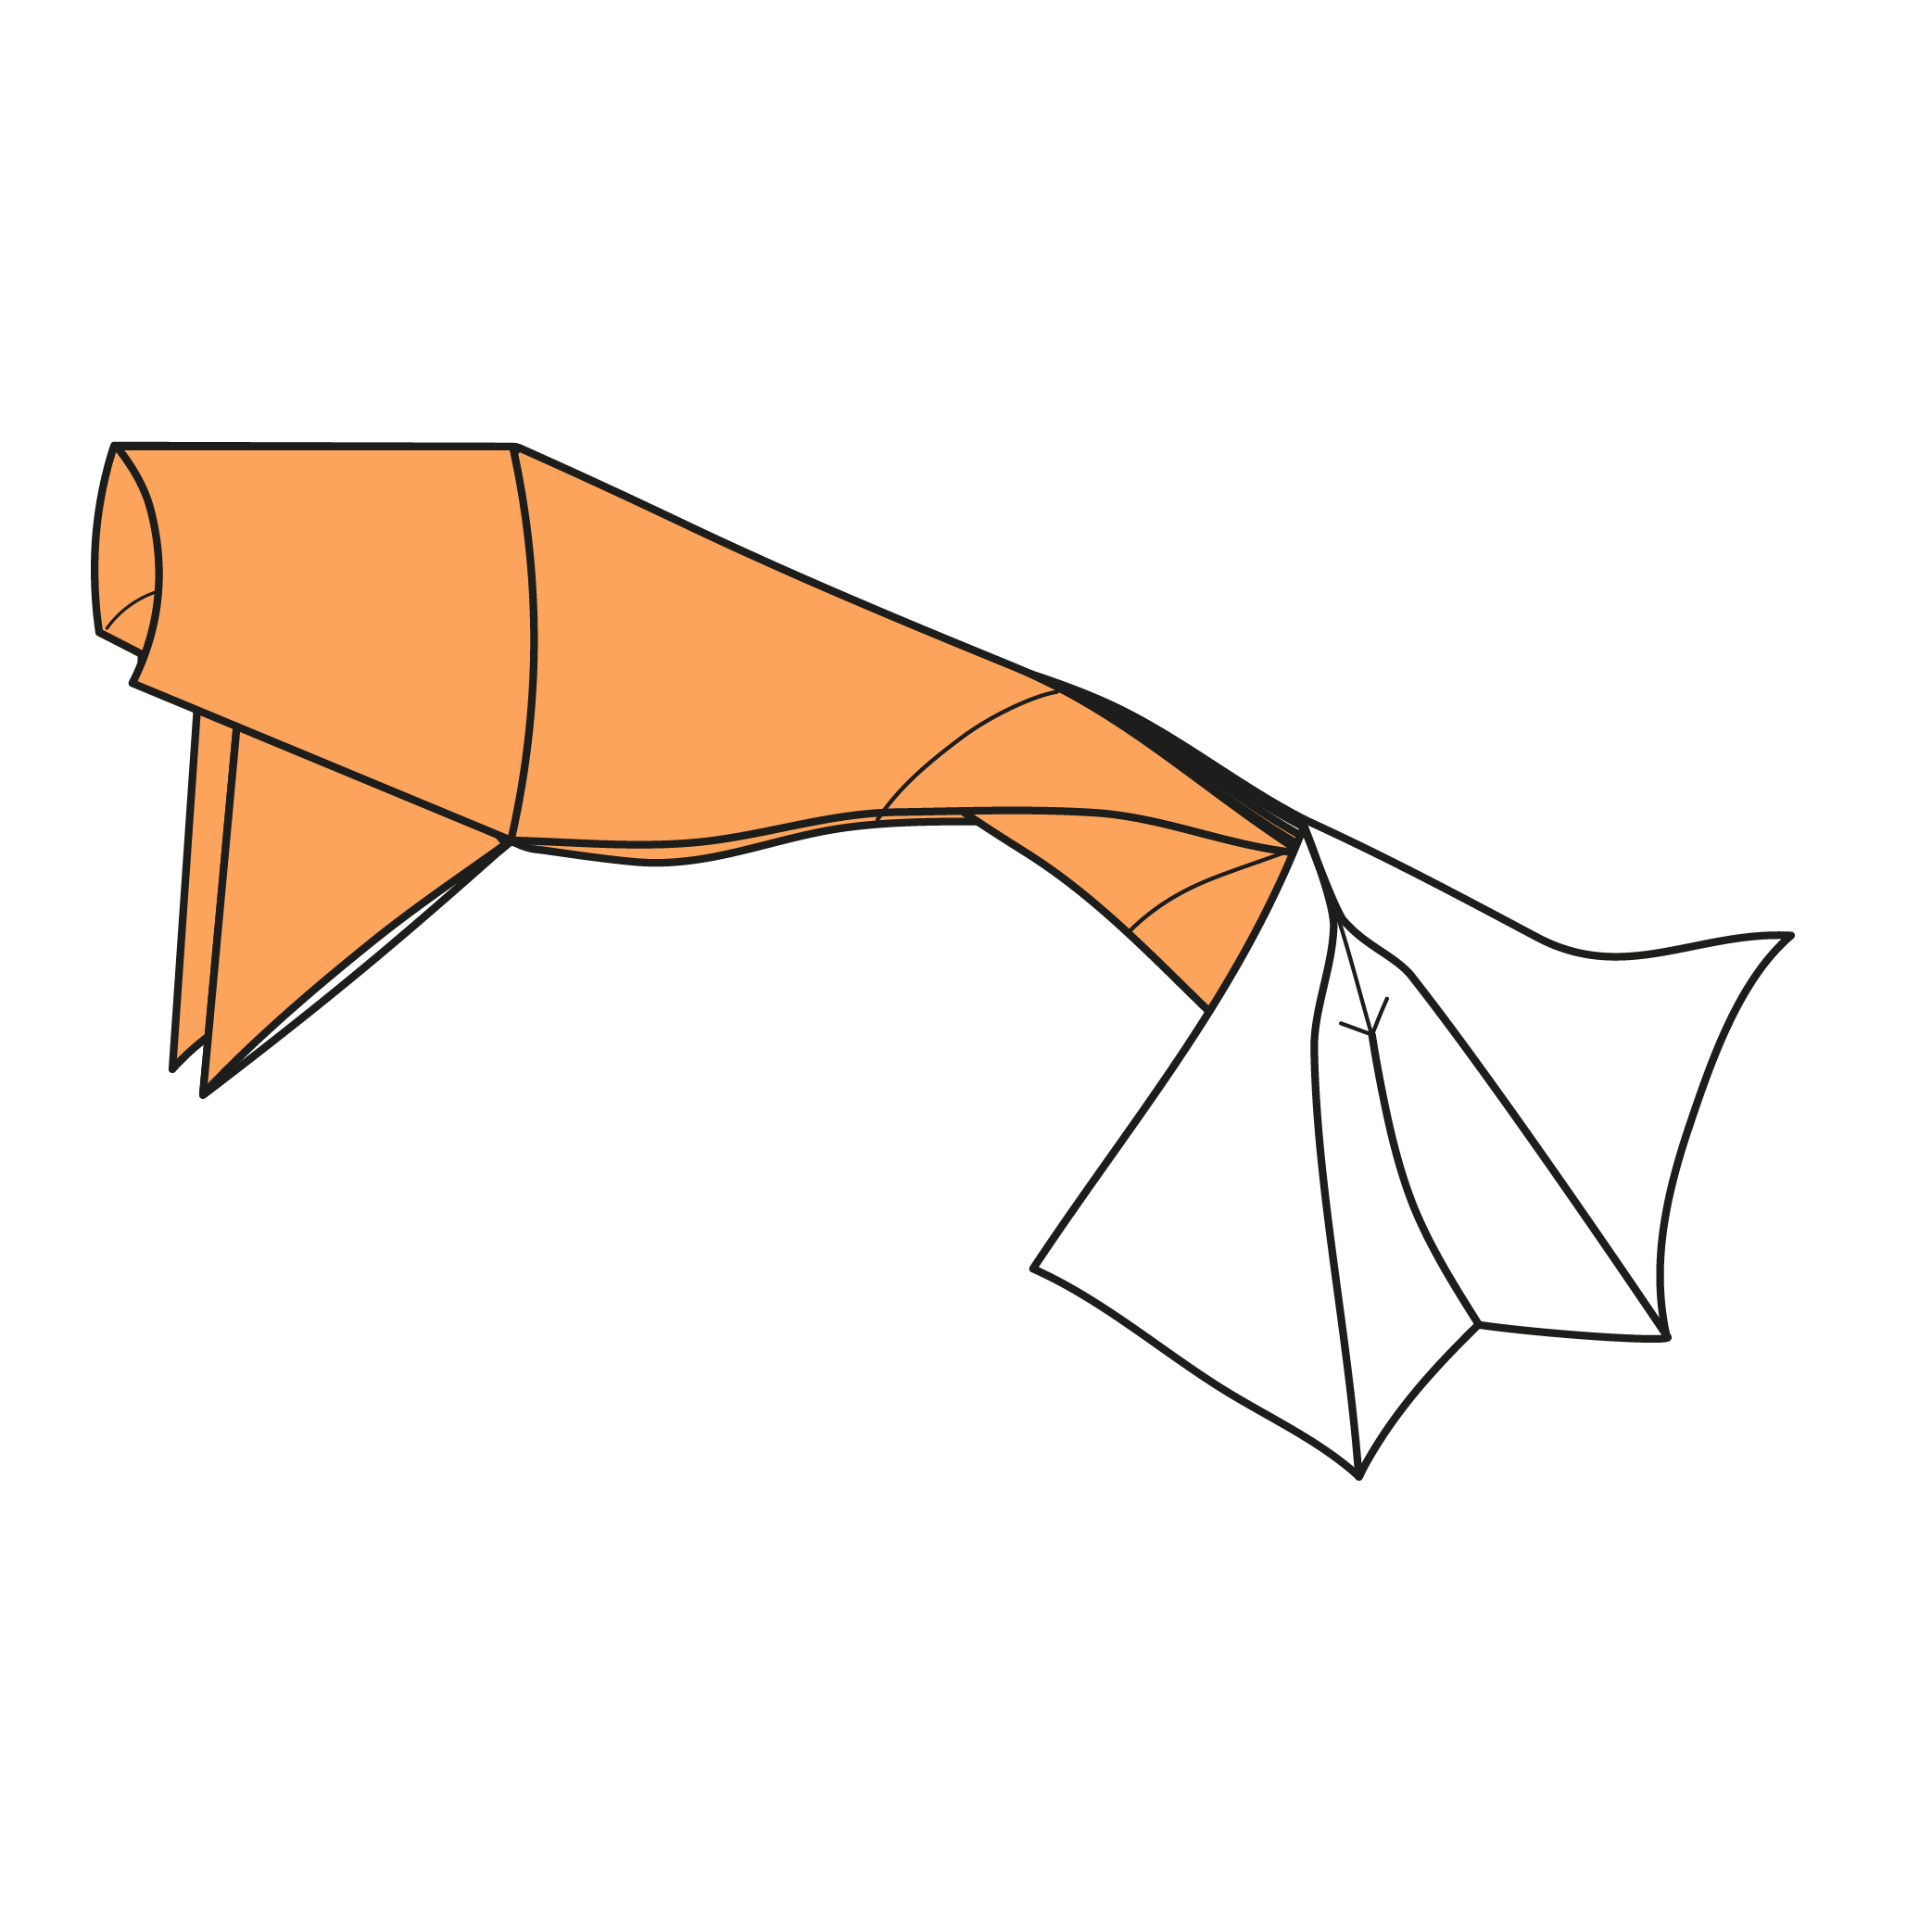
Gently curve the tail.
Step 29
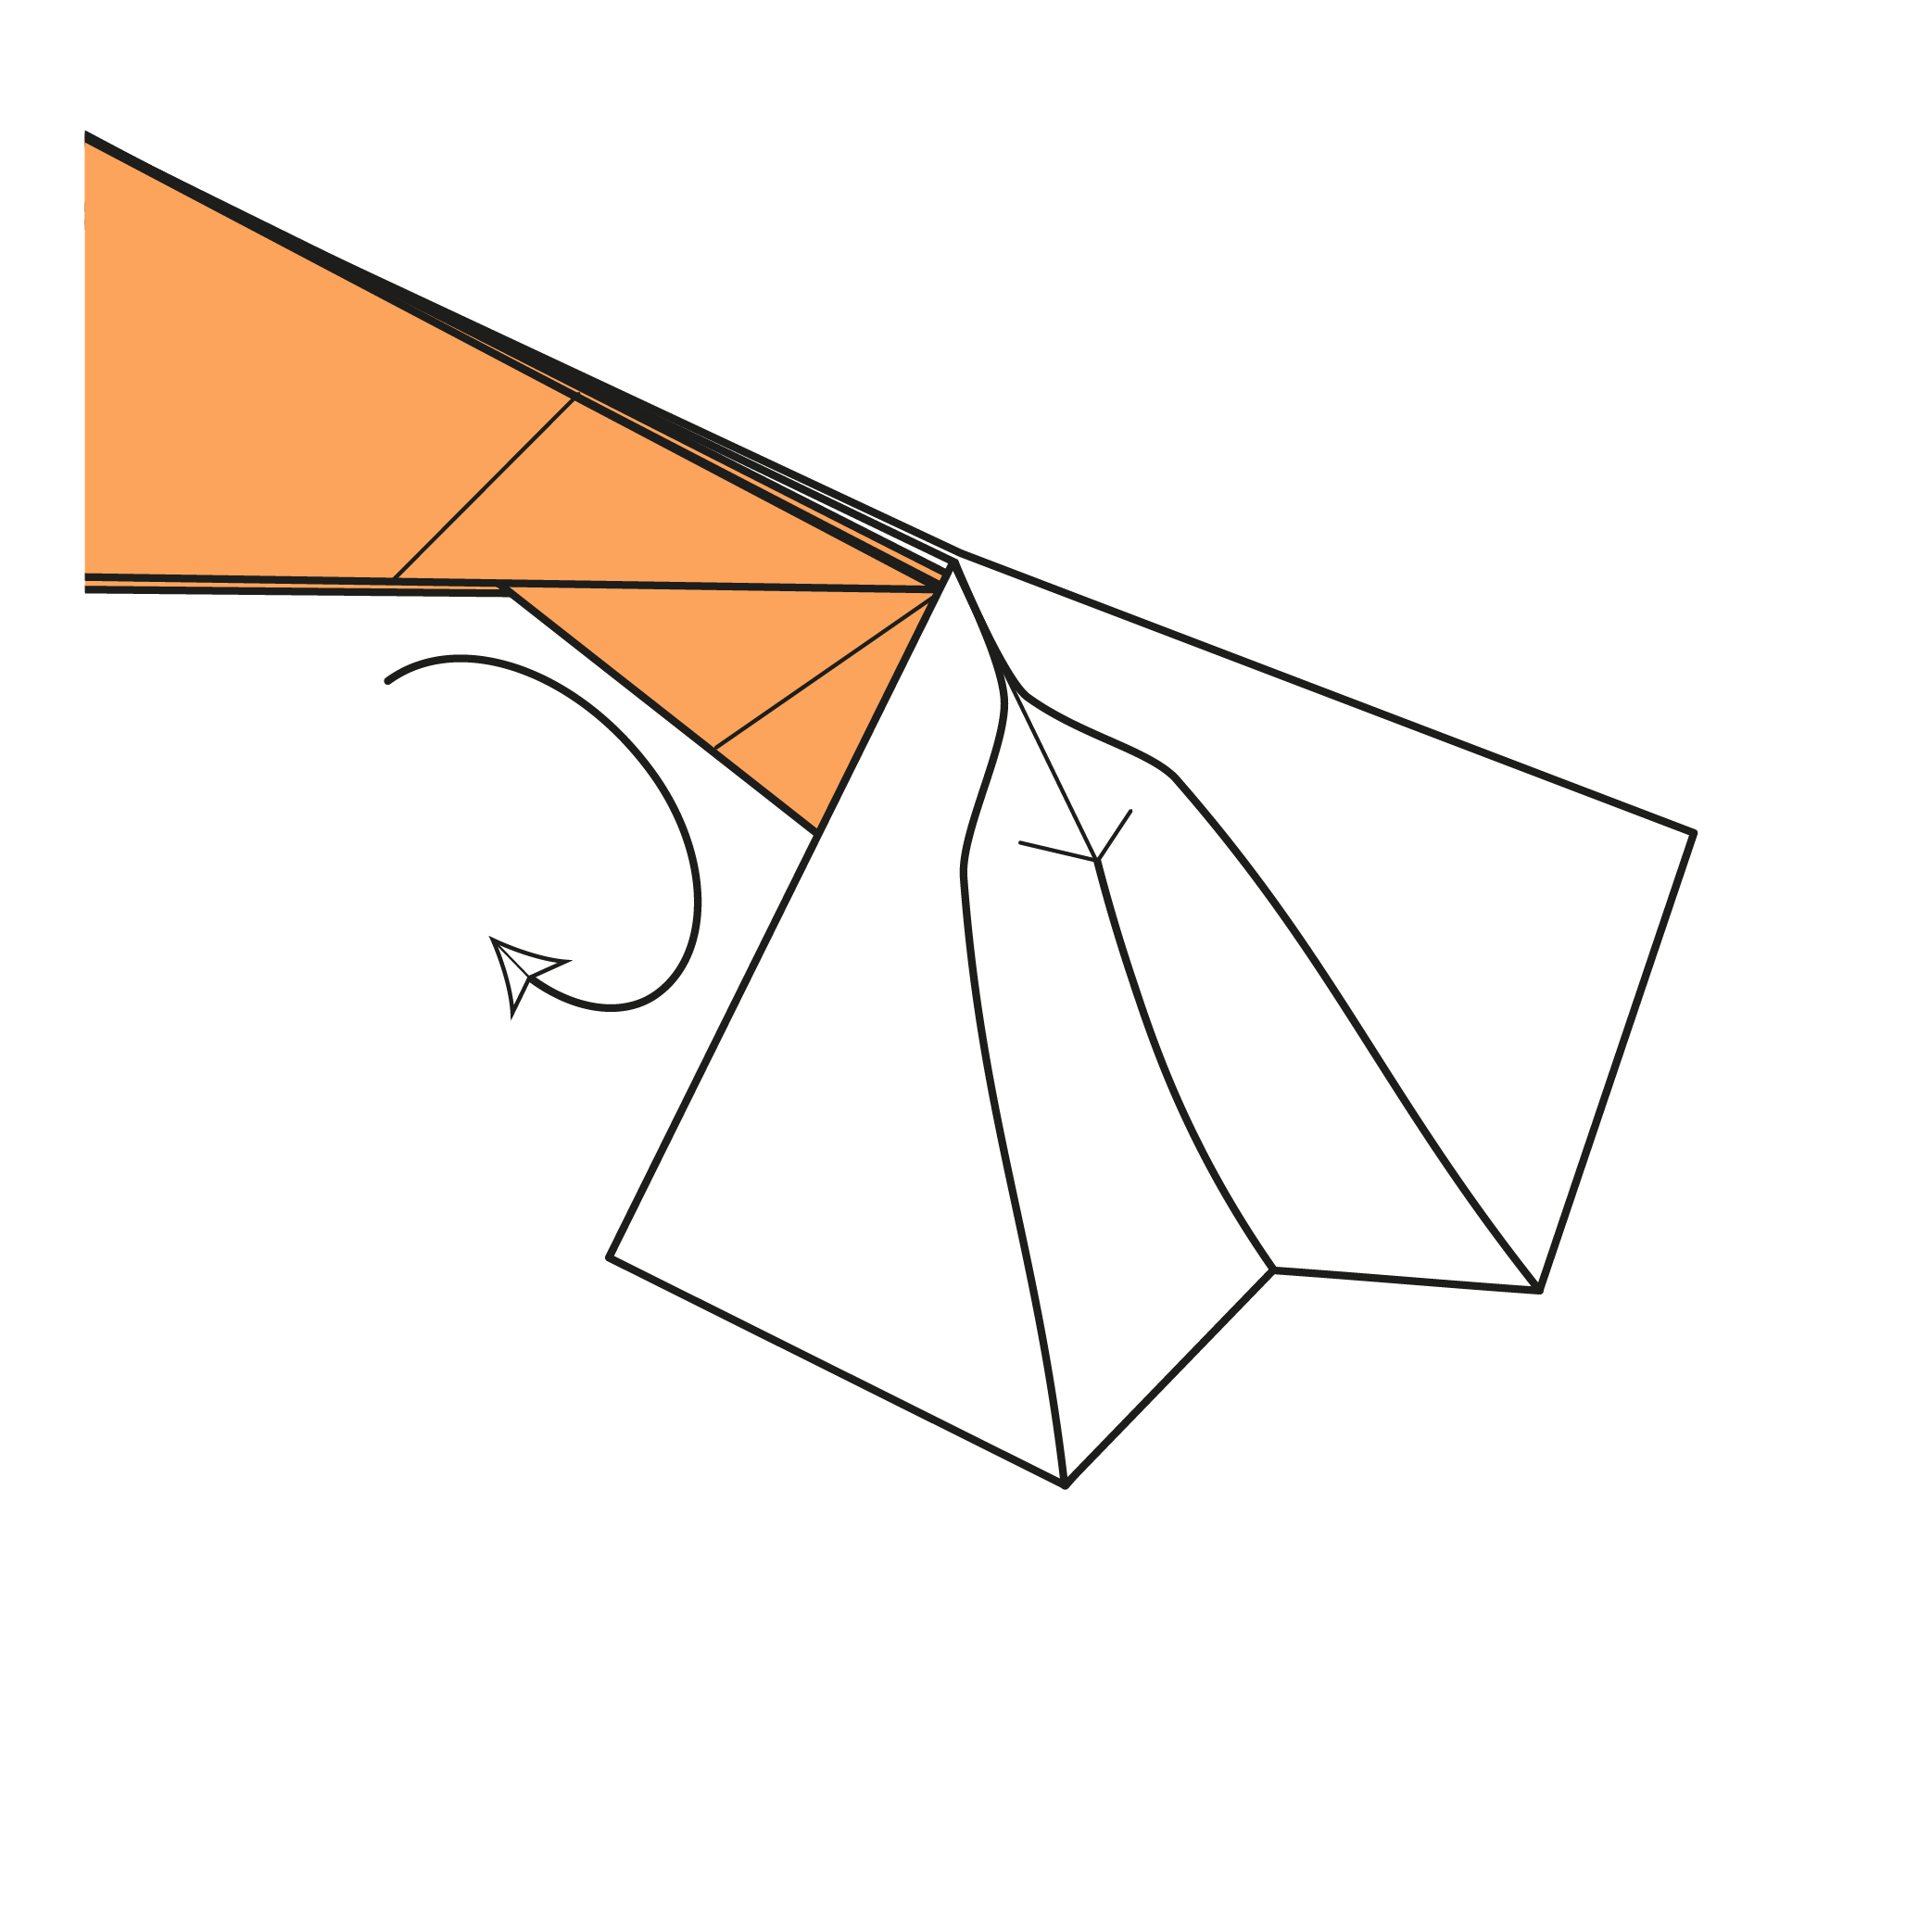
Open the body.
Step 30: Alternative Tail Shaping
You can keep the tail as-is or shape it further.
Back to Step 27: Inside reverse fold the center of the tail.
Step 31
Fold the left and right fins upward.
Step 32
Fold the bottom corner to the reference point. Then, unfold.
Step 33
Tuck the flap under the pocket above it.
Step 34
Open the tail while holding all the flaps together.
Step 35
Add a soft curve to the tail.
Step 36
Open the body.
Fin-tastic! Your origami koi is complete! 🎏
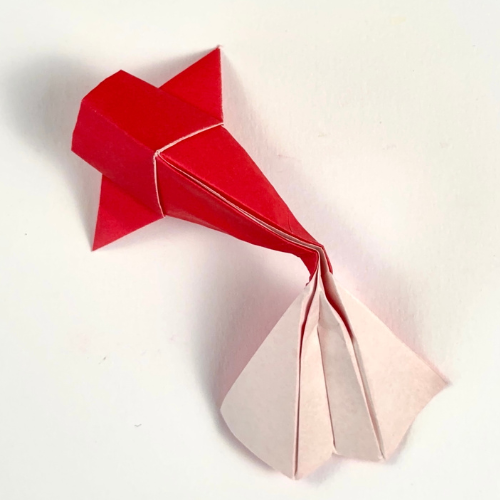
We hope you enjoyed folding Riccardo Foschi’s elegant origami koi. It’s a model that really shines with creative paper choices, so feel free to experiment and make it your own.
For more tutorials like this one, join us on YouTube and sign up for our newsletter to get fresh ideas, folding tips, and model inspiration delivered to your inbox.

Download the Complete Origami Koi Printable PDF Instructions
This printable PDF is part of our Origami Friends membership on Patreon. As a member, you get access to these diagrams, our full library of printable PDFs, and member-only content.


I was very excited when I first saw the newsletter, and then, the next thing I felt, was a great disappointment towards my creation after folding it… Well, it didn’t stayed with me for long as I gave the koi another shot😇 I think you can clearly tell which is the improved version ☆
Never give up!!!!!!
Thank you for sharing your beautiful folds! You’re absolutely right. Folding the same model several times is one of the best ways to refine your skills. You should see my office 😂
Pleasantly challenging, but well worth it! I love this little friend <3
I’m looking forward to seeing your fold 🙂