
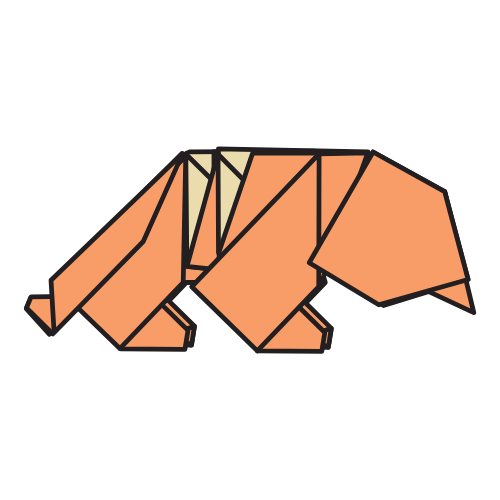
How to Fold an Origami Tiger
Let’s learn how to fold this origami tiger, designed by Sébastien Limet, which has the look of a curious cub, with proportions and a pose that give it a lot of character. The shape of the tail is especially striking and adds a nice finishing touch to the model.
The folding sequence is low-intermediate, making it a great project for beginners with a bit of experience. The model stays on the simple side, which keeps it accessible. Yet all the key features of a tiger are here, from the rounded face to the suggestion of stripes with a color change.
We folded it in orange and white, but using black and orange paper will give it even more impact. Just make sure to use a sheet larger than 20×20 cm (8×8 in) wide, as the tail and stripe sections need a bit of precision.
Origami Tiger Step-by-Step Instructions
- Difficulty: Low-Intermediate
- Folding time: 20-30 minutes
Recommended Paper
9 x 9 in (24 x 24 cm) origami paper (Kami)
Step 1
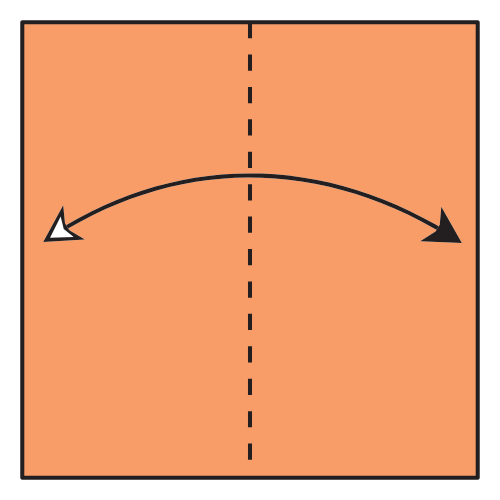
Start with the colored side of the paper facing up. Fold the paper in half vertically, then unfold.
Step 2

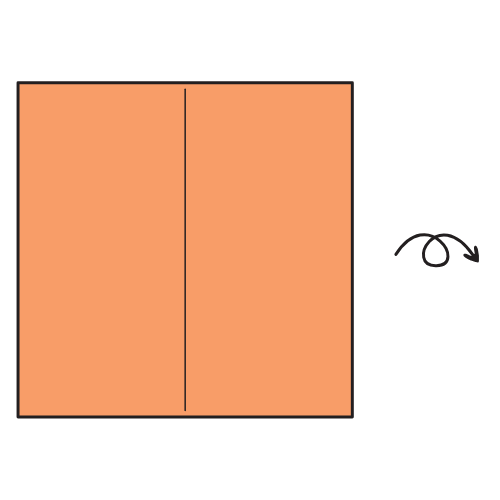
Turn the paper over.
Step 3
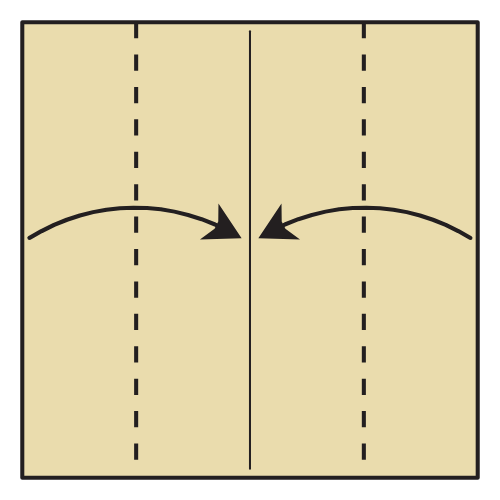
Fold the left and right edges to meet the centerline.
Step 4
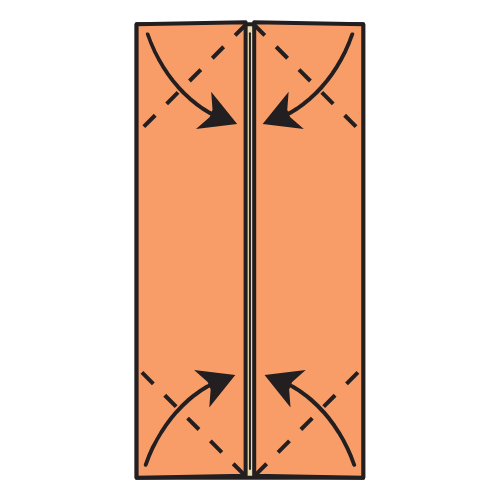
Fold all four corners in so the top and bottom edges align with the vertical centerline.
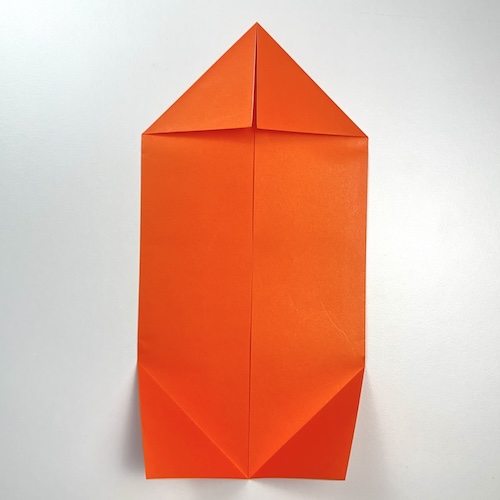
Step 5
Mountain fold the top triangle behind.
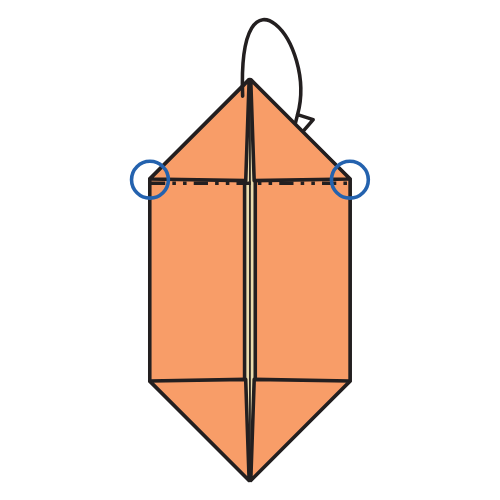
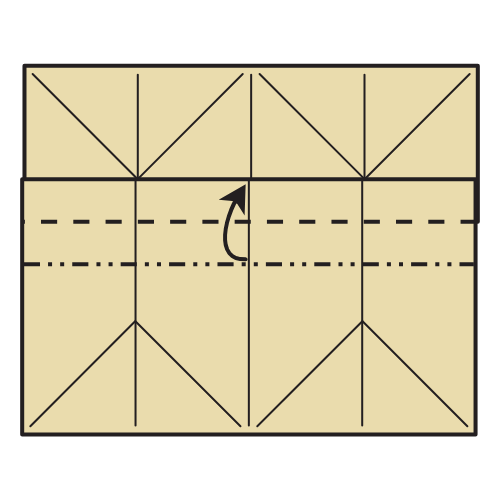
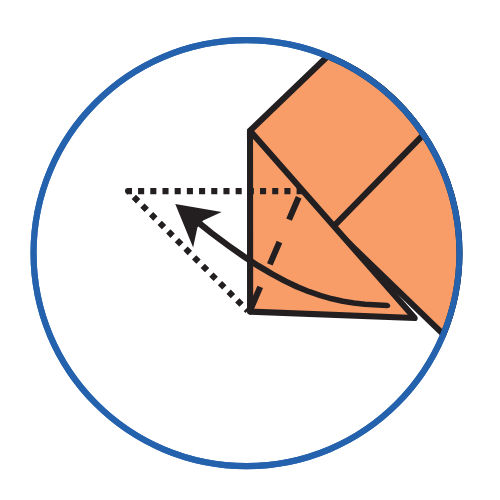
Step 6
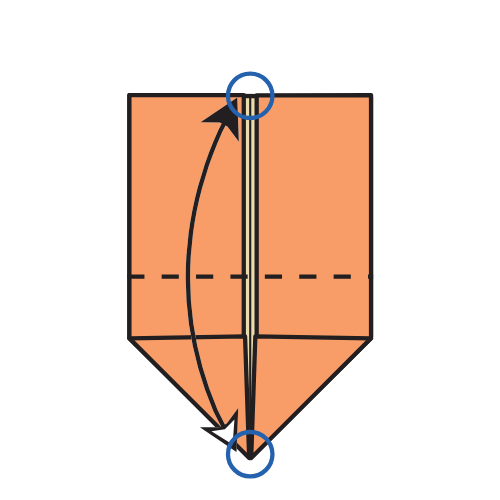
Fold the bottom corner up to meet the center of the top edge. Then unfold.
Step 7
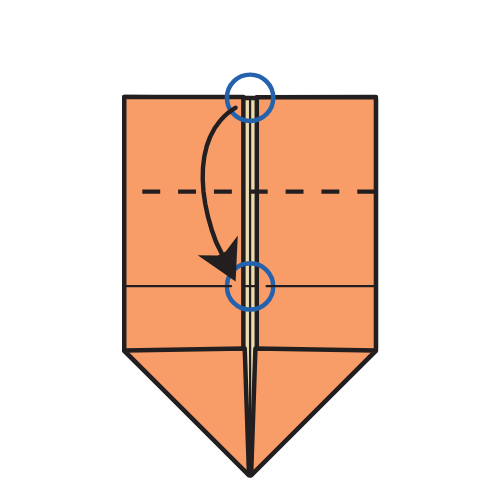
Fold the top edge down to the crease line you just made.
Step 8
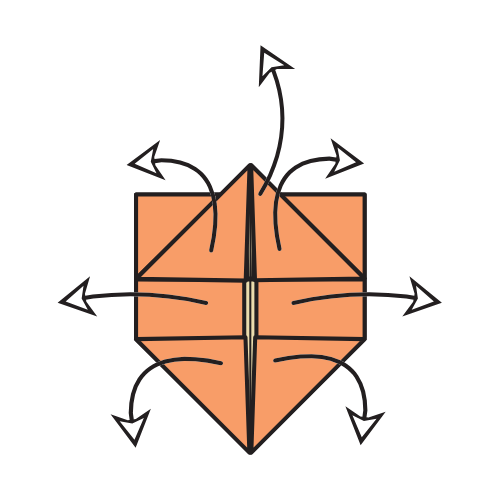
Unfold everything.
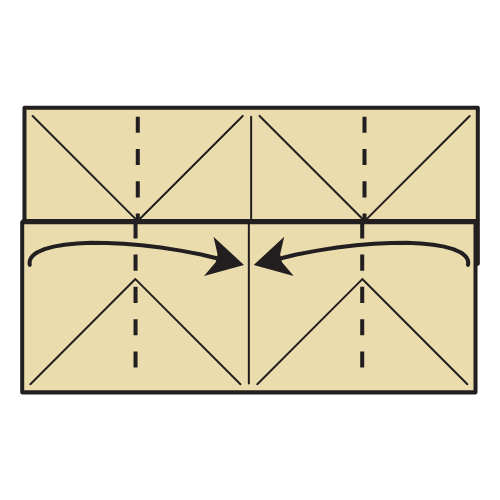
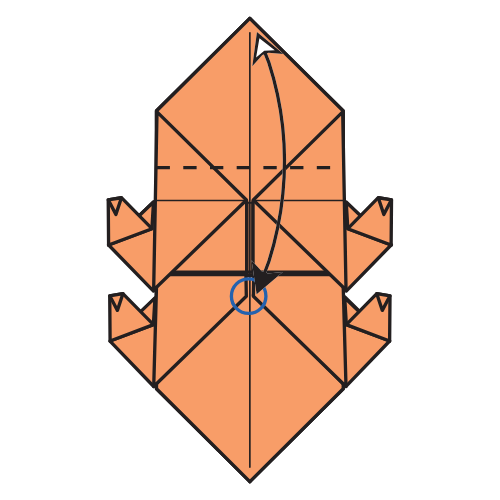
Step 9
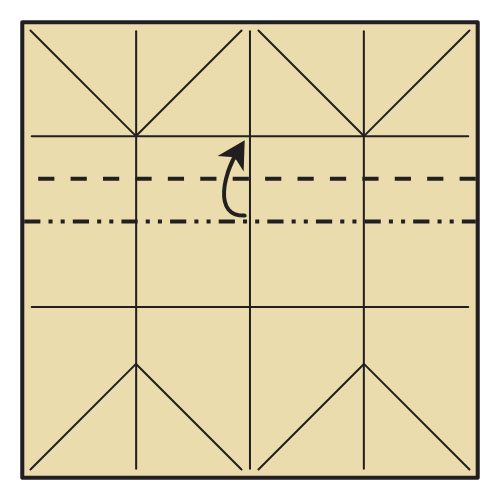
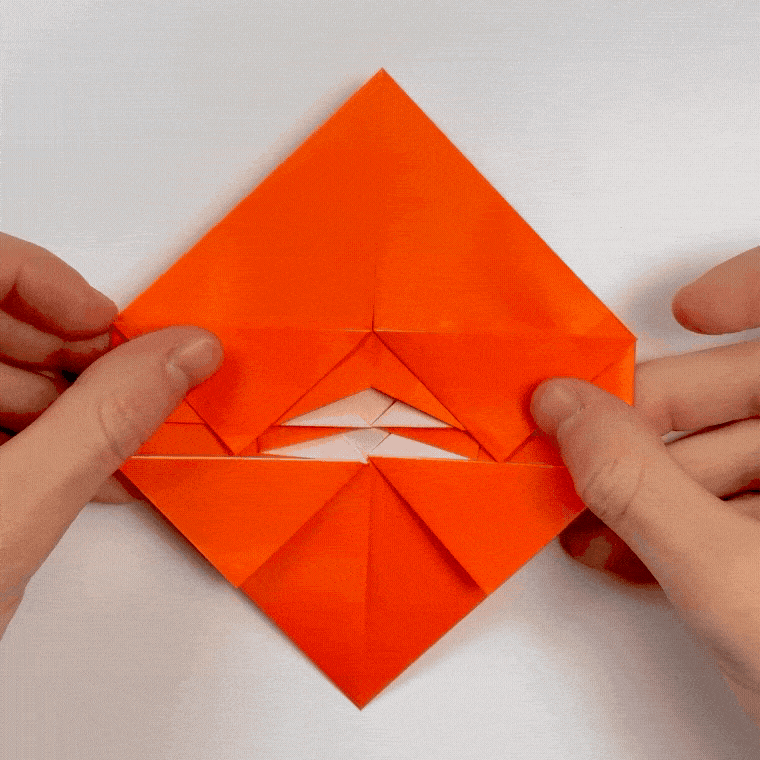
Pinch along the mountain fold and pleat it upward to meet the nearest horizontal line.
Step 10
Repeat the same pleat on the next existing crease, folding it up to meet the nearest horizontal line.
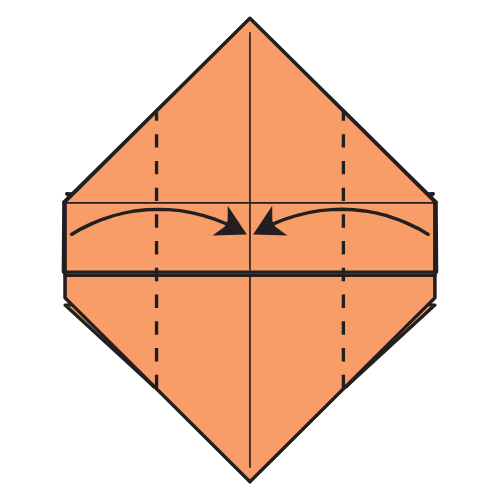
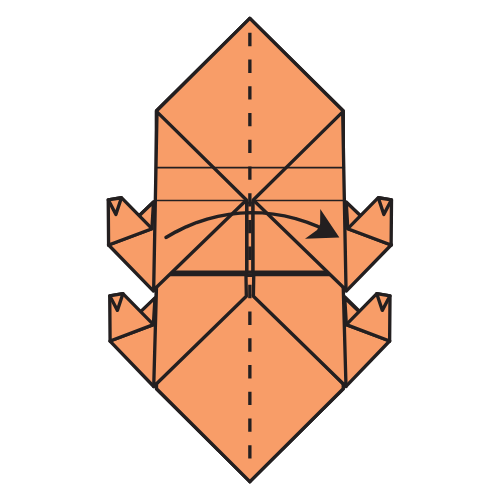
Step 11
Fold the left and right edges into the centerline along existing creases.
Step 12
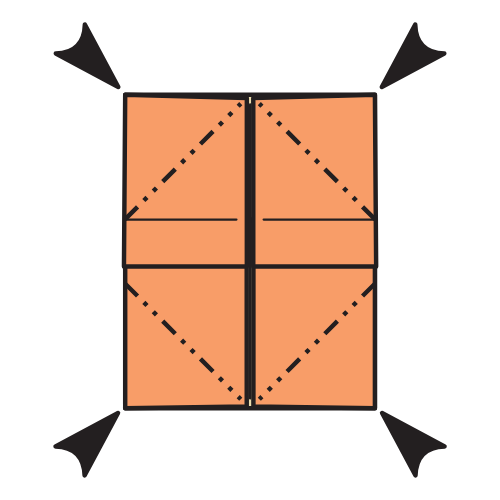
Inside reverse fold all four corners using the existing creases.
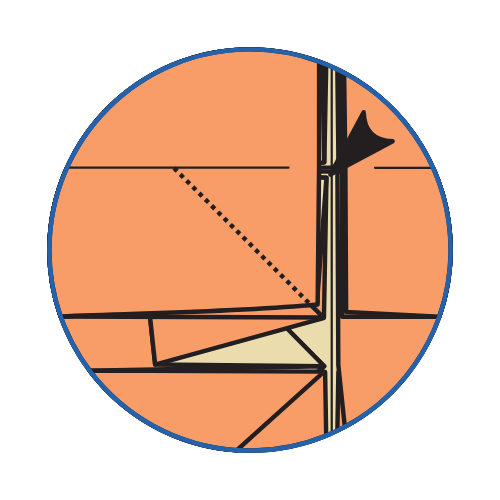
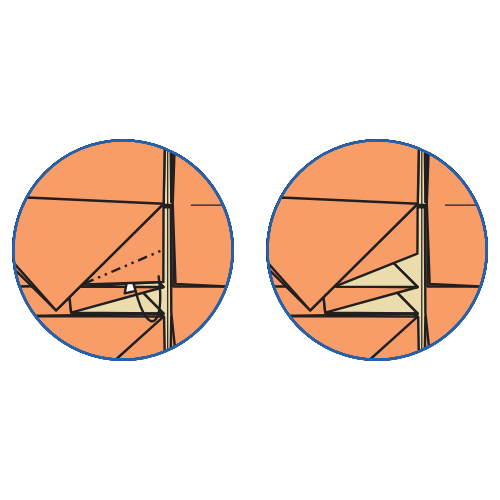
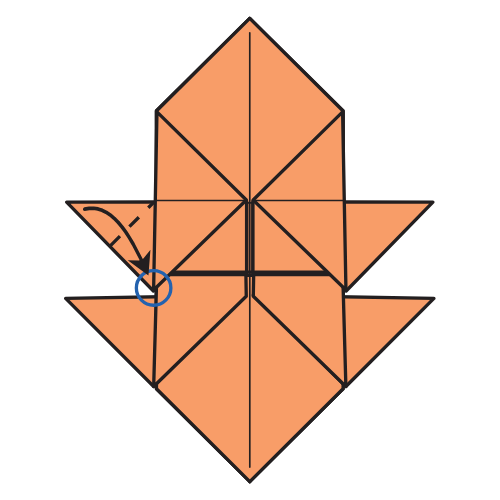
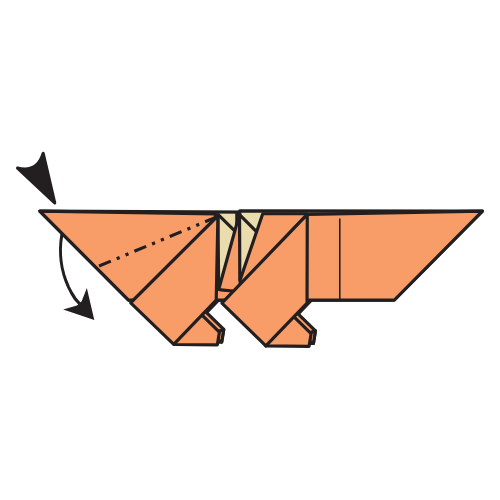
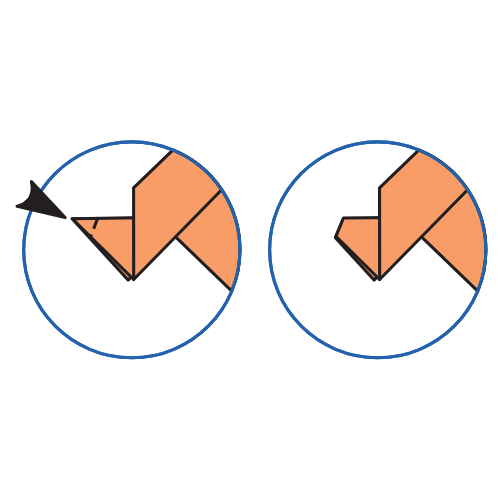
Step 13
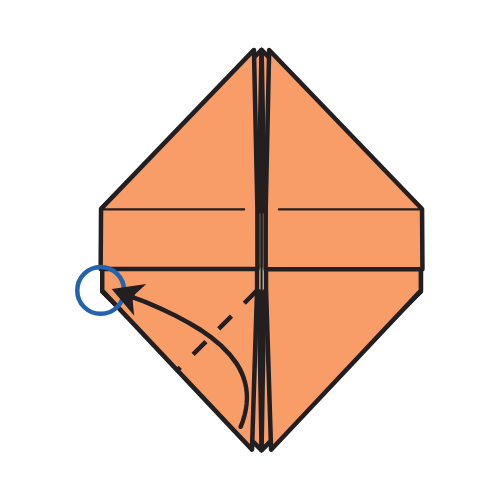
Fold the bottom left corner of the top flap to the circled point.
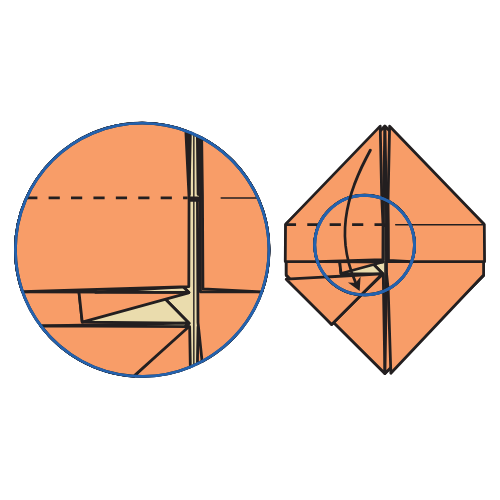
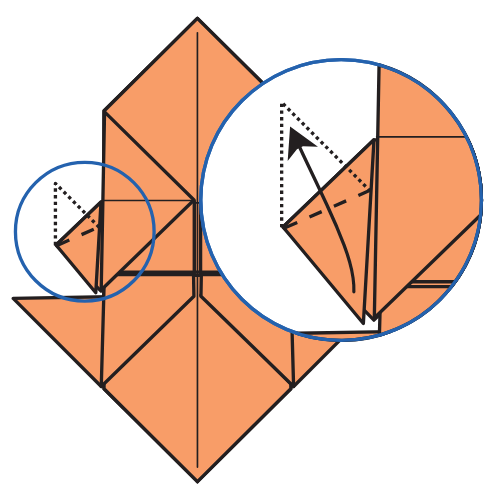
Step 14

Reverse fold along new creases so that part of the vertical edge becomes horizontal.
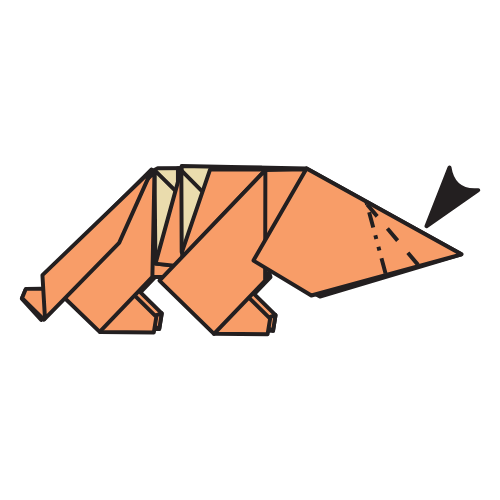
🐯 Folding tip: Check the next diagram to see how it should look. And of course, the video is there if you need extra help!
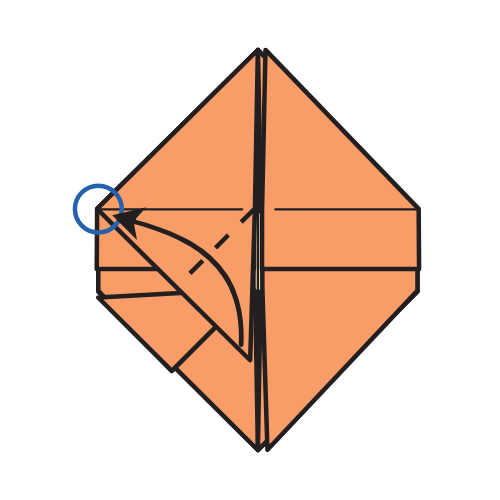
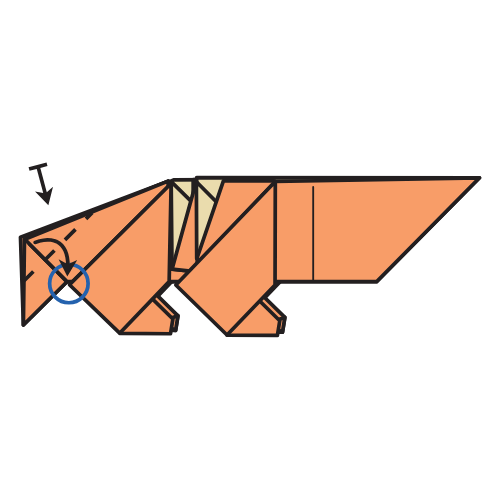
Step 15
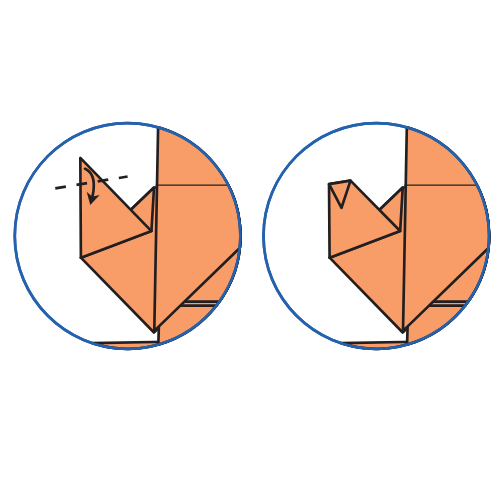
Reverse fold the hidden flap so the vertical edges become horizontal.
🐯 Folding tip: This step is similar to the last one. We’re shaping the tiger’s stripes here.
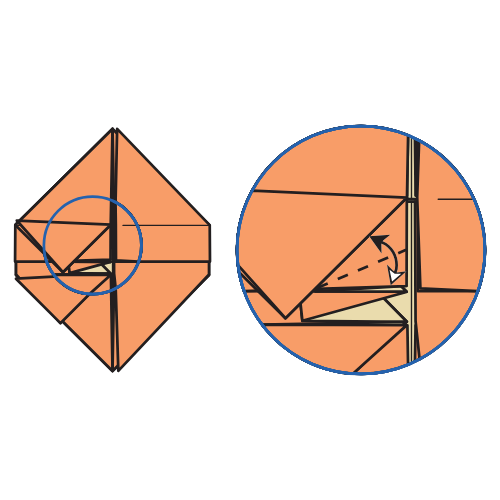
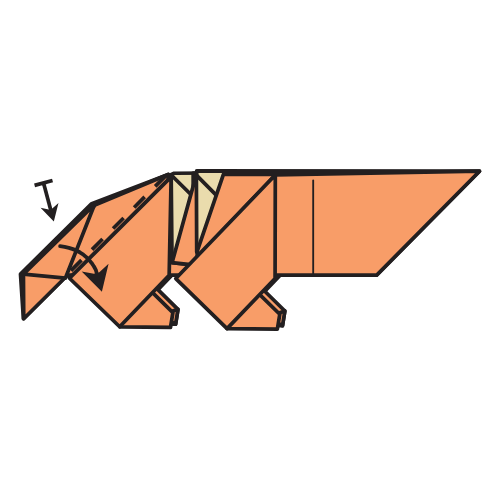
Step 16

Fold the top left triangle down.
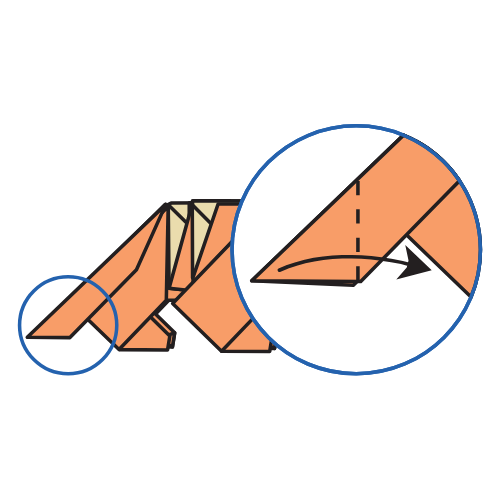
Step 17
Fold the triangle from Step 15 in half.
Step 18
Fold the bottom edge of the circled flap to the nearest line, then unfold.
Step 19
Mountain fold the corner underneath, using the crease you just made.
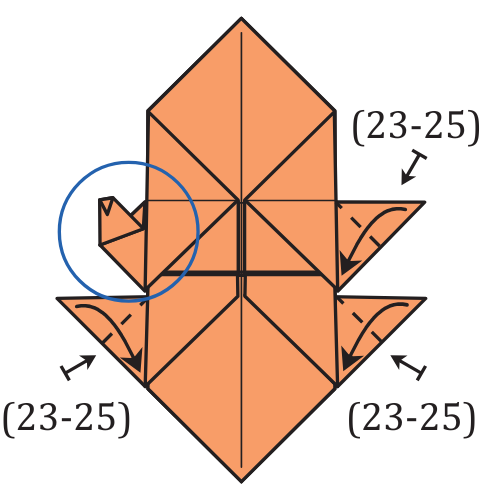
Step 20

Repeat Steps 13 to 19 on the right side.
Step 21
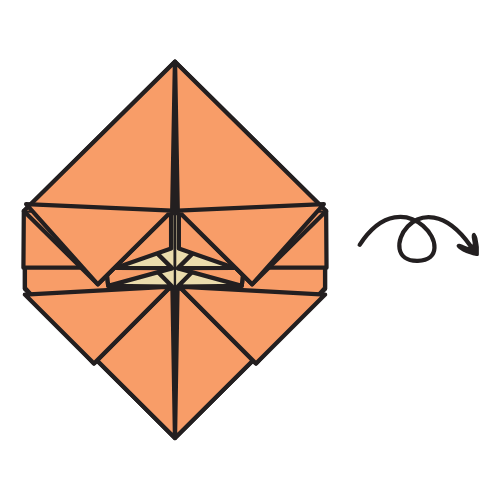
Turn the model over.
Step 22
Fold the top flap’s left and right edges to the center.
🐯 Folding tip: Press down on the center of the model as you fold to keep the layers from shifting. This helps avoid unwanted white gaps.
Step 23
Fold the top left triangle in half. This will be one of the front legs.
Step 24
Fold the corner up so the left edge becomes vertical.
Step 25
Fold the tip inward. There’s no exact reference point here.
Step 26
Repeat Steps 23 to 25 for the other three legs.
Step 27
Fold the top corner to the circled point, then unfold.
Step 28
Fold the model in half from left to right.
Step 29

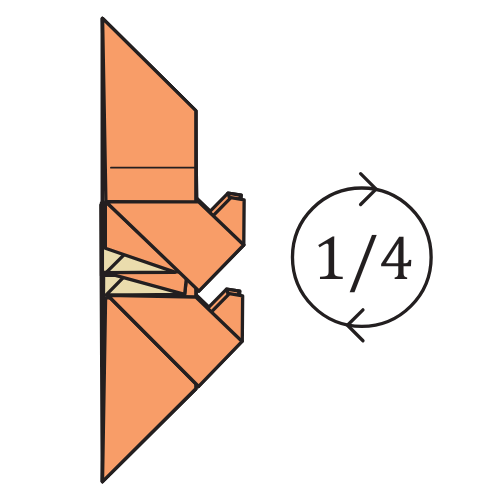
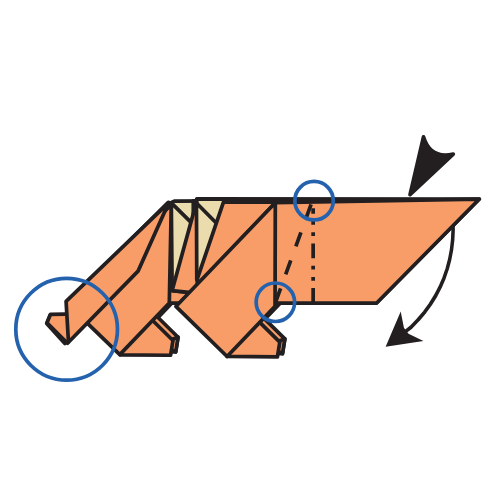
Rotate the paper 1/4 turn clockwise.
Step 30
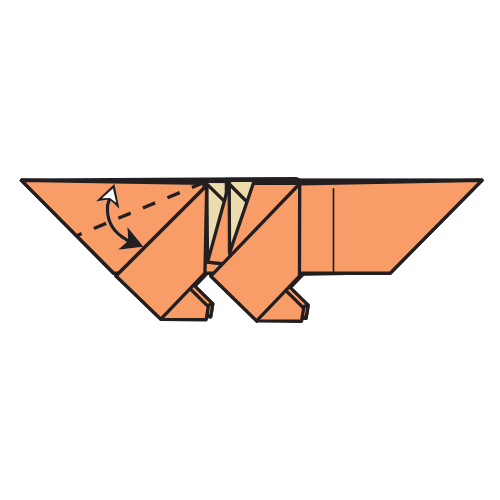
Fold the top edge of the tail to the nearest line. Crease well, then unfold.
Step 31
Inside reverse fold along the crease you just made.
Step 32
Fold the corner to the circled point. Then repeat on the other side.
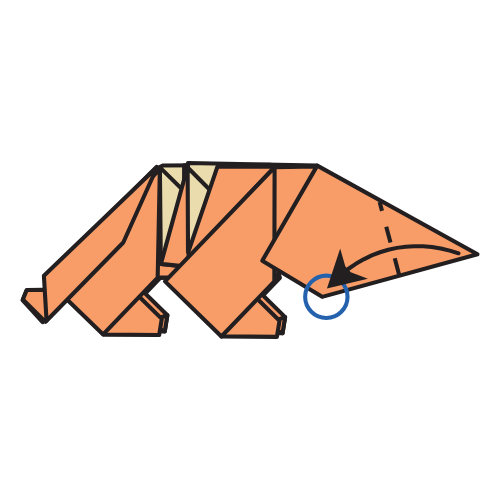
Step 33
Fold the edge down. Then repeat on the other side.
Step 34
Fold the left corner to the right and crease well. The vertical crease should start where the two bottom edges meet.
Step 35
Fold the corner to the left so the top edge becomes vertical. Crease well.
Step 36


Unfold Steps 34 and 35.
Step 37

Reverse fold in and out along the creases made in Steps 34 and 35.
Step 38
Inside reverse fold the tip of the tiger’s tail.
Step 39
Crimp along a new valley fold between the circled points.
Step 40
Fold the right corner to the circled point. Crease well.
Step 41
Fold the flap you just made in half. Crease well.
Step 42
Unfold Steps 40 and 41.
Step 43
Reverse fold in and out along the creases made in Steps 40 and 41.
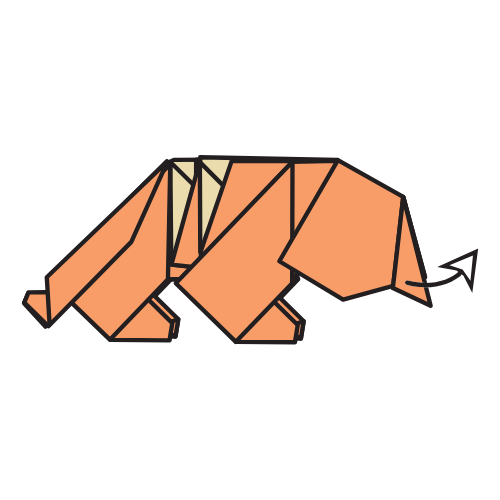
🐯 Folding tip: Feel free to shape the tongue however you like, or tuck it away entirely!
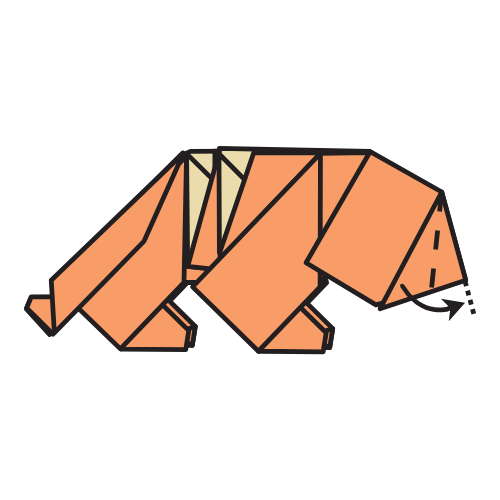
The Completed Origami Tiger
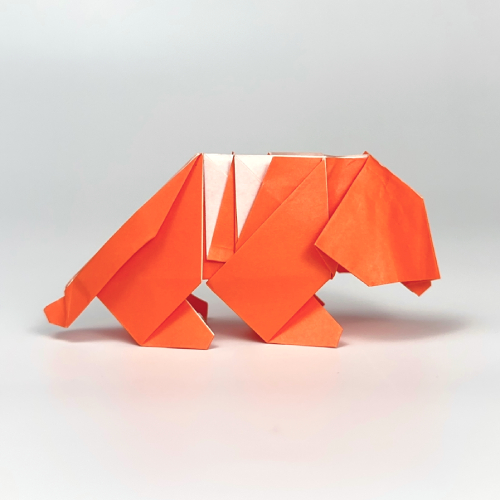
I hope you enjoyed folding this little tiger!
For more origami animal tutorials, be sure to sign up for our newsletter. We share step-by-step videos, folding tips, and beautiful models each week.
And feel free to share your creations with us in the comments or on socials. We love to see them!

Download the Complete Origami Tiger Printable PDF Instructions
This printable PDF is part of our Origami Friends membership on Patreon. As a member, you get access to these diagrams, our full library of printable PDFs, and member-only content.


Love it
Nice folds! Thank you for sharing 🙂