How to Fold an Origami Pumpkin

 Ryan Dong
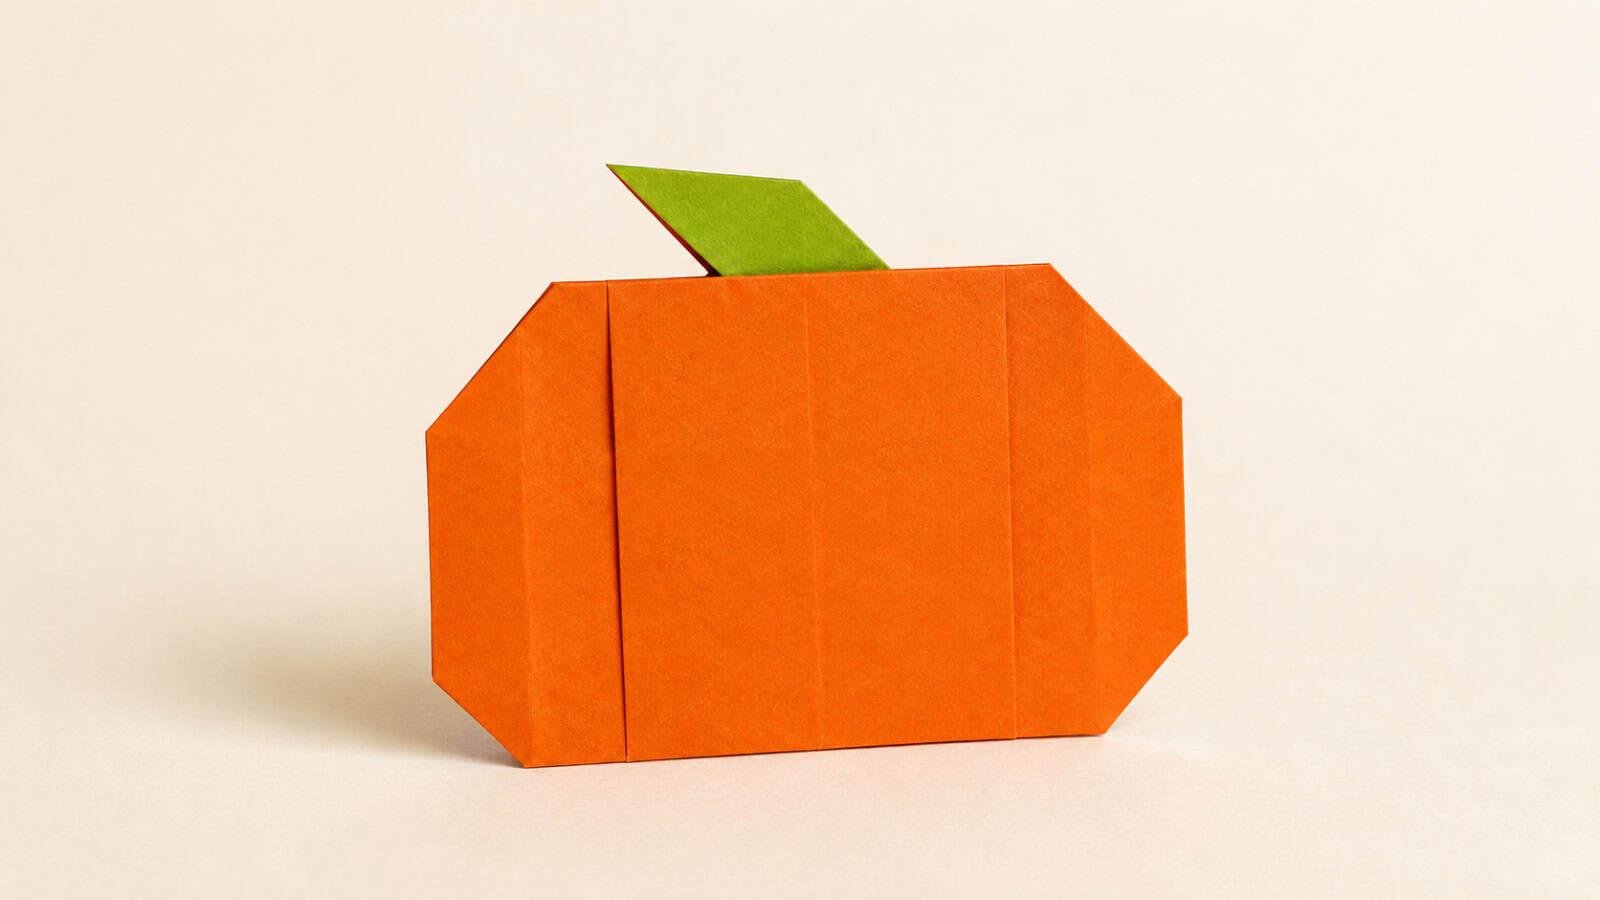
 Let’s learn how to fold an origami pumpkin designed by Ryan Dong. This is a simple model that creates a pumpkin shape in about 10 minutes.
The finished pumpkin has a wide body, a small stem, and a few folds that look like the natural sections of a real pumpkin. It has a clean look that works well for fall decorations.
This is an easy project and a great choice for beginners. The folding sequence is smooth and easy to follow. A few pleats at the back help the pumpkin stand on its own for display.
Because the model stays mostly flat, it also works well on handmade cards, gift tags, and other seasonal crafts.
Origami Pumpkin Step-by-Step Instructions
- Difficulty: Easy – Beginner level 3
- Folding time: 10 minutes
Recommended Paper
6 x 6 in (15 x 15 cm) duo-colored origami paper (Kami).
If you don’t have duo-colored origami paper, you can also paint or color the pumpkin stem after folding the model.
Step 1
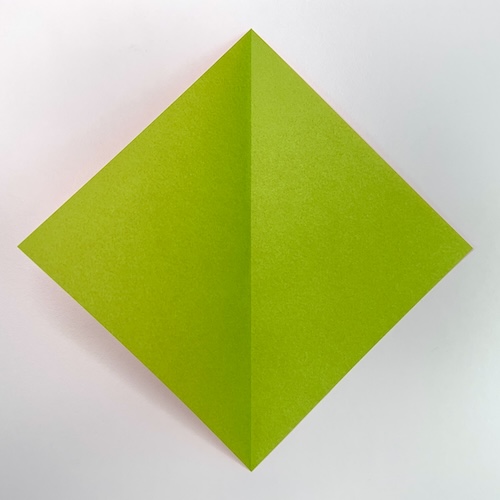
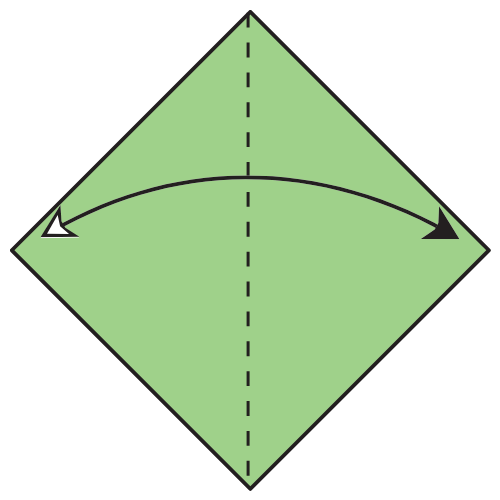
Start with the green side of the paper facing up in a diamond position. Fold the paper in half vertically, then unfold.
Note: If your paper is white and orange, start with the white side facing up. This color will become the pumpkin stem.
Step 2
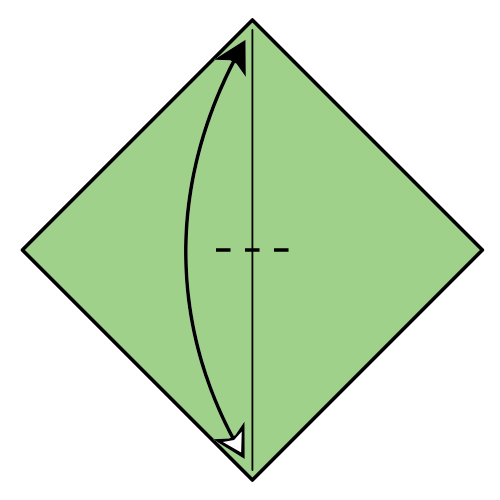
Fold the bottom corner up to the top corner. Make a small pinch mark at the center, then unfold.
Step 3
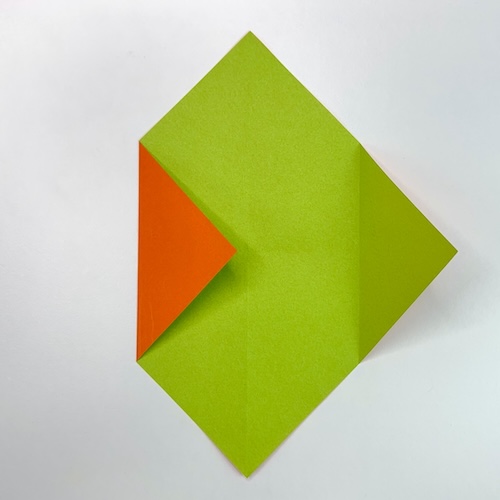
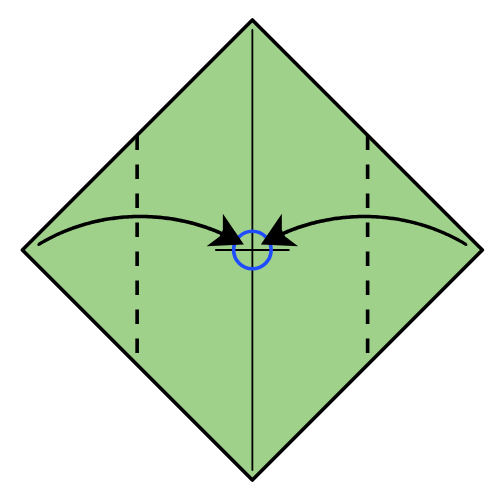
Fold the left and right corners to the center point.
Step 4
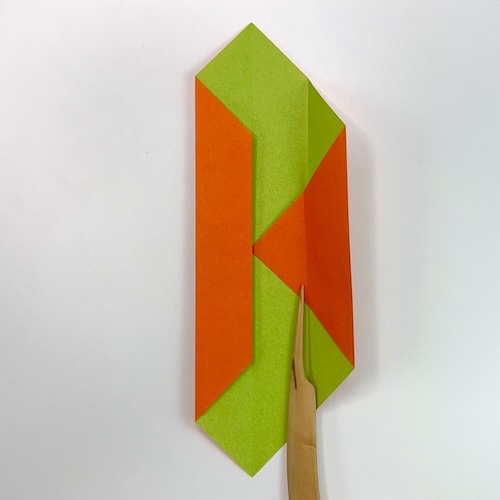
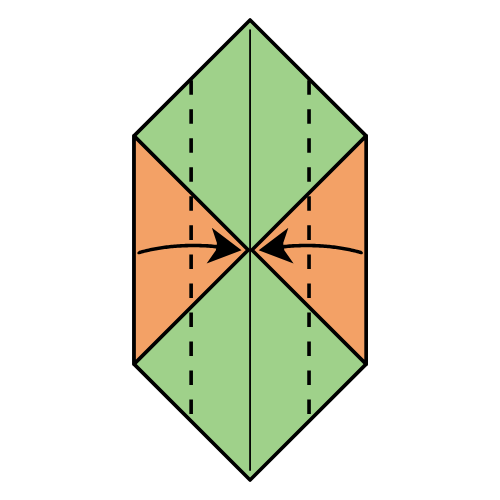
Fold the left and right edges to the vertical center crease.
🎃 Folding tip: Hold all layers firmly together while folding to keep them from shifting.
Step 5
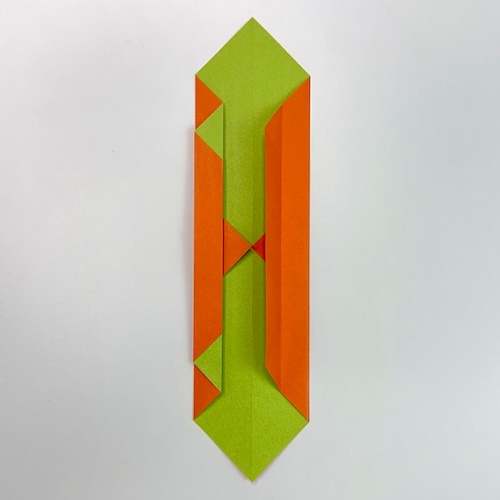
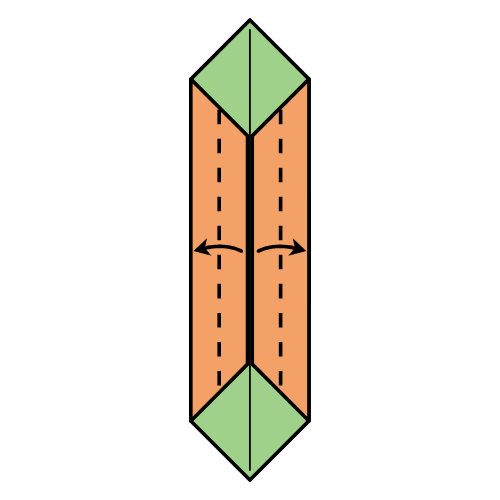
Fold the inner edges of the top flaps outward to the left and right edges.
Step 6
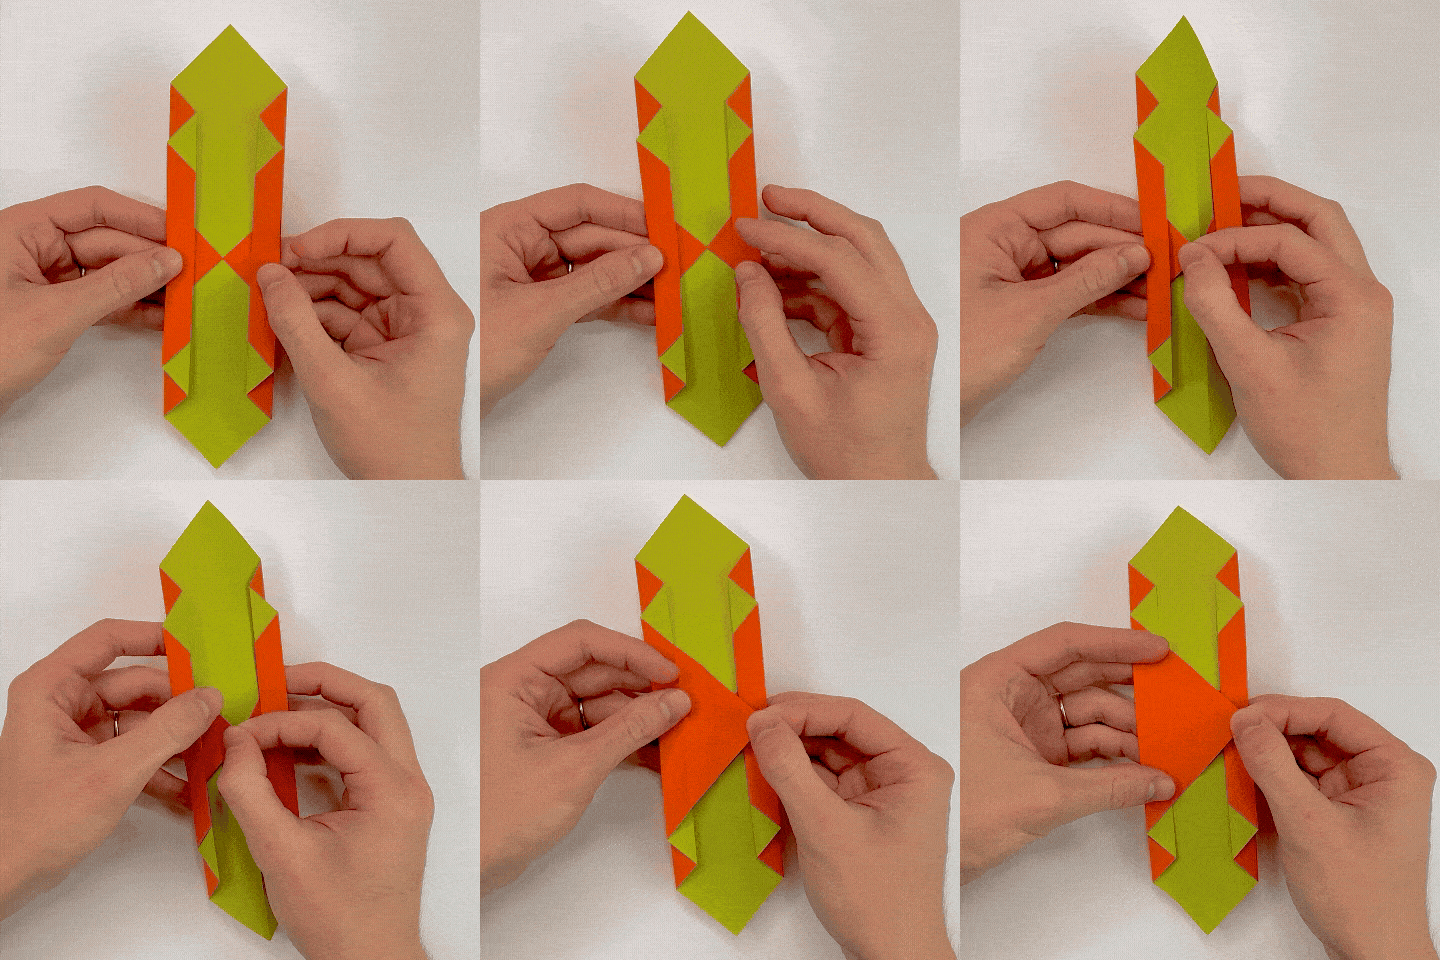
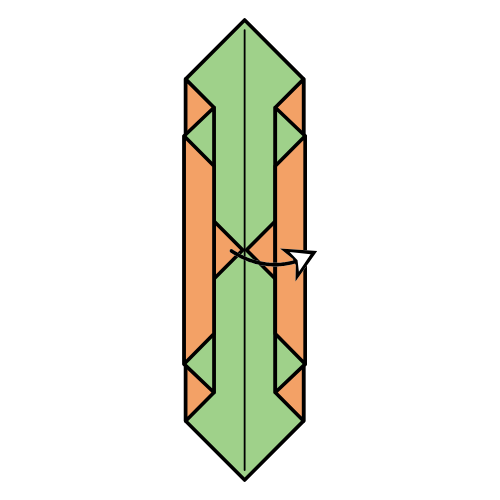
On the left side, untuck one pleat by pulling the corner to the right.
Step 7
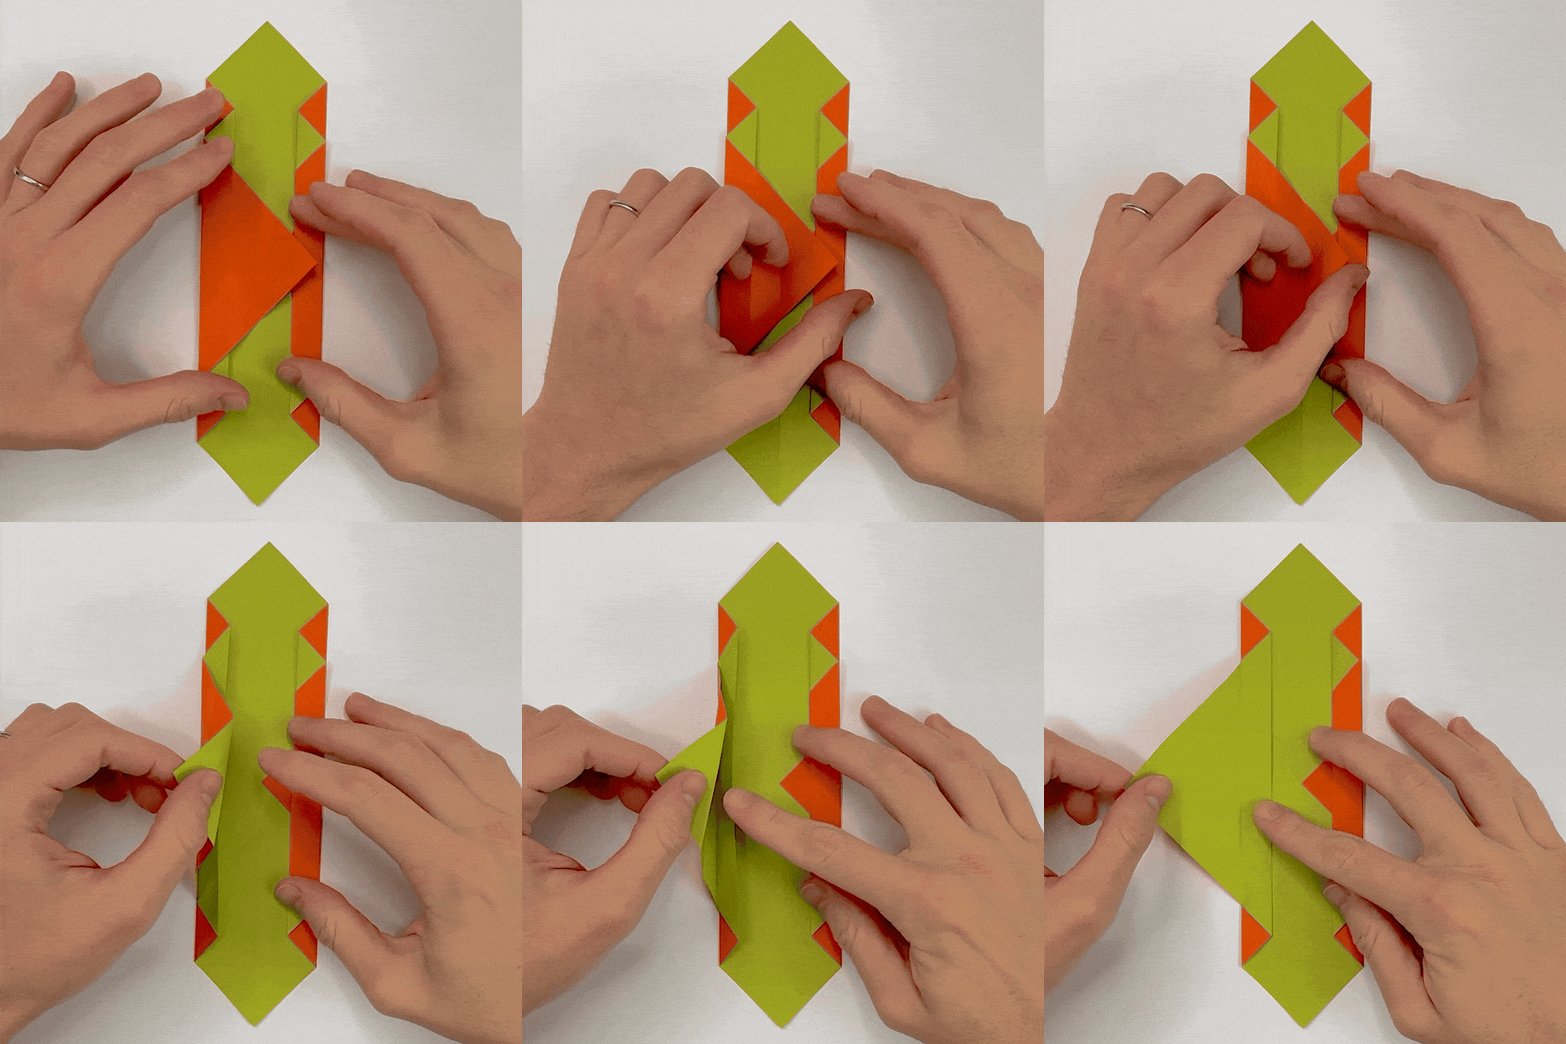
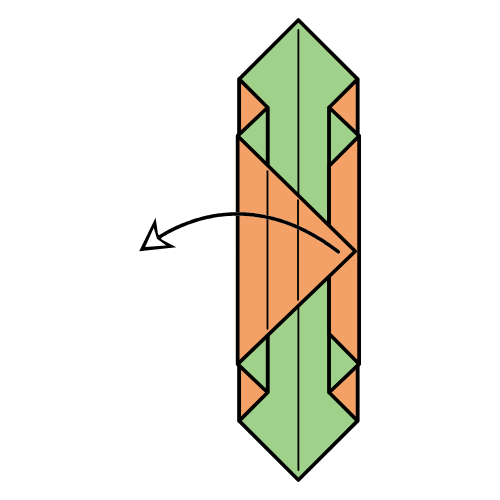
Unfold the triangle to the left.
Step 8
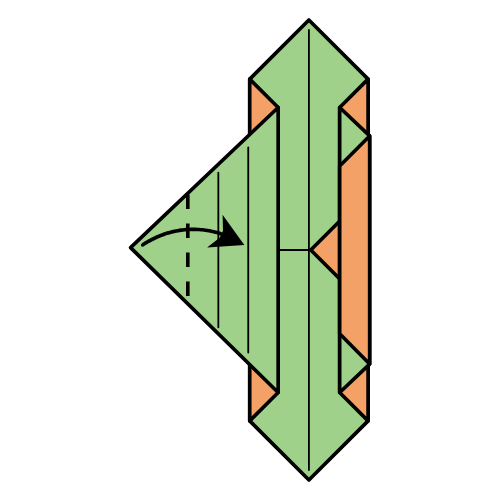
Fold along the existing crease.
Step 9
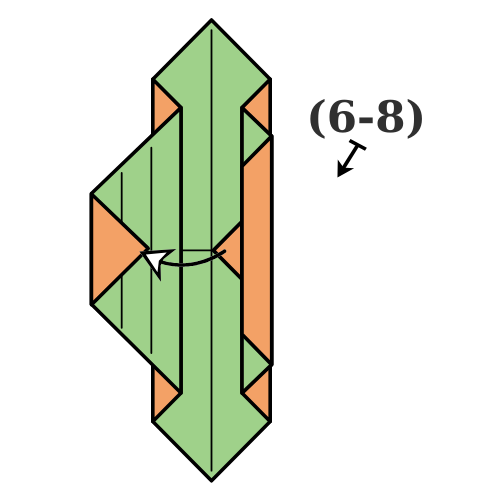
Repeat Steps 6 to 8 on the right side.
Step 10
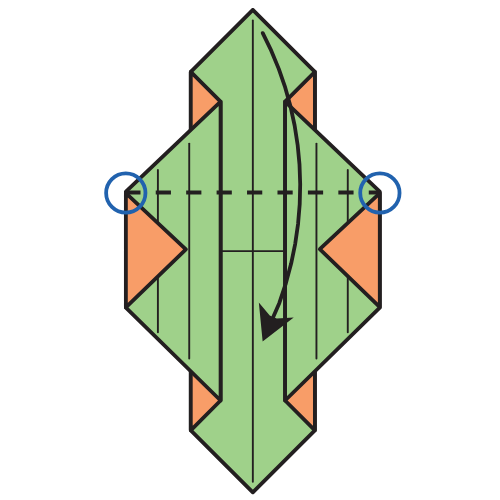
Fold the top corner downward along the fold line that connects the circled points.
Step 11
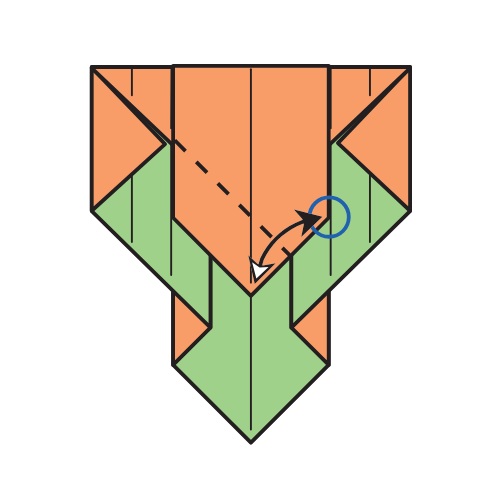
Fold the corner to the circled point. Crease well, then unfold.
Step 12
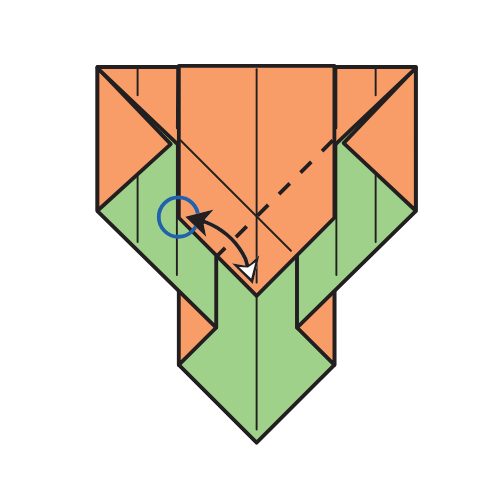
Repeat Step 11 in the opposite direction.
Step 13
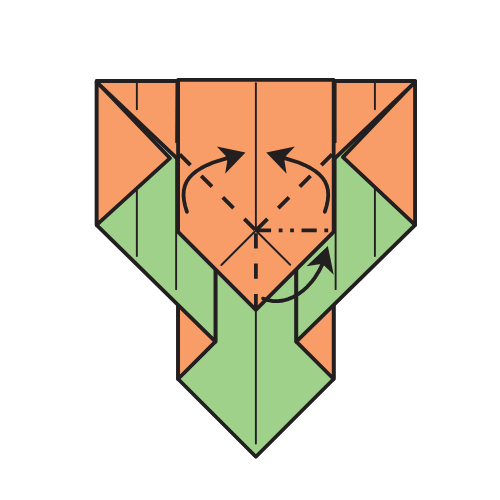
Rabbit ear fold the corner to the right using the existing creases.
Step 14
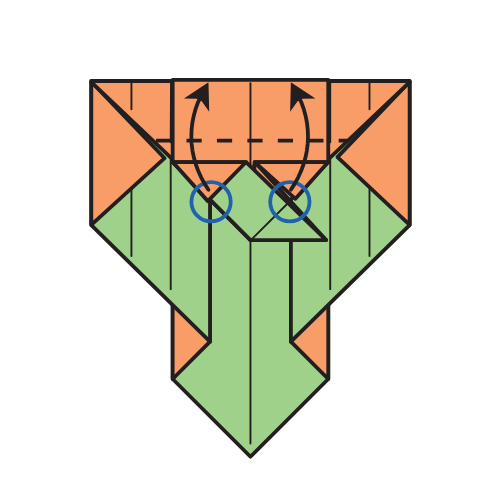
Fold the near flap upward, bringing the circled points to the top edge.
Step 15
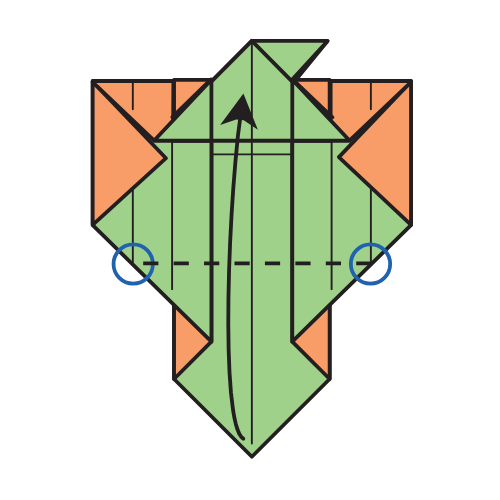
Fold the bottom corner upward along the fold line that connects the circled points.
Step 16
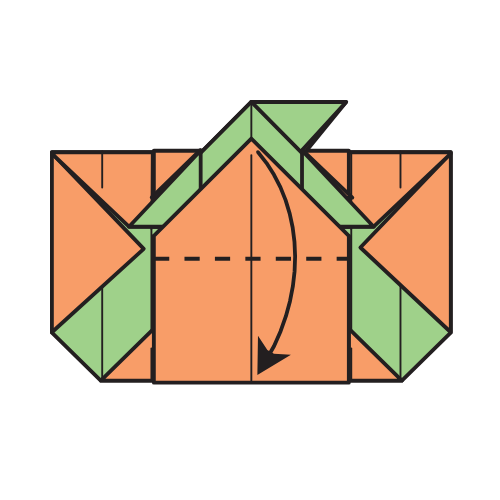
Fold the top corner of the near flap down to the bottom edge.
Step 17
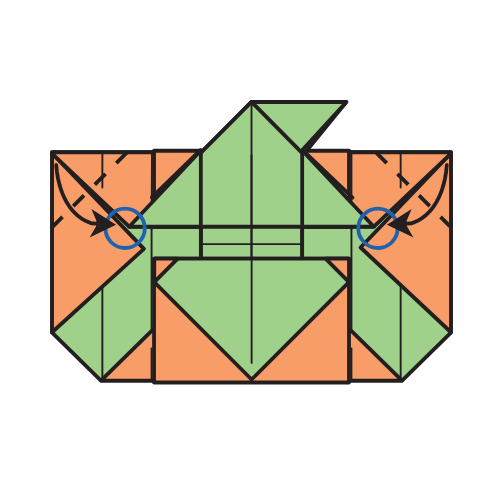
Fold the top left and right corners to the circled points.
Step 18
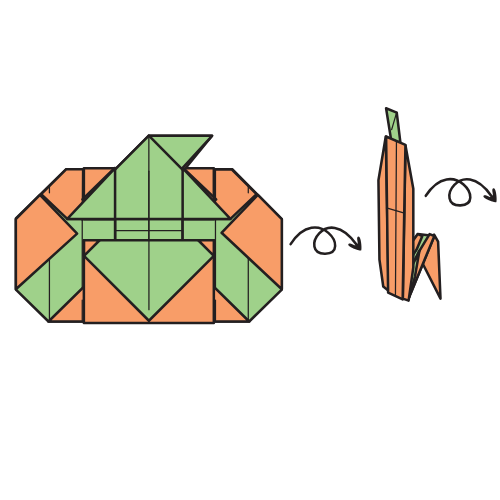
Turn the model over. The pleated flaps on the back can be used as supports to help the origami pumpkin stand upright.
Your Origami Pumpkin Is Finished and Ready to Display!
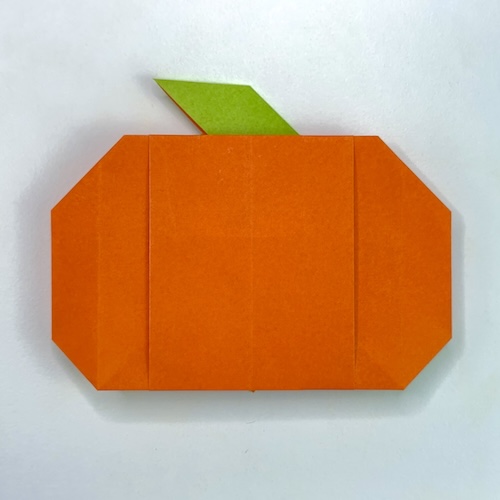
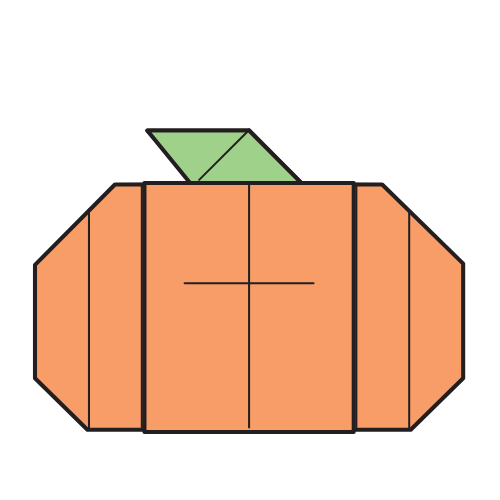
I hope you enjoyed folding this origami pumpkin. It’s a quick project, and the finished model looks great on a shelf, desk, or card.
You can fold several pumpkins in different colors and sizes to create a simple fall display. They also make fun decorations for Halloween and Thanksgiving.
If you fold one, feel free to share a photo in the comments. I’d love to see how you use your pumpkins.
If you’d like to keep folding, you can explore more easy origami tutorials or browse our collection of fall origami models.
You can also get new tutorials and folding ideas in our newsletter here. And if you’d like to fold along with videos, you can subscribe to our origami YouTube channel.
Download the Complete Origami Pumpkin Printable PDF Instructions
This printable PDF is part of our Origami Friends membership on Patreon. As a member, you get access to these diagrams, our full library of 120+ printable PDFs, and member-only content.