
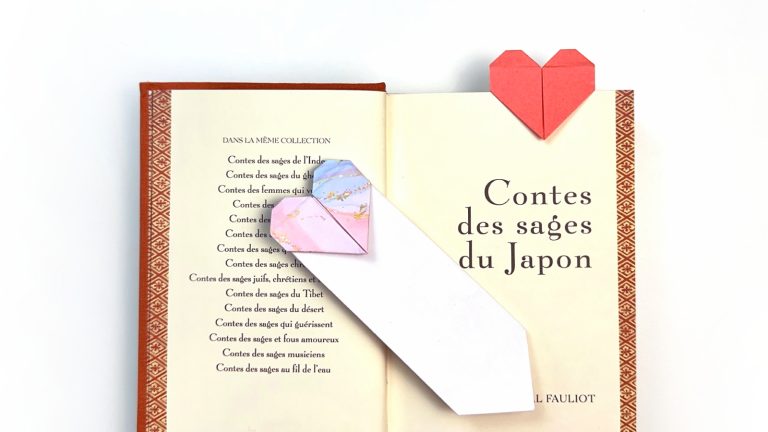
How to Fold a Very Easy Origami Corner Bookmark
This origami bookmark, designed by Nick Robinson, is quick, practical, and stylish, making it perfect for book lovers!
In less than a minute, you’ll fold a handy paper bookmark that fits neatly onto the corner of your page, keeping your spot without needing to fold pages.
Choose a patterned origami paper for an eye-catching bookmark you’ll enjoy every time you open your book. A 10 cm square or smaller paper is ideal for crafting the perfect-sized bookmark.
Ready to fold? Let’s begin!
Origami Bookmark Step-by-Step Instructions
- Difficulty: Easy – Beginner Level 1
- Folding time: Less than a minute
Recommended Paper
10×10 cm (4×4 in) Chiyogami
Step 1


Start with the white side of the paper facing up in a diamond position. Fold the top corner down to meet the bottom corner, then unfold to create a horizontal diagonal crease.
Step 2

Fold the lower half of the paper vertically from left to right, then unfold.
Step 3


Fold the top corner down to meet the center crease.
Step 4


Fold the bottom corner up to meet the center crease.
Step 5


Fold the model in half along the diagonal crease from Step 1.
Step 6

Fold the bottom left edge along the dotted line so that it aligns with the central crease made in Step 2.
Step 7

Repeat Step 6 on the right side.
Step 8


Turn the model over.
Step 9

Fold the top corners down to the bottom corner, then unfold.
Step 10

Tuck the two top flaps down into the pocket.
The Completed Origami Bookmark


Great job on completing your origami bookmark!
Try experimenting with different patterns and colors to create personalized bookmarks.
Don’t hesitate to share your bookmarks with us in the comments or tag us on social media. We’d love to see your creations!

Download the Complete Origami Bookmark Printable PDF Instructions
This printable PDF is part of our Origami Friends membership on Patreon. As a member, you get access to these diagrams, our full library of printable PDFs, and member-only content.
Watch the Origami Bookmark Video Tutorial
Enjoyed this tutorial?
Subscribe to our YouTube channel for new inspiring origami videos every week!


i am very confused on step 2
Hi Raya, It’s like folding in half vertically except that you crease only the bottom part. The goal is to create a reference line so you can fold the next steps more accurately. If it’s still unclear, the videos should help you 🙂
so ez pz I loved it
Best for book lovers
This was so fun and easy. It says one minute but it took me probably two but it was still really fast and I loved it!
I’m glad you had fun with it! They’re such a handy fold to keep around for your favorite books.
so easy
this is so slay
this is the easiest origami i have ever done !