
How to Make an Easy Origami Goldfish
This traditional Japanese origami goldfish is a great example of how origami evolves over time.
It starts off just like the origami samurai helmet, a model that’s been around for centuries, but a few extra folds (and a quick snip with scissors) turn it into something completely different.
It’s simple, quick to fold, and has a friendly, playful shape that’s instantly recognizable. This is the kind of origami that’s perfect for younger folders or anyone looking for a light, low-stress project.
Traditional Origami Goldfish Step-by-Step Instructions
- Difficulty: Easy – Beginner level 2
- Folding time: 5 minutes
Recommended Paper
15×15 cm (6×6 in) Kami
Step 1

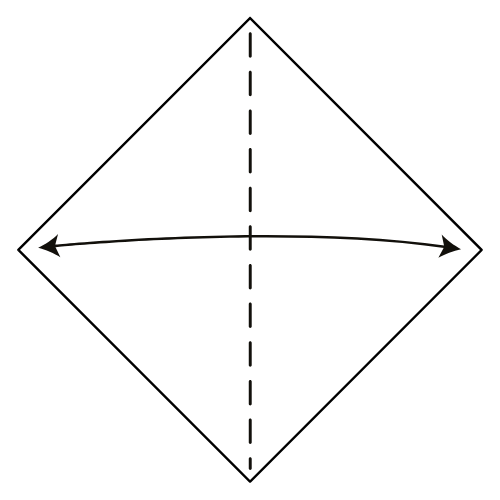
Start with the white side of the paper facing up. Fold along the vertical diagonal, then unfold.
Step 2


Fold along the horizontal diagonal, from top to bottom.
Step 3


Fold the left and right corners in to meet the bottom corner.
🐟 Folding tip: Make sure the top edges line up neatly with the vertical center crease.
Step 4
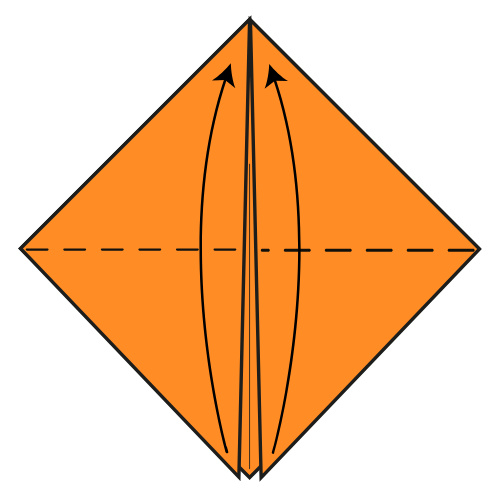
Fold the bottom corners of the top flaps up to meet the top corner.
Step 5

Fold the top corner of the left flap out to the left so the diagonal edge becomes horizontal.
Step 6
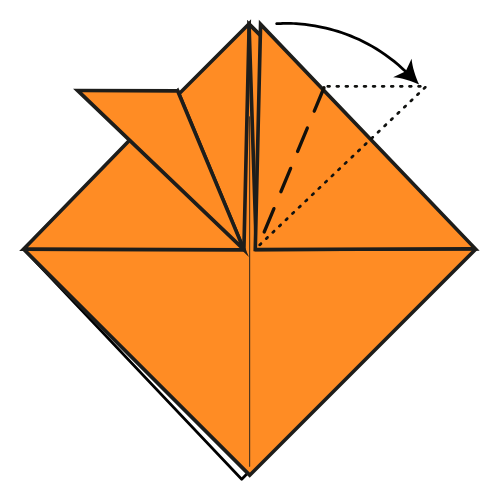
Repeat the same fold on the right side.
Step 7
Fold the bottom corner of the top flap upward along the dashed line. There are no exact reference points here.
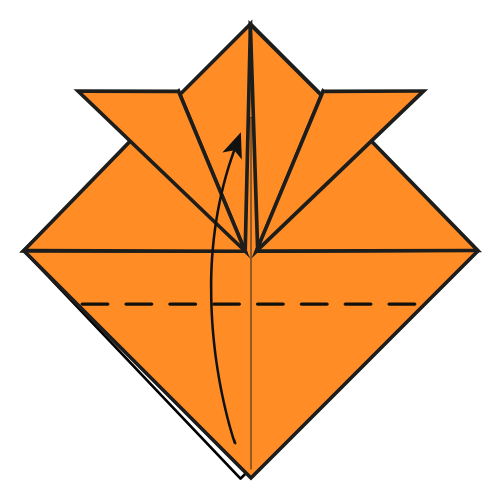
Step 8

Fold the top two layers upward along the horizontal centerline.
Step 9


Turn the model over.
Step 10

Fold the bottom corner up to meet the top corner. Then turn the model over again.
Step 11
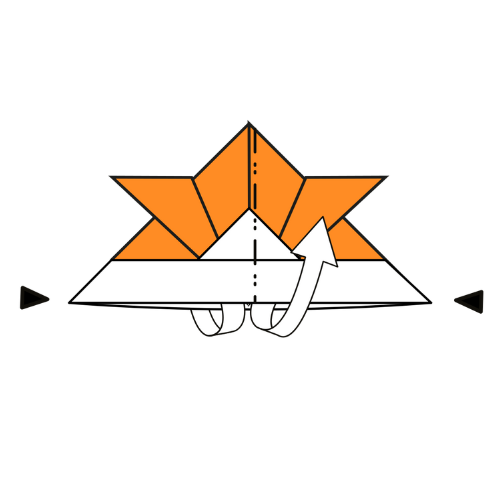
Open the pocket at the bottom and gently spread the layers apart, folding the model in half.
Step 12

Starting from the bottom corner, cut only the top layer up along the bottom edge (about two-thirds of the way). Repeat the same cut on the other side.
Step 13

Fold the right corner inward. Crease well, then unfold. There’s no exact reference.
Step 14
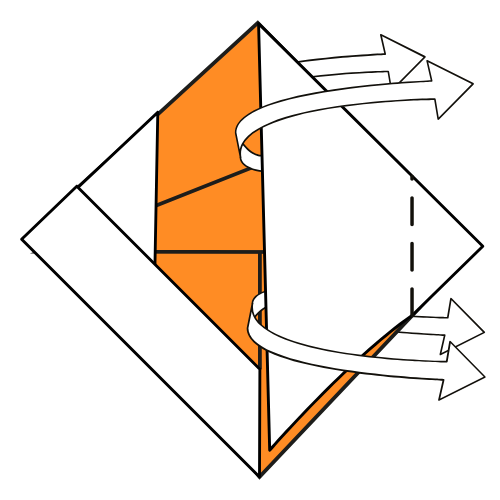
On both sides, lift the layer you cut in Step 12 and unwrap it to the back, folding it along the crease made in Step 13.
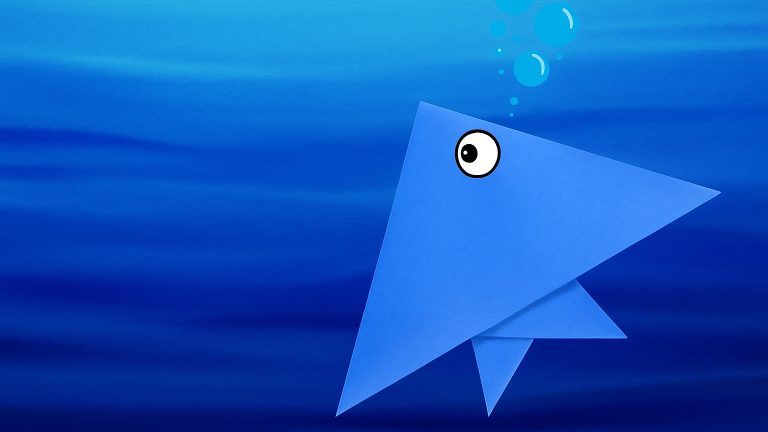
The Completed Origami Goldfish
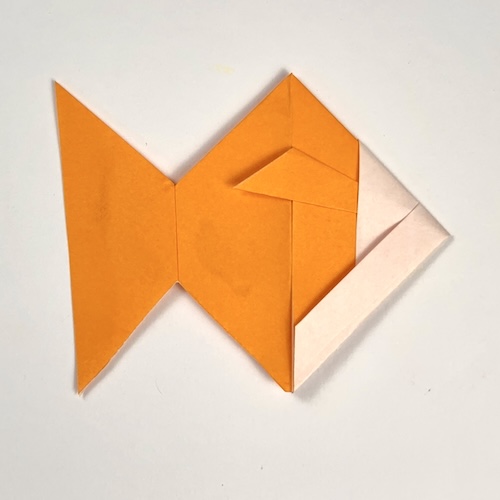
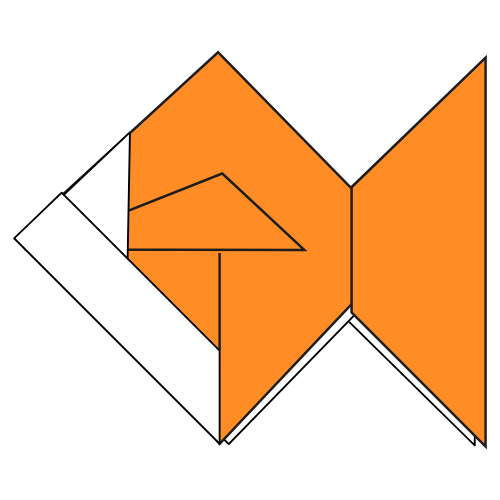
This little origami goldfish is simple, fun, and surprisingly expressive for such an easy model. It’s great for kids, quick crafts, or adding a playful touch to cards or decorations.
Here, I used duo-colored paper to highlight the white face and bright orange body, but feel free to play with colors.
If you enjoyed folding it, have a look at the rest of our easy origami collection or join our newsletter for more relaxing tutorials and hidden gems from the origami world.
And don’t hesitate to post your creations in the comments or on socials. We love to see them!

Download the Complete Origami Goldfish Printable PDF Instructions
This printable PDF is part of our Origami Friends membership on Patreon. As a member, you get access to these diagrams, our full library of 120+ printable PDFs, and member-only content.


Do you change from white to a orange paper
Ho Oakley, we’re using double sided origami paper. One side is orange and one side is white.