
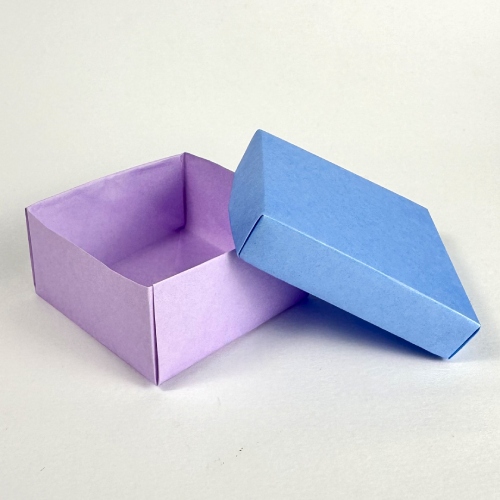
How to Make an Origami Box With Lid
Let’s learn how to make a classic origami box, also known as a masu box.
Masu boxes were originally square wooden containers used in Japan to measure rice. This paper version keeps the same simple shape, but is quick to fold and very practical. You can use it to hold small items like paper clips, candies, or anything you want to keep organized.
In this tutorial, I’ll show you how to fold both the classic lid and a shallow lid. The classic lid is easier and a good place to start if you’re new to origami. The shallow lid looks cleaner and is easier to use, but it requires a bit more precision, so it’s better suited if you already have some folding experience.
Once finished, the box holds together well on its own. If a flap doesn’t sit perfectly flat inside, you can press it down with what you put inside, or use a little bit of glue if needed.
Origami Box Step-by-Step Instructions
- Difficulty: Easy – Beginner level 3
- Folding time: 5-15 minutes
Recommended Paper
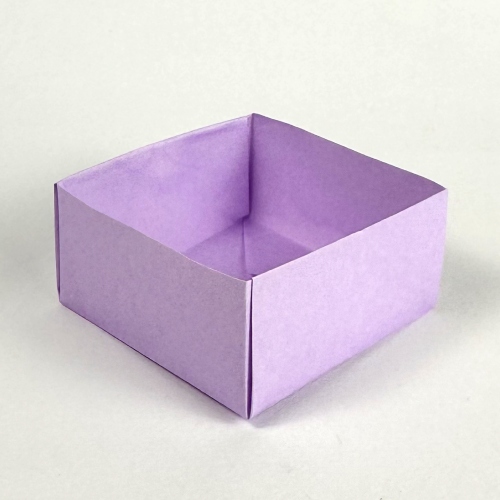
15×15 cm (6×6 in) Kami, Tant, or Chiyogami (patterned paper). This will make a 5.5×5.5×3 cm (2.2×2.2×1.2 in) box.
This tutorial was updated in March 2026 with clearer steps and improved visuals.
Folding the Origami Masu Box
Step 1
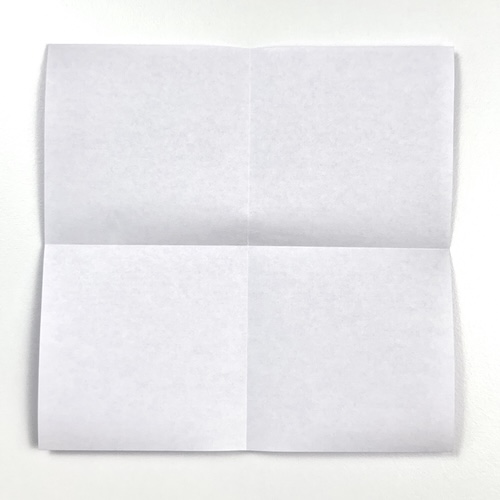
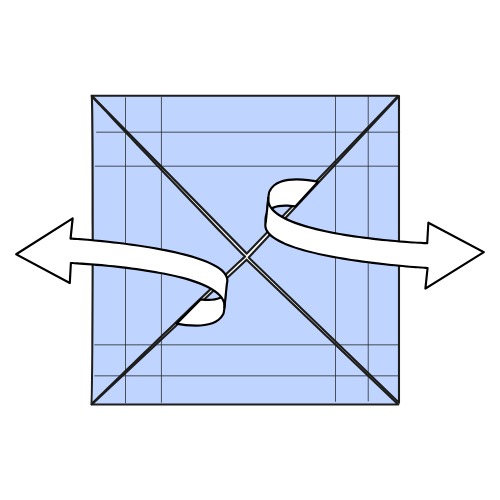
Start with the white side facing up. Fold and unfold in half both vertically and horizontally.
Step 2

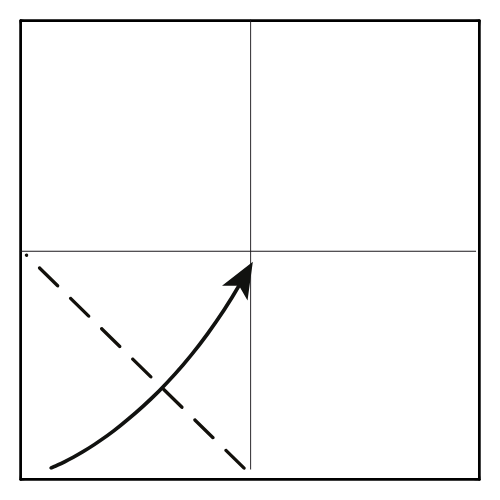
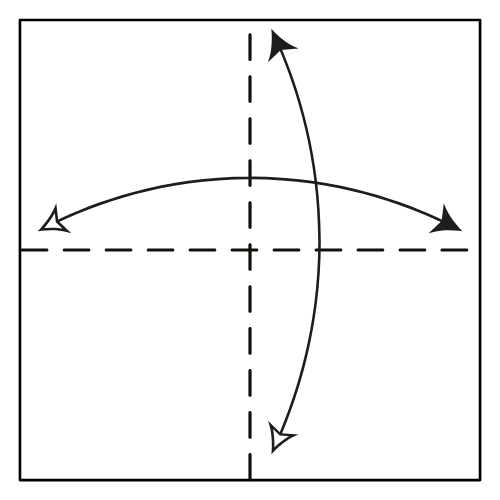
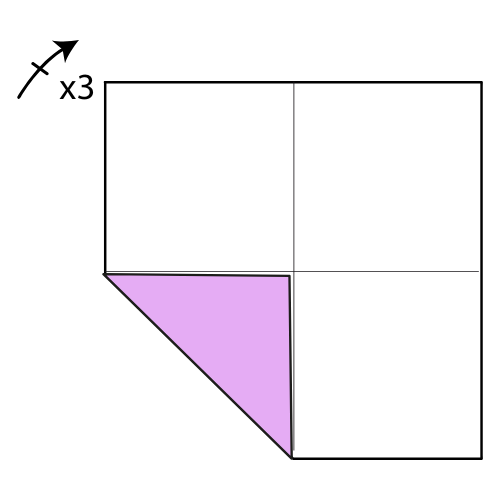
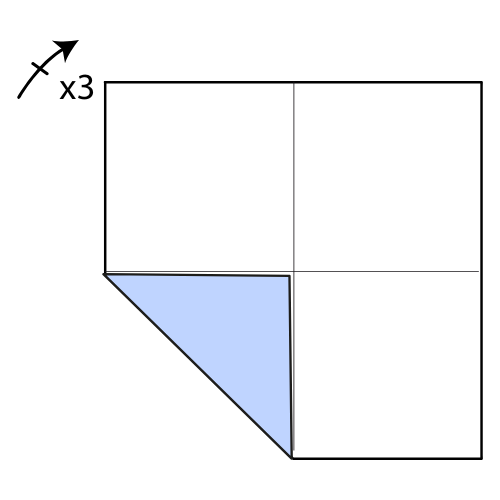
Fold the bottom left corner to the center point.
🎁 Folding tip: Instead of aiming directly for the center point, focus on where your folds intersect the horizontal and vertical crease lines. You’re creating a diagonal fold within the square area.
Step 3
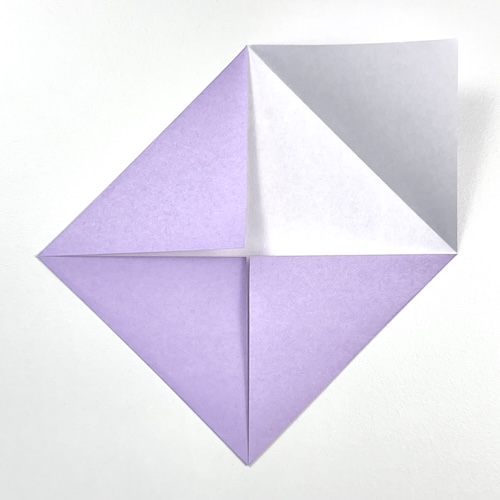
Fold the remaining three corners to the center point.
Step 4

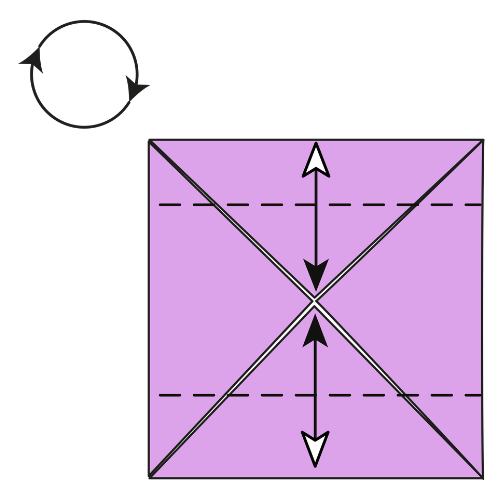
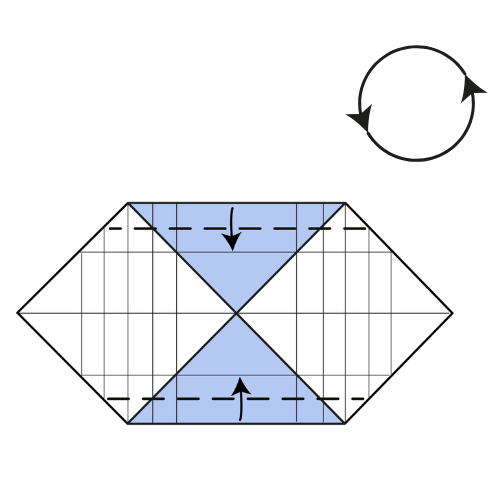
Rotate the paper 45° clockwise. Then, fold and unfold the top and bottom edges to the center point.
Step 5

Unfold the top and bottom flaps completely.
Step 6

Fold the left edge to the center point and unfold. Repeat with the right edge.
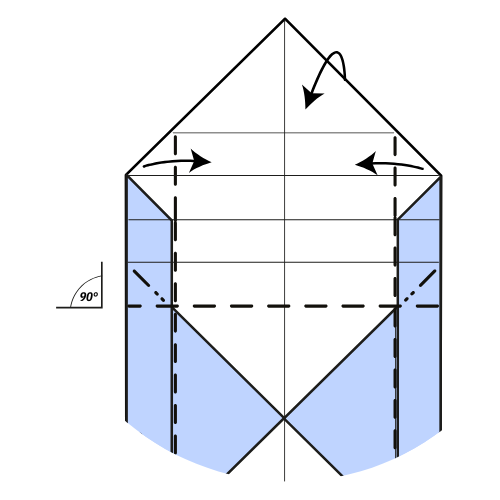
Step 7
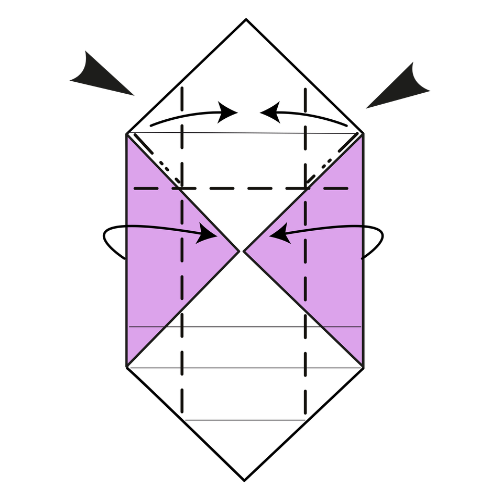
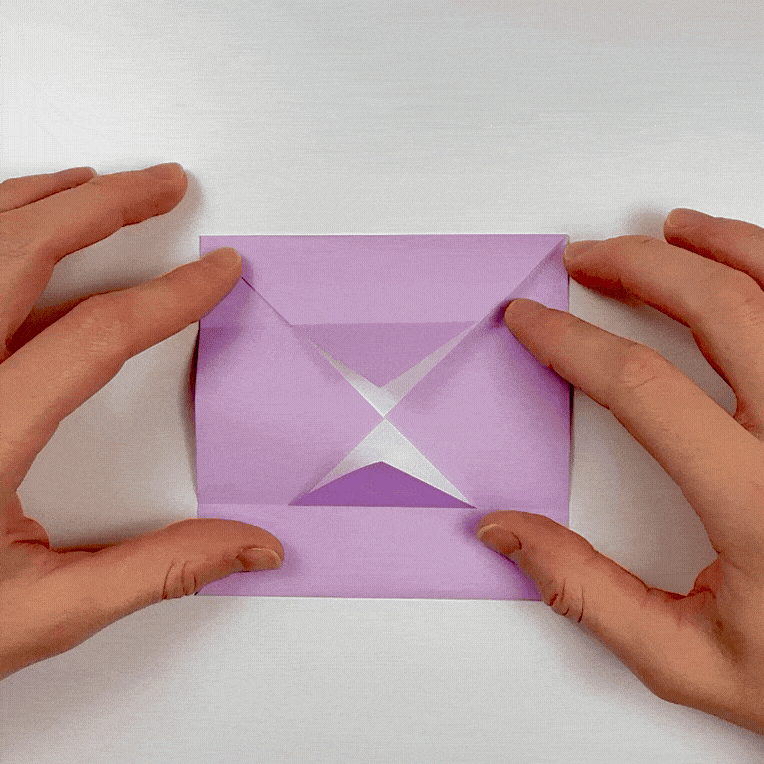
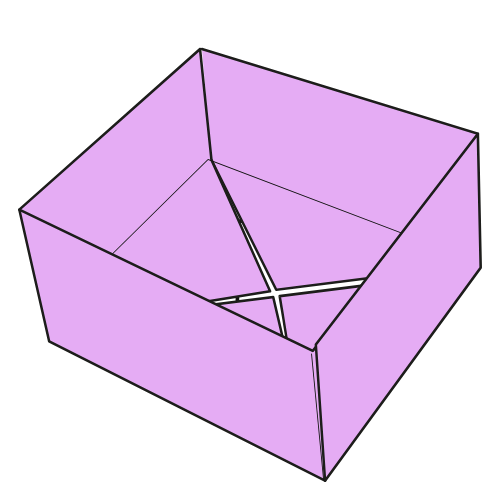
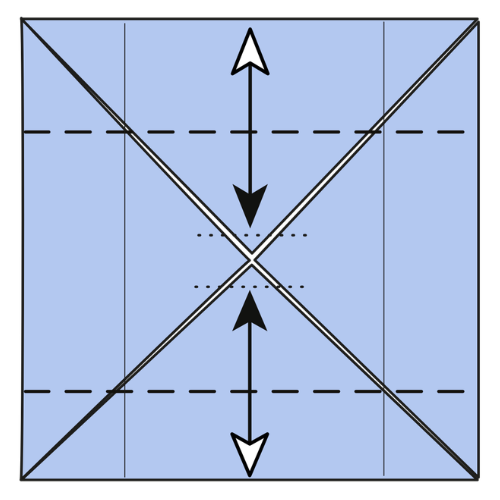
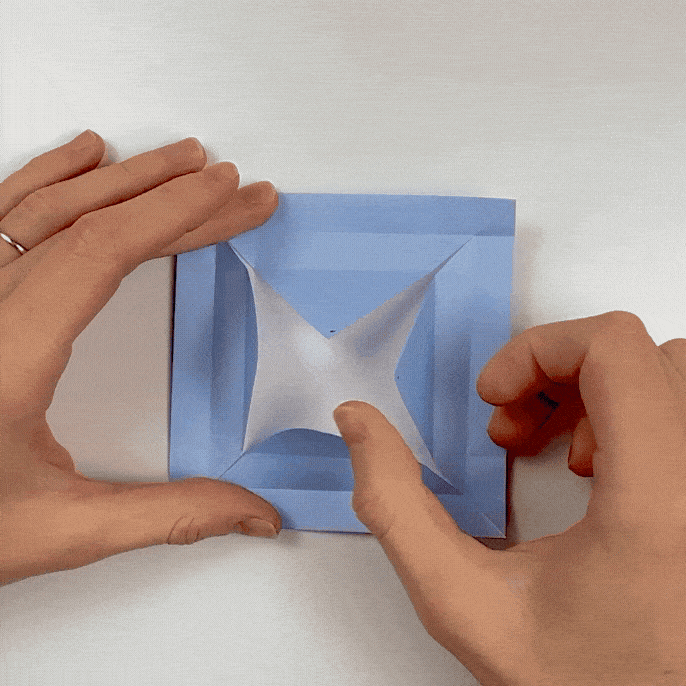
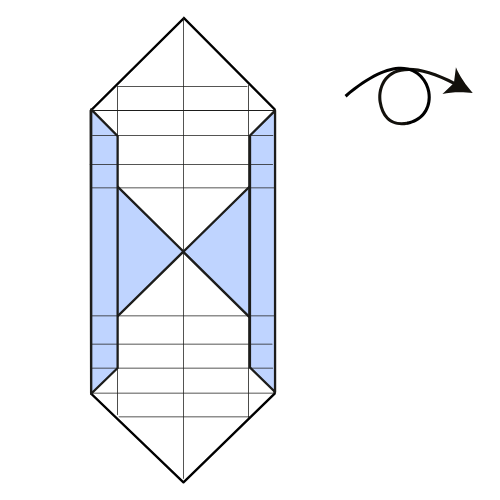
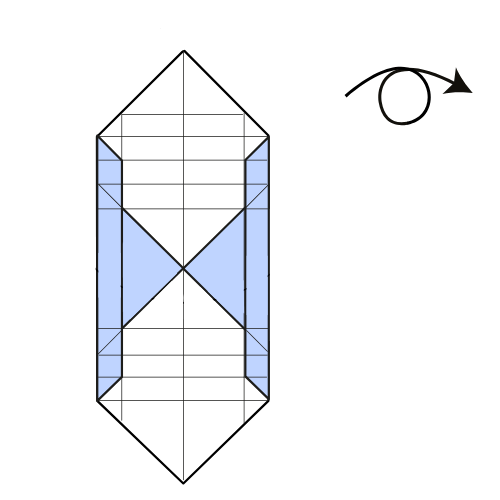
Collapse the box as shown:
- Fold the left and right sides upward toward the center, keeping a 90° angle.
- Push the top left and top right areas inward to form the box corners.
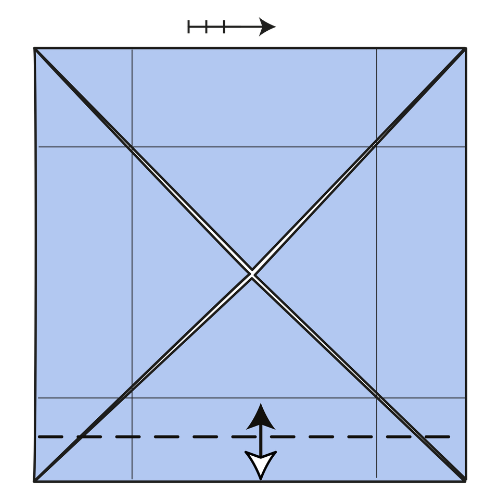
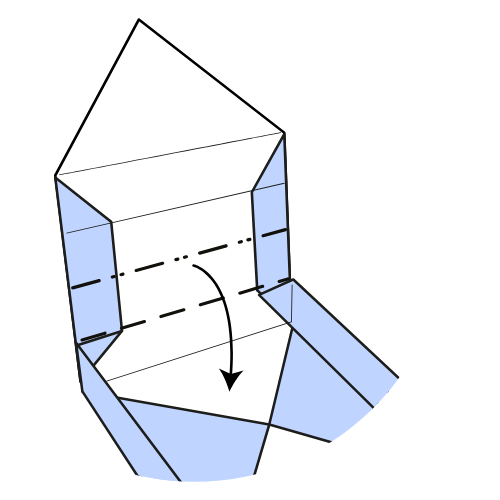
Step 8
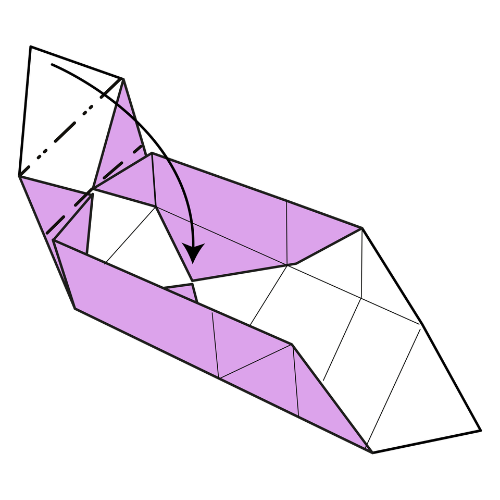
Fold the top flap down into the box to close and secure it.
🎁 Folding tip: Crease the top edge firmly so the flap locks neatly into place.
Step 9
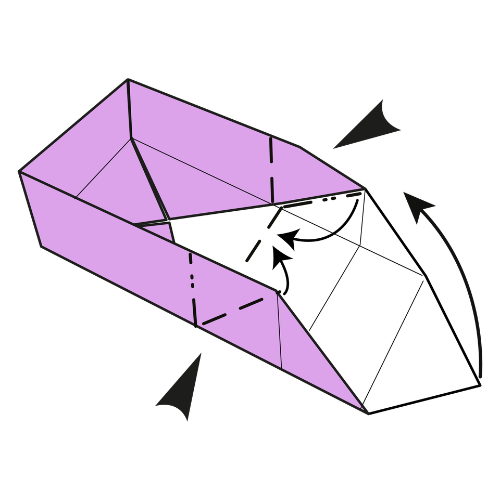
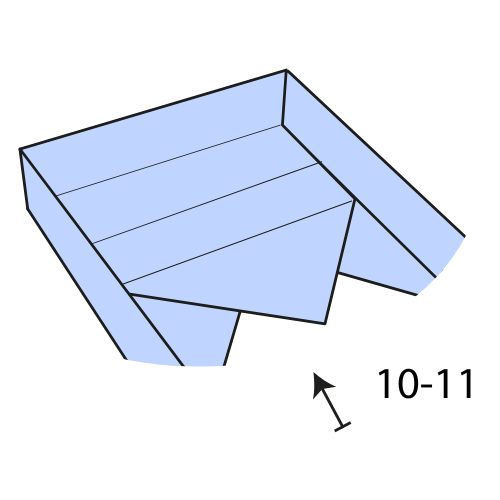
Push the bottom left and bottom right areas inward, just like in Step 7.
Step 10
Fold the remaining flap down into the box to close it, just like in Step 8.
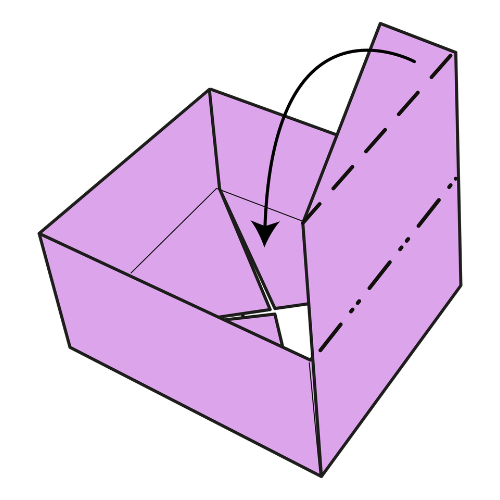
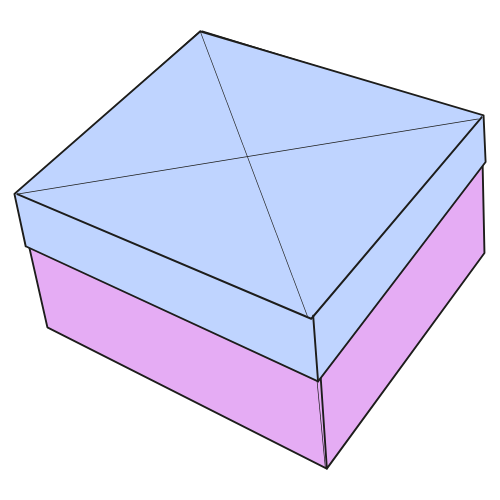
The Completed Origami Box 🎉

Folding the Box Lid
Repeat the same process as the box, except in Steps 2 and 3 the corners should not meet at the center point. Leave a small gap between the corners and the center.
For a 6 in (15 cm) square paper, leaving about 2 mm works well. The slight gap makes the lid a bit larger so it can slide on and off easily.
If you want to fold a shallow lid, keep reading.
Step 1

Repeat the same folding process as the box, but leave a small gap between the corners and the center point in Steps 2 and 3.
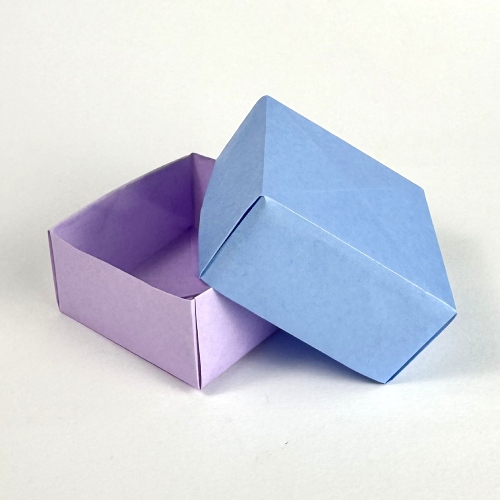
The Completed Origami Box with Lid 🎁
Challenge: Folding a Shallow Box Lid
This version is a little more challenging, but the result is worth it. A shallow lid is easier to open and close, and it looks more polished.
Step 1
Repeat the box folding process from Steps 1 to 3.
Step 2

Fold the top edge to the center point and unfold, but leave a gap this time. Then fold the bottom edge the same way, leaving the same gap.
With a 6 in (15 cm) paper, leave about a 4 mm gap on each side.
🎁 Folding tip: Use a ruler to measure the gaps and lightly mark them with a pencil. The marks will end up inside the lid, so they won’t be visible.
Step 3
Rotate the paper 90° clockwise. Repeat Step 2 on the other two sides.
Step 4
Fold and unfold the bottom edge to the nearest horizontal crease line. Repeat on the other three sides.
Step 5
Unfold the left and right flaps.
Step 6
Fold the top and bottom edges along the nearest existing creases. Then rotate the model 90° clockwise.
Step 7

Turn the model over.
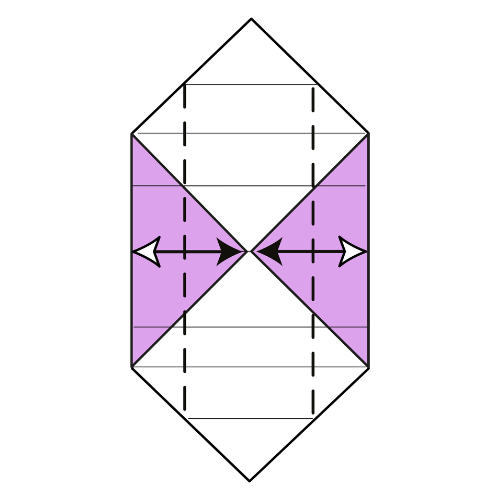
Step 8

Fold and unfold along the two existing diagonals.
🎁 Folding tip: Hold all the layers firmly together and double check alignment before making your creases. Clean alignment makes the lid look much sharper.
Step 9

Turn the model over.
Step 10
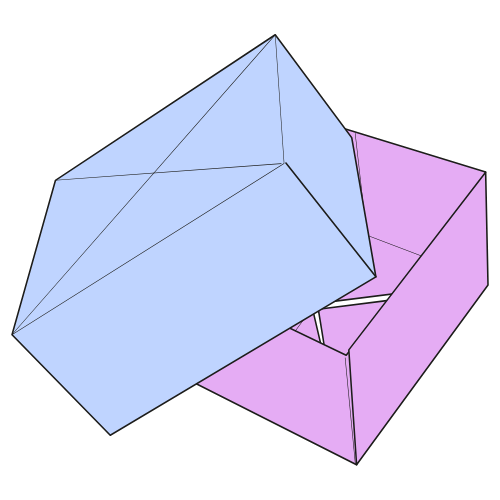
Collapse the lid as shown:
- Fold the left and right sides upward toward the center, keeping a 90° angle.
- Push the top left and top right areas inward.
Step 11
Fold the top flap down into the lid to close it.
Step 12
Repeat Steps 10 and 11 on the other side.
The Completed Origami Shallow Box Lid
That’s it, your origami box is ready. Once you’ve folded one, it’s hard not to make a few more. They look clean on a desk and are genuinely useful for organizing small things.
If you try both versions, you’ll quickly feel the difference between the classic lid and the shallow one. The classic version is great to get comfortable with the folds, while the shallow lid gives a nicer finish once you’re more confident.
If you made a few boxes, I’d be curious to see how you’re using them. Feel free to share your creations in the comments, especially if you played with different sizes or colors.
And if you’d like to keep folding, you can explore more models on our easy origami page or browse our useful origami collection for ideas you can actually use around your home.
You can also subscribe to our YouTube channel for step-by-step videos, and join our newsletter to get new models and tutorials straight to your inbox.

Download the Full Origami Box Printable PDF
Instructions
We’d love to keep you in the loop, so by sharing your email with us, you’ll be signed up for our mailing list. Don’t worry; we won’t bombard you with spammy emails, and your information is safe with us – we won’t share it with anyone else.
Watch the Origami Box Video Tutorial
Enjoyed this tutorial?
Subscribe to our YouTube channel for new inspiring origami videos every week!


Hi everyone, I just wanted to let you know that we’ve added some helpful images and videos to make things easier for you (especially step 17). I hope this helps!
Help With 17!
Hi Sam! Check the gifs in steps 17 and 19. They show you how to fold one side of the box in two steps. The video in step 20 shows you how to do it for the other side. The folds are the same, and you already created the creases in the previous steps. We’ll also post a video in the coming weeks.
Oh, I looked really hard and realized it was super easy. I am making a bigger one because it’s too small
I find step 17 hard can you please help me out?
Have you seen our YouTube video? It might be easier to follow along. We’re also working on updated diagrams for this masu box, including a shallow lid version. They should be much clearer. Stay tuned!
This is the best tutorial I have ever seen on the origami box. It has everything (diagram with photo of each step and succinct instruction) a beginner would need to learn how to make box. I can see you put a lot of work on creating this tutorial. I use it for my library program and ref to your website. Thank you very much.
Thank you so much for your kind words! It truly means a lot to hear that the tutorial has been helpful.
I needed this for wrapping a Christmas present at school. And now, with your help, i have given tge gift. This is amazing!
WOW! this is soooooooooo cool! It can hold a lot of origami crafts!!! 😍love it! thanks for sharing the instructions!
My box with Two Traditional Origami Jumping Frogs!! I made it lager because 15×15 was too small (i forgot to add it 😑)
My Box with lid
This box is really good and I give it a 5 out of 5 stars.
so cool just made it an it turned out great
I found step 17 really confusing, I eventually figured out that if you pinch above where the dotted line is then slowly pull it open then it will start to look like the next step, hold the pinch and complete the fold that starts to form to finish it
Hope this helps
I like this ORIGAMI
Thanks for your very clear instructions. 20+ years since I made these and now I share this joy with my children
This is SUPER EASY. YOU GUYS DID A GOOD JOB MAKING THIS. :-)*Im watching you when you are sleeping*(-:
I’m using most of these instructions and pictures to show Brownies how to make boxes. We’re making Peppermint creams to go inside them.
For the tricky stage (17+) I’m describing it as follows:
Push your index fingernails into the diagonal ‘valley’ creases near the top.
Slide your thumbs into the middle line and open each side up towards the ceiling.
With your middle fingers, grab the back of the paper and pull out your index fingers. Pinch in the sides between your thumbs and middle fingers.
With your index fingers, bring the top flap down over the top and fold into place.
Hope that helps others!
this is good thanks
Oh! I love this Orgami Box even though I didn’t do very good! 🙂
Awesome ????
I loved the project!! I still had trouble making it but I still made it.
Me too, but I didn’t give up.
ty 😀
This was fun! Thank you for helping all of us beginner origami strangers make a box!
Many years ago someone taught me how to make these boxes. I am a retired teacher. Each year my second graders would bring Christmas cards to class, after Christmas. Those cards would supply me with cards for the next year’s class. I already had a stash for the first year. I would select cards whose fronts had a design or picture that would show up on the top of the box when folded. I cut the cards fronts into the square needed for the box top. I cut the back of the card into a slightly smaller square for the box bottom. The students selected a card to make a cute little box that we would hang like an ornament on our class Christmas tree. They wrote a special greeting to their parents on a slip of paper and put the note inside. They slipped a loop of yarn into the box before closing it to make a hanger. They, of course, would take their box home just before Christmas break. I had the students practice making boxes with paper first since paper is easier to fold than the cardstock greeting cards. They learned to make their own squares by folding a sheet of paper diagonally and cutting off the excess. It made two triangle shapes. After cutting off the excess they folded the paper into opposite corners so the folds created intersecting lines, showing the exact center of the square needed to make the boxes. Hands-on Math in action! They loved making these boxes. Upon retiring, I offered a box making class at the local senior center. I discovered that tablets of scrapbook paper is already cut into squares and is quite decorative. For senior hands it was easy for them to fold the boxes using the scrapbook paper. Greeting cards made of cardstock require a little more finger muscle to fold a sharp exacting crease so practicing with paper helps with the basics before tackling the sturdier cardstock. I also showed them they could fold sturdier boxes using cereal boxes. I asked my students and the seniors what they would suggest putting into the boxes when used as gift boxes. They suggested: Love notes, engagement rings, money, jewelry, and candy. Other suggestions were for buttons, nuts and bolts, garden seeds, sewing notions, board game parts, small cosmetics, bulletin board tacks. These boxes are just so much fun to make, but even more fun to show others how to make them. It’s such a satisfying positive experience.
i wish i was your student ????
Janice, I don’t know if you’ll see this, but that suggestion to make these out of Christmas cards is BRILLIANT! Thanks!
It got confusing at step 17-18, but I figured it out and now I have a beautiful box