
How to Make an Origami Box With Lid
Let’s learn how to make a classic origami box, also known as a masu box.
Masu boxes were originally square wooden containers used in Japan to measure rice. This paper version keeps the same simple shape, but is quick to fold and very practical. You can use it to hold small items like paper clips, candies, or anything you want to keep organized.
In this tutorial, I’ll show you how to fold both the classic lid and a shallow lid. The classic lid is easier and a good place to start if you’re new to origami. The shallow lid looks cleaner and is easier to use, but it requires a bit more precision, so it’s better suited if you already have some folding experience.
Once finished, the box holds together well on its own. If a flap doesn’t sit perfectly flat inside, you can press it down with what you put inside, or use a little bit of glue if needed.
Origami Box Step-by-Step Instructions
- Difficulty: Easy – Beginner level 3
- Folding time: 5-15 minutes
Recommended Paper
15×15 cm (6×6 in) Kami, Tant, or Chiyogami (patterned paper). This will make a 5.5×5.5×3 cm (2.2×2.2×1.2 in) box.
This tutorial was updated in March 2026 with clearer steps and improved visuals.
Folding the Origami Masu Box
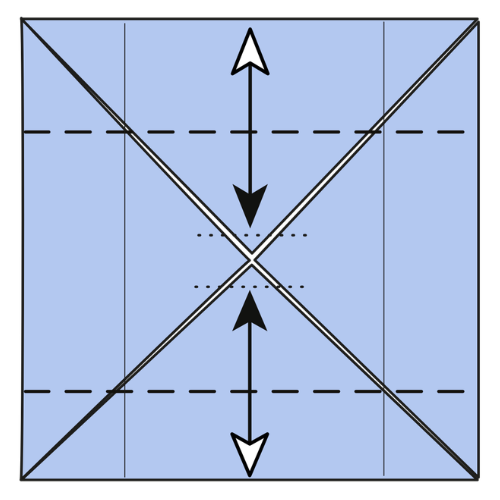
Step 1
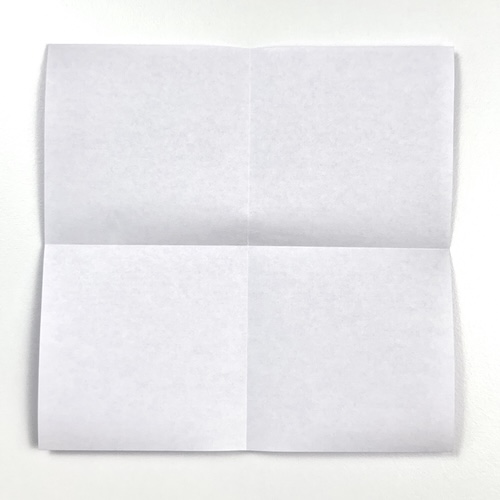
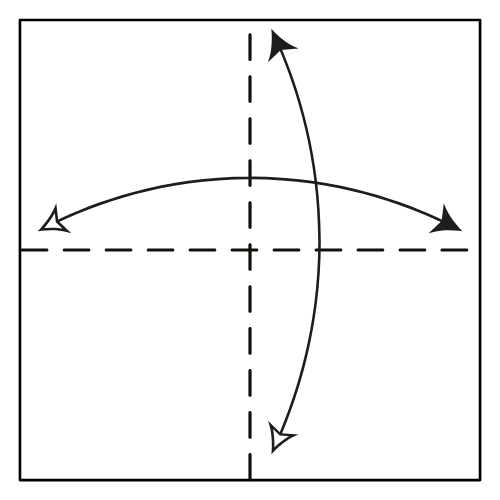
Start with the white side facing up. Fold and unfold in half both vertically and horizontally.
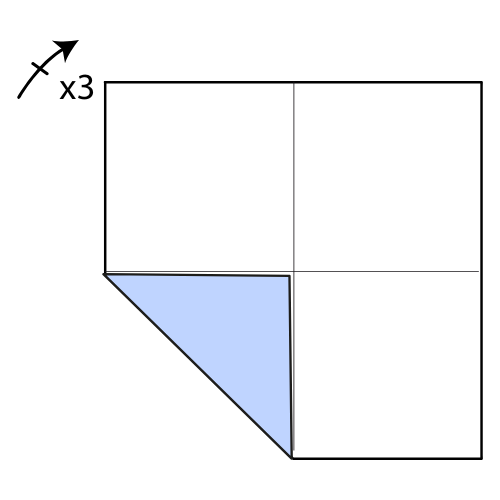
Step 2

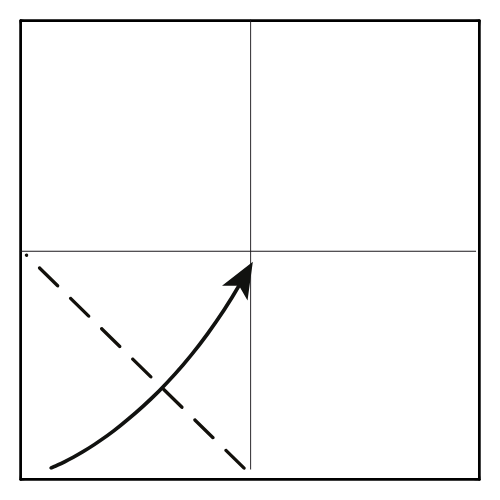
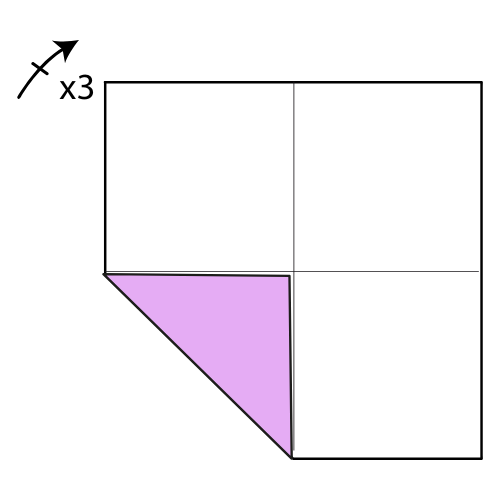
Fold the bottom left corner to the center point.
🎁 Folding tip: Instead of aiming directly for the center point, focus on where your folds intersect the horizontal and vertical crease lines. You’re creating a diagonal fold within the square area.
Step 3
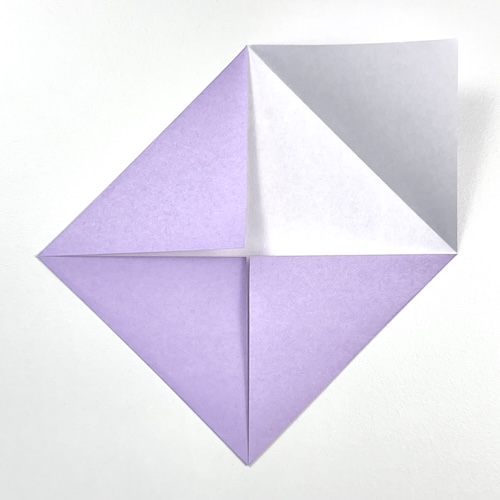
Fold the remaining three corners to the center point.
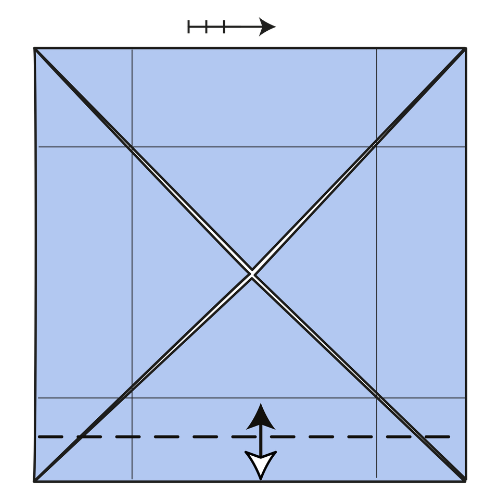
Step 4
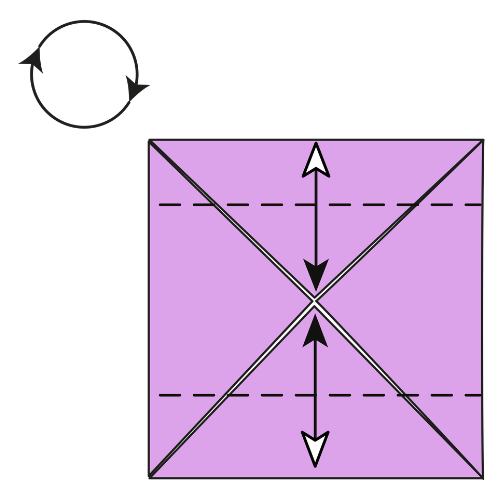
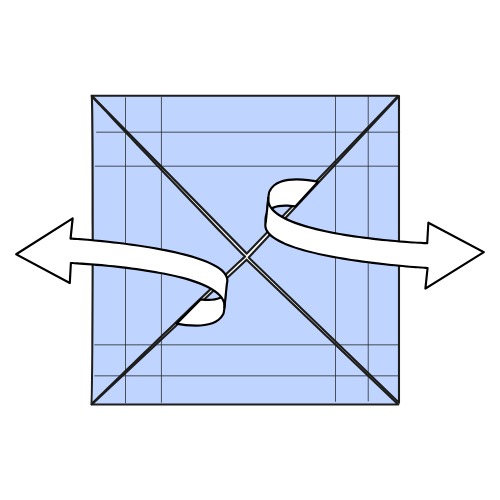
Rotate the paper 45° clockwise. Then, fold and unfold the top and bottom edges to the center point.
Step 5


Unfold the top and bottom flaps completely.
Step 6

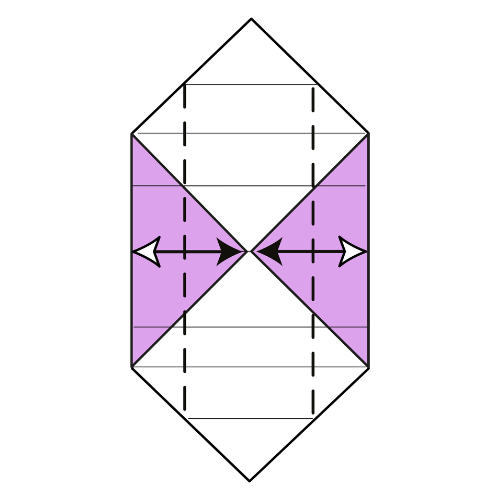
Fold the left edge to the center point and unfold. Repeat with the right edge.
Step 7
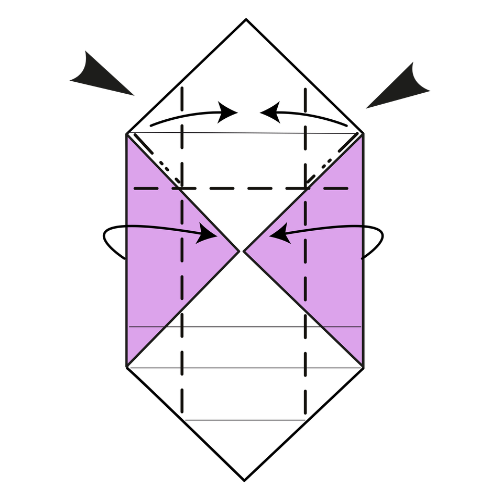
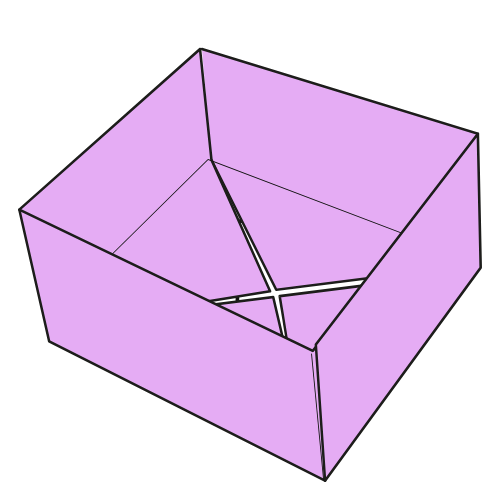
Collapse the box as shown:
- Fold the left and right sides upward toward the center, keeping a 90° angle.
- Push the top left and top right areas inward to form the box corners.
Step 8
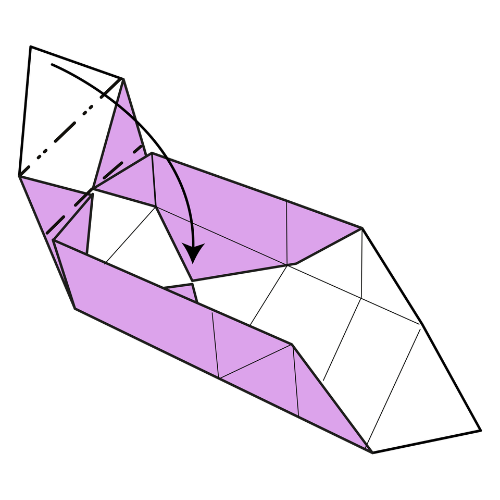
Fold the top flap down into the box to close and secure it.
🎁 Folding tip: Crease the top edge firmly so the flap locks neatly into place.
Step 9
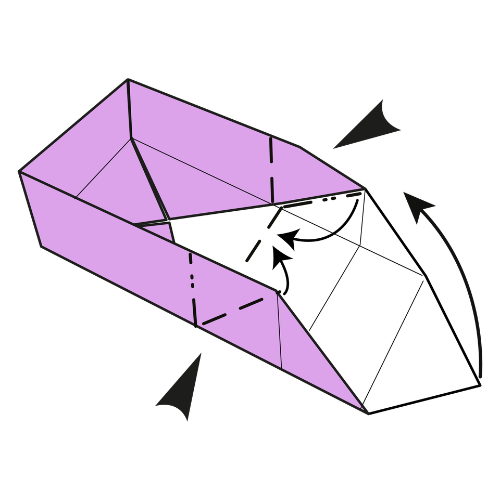
Push the bottom left and bottom right areas inward, just like in Step 7.
Step 10
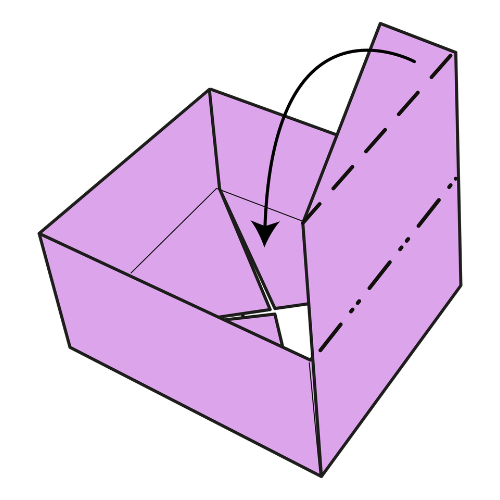
Fold the remaining flap down into the box to close it, just like in Step 8.
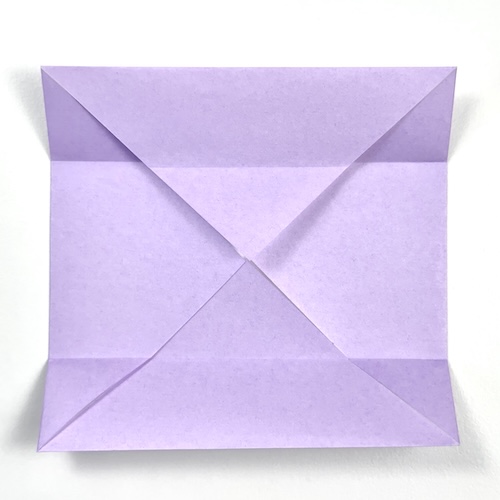
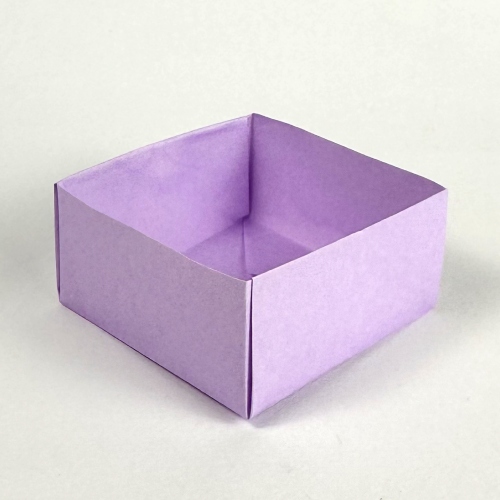
The Completed Origami Box 🎉
Next, I’ll show you how to fold the lid.

Folding the Box Lid
Repeat the same process as the box, except in Steps 2 and 3 the corners should not meet at the center point. Leave a small gap between the corners and the center.
For a 6 in (15 cm) square paper, leaving about 2 mm works well. The slight gap makes the lid a bit larger so it can slide on and off easily.
If you want to fold a shallow lid, keep reading.
Step 1

Repeat the same folding process as the box, but leave a small gap between the corners and the center point in Steps 2 and 3.
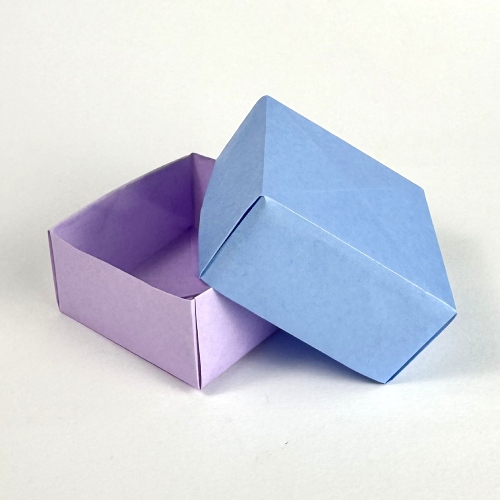
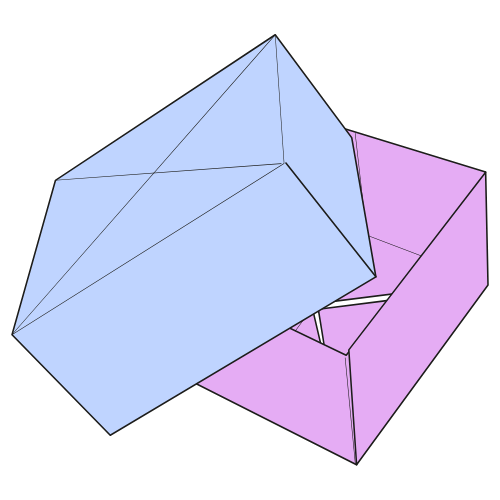
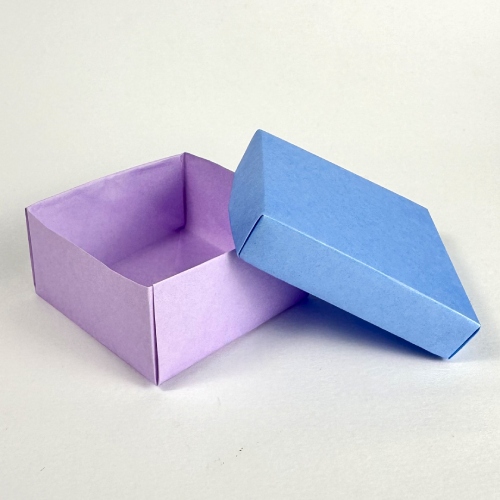
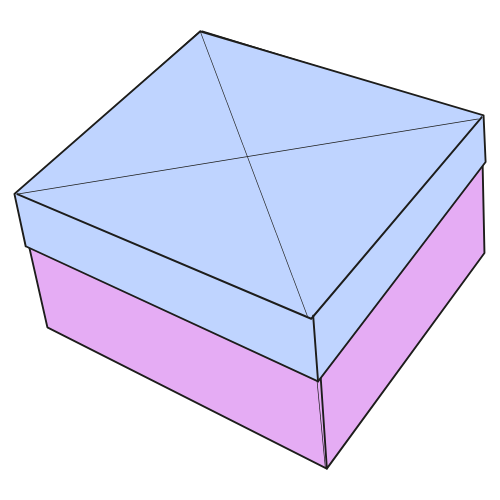
The Completed Origami Box with Lid 🎁
Ready for a challenge? Let’s try to fold a shallow lid.
Challenge: Folding a Shallow Box Lid
This version is a little more challenging, but the result is worth it. A shallow lid is easier to open and close, and it looks more polished.
Step 1
Repeat the box folding process from Steps 1 to 3.
Step 2

Fold the top edge to the center point and unfold, but leave a gap this time. Then fold the bottom edge the same way, leaving the same gap.
With a 6 in (15 cm) paper, leave about a 4 mm gap on each side.
🎁 Folding tip: Use a ruler to measure the gaps and lightly mark them with a pencil. The marks will end up inside the lid, so they won’t be visible.
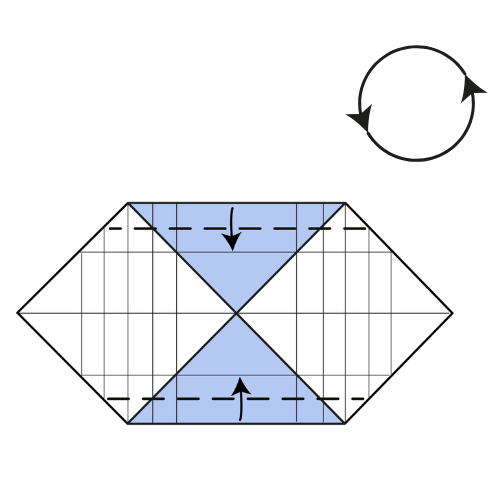
Step 3
Rotate the paper 90° clockwise. Repeat Step 2 on the other two sides.
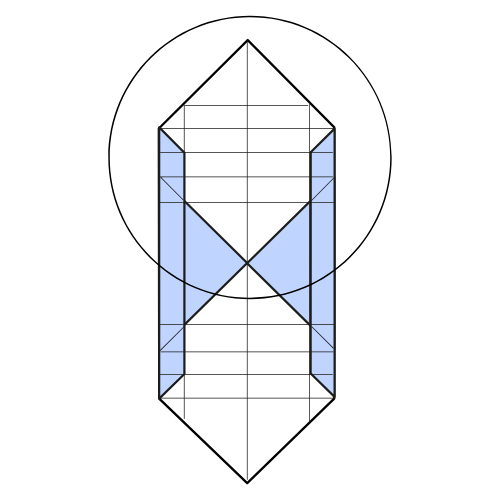
Step 4
Fold and unfold the bottom edge to the nearest horizontal crease line. Repeat on the other three sides.
Step 5
Unfold the left and right flaps.
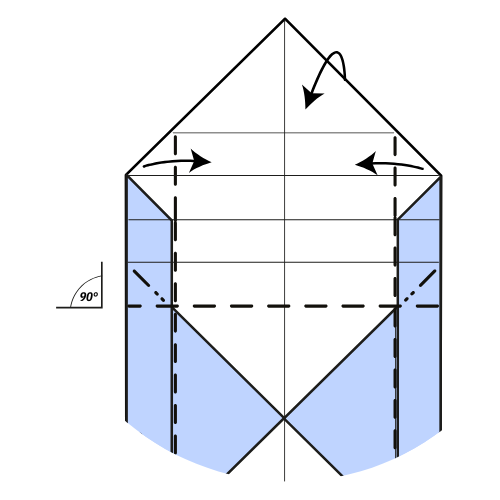
Step 6
Fold the top and bottom edges along the nearest existing creases. Then rotate the model 90° clockwise.
Step 7

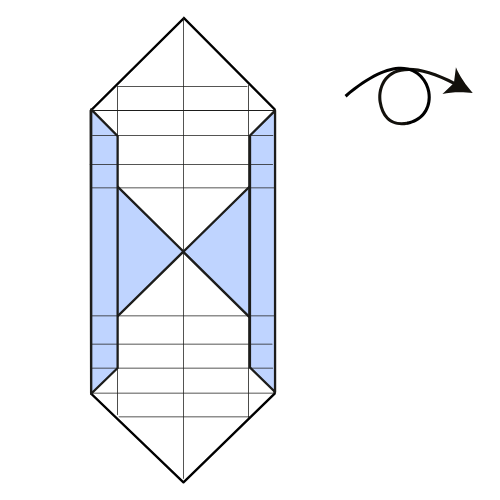
Turn the model over.
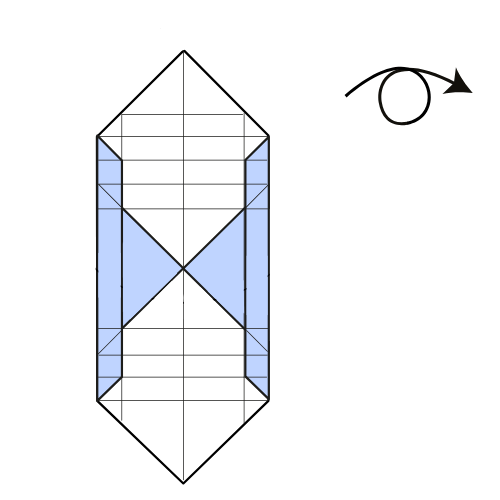
Step 8

Fold and unfold along the two existing diagonals.
🎁 Folding tip: Hold all the layers firmly together and double check alignment before making your creases. Clean alignment makes the lid look much sharper.
Step 9

Turn the model over.
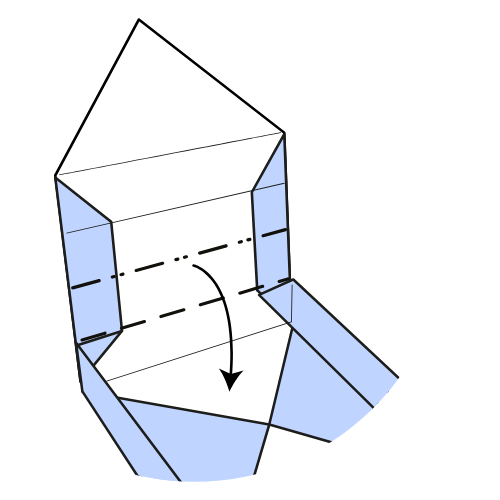
Step 10
Collapse the lid as shown:
- Fold the left and right sides upward toward the center, keeping a 90° angle.
- Push the top left and top right areas inward.
Step 11
Fold the top flap down into the lid to close it.
Step 12
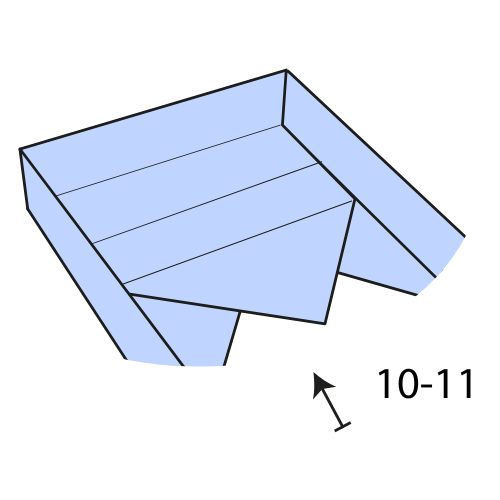
Repeat Steps 10 and 11 on the other side.
The Completed Origami Shallow Box Lid
That’s it, your origami box is ready. Once you’ve folded one, it’s hard not to make a few more. They look clean on a desk and are genuinely useful for organizing small things.
If you try both versions, you’ll quickly feel the difference between the classic lid and the shallow one. The classic version is great to get comfortable with the folds, while the shallow lid gives a nicer finish once you’re more confident.
If you made a few boxes, I’d be curious to see how you’re using them. Feel free to share your creations in the comments, especially if you played with different sizes or colors.
And if you’d like to keep folding, you can explore more models on our easy origami page or browse our useful origami collection for ideas you can actually use around your home.
Learn more about origami. Browse our origami hub and explore more models and techniques.
You can also subscribe to our YouTube channel for step-by-step videos, and join our newsletter to get new models and tutorials straight to your inbox.

Download the Complete Origami Box Printable PDF Instructions
This printable PDF is part of our Origami Friends membership on Patreon. As a member, you get access to these diagrams, our full library of printable PDFs, and member-only content.
Watch the Origami Box Video Tutorial
Enjoyed this tutorial?
Subscribe to our YouTube channel for new inspiring origami videos every week!


Hi everyone, I just wanted to let you know that we’ve added some helpful images and videos to make things easier for you (especially step 17). I hope this helps!
Help With 17!
Hi Sam! Check the gifs in steps 17 and 19. They show you how to fold one side of the box in two steps. The video in step 20 shows you how to do it for the other side. The folds are the same, and you already created the creases in the previous steps. We’ll also post a video in the coming weeks.
Oh, I looked really hard and realized it was super easy. I am making a bigger one because it’s too small
This is such a cool origami box. I know haave a safe a place to put my phone. But step 17 is sooooooooooooooooooo confusing. i sugest you make videos instead of diagrams.
Oh yes. Everyhting was going great until step 17, then I got confused.
I looks good
I love this origami Masu Box I have memorized it by heart, making a bunch for my family. Who knew I would make a career out of making Boxes?!
Hardest: 17-18
Do you have instructions for an accompanying lid?
There’s instructions at the end for making a lid. You make it pretty much the same as the box itself just with a slight modification to one of the steps.
I love this box! It was pretty hard at number 17, I had to ask my mom for help.
Yeah, that’s definitely the hardest part of this model.
Use crisp paper and make strong creases. Also at step #17 know where the bottom on the box will be and that helps make sense of those next few steps. My first box popped into place with these tips!
The directions are perfect! Use crisp paper and make strong creases in the folding. At step #17 know where the bottom on the box will be and take helped me with the next few steps. Using crisp paper and making strong creases, the box popped into place! Thanks for this. I love having projects that I can do with just a piece of paper!
This was really easy to follow, best one yet! Thank you. It came put perfect 🙂
It’s damn easy idk which part are you confused at?
Yes! It is! Sorry can’t Help.
I made 23 of these about 12 years ago to give tiny Christmas ornaments to my 2nd grade class and haven’t made any since. Kind of forgot how. So glad to find instructions again.
I have a box made by a Japanese friend that is 1¾ × ¾ in. which seems to have 17 smaller boxes inside it. Incredible & beautiful.
Thank you for this. This one of the easiest tutorials I have come across, our schools KS3 maths classes will be making these now at Christmas! We’re thinking of doing it with wrapping paper to make some nice Christmas gift boxes.
How did that work out! I think wrapping paper is too thin but christmas scrapbooking paper (12″) made some nice boxes! and heavy enough to stand up to a little pressure. 😉
I made one a few years ago from origami papaer. Was sturdy enough fo my purpuposes. (I’m so glad to find the pattern again!)
Thank you so much for the easy tutorial!! ♥
After 17 its very unclear? COuld you have like a 17a and 17b or something ?
This is the trickiest step and I don’t really know how to draw it halfway. Try un-folding the top layers back out to the left and the right.
While you do that fold the bottom layer up along that horizontal dotted line while also making valley folds along the two diagonal lines.
Those are all existing creases so as you unfold the top two layers back out you can kind of push the paper together and it should take on the shape in the next step.
Hope this helps.
This is great – thanks! Would love to know what size paper you need to make different sized boxes if you know? Else I will have to find out by practicing I suppose.
I believe the length and width of the bottom of the final box is roughly 1/4 the size of the original paper. Hope that helps!
A mathematician (who made a bunch of these boxes) is going to chime in: the box is actually closer to 1/sqrt(8) the size of the paper. I know that’s super geeky: that’s just a tad bigger than 1/3. So, a 12″ square of paper made a box that was 4.5″ wide and 2.25 inches high.
Thanks for these instructions! I used them to make last year’s calendars into next year’s gift boxes!
Got it down and I now have a box to hold the other finished origami products
Exactly what I will do when I finish mine…..
Done! Need a bigger one…
Things got confusing at step 17…. please help 🙁
Yeah, this is probably the hardest step. You need to open up the paper unfolding the two folds on each side.
As you do that you need to also fold along the dotted lines there, those creases are already there.
This kind of pinches in the sides and will give you the 3D shape on the side that you see in the next step. You can use that next step as a reference.
I know it really did but I eventually understand it
Think outside the box
its pretty easy just slowly pull the triangles till they are halfway up
It’s easy,just practice ok????????????????
Cool
It worked perfectly, now I have box to put my ring in. The instructions were easy to follow along to and I give this origami box a 4 out of 5 stars.
Glad you liked it!