
How to Make an Origami Camel
This origami camel, designed by Sébastien Limet, has a simple, almost classic look. But folders familiar with Sébastien’s work will probably recognize his style right away.
It’s not particularly complex, but it does ask for a bit of folding experience. So if you’re a beginner looking for a small challenge, this one’s a great pick.
The diagrams, created by Peter Buchan-Symons, guide you through the sequence in a way that feels smooth and intentional. Every step builds clearly on the last, making the whole folding process feel well thought-out.
I recommend using paper that’s the same color on both sides to avoid the color change on the front legs. For best results, we used Tant paper in our photos.
It’s a bit thick for the final steps, but the texture gives the finished model a beautiful presence.
Origami Camel Step-by-Step Instructions
- Difficulty: Low-Intermediate
- Folding time: 10-15 minutes
Recommended Paper
15×15 cm (6×6 in) Kami or Tant
Step 1
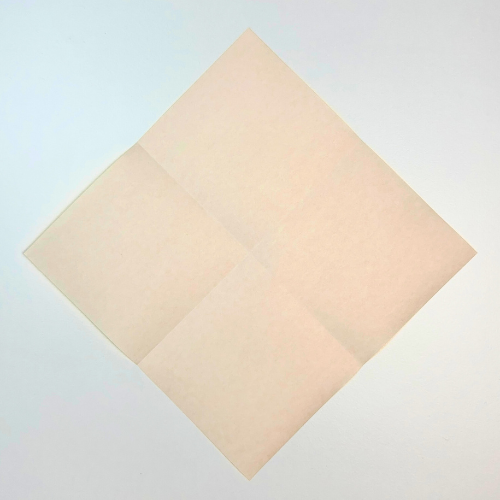
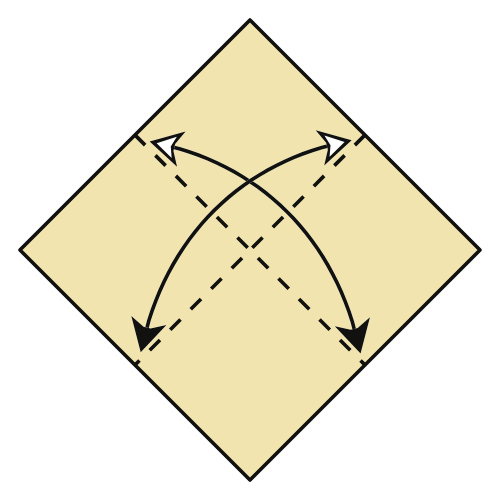
Start with the white side of the paper facing up in a diamond position. Fold side to side in both directions, then unfold.
Step 2
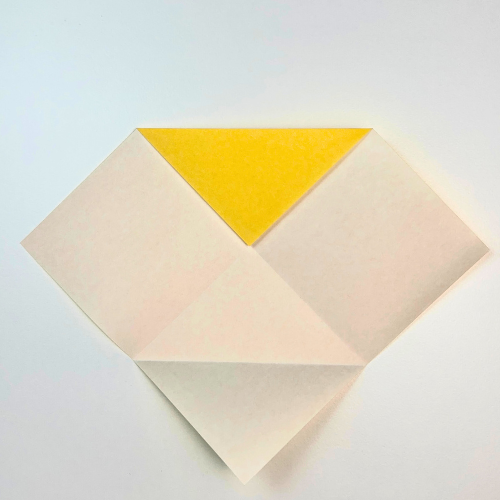
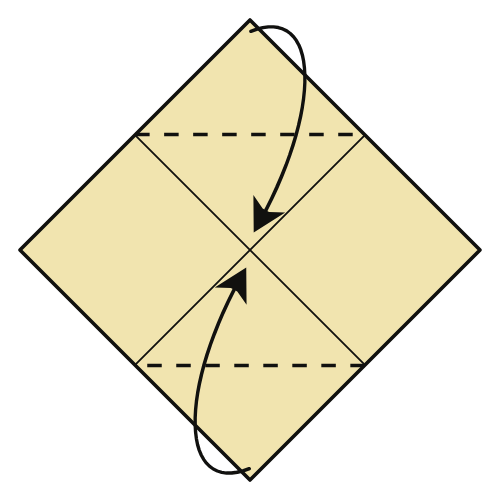
Fold the top and bottom corners in to meet the center point.
Step 3

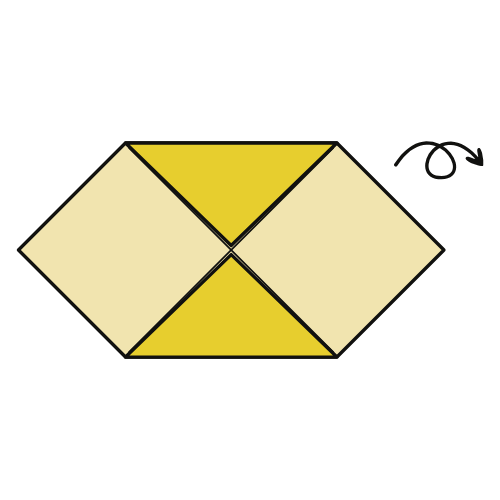
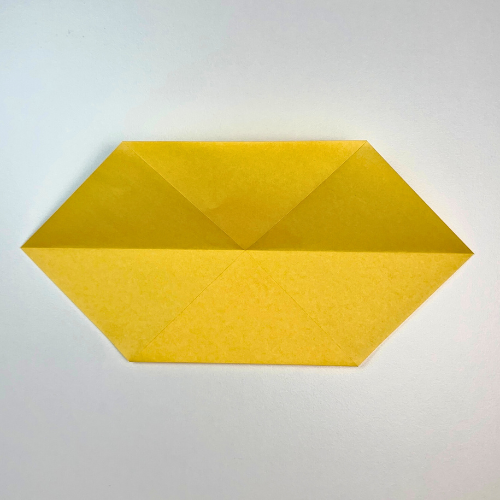
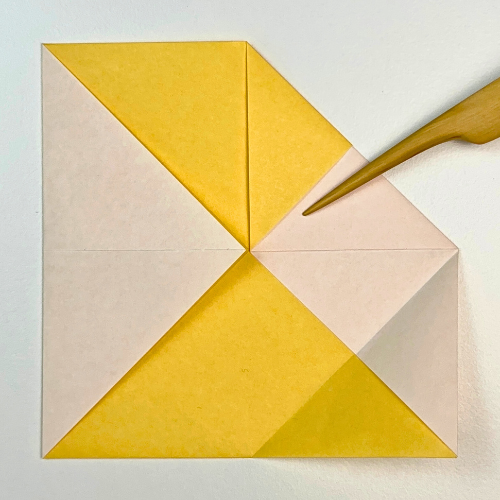
Turn the paper over.
Step 4
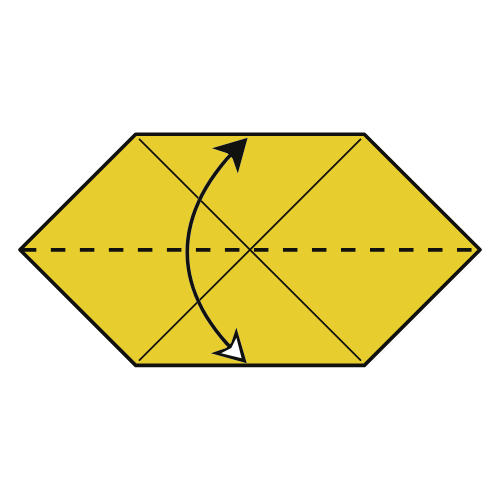
Fold the bottom edge up to the top edge, then unfold.
Step 5
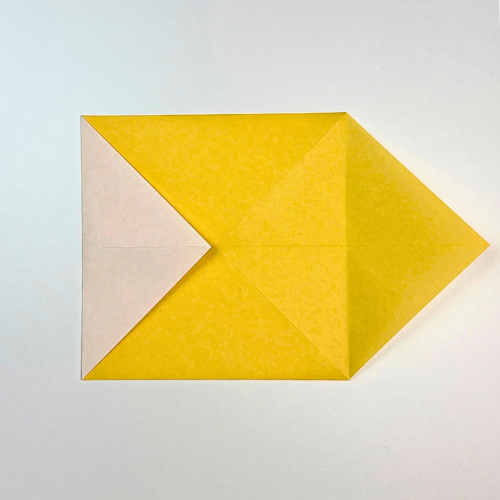
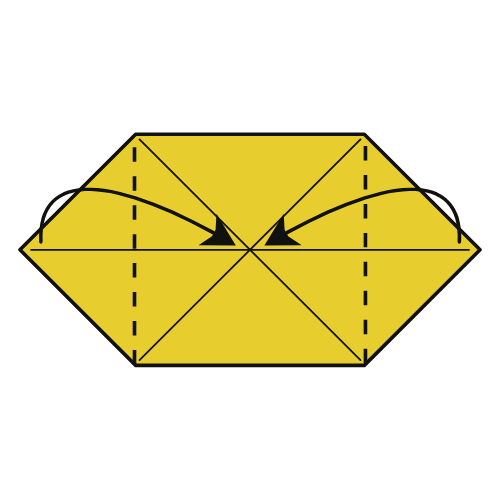
Fold the left and right corners to the center point.
Step 6
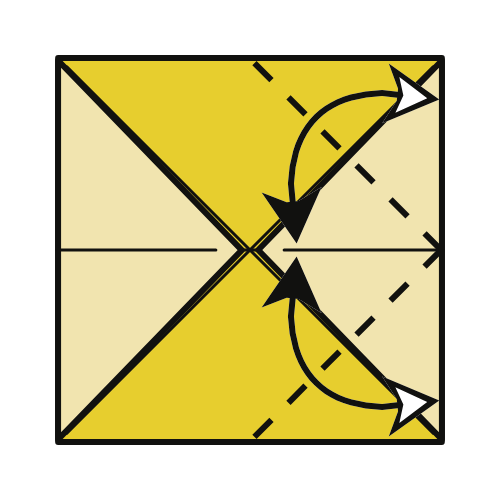
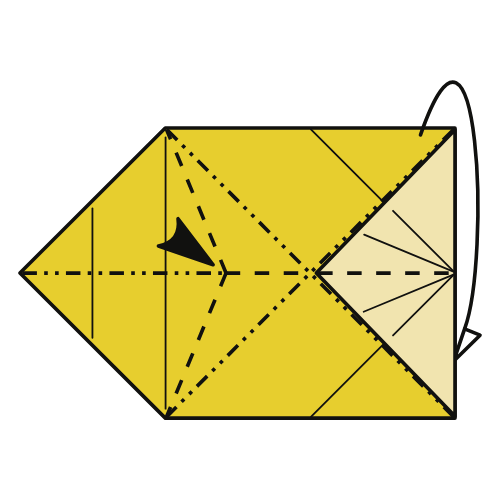
Fold and unfold both right corners to the center point.
Step 7
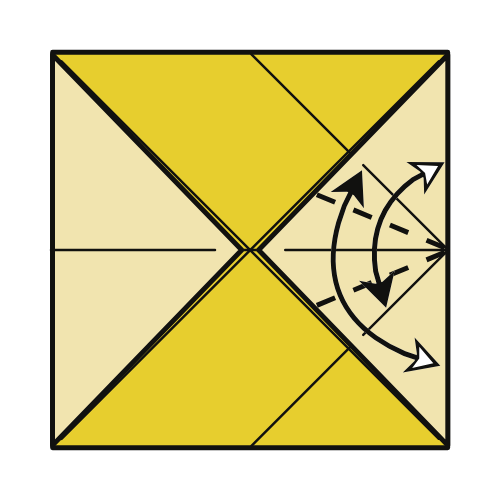
Fold and unfold the top and bottom right edges to the crease lines you made in Step 6.
Step 8
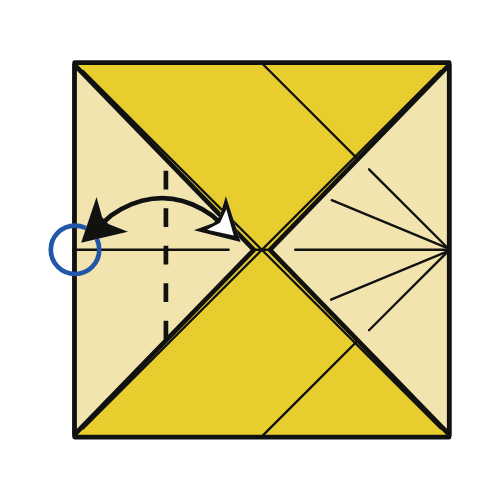
Fold the center point of the left triangle to the left edge, then unfold.
Step 9
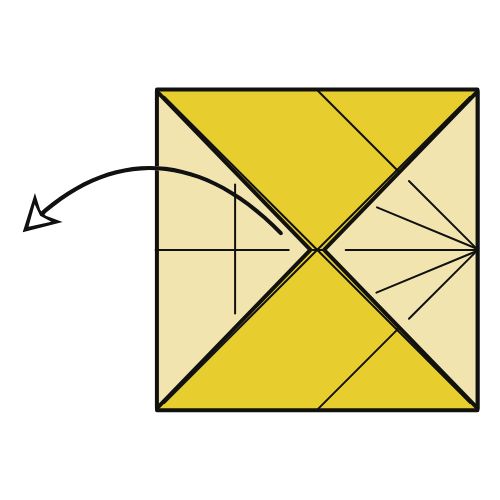
Unfold the entire left triangle.
Step 10
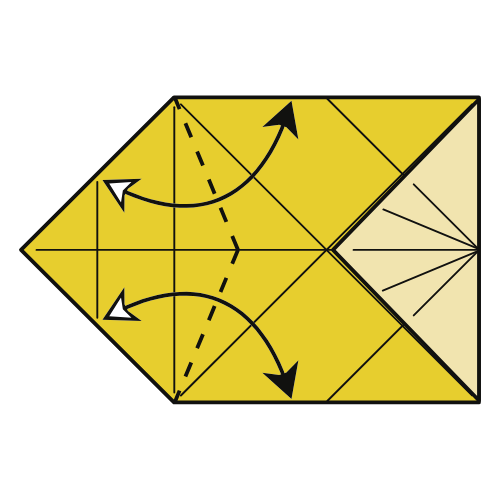
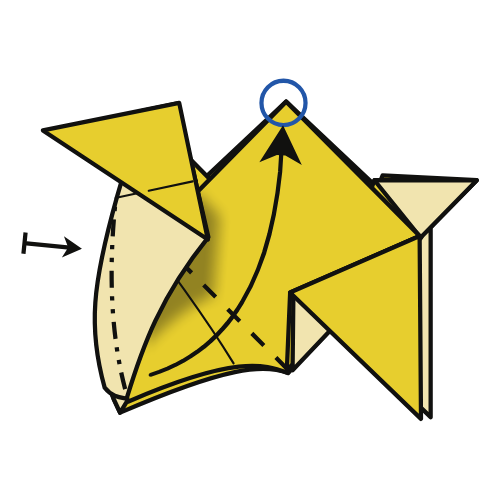
Fold and unfold the top left edge to the top edge. Only crease from the corner to the horizontal centerline. Repeat this for the bottom left edge.
Step 11
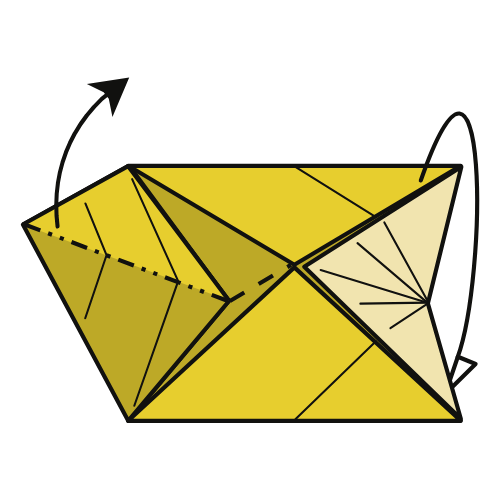
Collapse the model in half using the existing creases.
Collapse in progress.
Step 12
Fold the bottom right corner up to the top corner. Repeat on the other side.
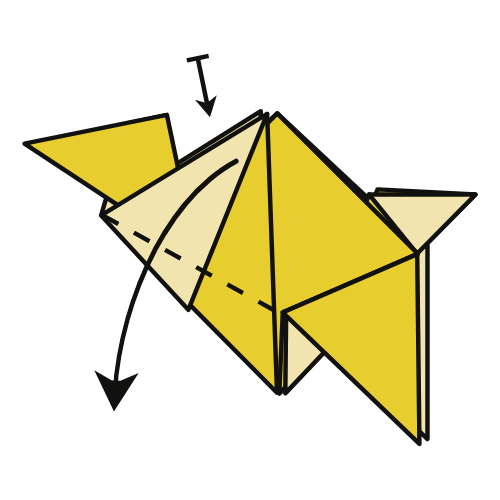
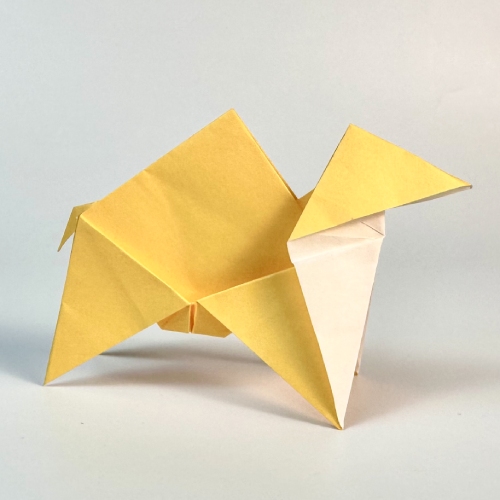
Step 13
Fold the flap you just made down so the top edge becomes vertical. Repeat on the other side.
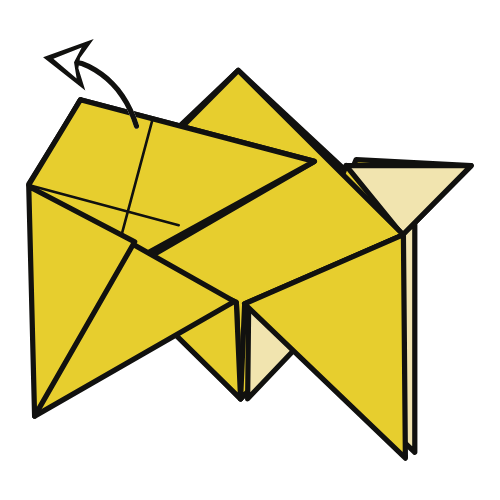
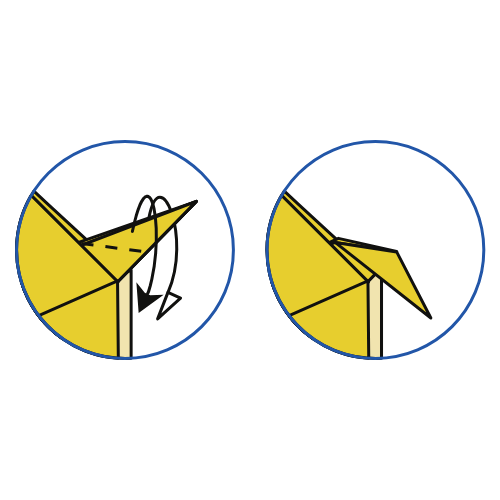
Step 14
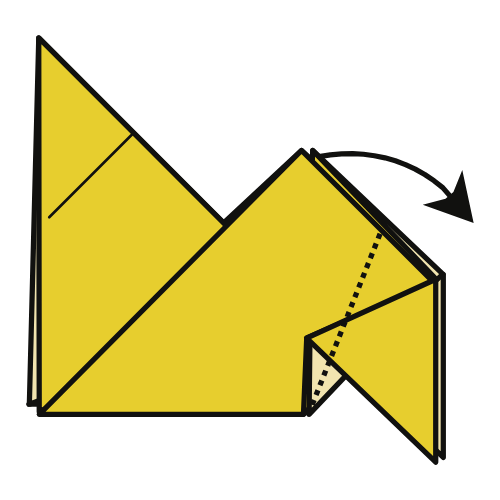
Use the existing crease to reverse fold the hidden flap and form the camel’s tail.
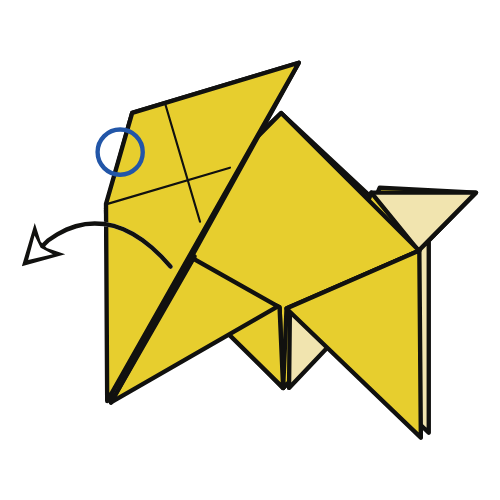
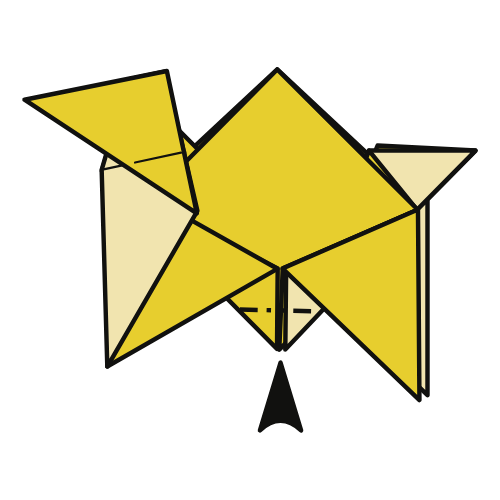
Step 15
Fold and unfold the bottom left corner to the circled point. Repeat on the other side.
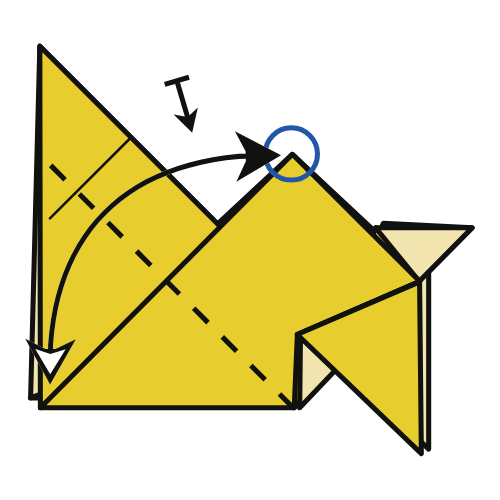
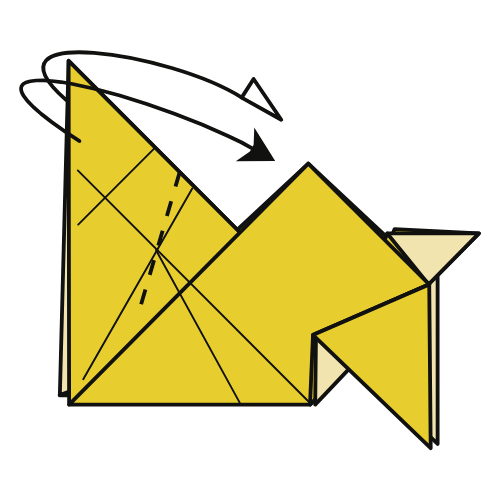
Step 16
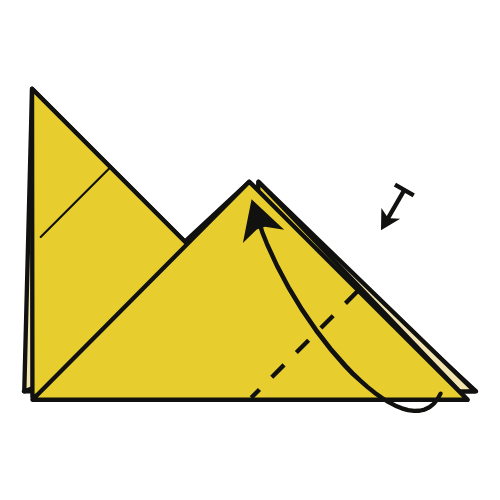
Fold the top left corner to the dotted line. Start your crease from the bottom left corner.
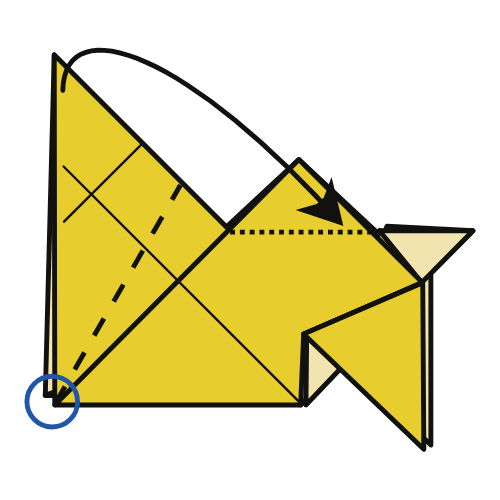
Step 17

Fold the bottom left corner up to the top corner. Crease well through all layers using the creases made in Step 15.
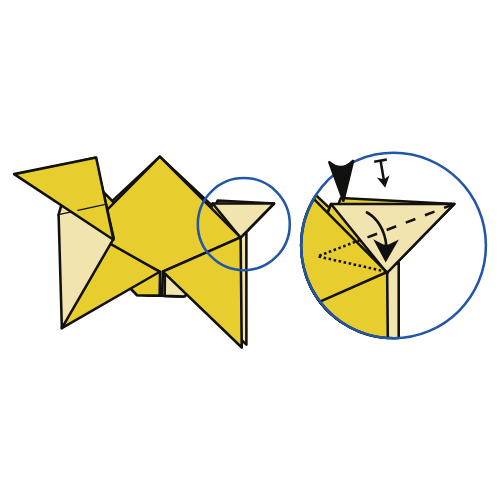
Step 18
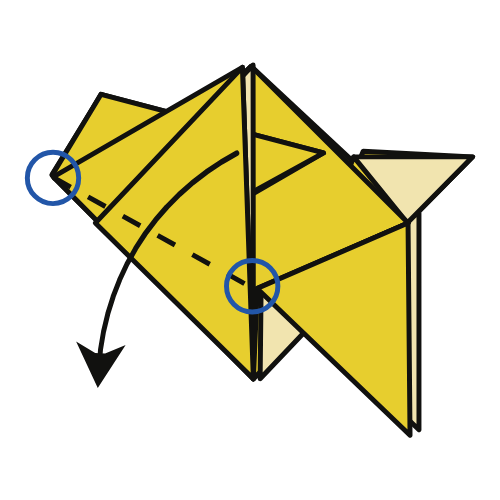
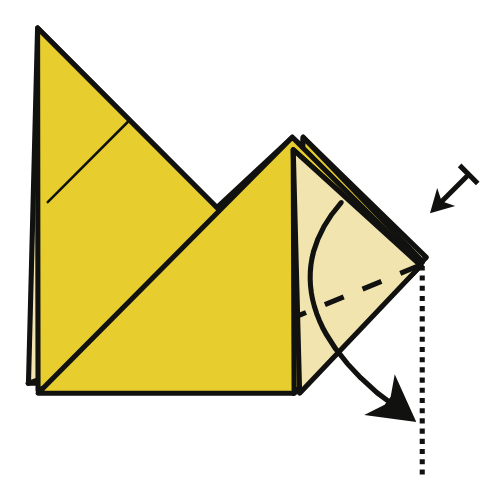
Fold the top flap down using a fold-line that connects the circled points.
Step 19
Gently lift the flap so the nearest layers flatten out.
Step 20
Firmly crease along the circled crease, then unfold Steps 16 to 19.
Step 21
Do an outside reverse fold using the crease you made in Step 20. The paper won’t lie flat.
Step 22

Outside reverse fold again using the existing crease.
Step 23
Fold the bottom left corner up to the top circled point to flatten the model. Repeat on the other side.
Step 24
Fold the top flap down using the existing crease. Repeat on the other side.
Step 25
Fold the lower section from the bottom to the top corner. Crease well, then unfold. Now reverse fold all layers on both sides.
🐪 Folding tip: Want to avoid color changes and extra thickness? Unlock the white area and fold it between the legs. Or, leave it as-is for a male camel 🤭
Step 26
On each side, reverse fold the top edge down to narrow the Camel tail.
Step 27
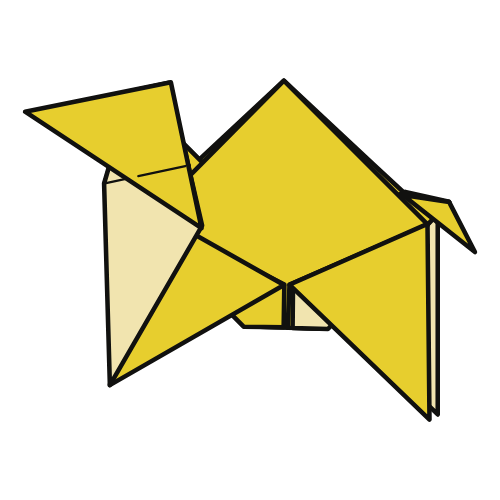
Outside reverse fold the tail downward.
🐪 Your origami camel is ready to trot!
I hope you enjoyed folding this little desert traveler!
Try making a few in different sizes or lining them up in a caravan. They look great as a group.
And if you want to go further, explore more of Sébastien Limet’s creative designs. He has a real knack for expressive simplicity.
Happy folding! 🐫

Download the Complete Origami Camel Printable PDF Instructions
This printable PDF is part of our Origami Friends membership on Patreon. As a member, you get access to these diagrams, our full library of 120+ printable PDFs, and member-only content.


I loved it!.
It is very nice .I am very happy to learn about lot of handicraft..
Omg! I love it all I’ve known about origami for decades but just didn’t have time. Now I do