
How to Fold an Origami Celebration Crane
The origami celebration crane is a graceful and festive traditional model, often gifted in Japan to mark special moments.
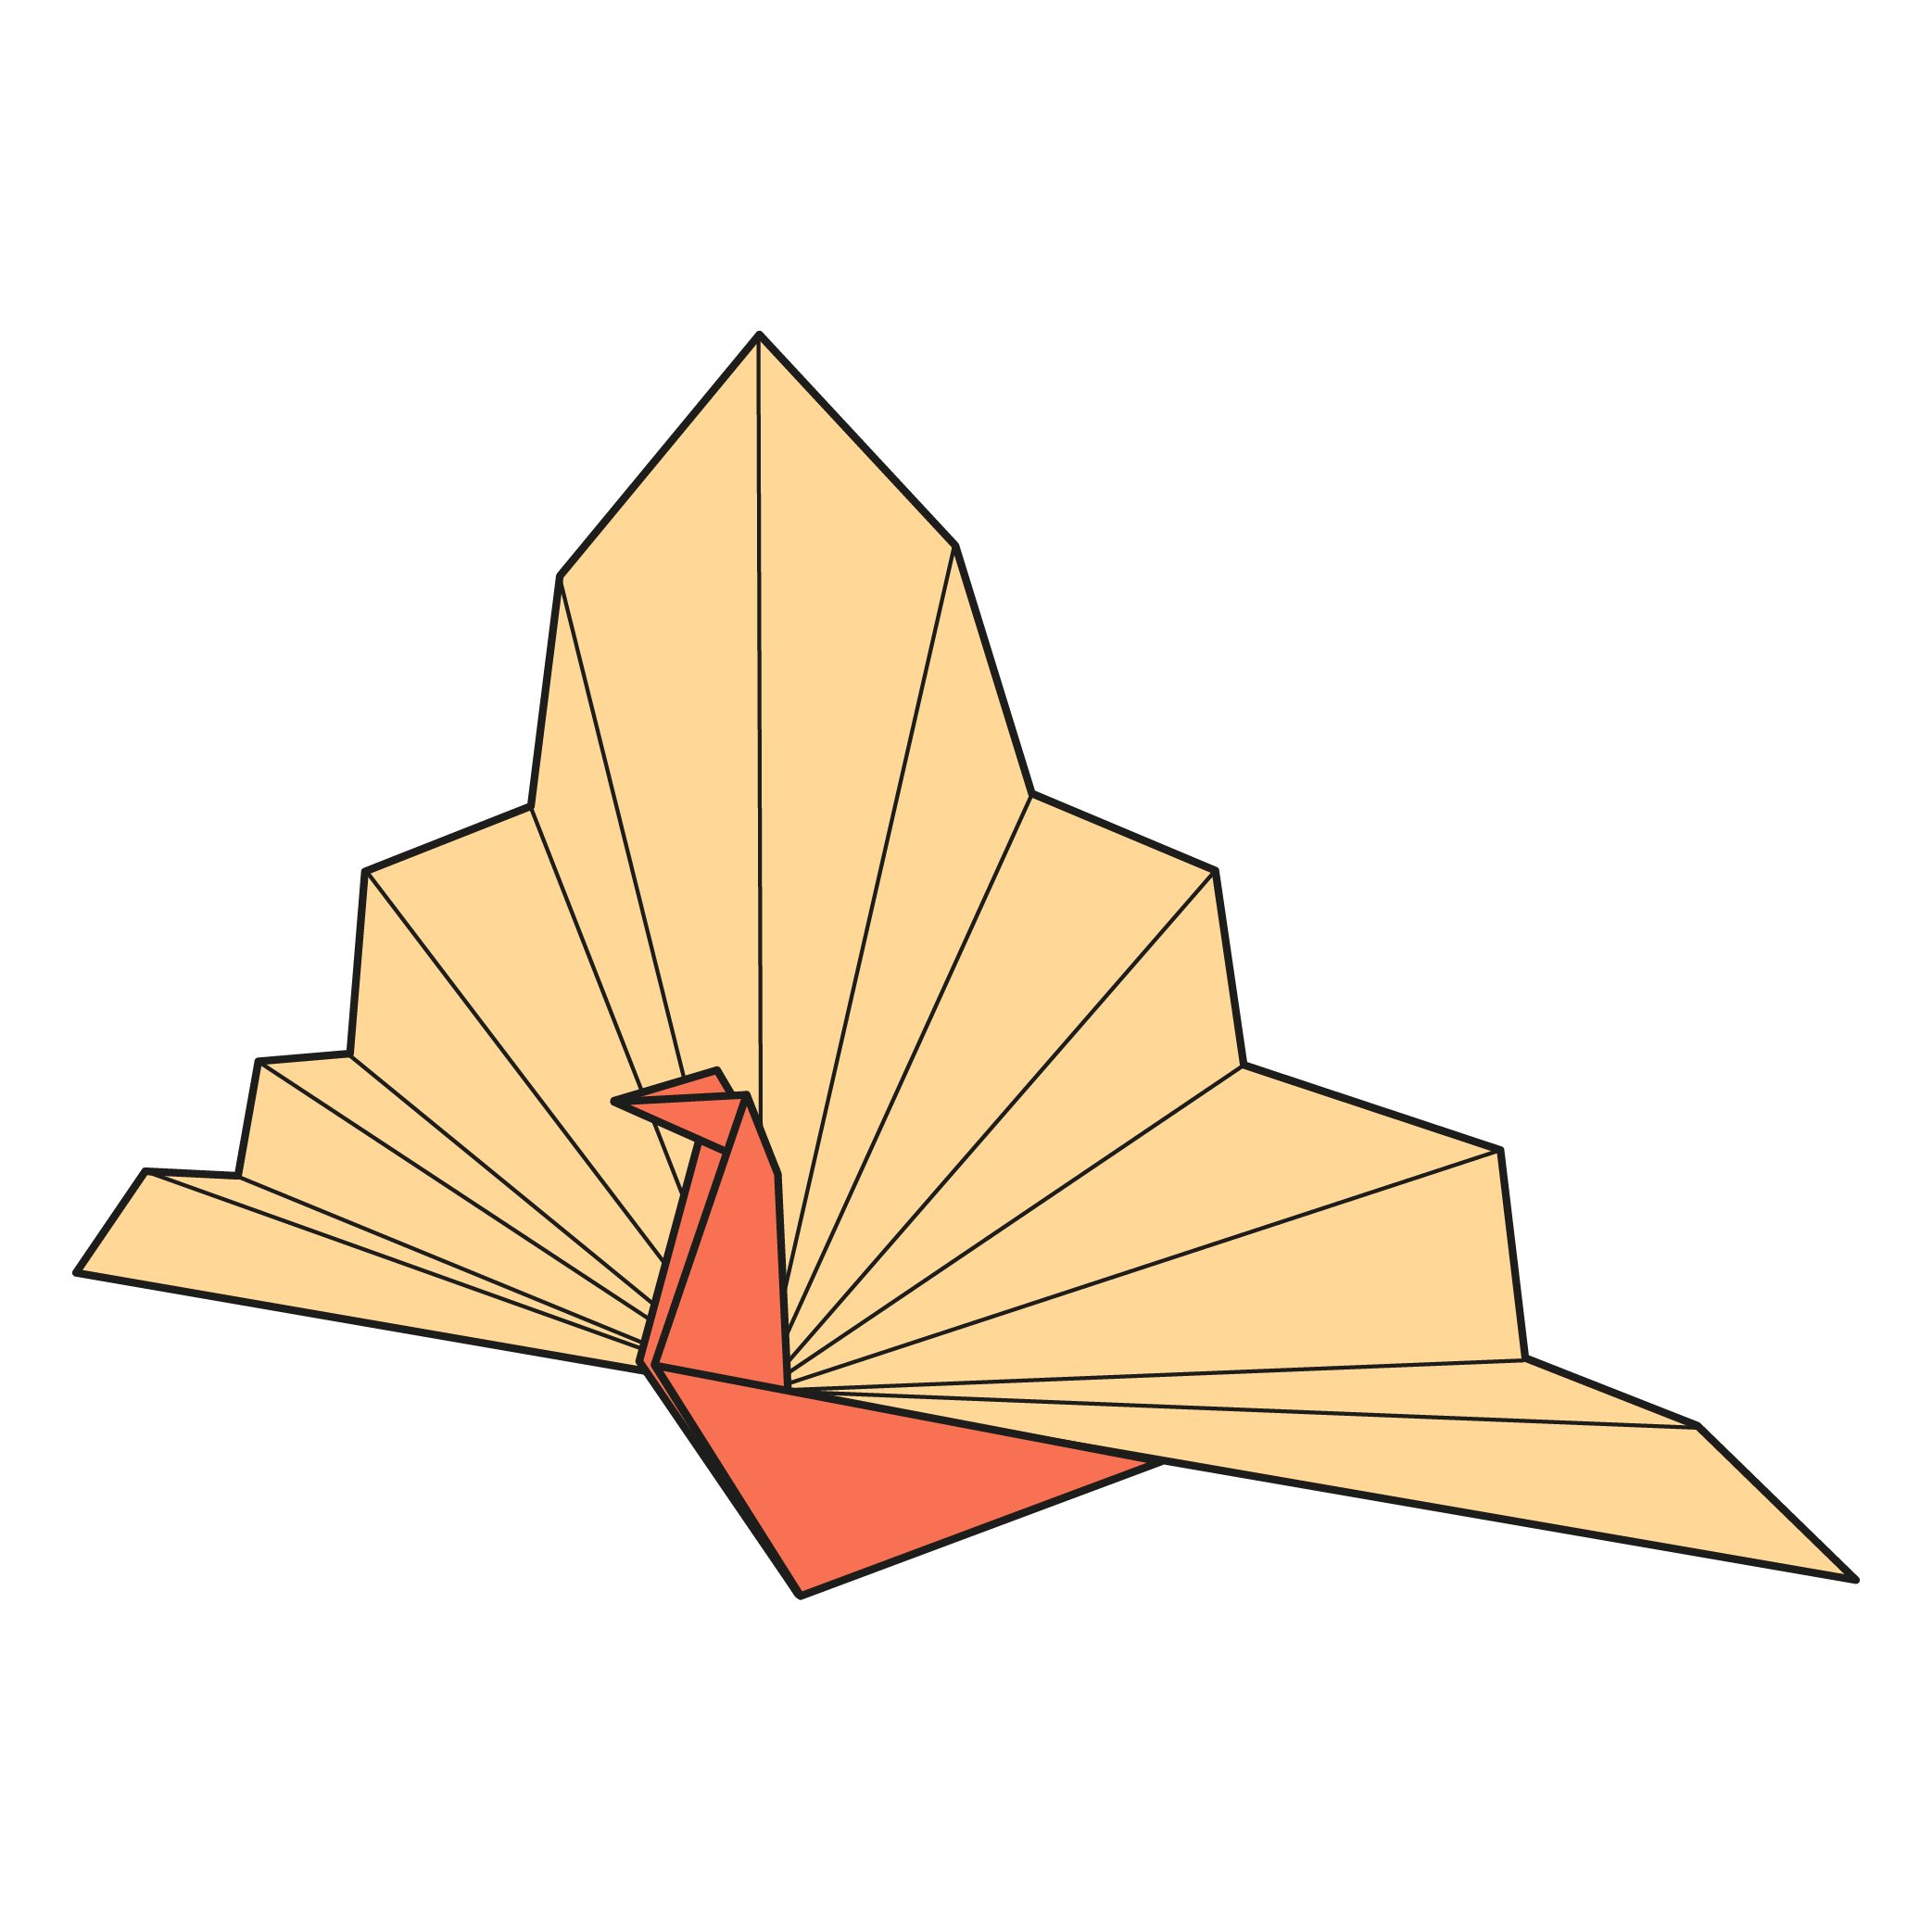
Unlike the classic crane with its tucked wings and level stance, this model opens dramatically. The wings sweep upward and outward, almost like a fan, giving the model an expressive, celebratory feel.
If you use patterned chiyogami paper, like I did on the featured photo, the design beautifully reveals itself across the wide tail.
The folding sequence is not difficult but offers a few interesting twists, especially for those who have folded a traditional crane before.
Traditional Origami Celebration Crane Step-by-Step Instructions
- Difficulty: Easy – Beginner Level 3
- Folding time: 10 minutes
Recommended Paper
15×15 cm (6×6 in) Kami or Chiyogami
Step 1


Start with the paper in a diamond position. The color facing up will appear on the crane’s body and back wings (or feathers). Fold and unfold both diagonals. Then, turn the paper over.
Step 2


Fold and unfold side to side, both directions.
Step 3

Collapse the paper along the existing creases to form a Square base.
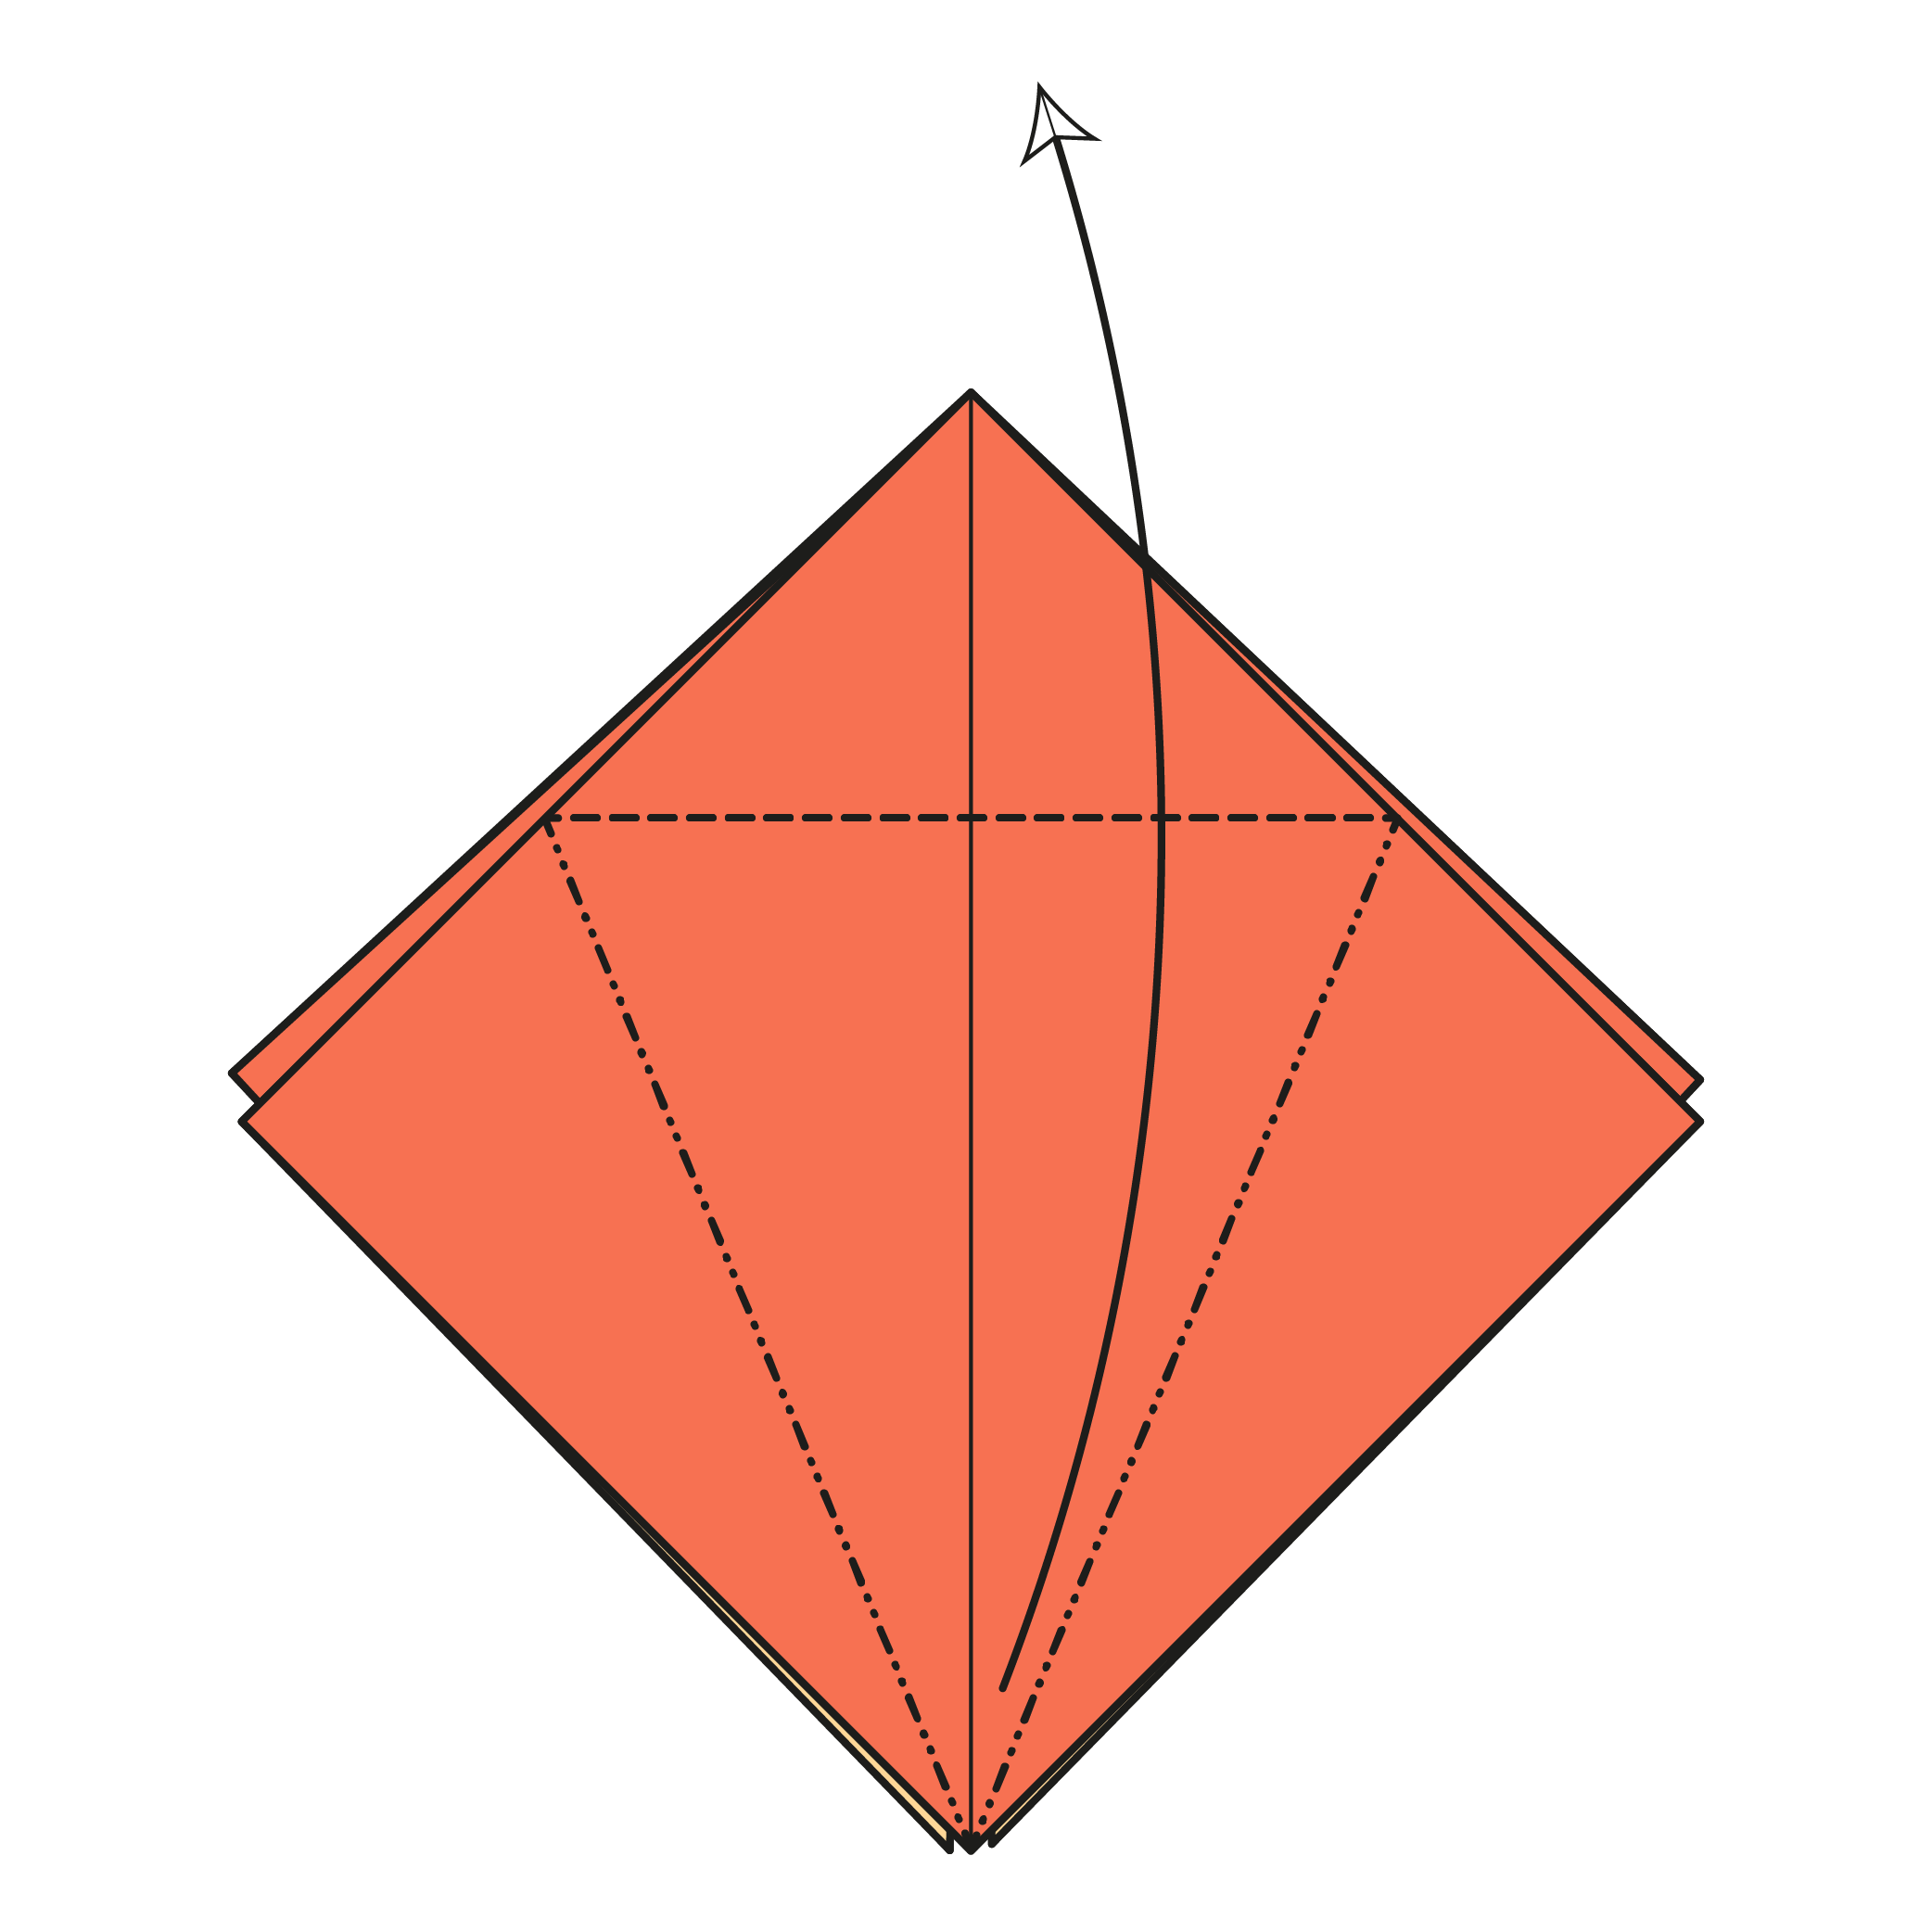
Step 4


Fold the bottom left and right edges in to meet the centerline, then unfold.
Step 5

Fold the top corner down along the dotted line and unfold. This crease should run horizontally where the Step 4 creases intersect with the top edges.
Step 6
Bring the bottom corner (top layer only) up and Petal fold along the existing creases.
Step 7

Turn the model over.
Step 8

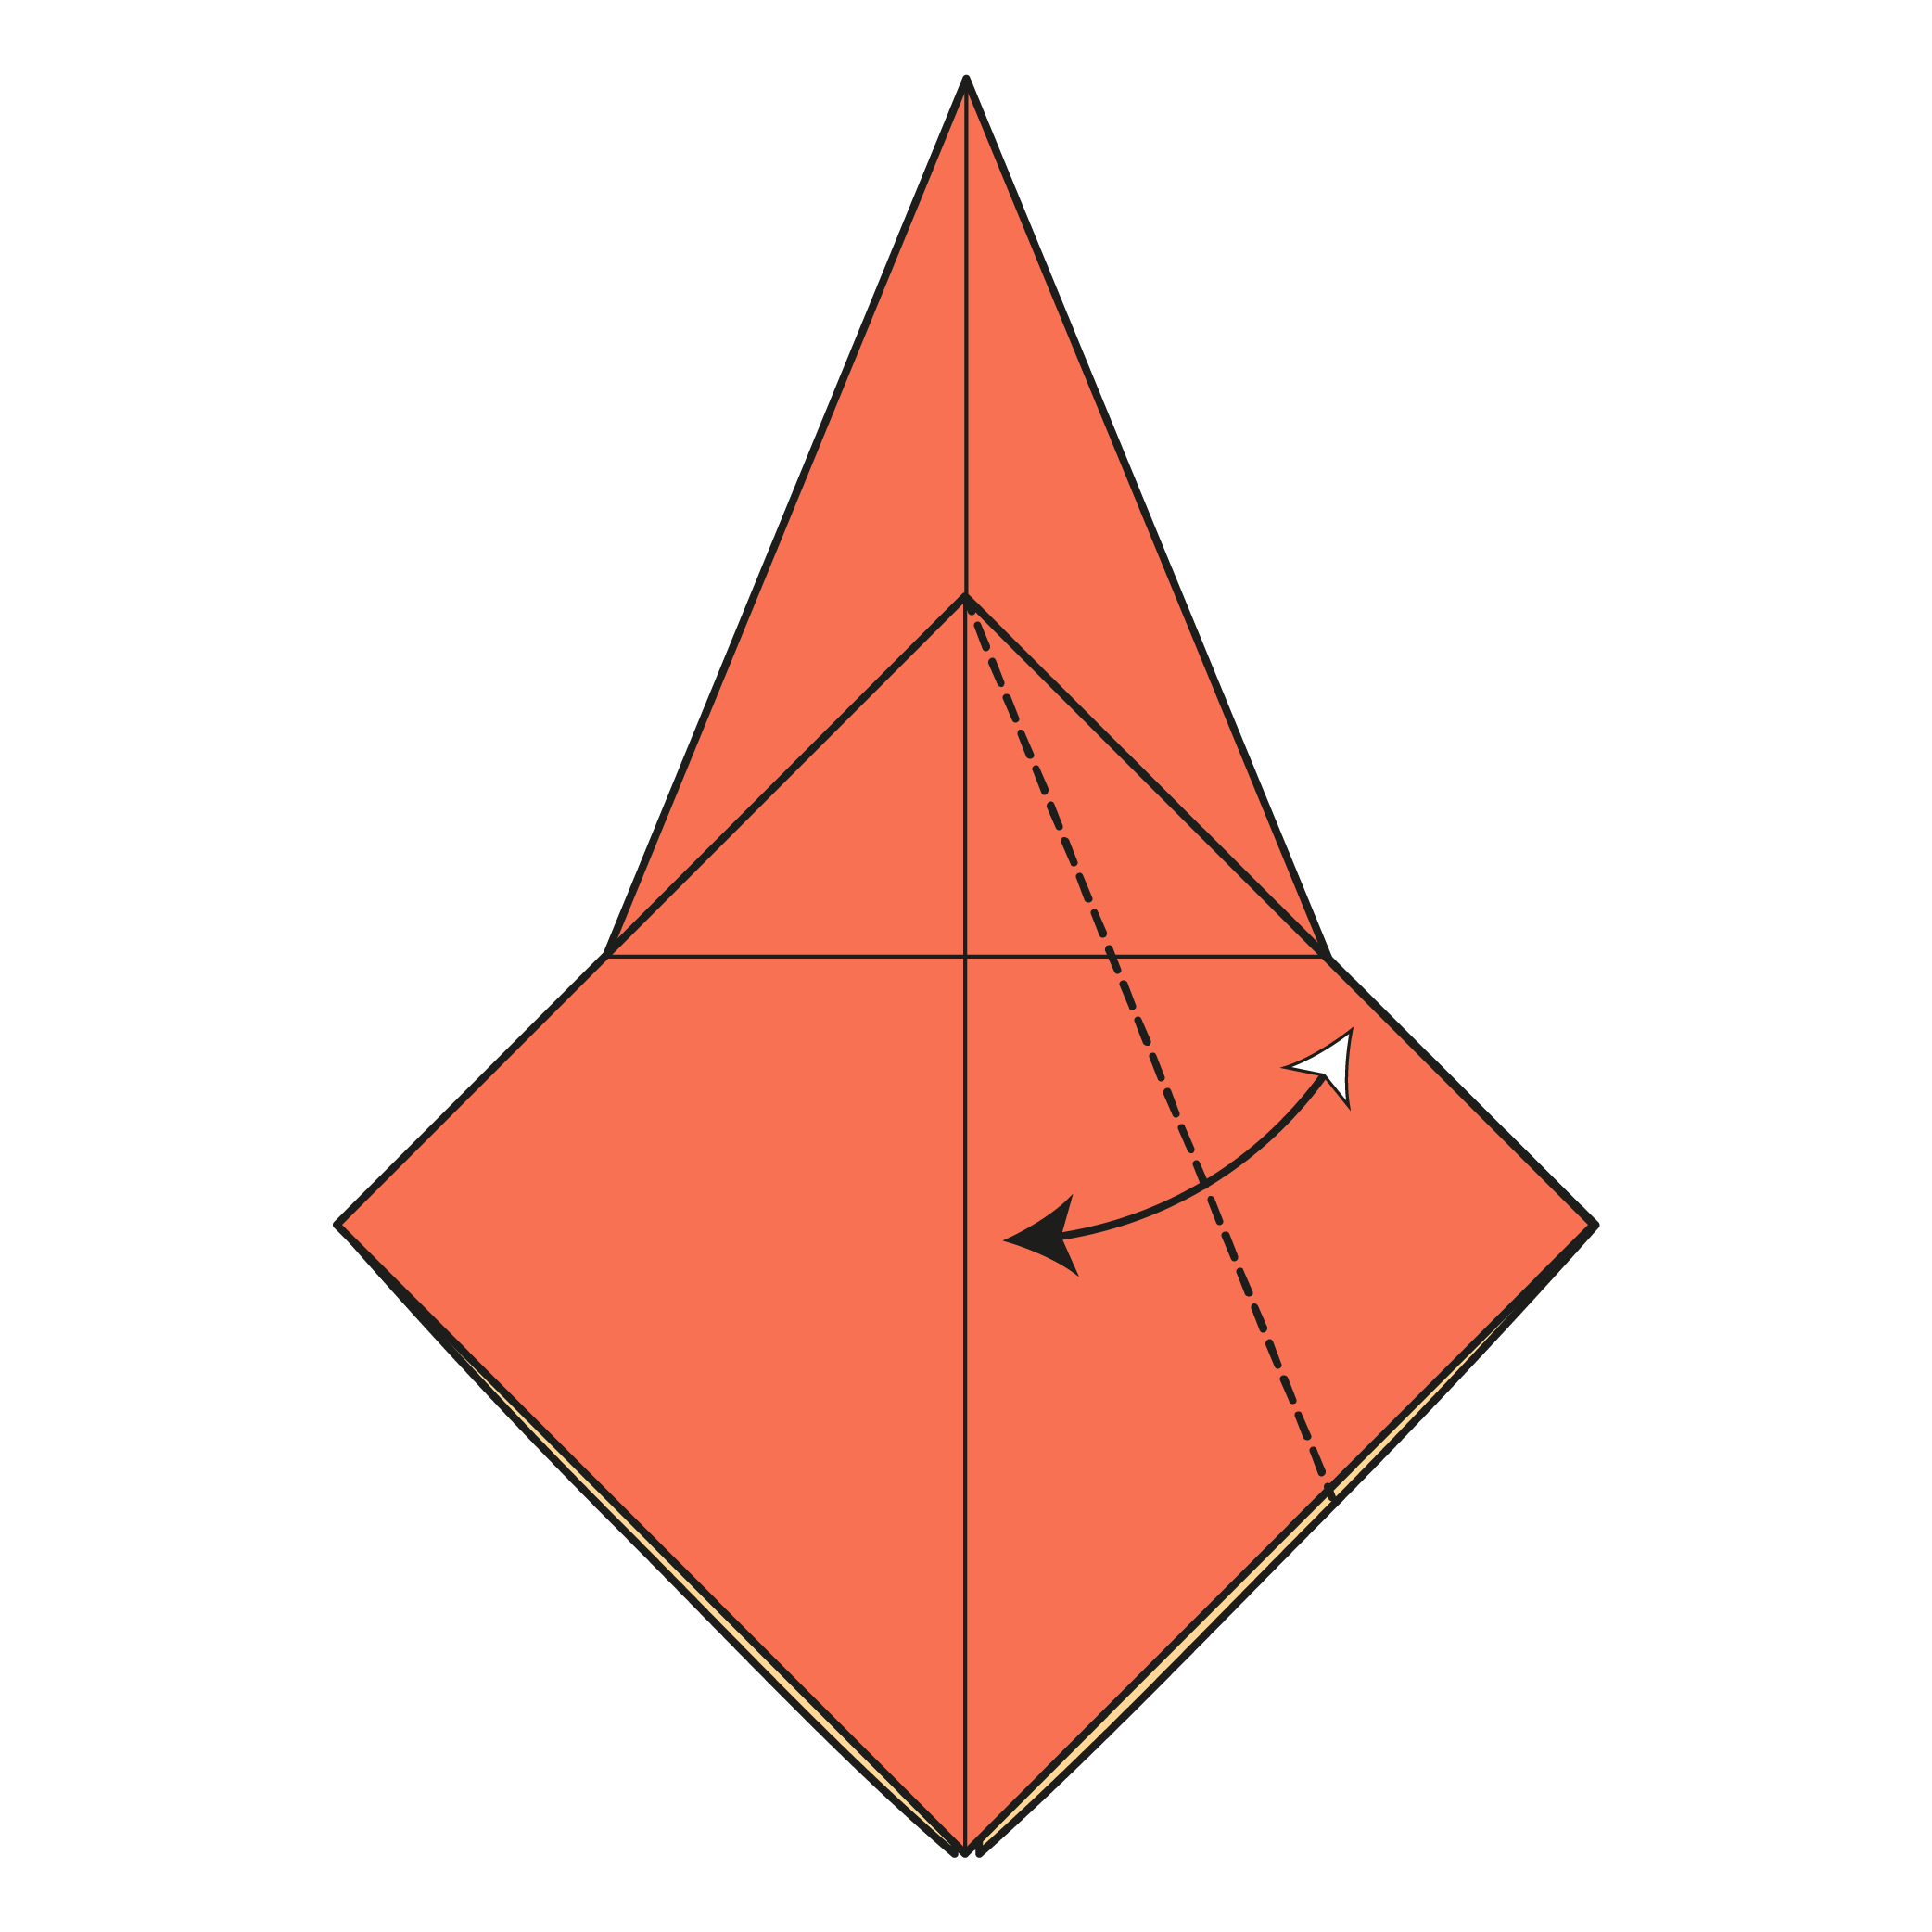
Fold the top right edge of the square to the centerline. Then, unfold.
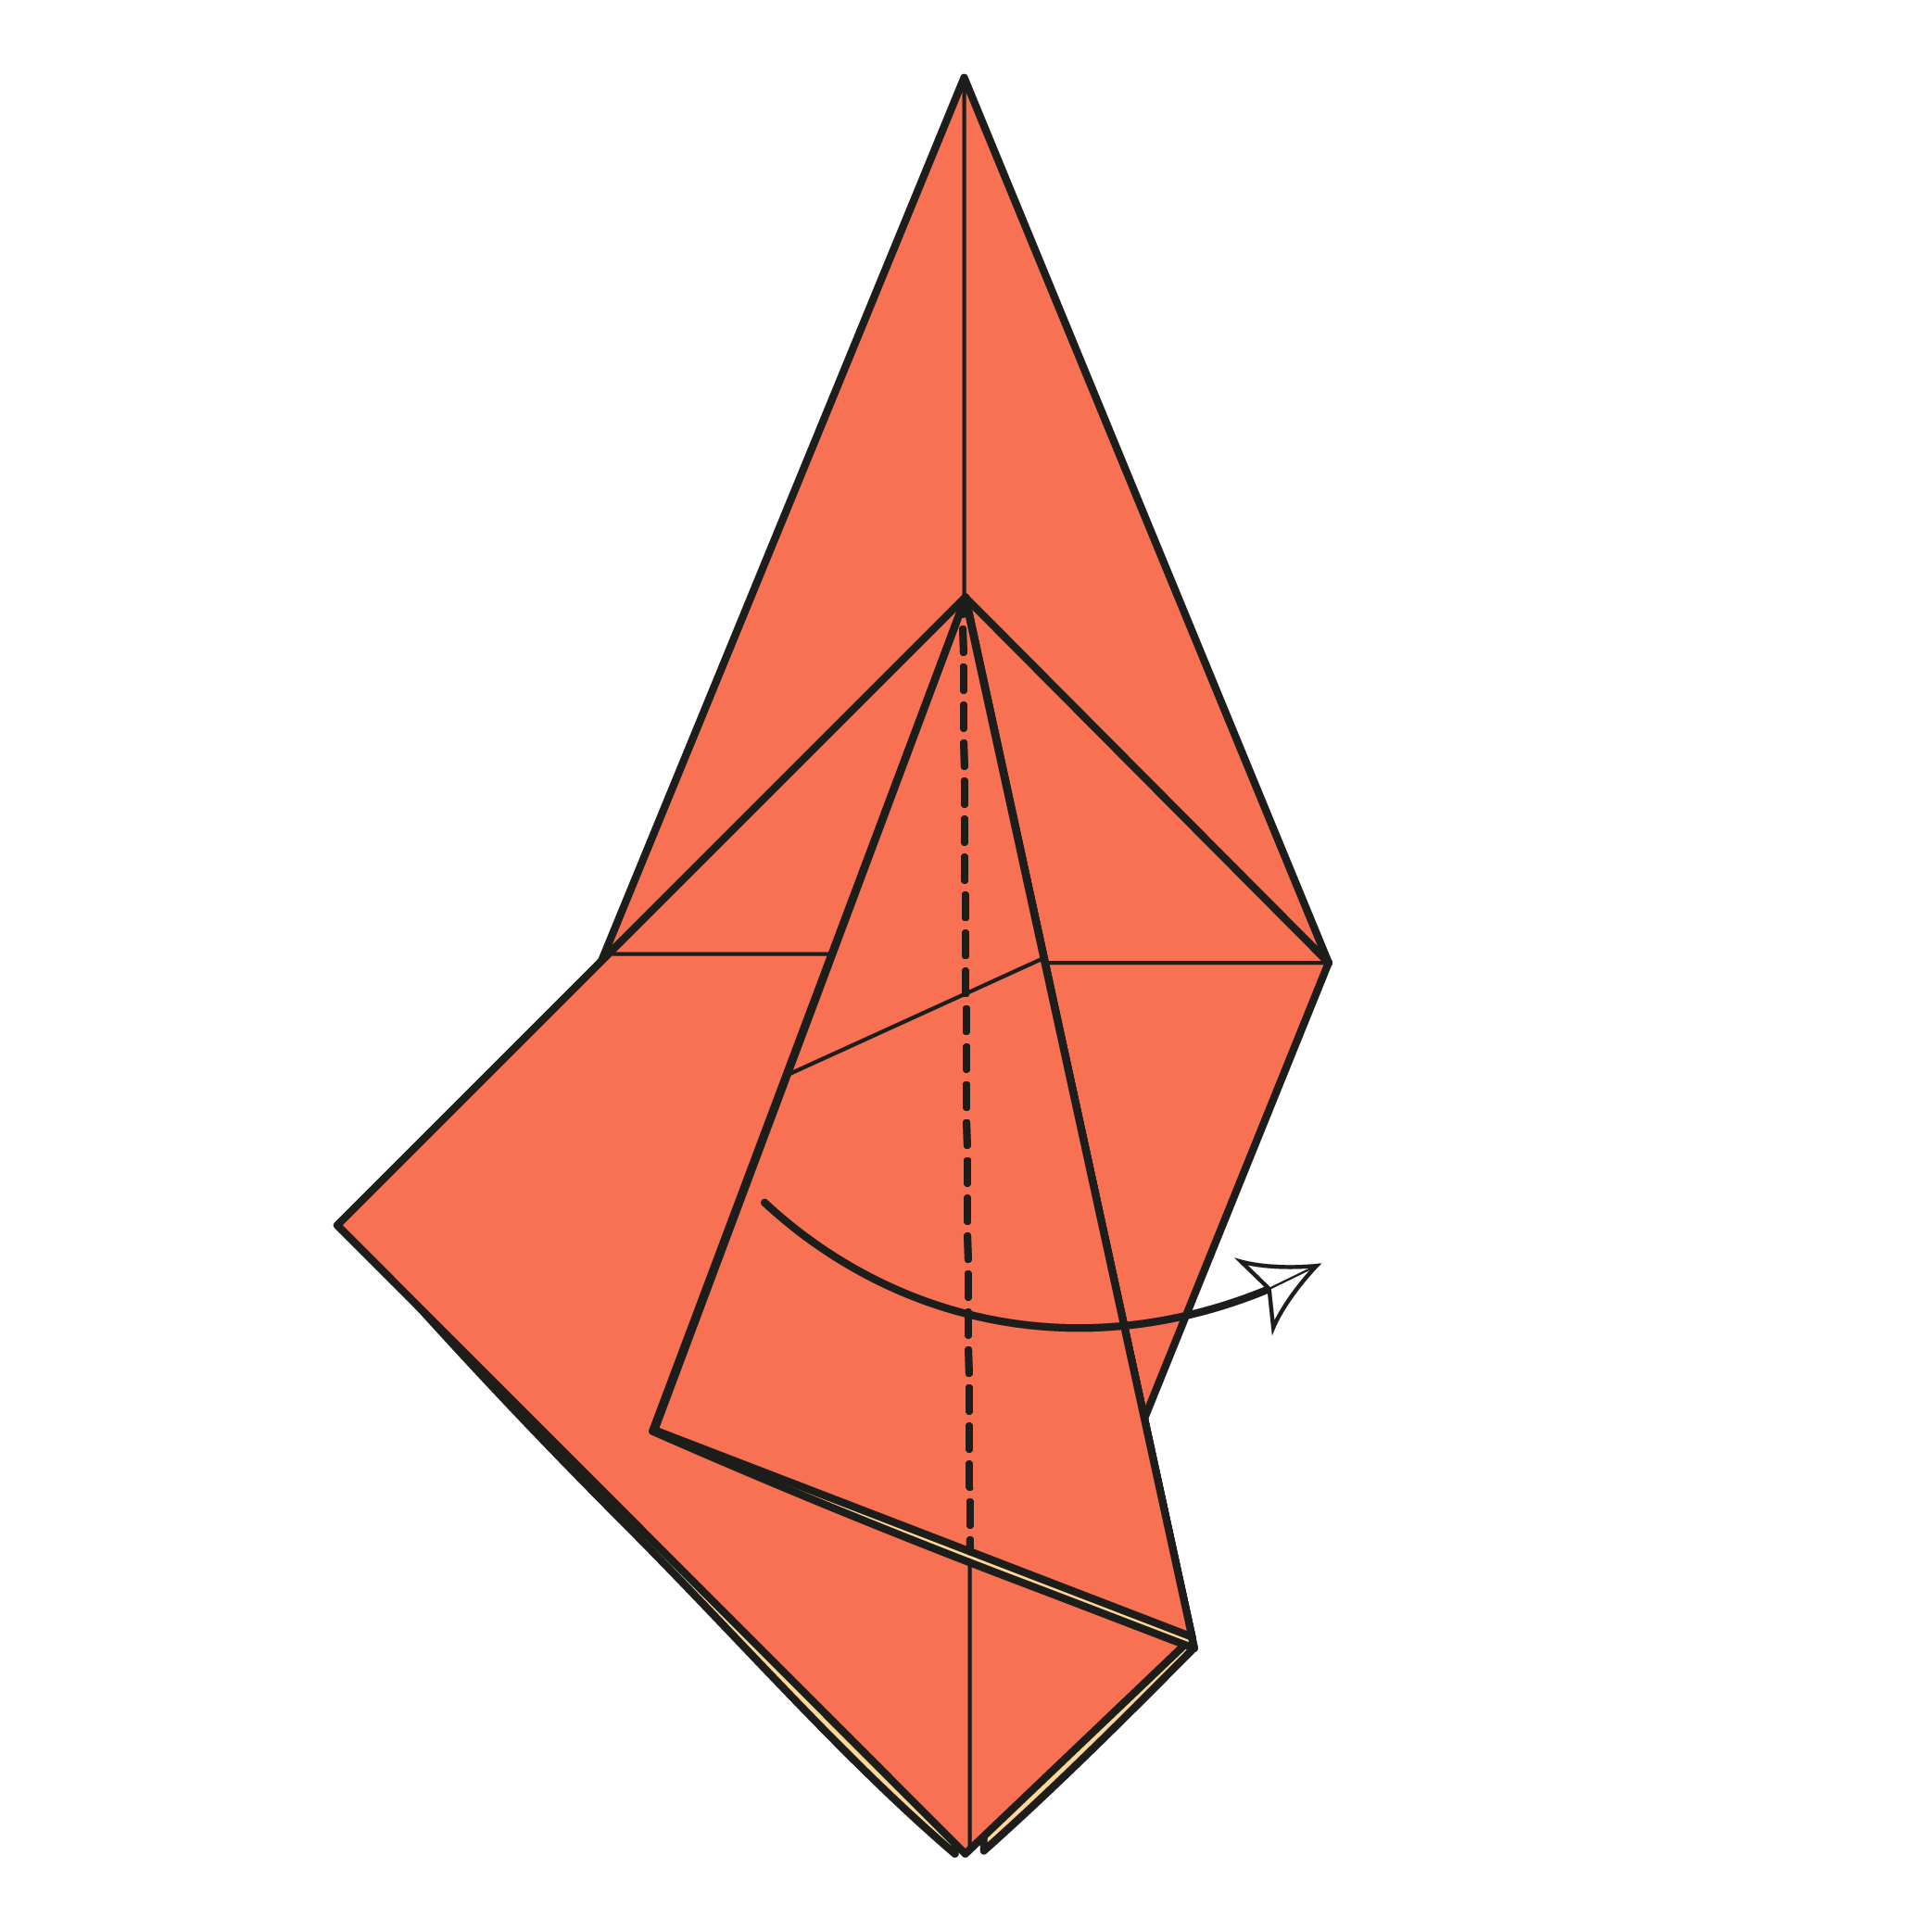
Step 9

Fold the new crease (from Step 8) inward so it aligns with the centerline.
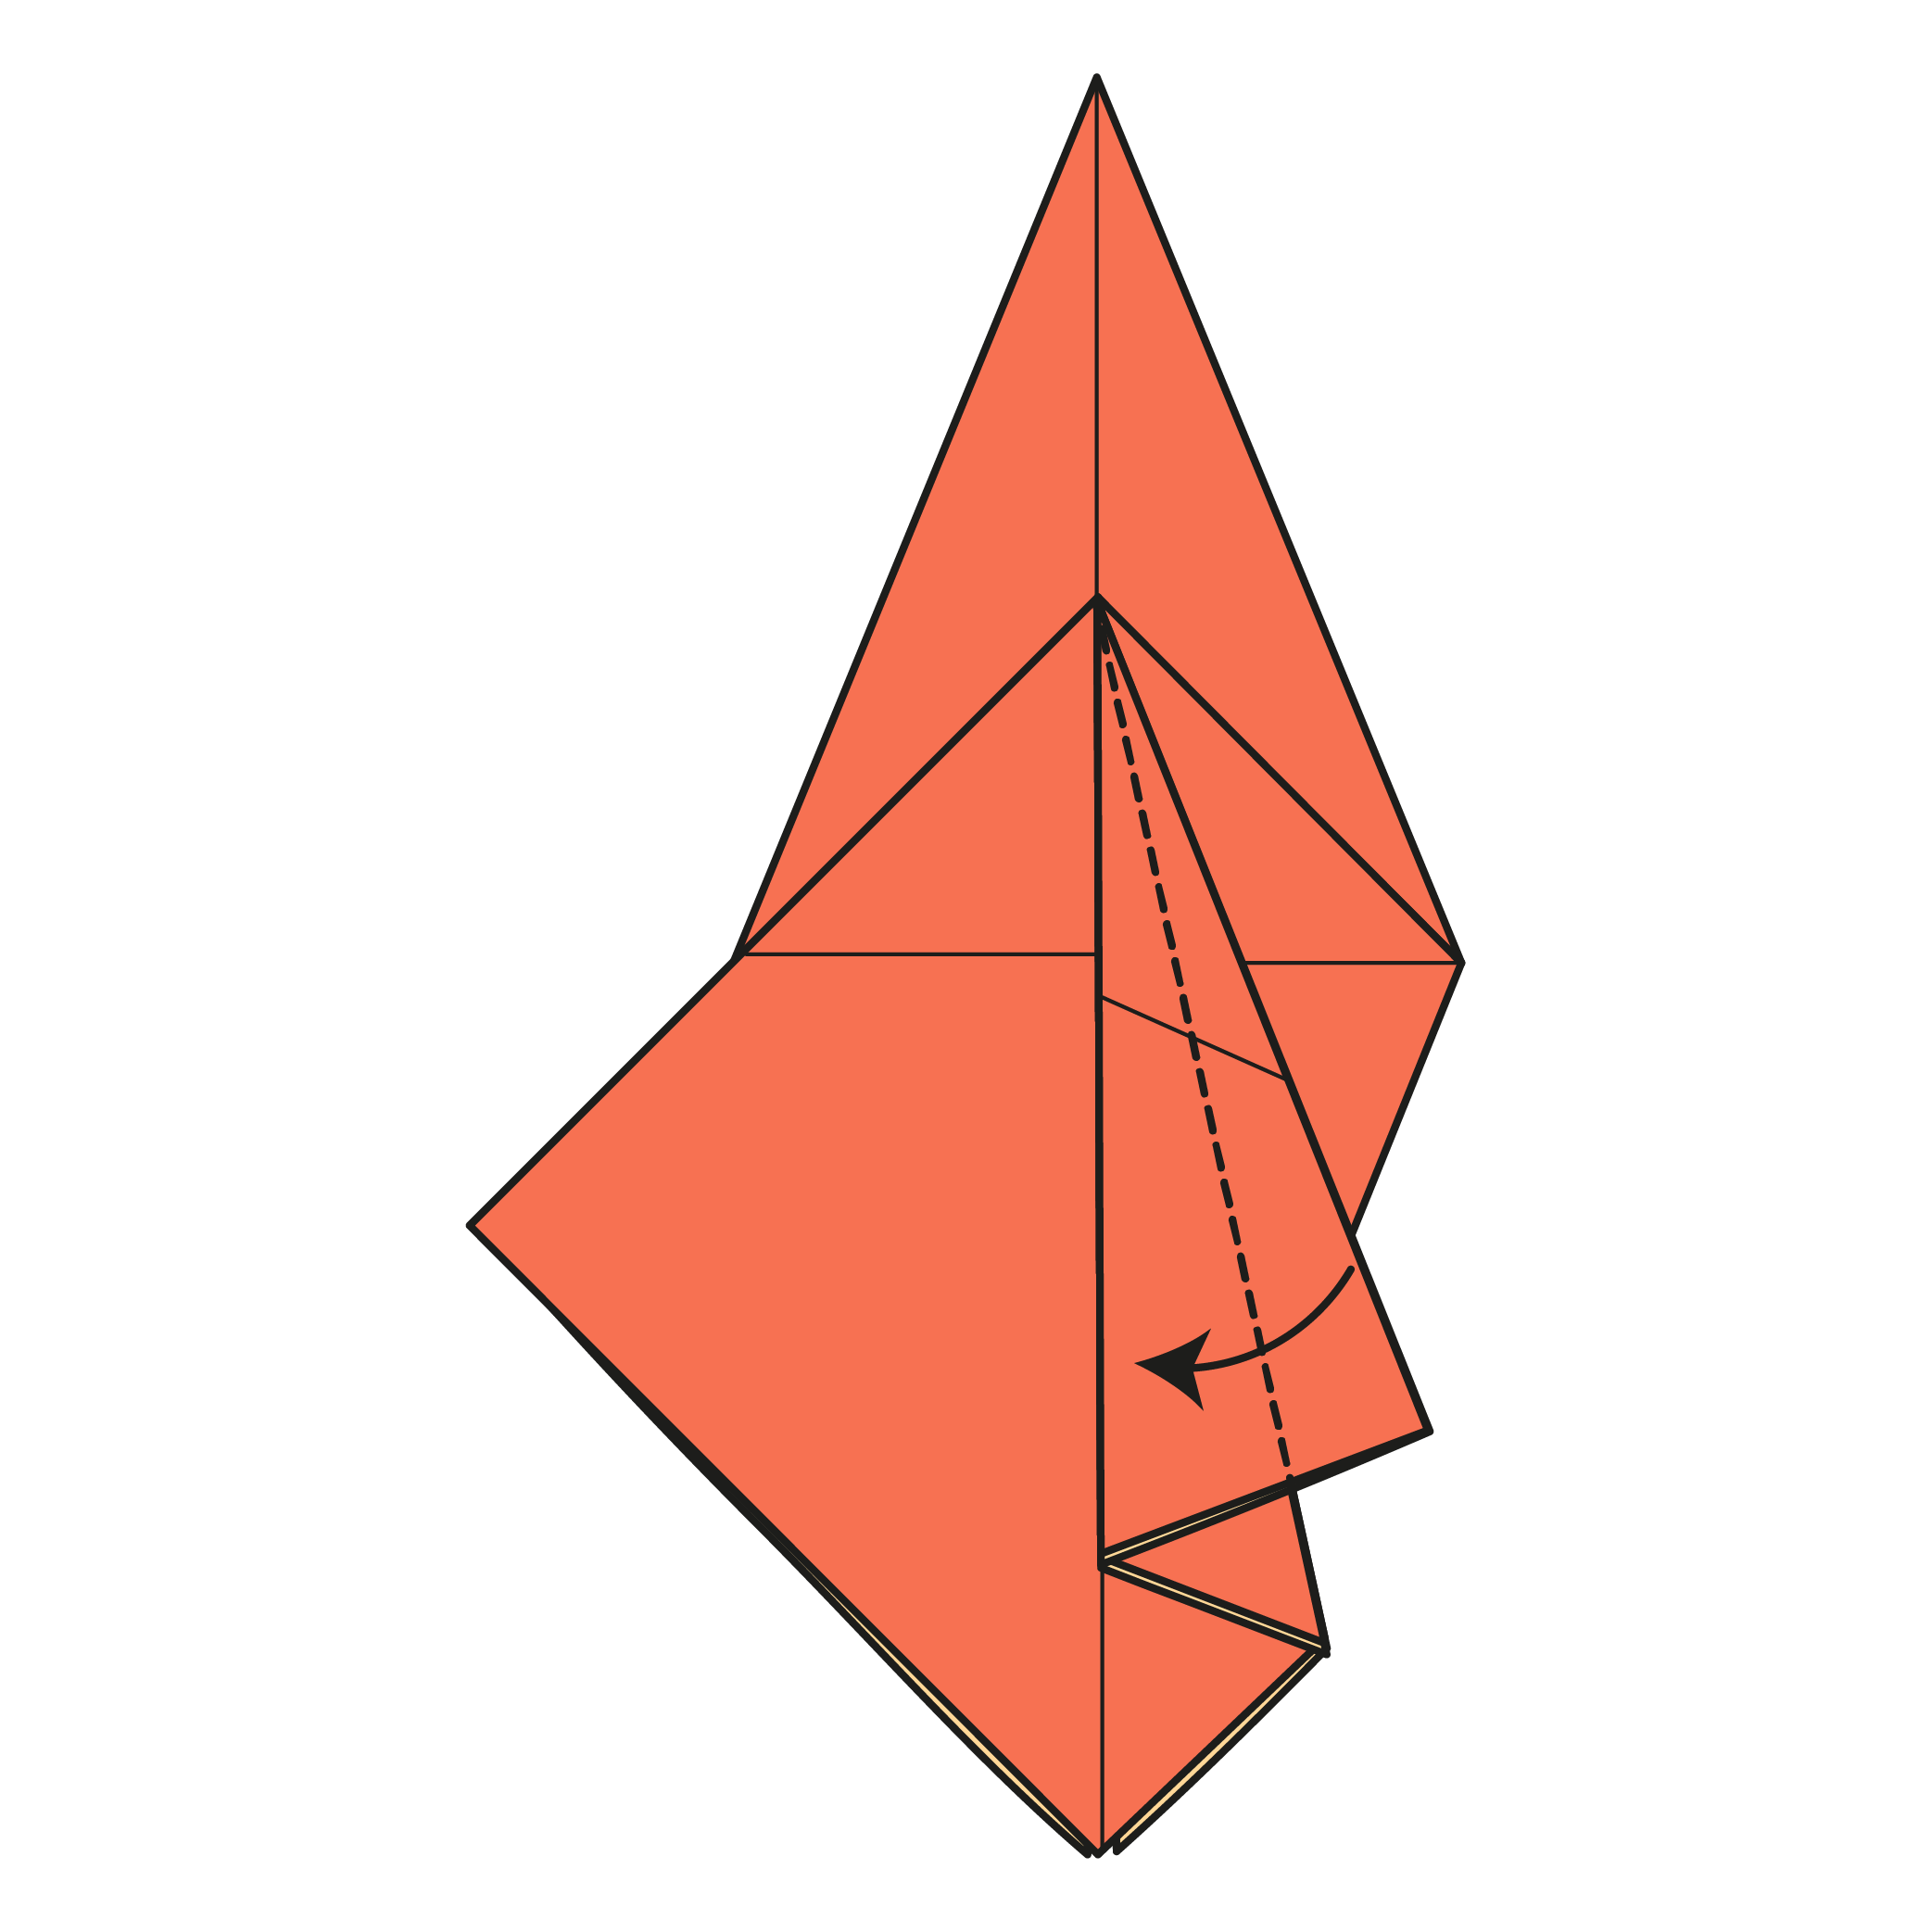
Step 10
Fold the top flap along the crease made in Step 8.
Step 11
Fold the top flap right edge inward to meet the centerline.
Step 12

Unfold everything from Steps 8 to 11.
Step 13
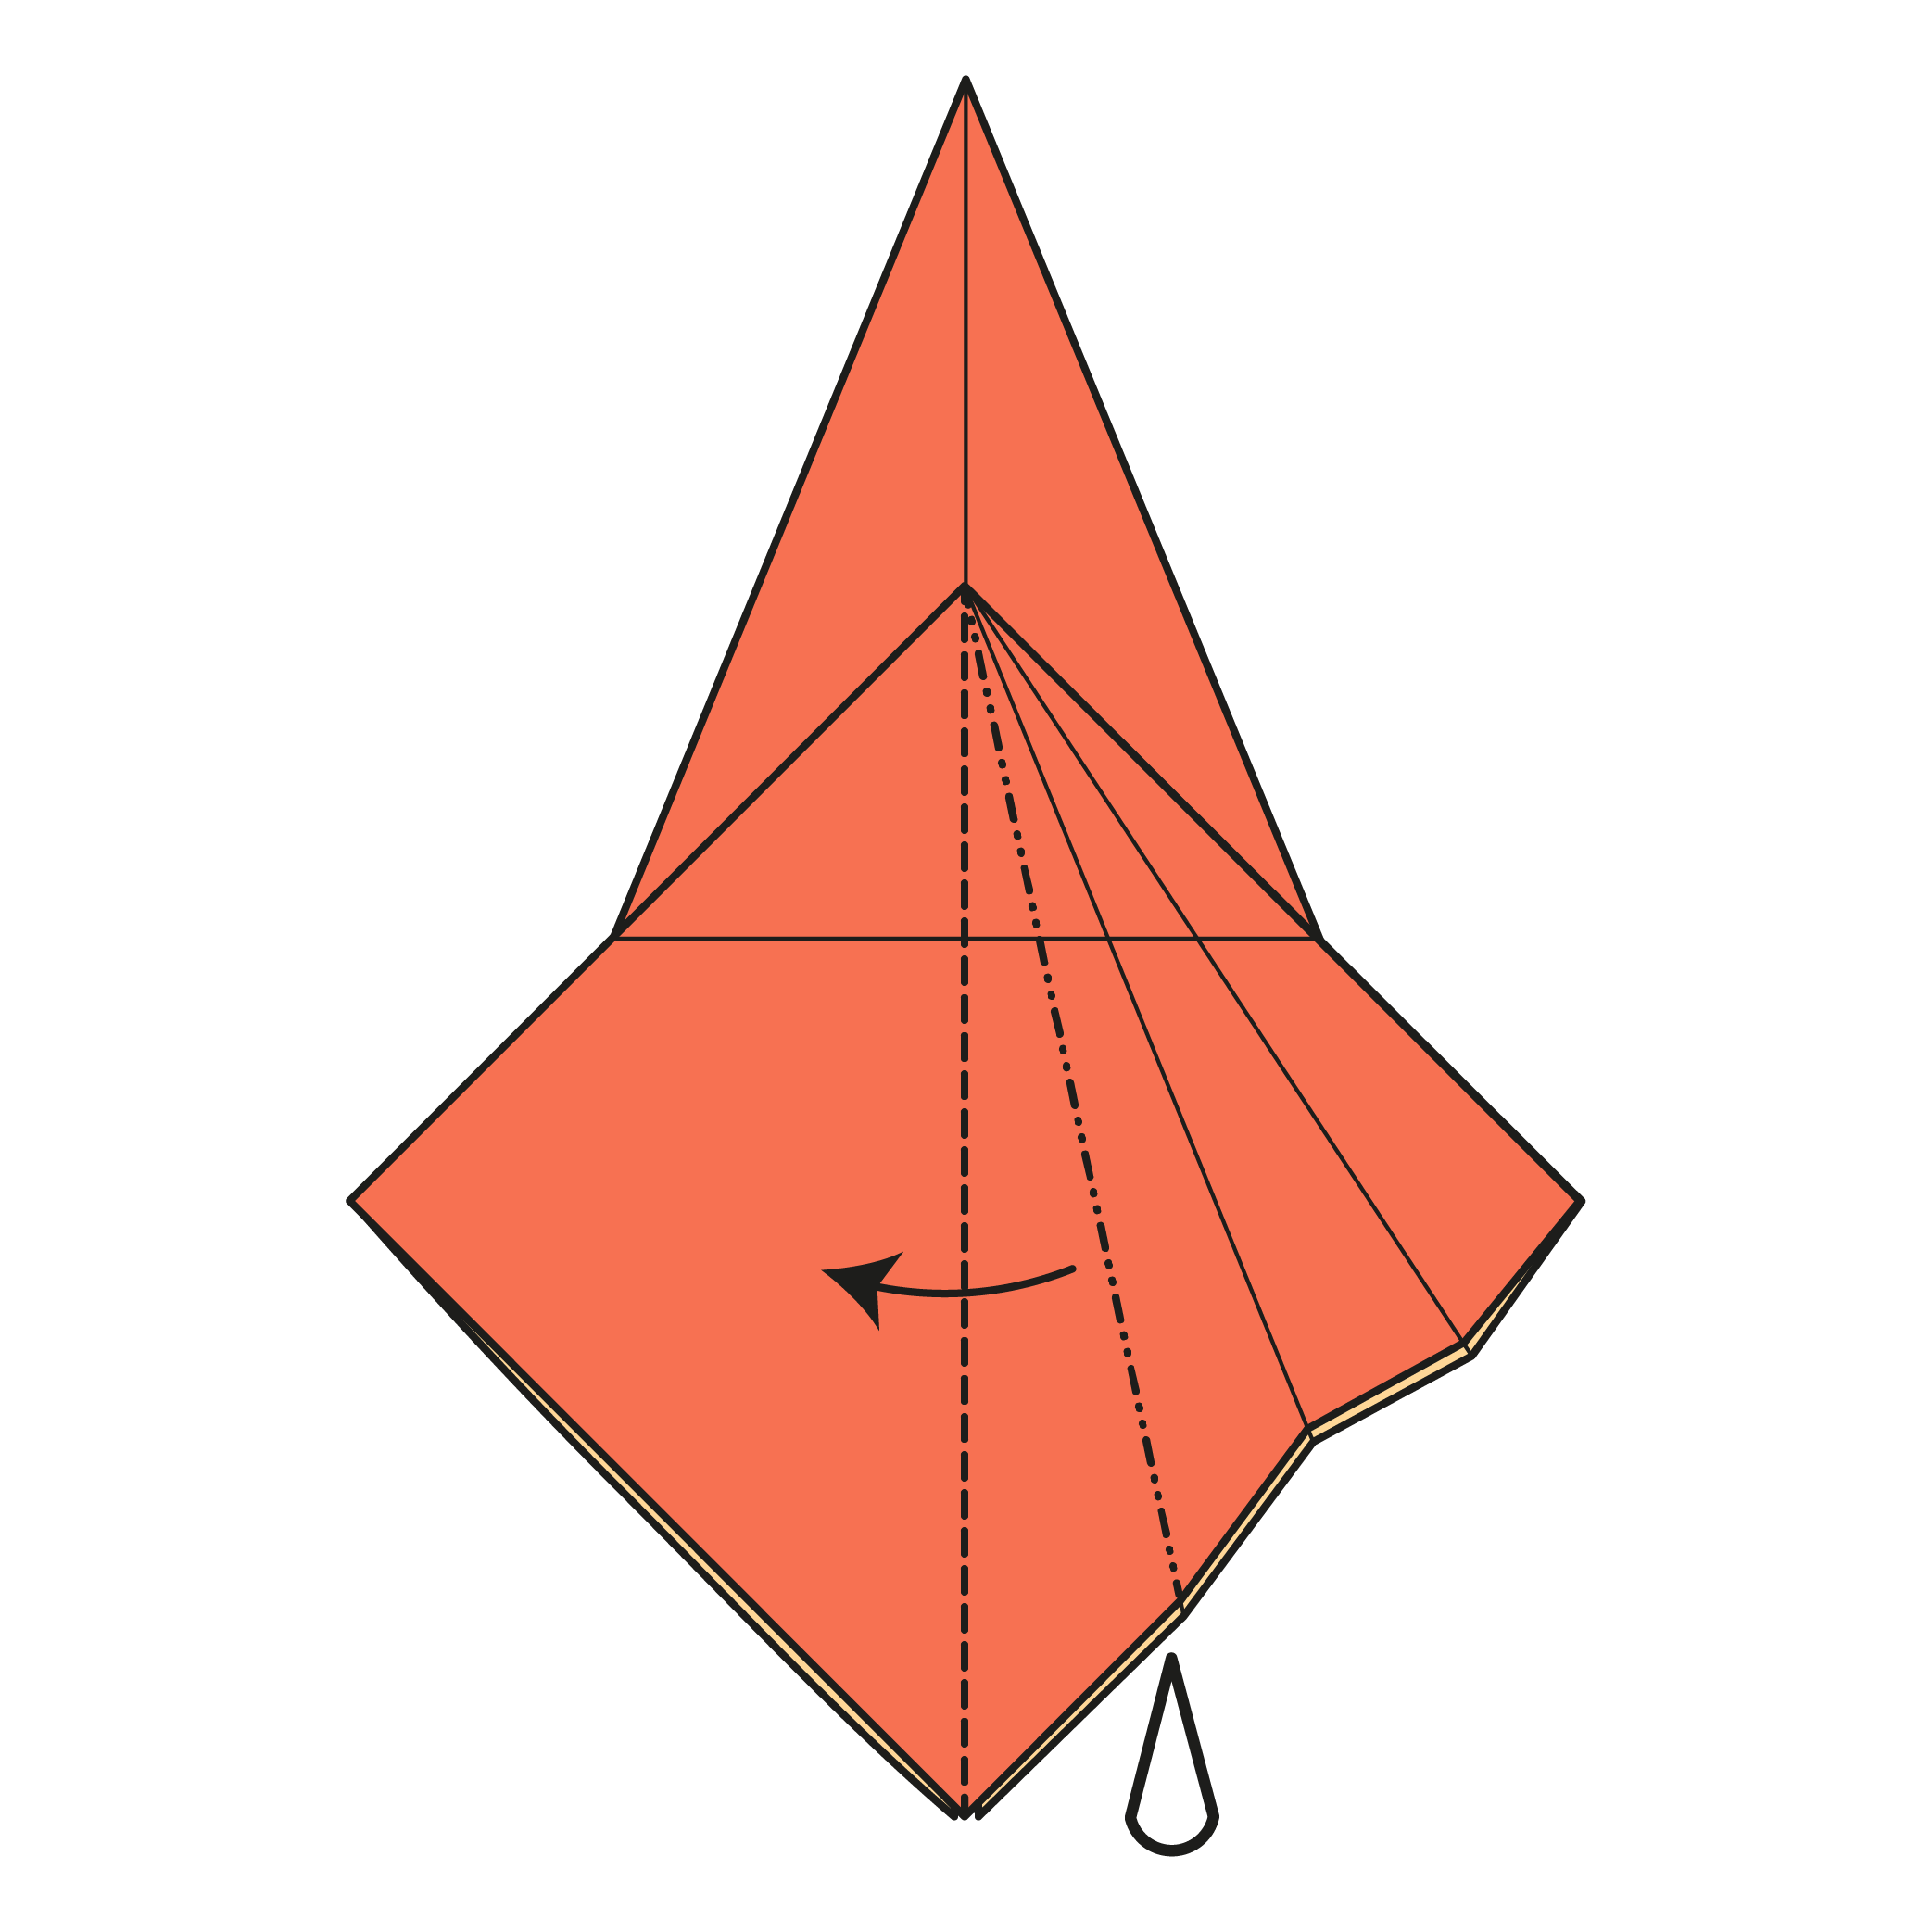
Squash fold along the vertical crease. Use a mountain fold on the nearest crease next to the vertical one.
Step 14
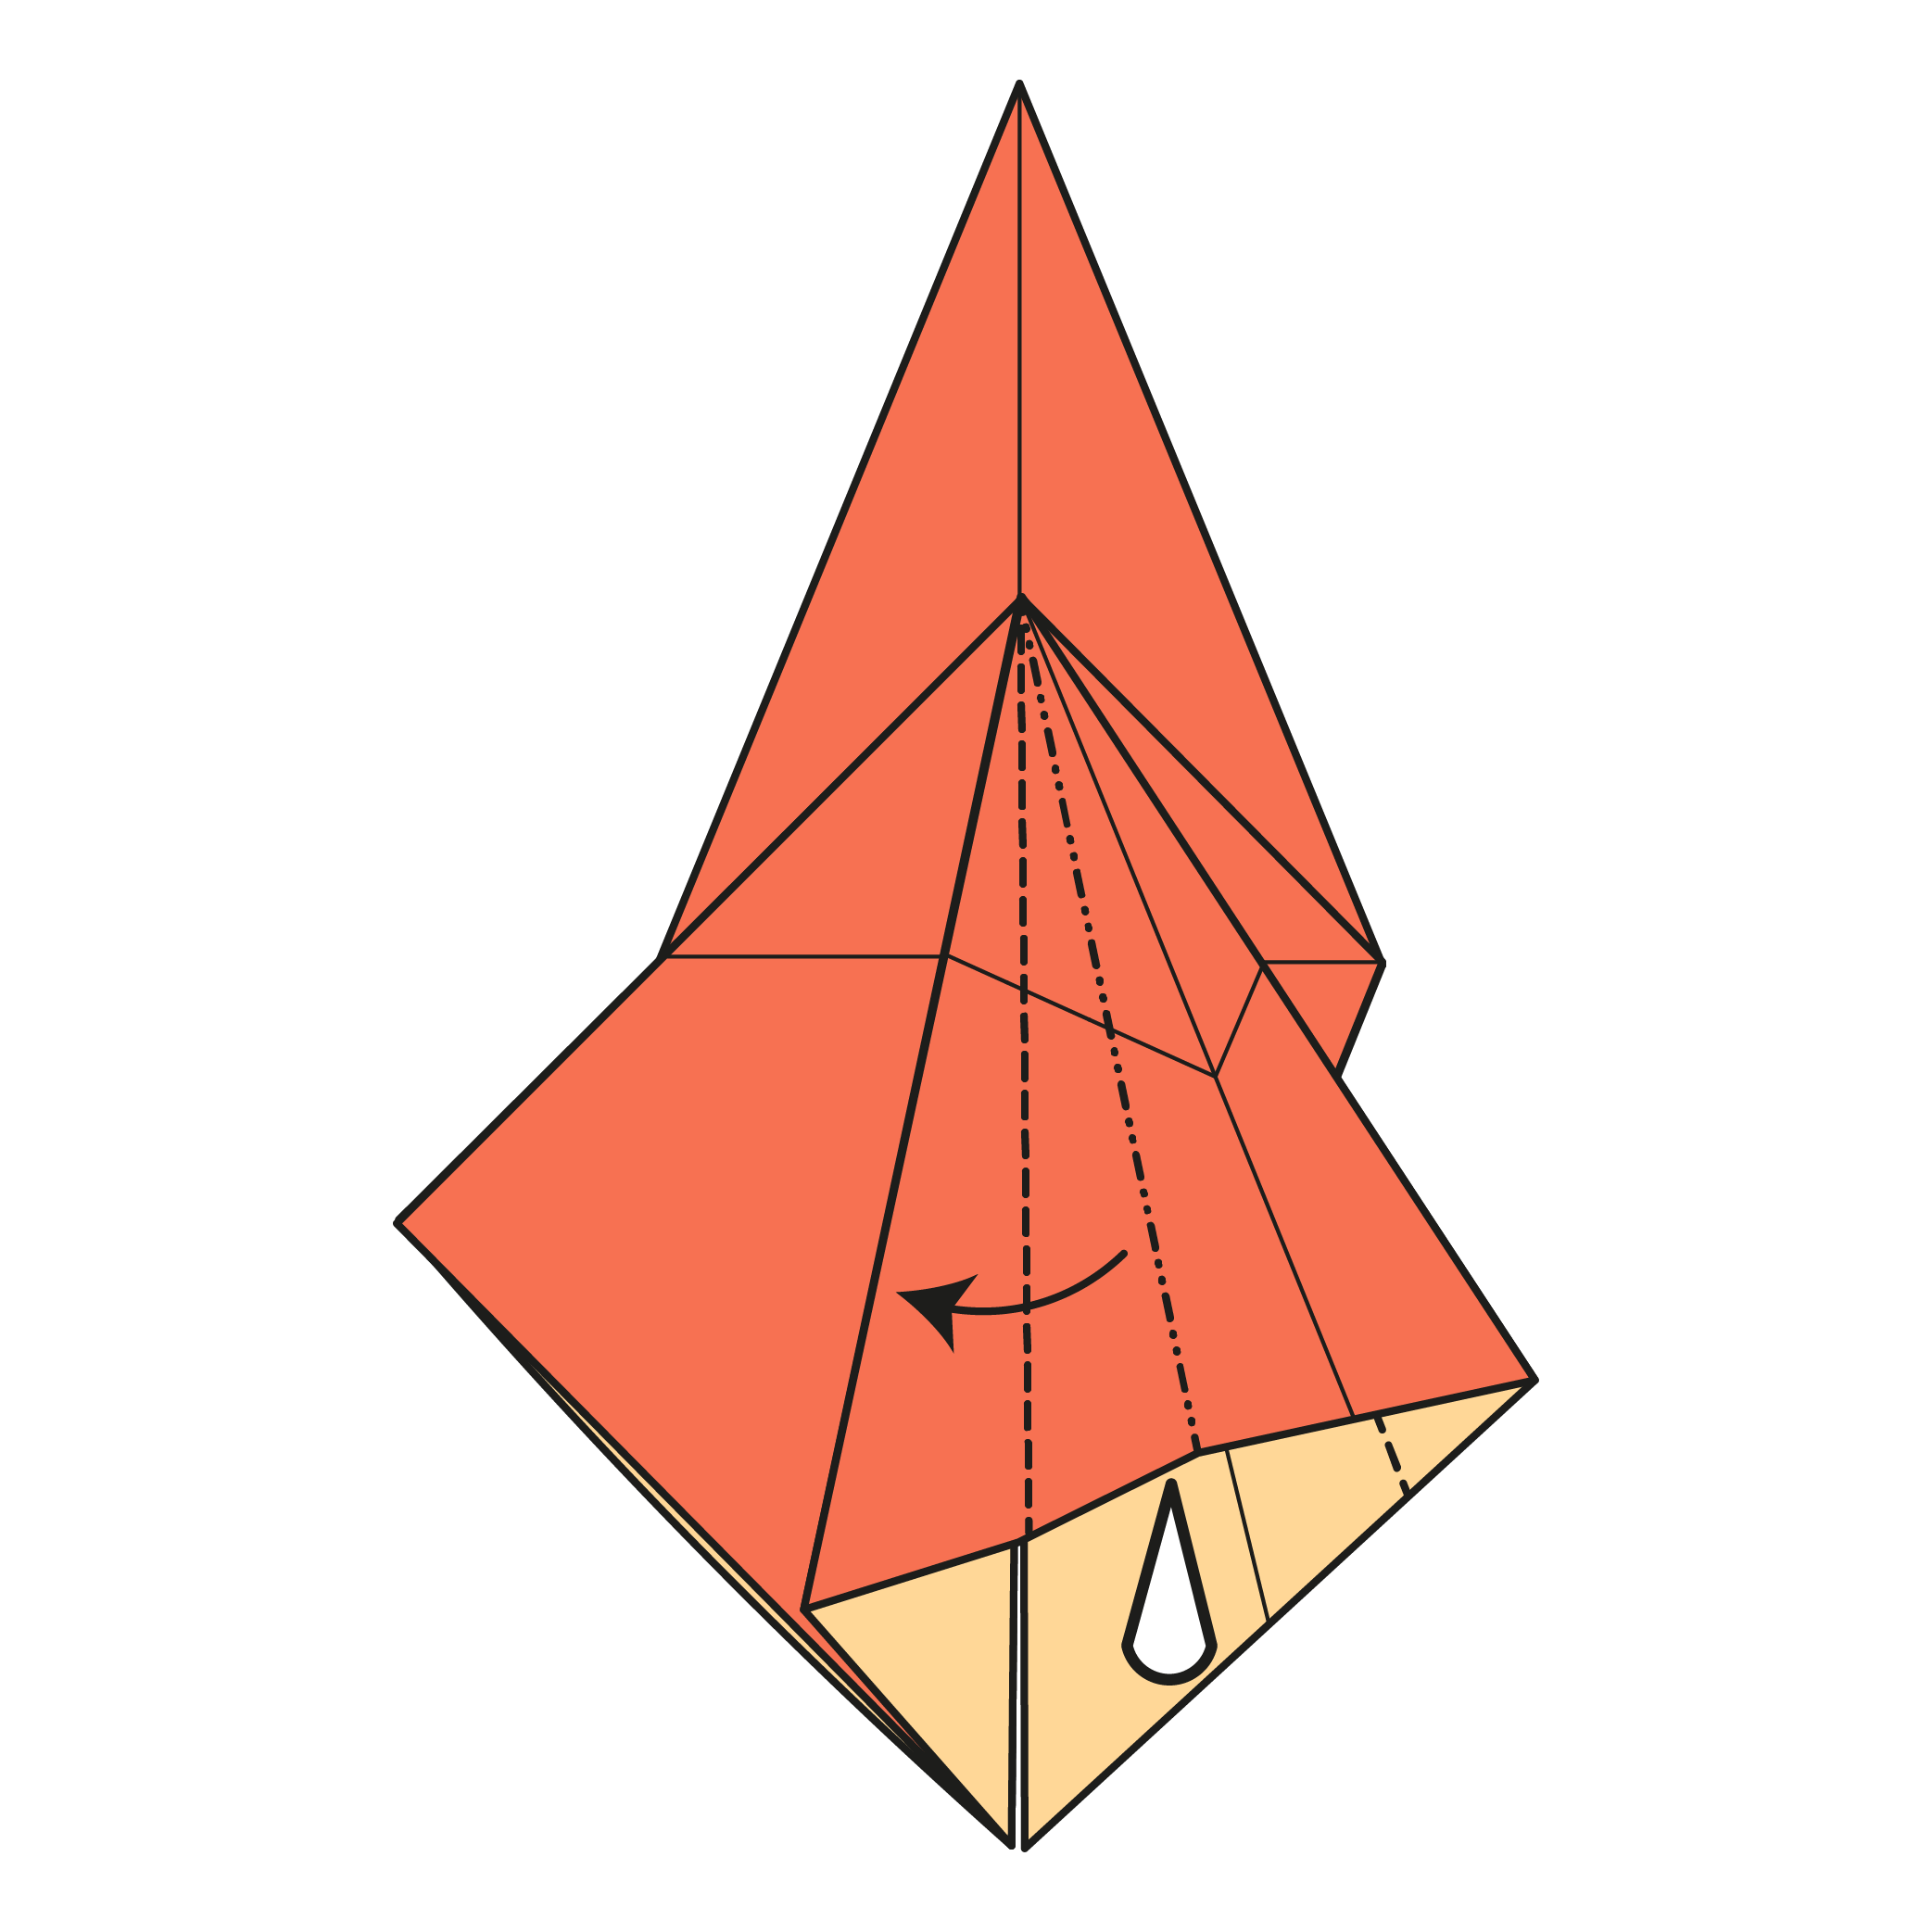
Repeat another Squash fold following the same steps as Step 13.
Step 15

Squash fold one more time using the same steps.
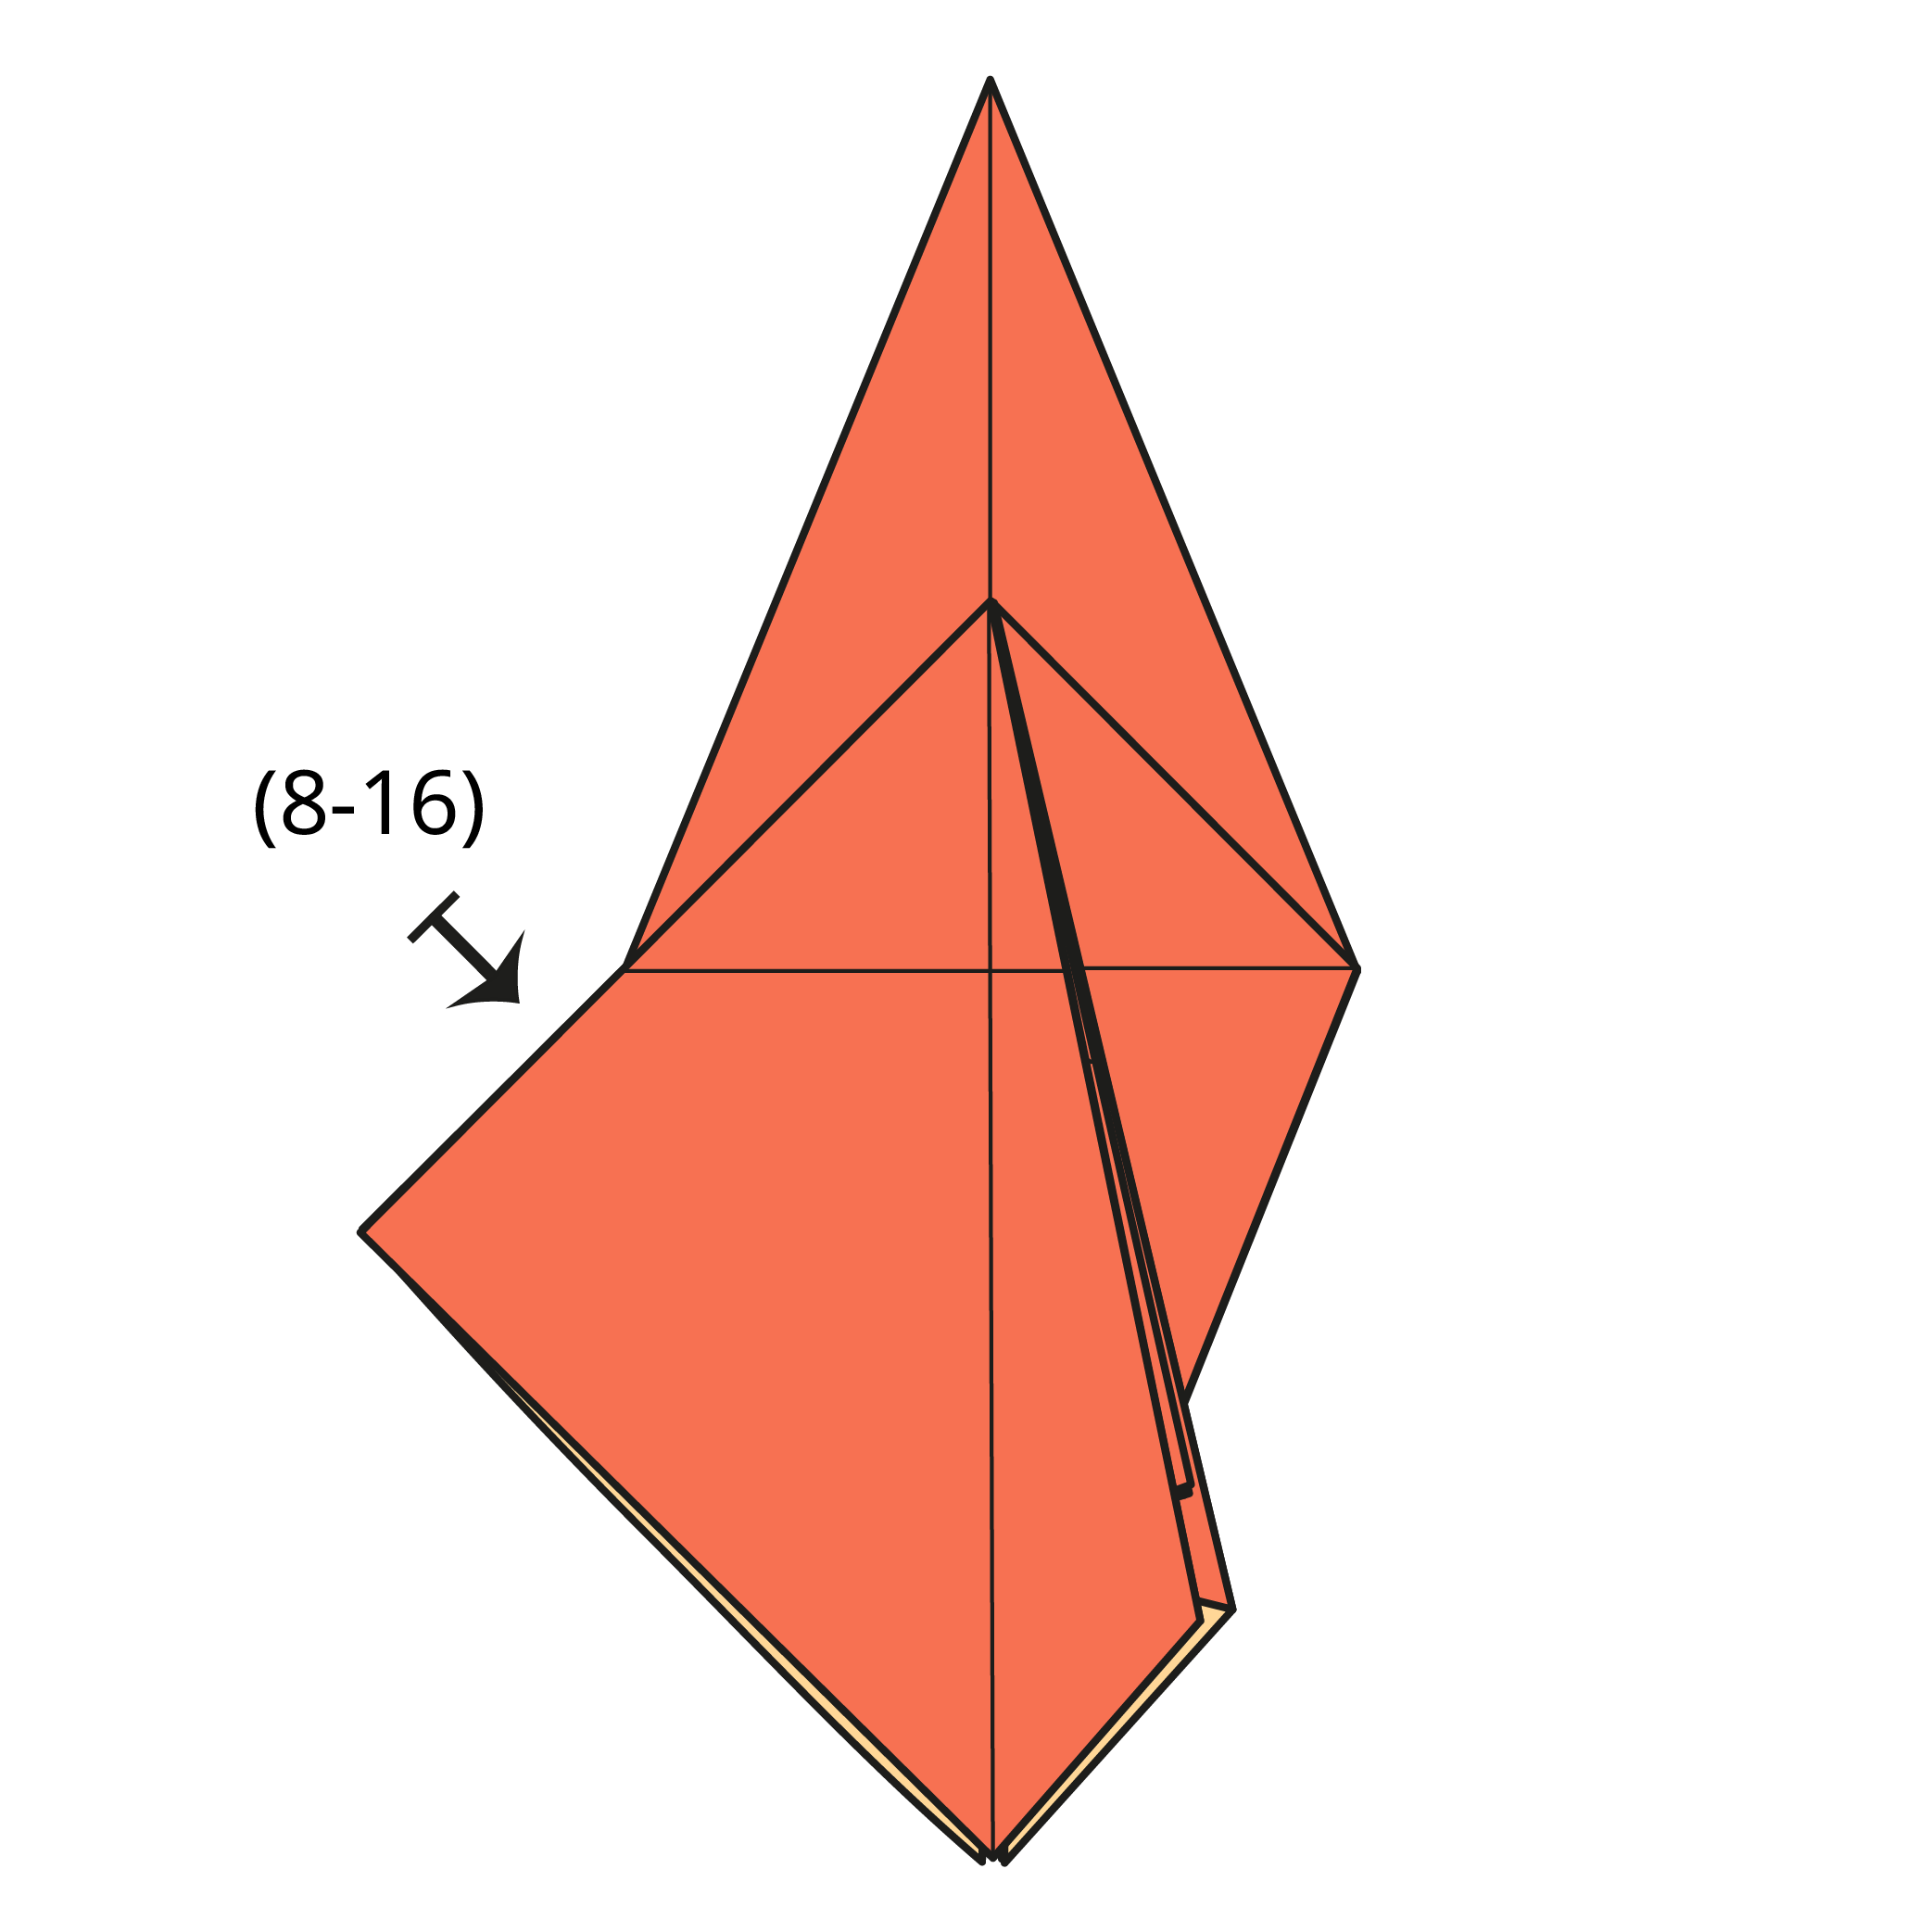
Step 16


Flip three flaps from left to right.
Step 17
Repeat Steps 8 to 16 on the left side.
Step 18
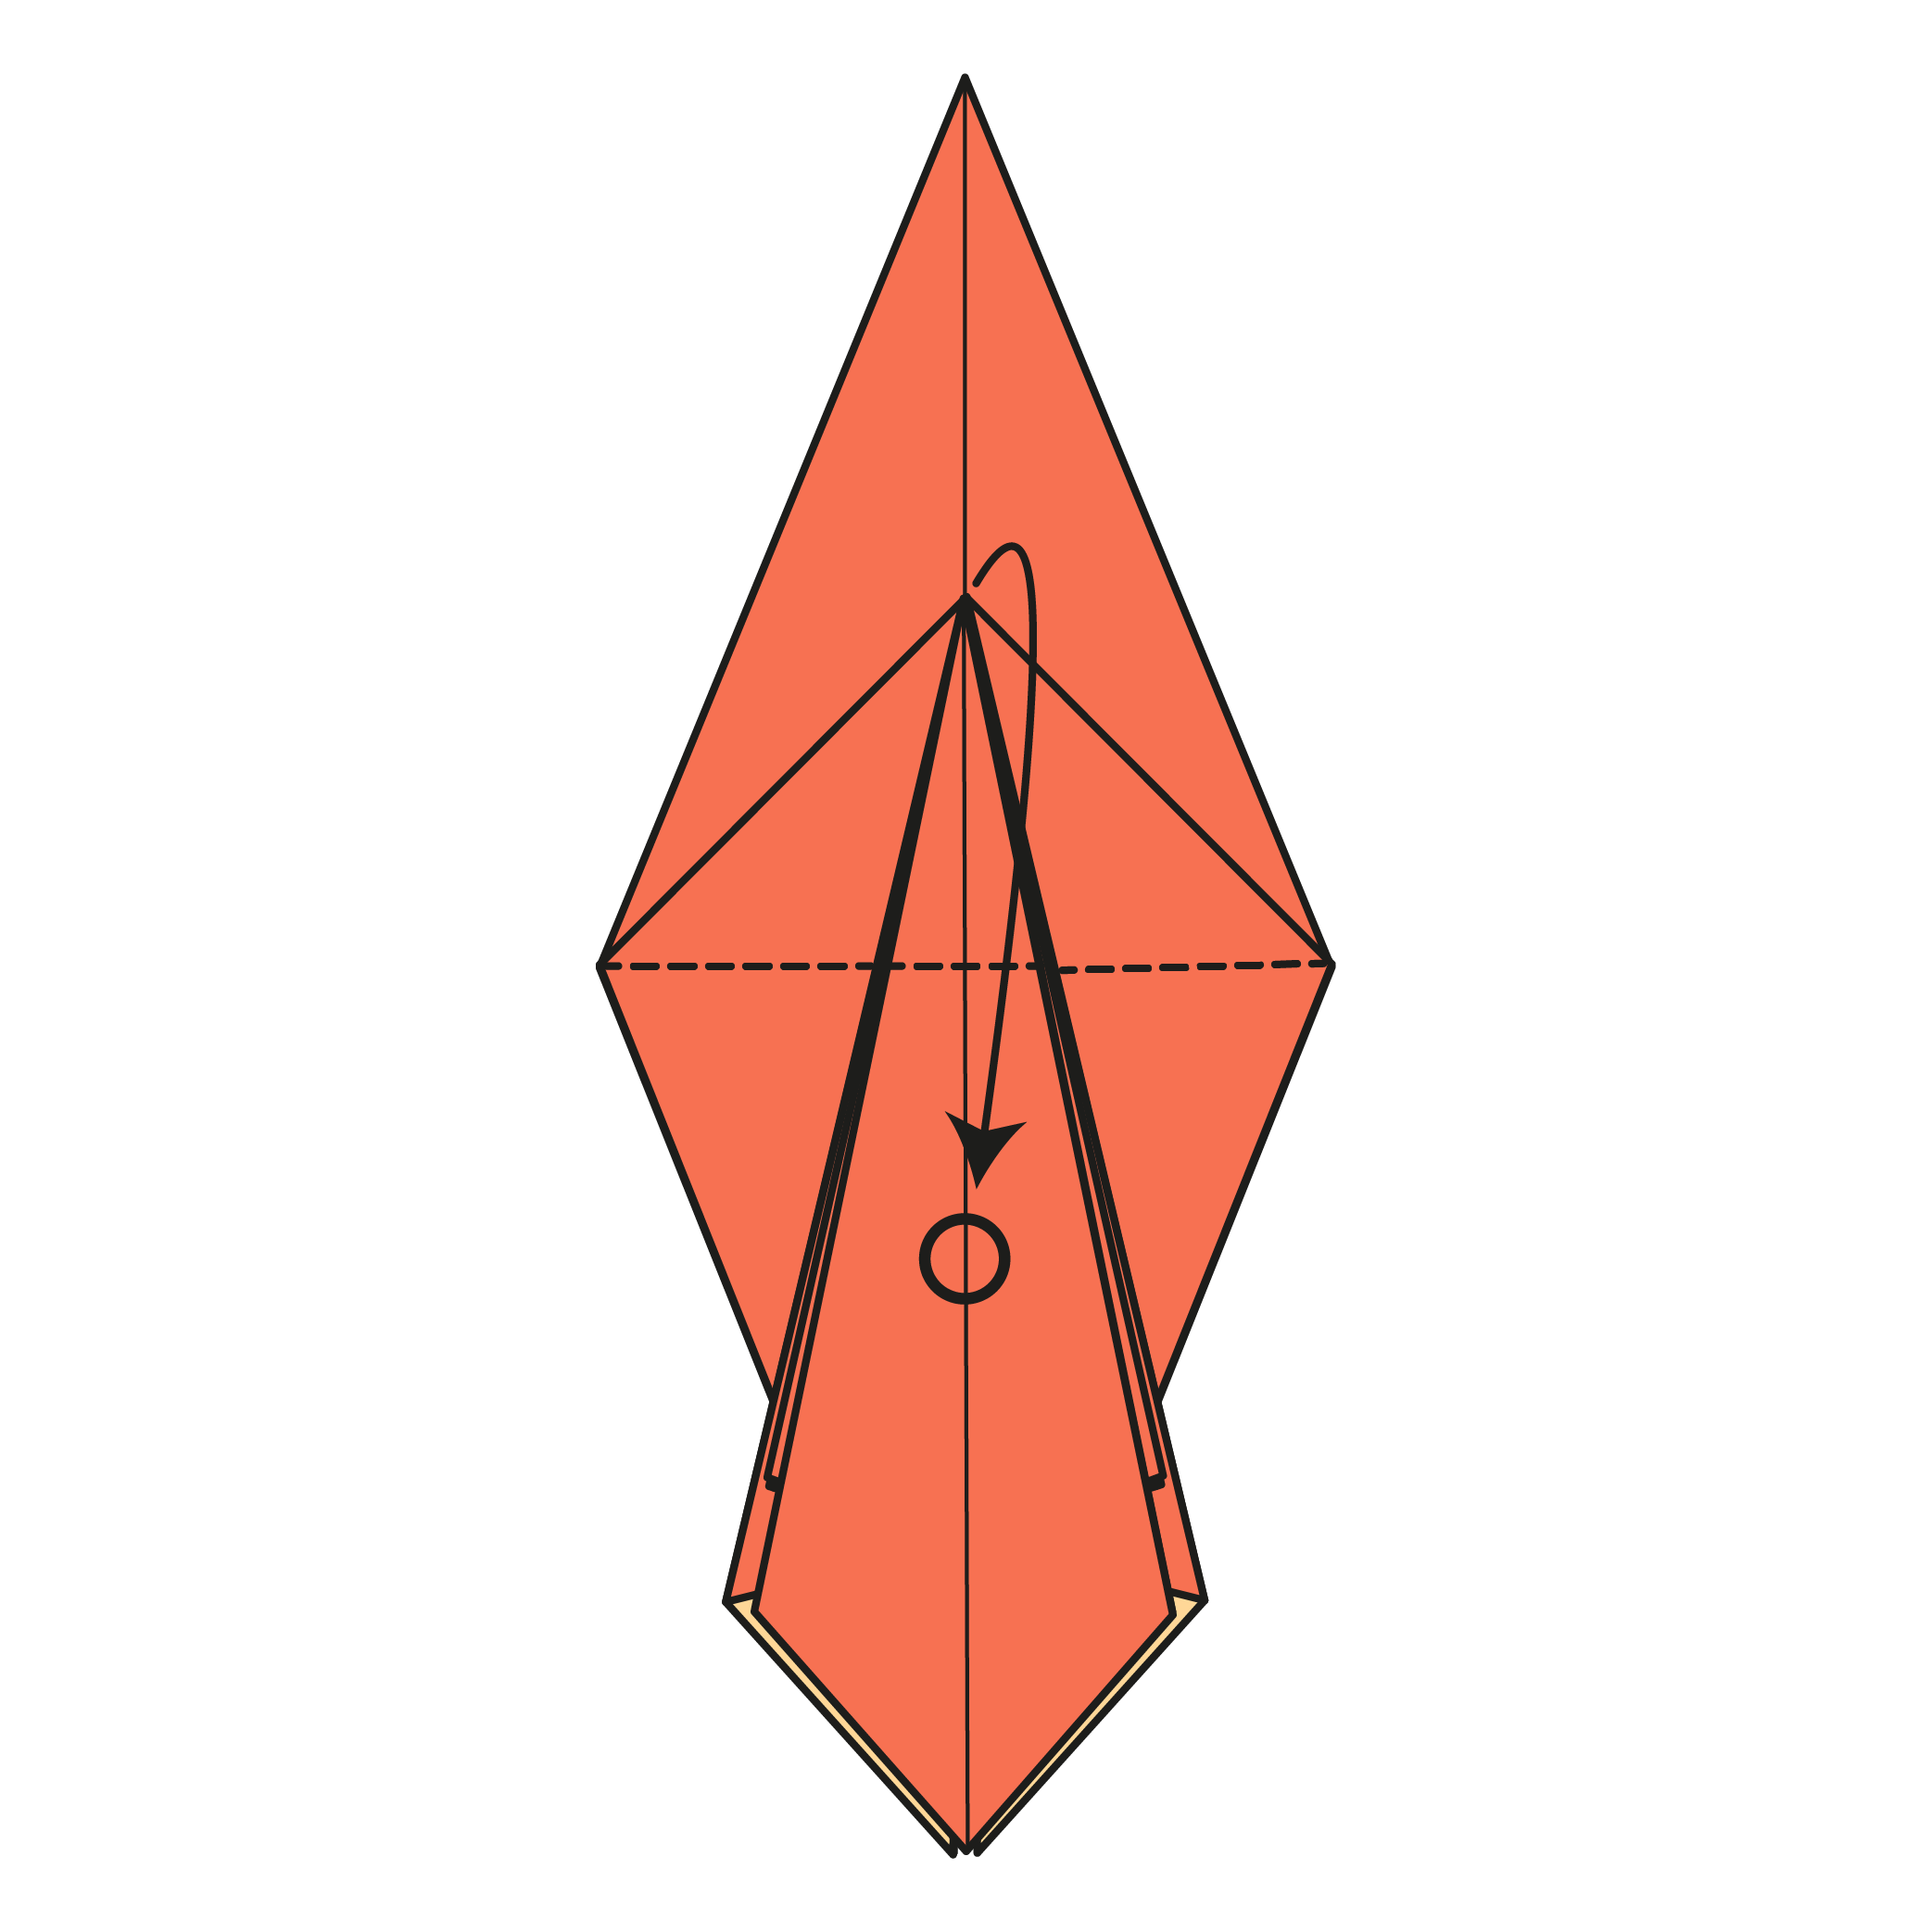
Fold the center flap down along the horizontal crease in the middle.
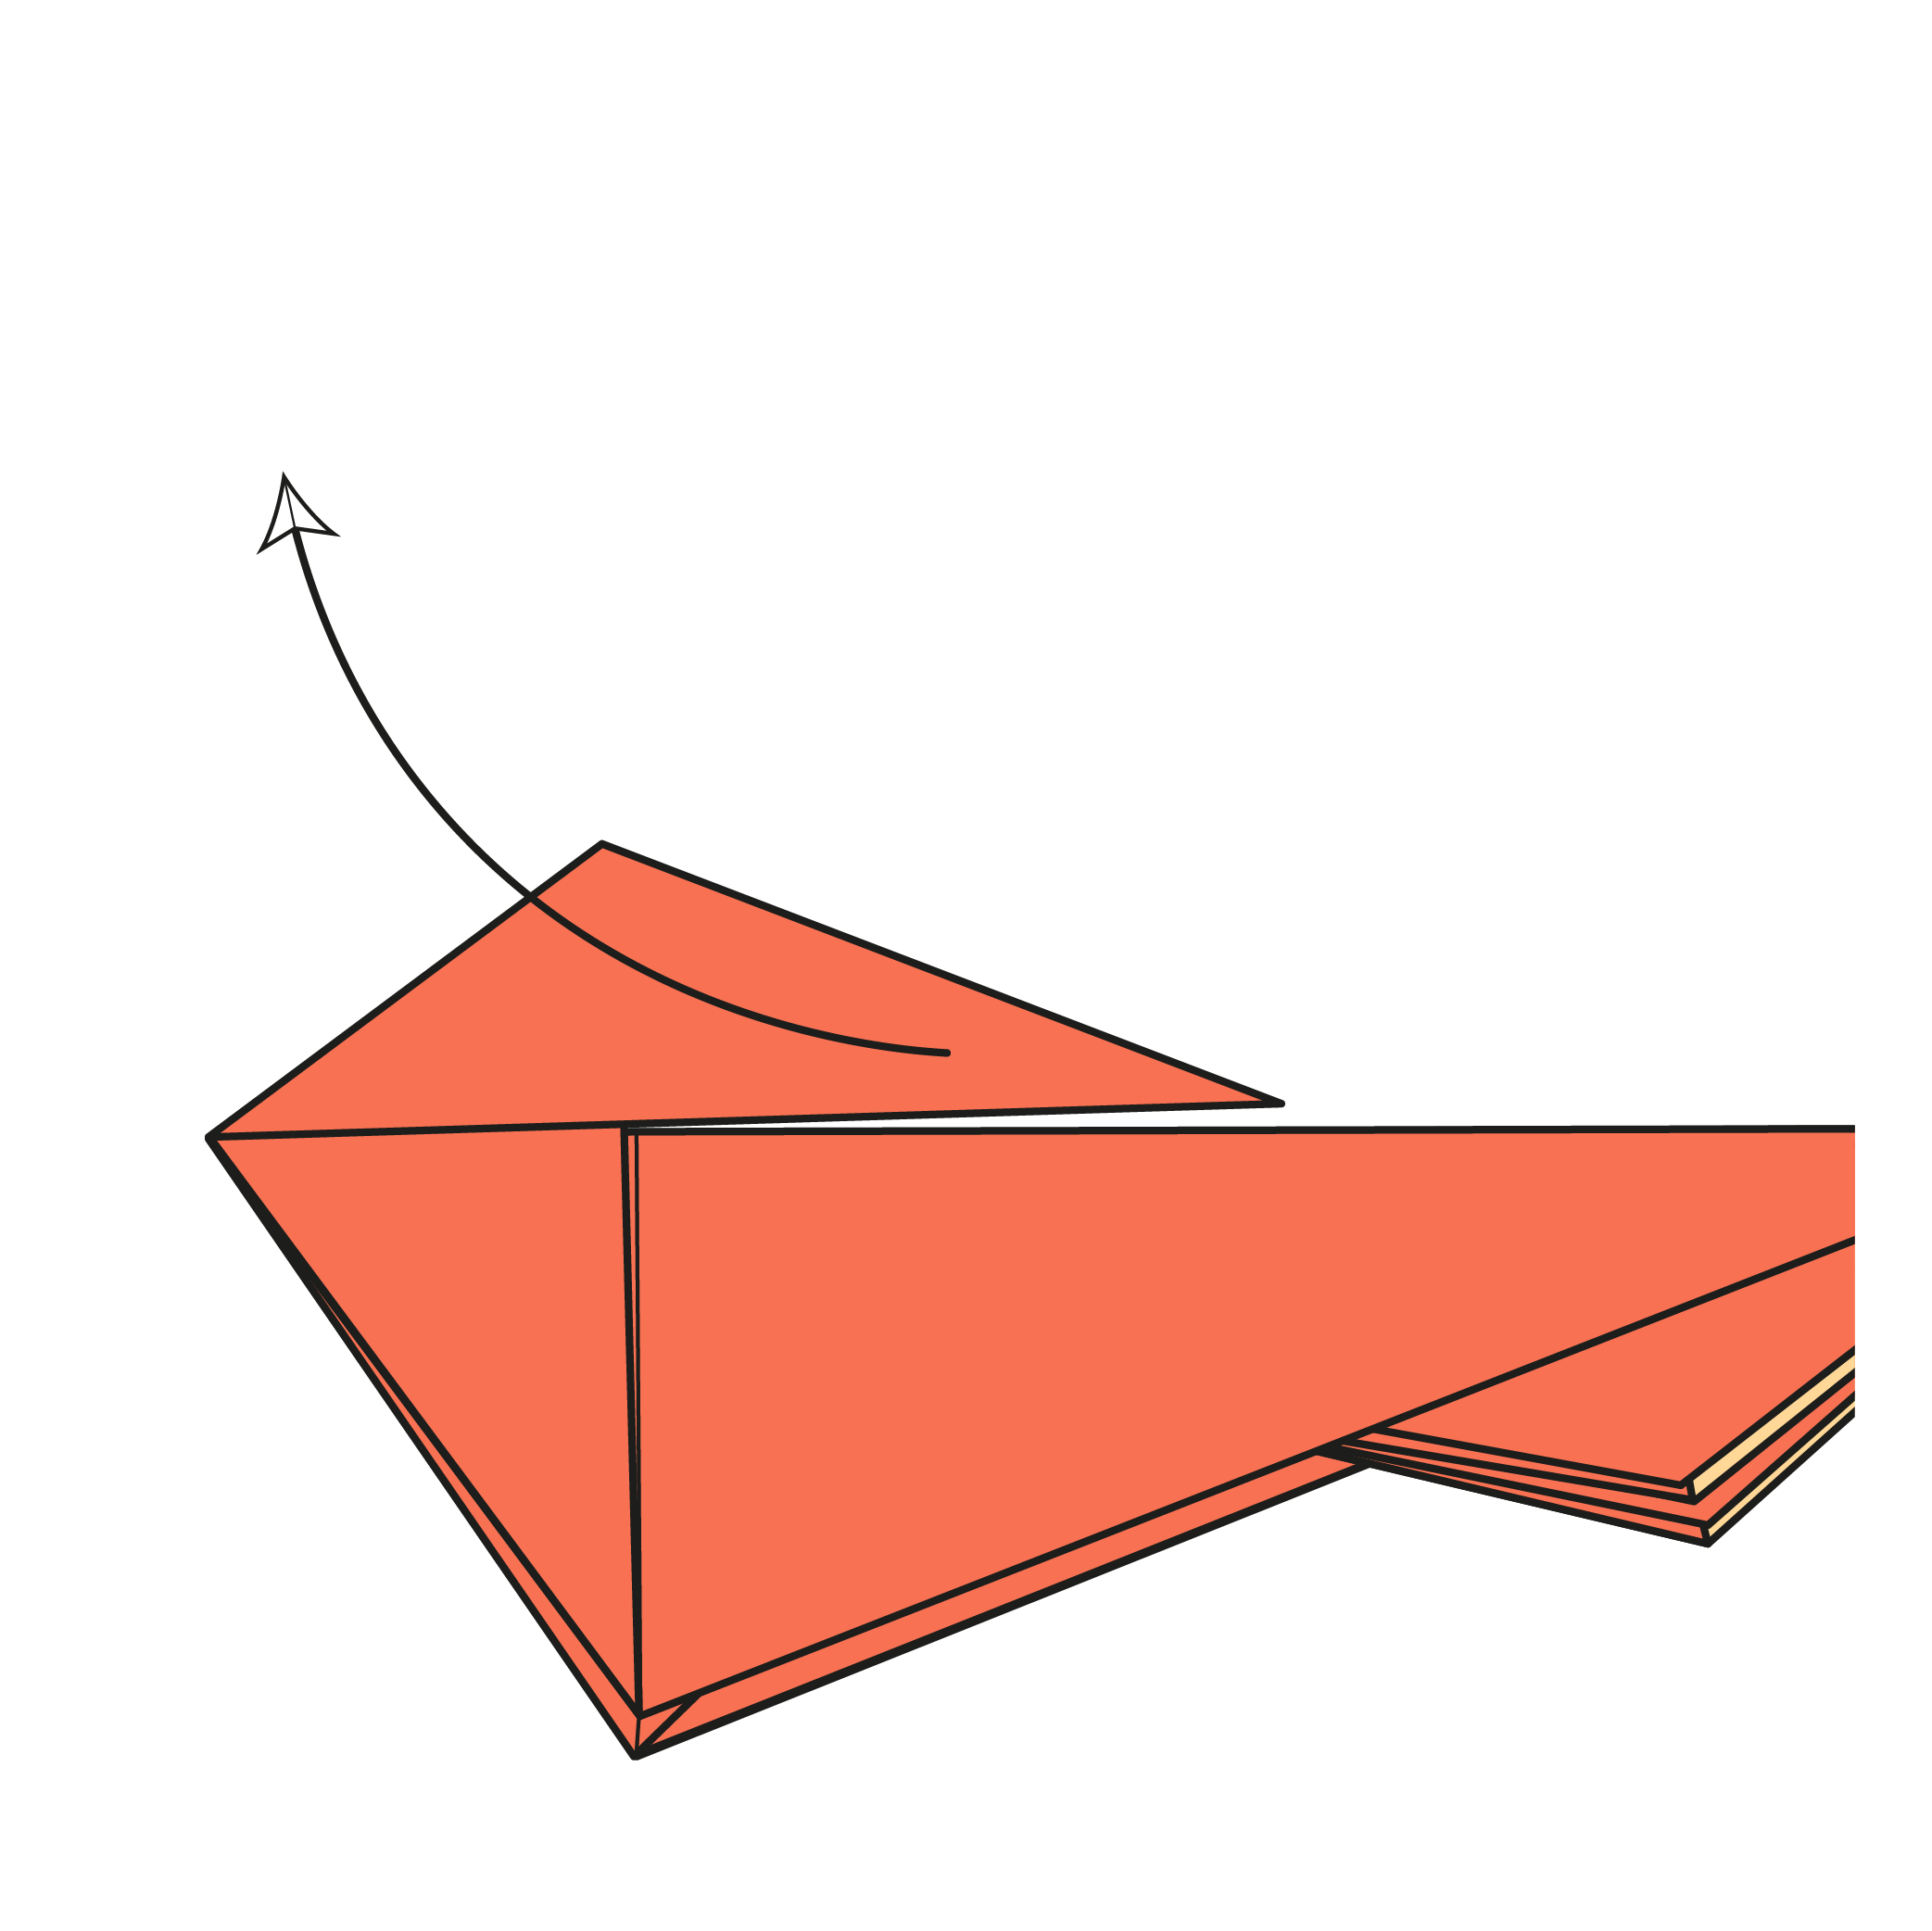
Step 19
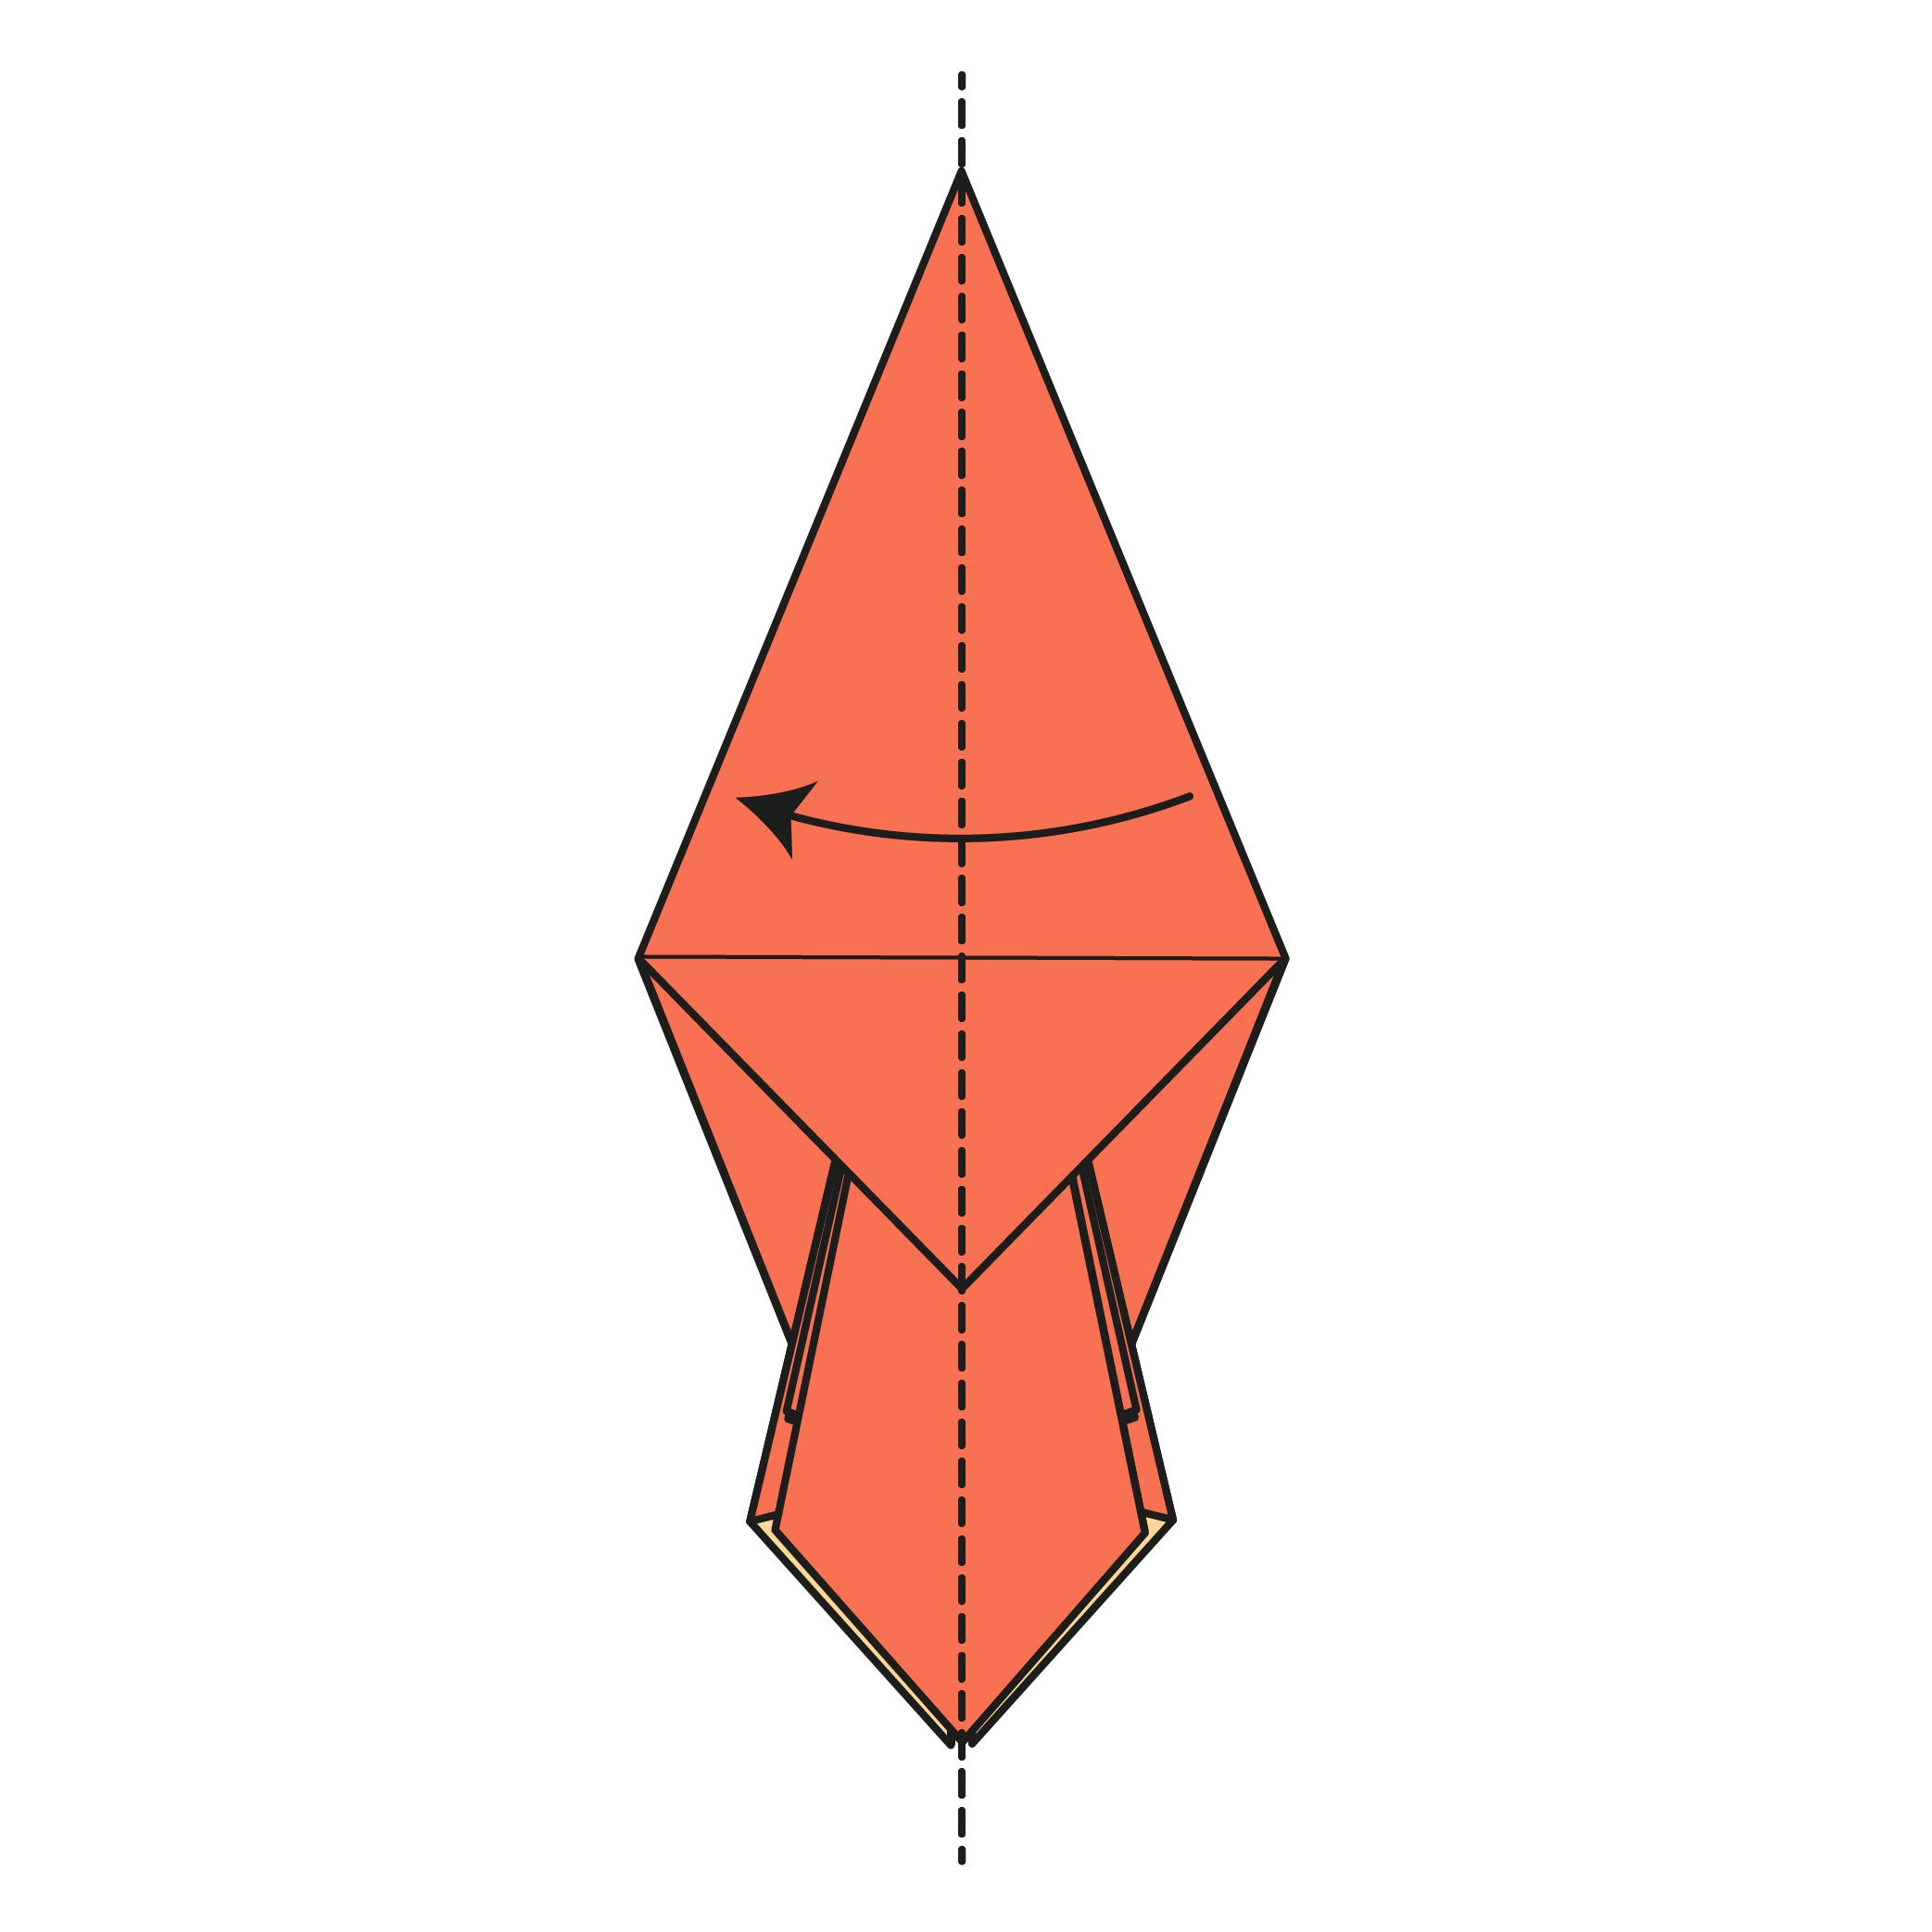
Fold the entire model in half from right to left.
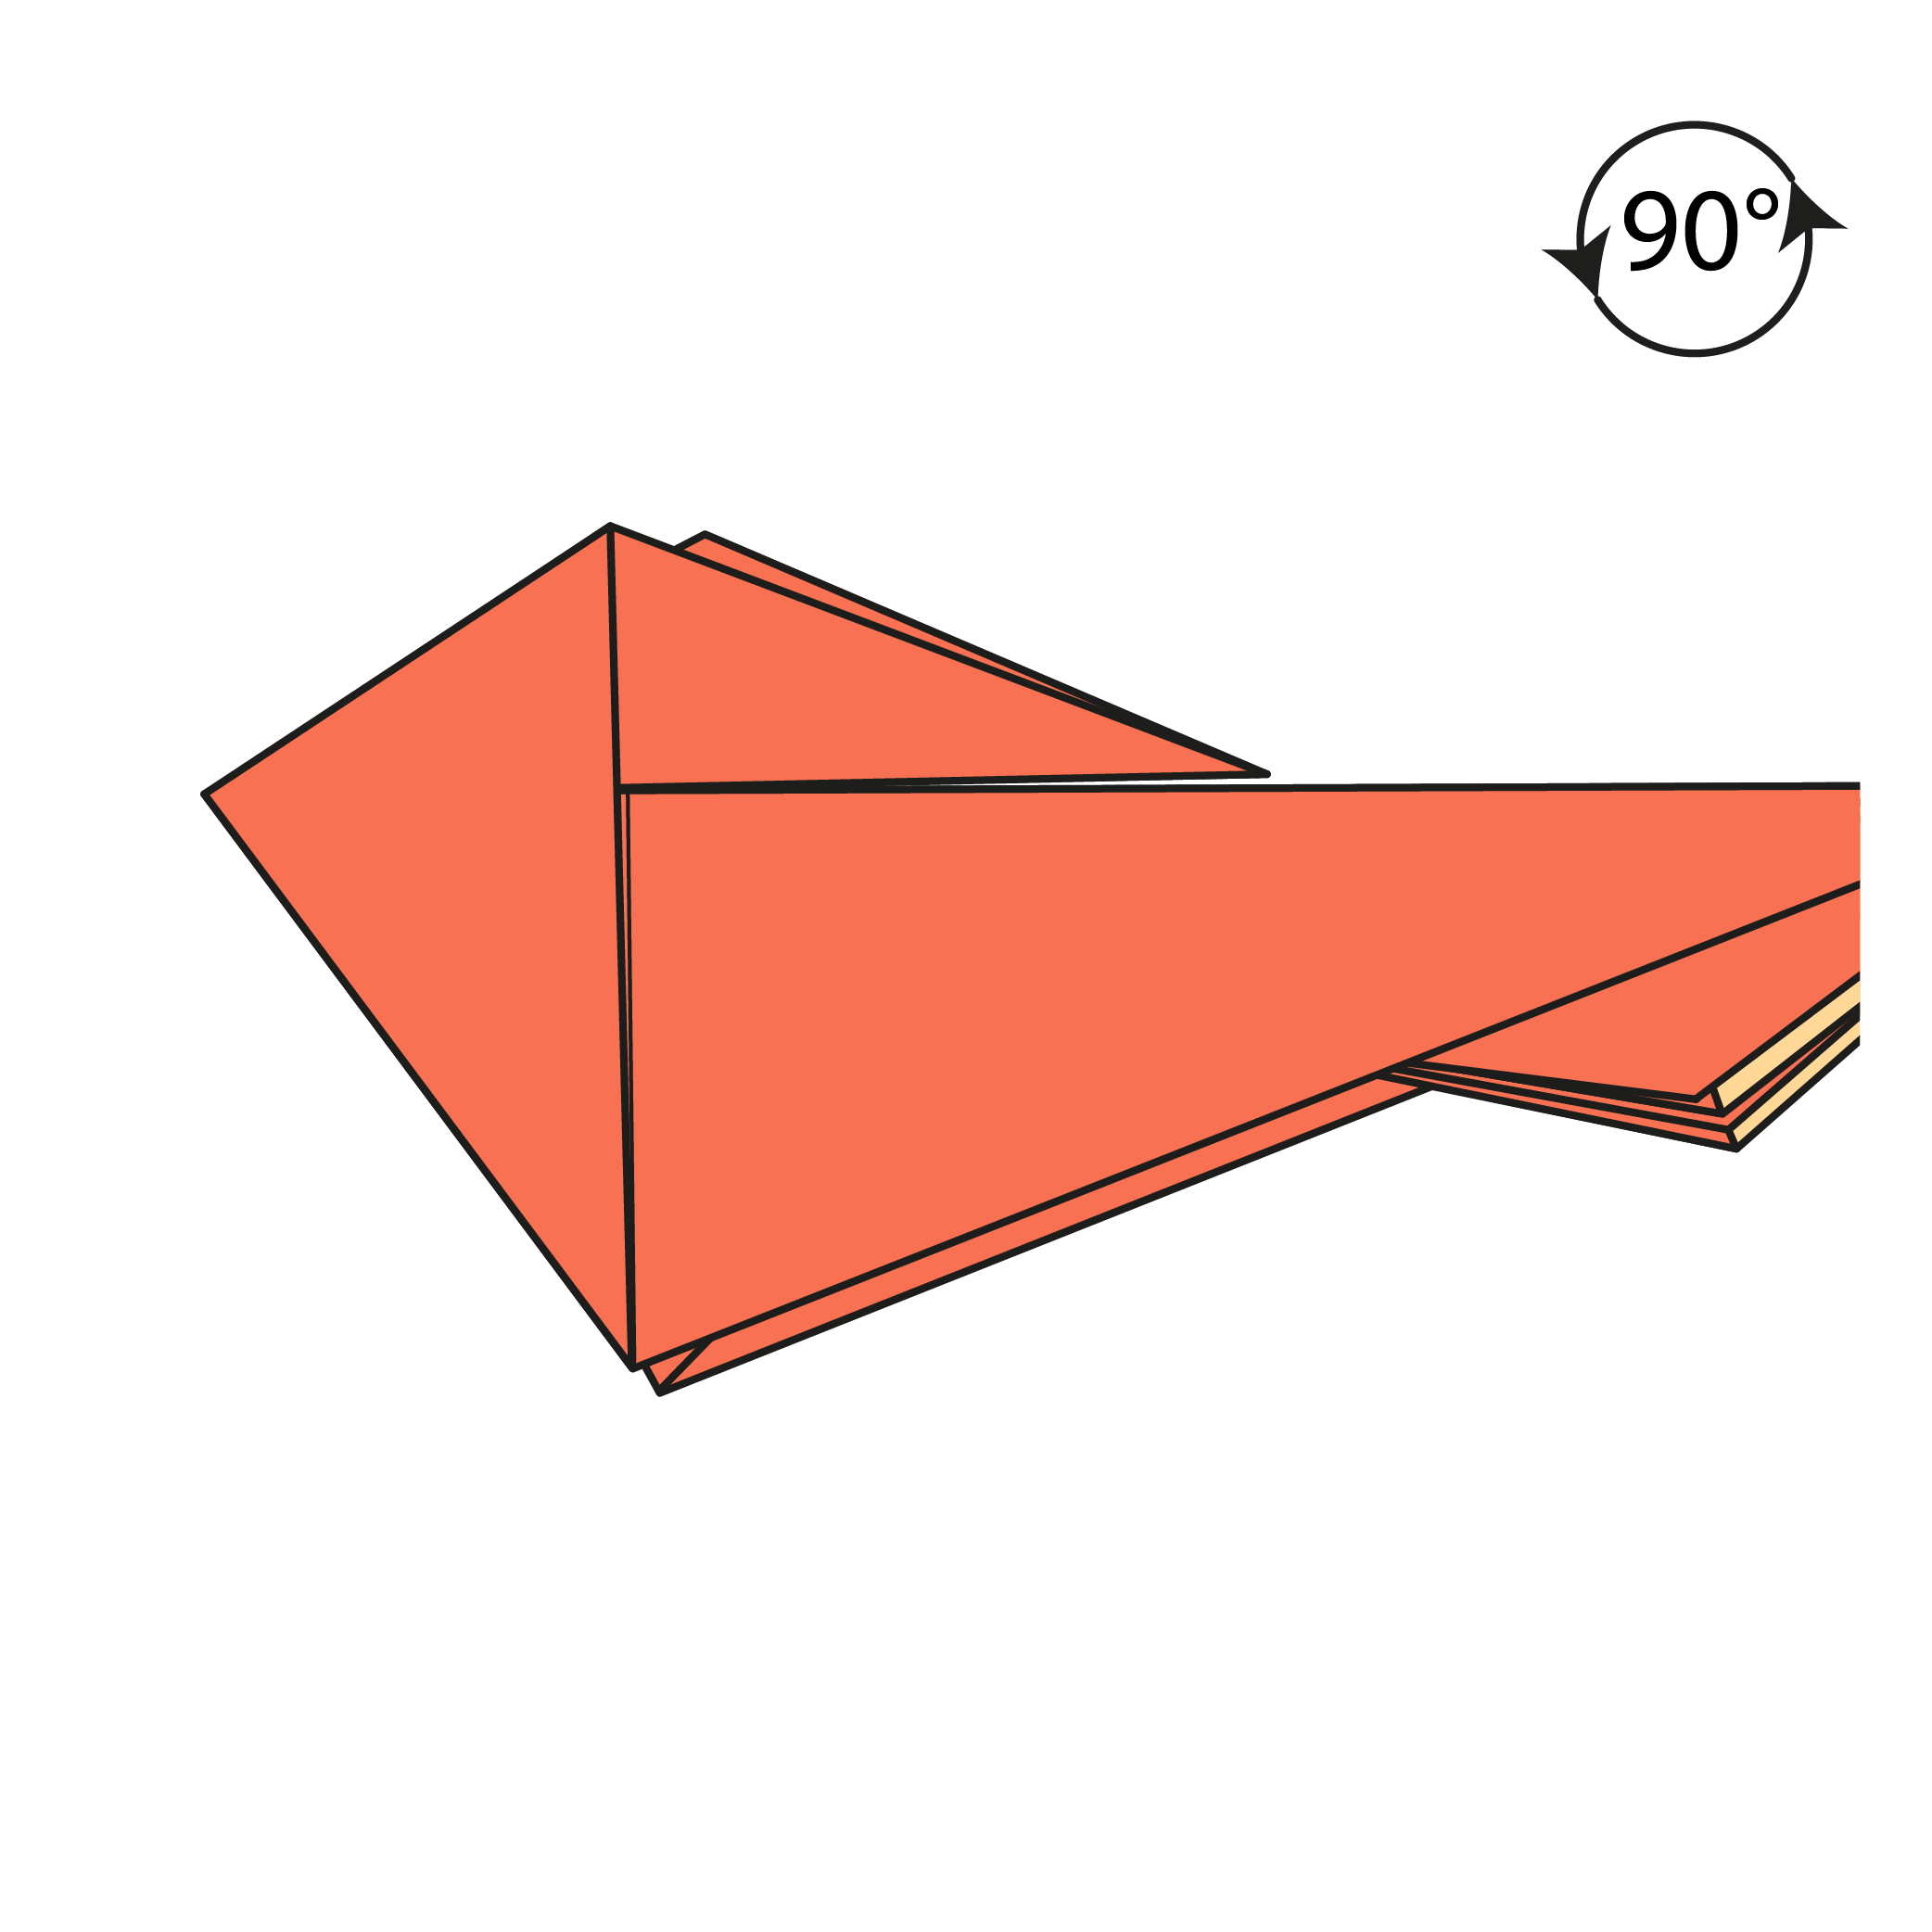
Step 20


Rotate the model 90° counterclockwise.
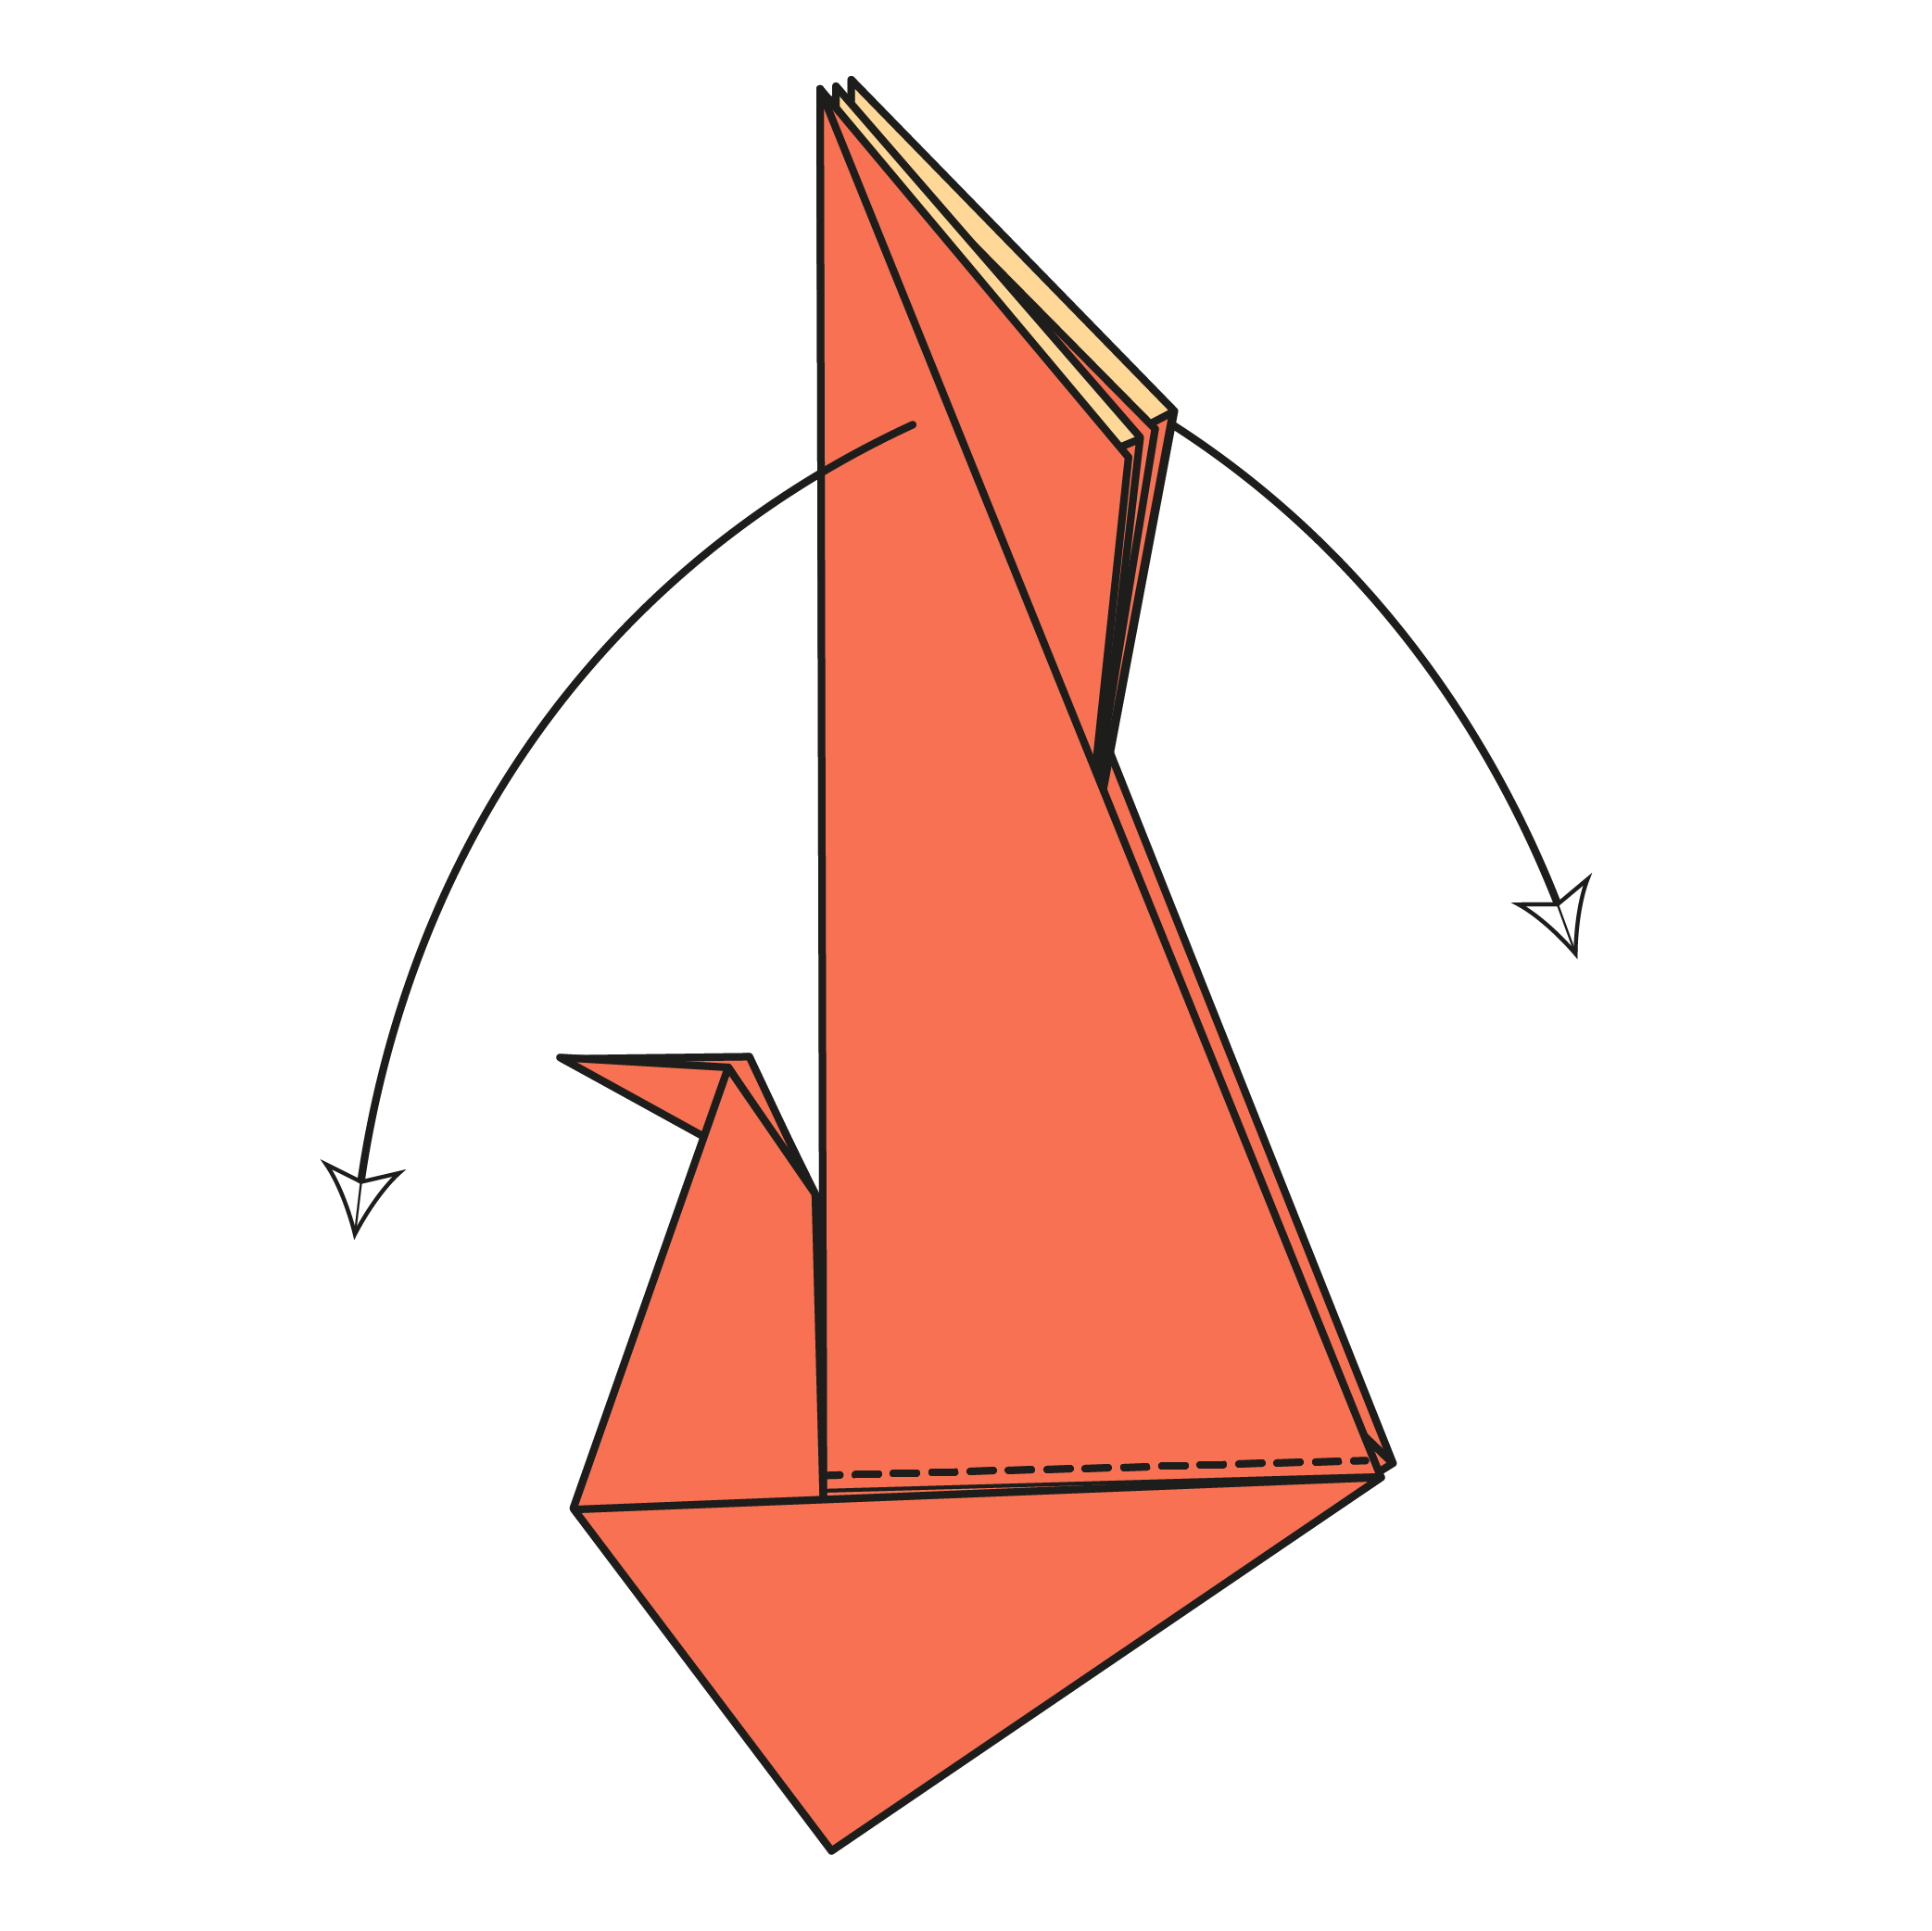
Step 21

Fold the bottom right edge in to the centerline. Crease well and unfold.
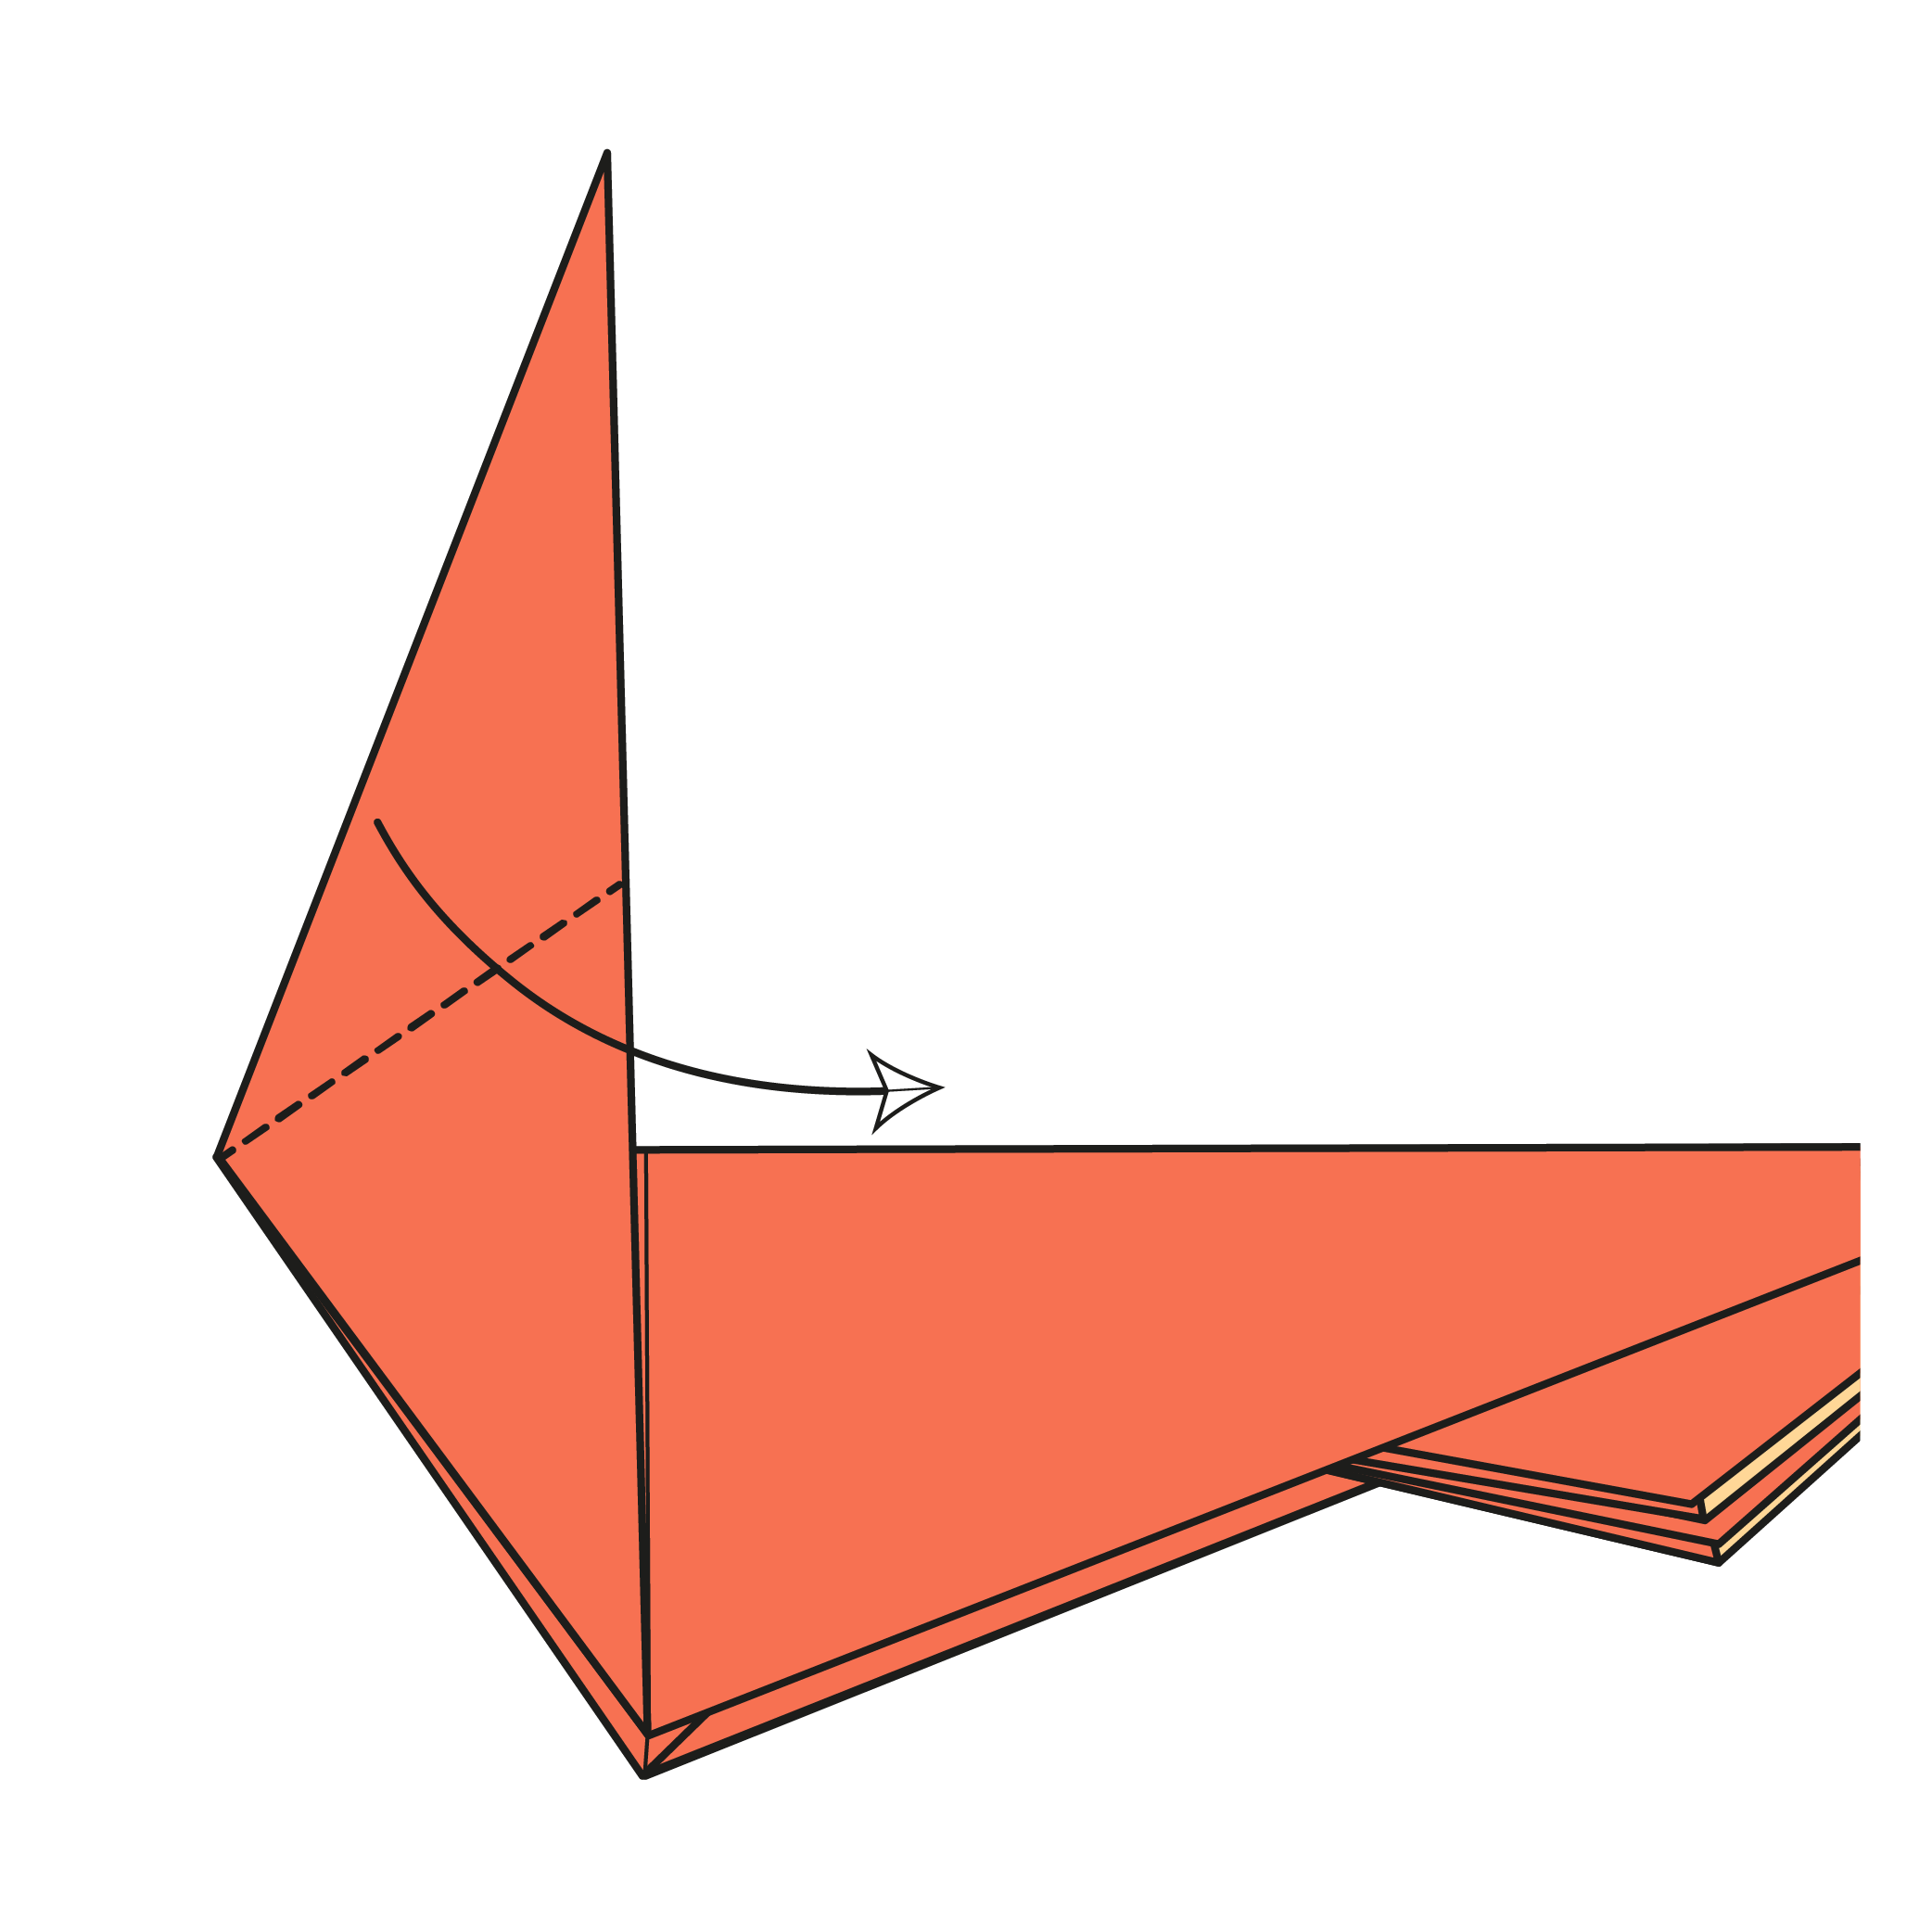
Step 22

Outside reverse fold along the crease from Step 21.
Step 23
Fold the top right edge down to meet the horizontal crease. Then, unfold.
Step 24

Inside reverse fold along the crease from Step 23.
Step 25
Rotate the model 90° counterclockwise.
Step 26

Fold the top corner to the left. Crease well and unfold.
✨ Folding tip: This will become the crane’s head. There’s no exact reference point, so adjust the angle to your liking!
Step 27

Inside reverse fold along the crease made in Step 26.
Step 28
Gently spread the wings (or feathers) outward to shape your crane.
🎉 The completed origami celebration crane!
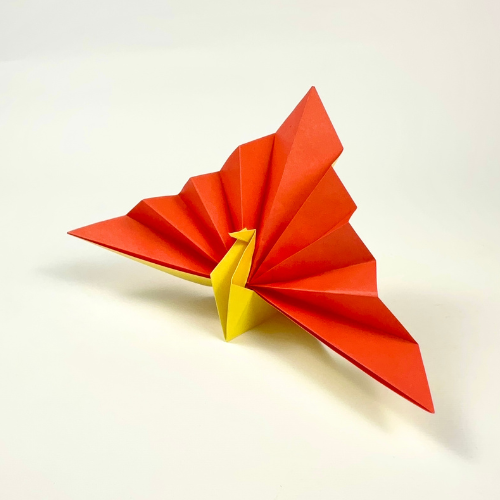
Your origami celebration crane is complete, and it truly lives up to its name.
With its open, elevated wings and sculptural form, this model feels full of energy and intention.
If you would like to share your crane, tag us on social media or leave a comment. We would love to see it. And if you’re ready for another project, feel free to subscribe to our YouTube channel or join our newsletter for more.
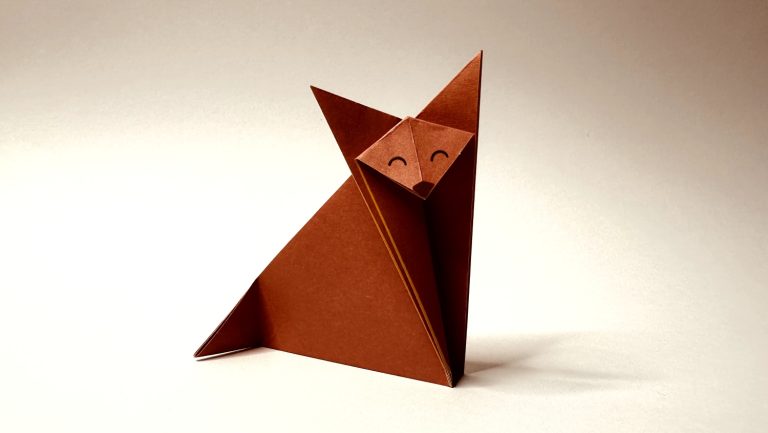
Other Origami Cranes:


Download the Complete Origami Celebration Crane Printable PDF Instructions
This printable PDF is part of our Origami Friends membership on Patreon. As a member, you get access to these diagrams, our full library of printable PDFs, and member-only content.
Watch the Origami Celebration Crane Video Tutorial
Enjoyed this tutorial?
Subscribe to our YouTube channel for new inspiring origami videos every week!


great model, shouldve read the instruction about the paper faces more carefully😅 but otherwise very fun origami!
yee!
This is a fantastic crane! Thank you for the detailed steps
What a fun model! Thanks for putting this up.
Hi Christine, Glad you enjoyed it! Thanks for folding along with us 😊