
How to Fold an Origami Heart Bookmark
This origami bookmark is a lovely and thoughtful model designed by the late Francis Ow, an origami artist known for his many heart-themed creations.
It’s simple, elegant, and makes a perfect little gift or a cute addition to your current read. With just a bit of folding experience, you can make one in a few minutes, and the best part is you can fold two bookmarks from a single 15 x 15 cm square.
Whether you use patterned paper, soft colors, or something more playful, the heart shape always shines through.
Origami Heart Bookmark Step-by-Step Instructions
- Difficulty: Easy – Beginner level 3
- Folding time: 5 to 10 minutes
Recommended Paper
15×15 cm (6×6 in) Kami
Step 1
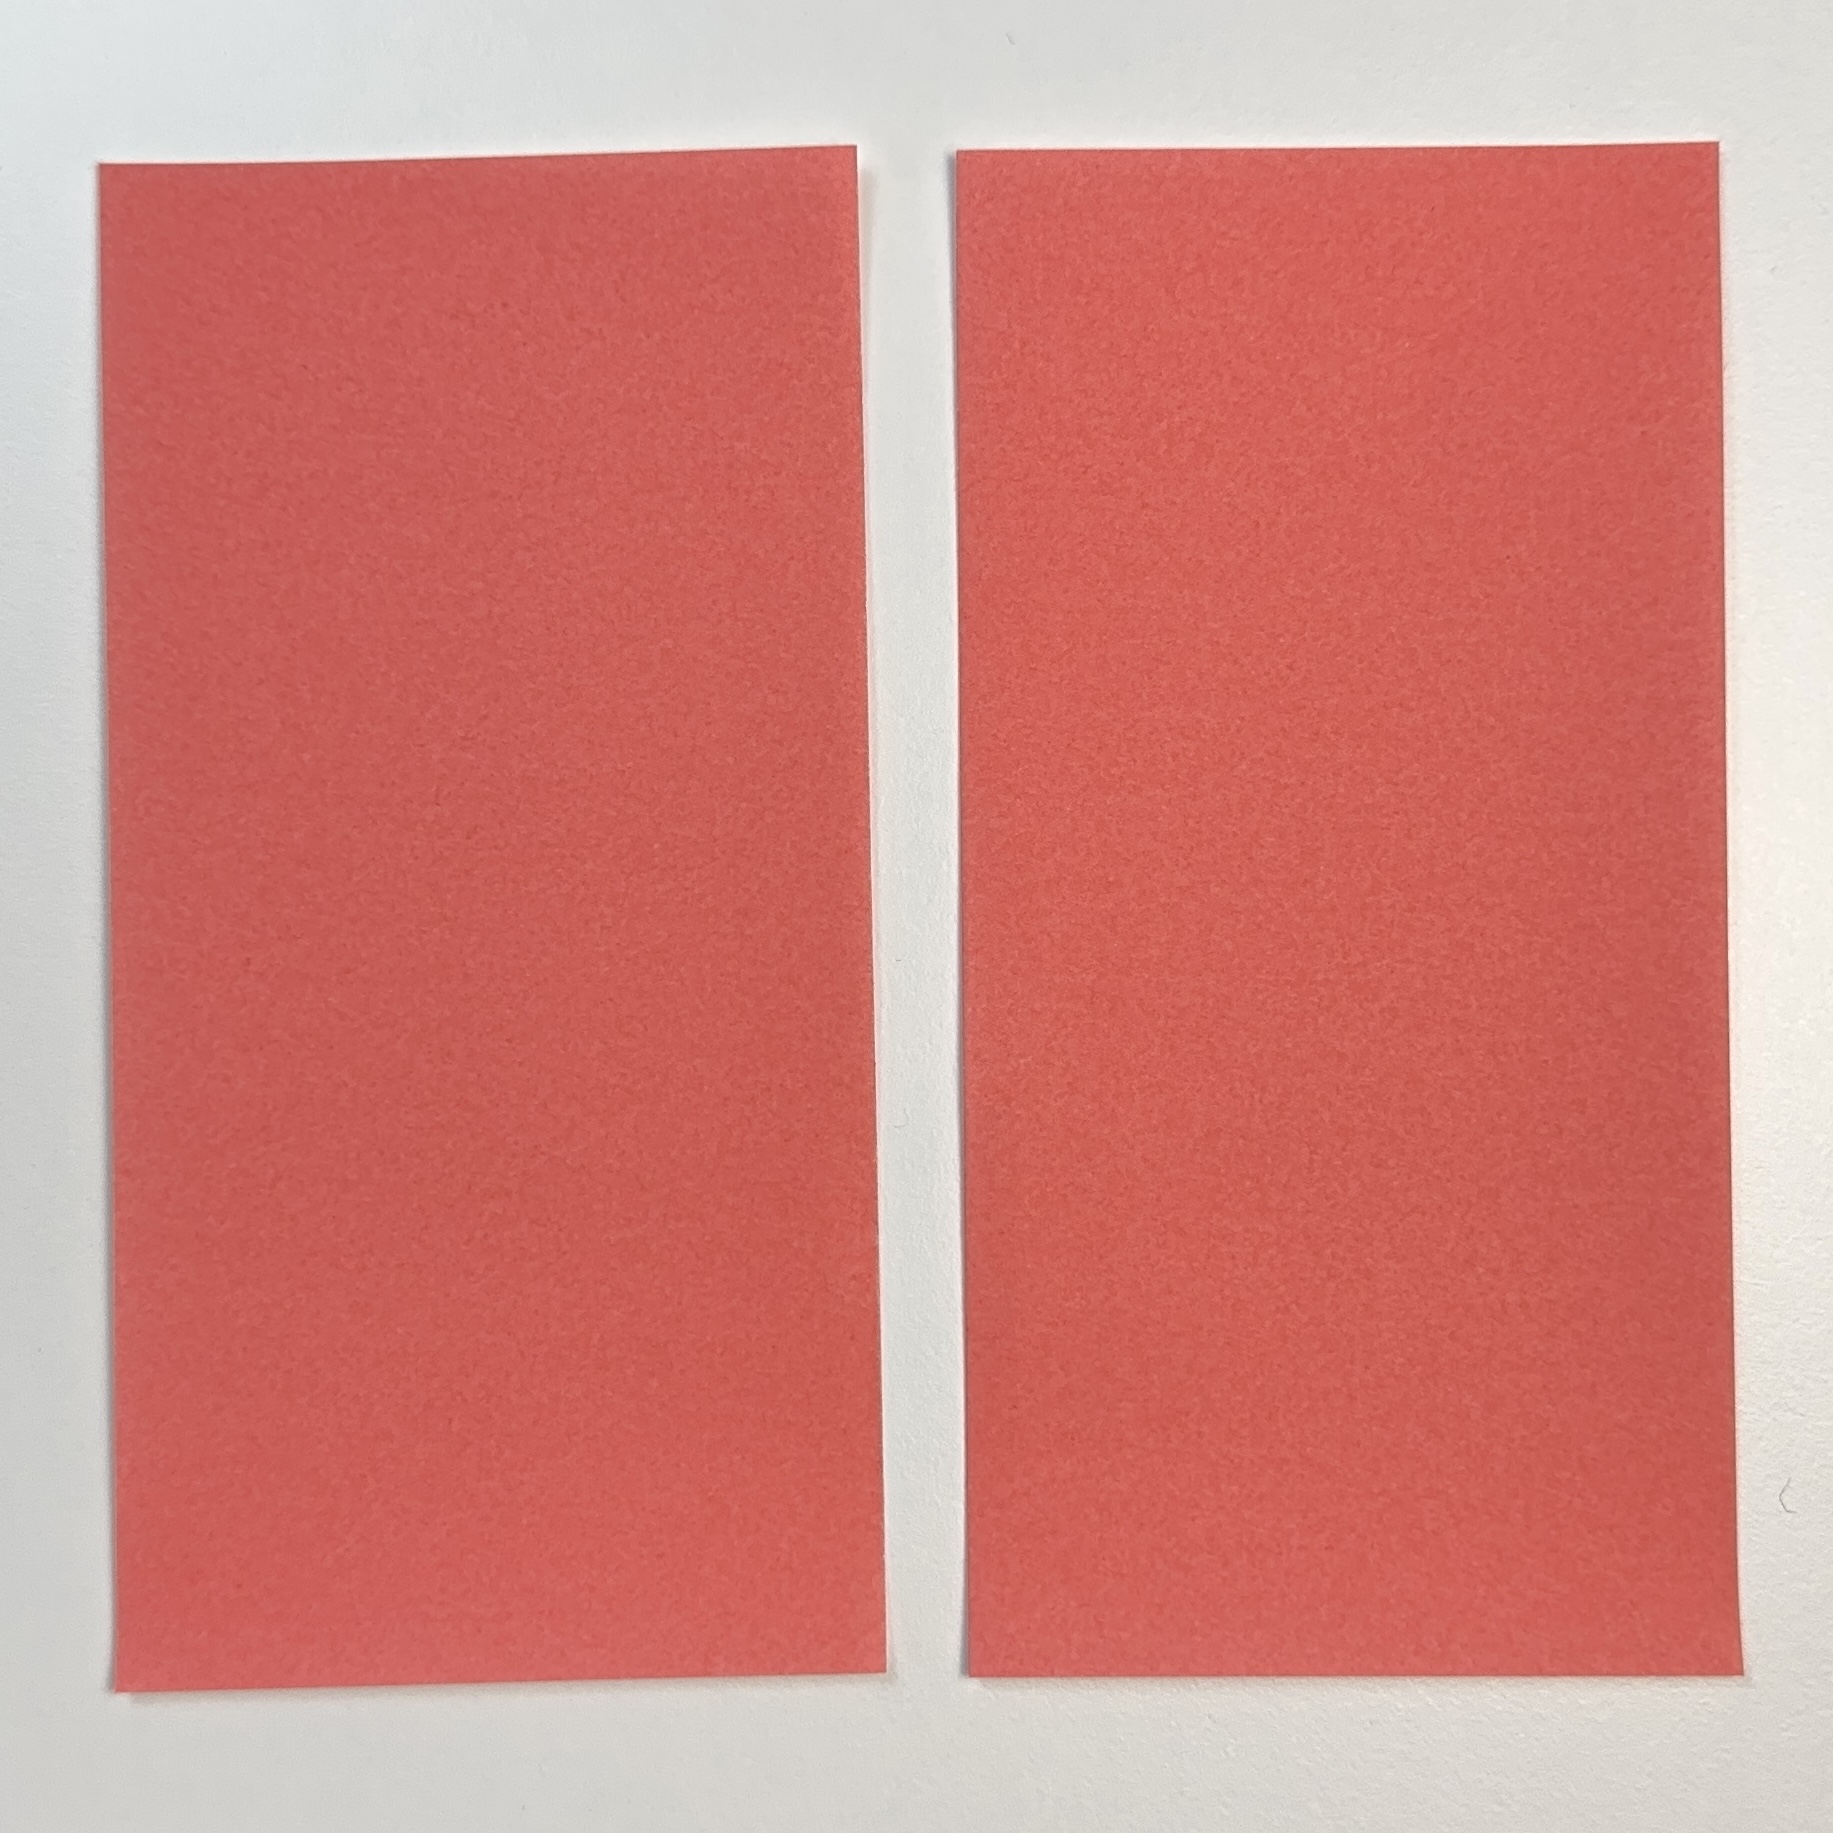
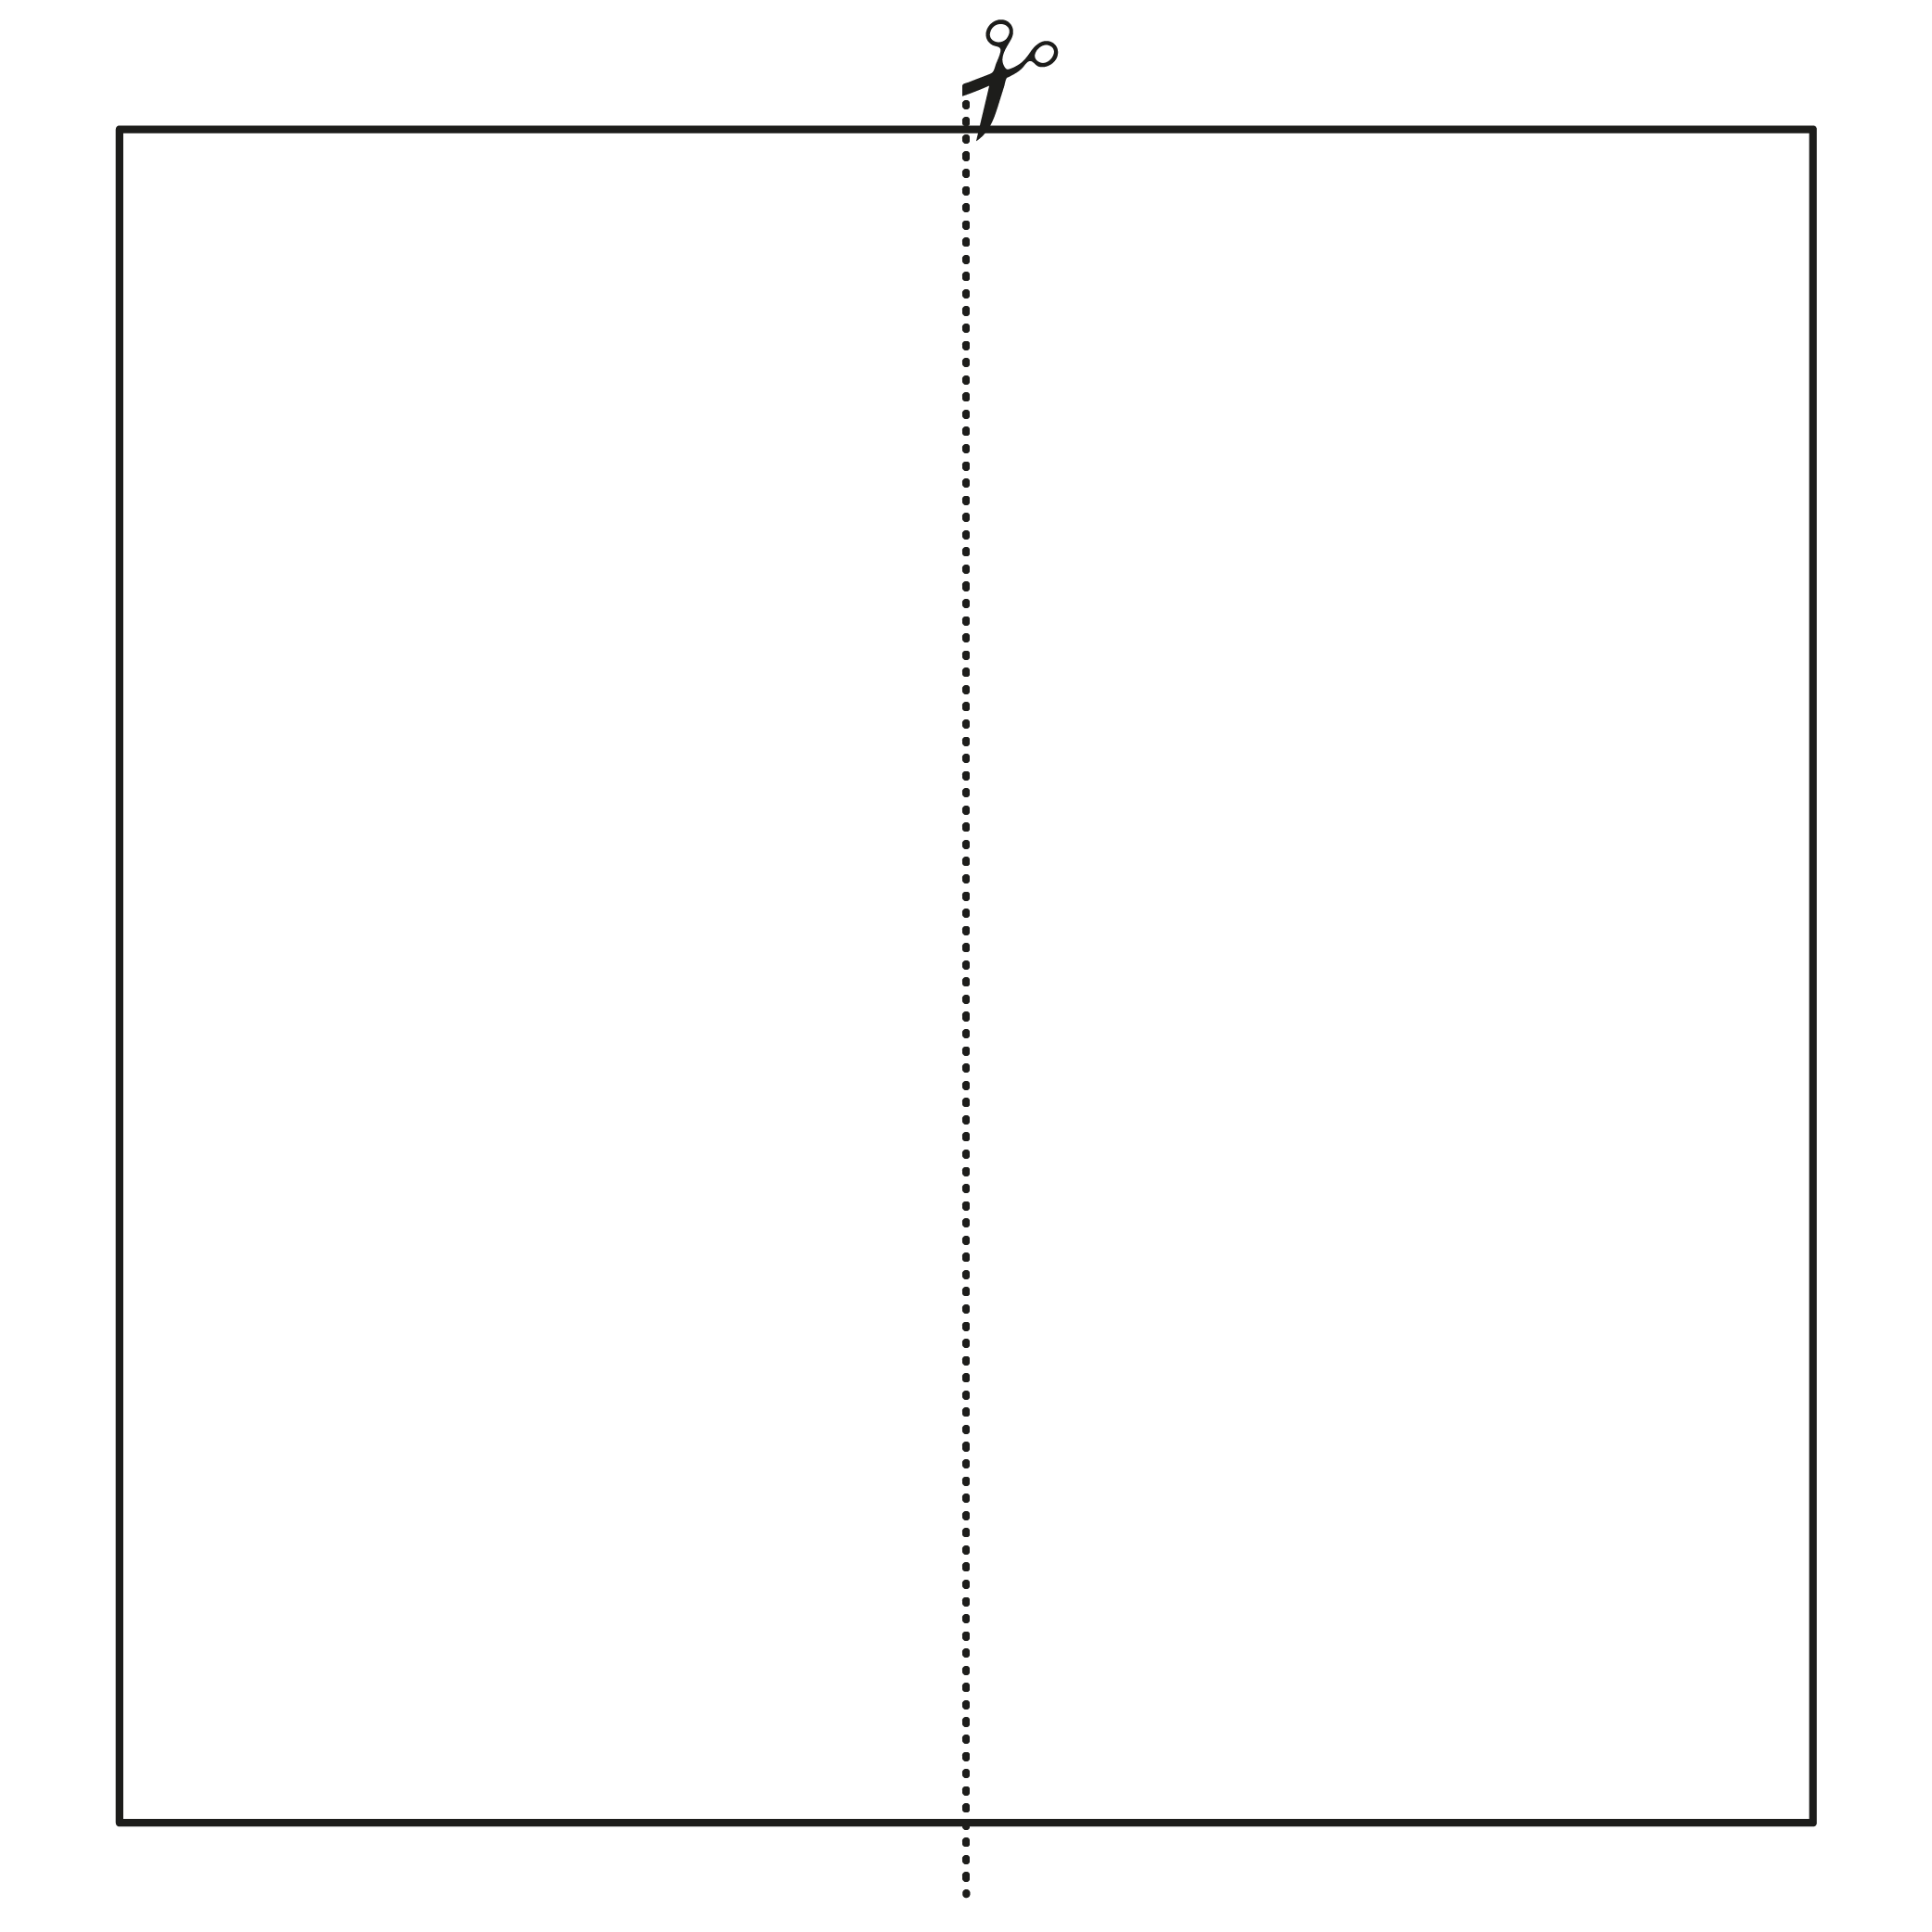
Cut a square sheet of paper in half.
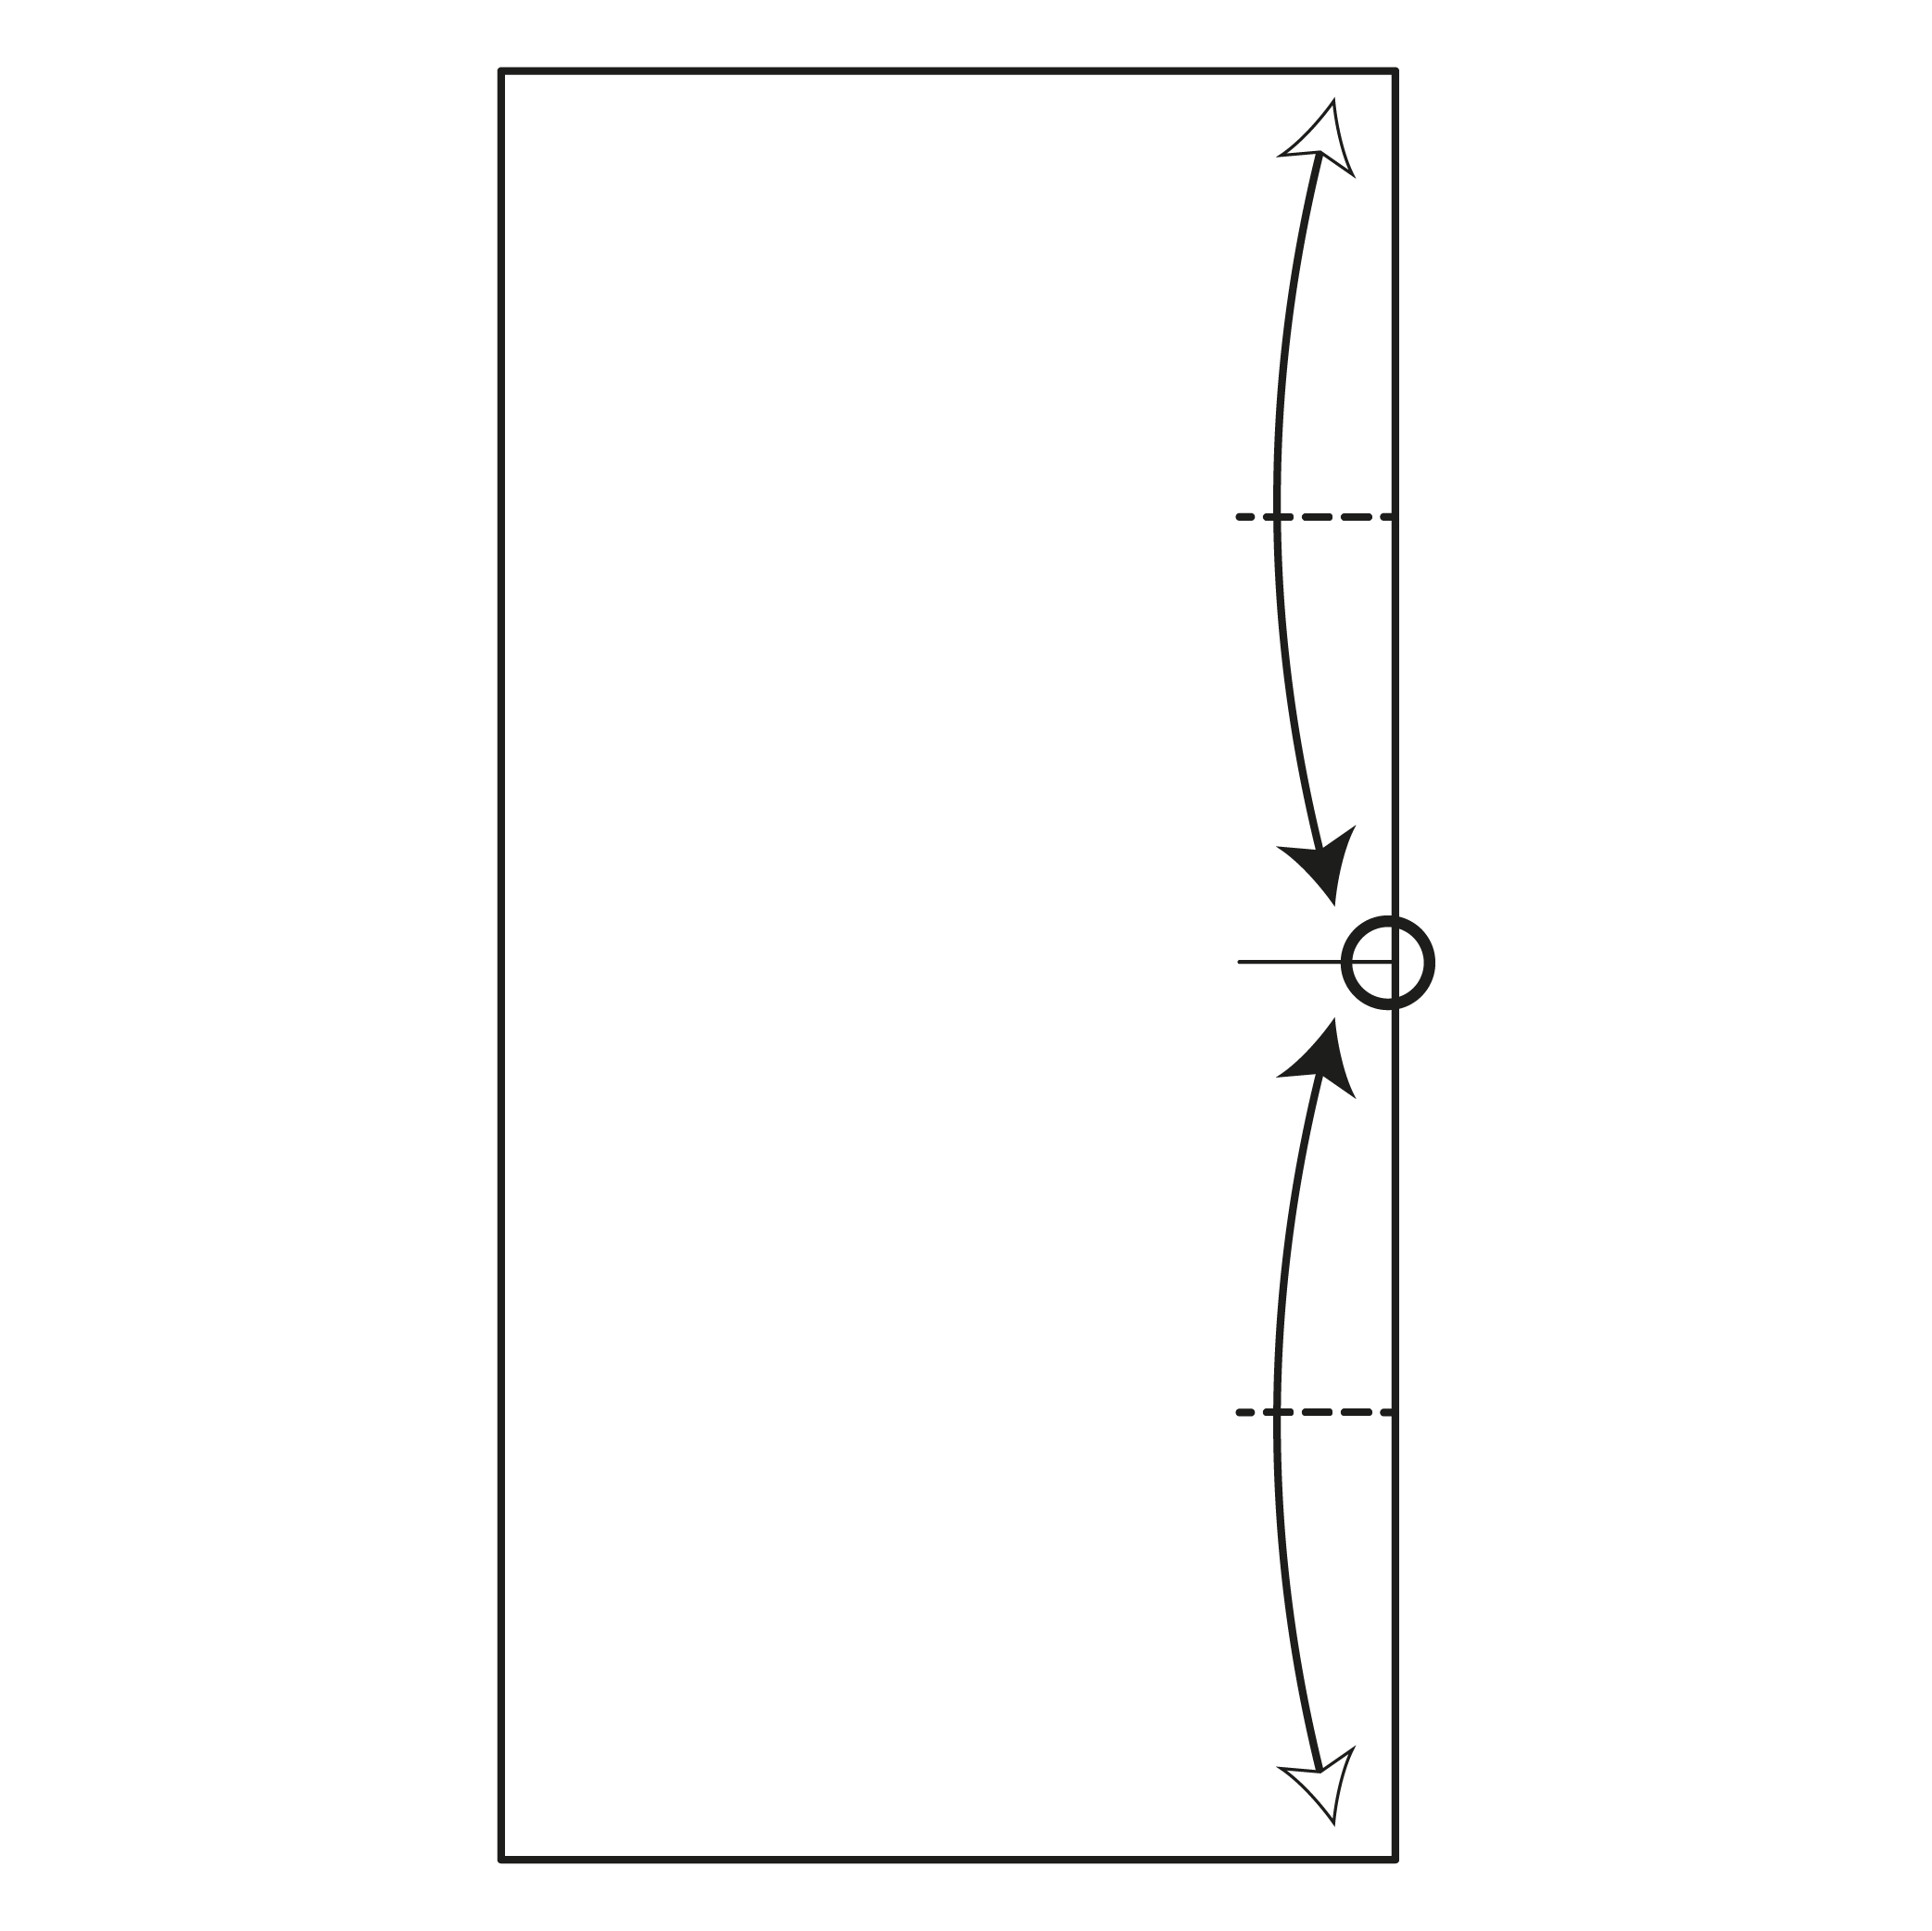
Step 2

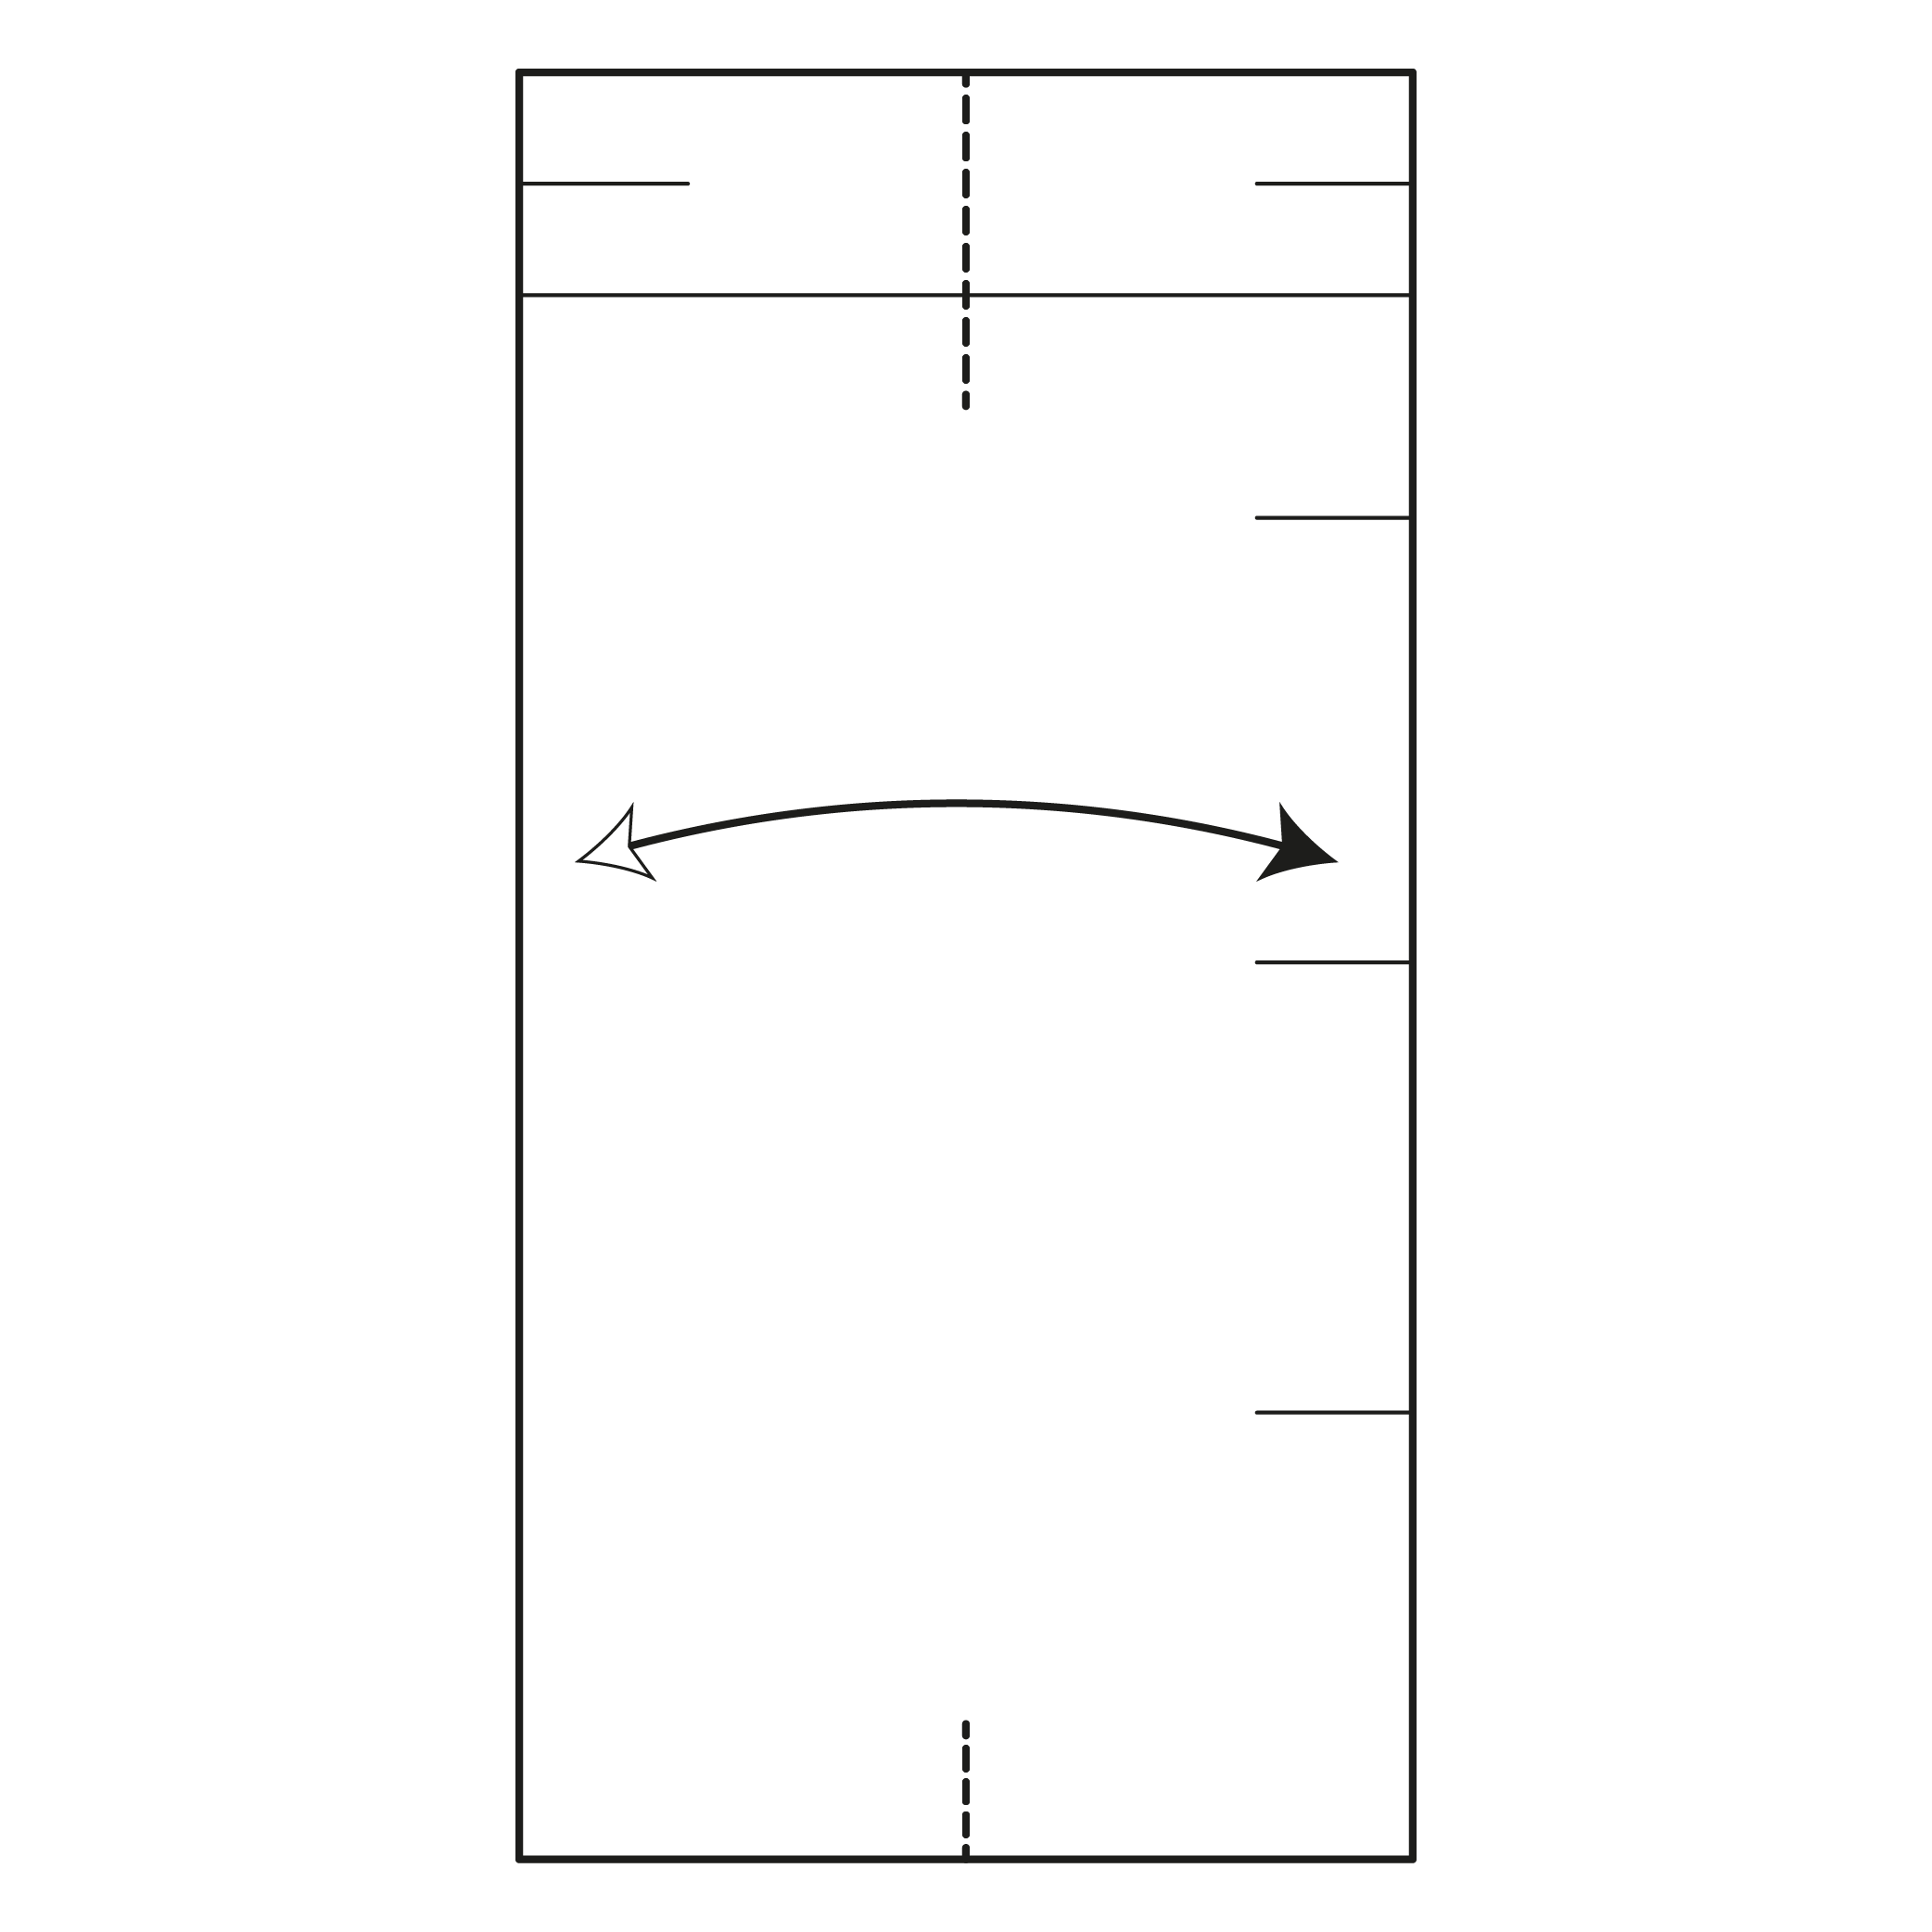
Start with the white side facing up. Fold the paper in half horizontally and make a pinch mark at the right edge. Then unfold.
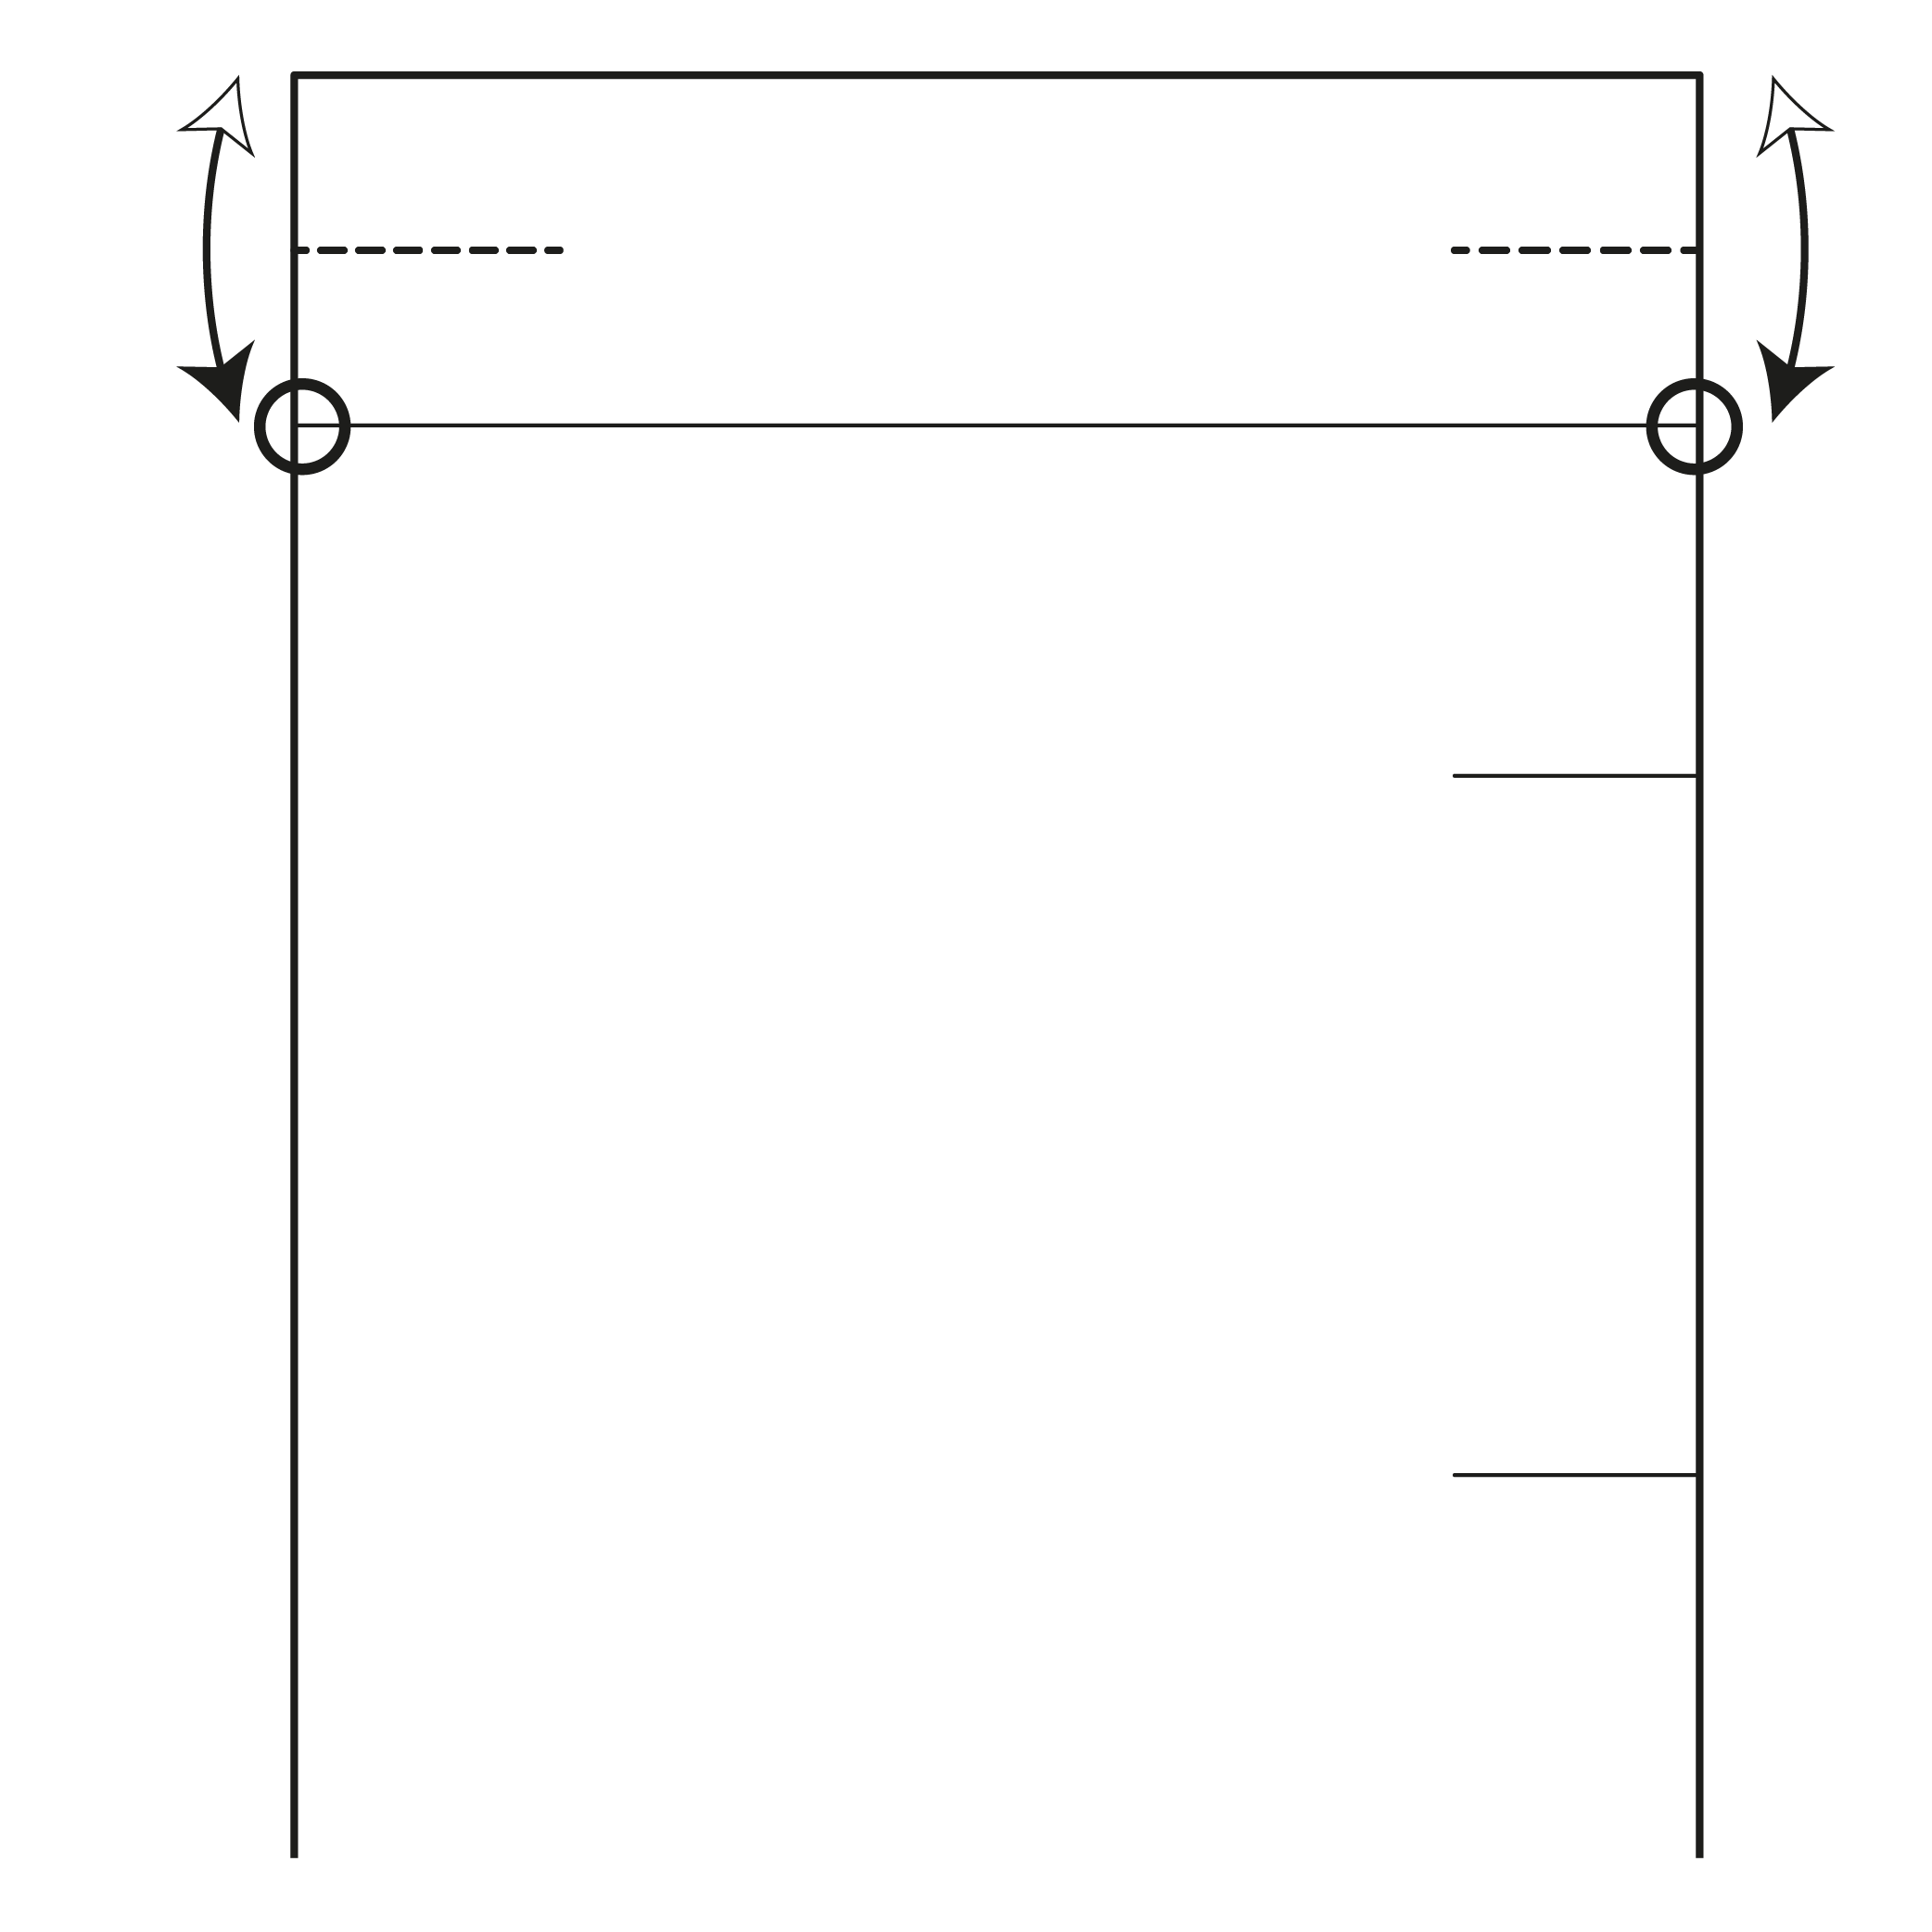
Step 3
Fold the top and bottom edges to meet the pinch mark. Make two new pinch marks at the left and right edges, then unfold.
Step 4

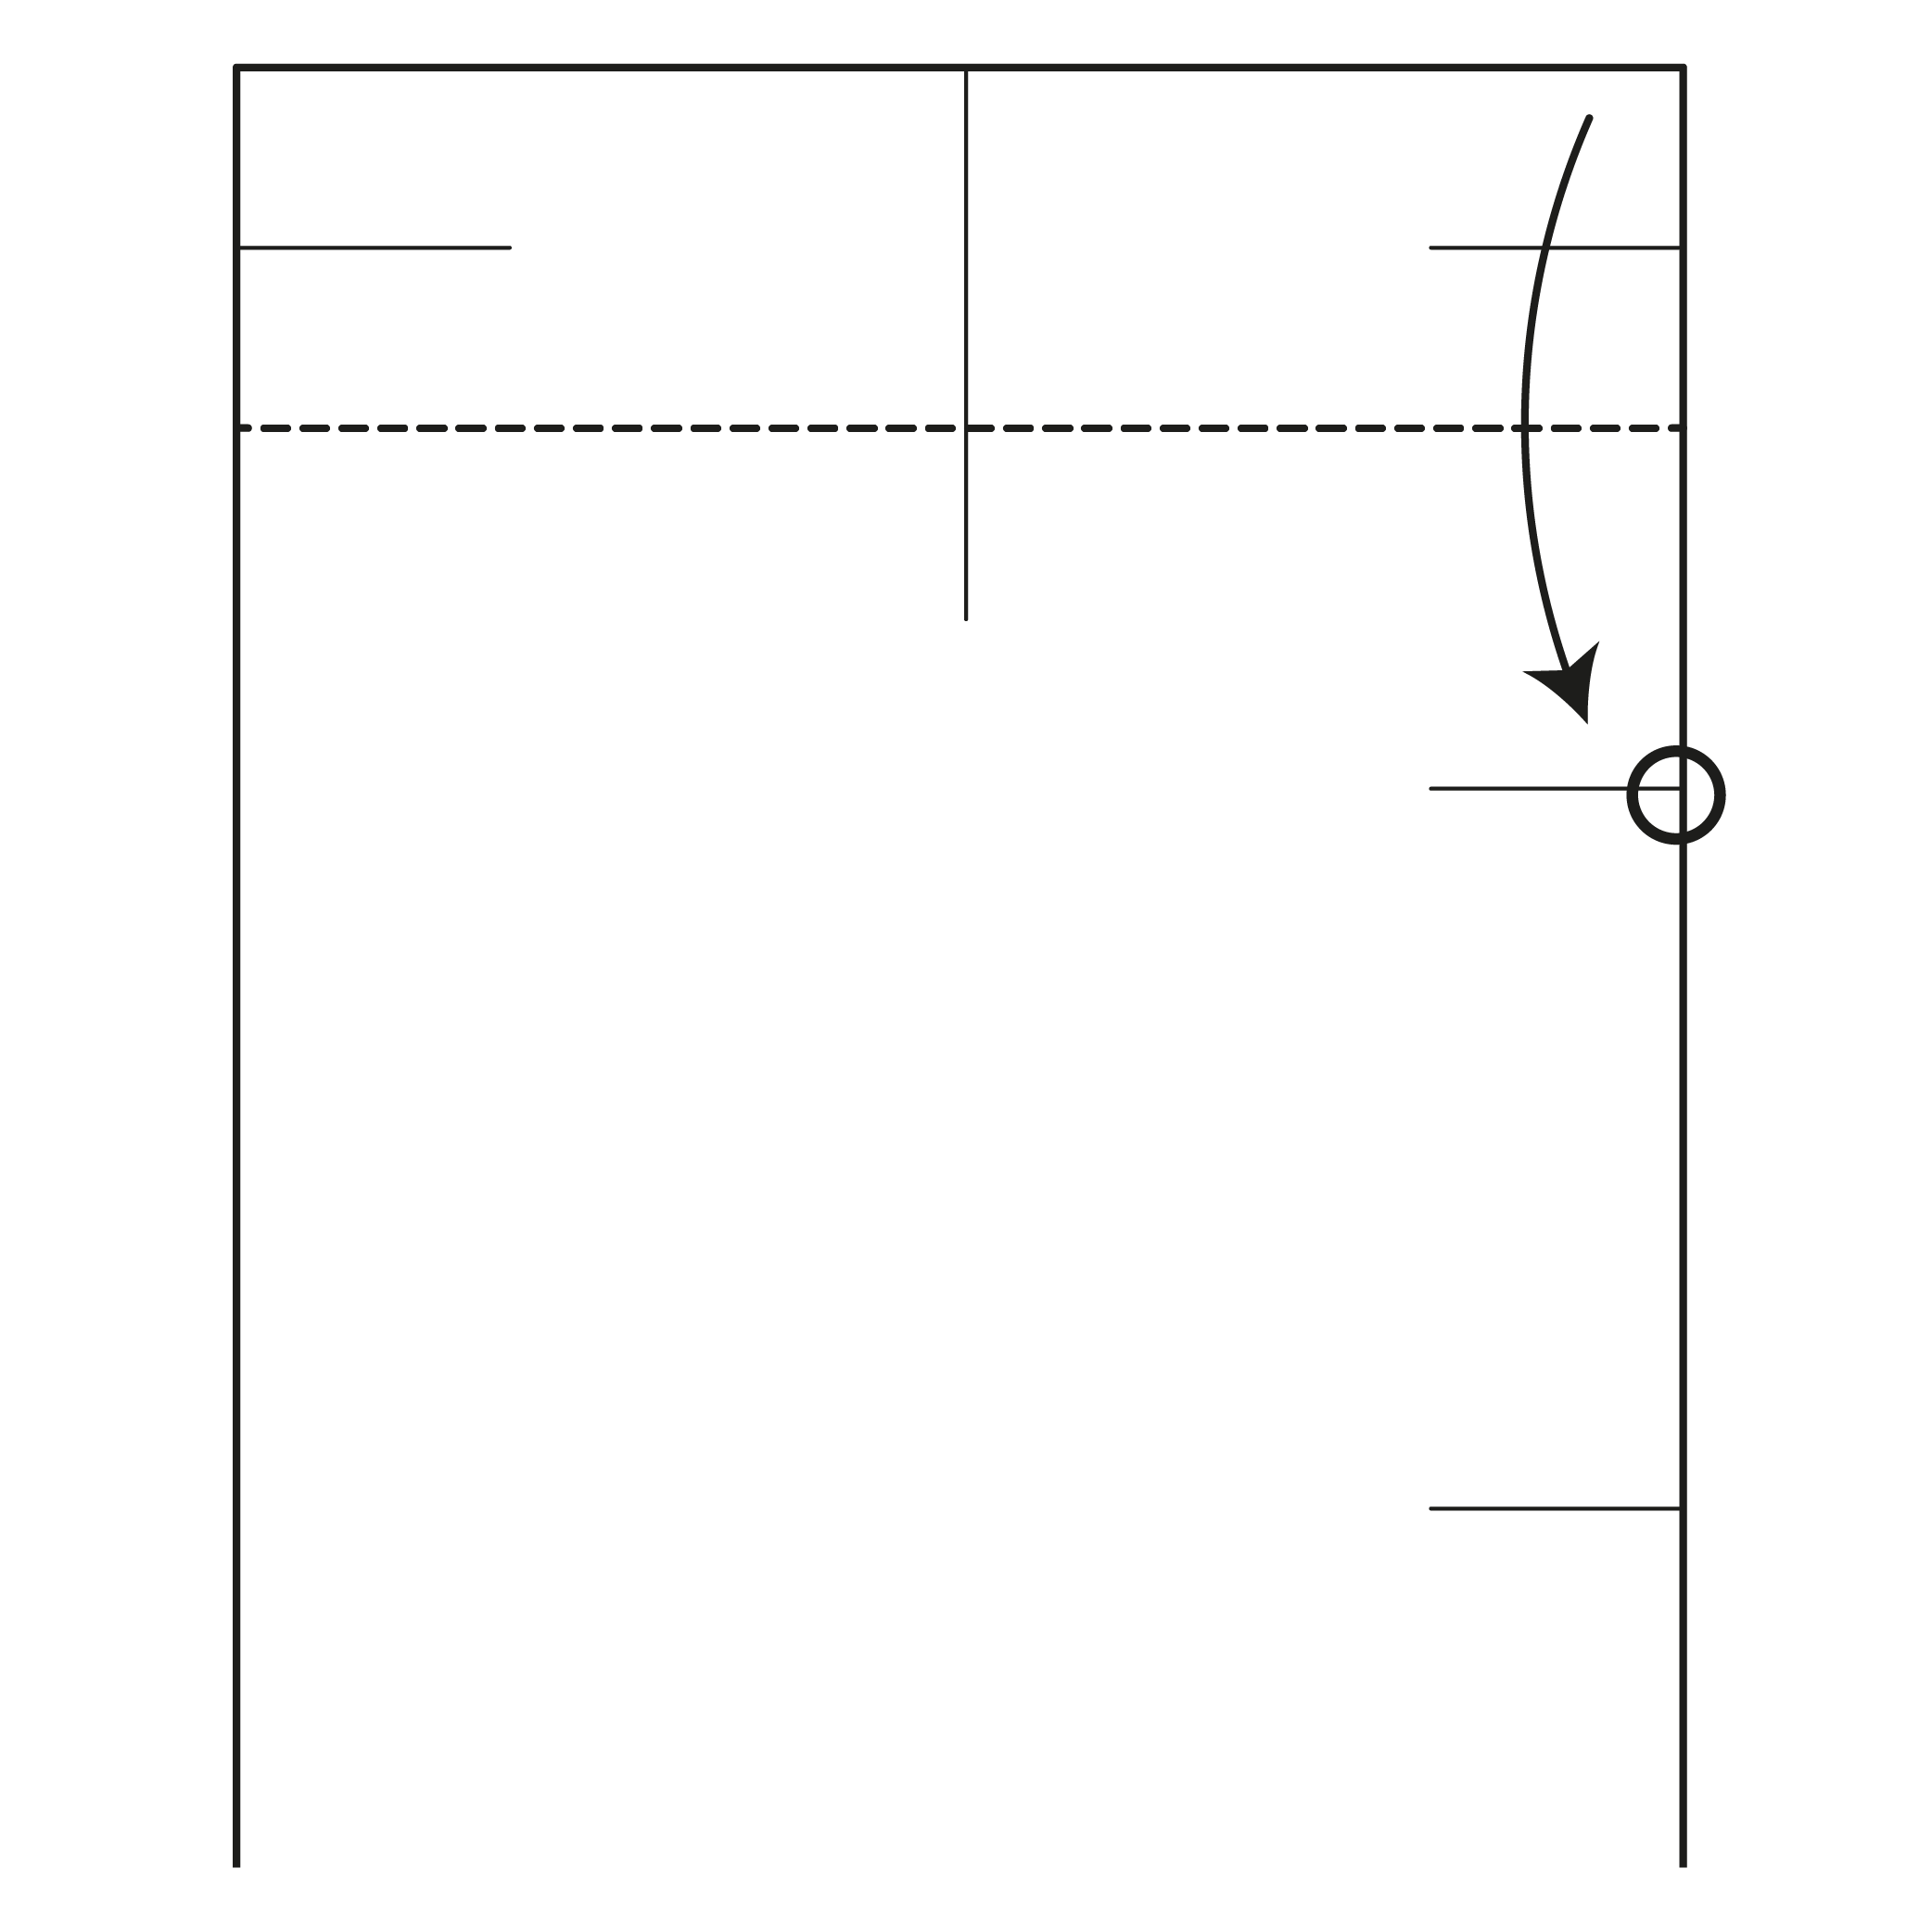
Fold the top edge to the nearest pinch mark. Then unfold.
Step 5
Fold the top edge to the crease you just made. Add two pinch marks at the left and right edges, then unfold.
Step 6
Fold the paper in half vertically. Make a pinch mark at both the top and bottom edges.
Note: The top edge pinch mark should extend slightly past the crease from Step 4.
Step 7
Fold the top edge down to the second pinch mark (counting from the top).
Step 8

Turn the paper over.
Step 9

Fold the top left and right edges in to meet the center pinch mark from Step 6.
Step 10
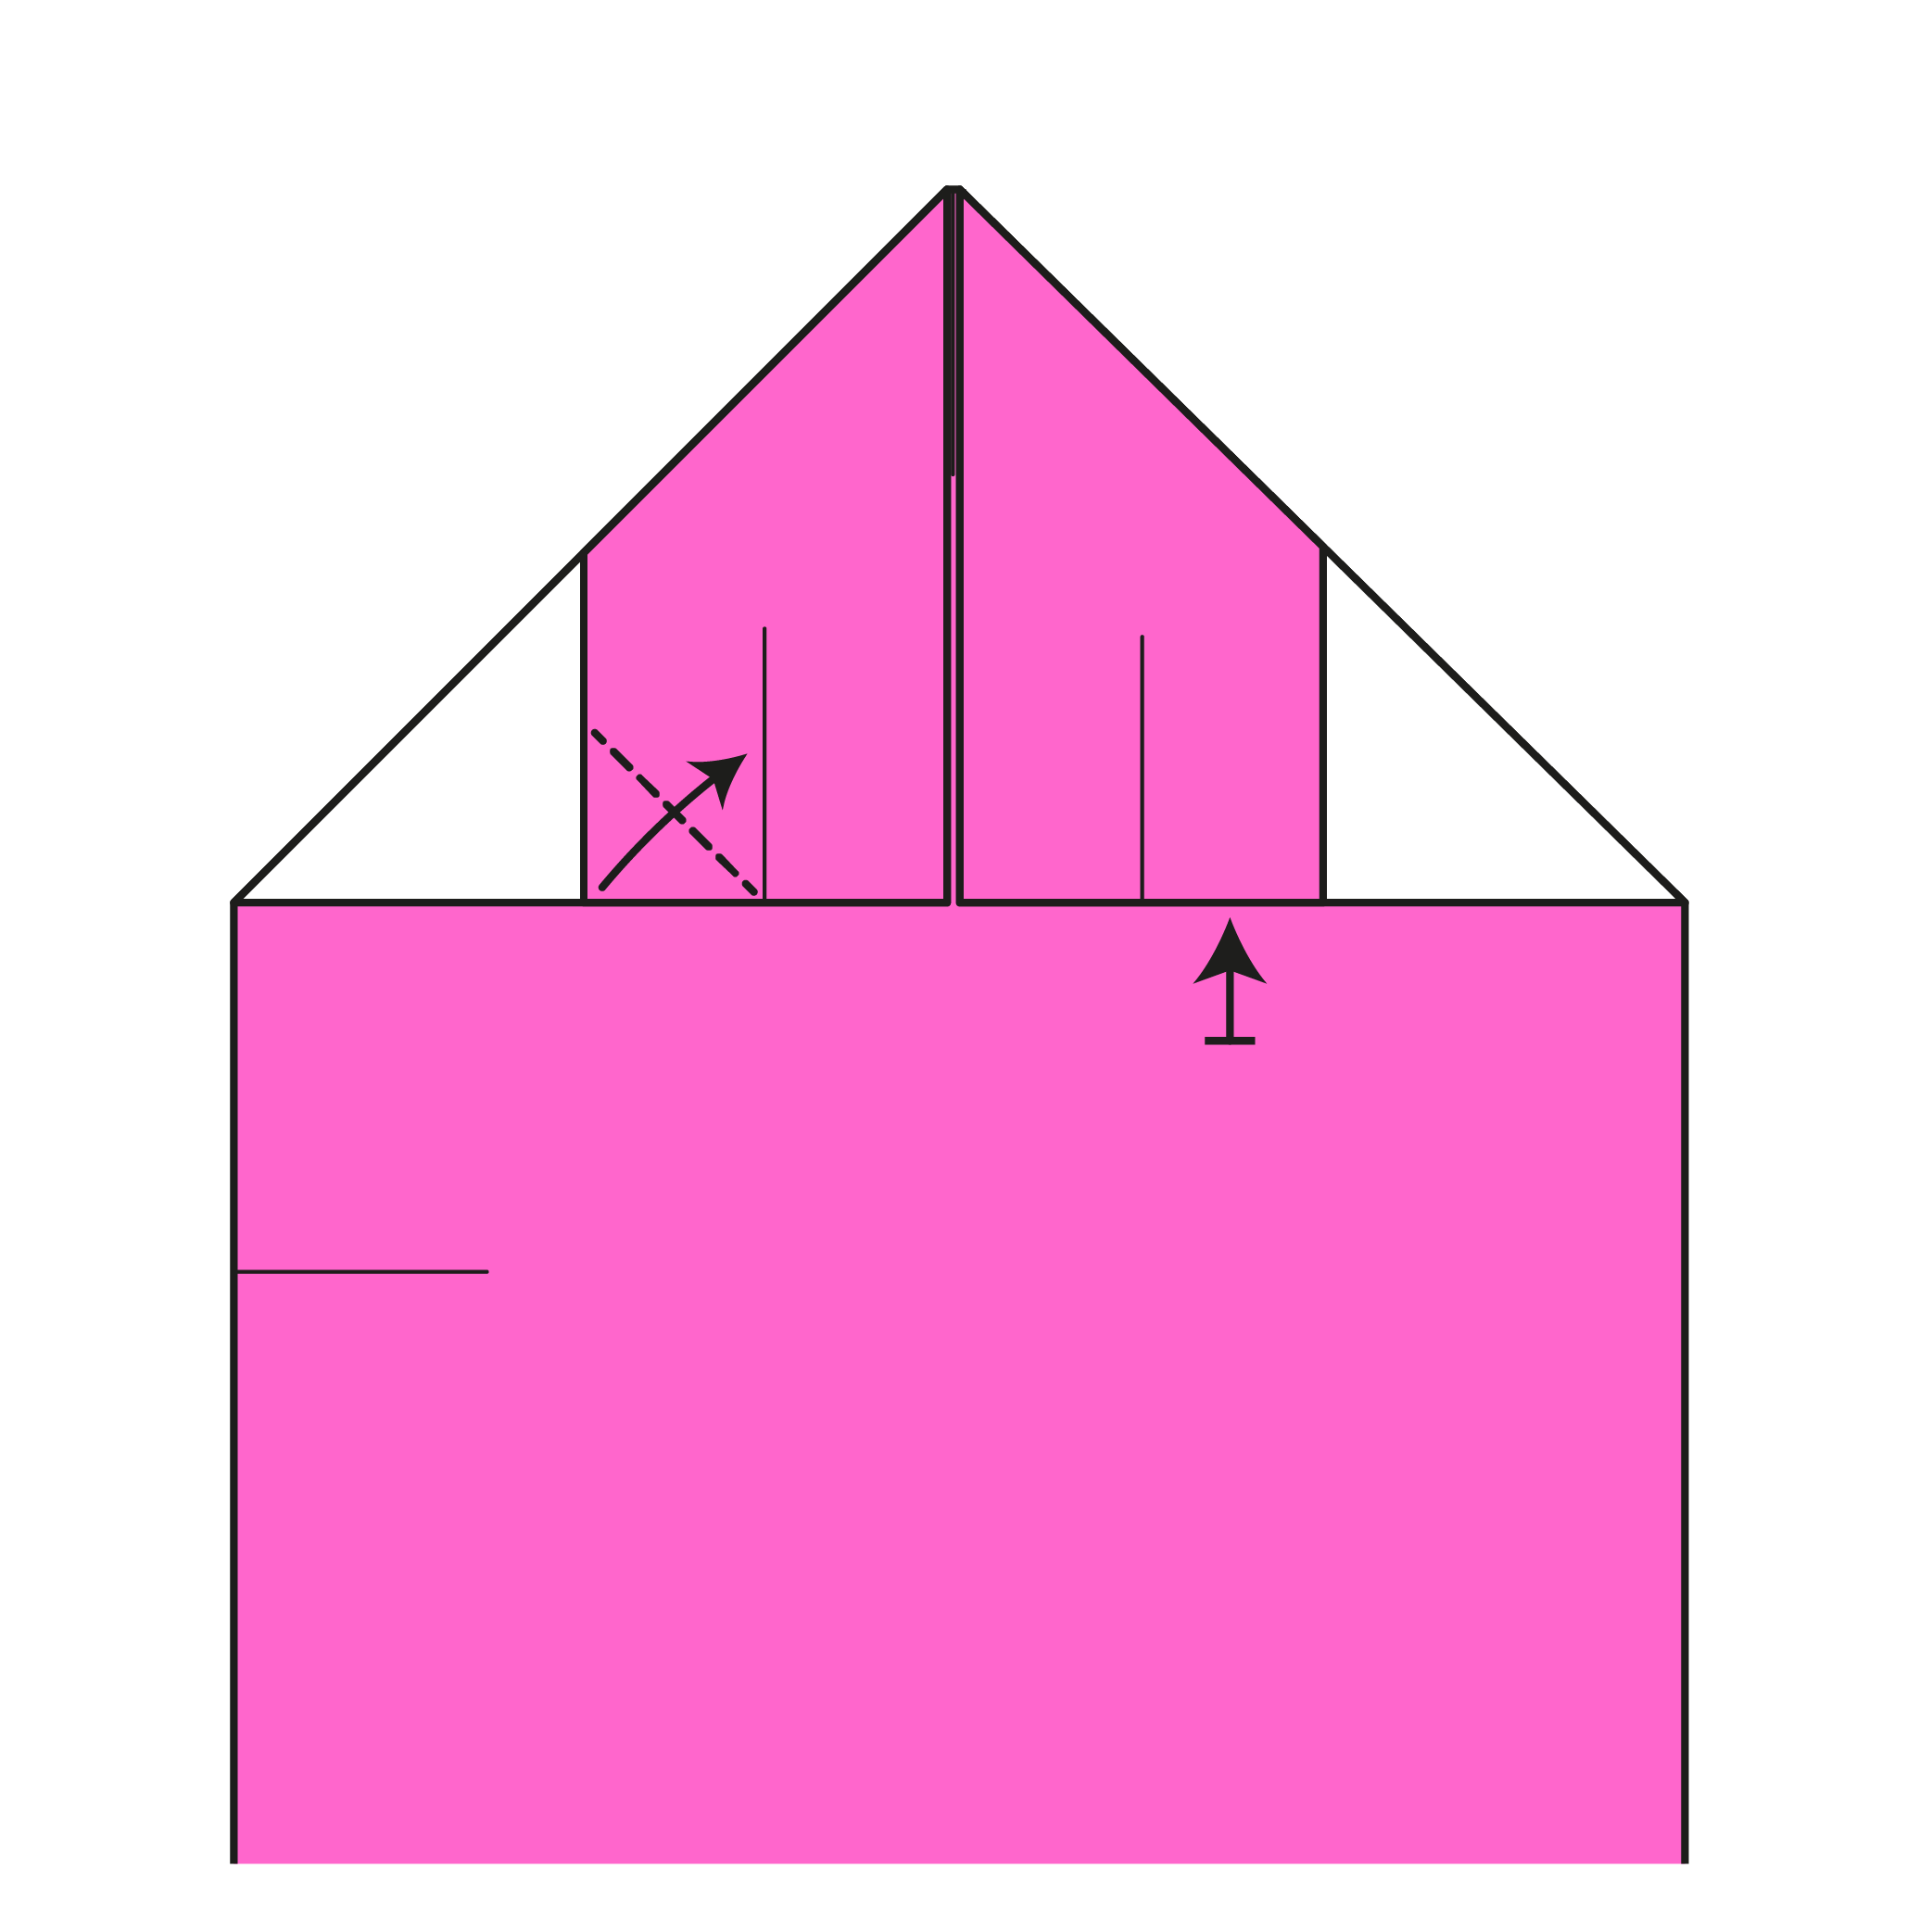
Focusing on the top left flap, fold its bottom left edge to the center pinch mark. Repeat on the right flap.
Step 11

Mountain fold the top section along the top edges of the flaps you just made in Step 10.
Step 12
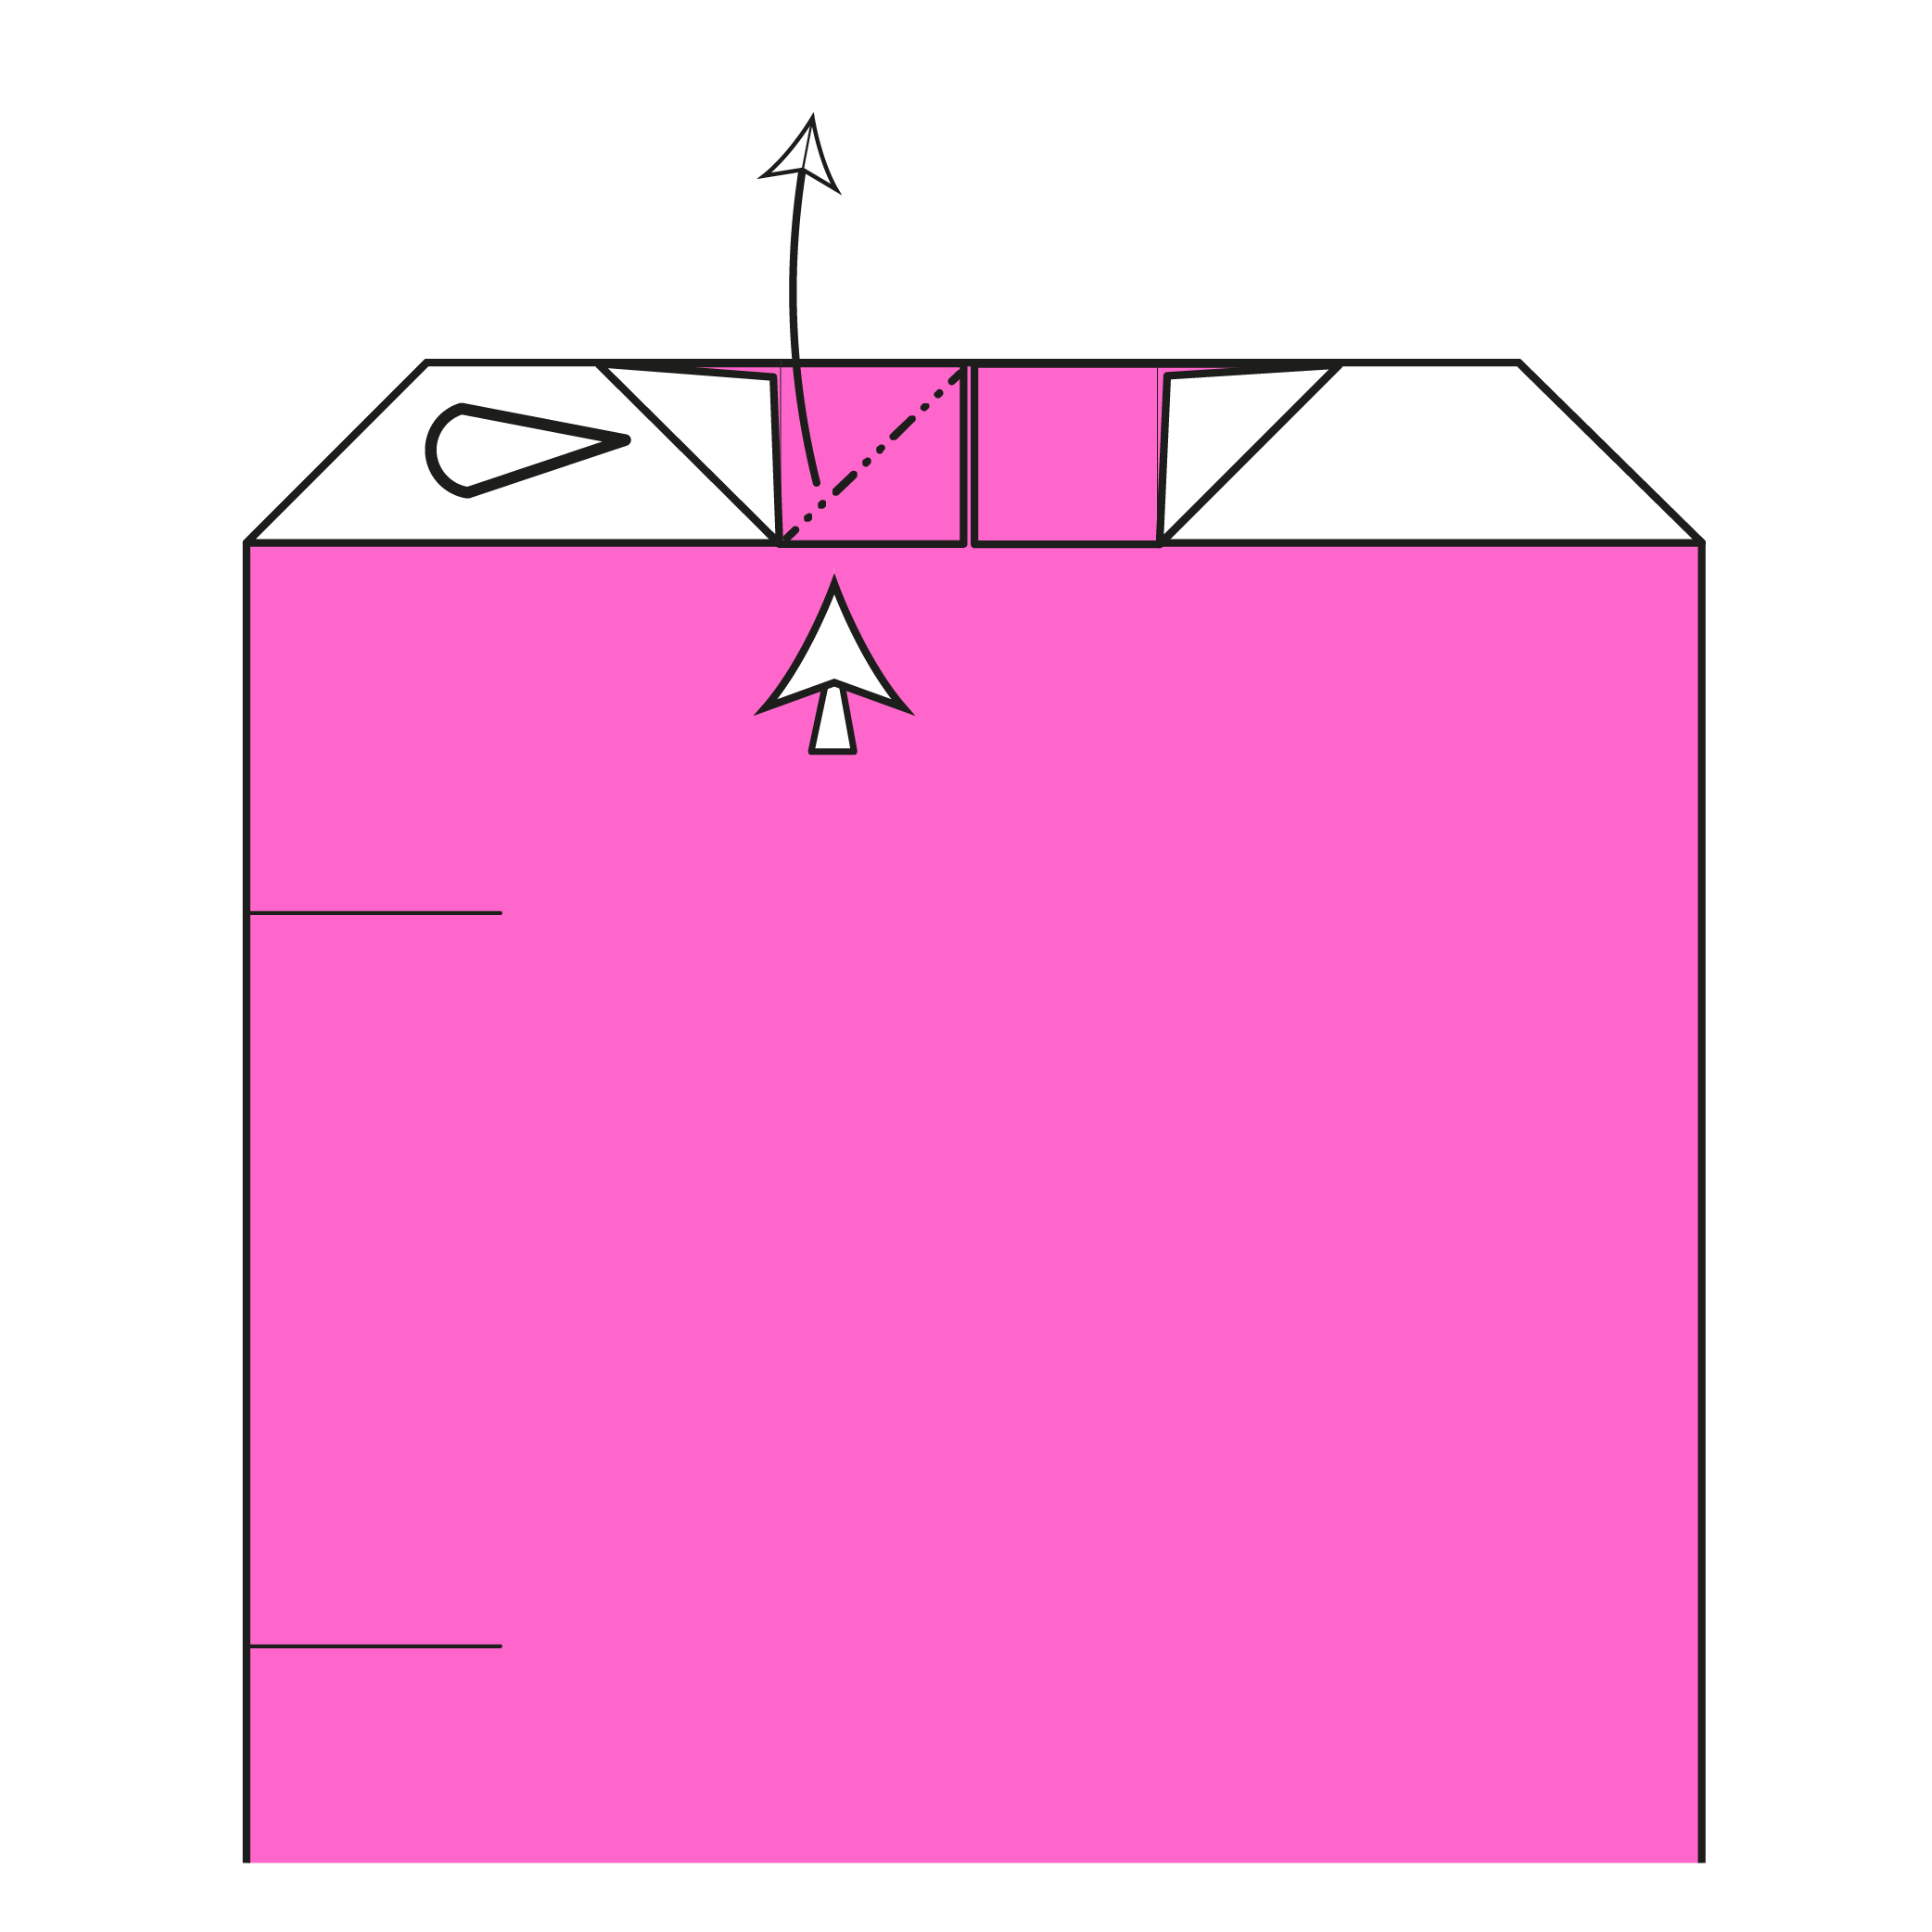
Open the top layer and squash fold it upward as shown.
Step 13

Move the flap from back to front, reversing the fold you made in Step 10.
Step 14
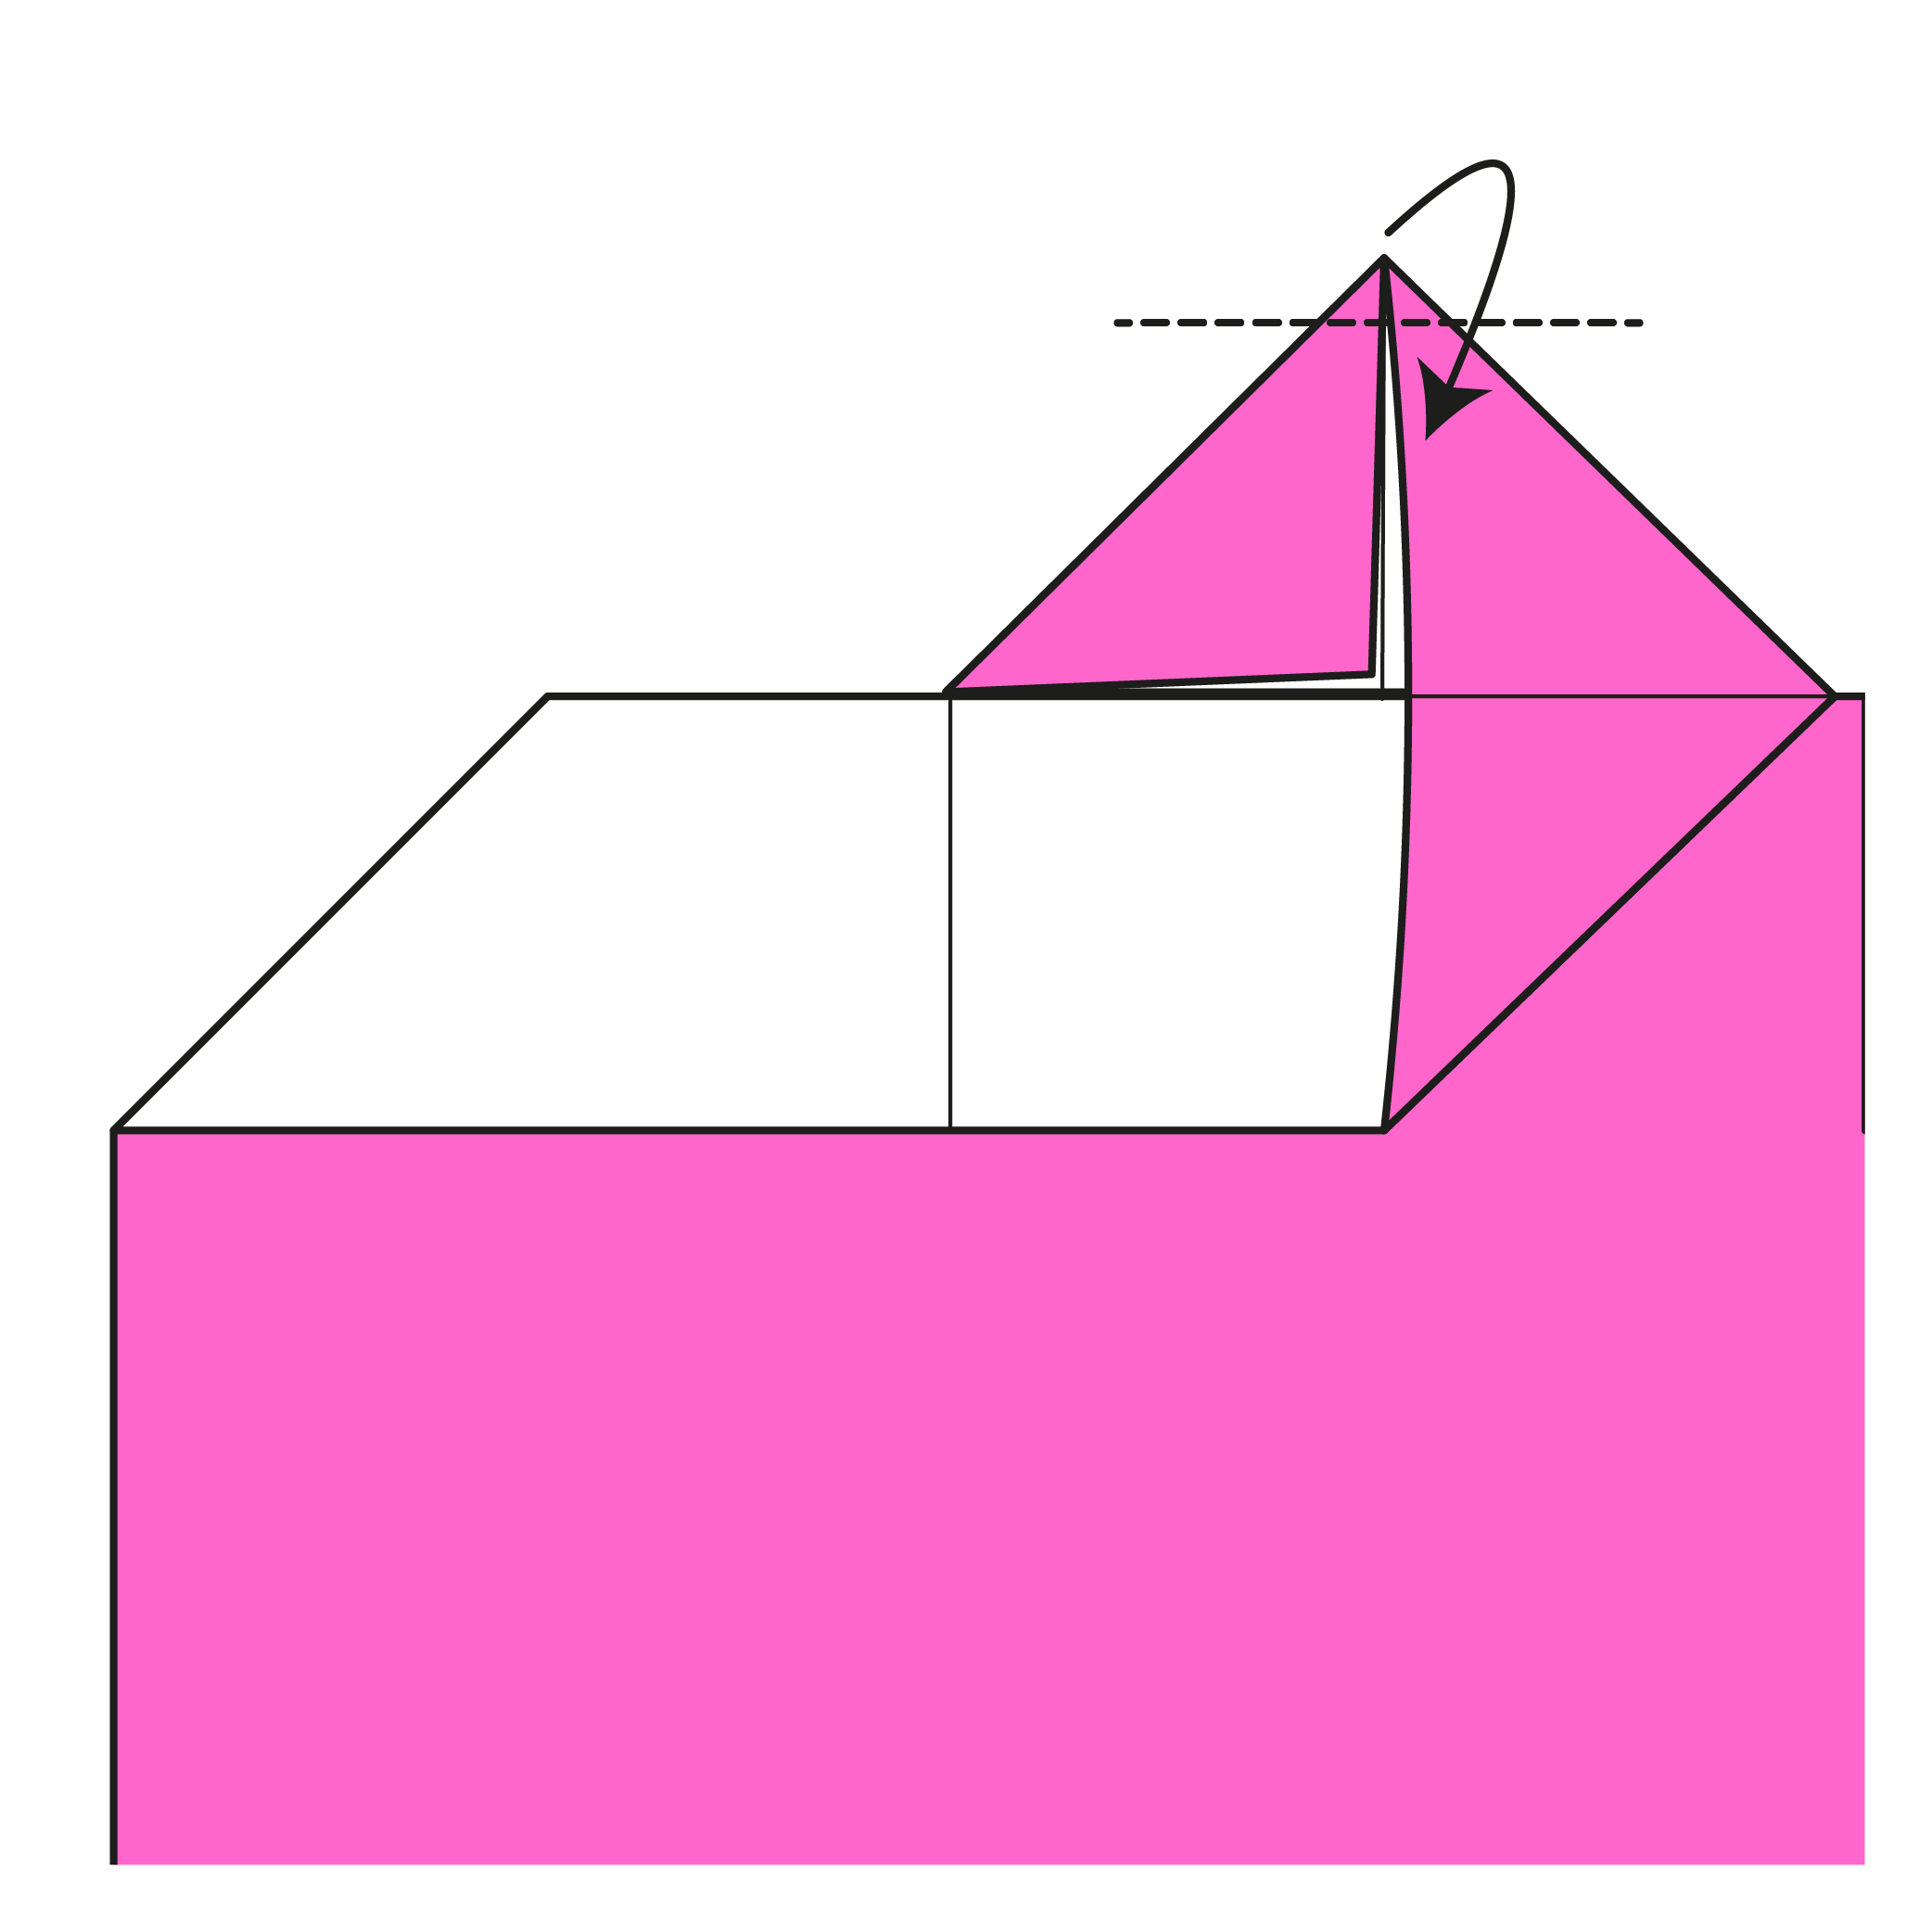
Fold the tip of the triangle downward.
Step 15
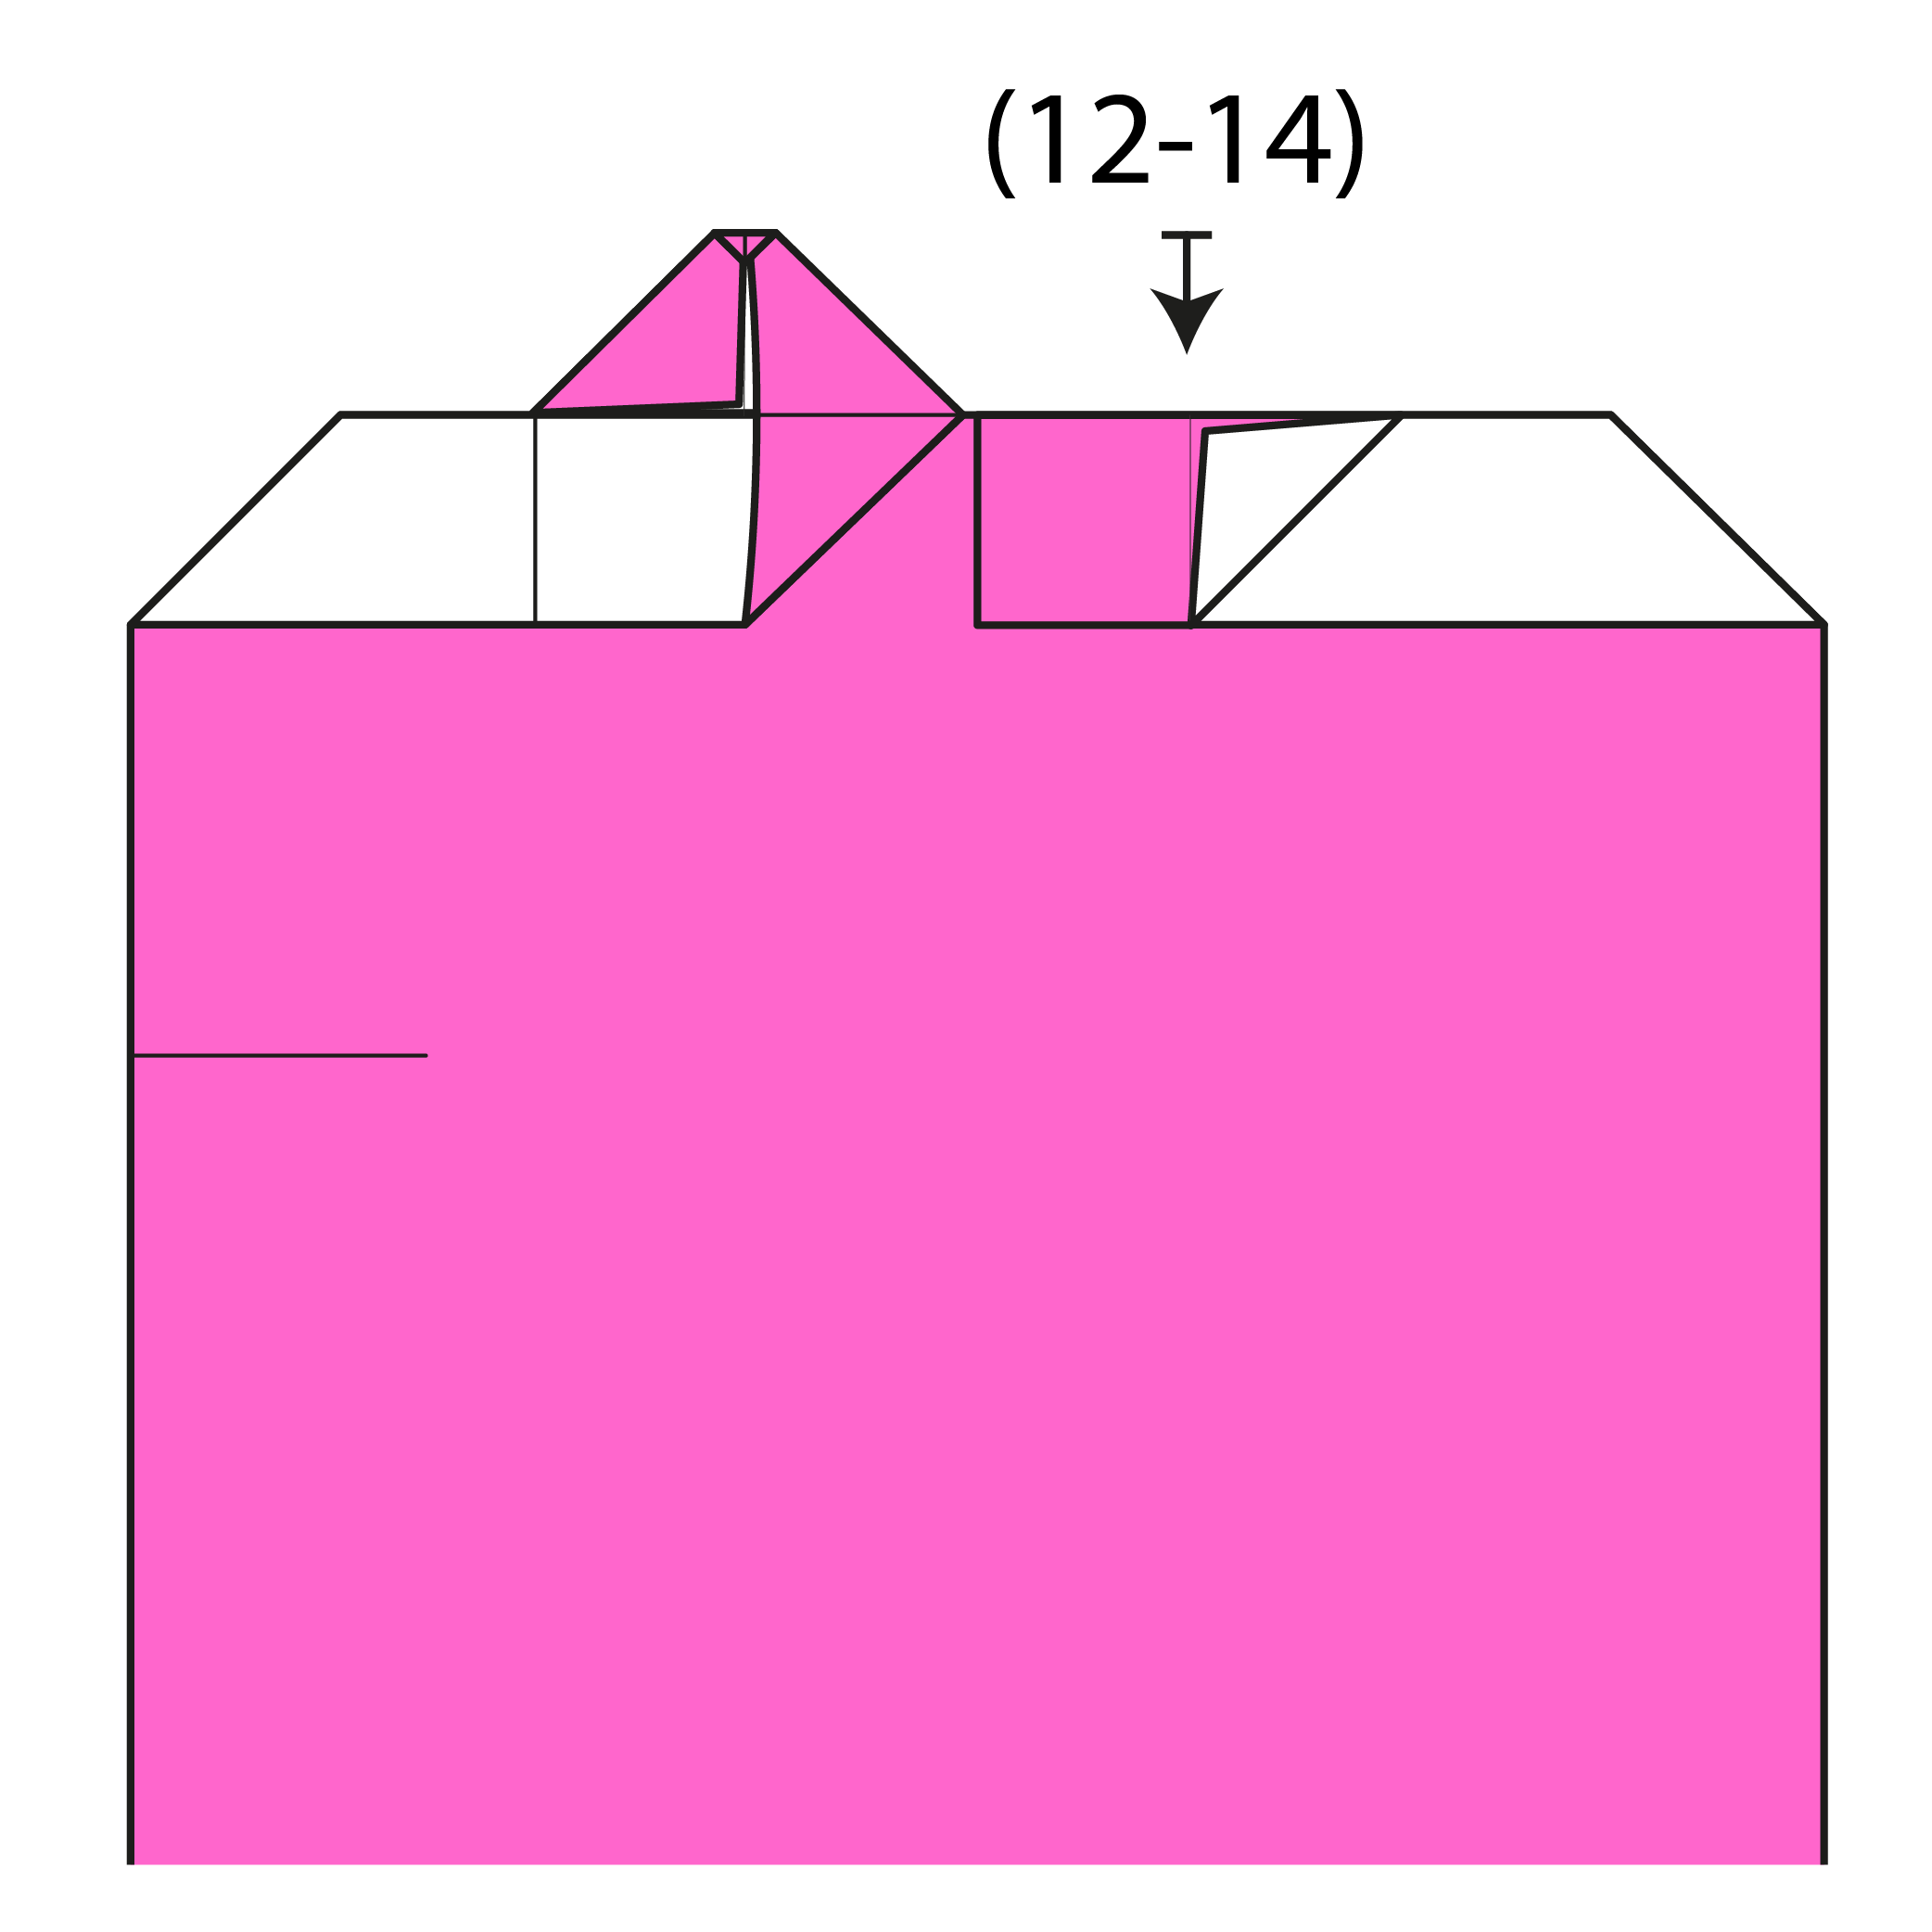
Repeat Steps 12 to 14 on the right side.
Step 16

Fold the left and right edges in to meet the center pinch mark at the bottom edge.
Step 17
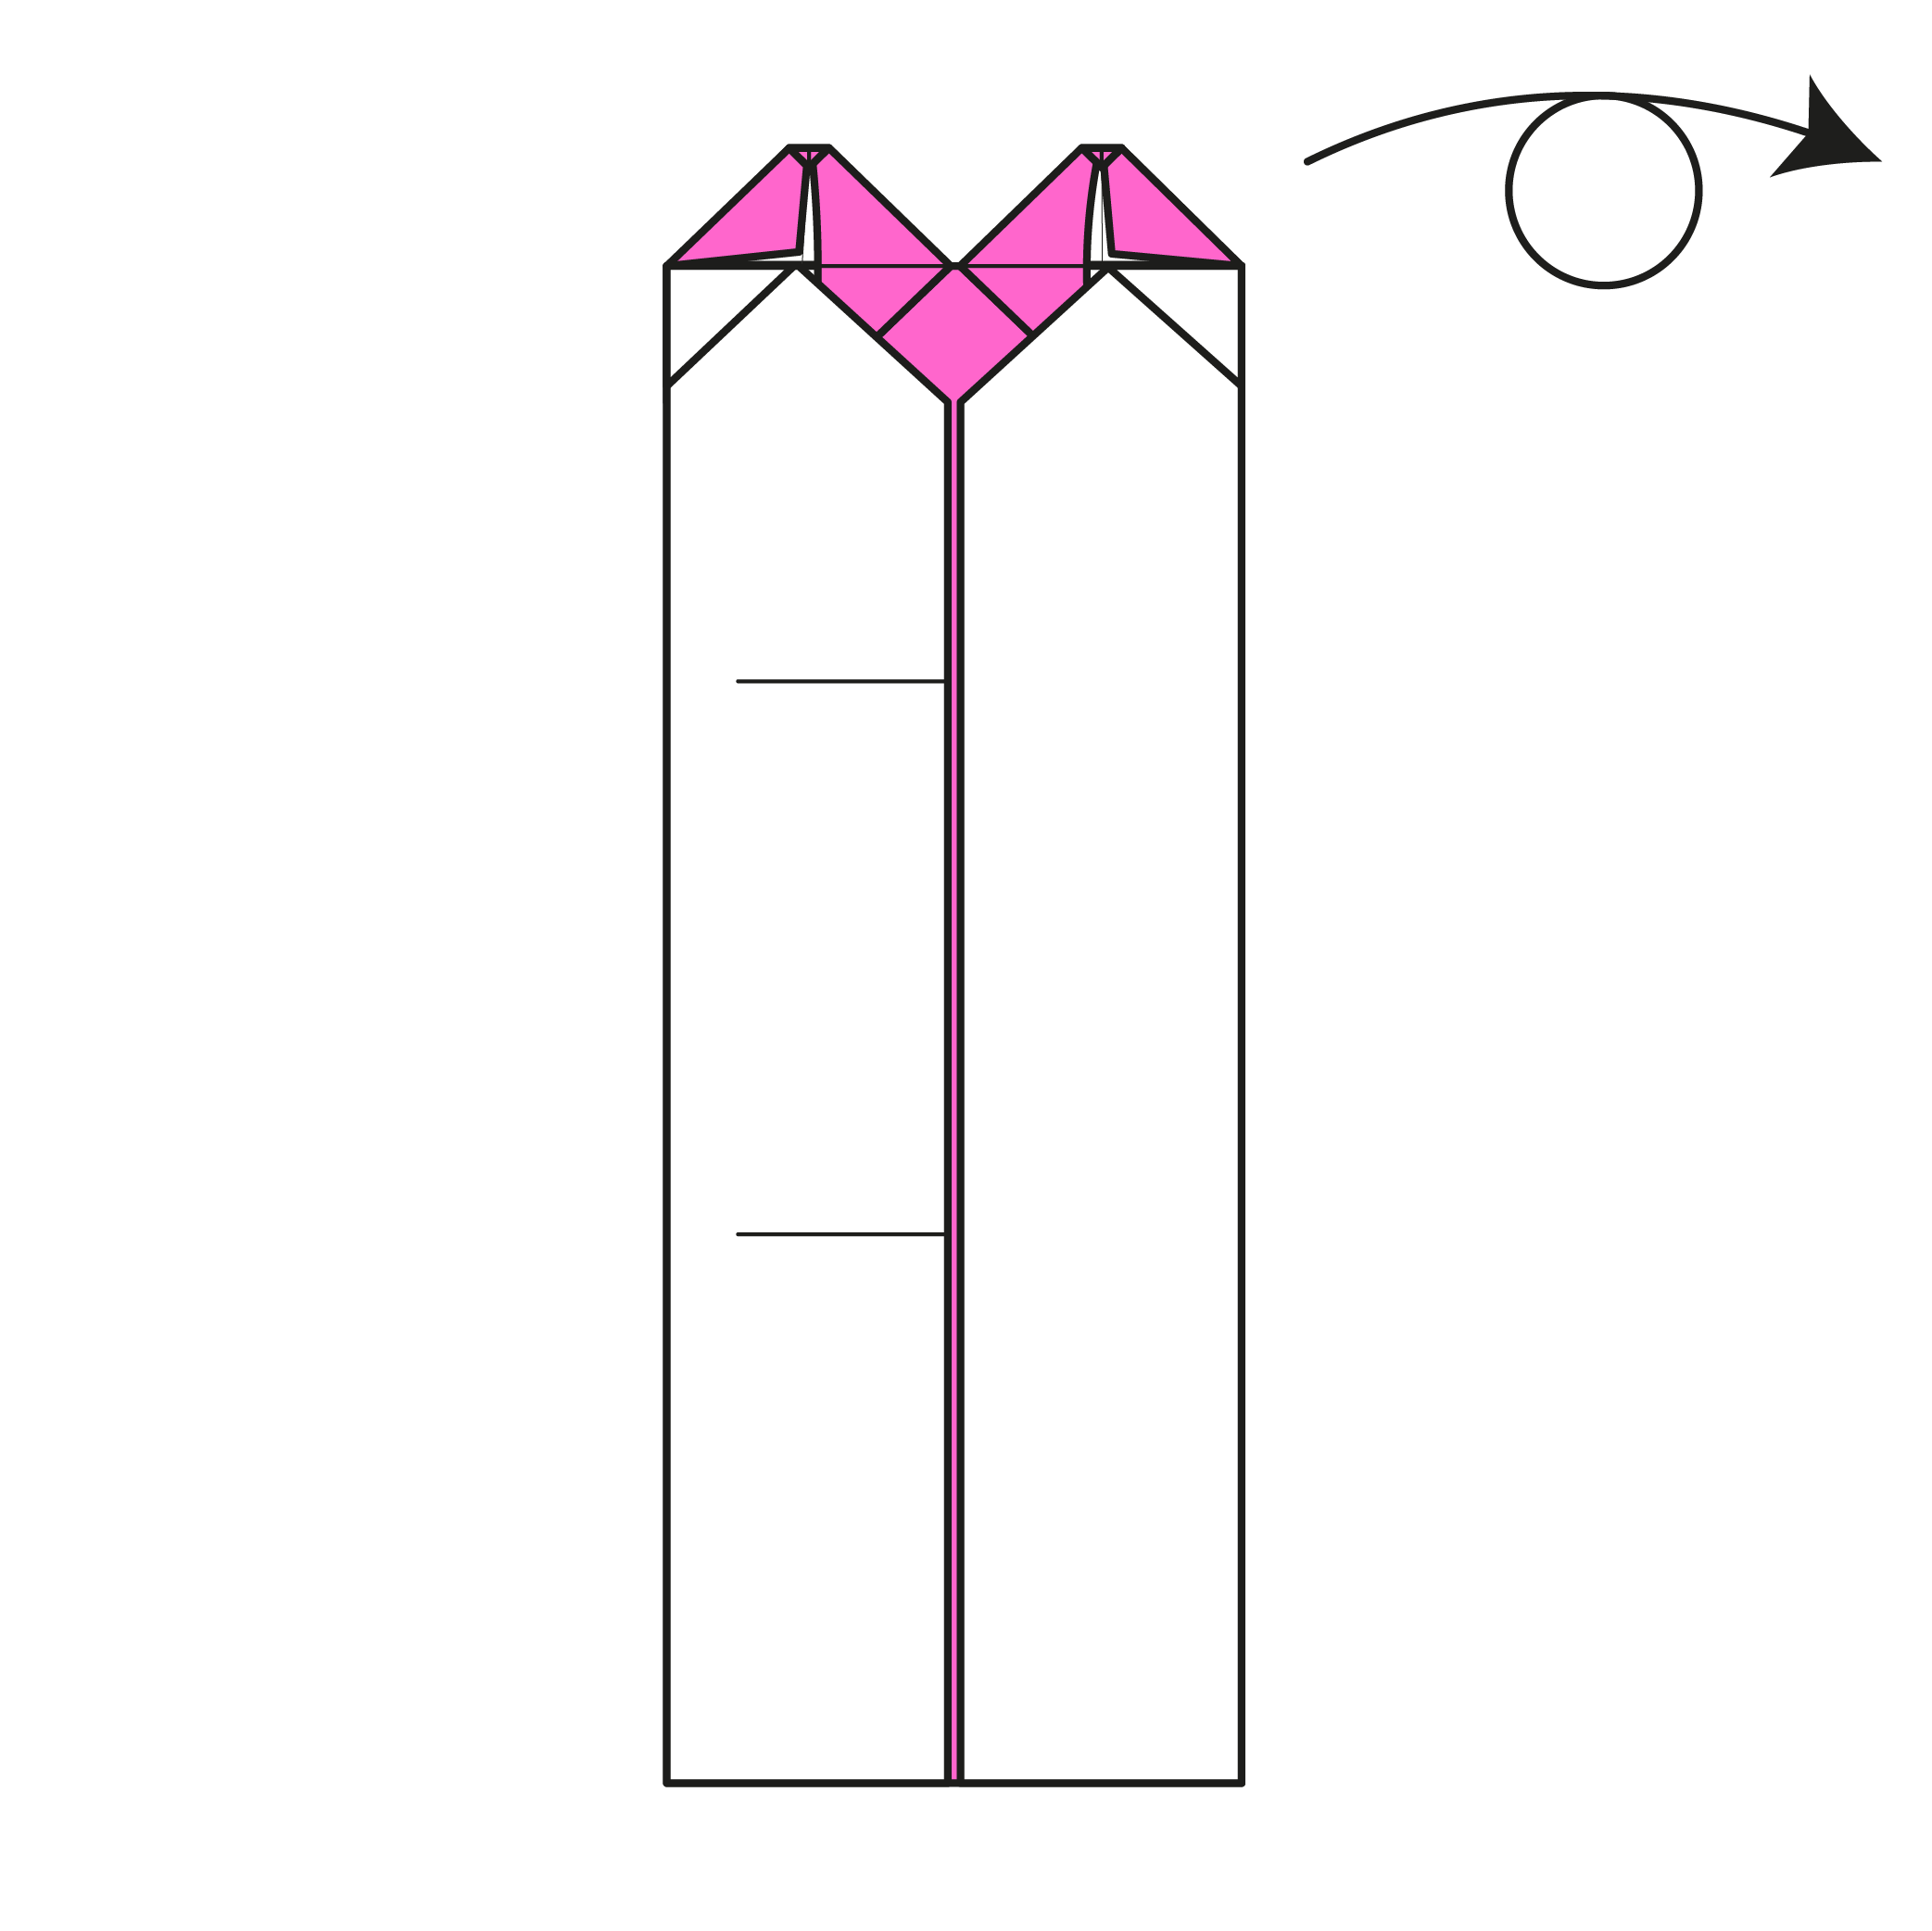
Turn the model over.
Step 18
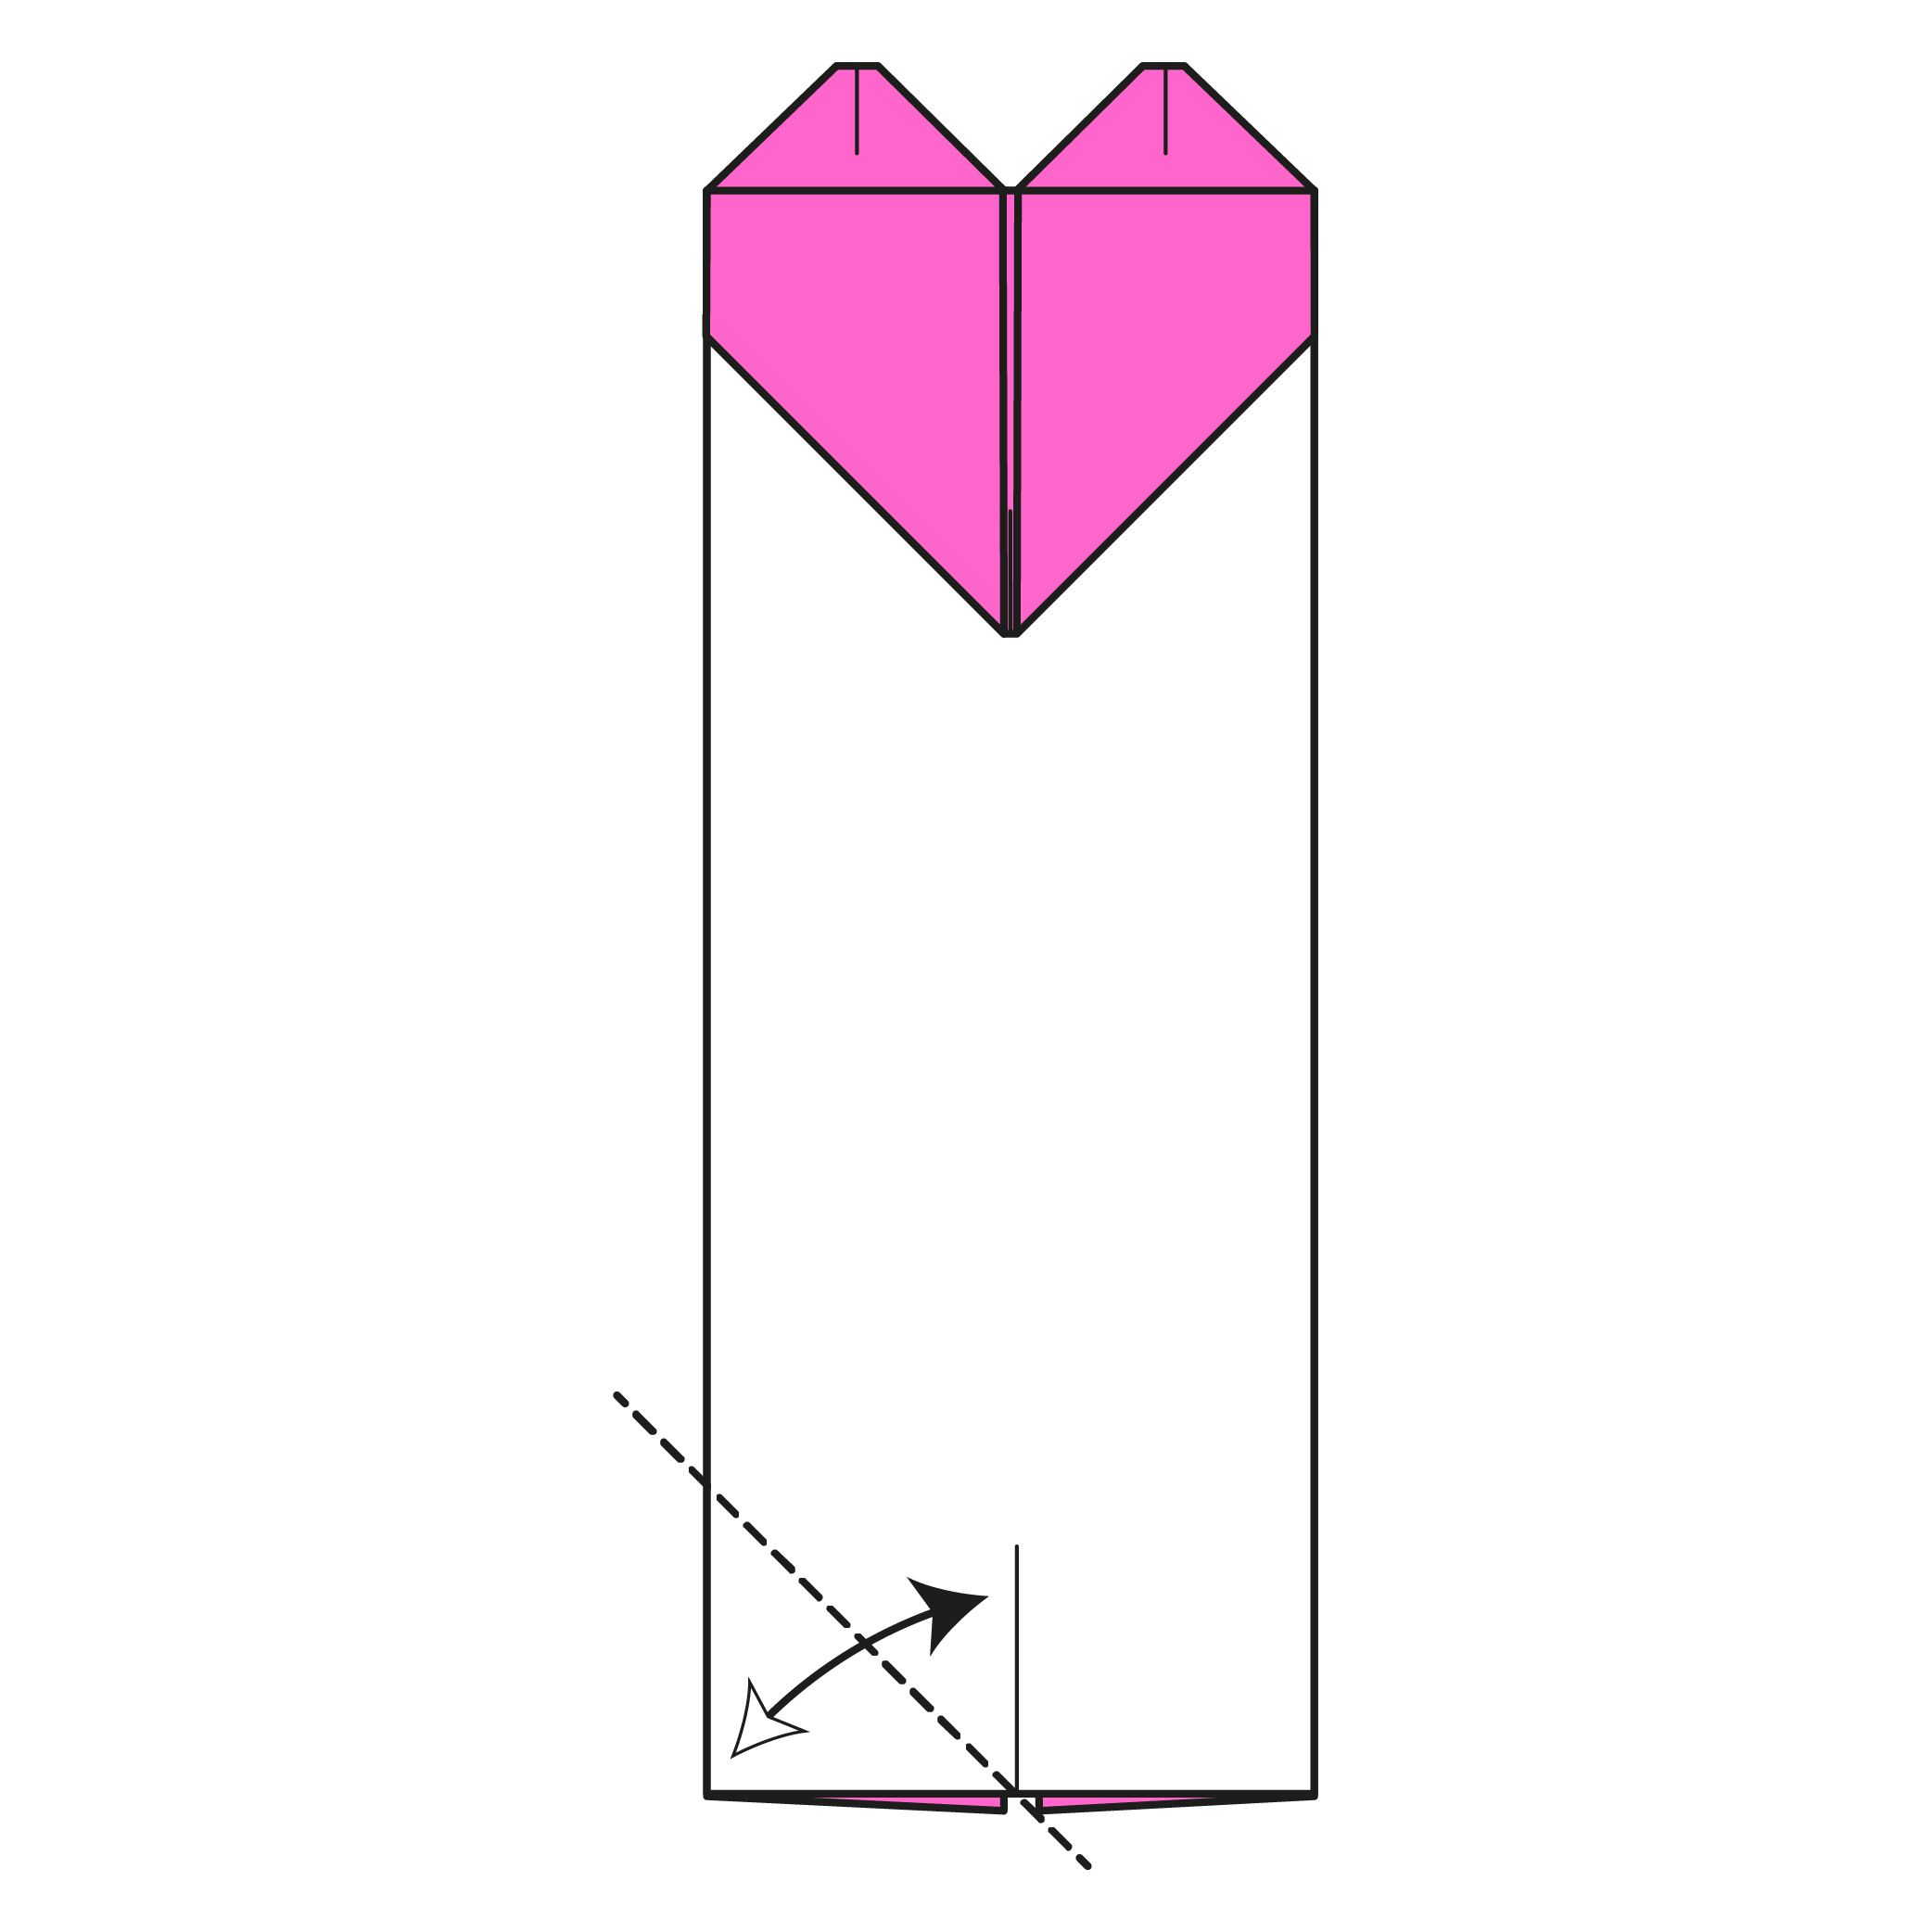
Fold the bottom left edge to the center pinch mark. Crease well, then unfold.
Step 19
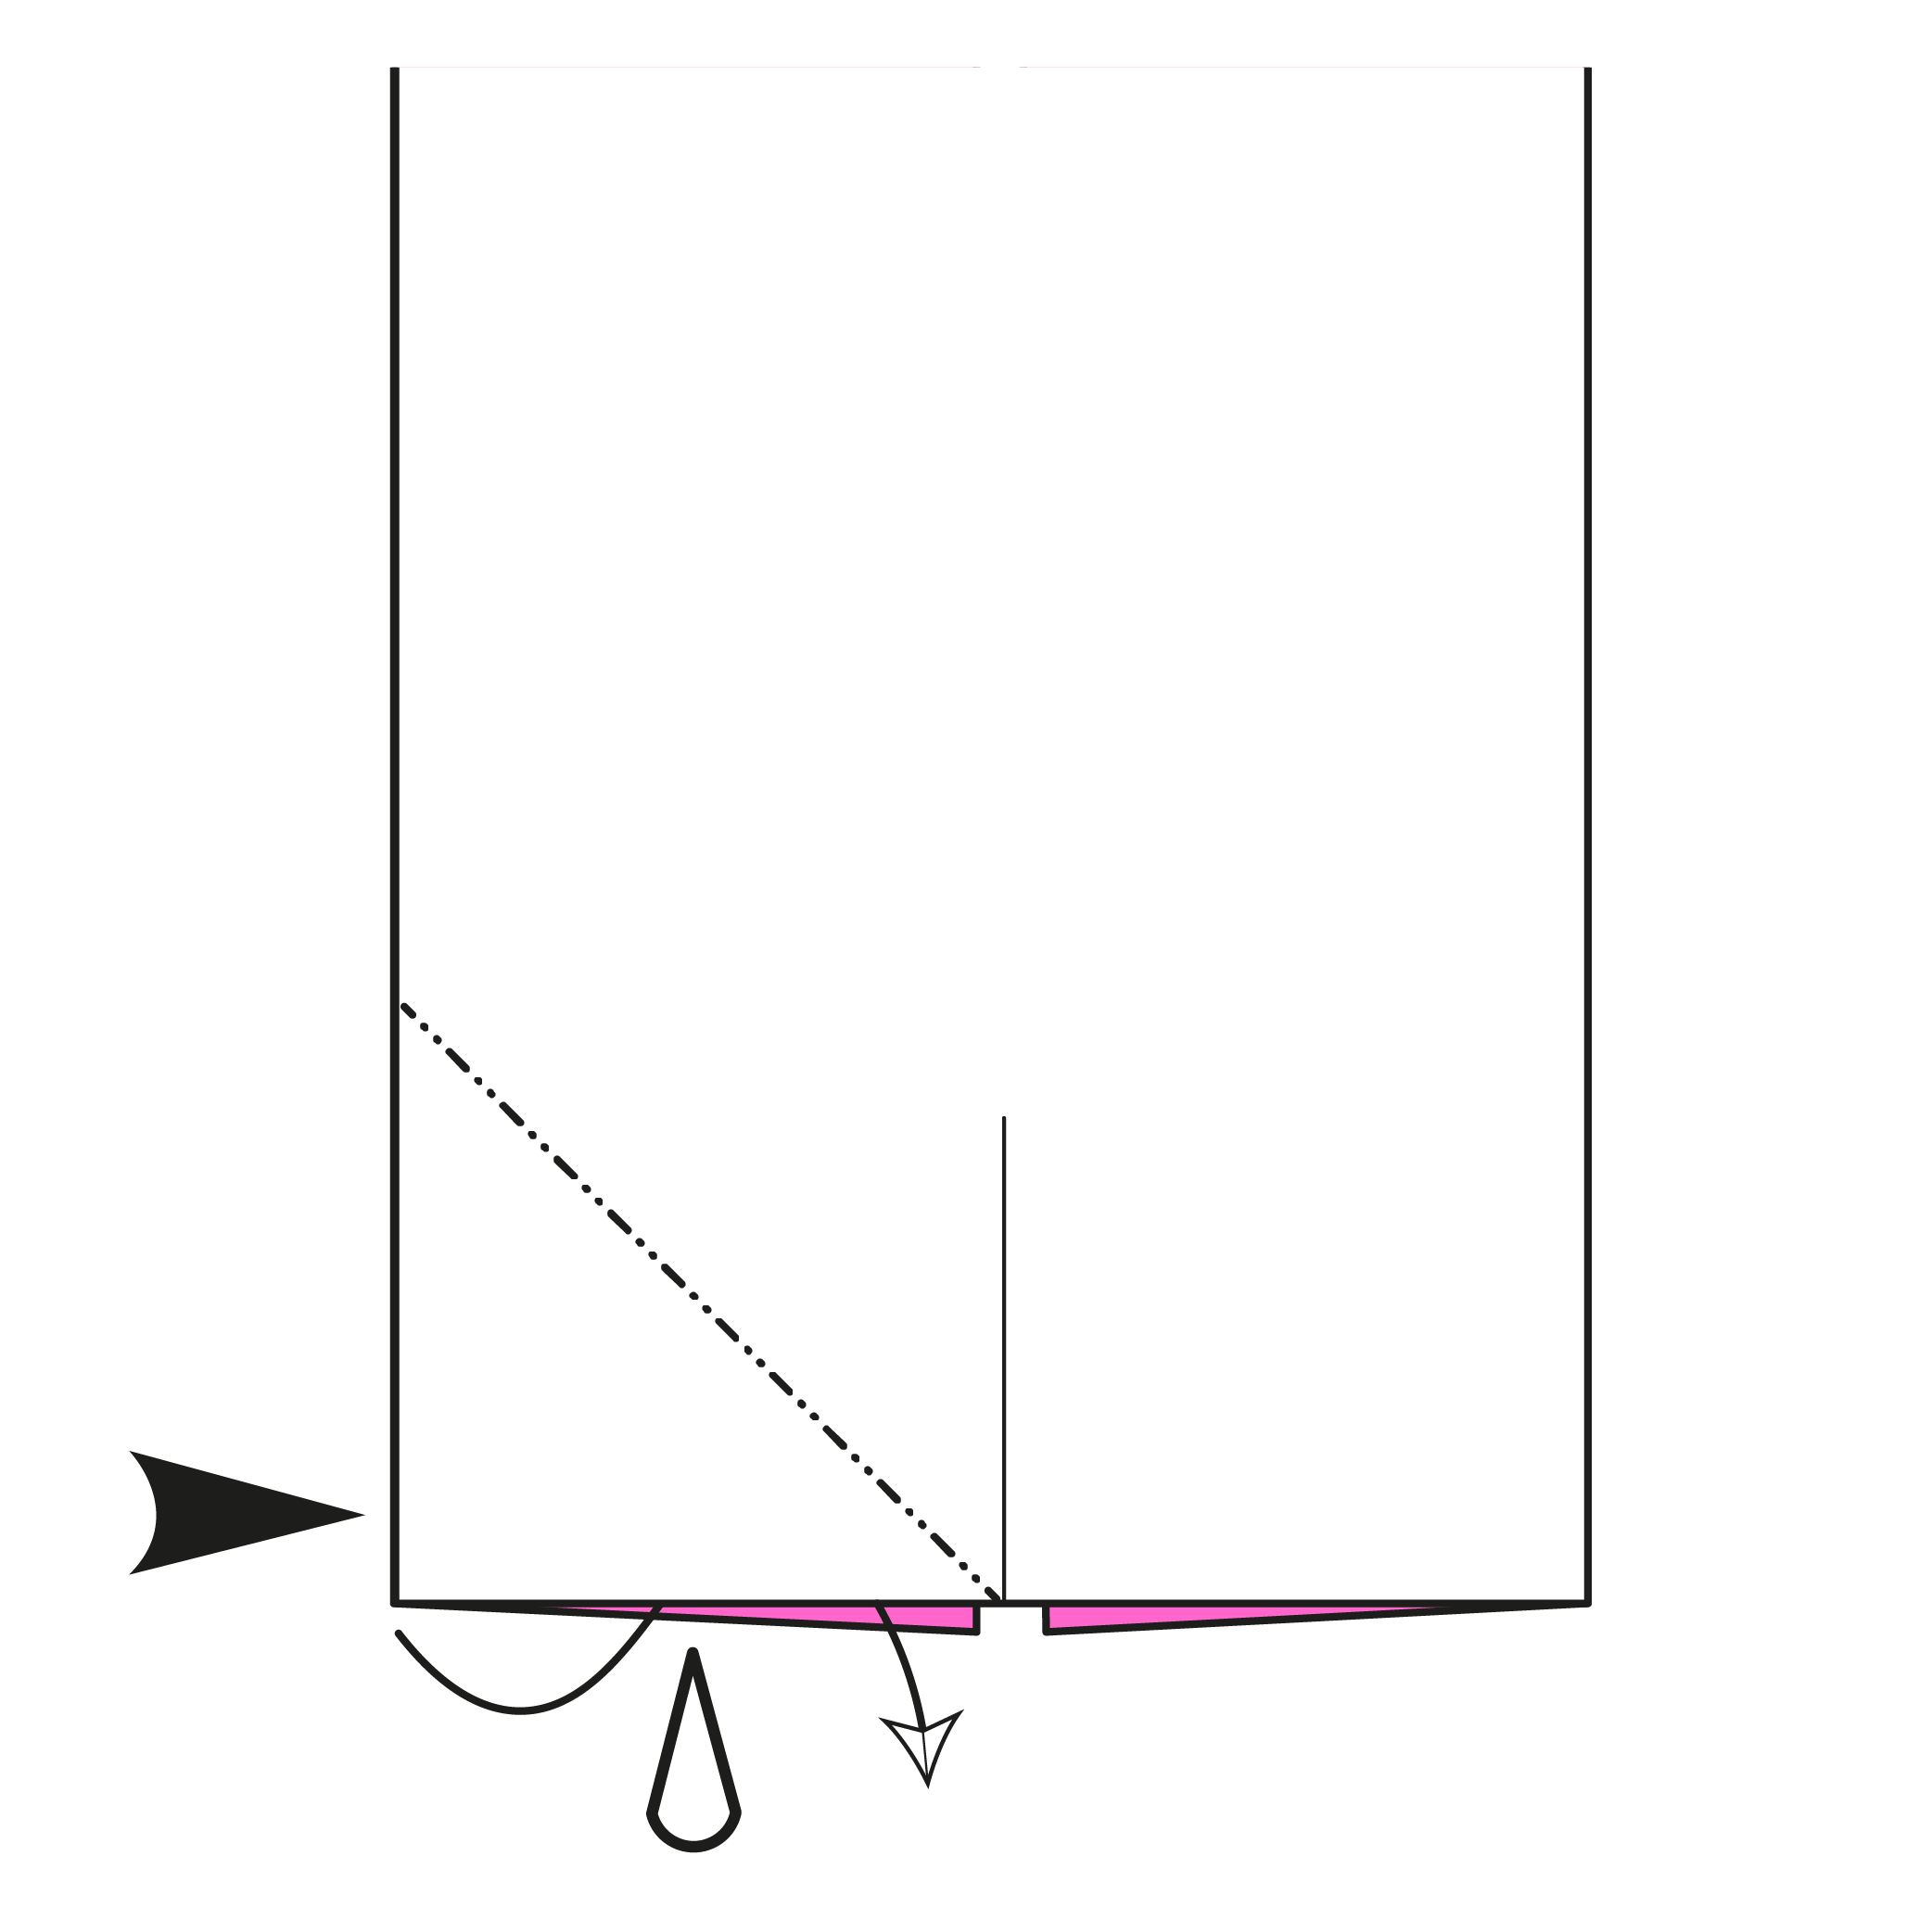
Inside reverse fold along the crease you just made in Step 18.
Step 20

Repeat Steps 18 and 19 on the right side.
The Completed Origami Heart Bookmark
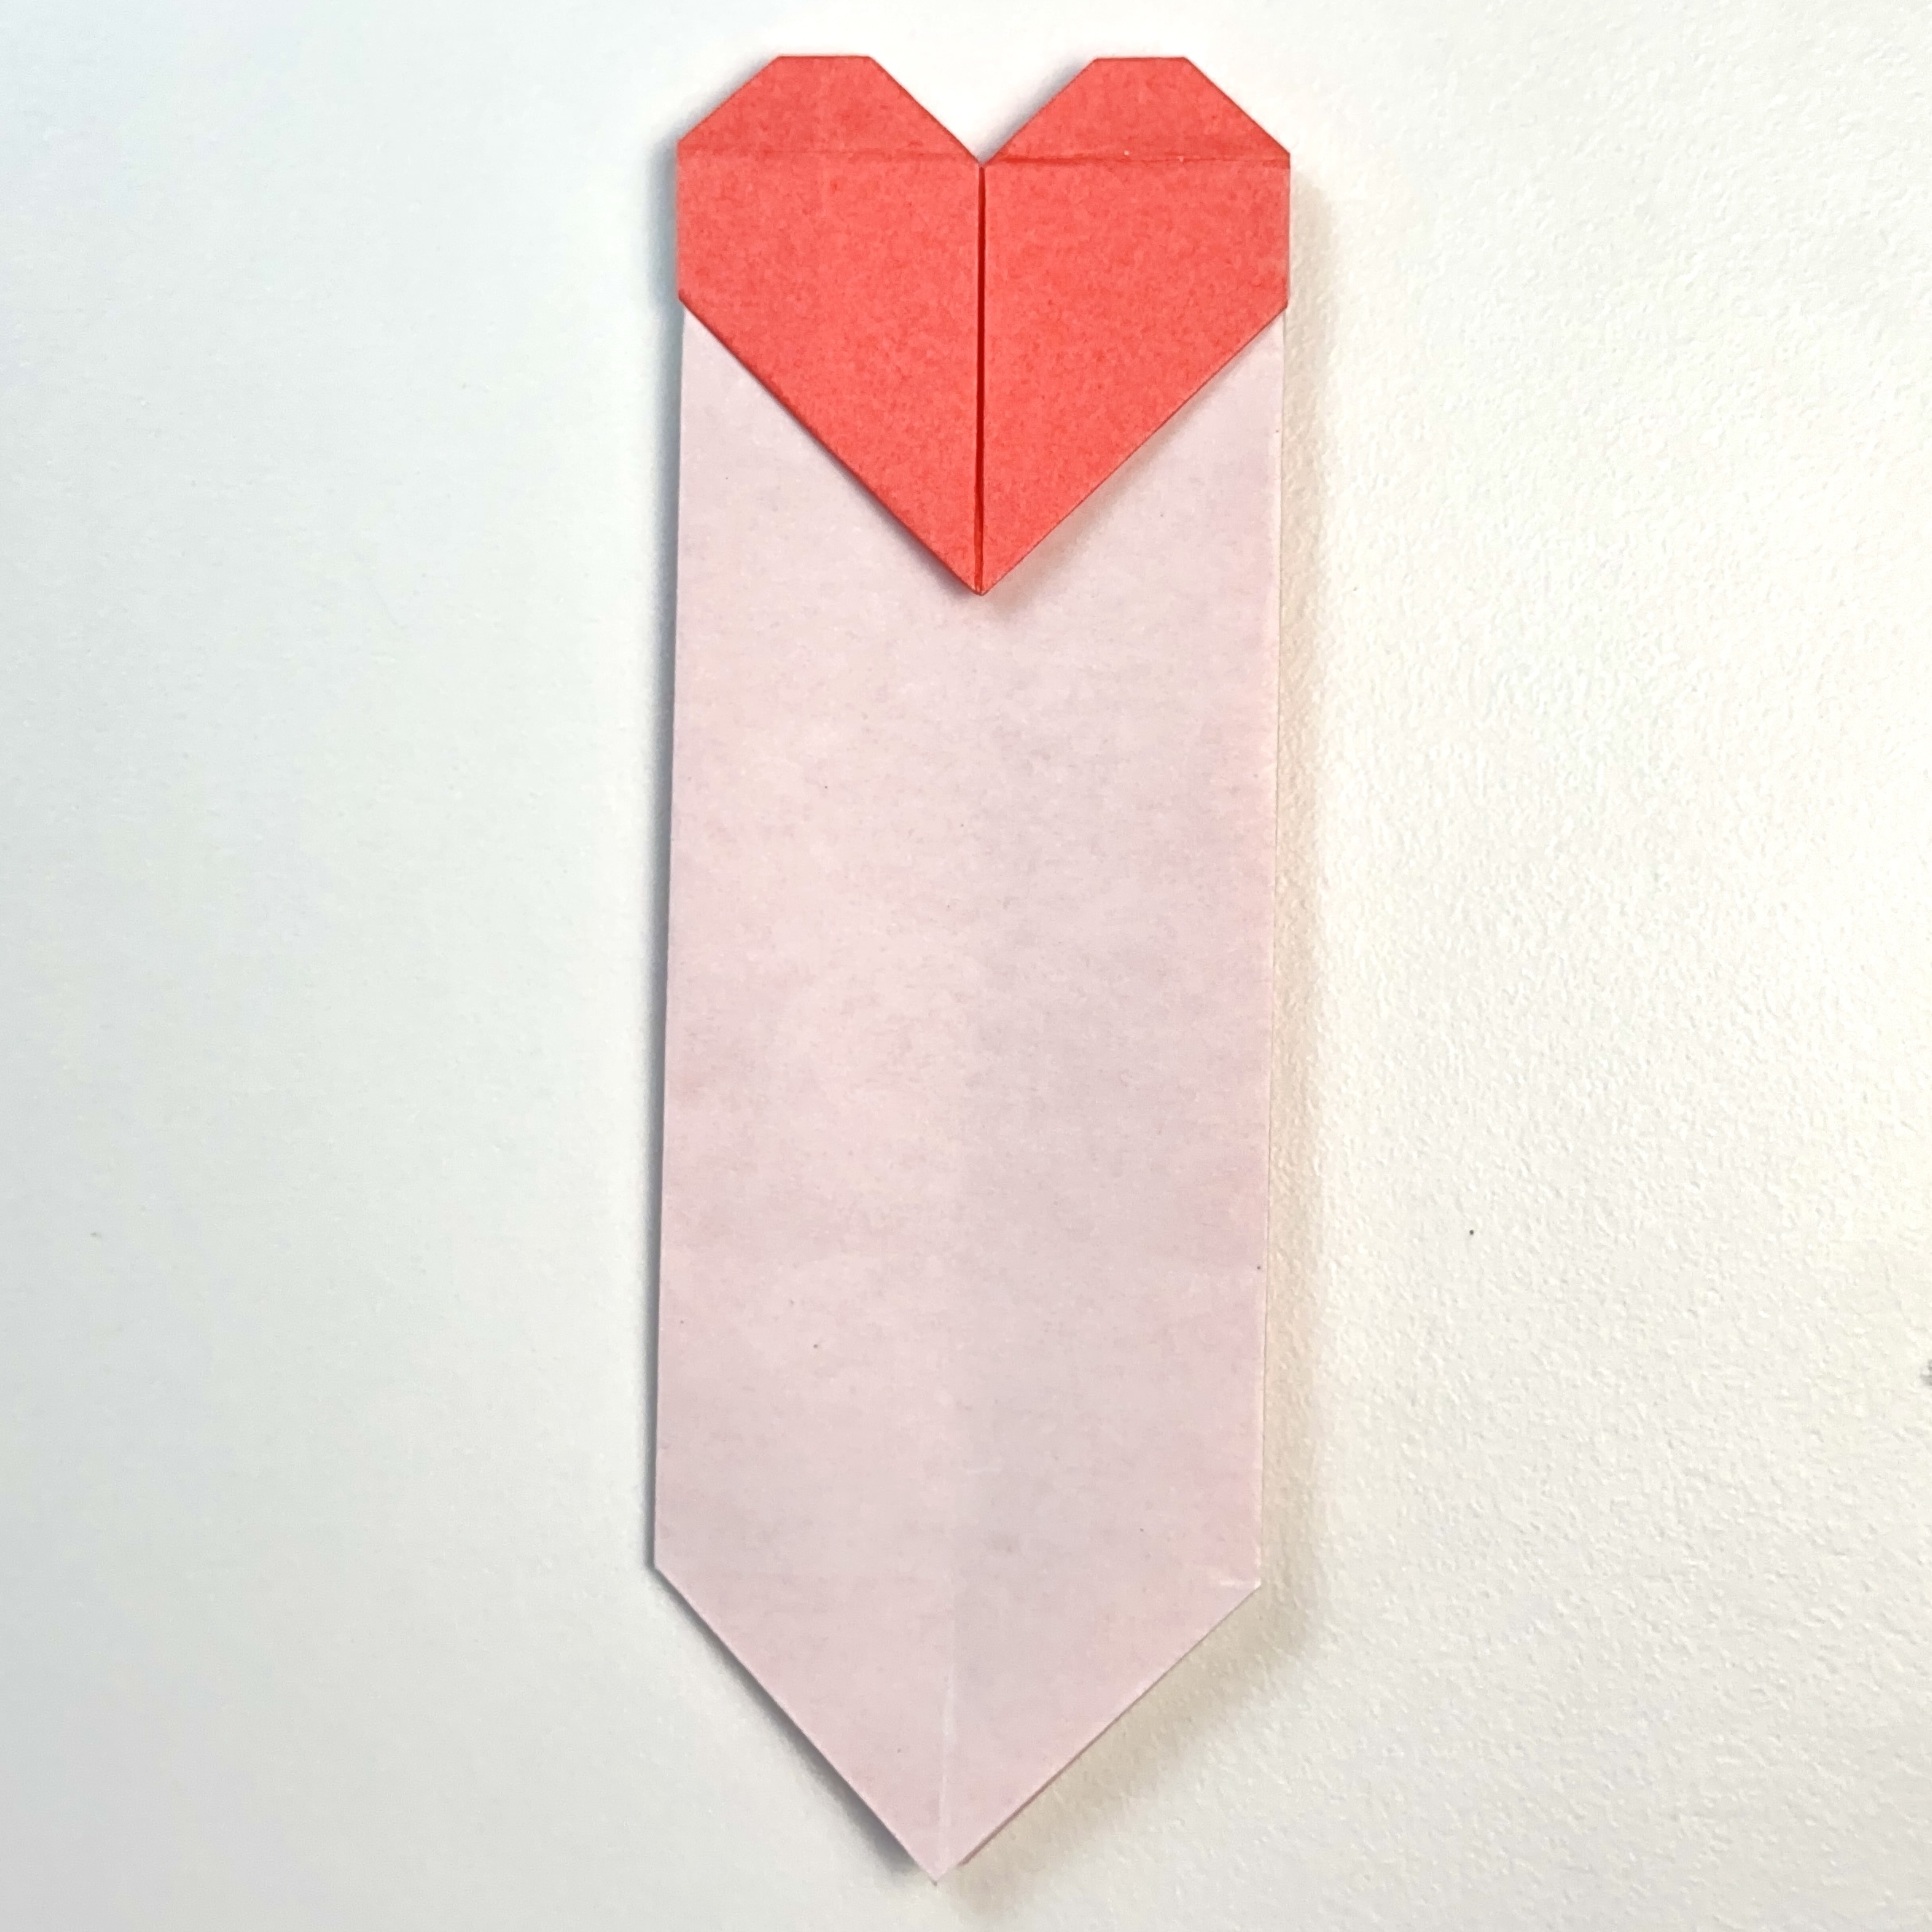

Your origami heart bookmark is ready!
Your bookmark is ready to slide onto the corner of your favorite page.
It’s a simple model, but one that feels meaningful, both for its design and for the artist behind it. If you enjoyed this fold, feel free to share it with someone or make a few extras as gifts.
You can also tag us on social media or leave a comment to show us how yours turned out. And if you want more relaxing folds like this one, feel free to join our newsletter or check out our latest YouTube tutorials.

Download the Complete Origami Heart Bookmark Printable PDF Instructions
This printable PDF is part of our Origami Friends membership on Patreon. As a member, you get access to these diagrams, our full library of printable PDFs, and member-only content.


I had to redo the last step a few times, but overall perfect.
Step 15 doesn’t make sense how am i supposed to do an inside reverse fold?
Did you watch the video? Sink the flap up inside the pocket.