
How to Fold a Origami Jack O’ Lantern
This cheerful origami jack-o-lantern by Nicolas Terry is the perfect beginner-friendly Halloween model.
With a few clever folds and some simple color changes, you’ll see the pumpkin’s mischievous face appear step by step, no tricky folds required.
You can fold the pumpkin in less than 5 minutes, and it looks great in classic orange with a contrasting color on the back.
🎃 Try purple, black, or even gold for a festive twist.
Origami Jack O’ Lantern Step-by-Step Instructions
- Difficulty: Easy – Beginner Level 2
- Folding time: 5 minutes
- Model designer: Nicolas Terry
- Paper: 15×15 cm (6×6 in) Kami
Step 1
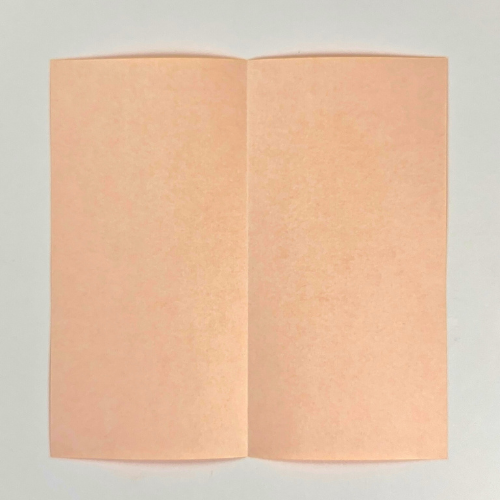

Start with the white side of the paper facing up. Fold in half vertically, then unfold.
Step 2
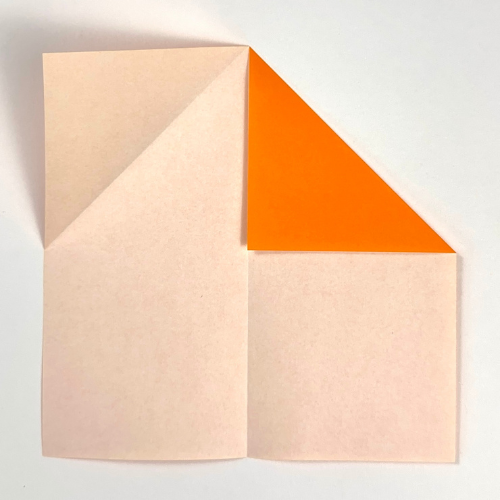
Fold the top edges to the centerline.
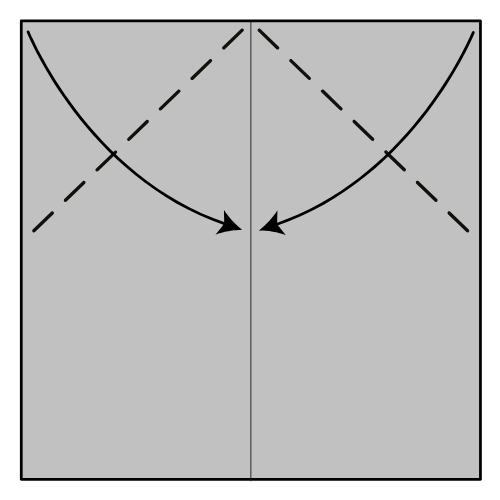
Step 3
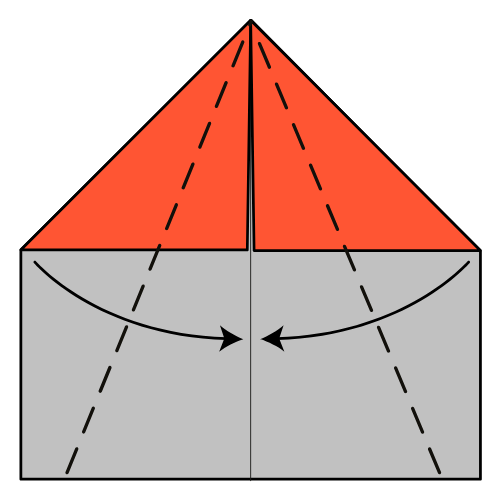
Fold the top edges to the centerline again.
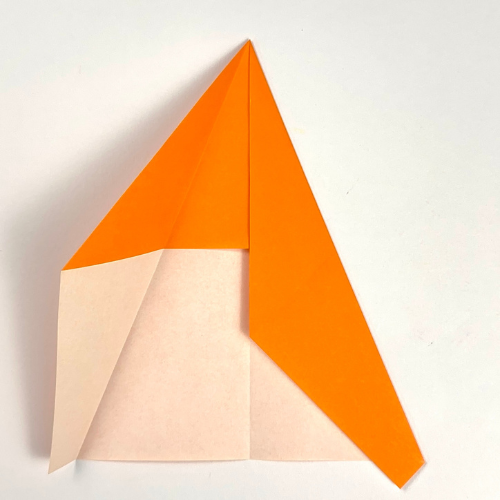
Step 4

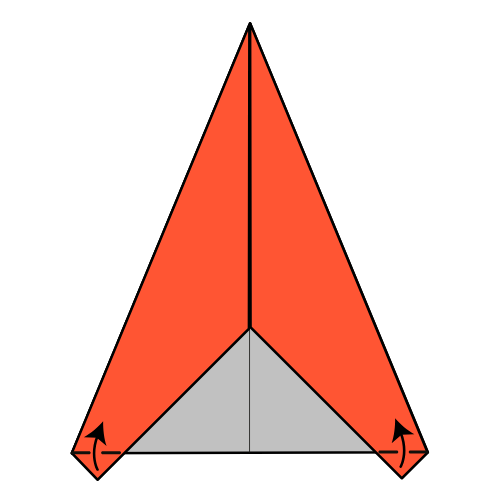
Fold the two flaps sticking out at the bottom upward.
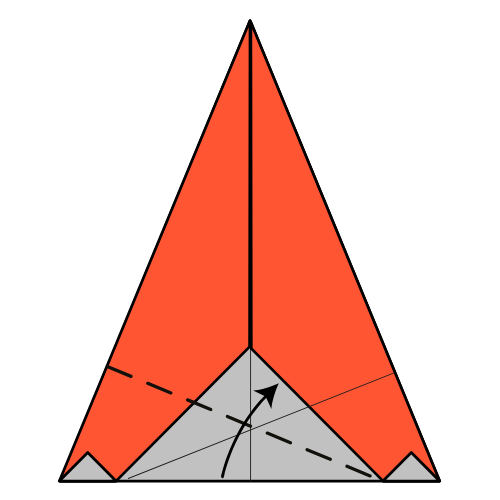
Step 5
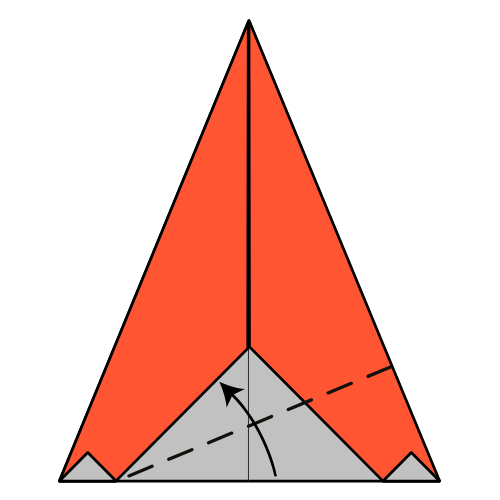
Fold the right part bottom edge up to where the colored and white sides meet.
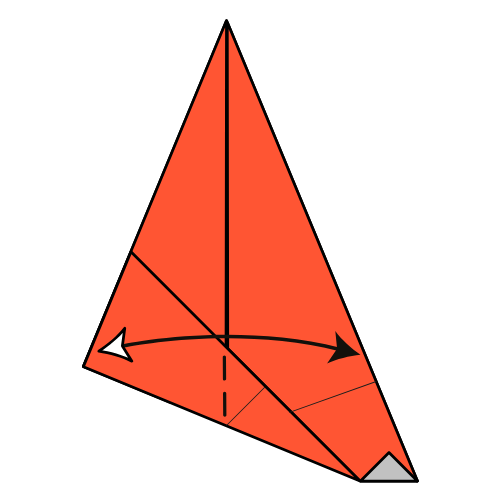
Step 6
Fold the model in half. Only crease the bottom part, then unfold.
Step 7


Unfold Step 5.
Step 8
Repeat Step 5 on the left side.
Step 9
Repeat Step 6.
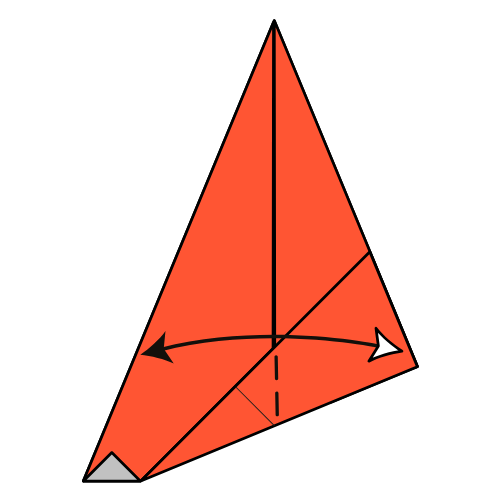
Step 10
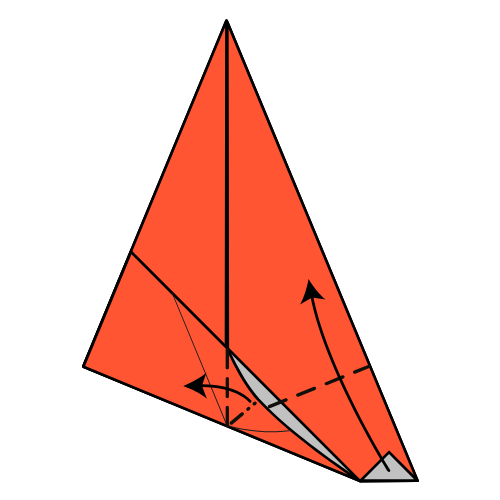
Gently open the bottom flap as shown and fold the bottom right corner up along the existing crease. Part of the flap will shift to the left.
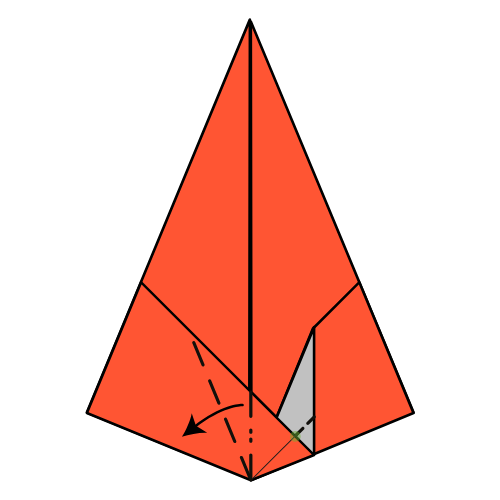
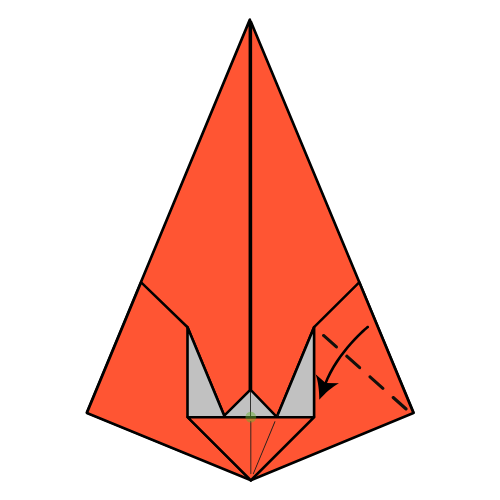
Step 11

Fold the flap you just made along the existing creases. This time, move it to the right.
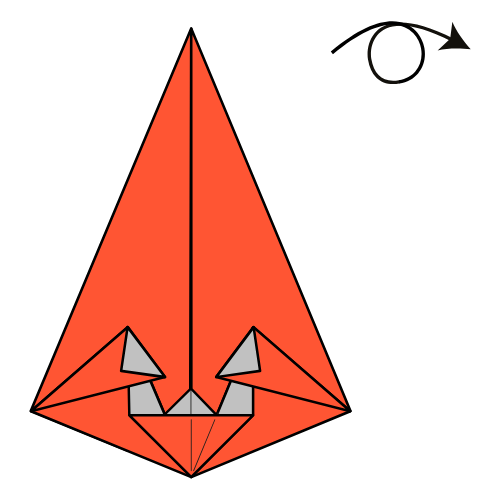
Step 12
Repeat on the left side, then squash fold the top flap to flatten.
🎃 Folding tip: Use the crease lines to help center the flap before squashing.
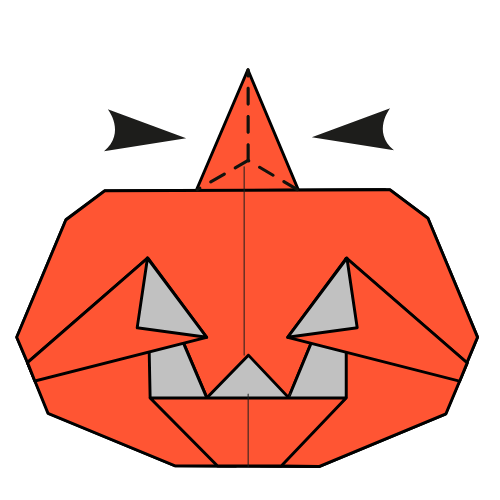
Step 13
Fold the top flap’s right corner down along the dashed line.
Step 14

Repeat on the left side.
Step 15

Turn the model over.
Step 16
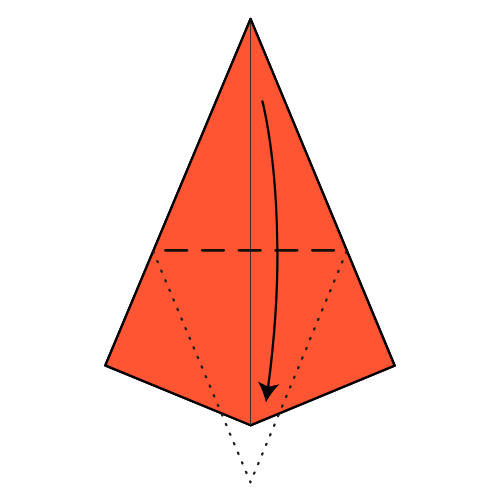
Fold the top corner down.
🎃 Folding tip: Flip the model over and adjust the fold until you like the pumpkin’s shape. This step decides the overall look!
Step 17

Fold the bottom corner up. It should stick out. This will become the pumpkin stem.
Step 18

Slightly fold each corner of the pumpkin inward to round the shape.
Step 19

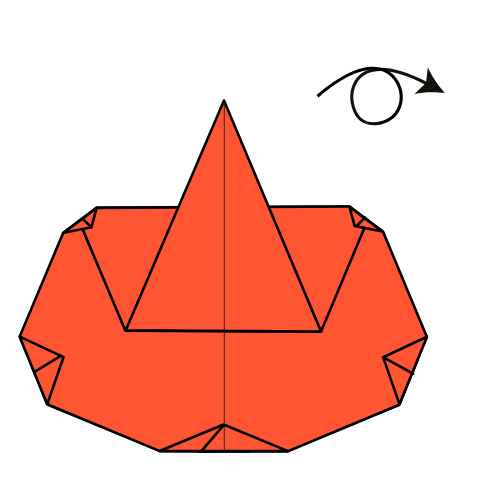
Turn the model over.
Step 20
Pinch the stem to make it thinner.
Step 21
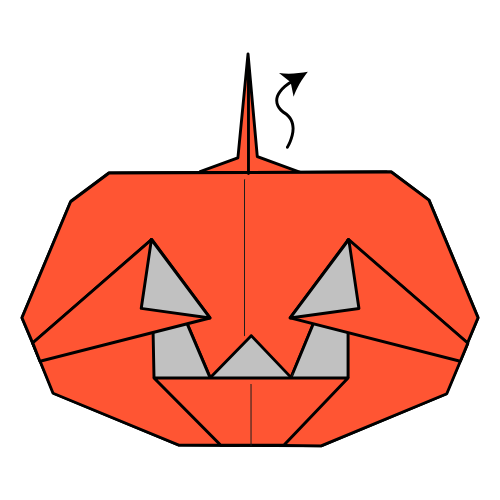
Shape the stem however you like.
Pumpkin Perfect! You Jack O’ Lantern Is Done! 🎃
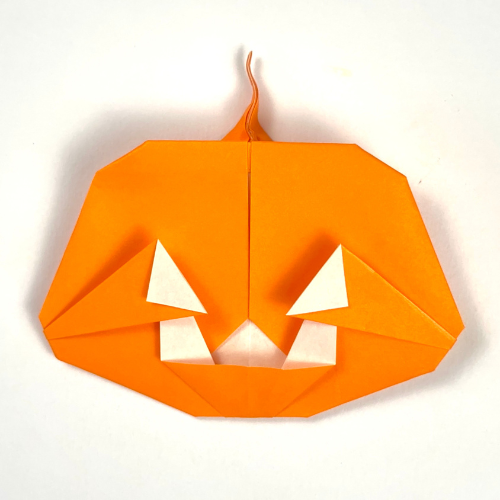
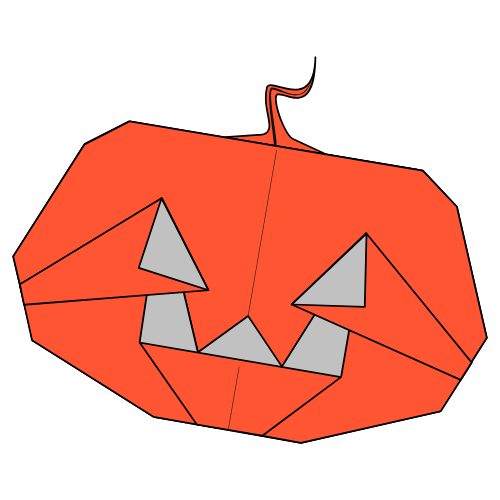
That’s it! Your origami jack-o-lantern is ready to grin its way through the spooky season! It’s a great model for decorating, sharing with friends, or folding with kids.
For more fun Halloween origami and easy folding tutorials, check out our YouTube channel and sign up for our newsletter to get new ideas straight in your inbox.
Download the Full Origami Jack O’ Lantern Printable PDF Instructions

We’d love to keep you in the loop, so by sharing your email with us, you’ll be signed up for our mailing list. Don’t worry; we won’t bombard you with spammy emails, and your information is safe with us – we won’t share it with anyone else.
Watch the Origami Jack-o’-lantern Video Tutorial
🌸 Enjoyed this tutorial? Subscribe to our YouTube channel for new inspiring origami videos every week!


I saw a lot of 3d pumpkin tutorials online, but I was hesitant to recreate any, since I saw that they used a few sheets of paper to fold them, and I don’t own many orange ones. I’m very happy how this one turned out, and that I can make more with my paper!!! such an economical friendly Halloween decoration!!!(I also a used black marker, since my paper is double sided and it’s very cute as u can see!!)
The model looks more complicated than it is, you’re right! Using a marker is a good solution. You can also paint your paper with acrylic before folding it. Thanks for sharing!