
How to Fold an Origami Kitten
This adorable origami kitten was designed by Francesco Mancini. It’s a beginner-friendly model with just enough challenge to keep things interesting. It’s perfect if you’ve folded a few models before and want to level up slightly.
The proportions are lovely, with a large head and tucked-in body that really capture a kitten’s vibe. Francesco also includes two options for folding the tail. One with a curled shape, and one with a color change for added contrast.
You can fold it in under 10 minutes, and it looks great in brown, grey, black or even patterned paper.
Origami Kitten Step-by-Step Instructions
- Difficulty: Easy- Beginner Level 4
- Folding time: 5-10 minutes
Recommended Paper
15×15 cm (6×6 in) Kami
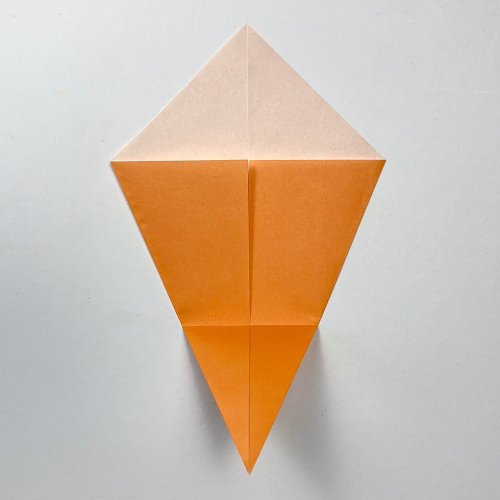
Step 1
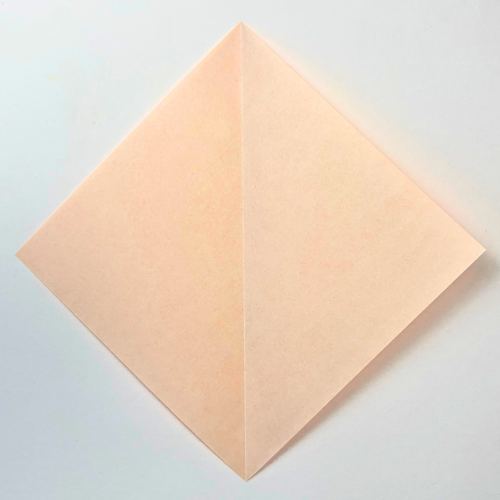
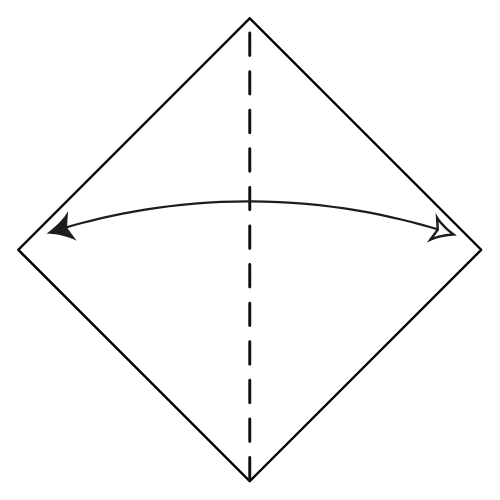
Start with the white side of the paper facing up in a diamond position. Fold it in half vertically, then unfold.
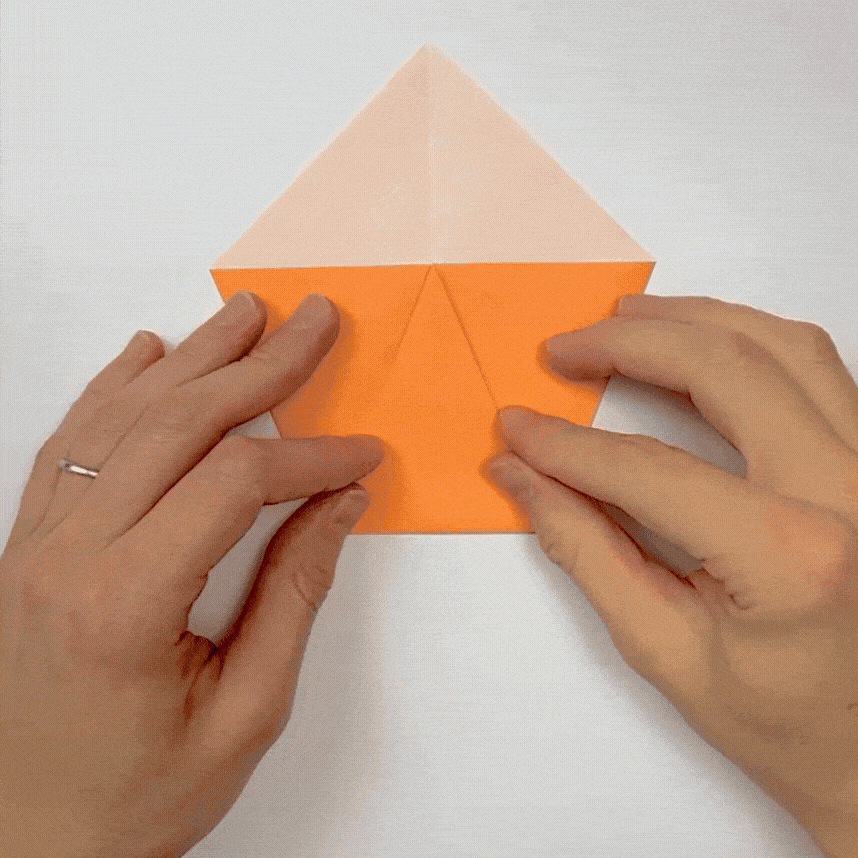
Step 2
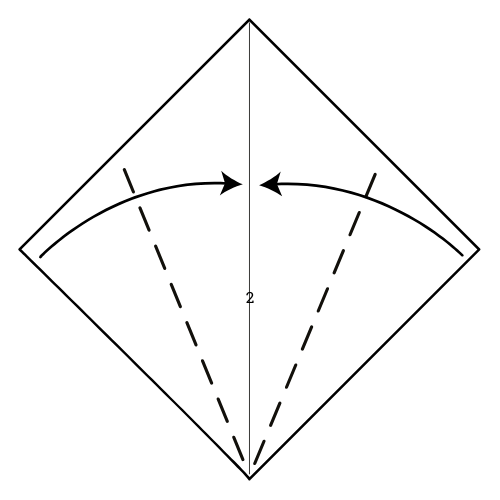
Fold the bottom edges in to meet the centerline.
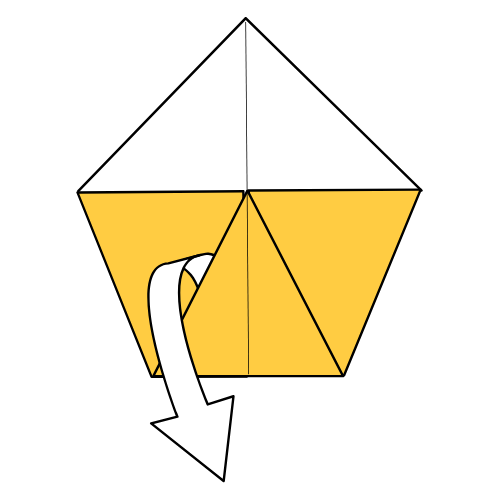
Step 3
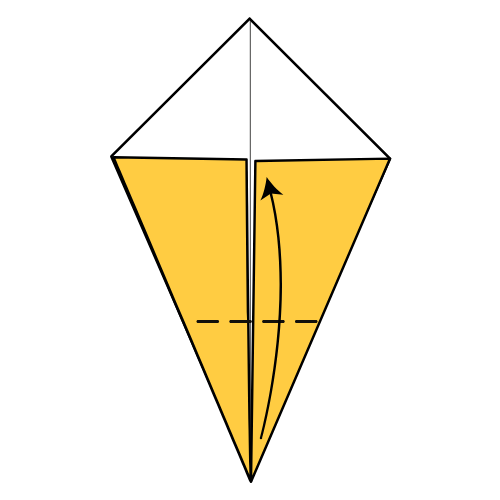
Fold the bottom corner up to where the white and colored sides of the paper meet.
Step 4
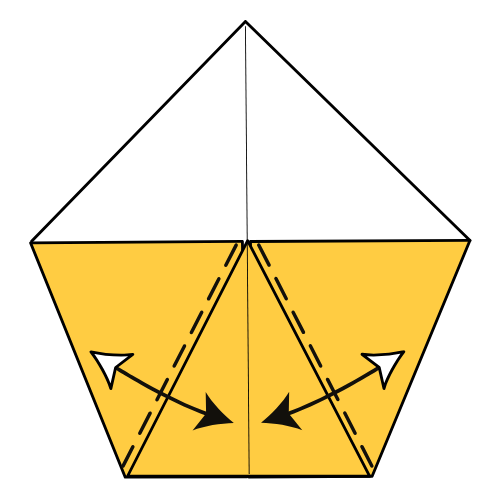
On each side, fold and unfold the bottom layer along the top flap edge.
Step 5
Unfold the top flap.
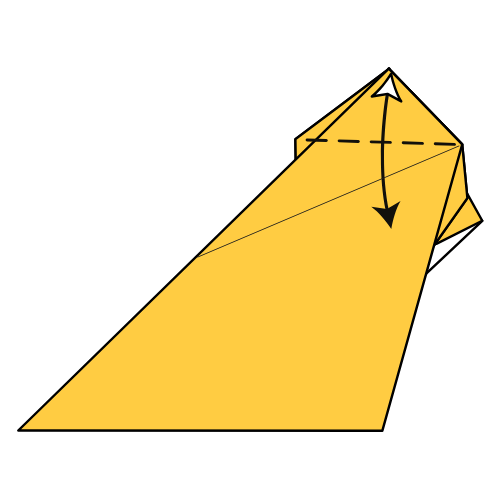
Step 6
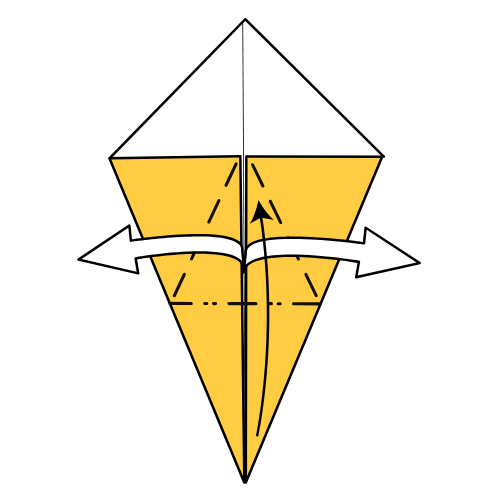
Open up the top layers and fold the bottom corner up using the existing creases as a guide.
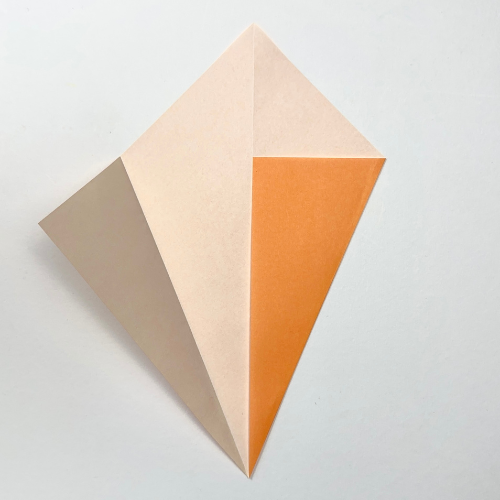
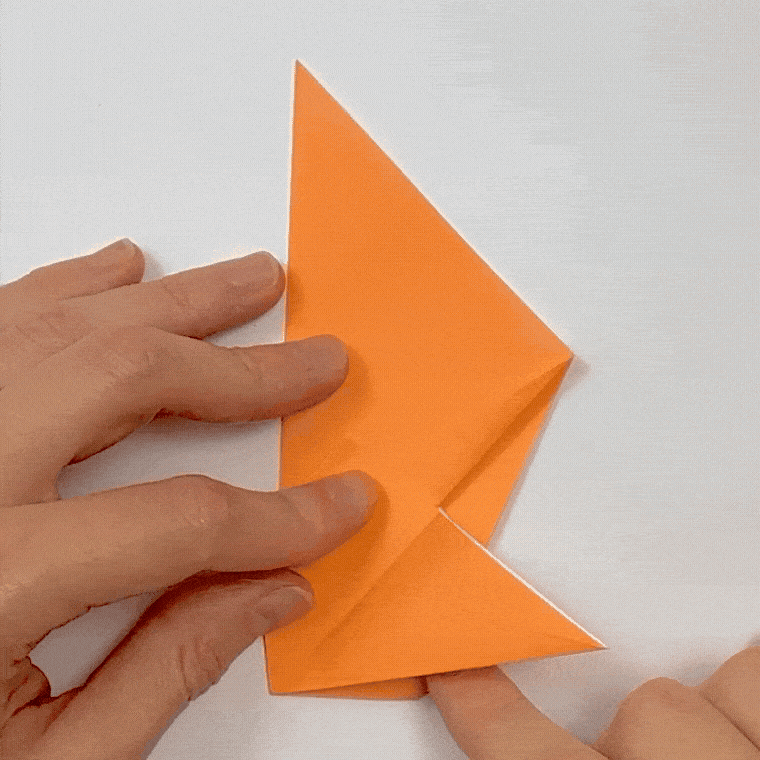
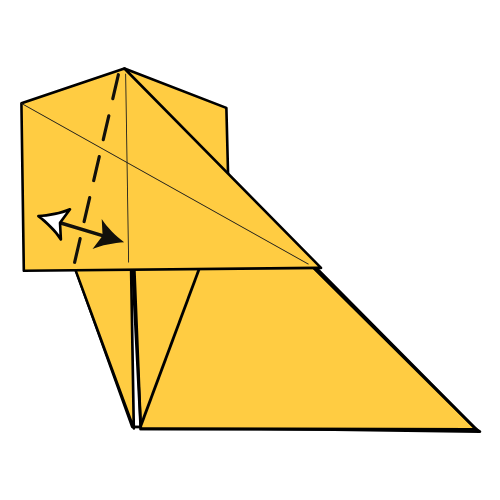
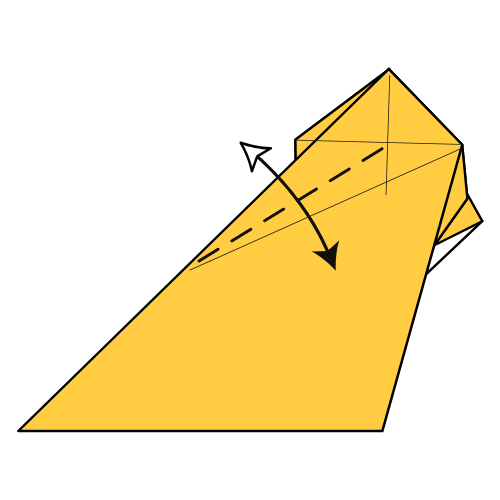
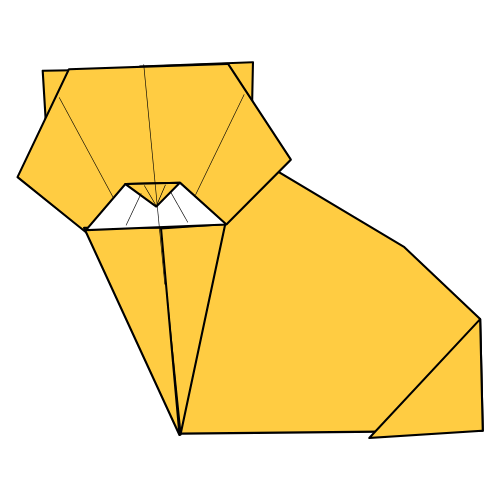
Step 7
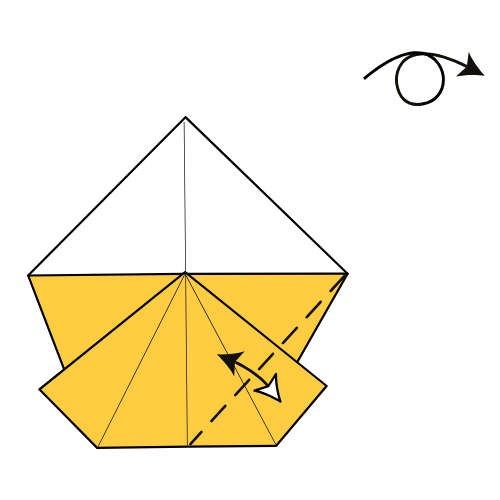
Fold and unfold along the dashed line, from the bottom edge center to the right corner. Then, turn the model over.
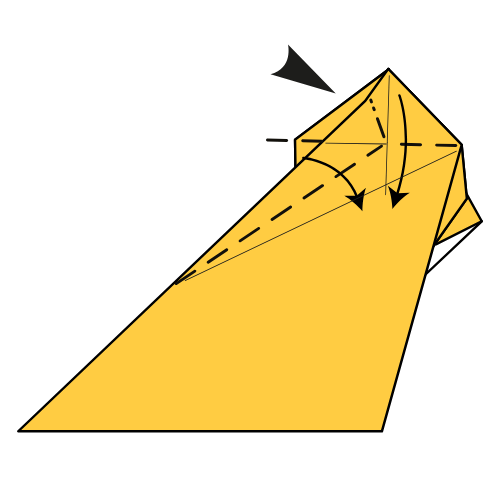
Step 8

Repeat Step 7 on this side.
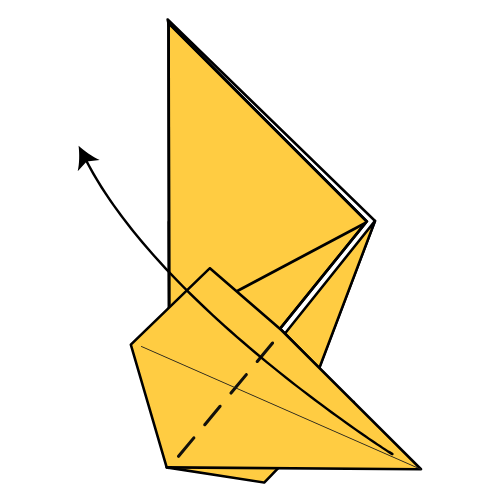
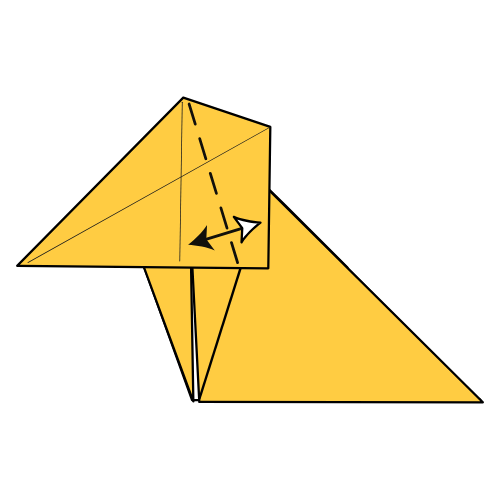
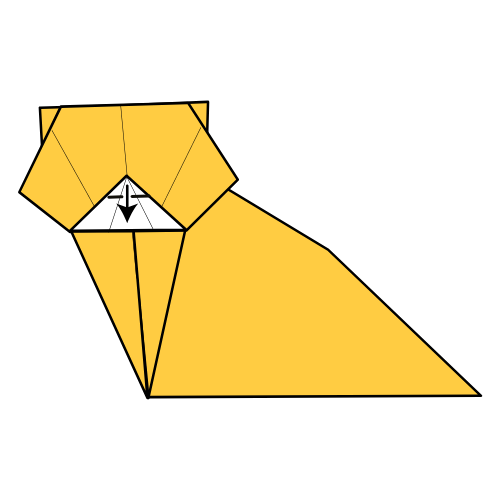
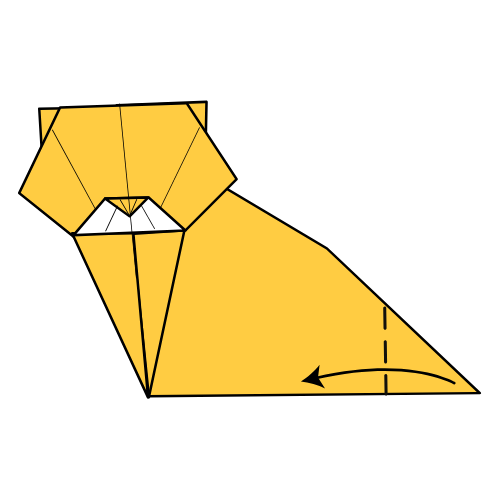
Step 9
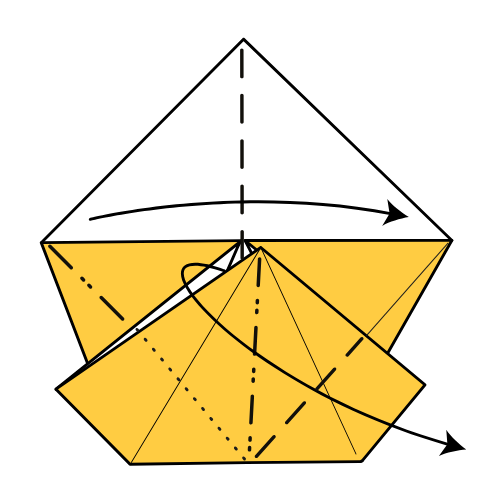
Collapse the paper using the creases from previous steps. Check the next diagram for reference.
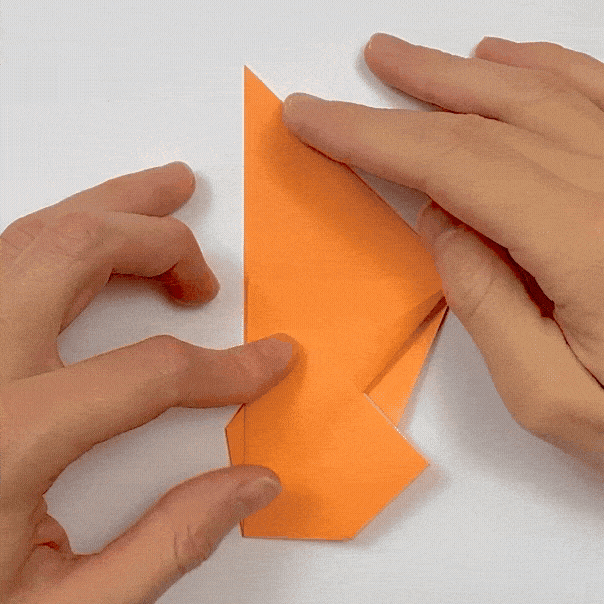
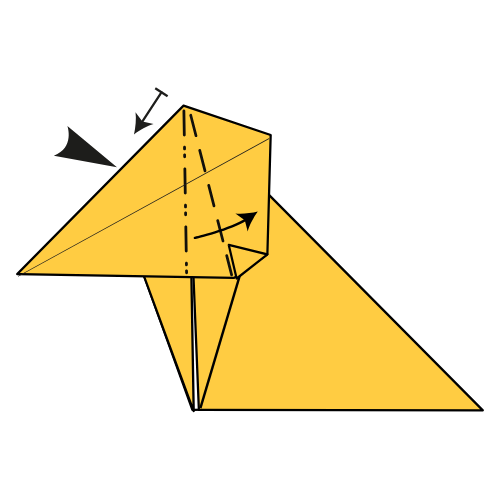
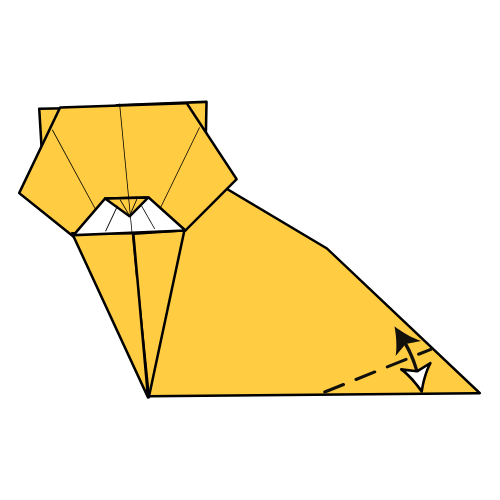
Step 10
Fold the top flap upward.
Step 11
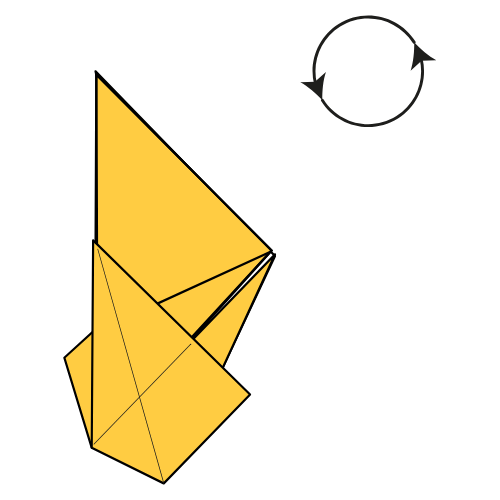
Rotate the model about 135° clockwise.
Step 12
Fold and unfold along the dashed line from the top corner down to where the head and body meet.
Step 13

Fold the bottom left edge up to the crease line you just made.
Step 14


Fold the top flap over to the left.
Step 15
Repeat Step 12 on the right side.
Step 16

Repeat Step 13 on the right side.
Step 17
Lift the top flap and squash it flat, using the existing creases to guide you.
🐈 Folding tip: Align the bottom corner with the centerline before squashing. You might need to create a couple of new creases if things don’t line up perfectly. Don’t worry, it won’t mess up the final look.
Step 18


Turn the model over.
Step 19
Fold and unfold the top corner downward. The crease should go from the left corner to the right corner.
Step 20

Reinforce the center crease at the top of the model.
Step 21
Fold the top left edge to the closest crease line, then unfold.
Step 22
Collapse the left edge and top of the head using the existing creases.
Step 23


Turn the model over.
Step 24

Fold the bottom corner of the top flap upward.
Note: There’s no specific reference point here.
Step 25
Fold the top corner of the top flap down to form the cat’s snout.
Step 26
Fold the right corner up along the dashed line. Crease firmly, then unfold.
Step 27

Outside reverse fold the kitten’s tail using the creases you just made.
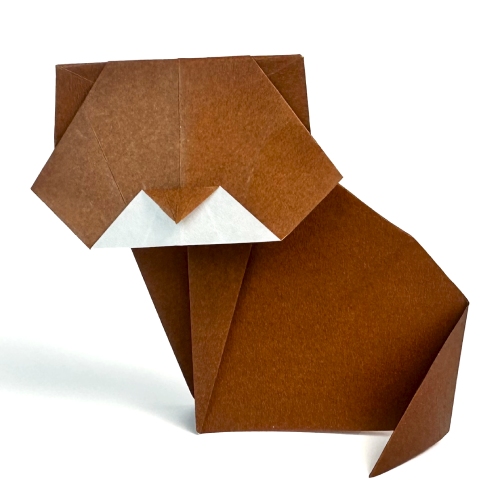
The Completed Origami Kitten 🐈


Alternative Tail Variation
🔁 Back at Step 26:
Instead of folding the right corner upward, fold it to the left for a curled tail look.
We hope you enjoyed folding this cute little kitten!
For more origami animals and creative paper projects, check out our YouTube channel and sign up for our newsletter. We share easy tutorials, seasonal models, and community favorites every week.
And now, I’m going to fold this kitten in black for a Halloween project. Can’t wait to see what you come up with too.
Until next time!

Download the Full Origami Kitten Printable PDF
Instructions
We’d love to keep you in the loop, so by sharing your email with us, you’ll be signed up for our mailing list. Don’t worry; we won’t bombard you with spammy emails, and your information is safe with us – we won’t share it with anyone else.


that is definitely cute.