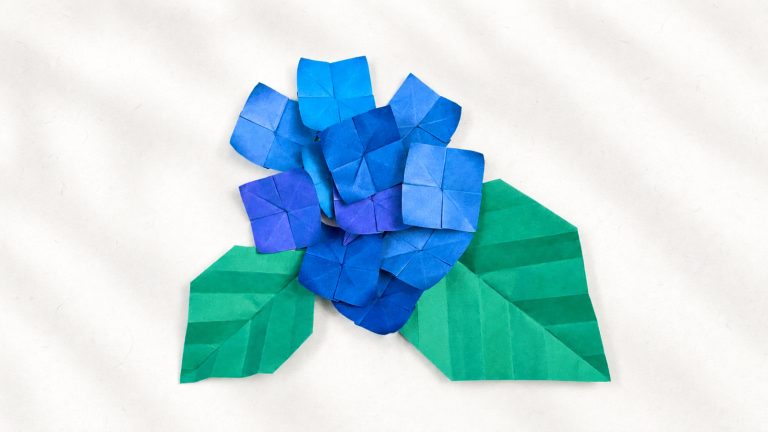
How to Fold an Origami Styracosaurus
Here’s a lovely design by Nick Robinson: an origami Styracosaurus that looks like a baby dinosaur straight out of a storybook.
It’s a friendly little model that’s simple to fold, with no tricky steps, making it perfect for beginners with a bit of practice under their belt. If you’ve folded a few traditional animals before, you’ll enjoy seeing this one come together.
You can use a sheet with a nice texture (like Tant or kraft) to give it a more earthy, prehistoric look, but any paper will do.
Origami Styracosaurus Step-by-Step Instructions
- Difficulty: Easy – Beginner Level 4
- Folding time: 10 minutes
Recommended Paper
15×15 cm (6×6 in) Kami or Tant
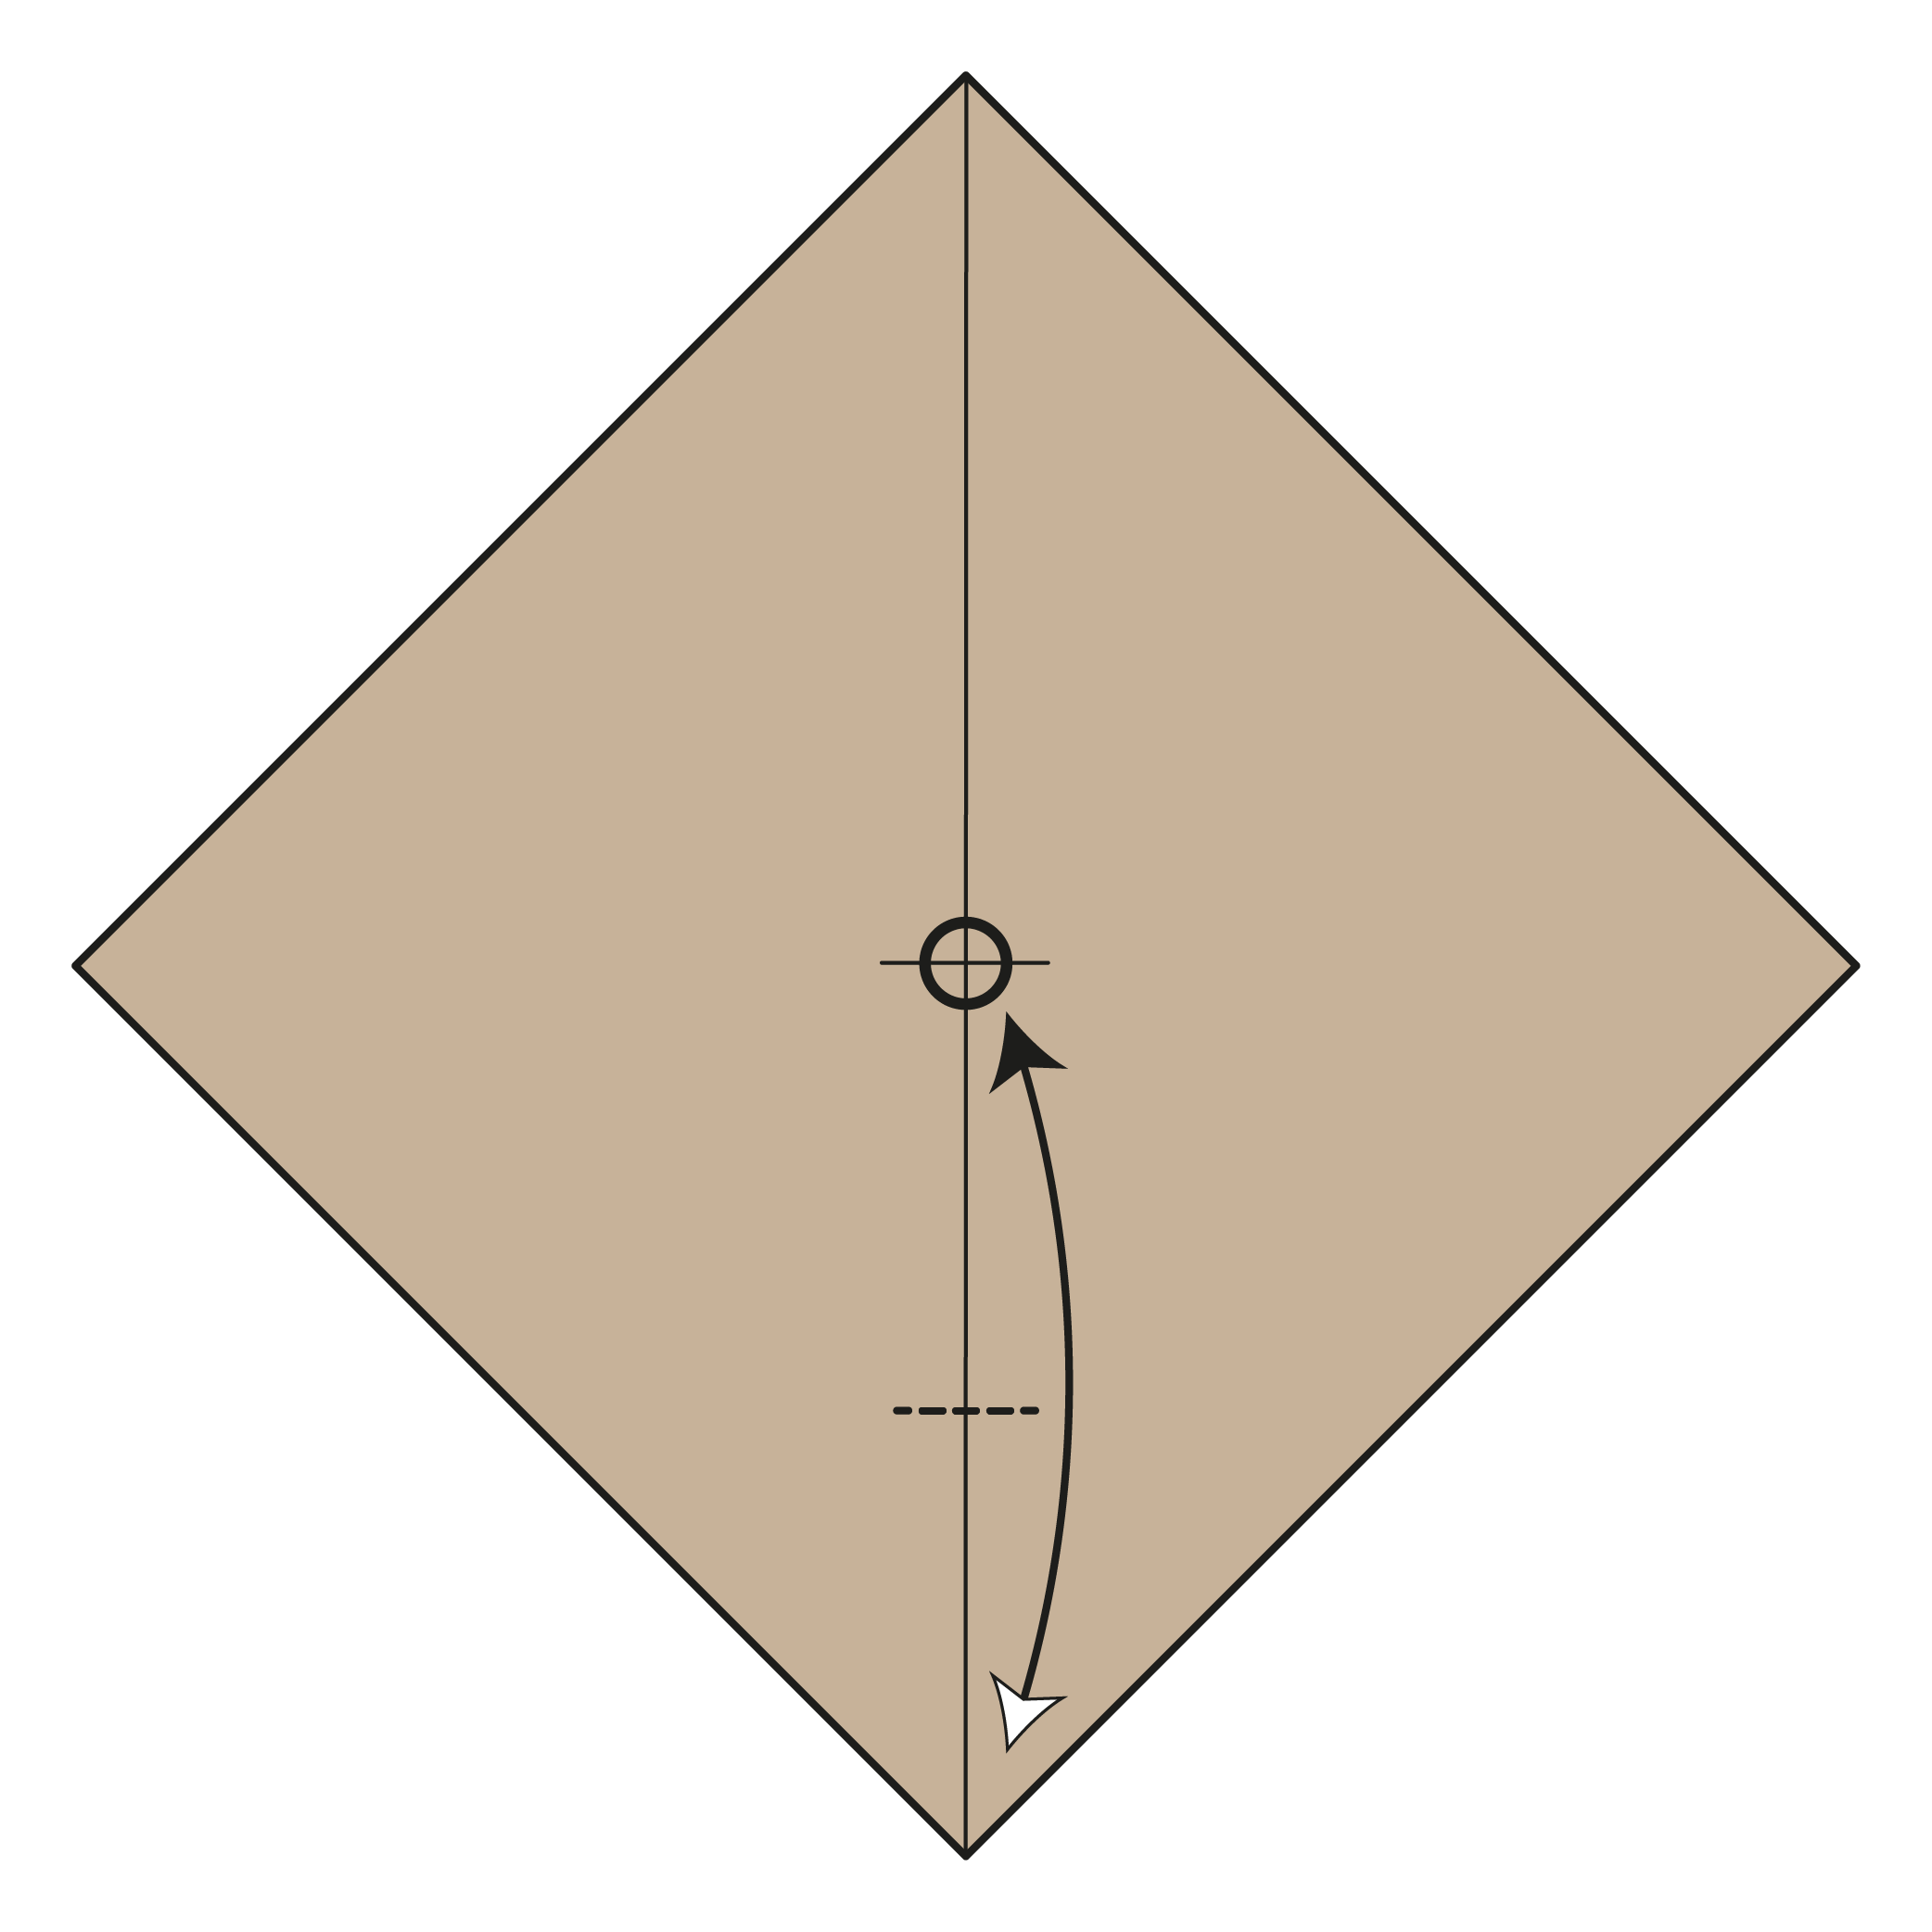
Step 1
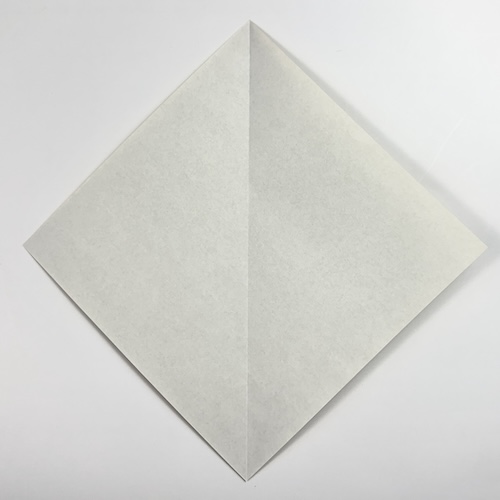
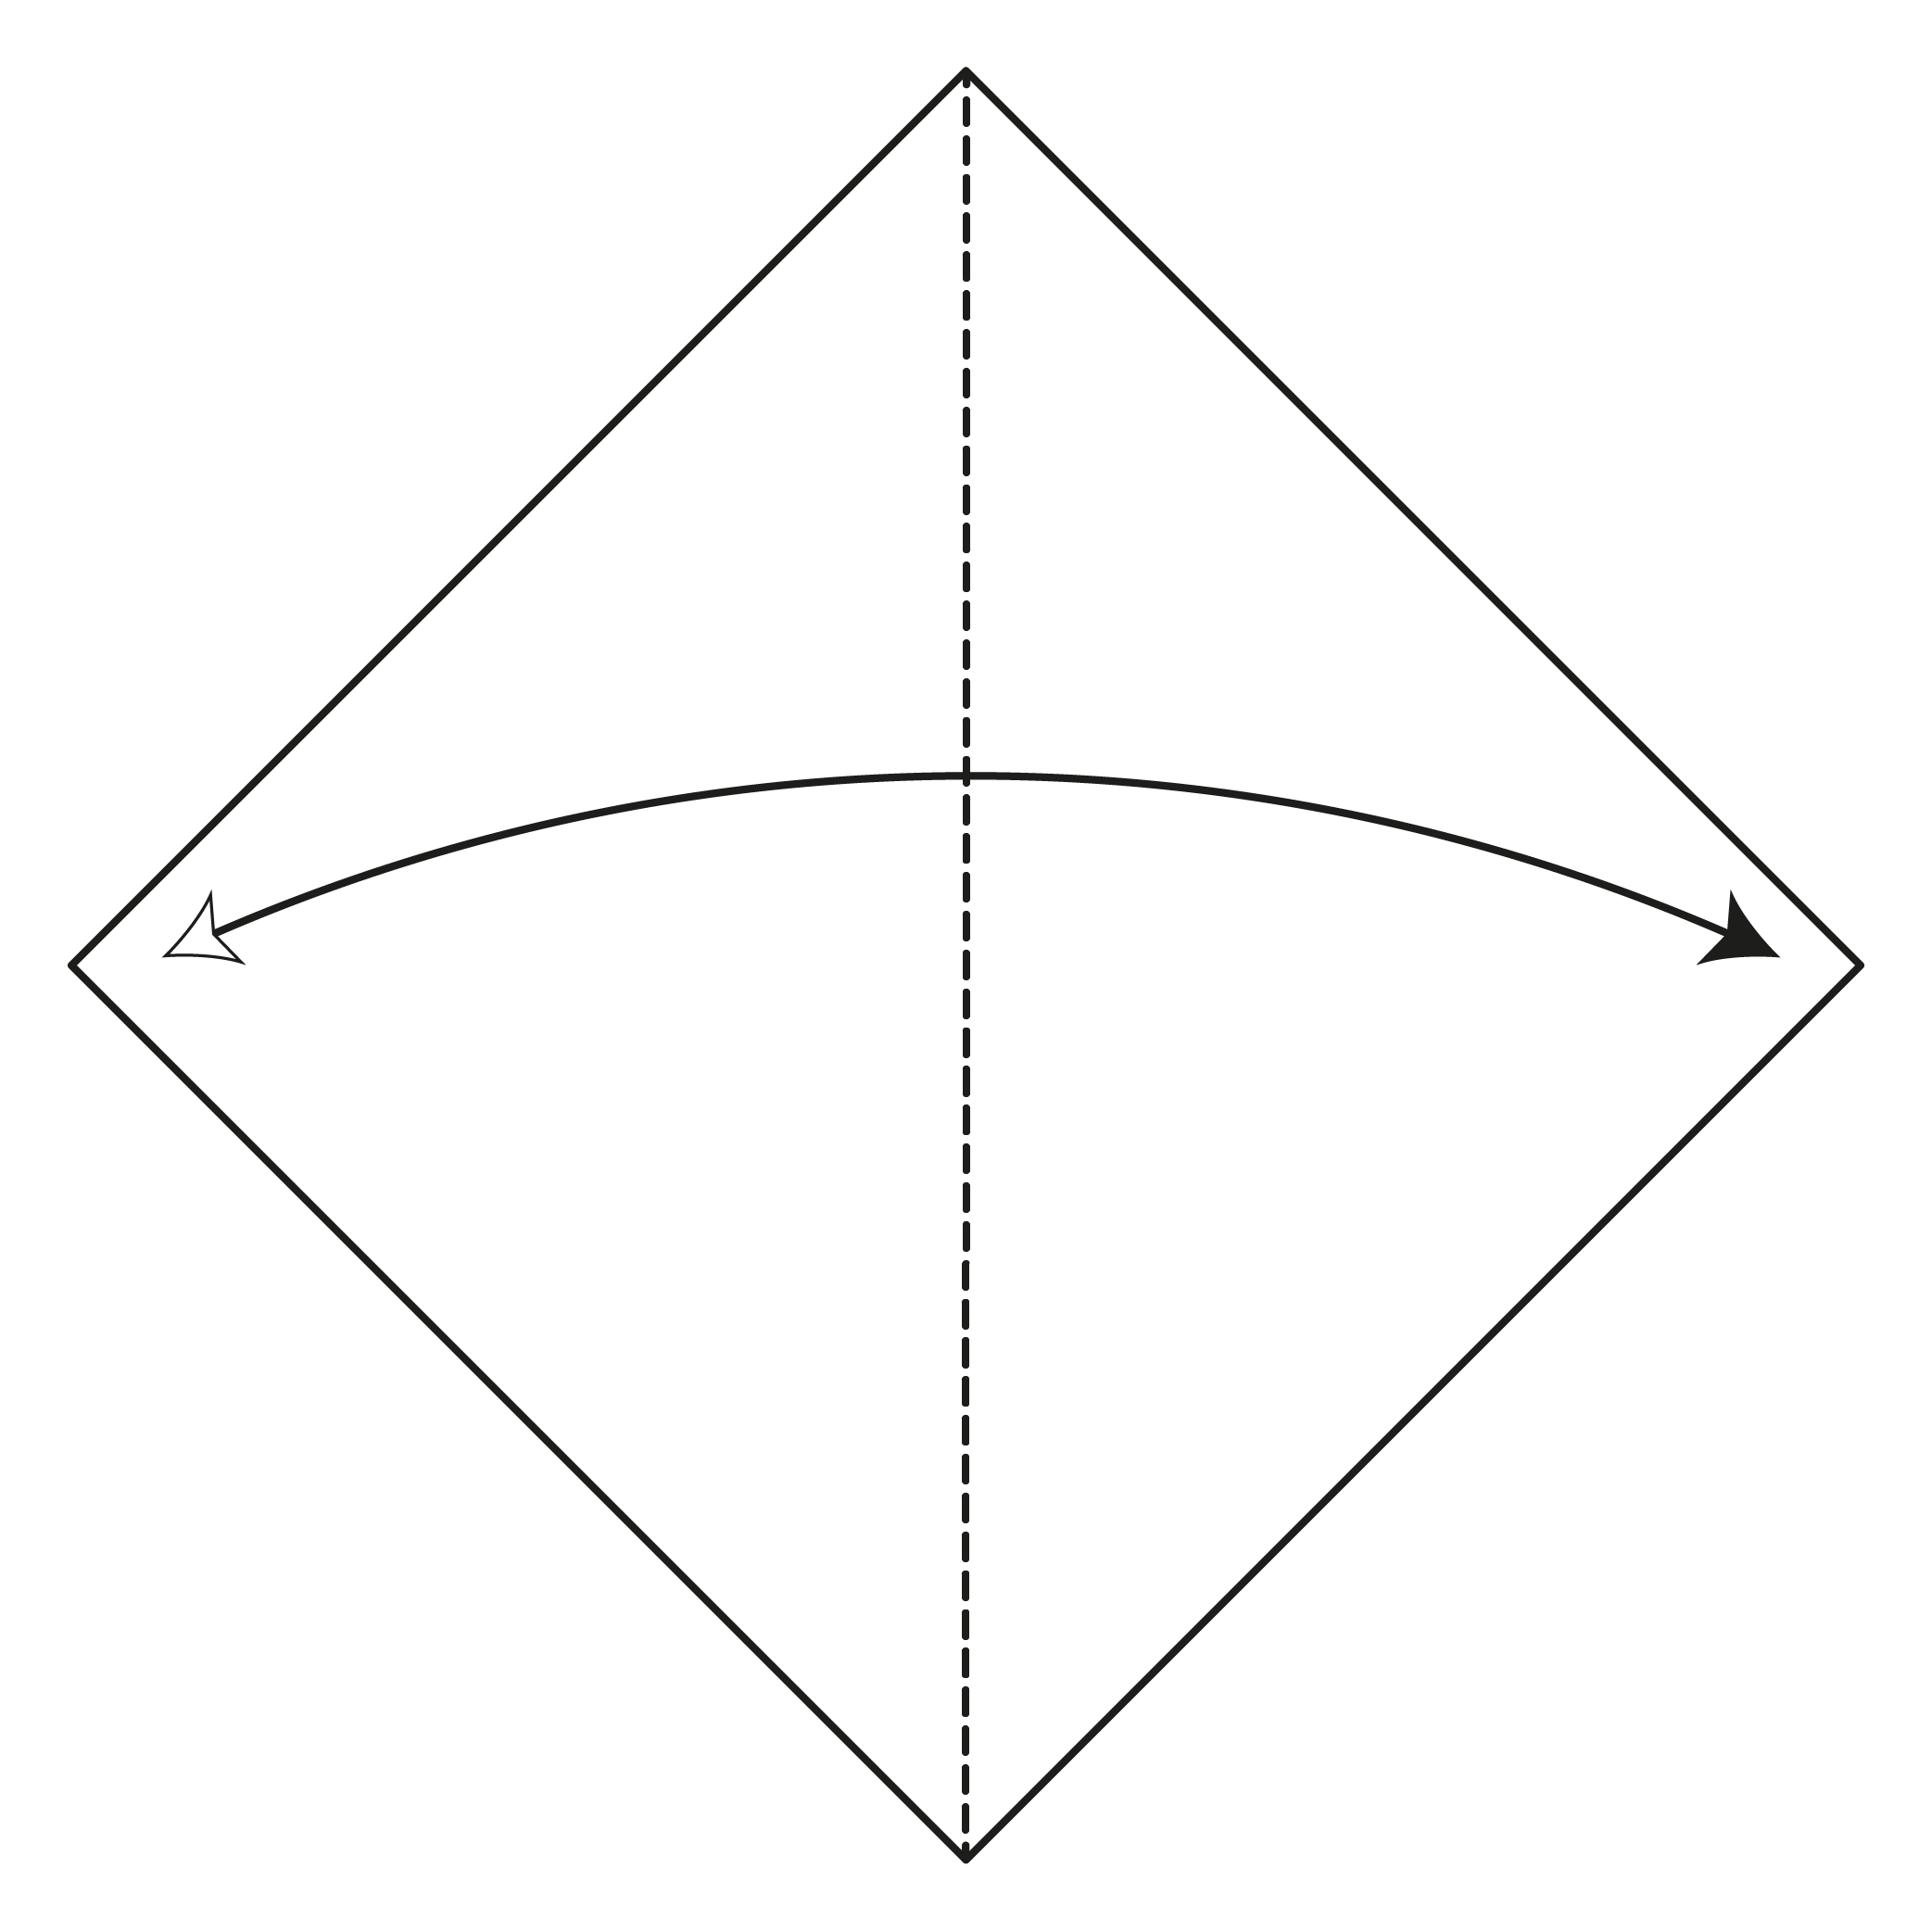
Start with the white side of the paper facing up in a diamond position. Fold in half vertically. Then, unfold.
Step 2


Turn the paper over.
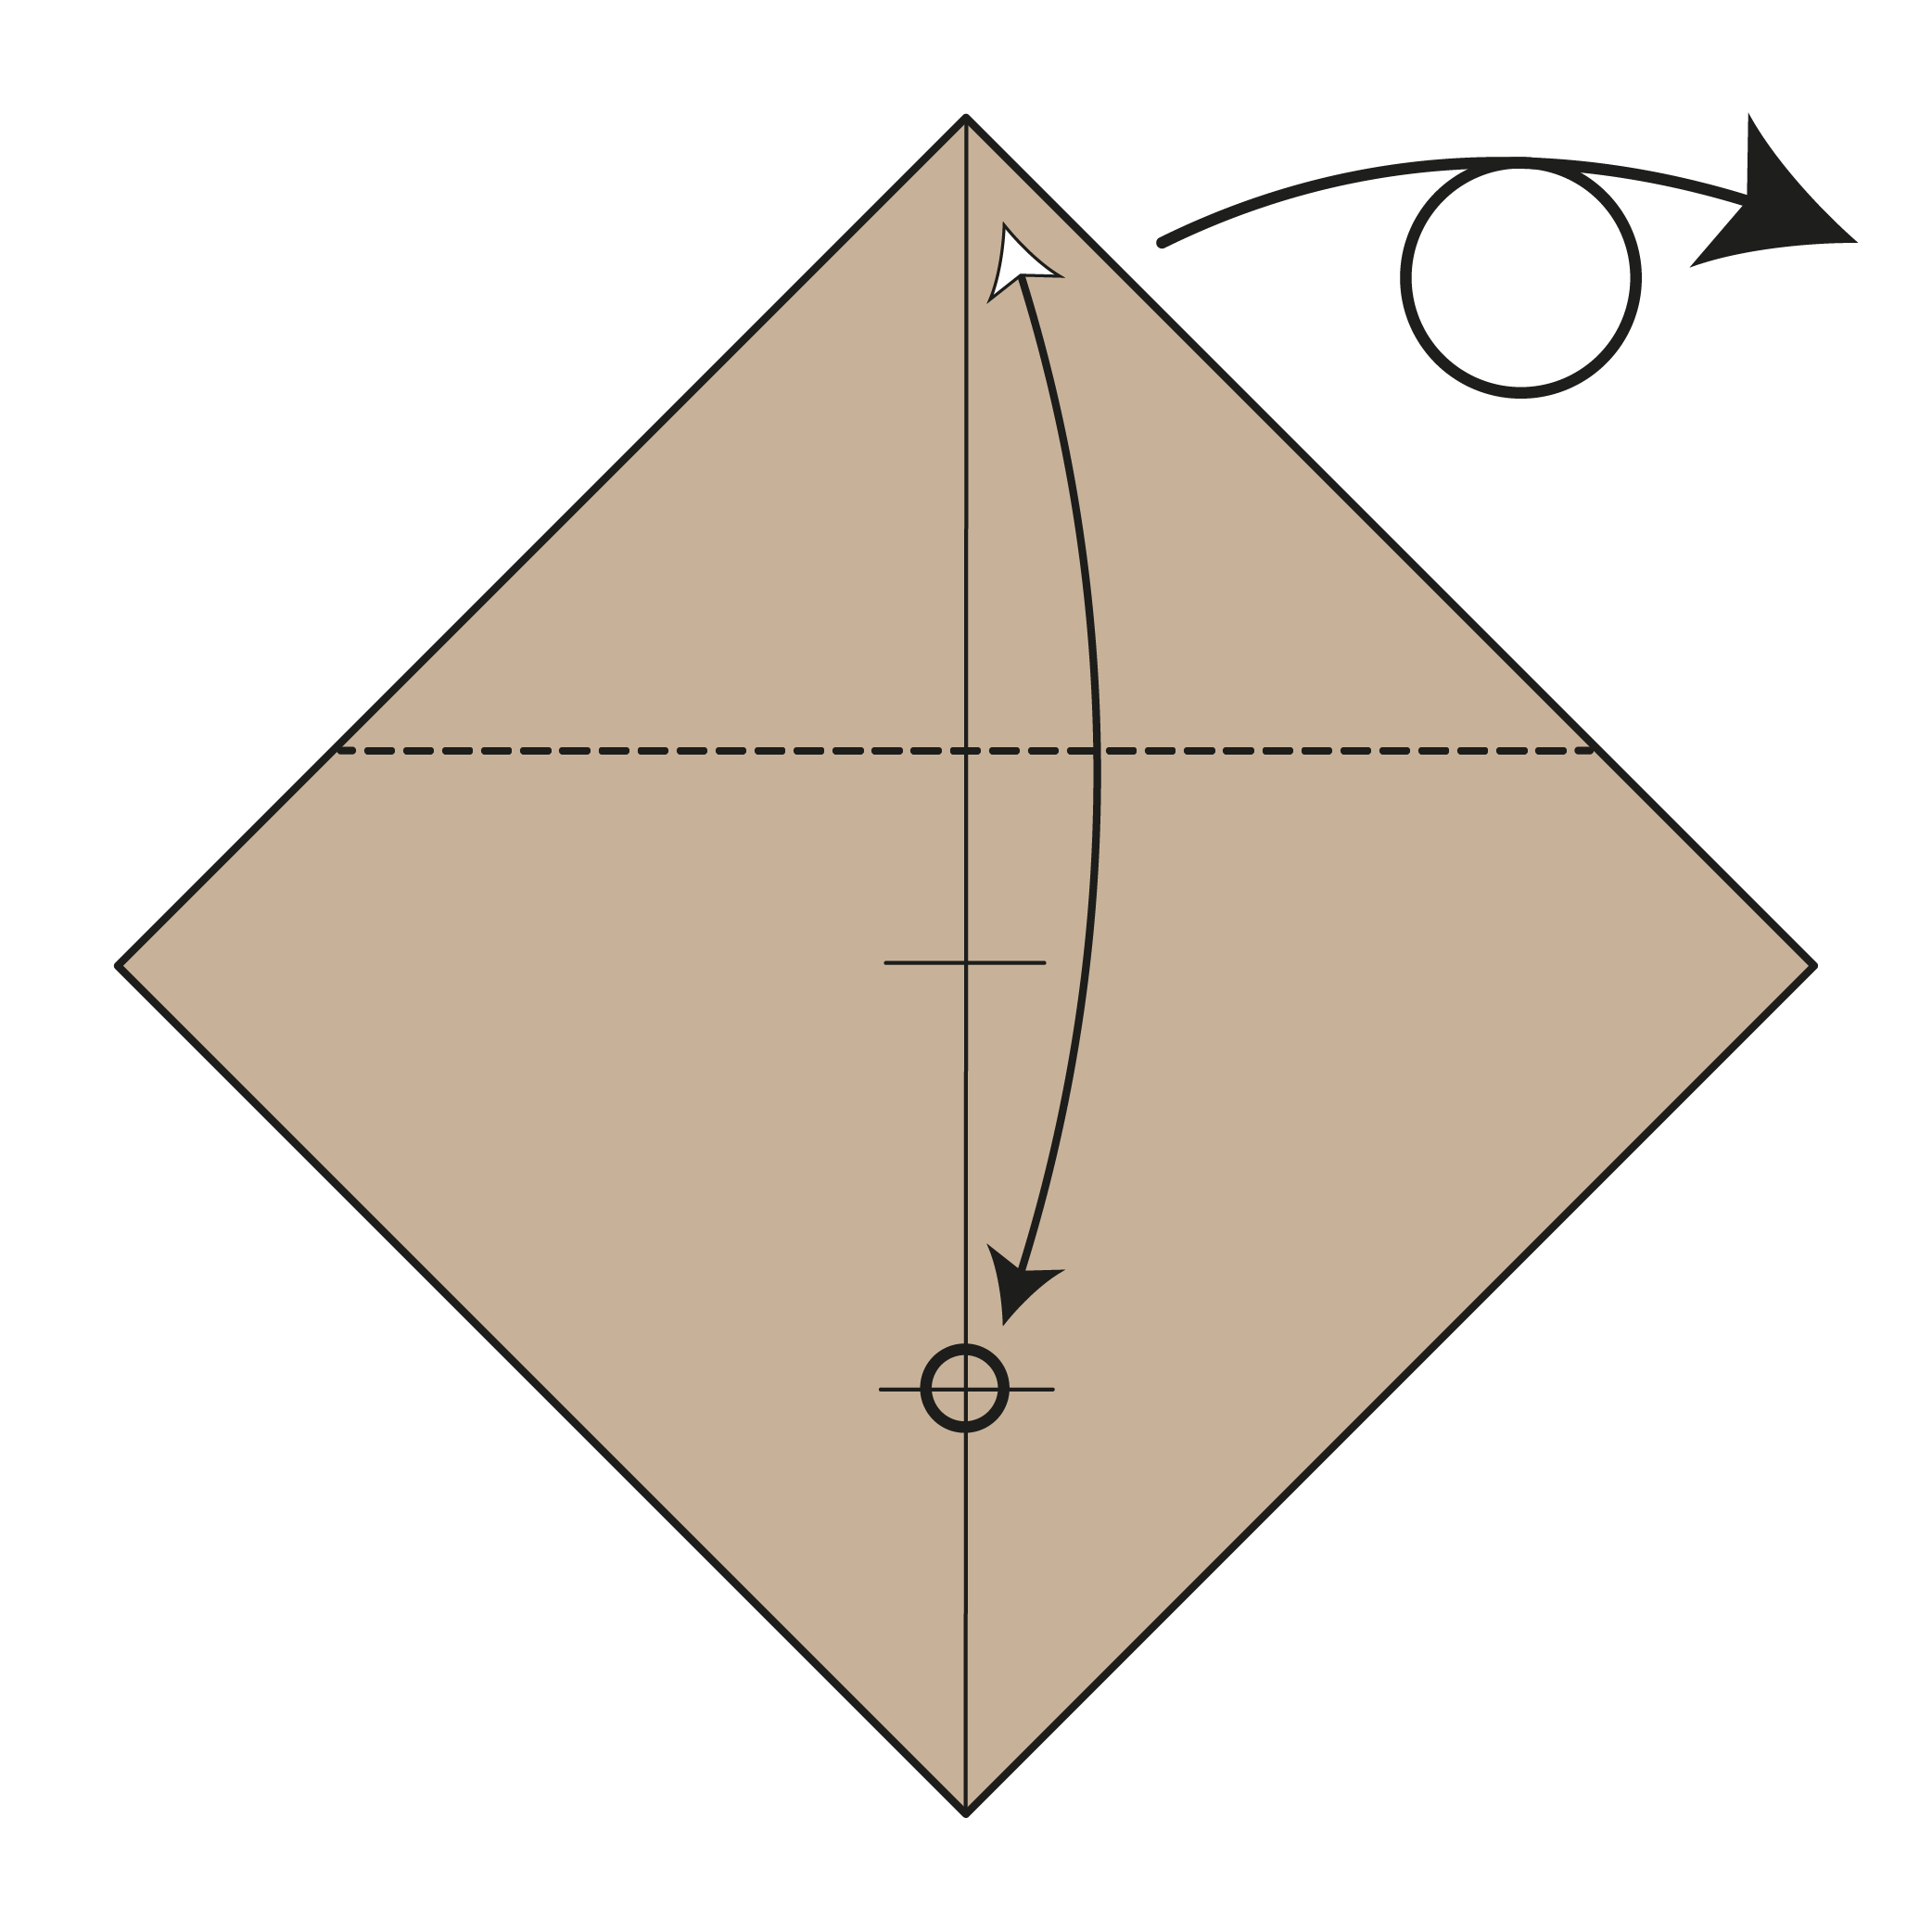
Step 3
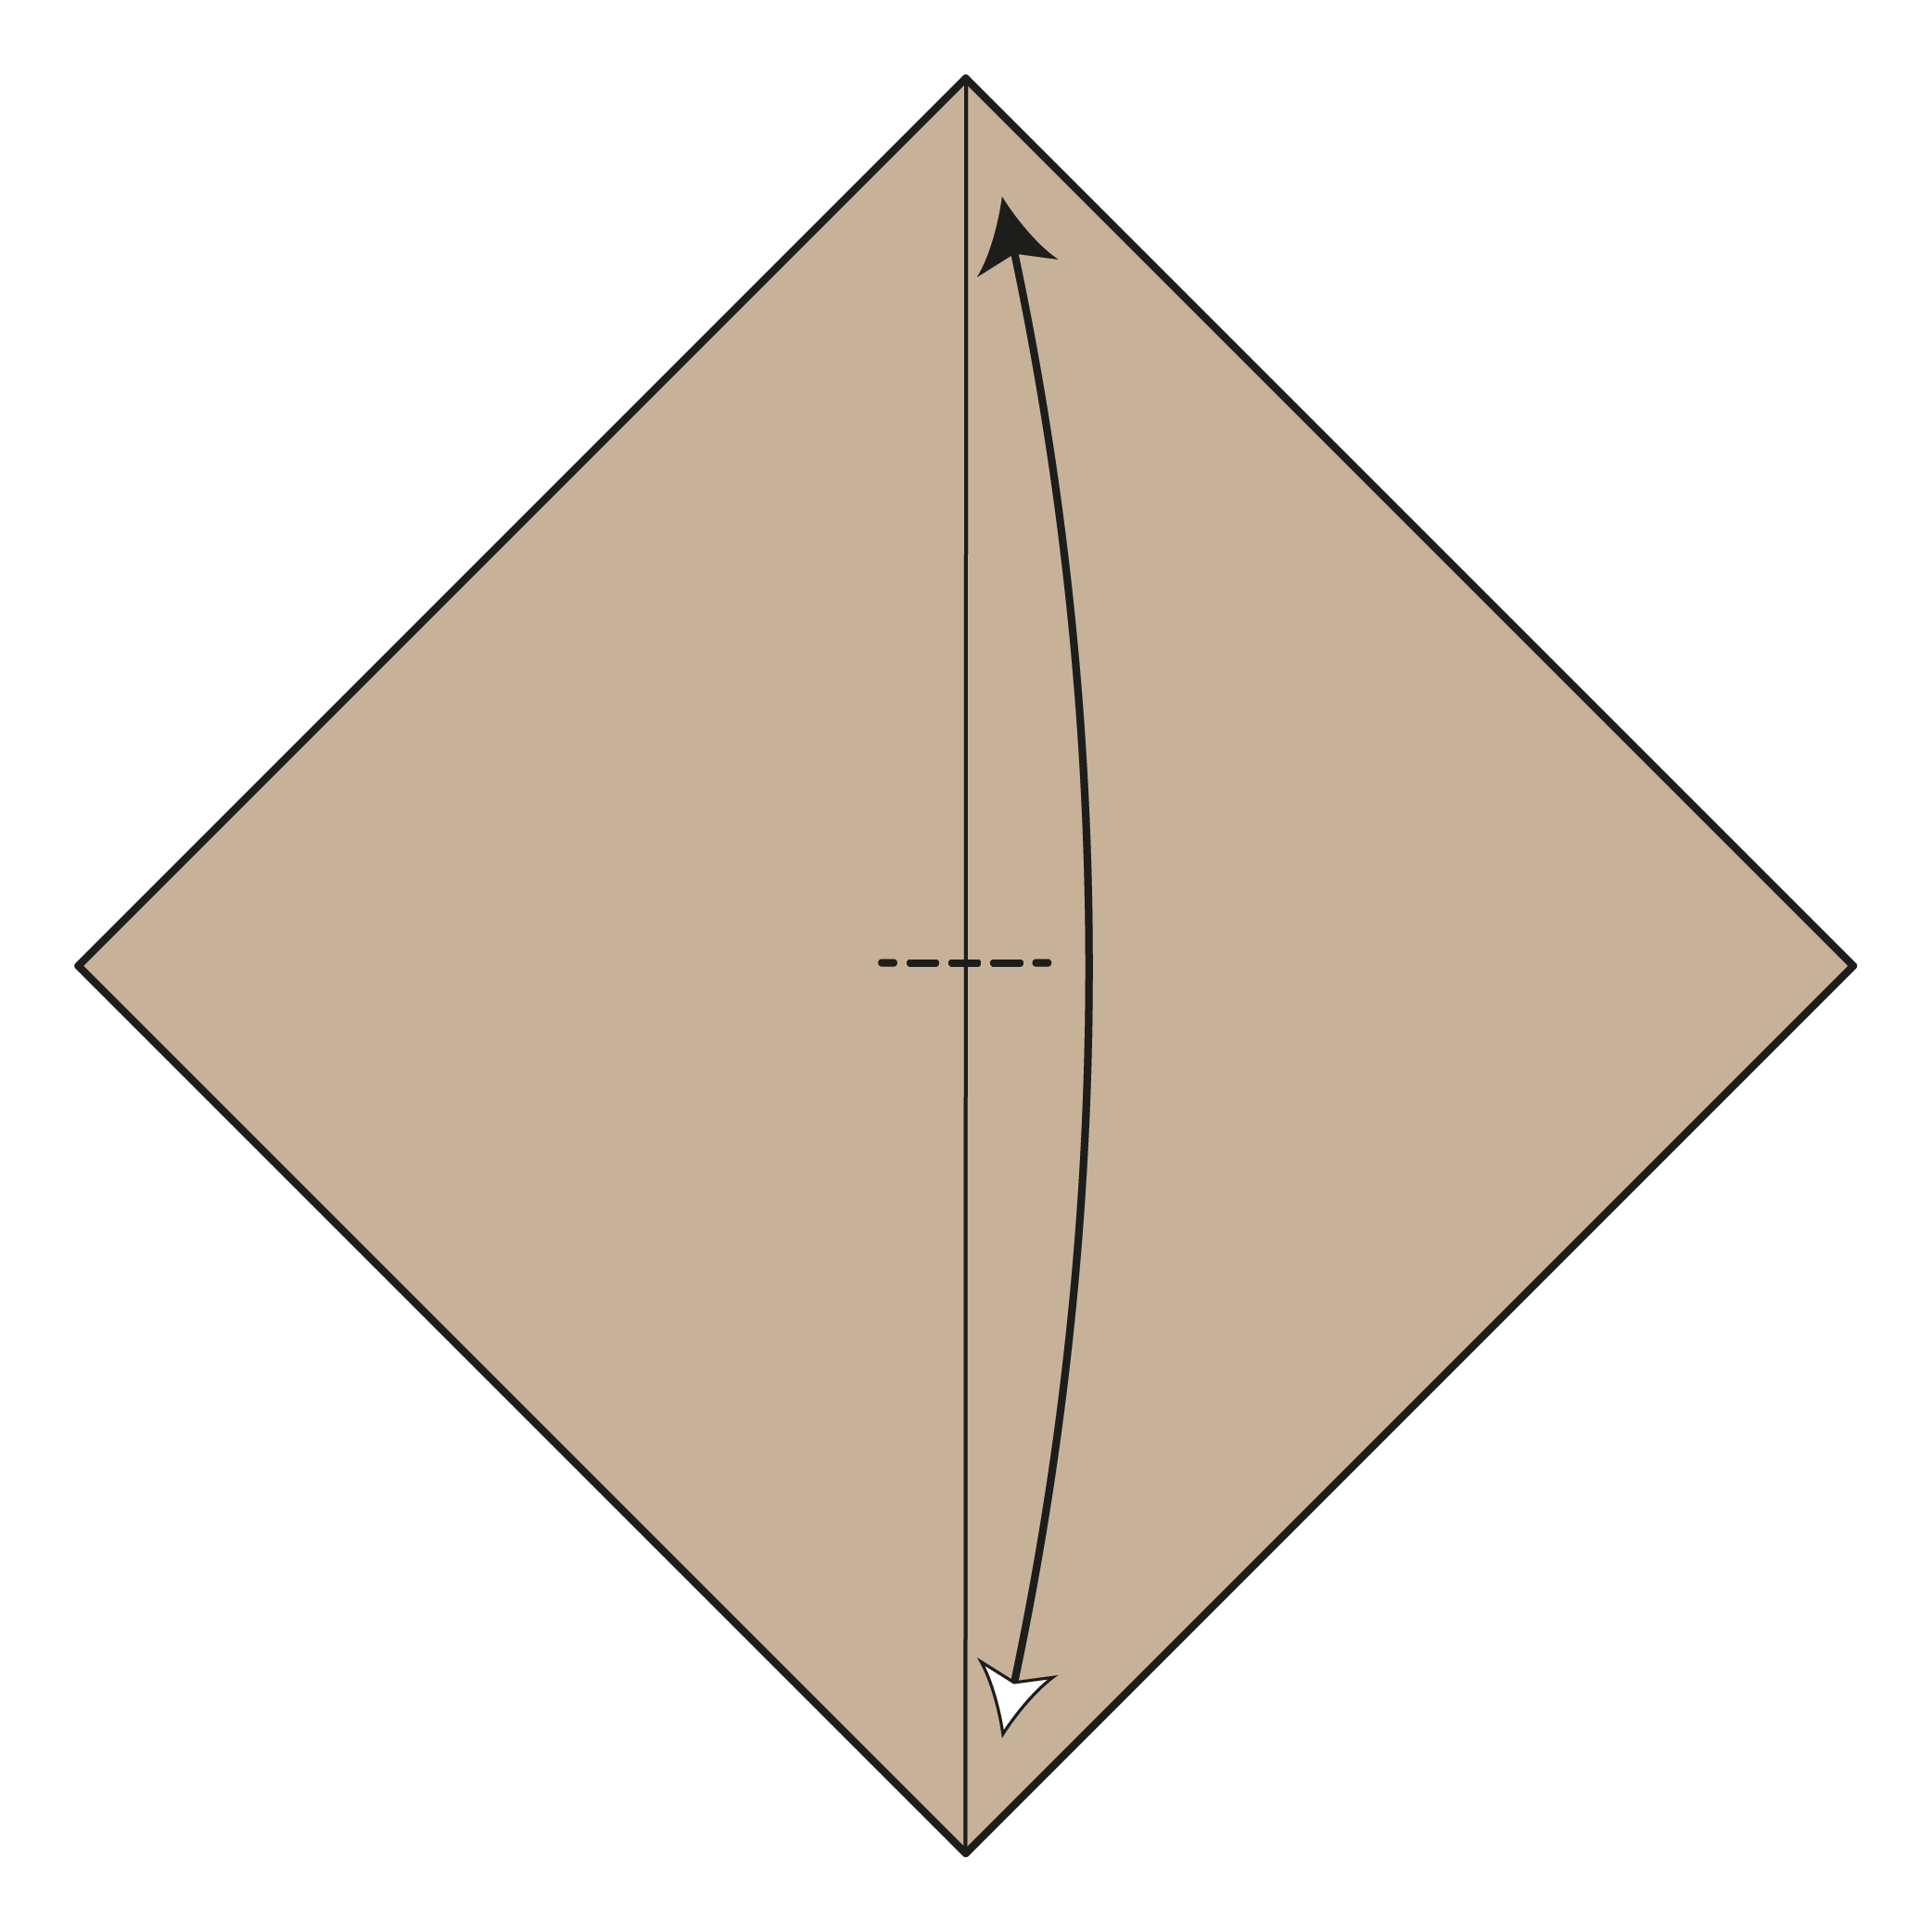
Fold the bottom corner up to the top corner and make a small pinch at the center. Then unfold.
Step 4
Fold the bottom corner up to the pinch mark you just made. Pinch again, then unfold.
Step 5
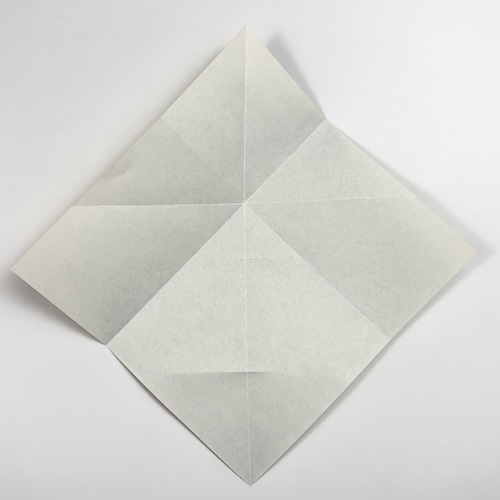
Fold the top corner down to the pinch mark. Then, turn the paper over.
Step 6
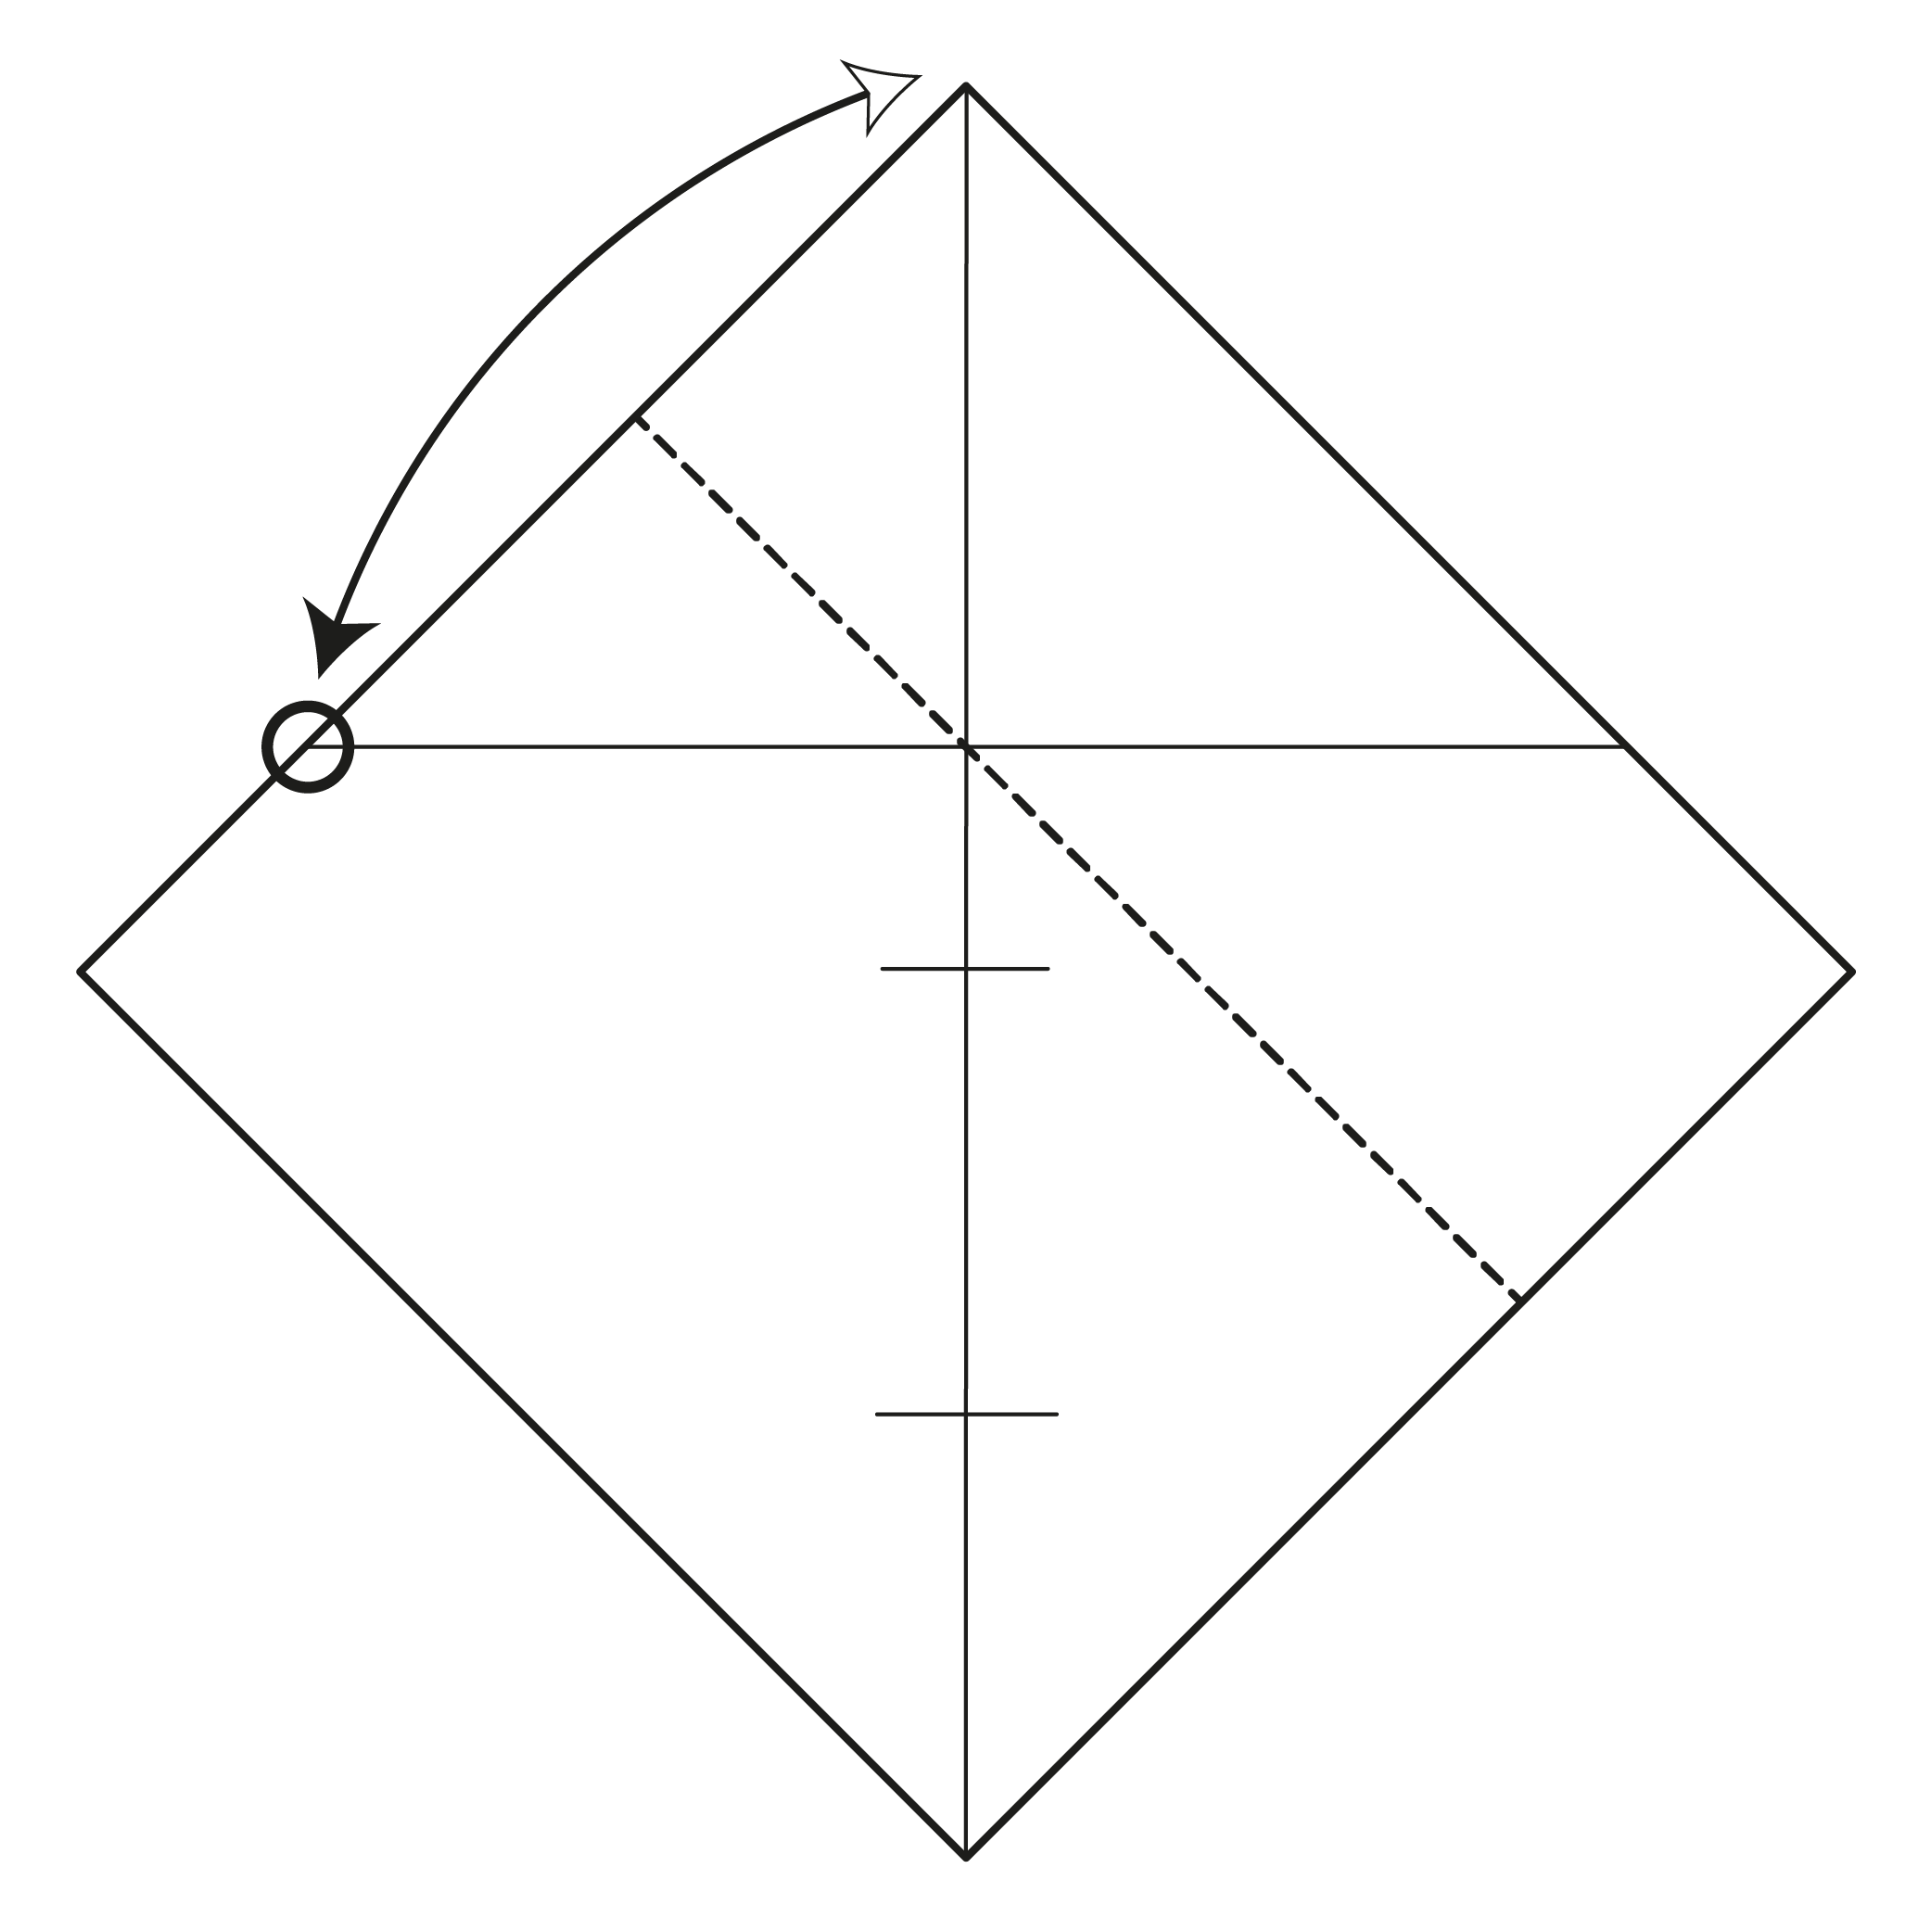
Fold the top corner to the circled point on the left, then unfold.
Step 7
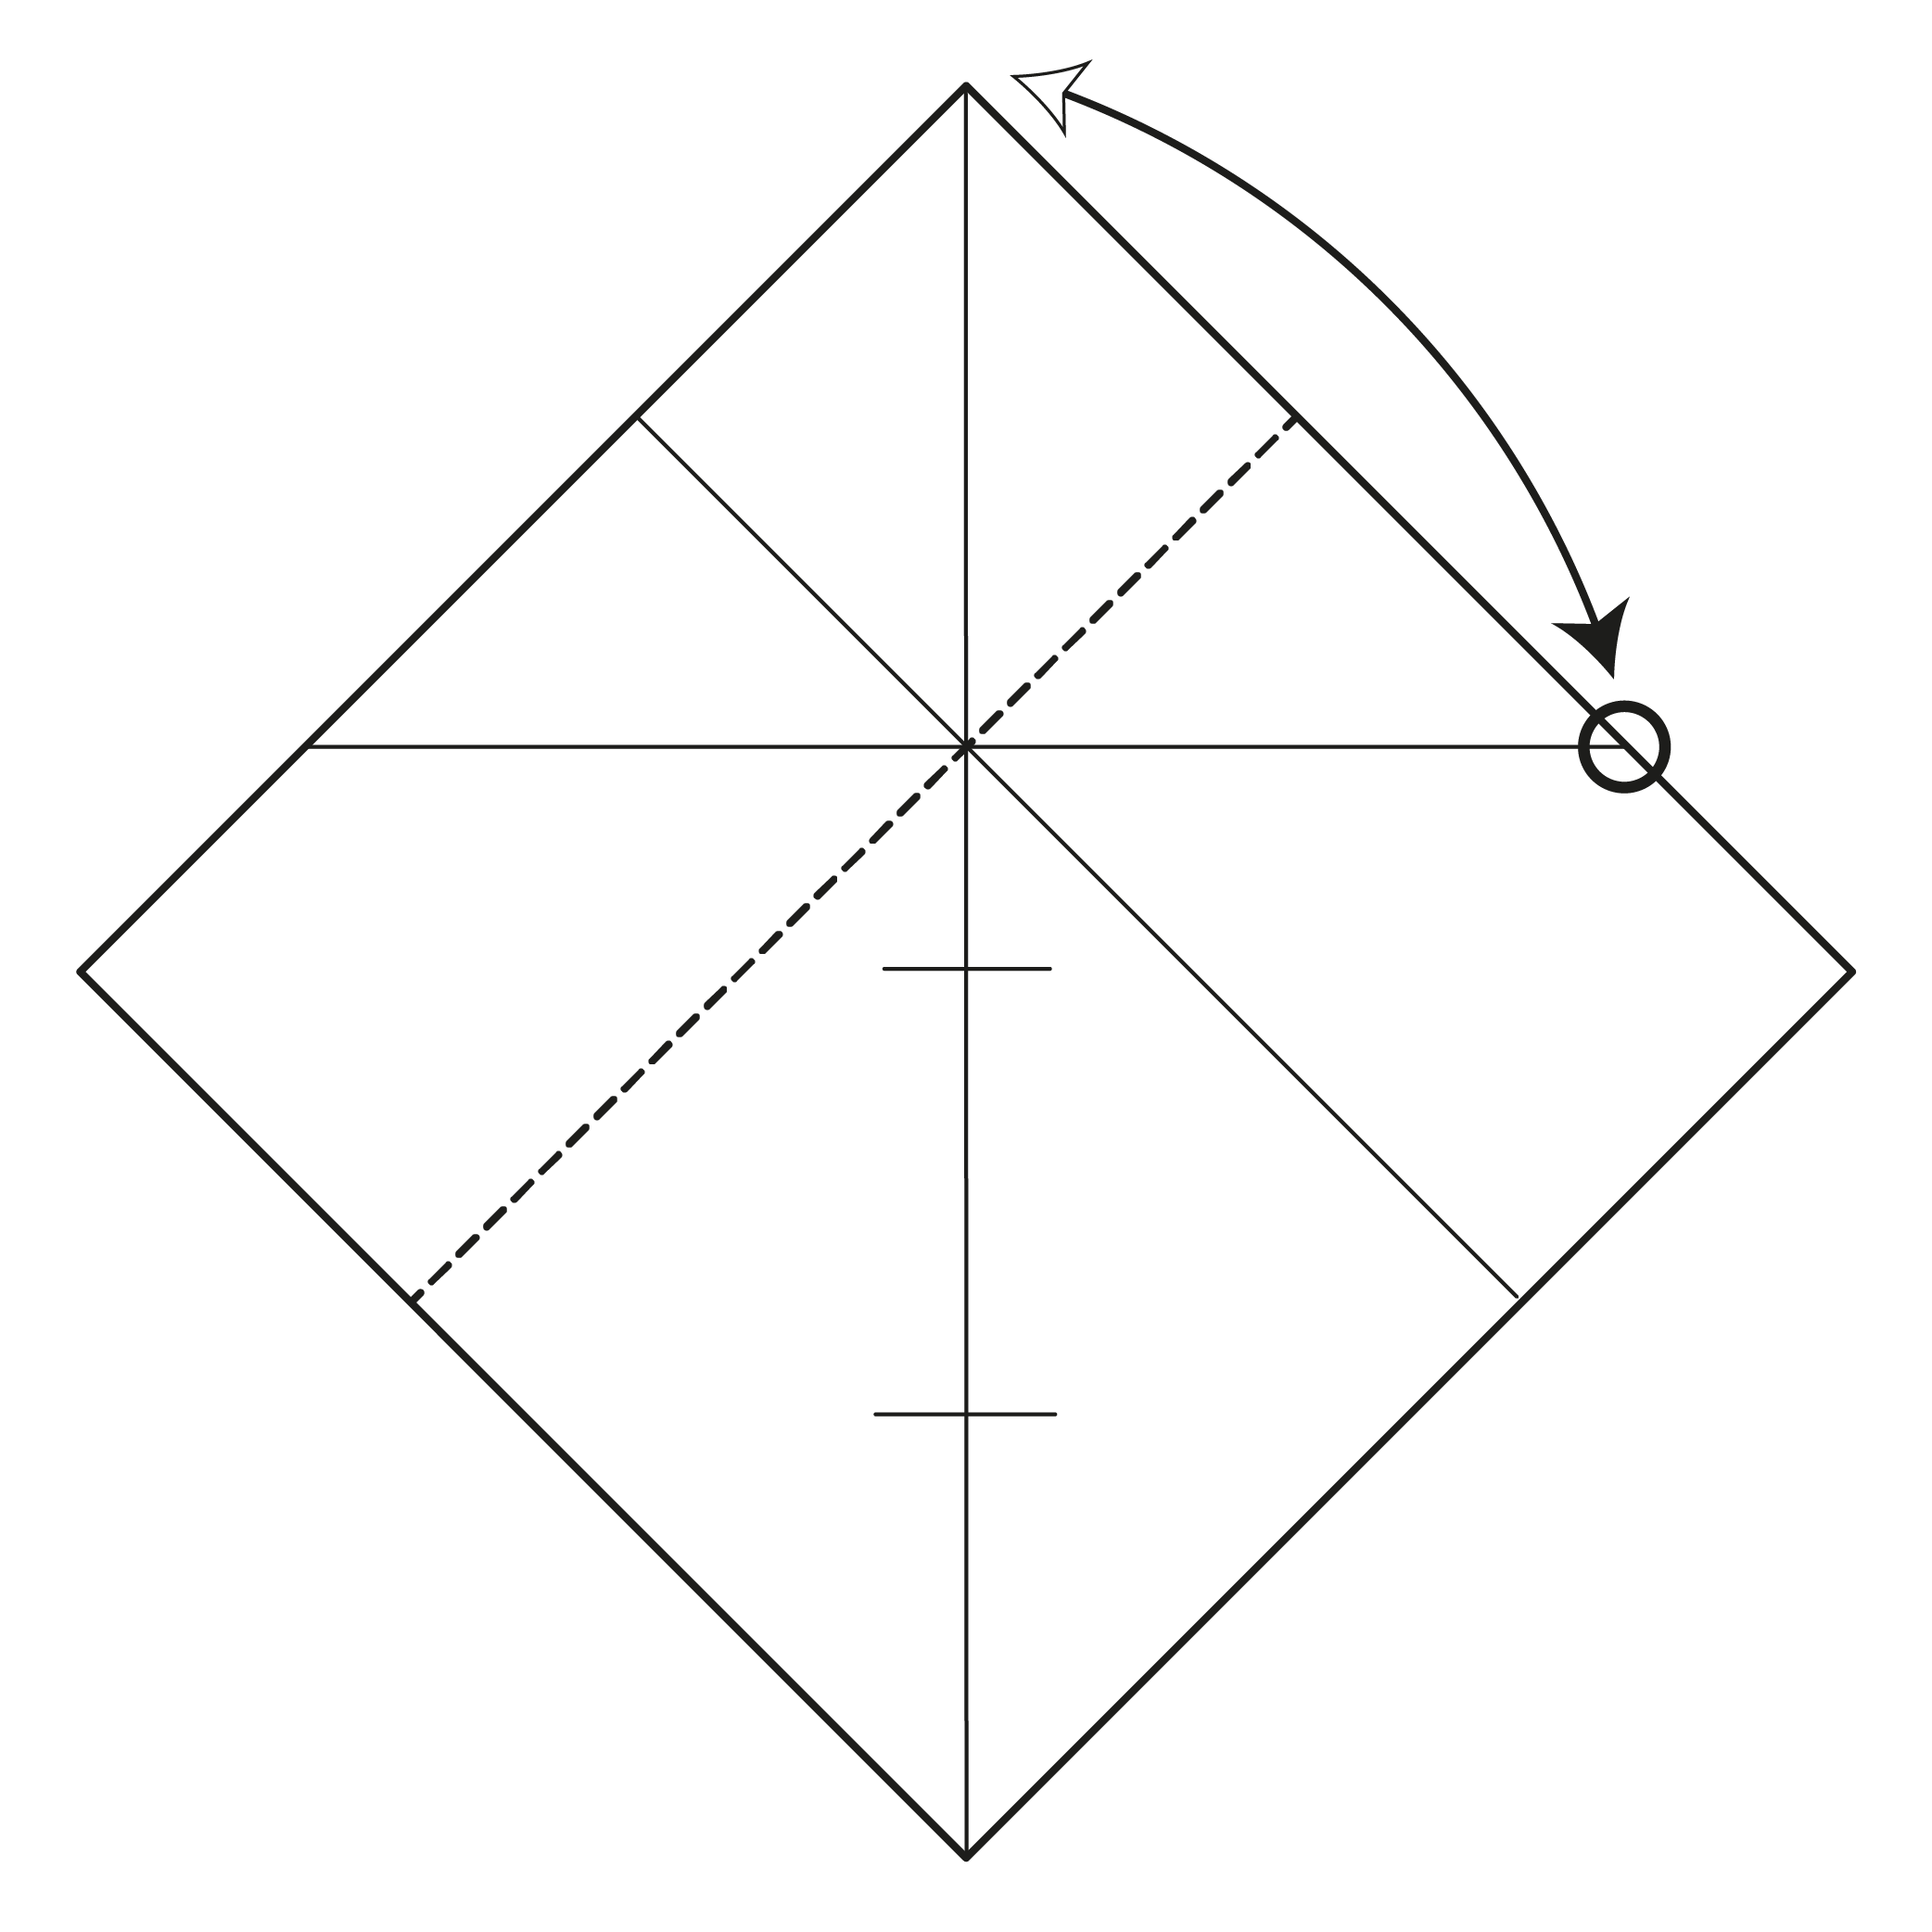
Repeat on the right side.
Step 8

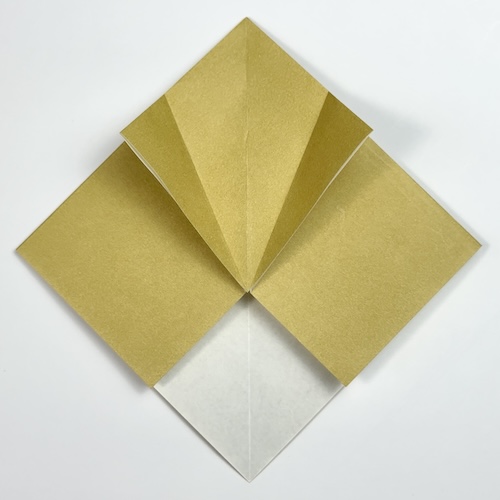
Collapse the paper along the creases made in Steps 4 to 6.
Step 9

Focus on the top square area. Fold and unfold the bottom left and right edges to the centerline.
Step 10
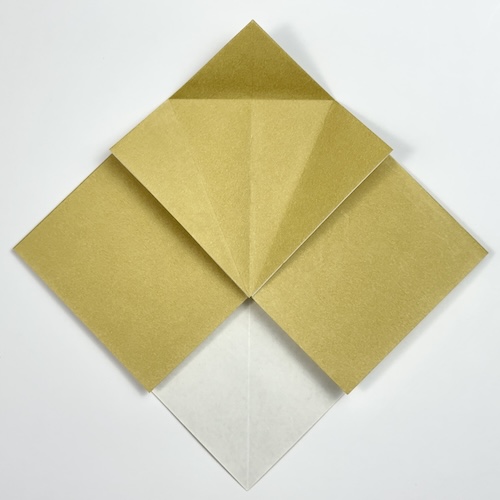
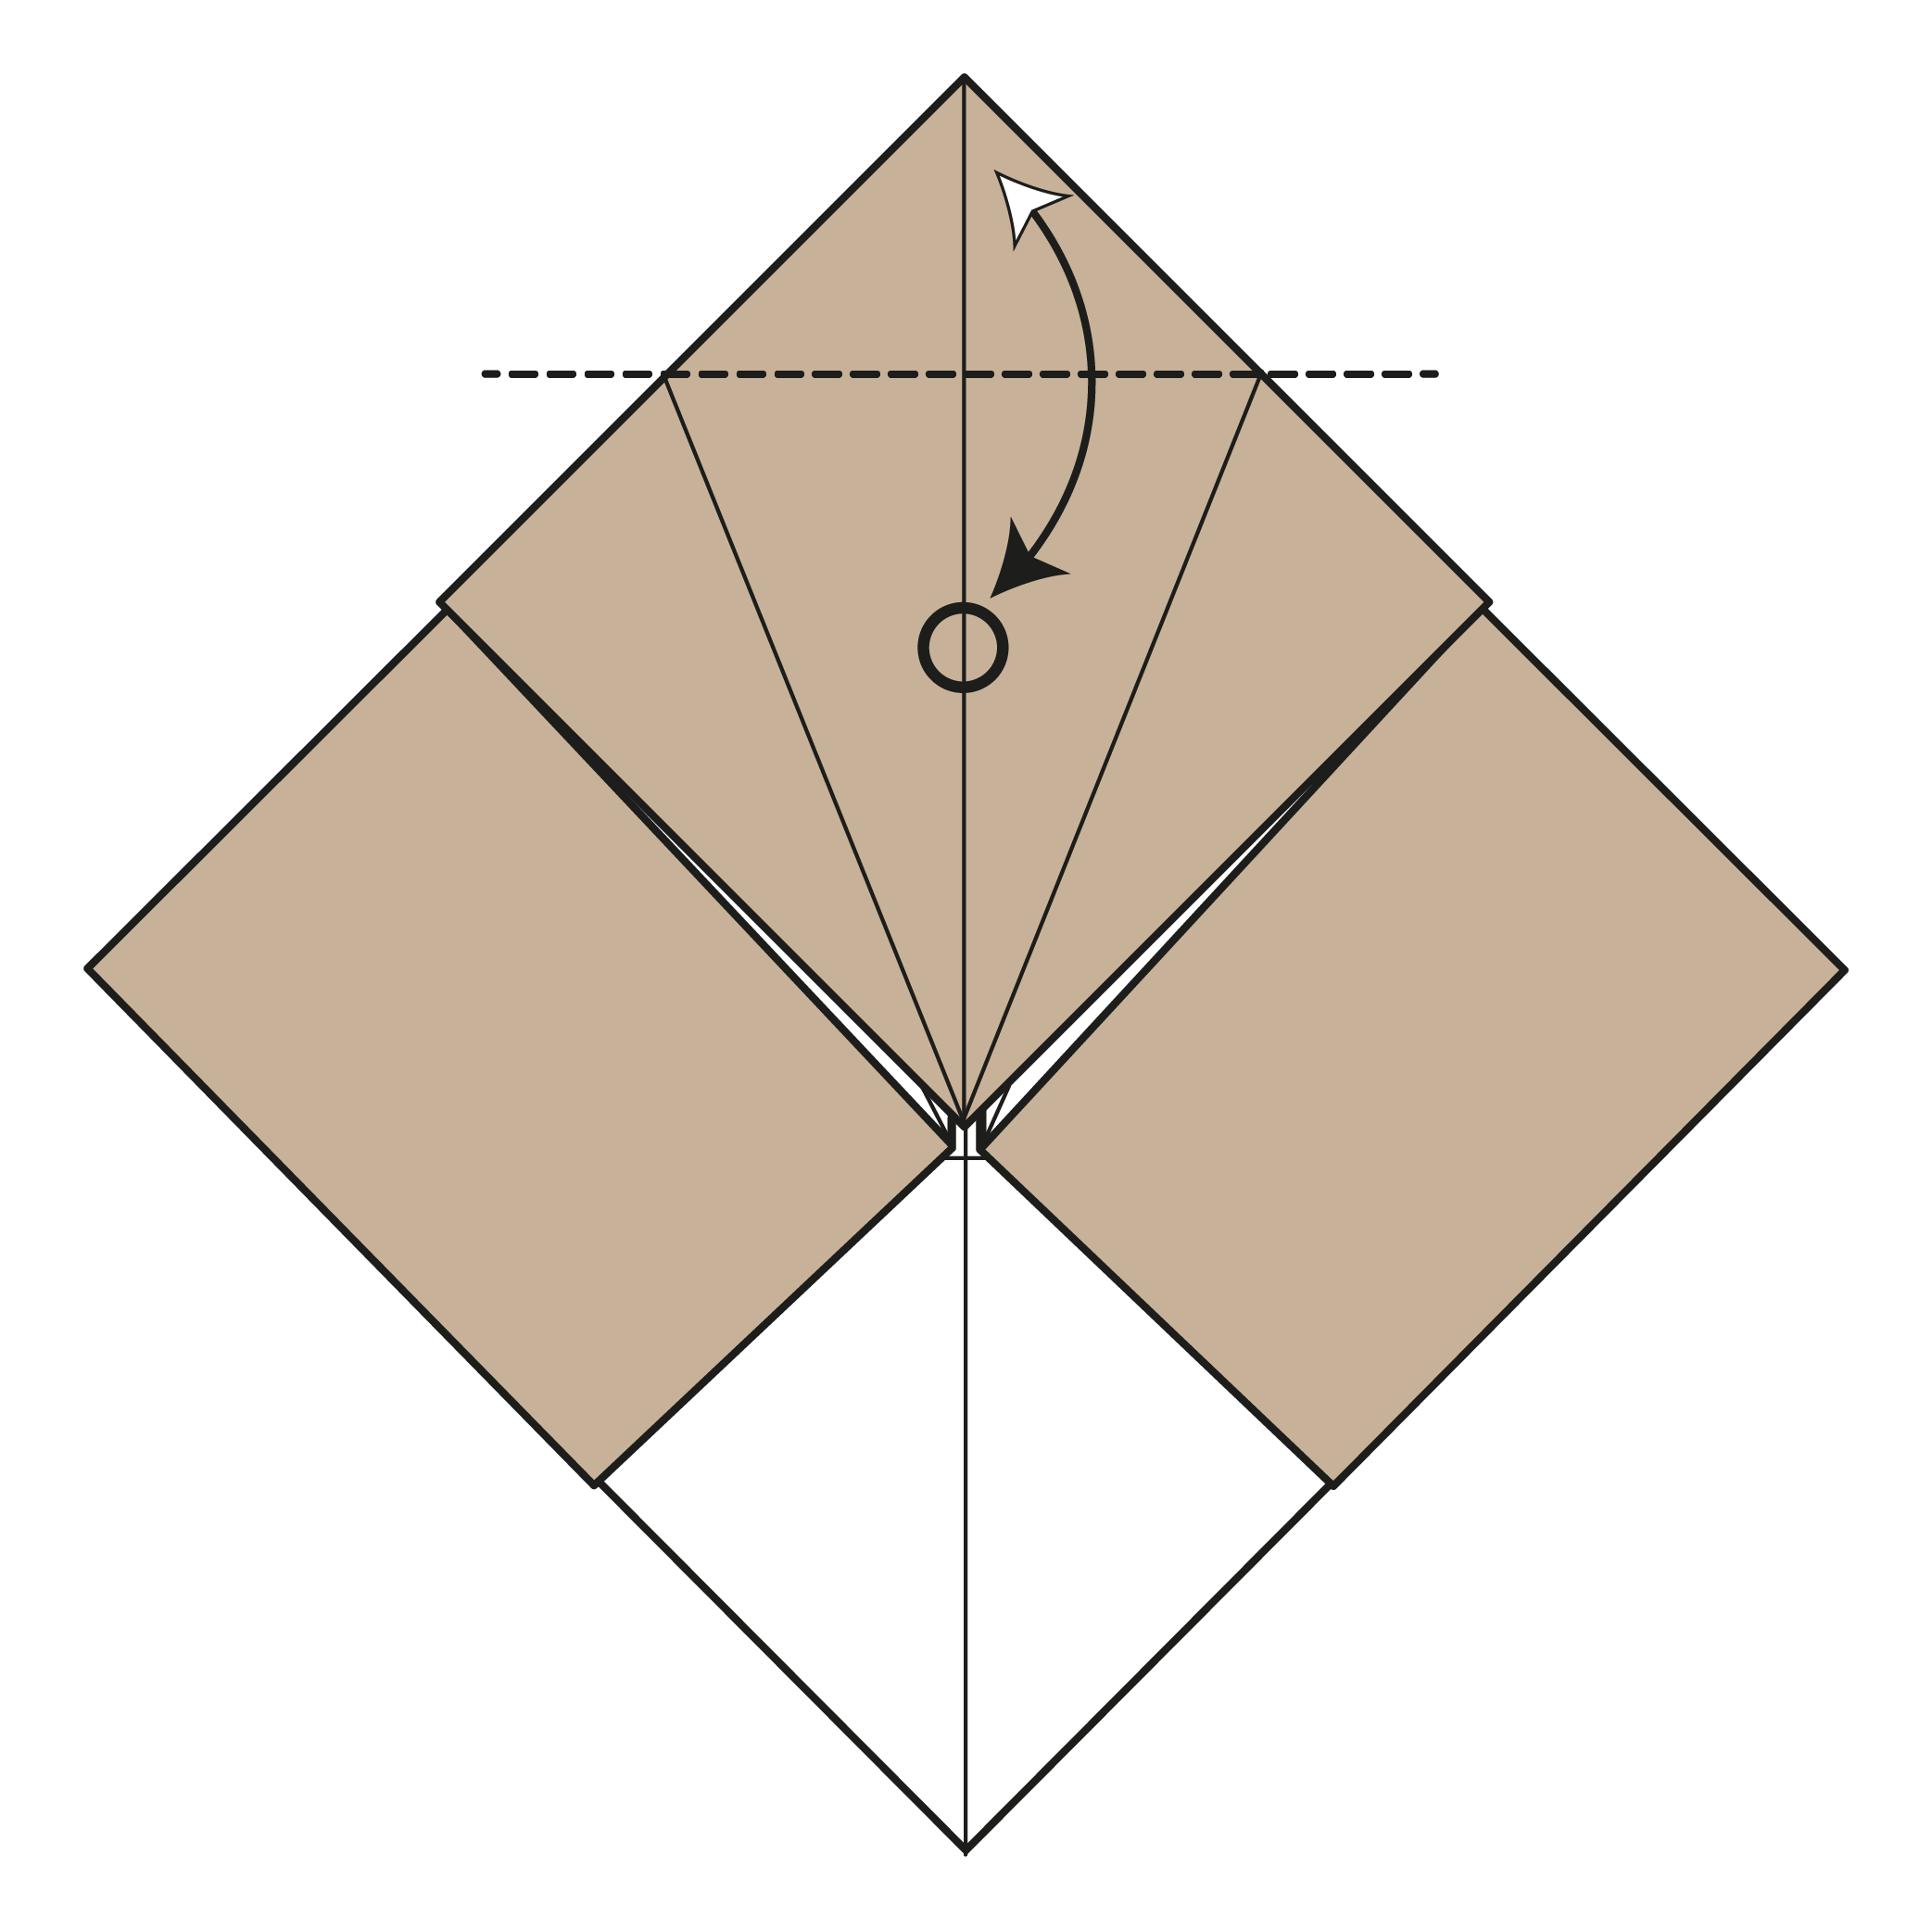
Using the creases you just made as a guide, fold the top corner down to meet the circled point.
Step 11

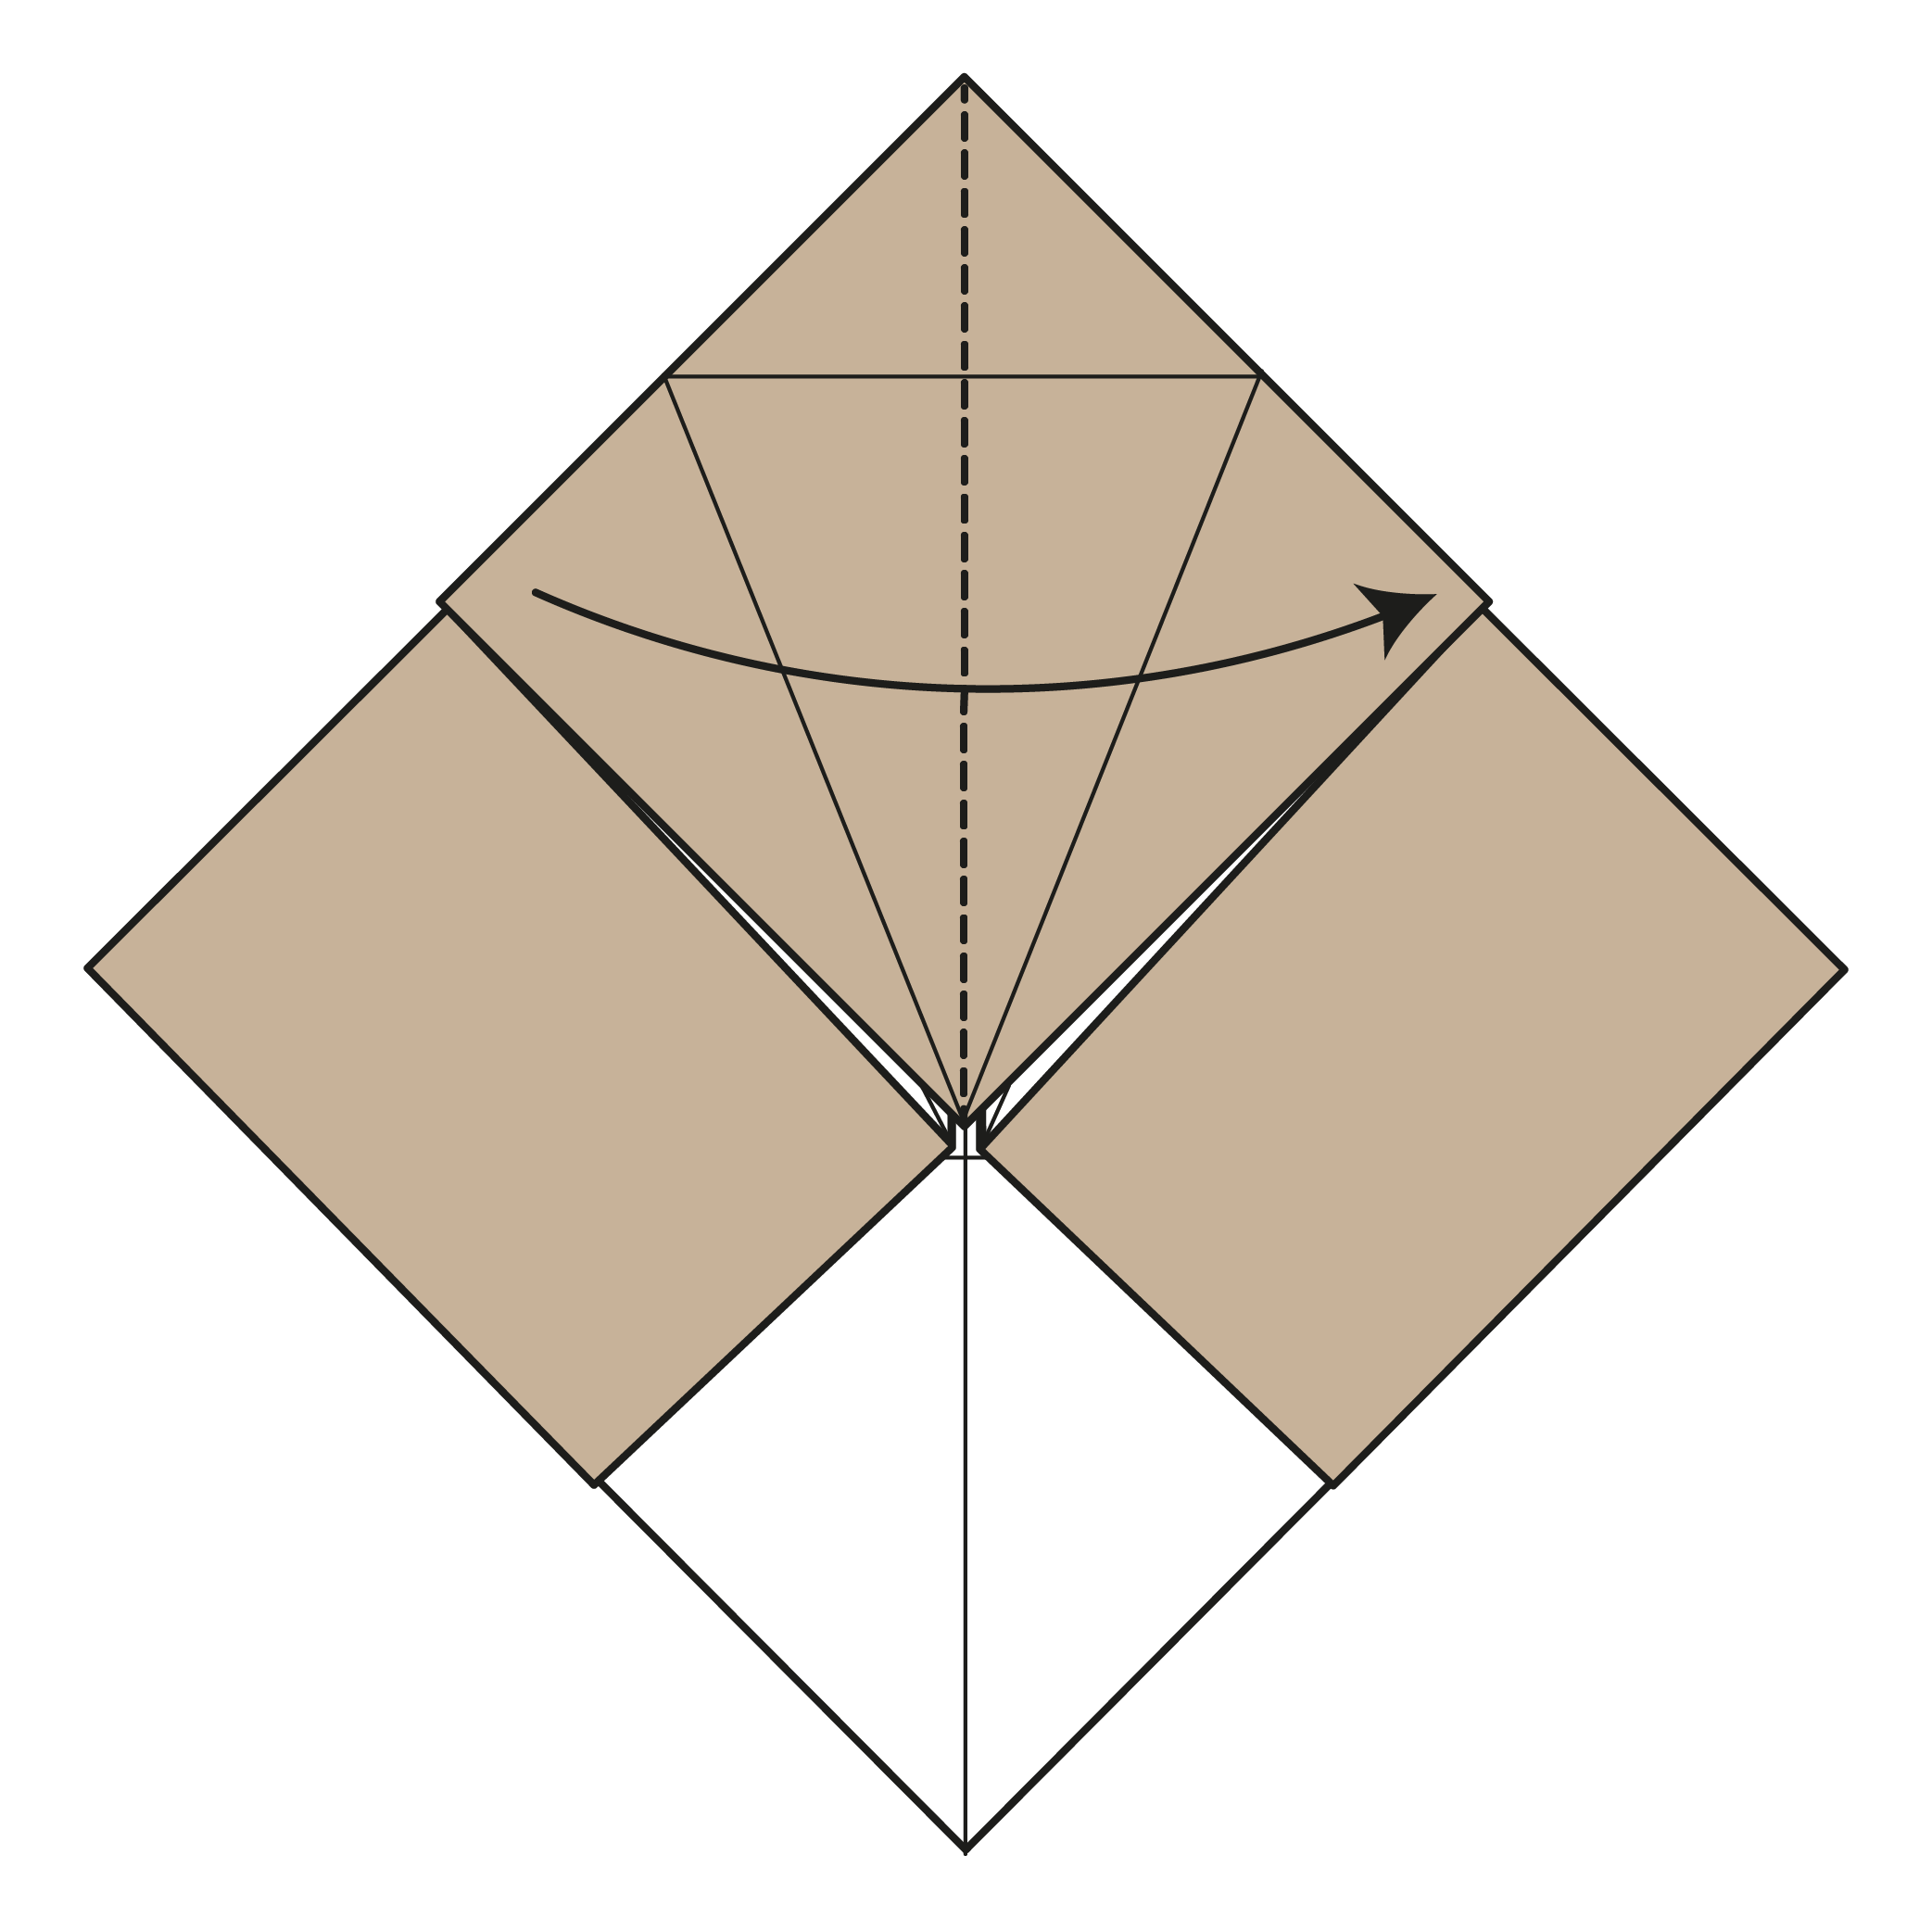
Flip the top left flap over to the right.
Step 12
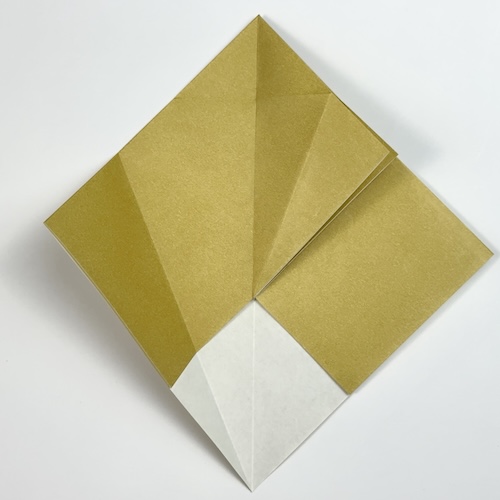
Fold the bottom left edge in to meet the centerline.
Step 13
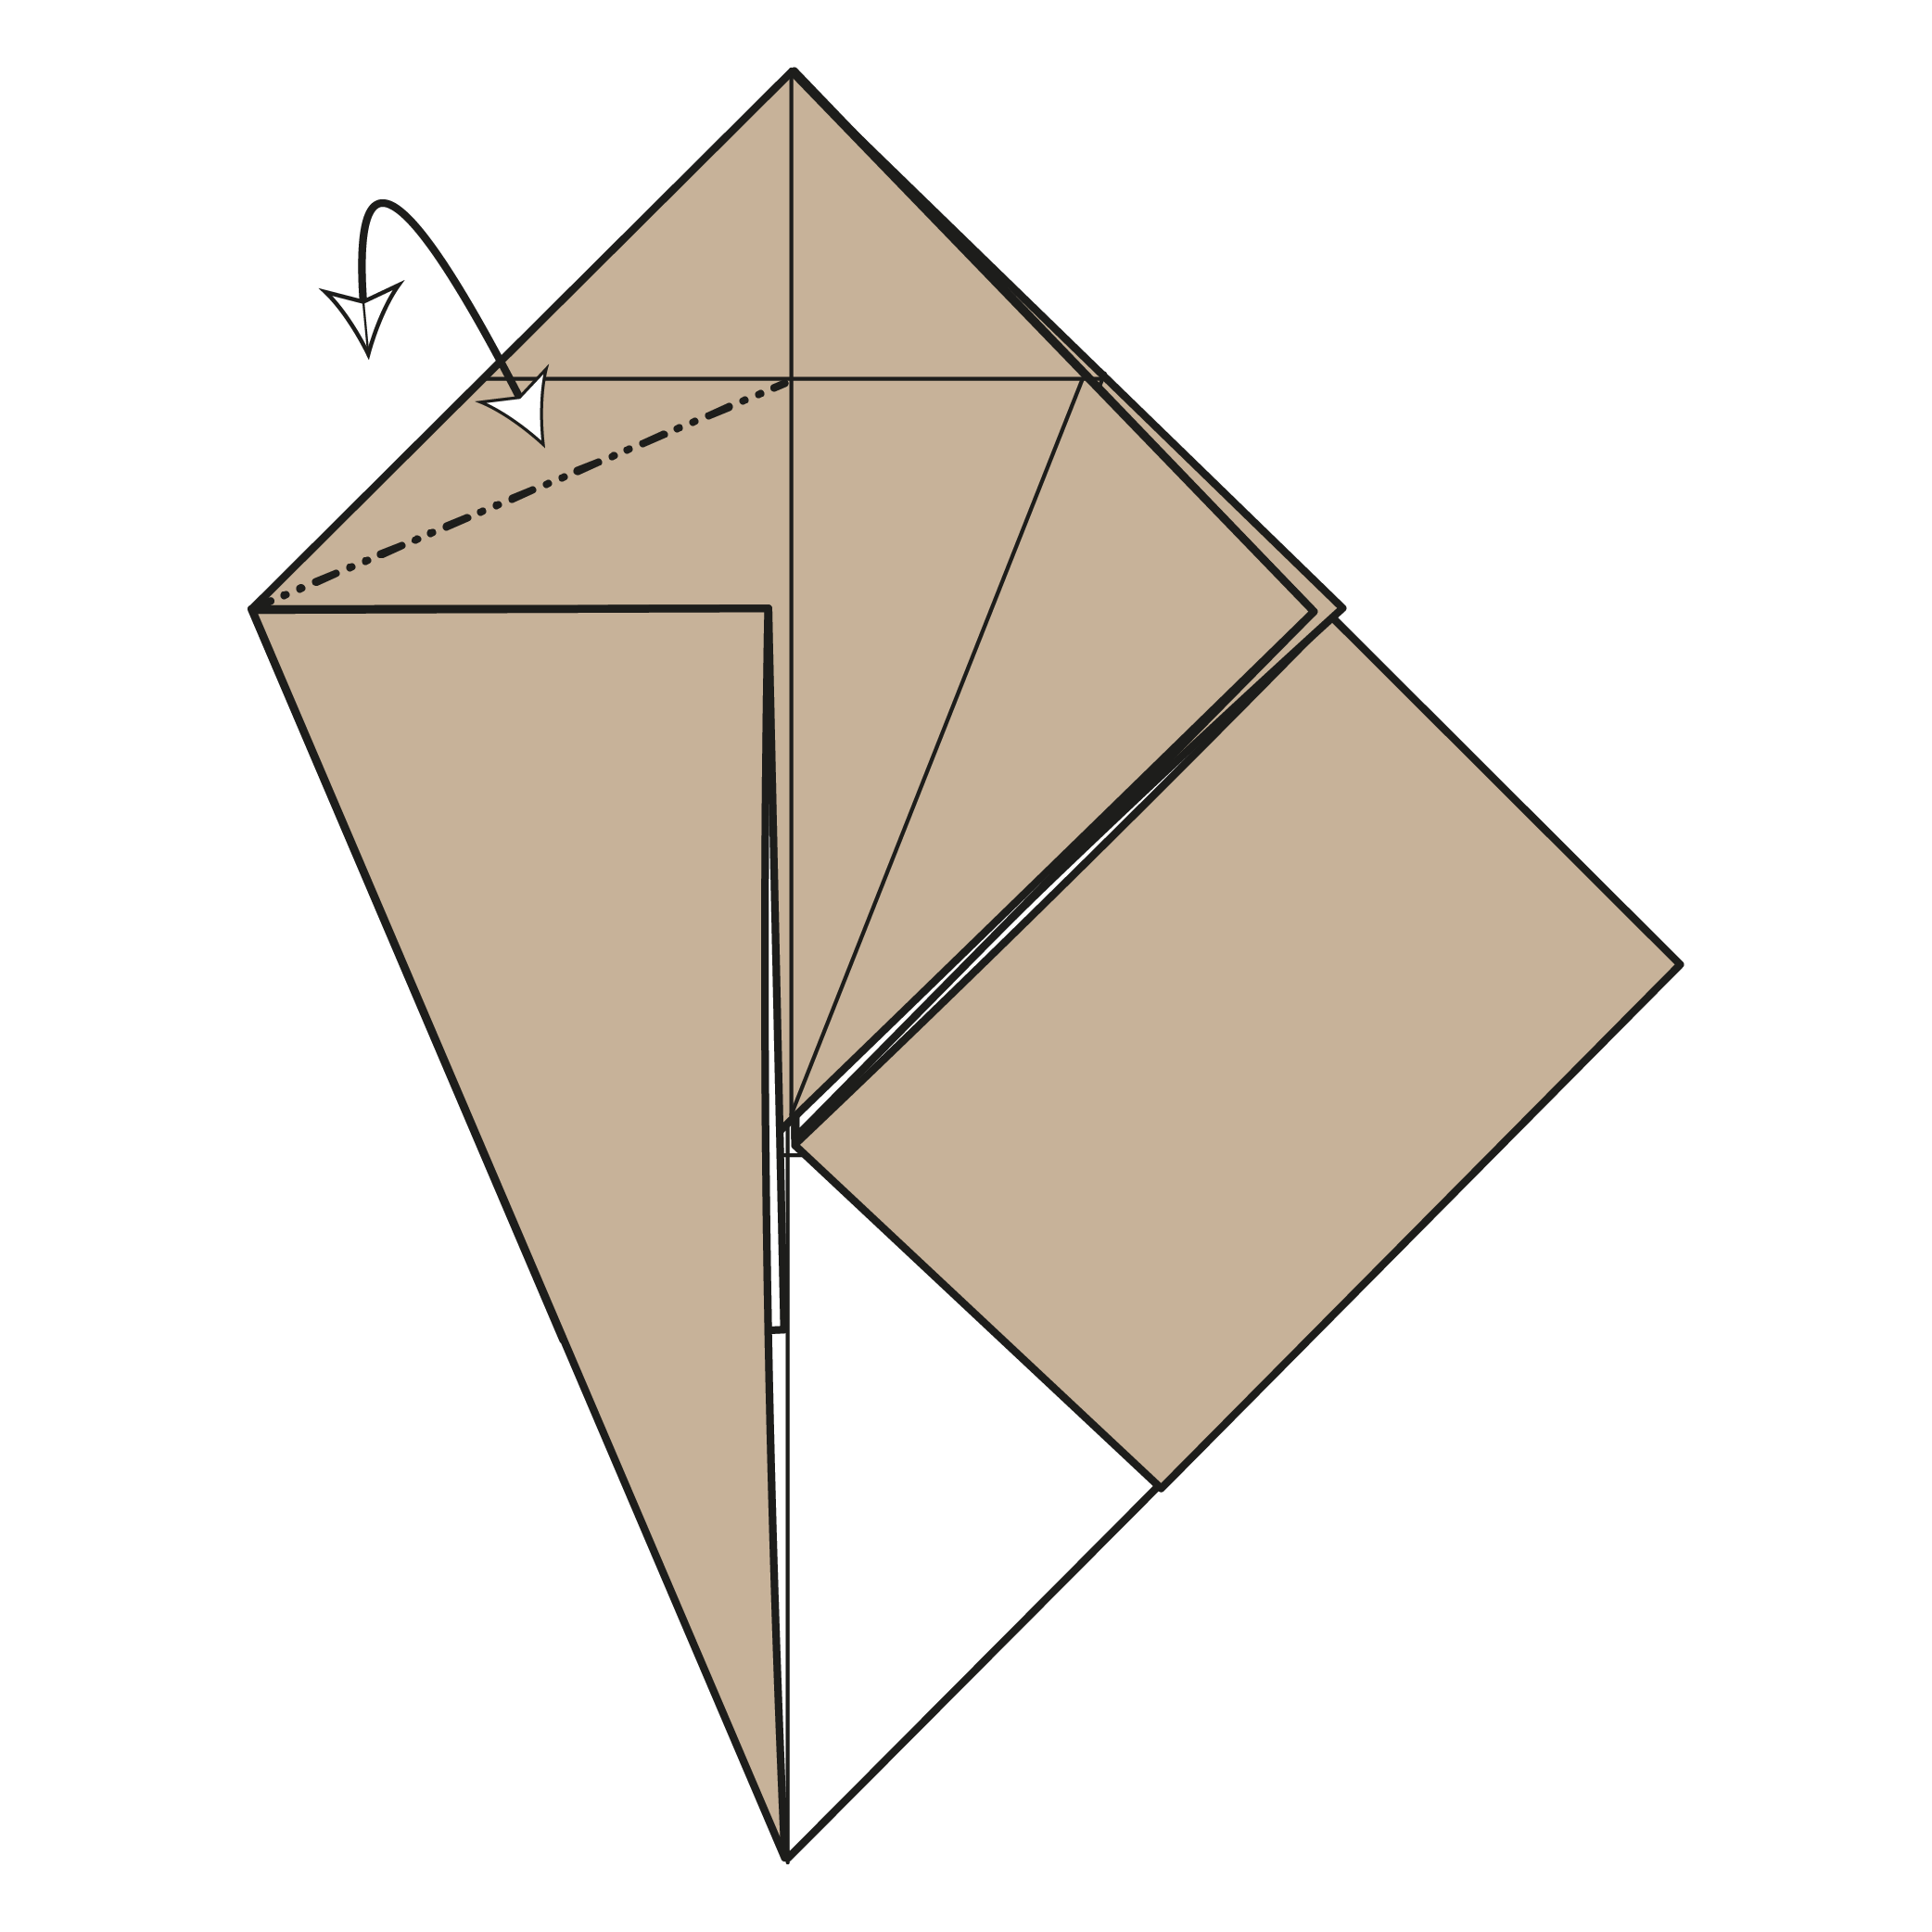
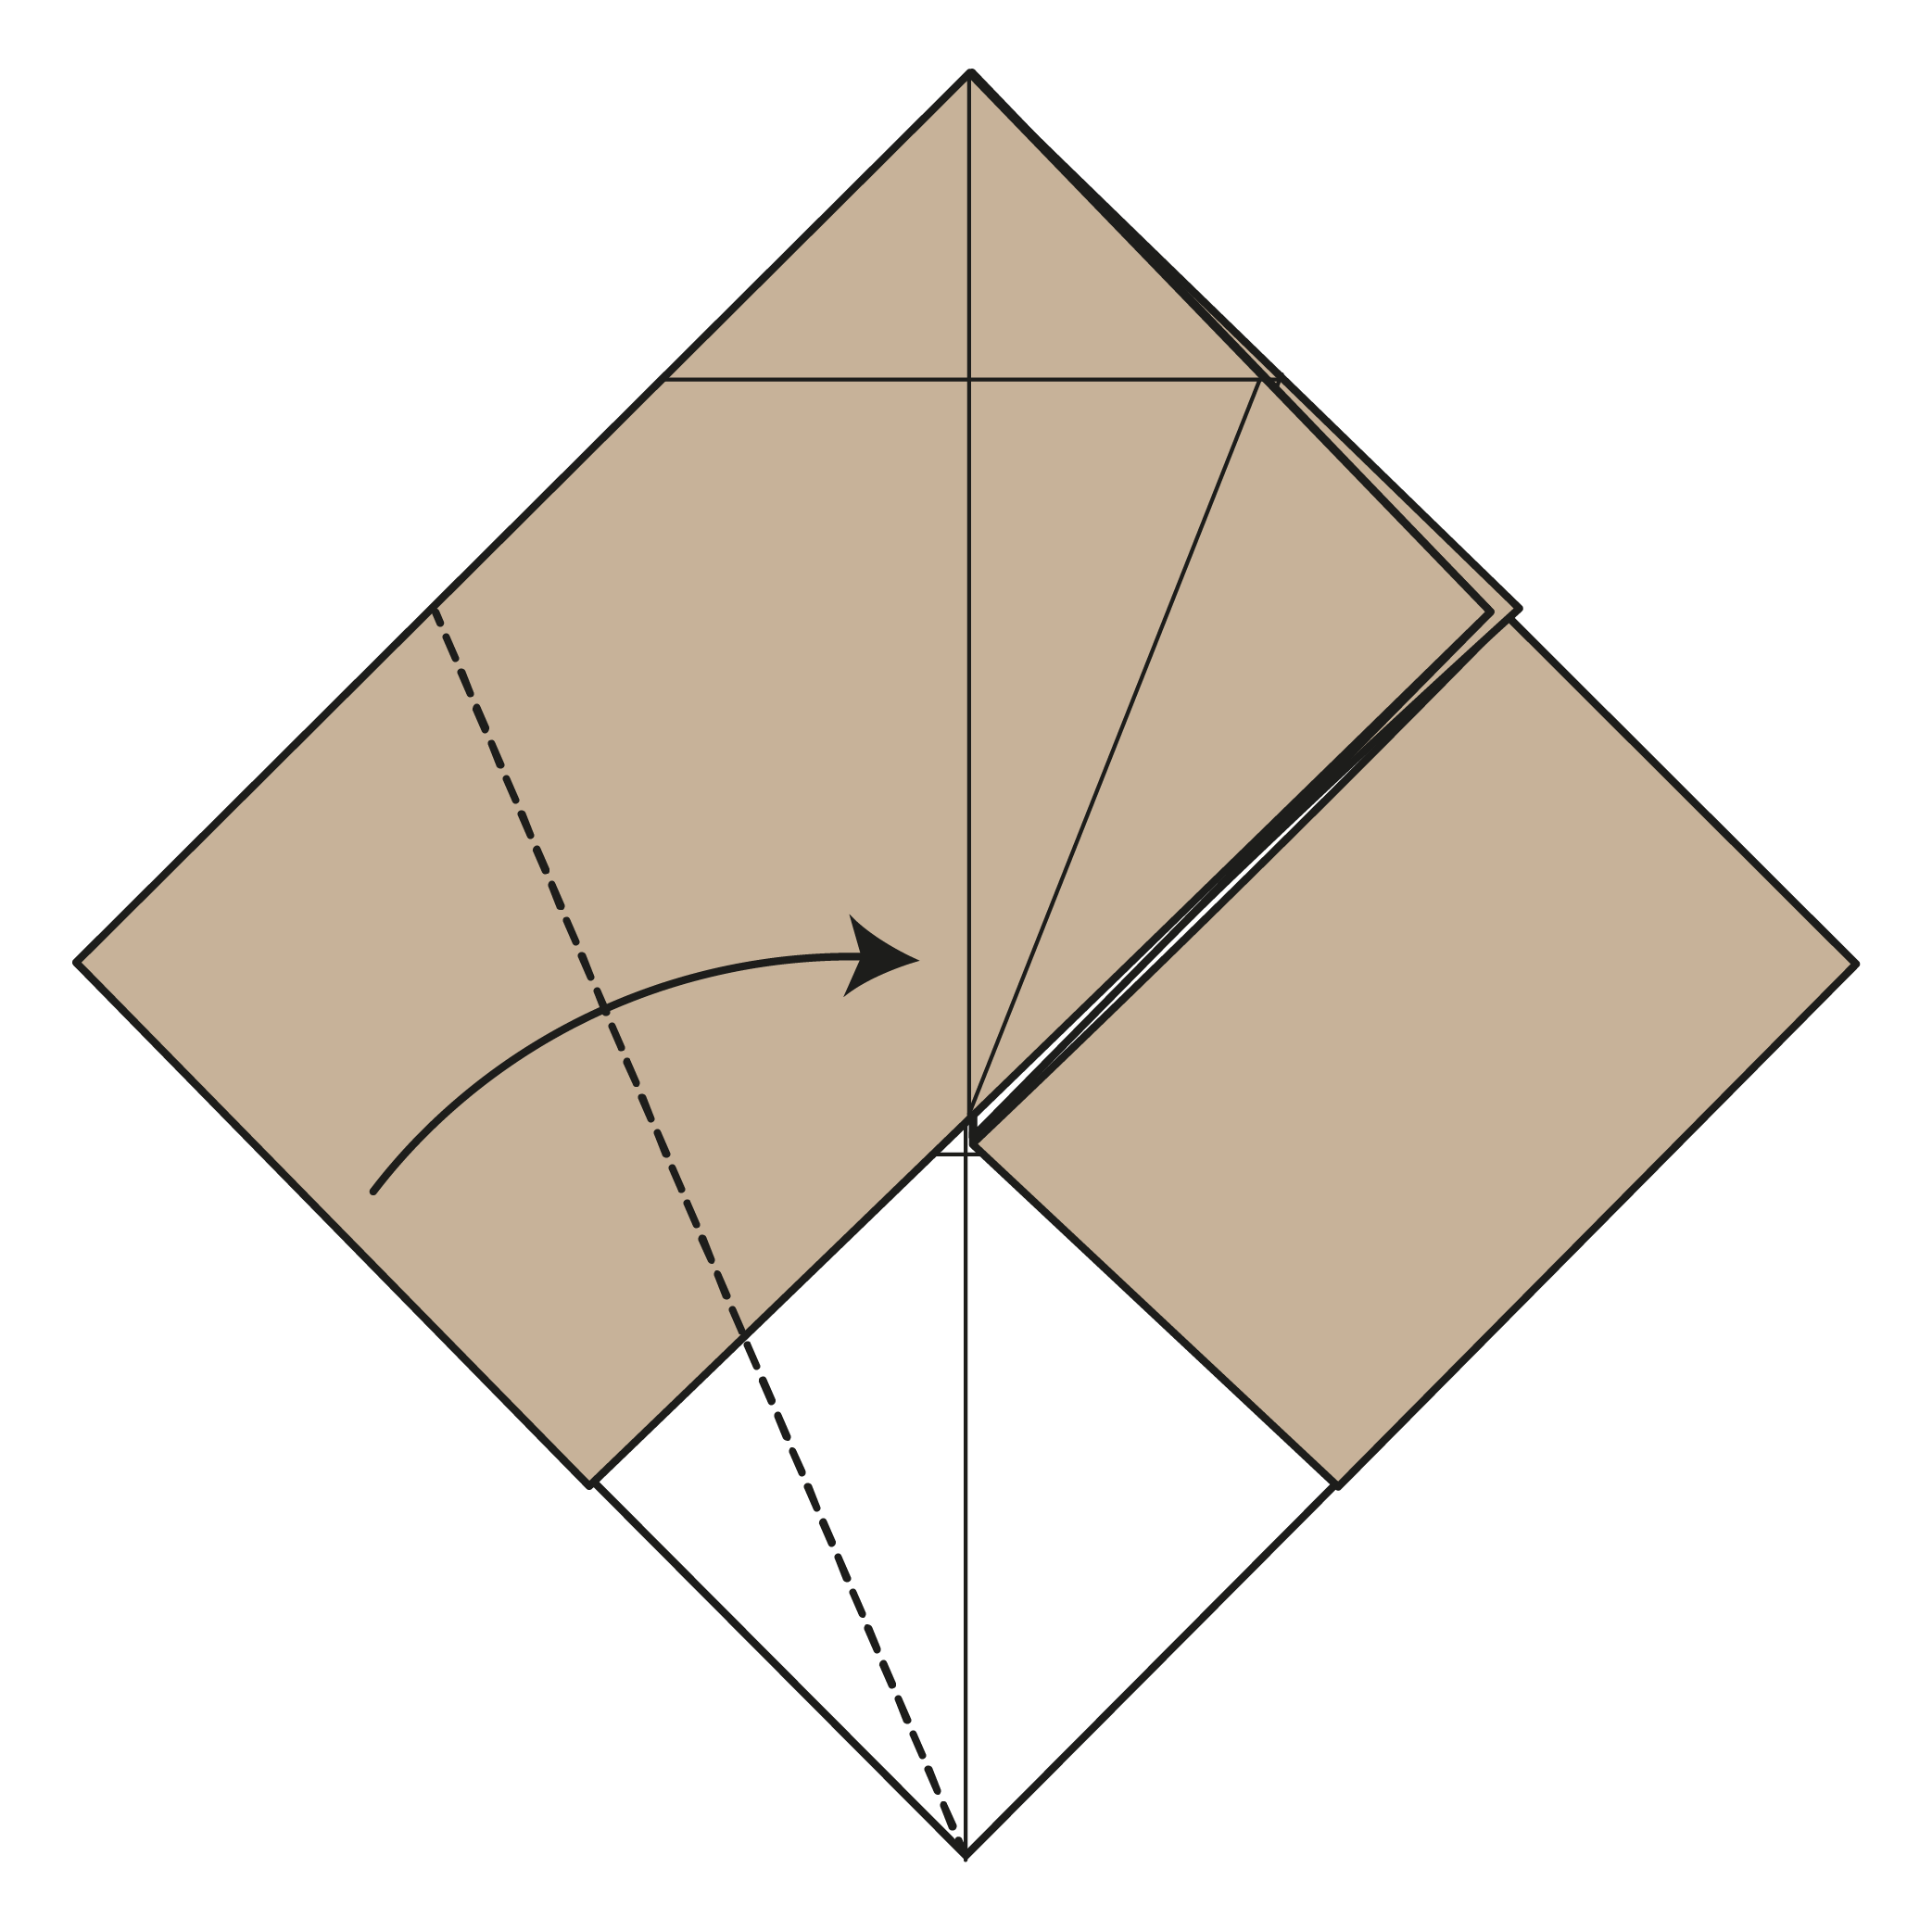
Mountain fold as shown—from the left corner to the point where the vertical and horizontal creases intersect.
Step 14

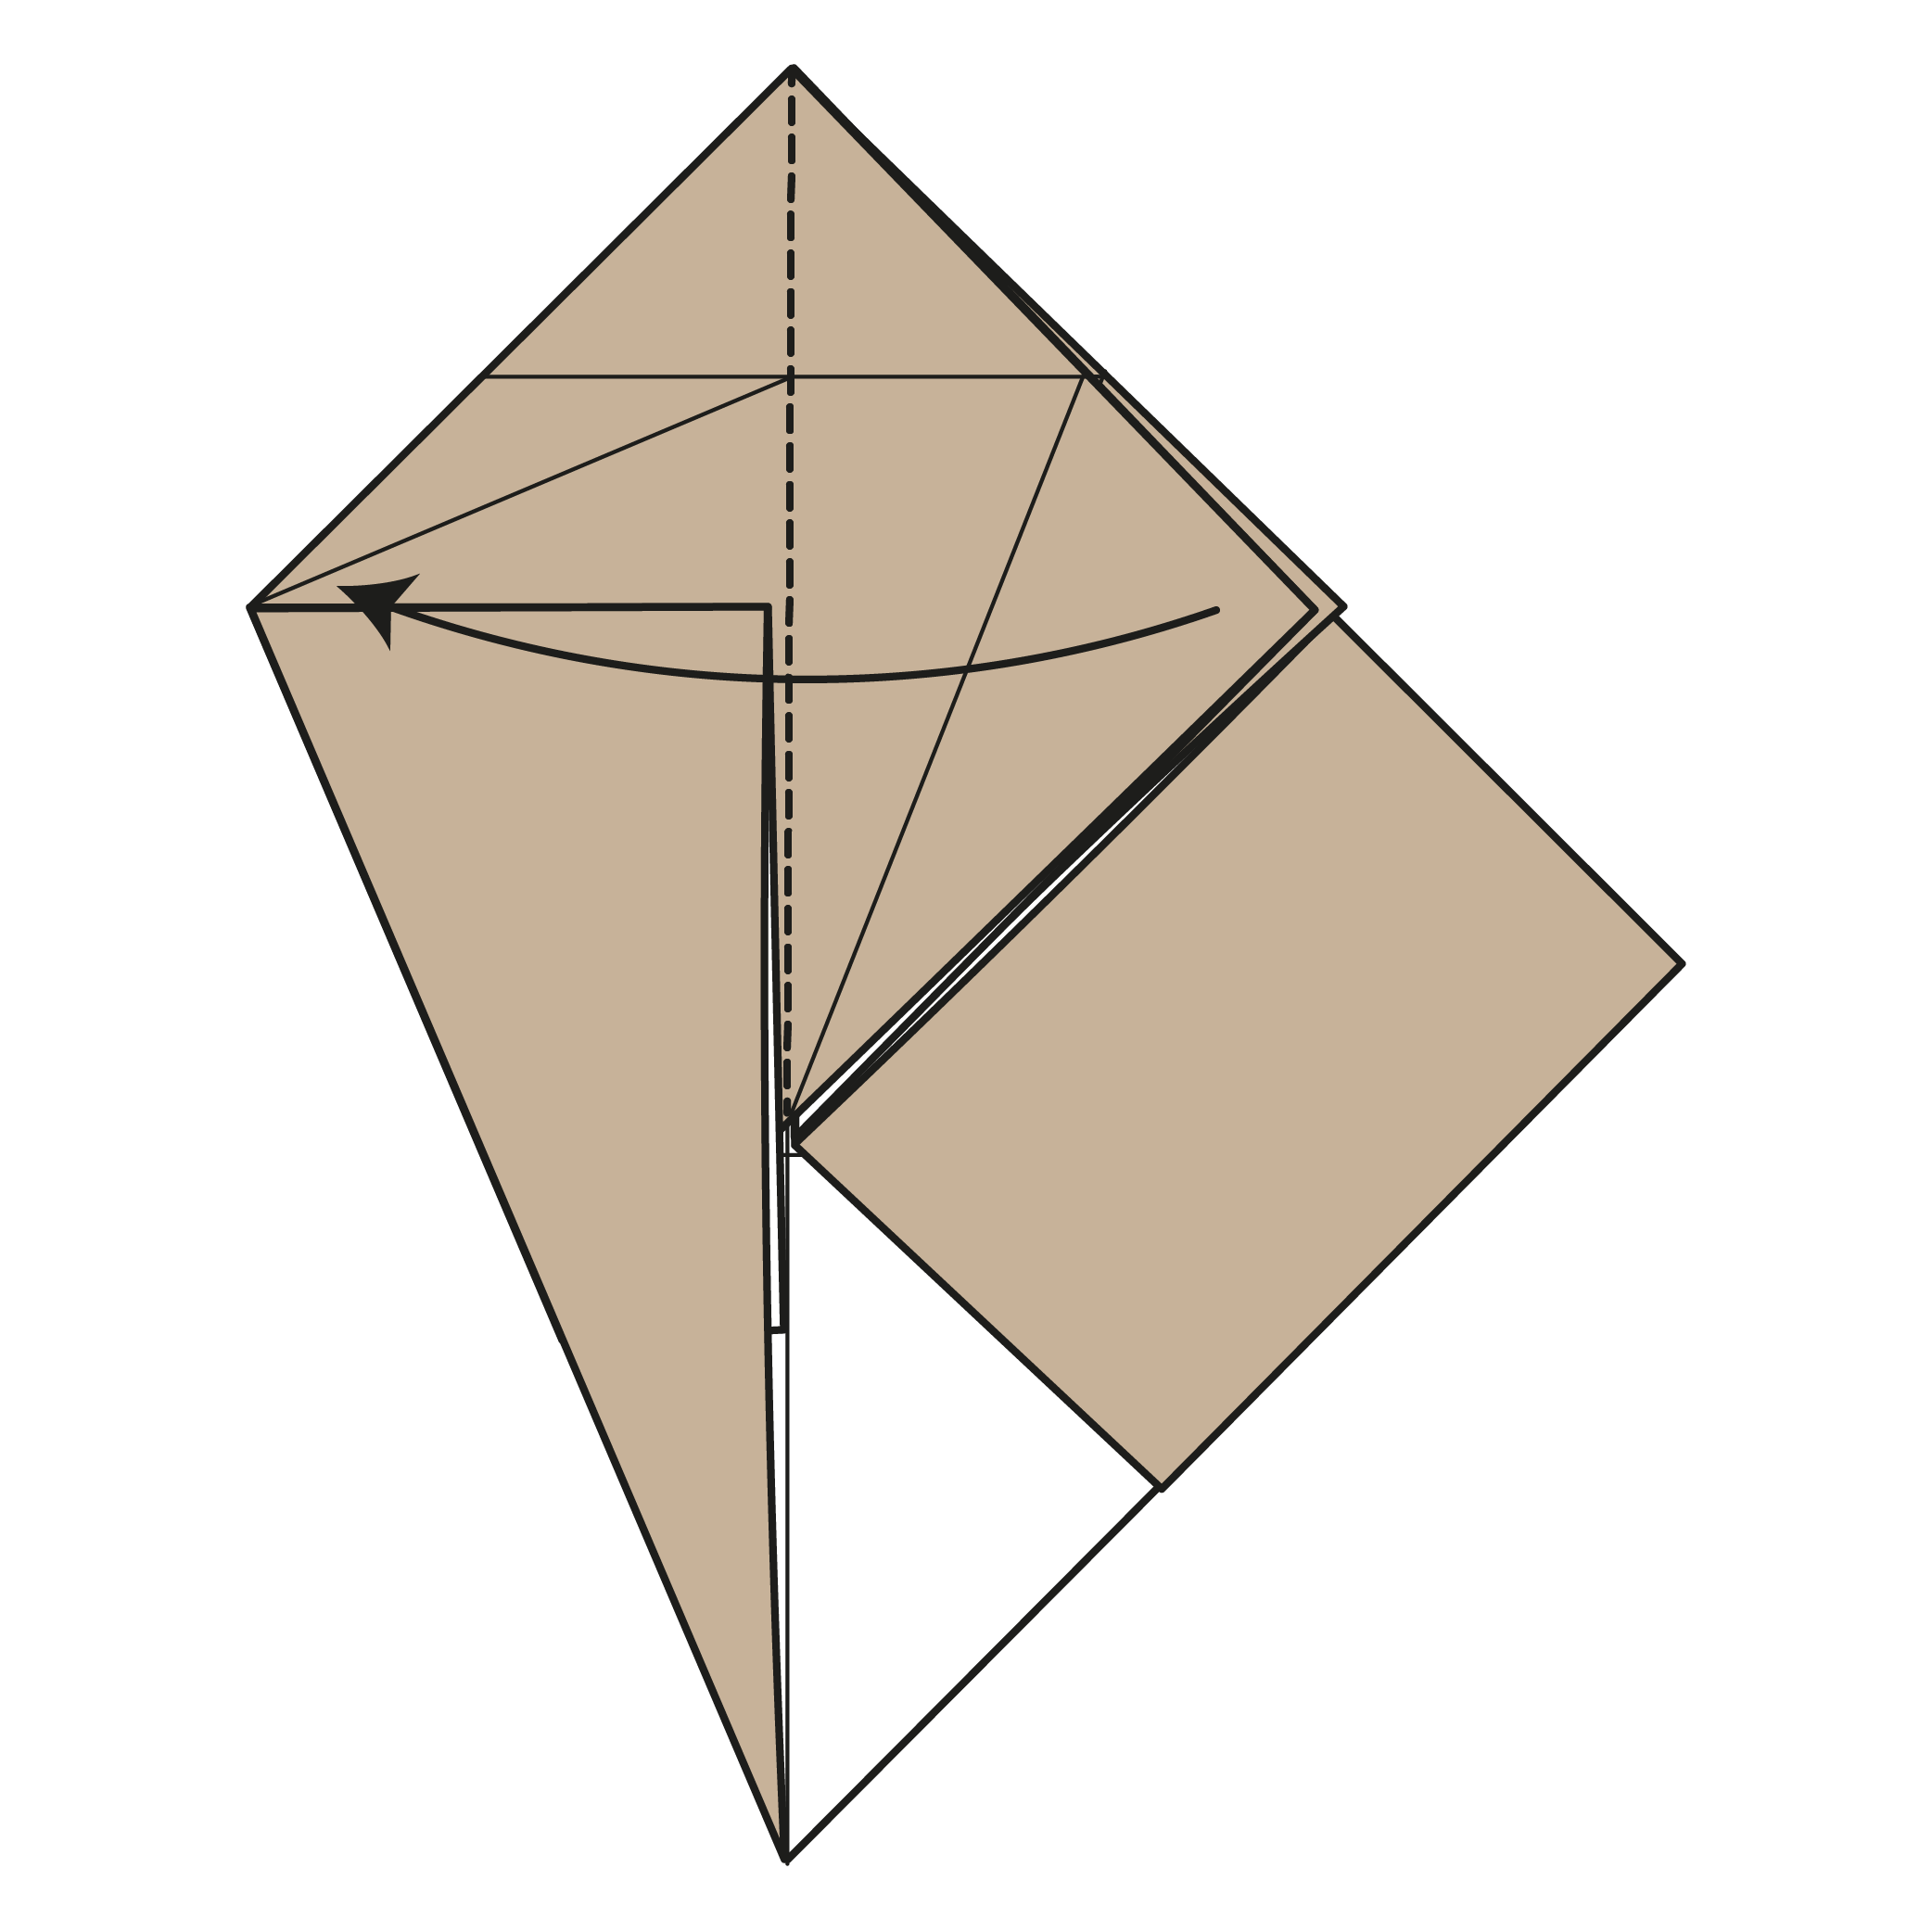
Flip the top right flap back over to the left.
Step 15
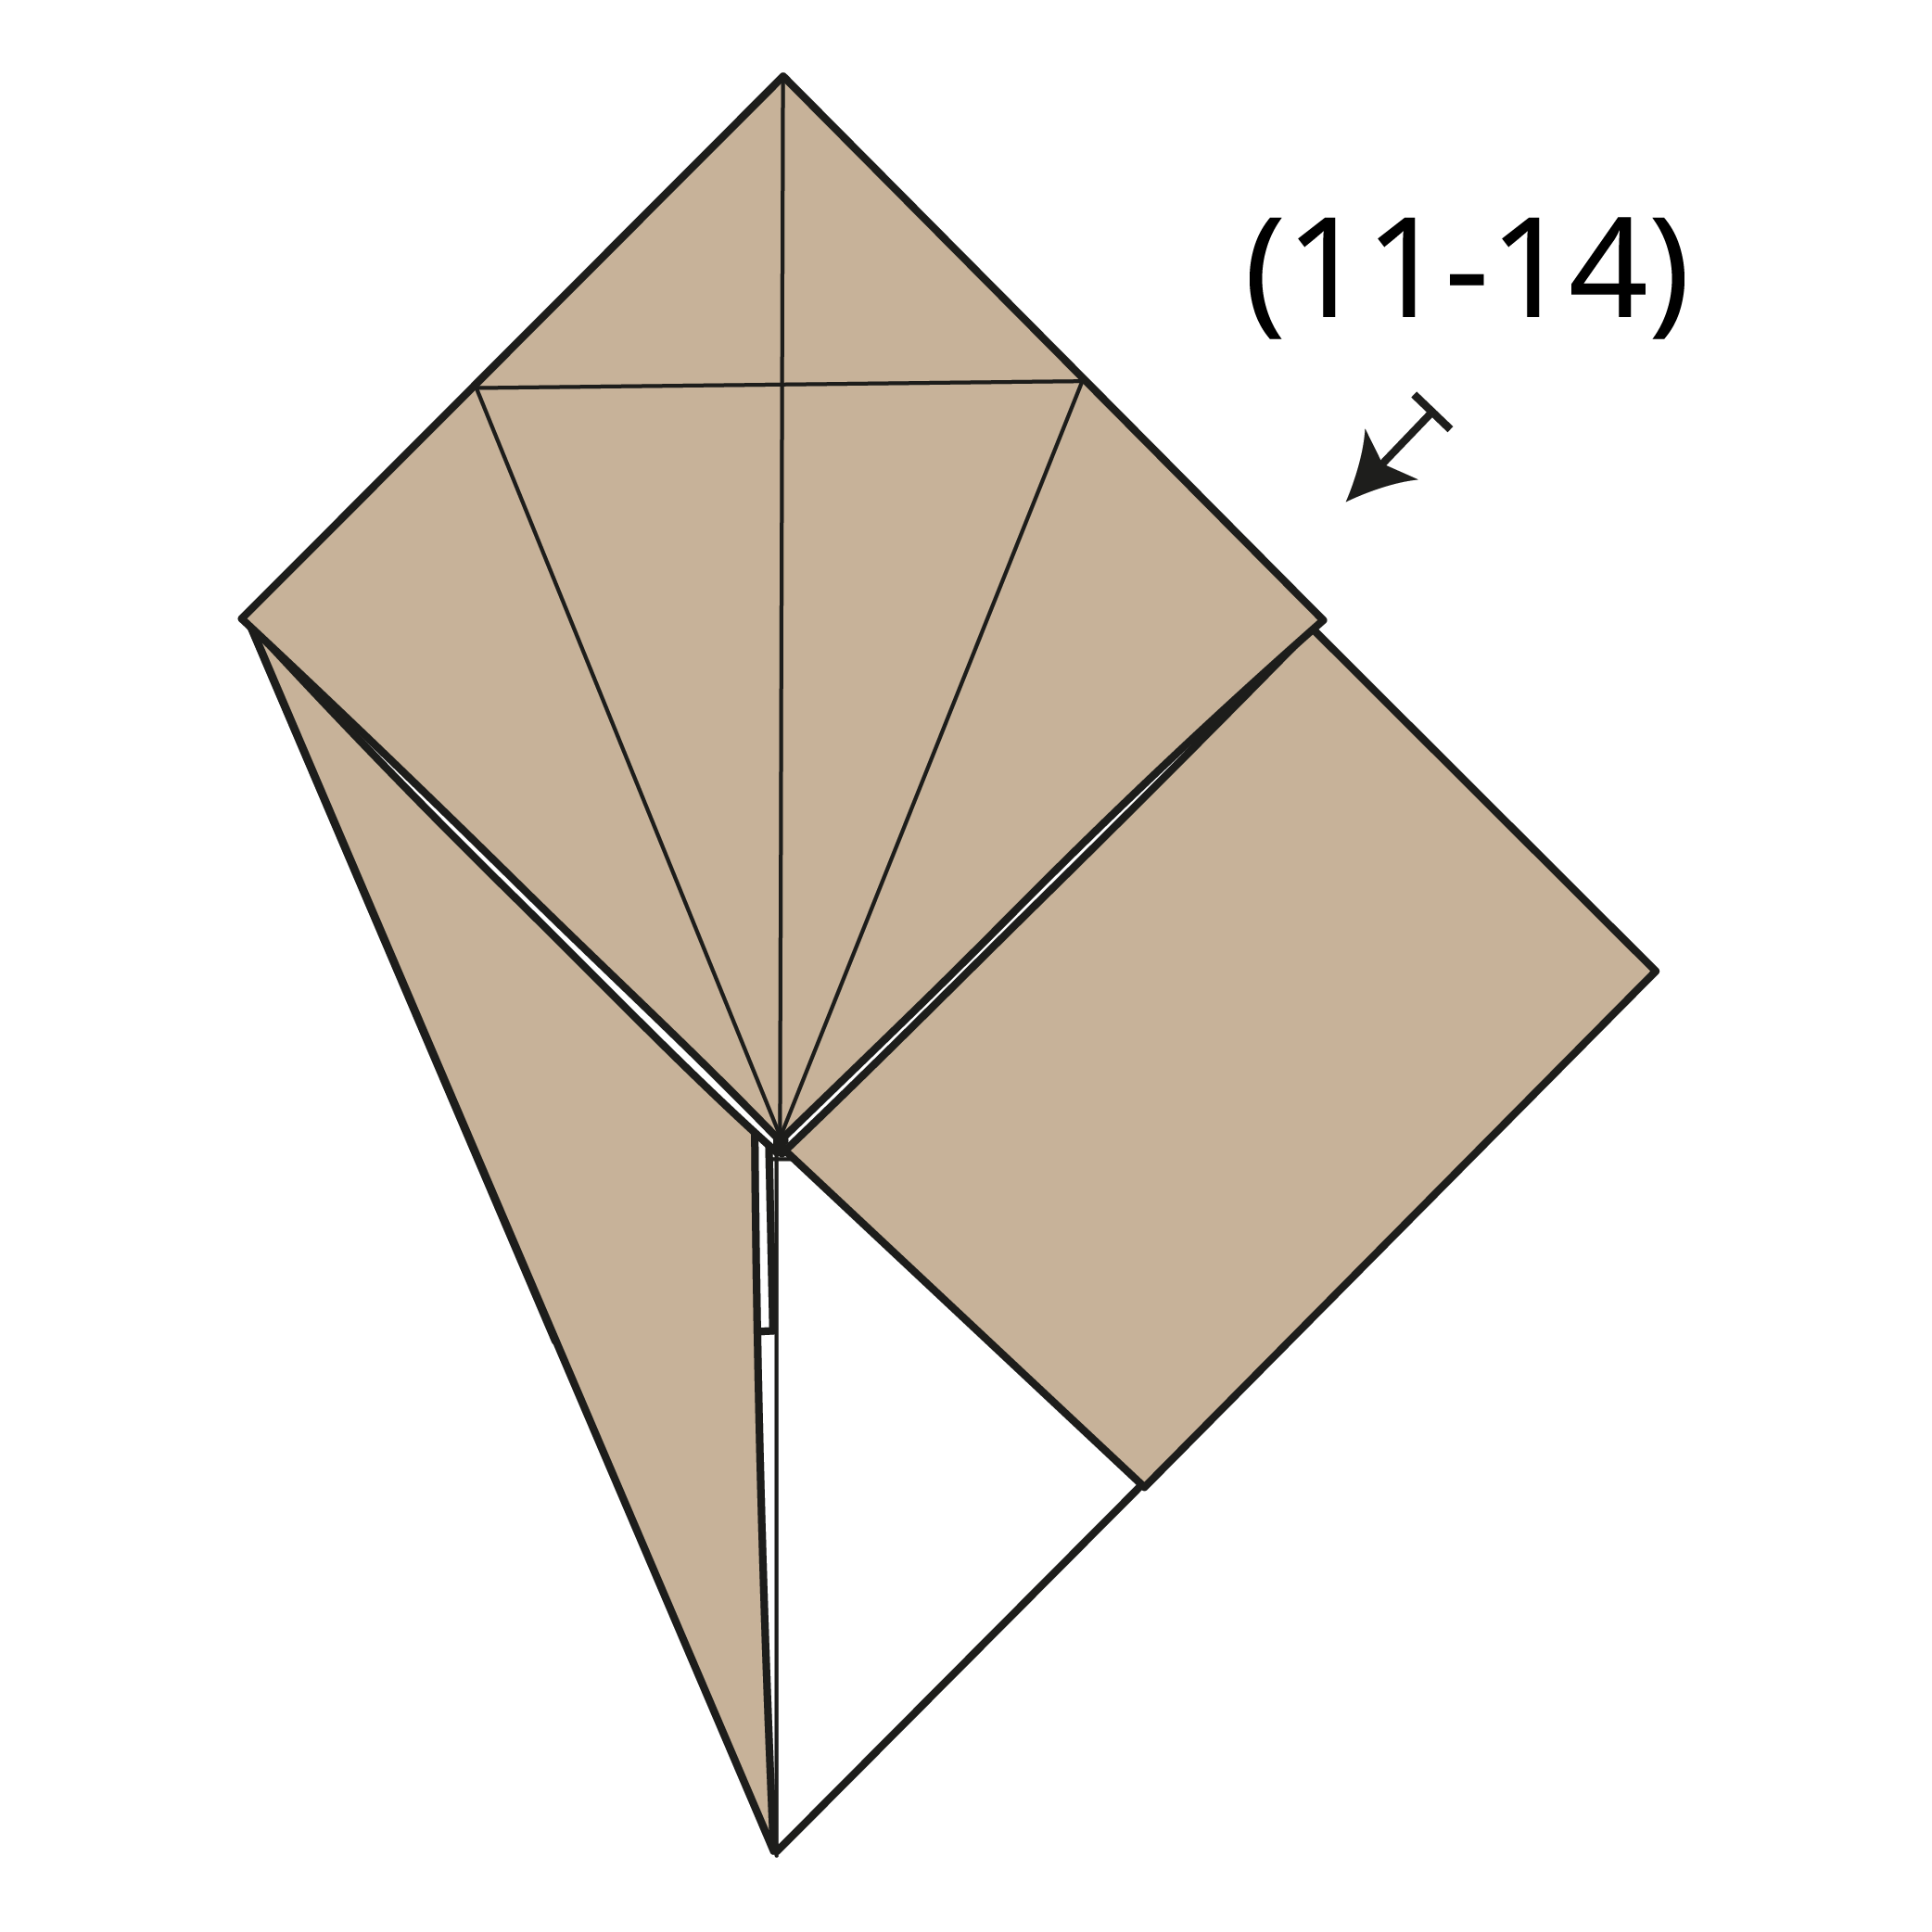
Repeat Steps 11 to 14 on the right side.
Step 16
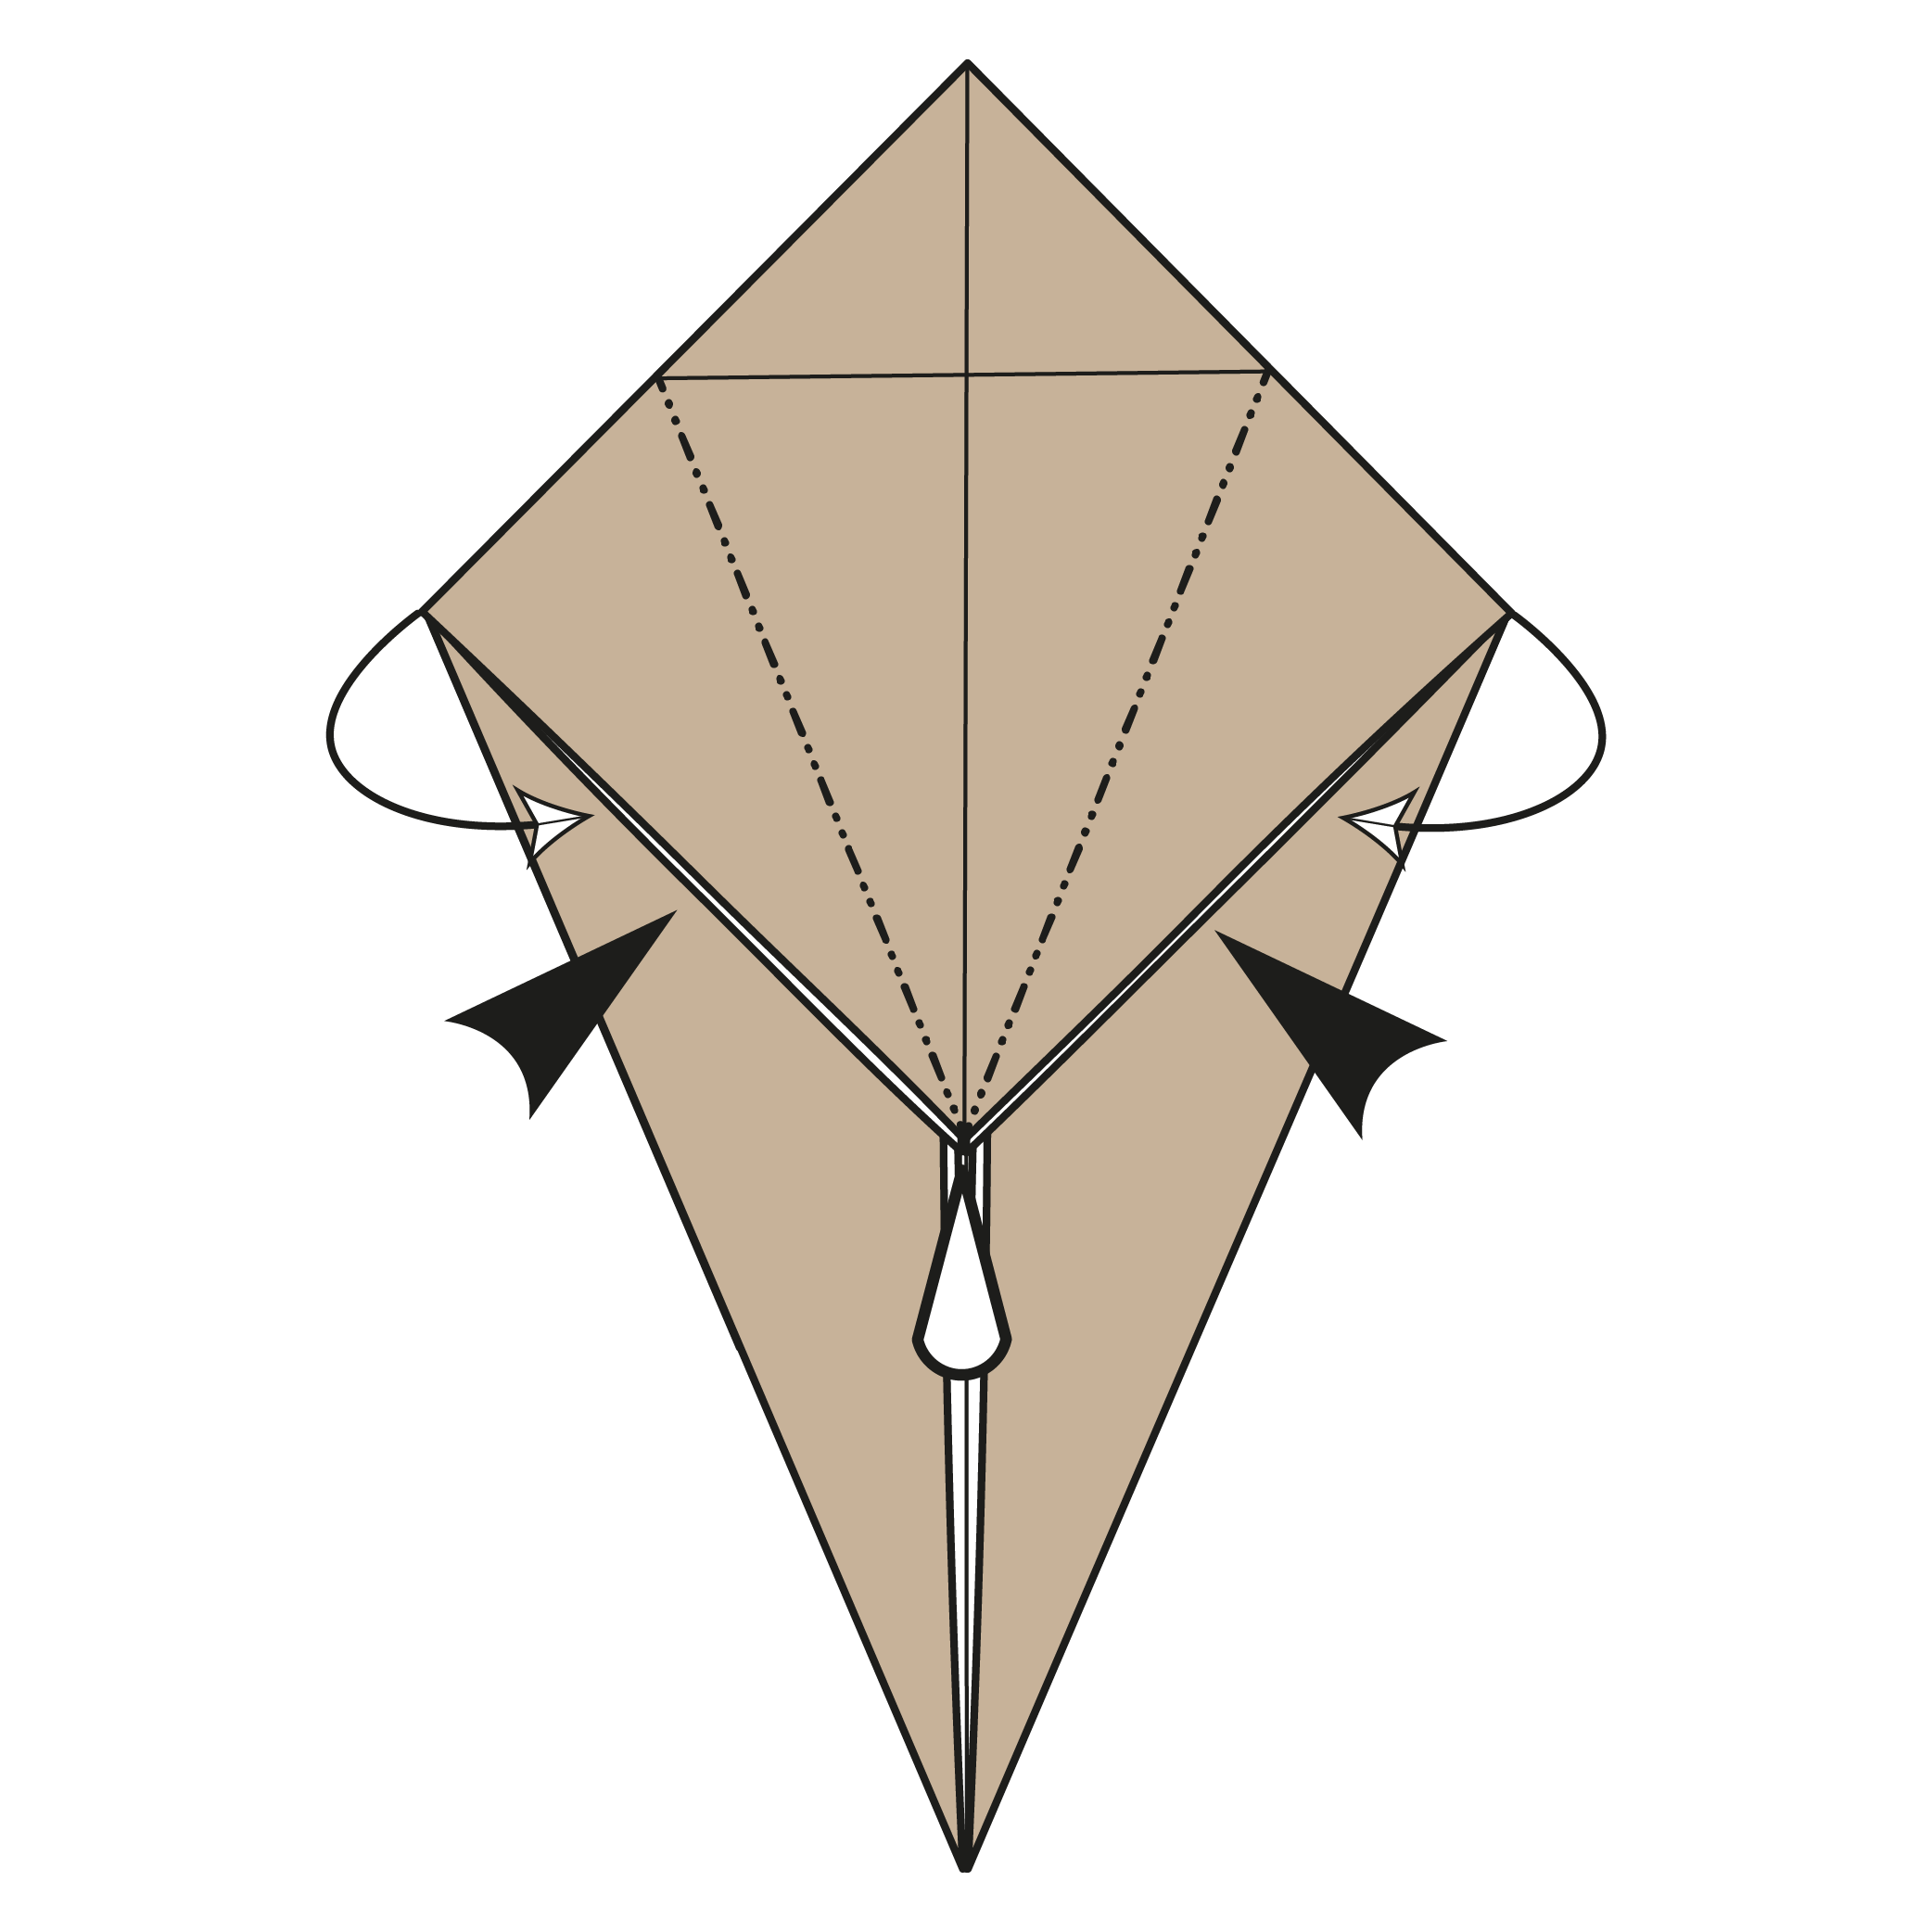
Inside reverse fold the left and right areas of the square (top flaps).
Step 17
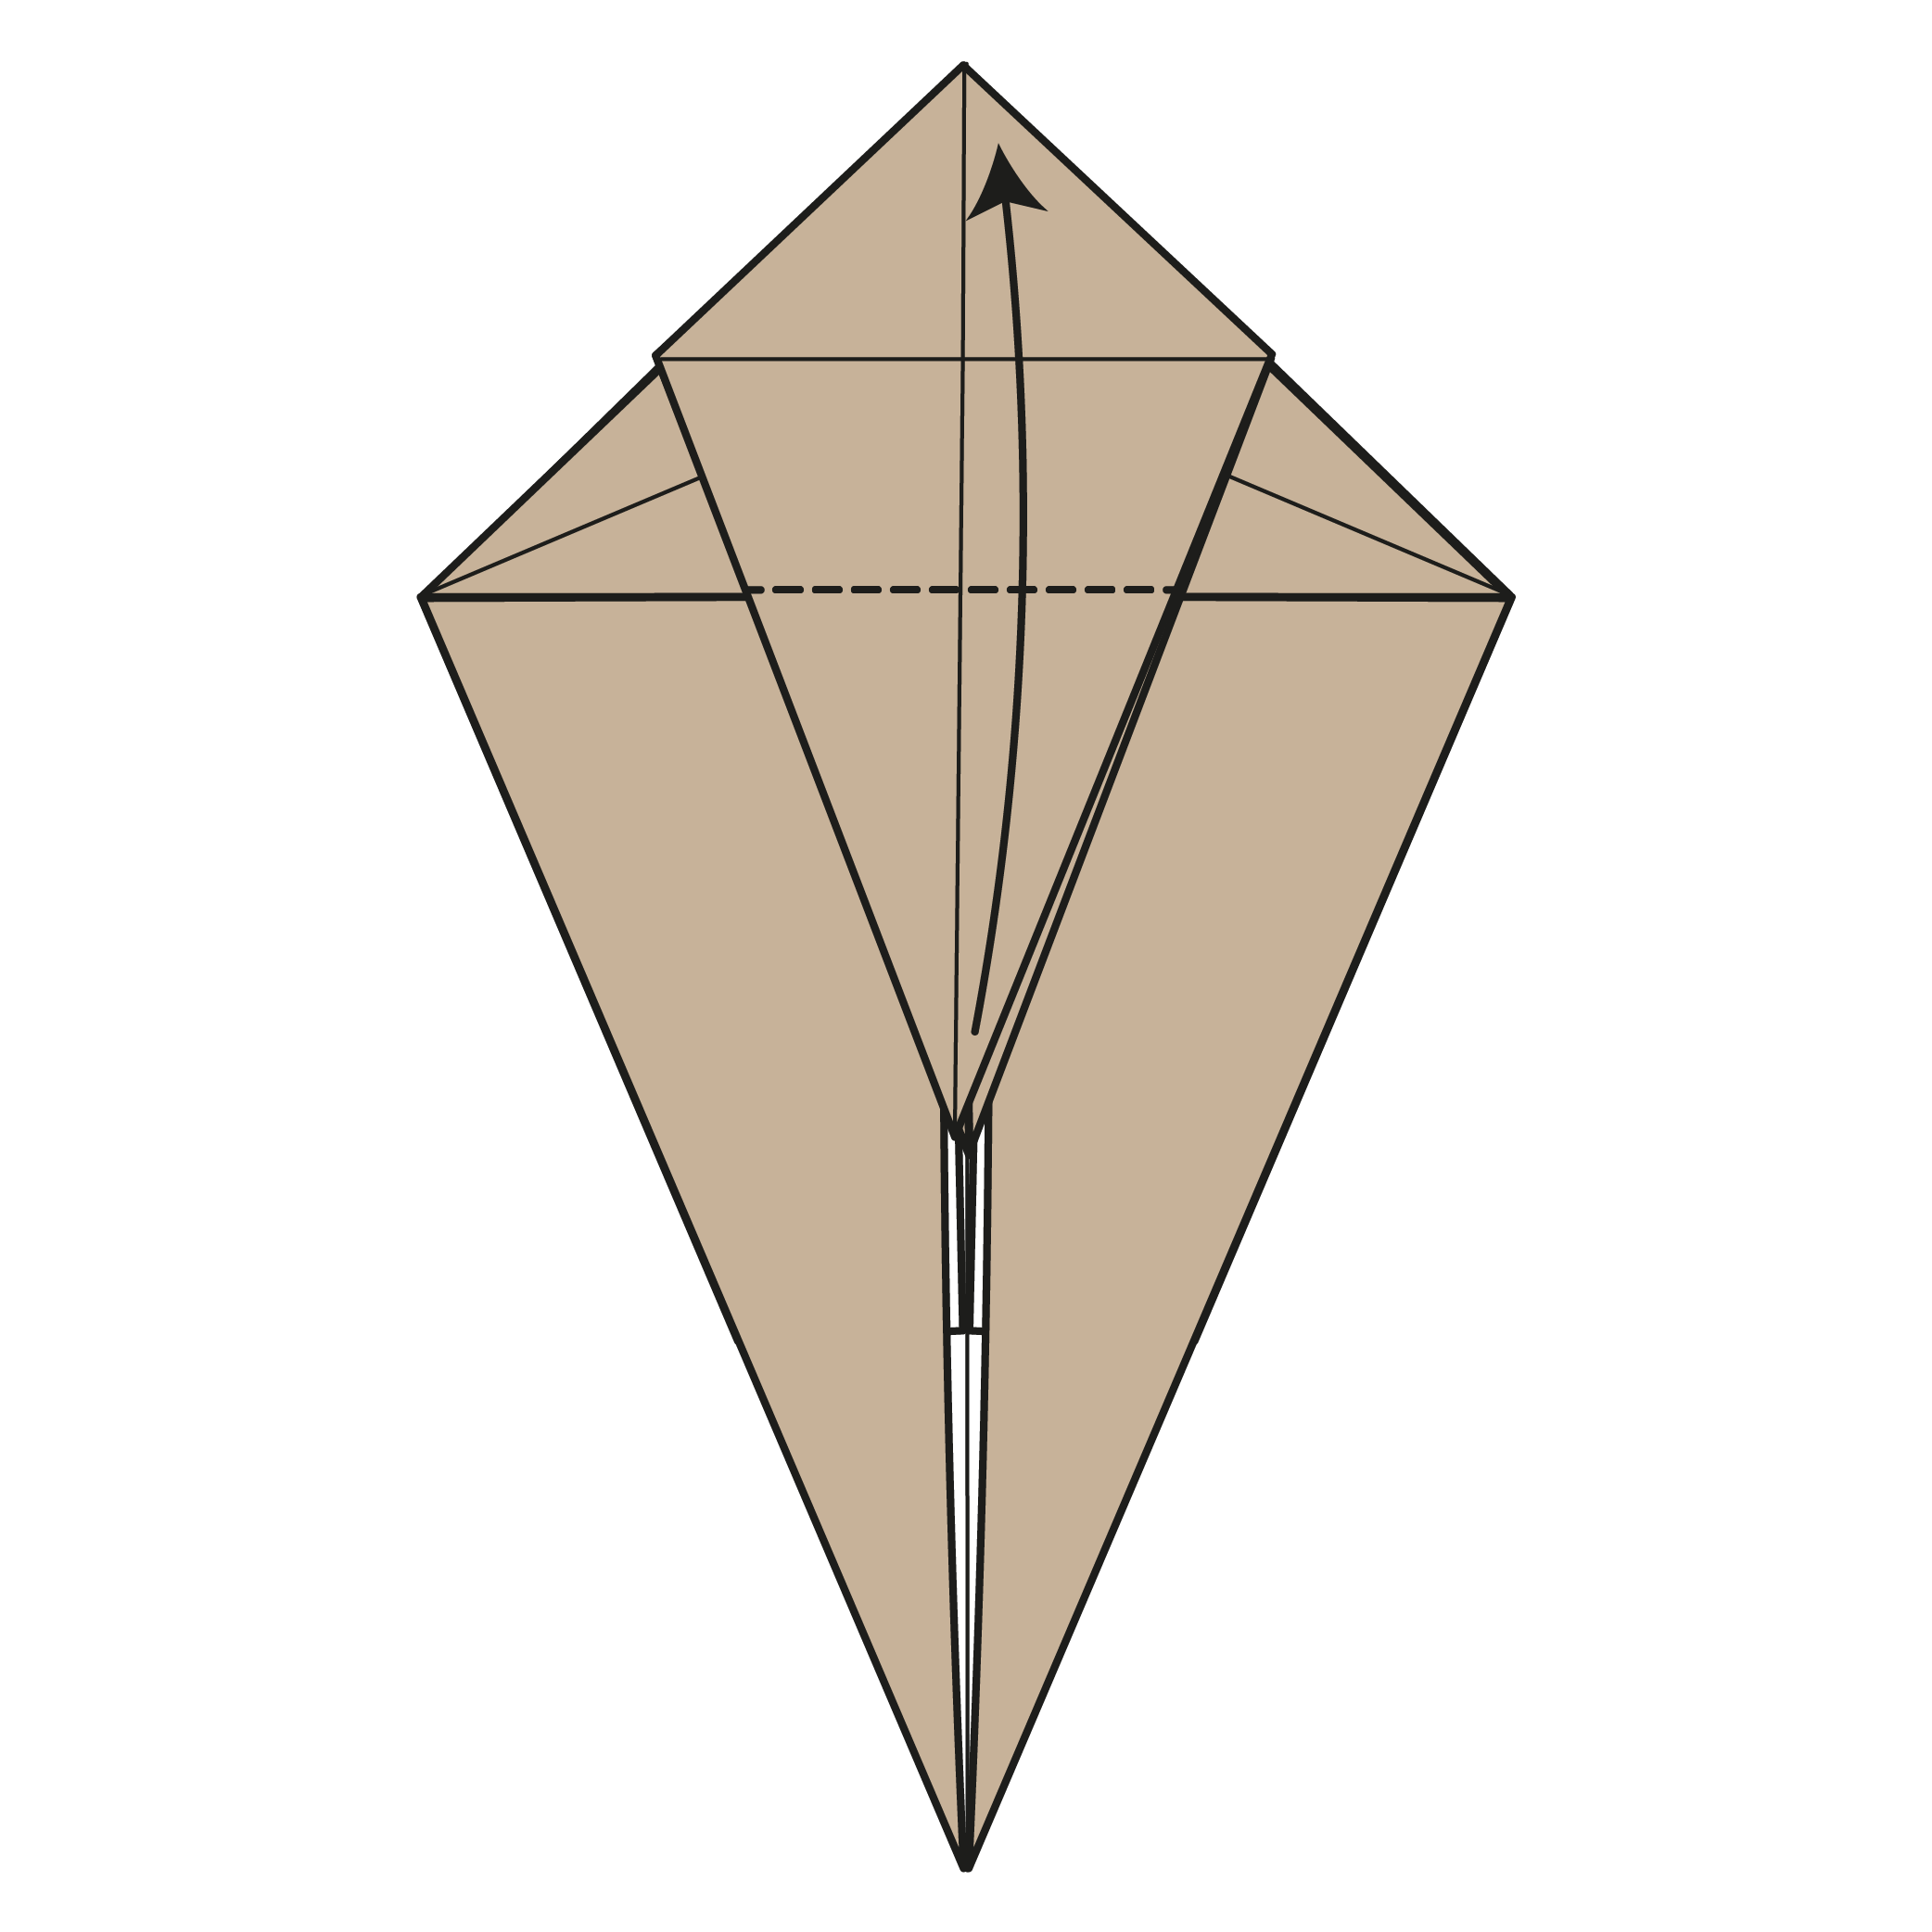
Fold the bottom corner of the top flap up to meet the top corner.
Step 18
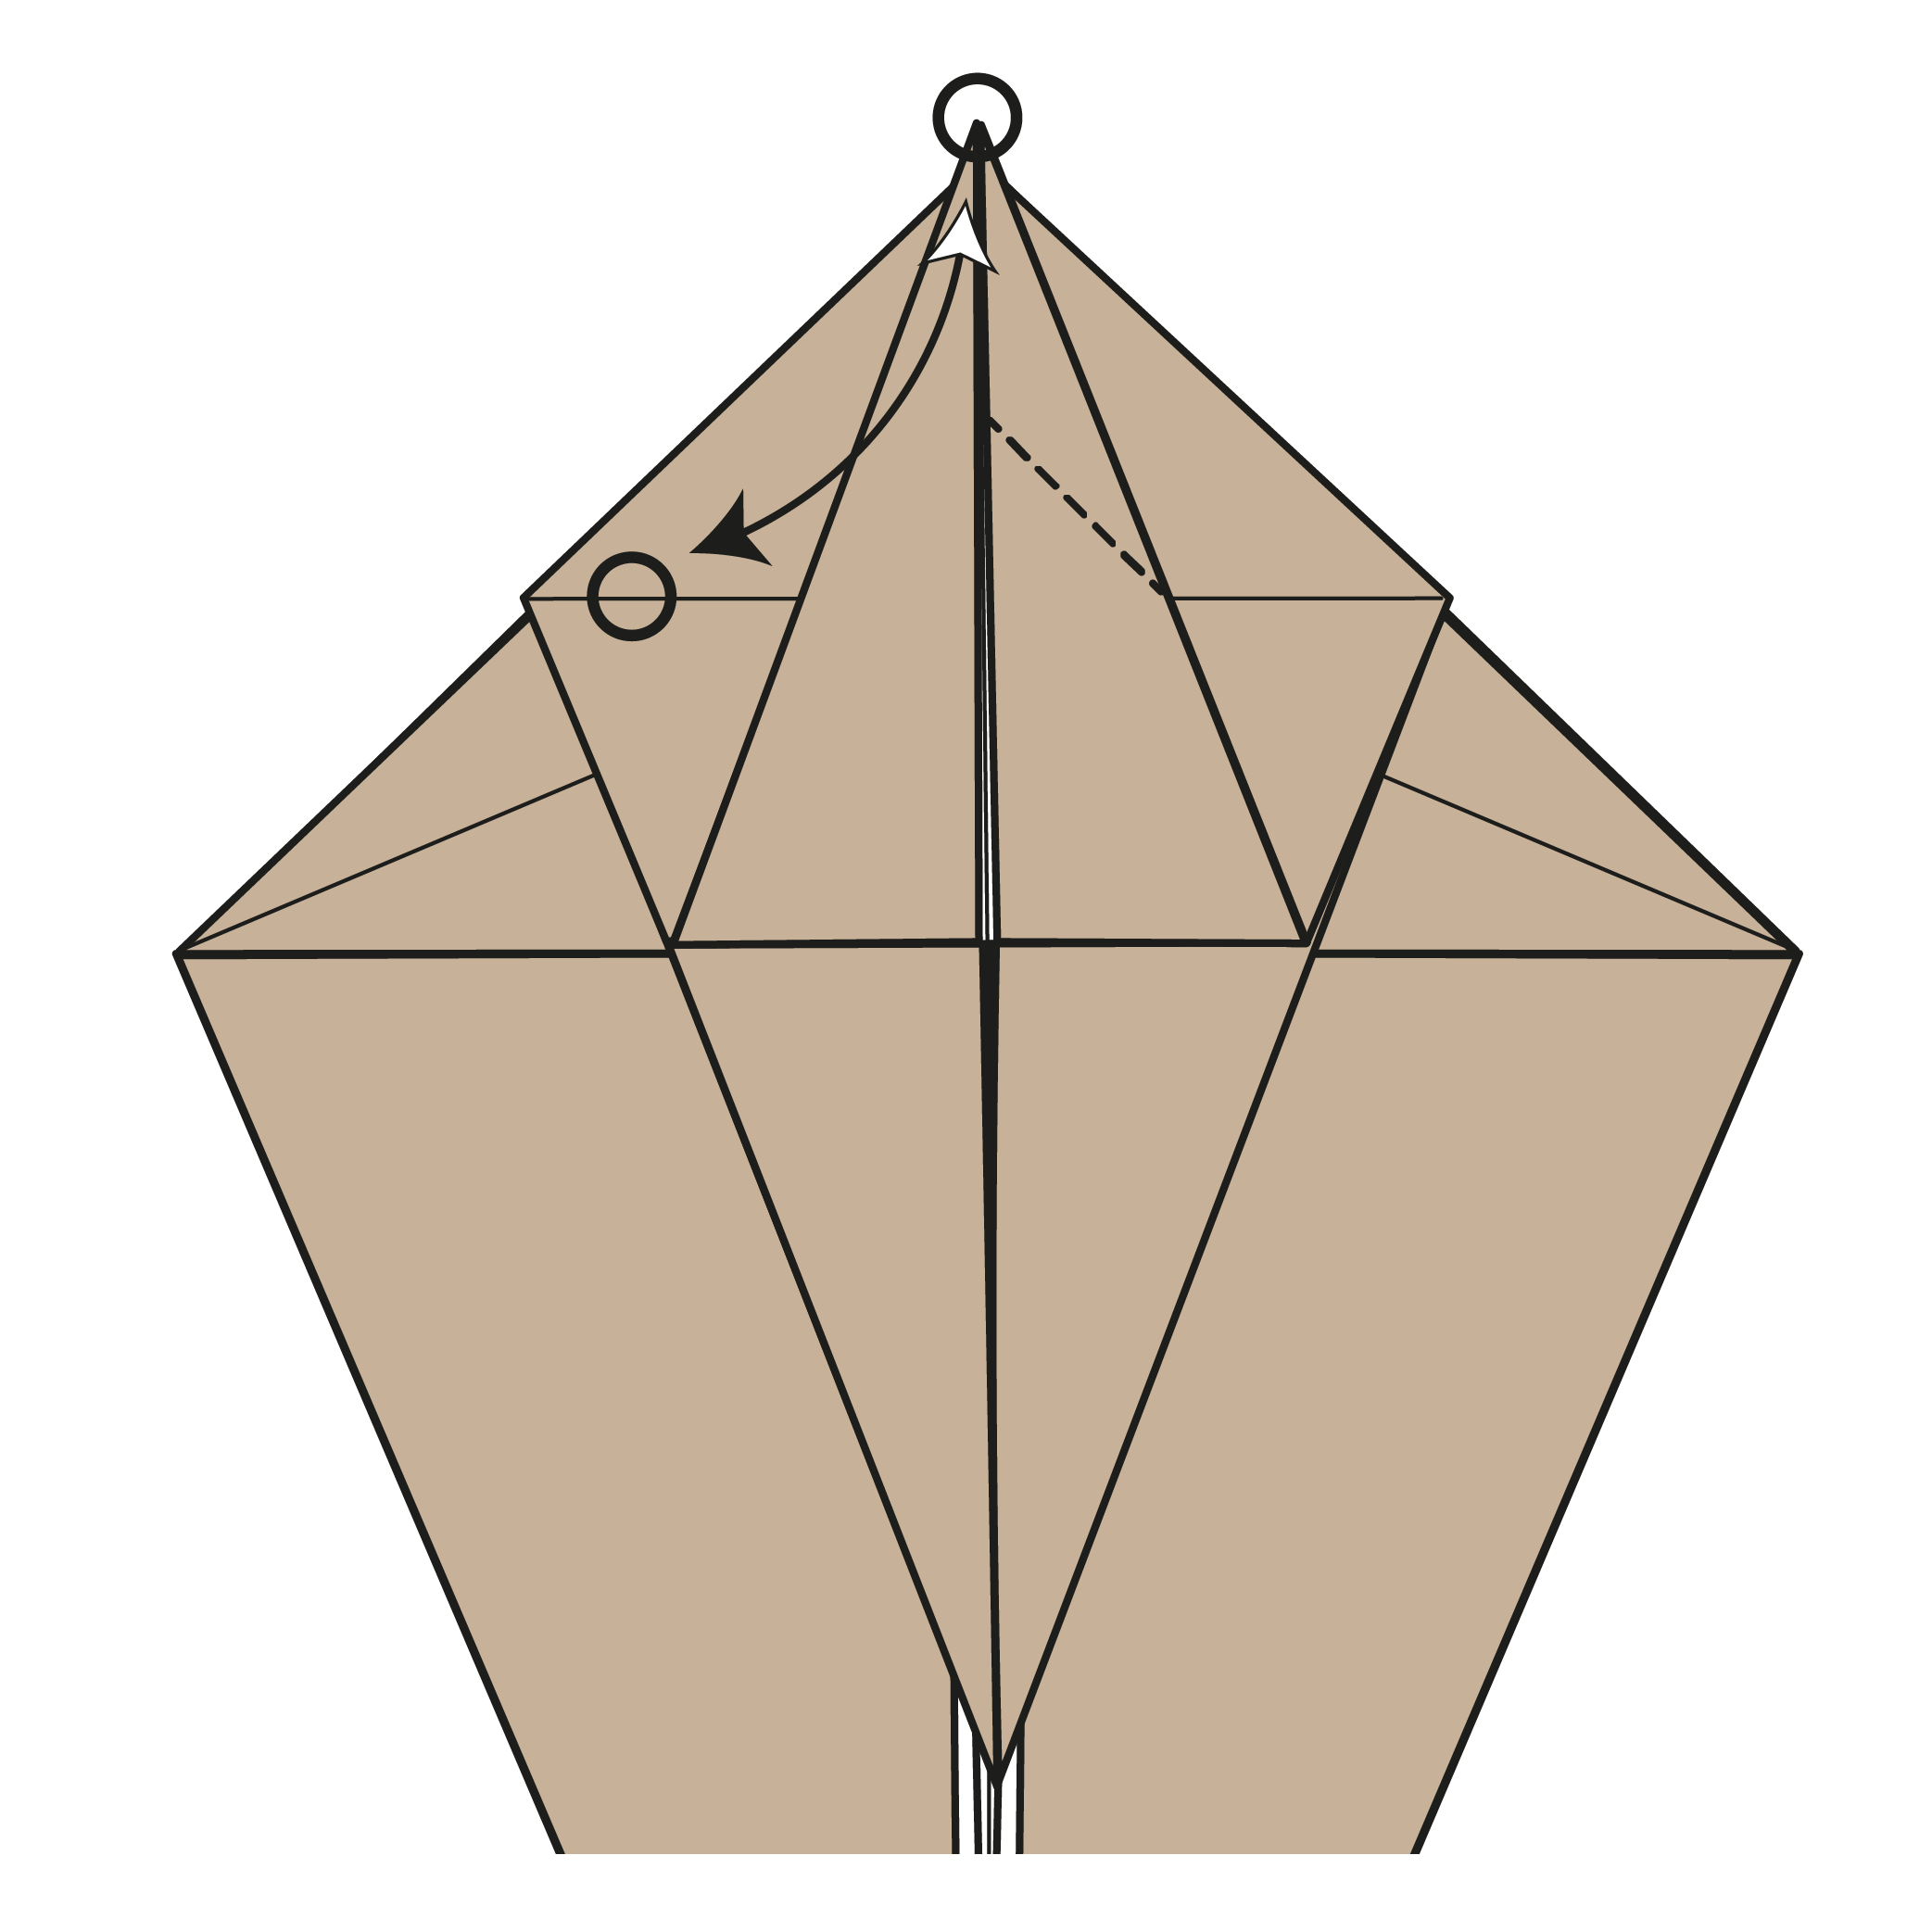
Fold the right edge of the top flap to the horizontal crease. Only crease from the centerline to the right edge. Then unfold.
Step 19
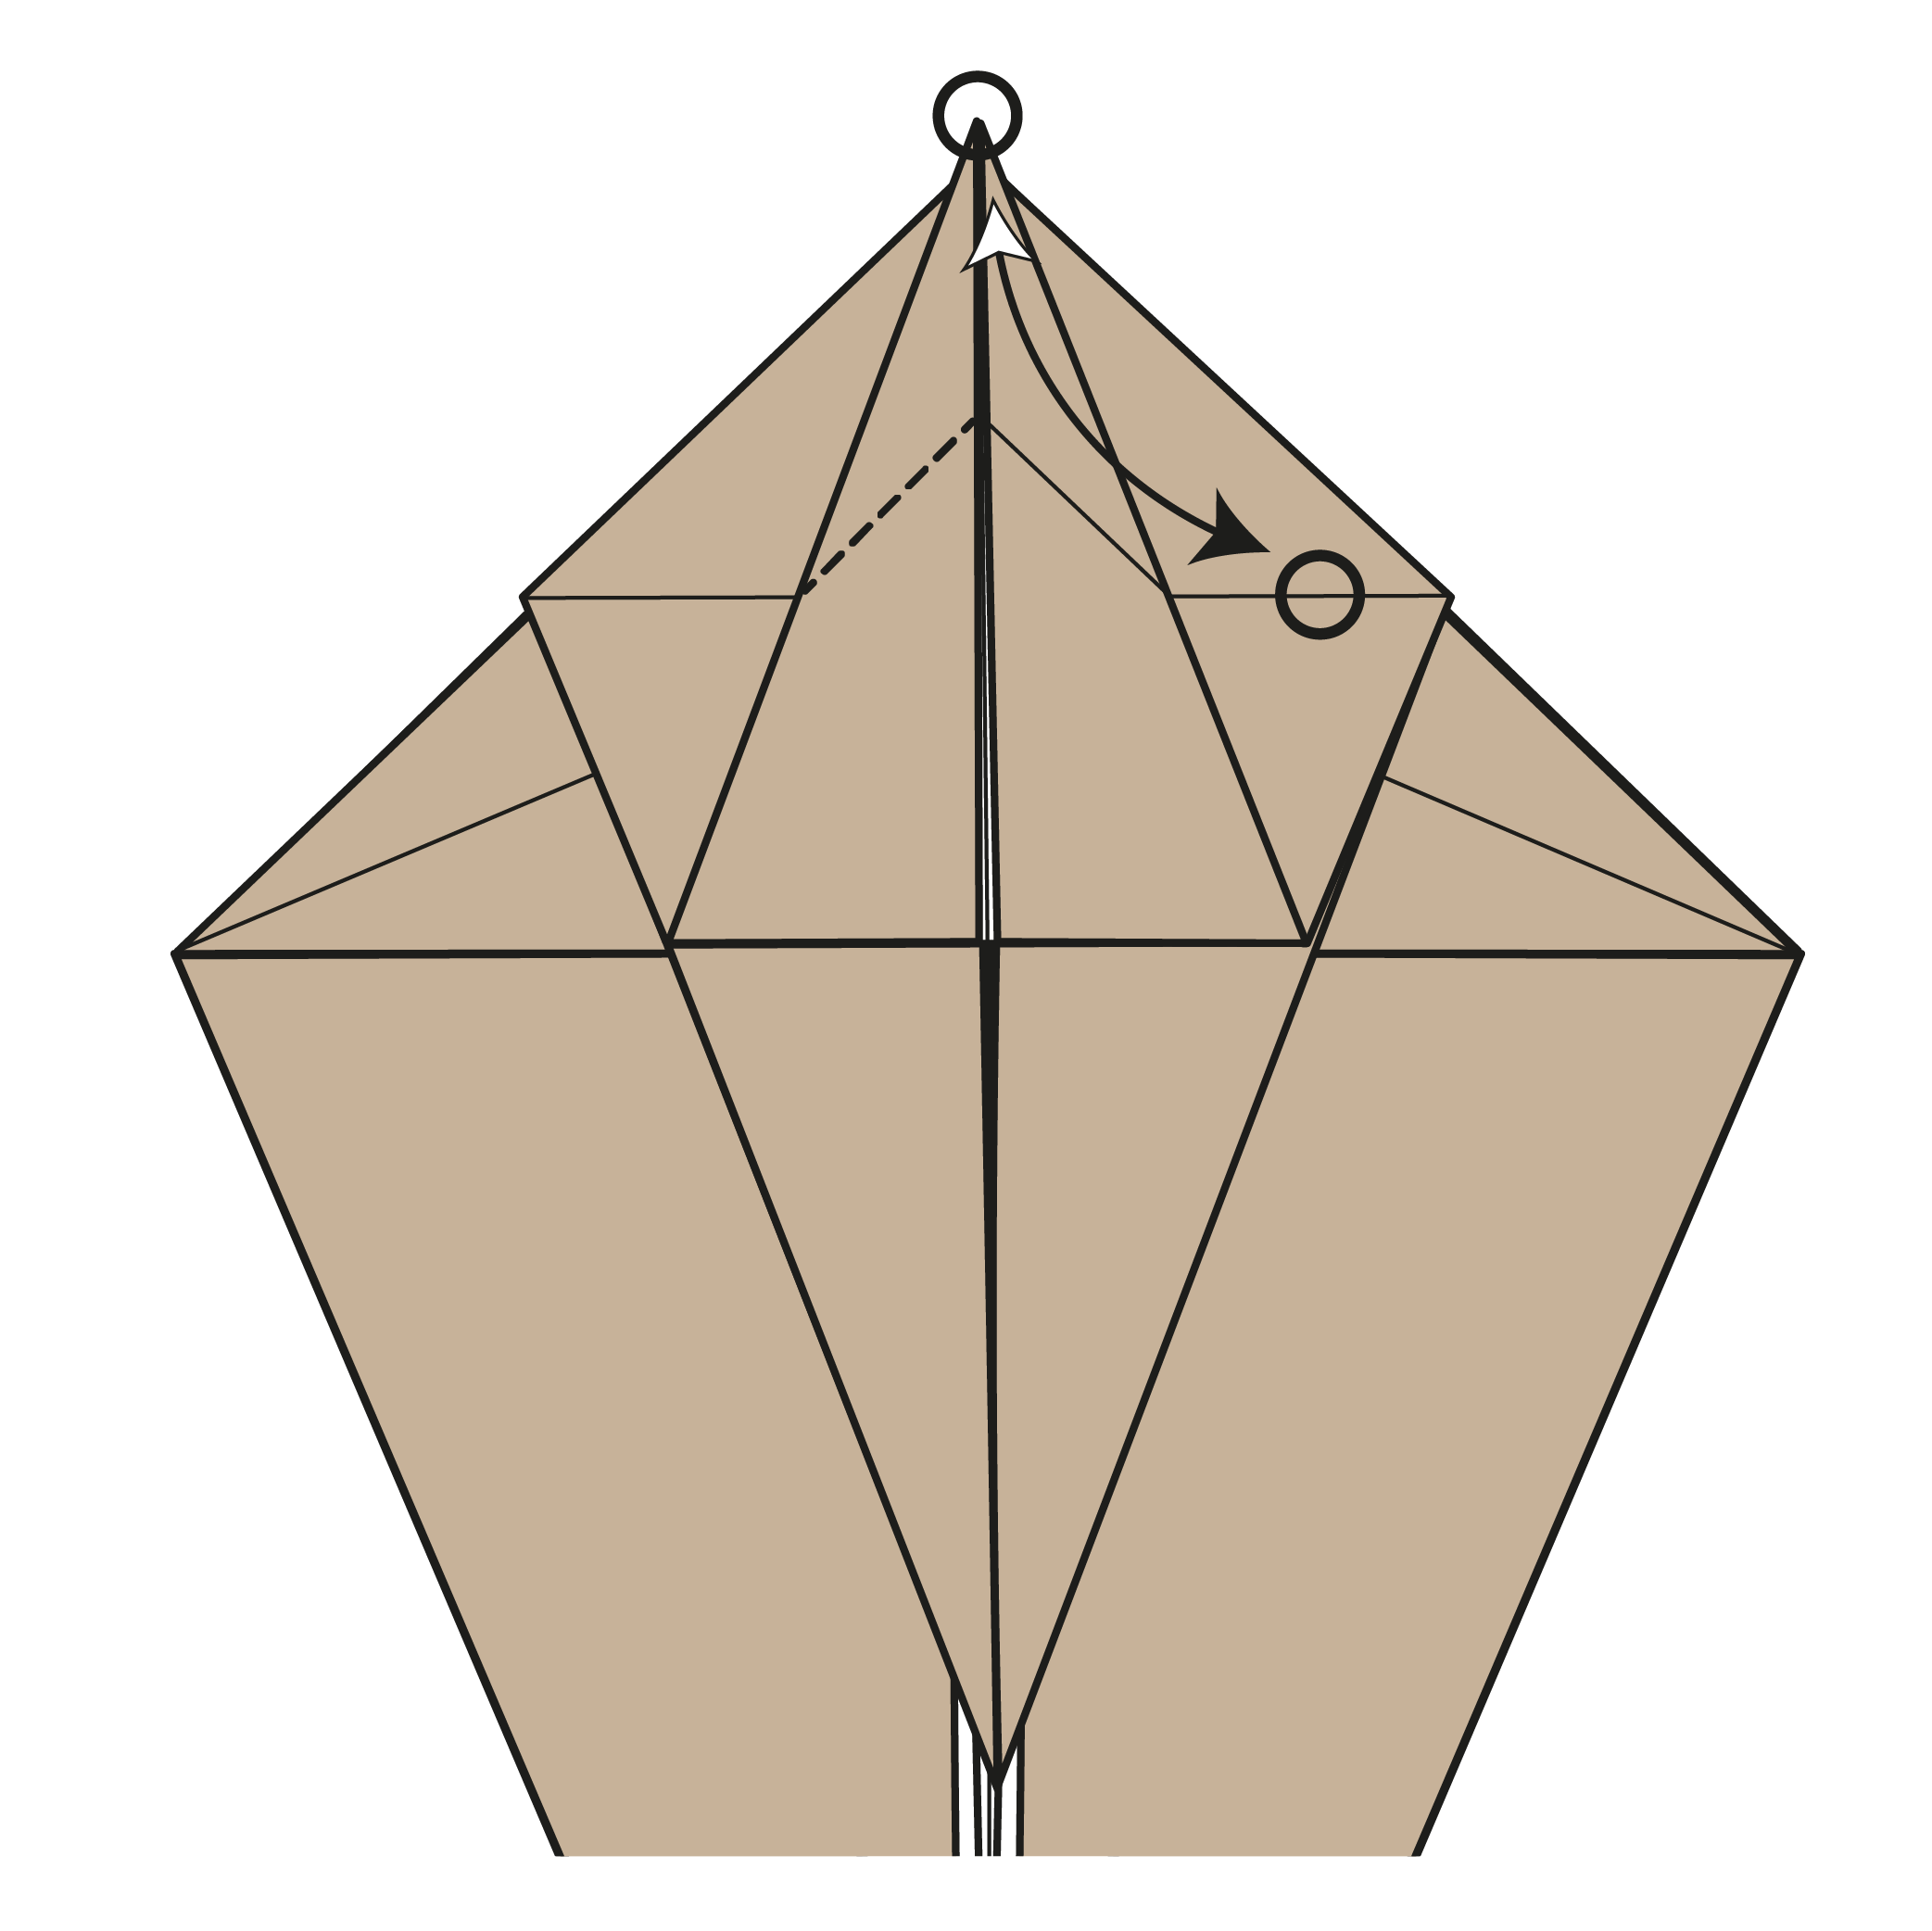
Repeat on the left side.
Step 20
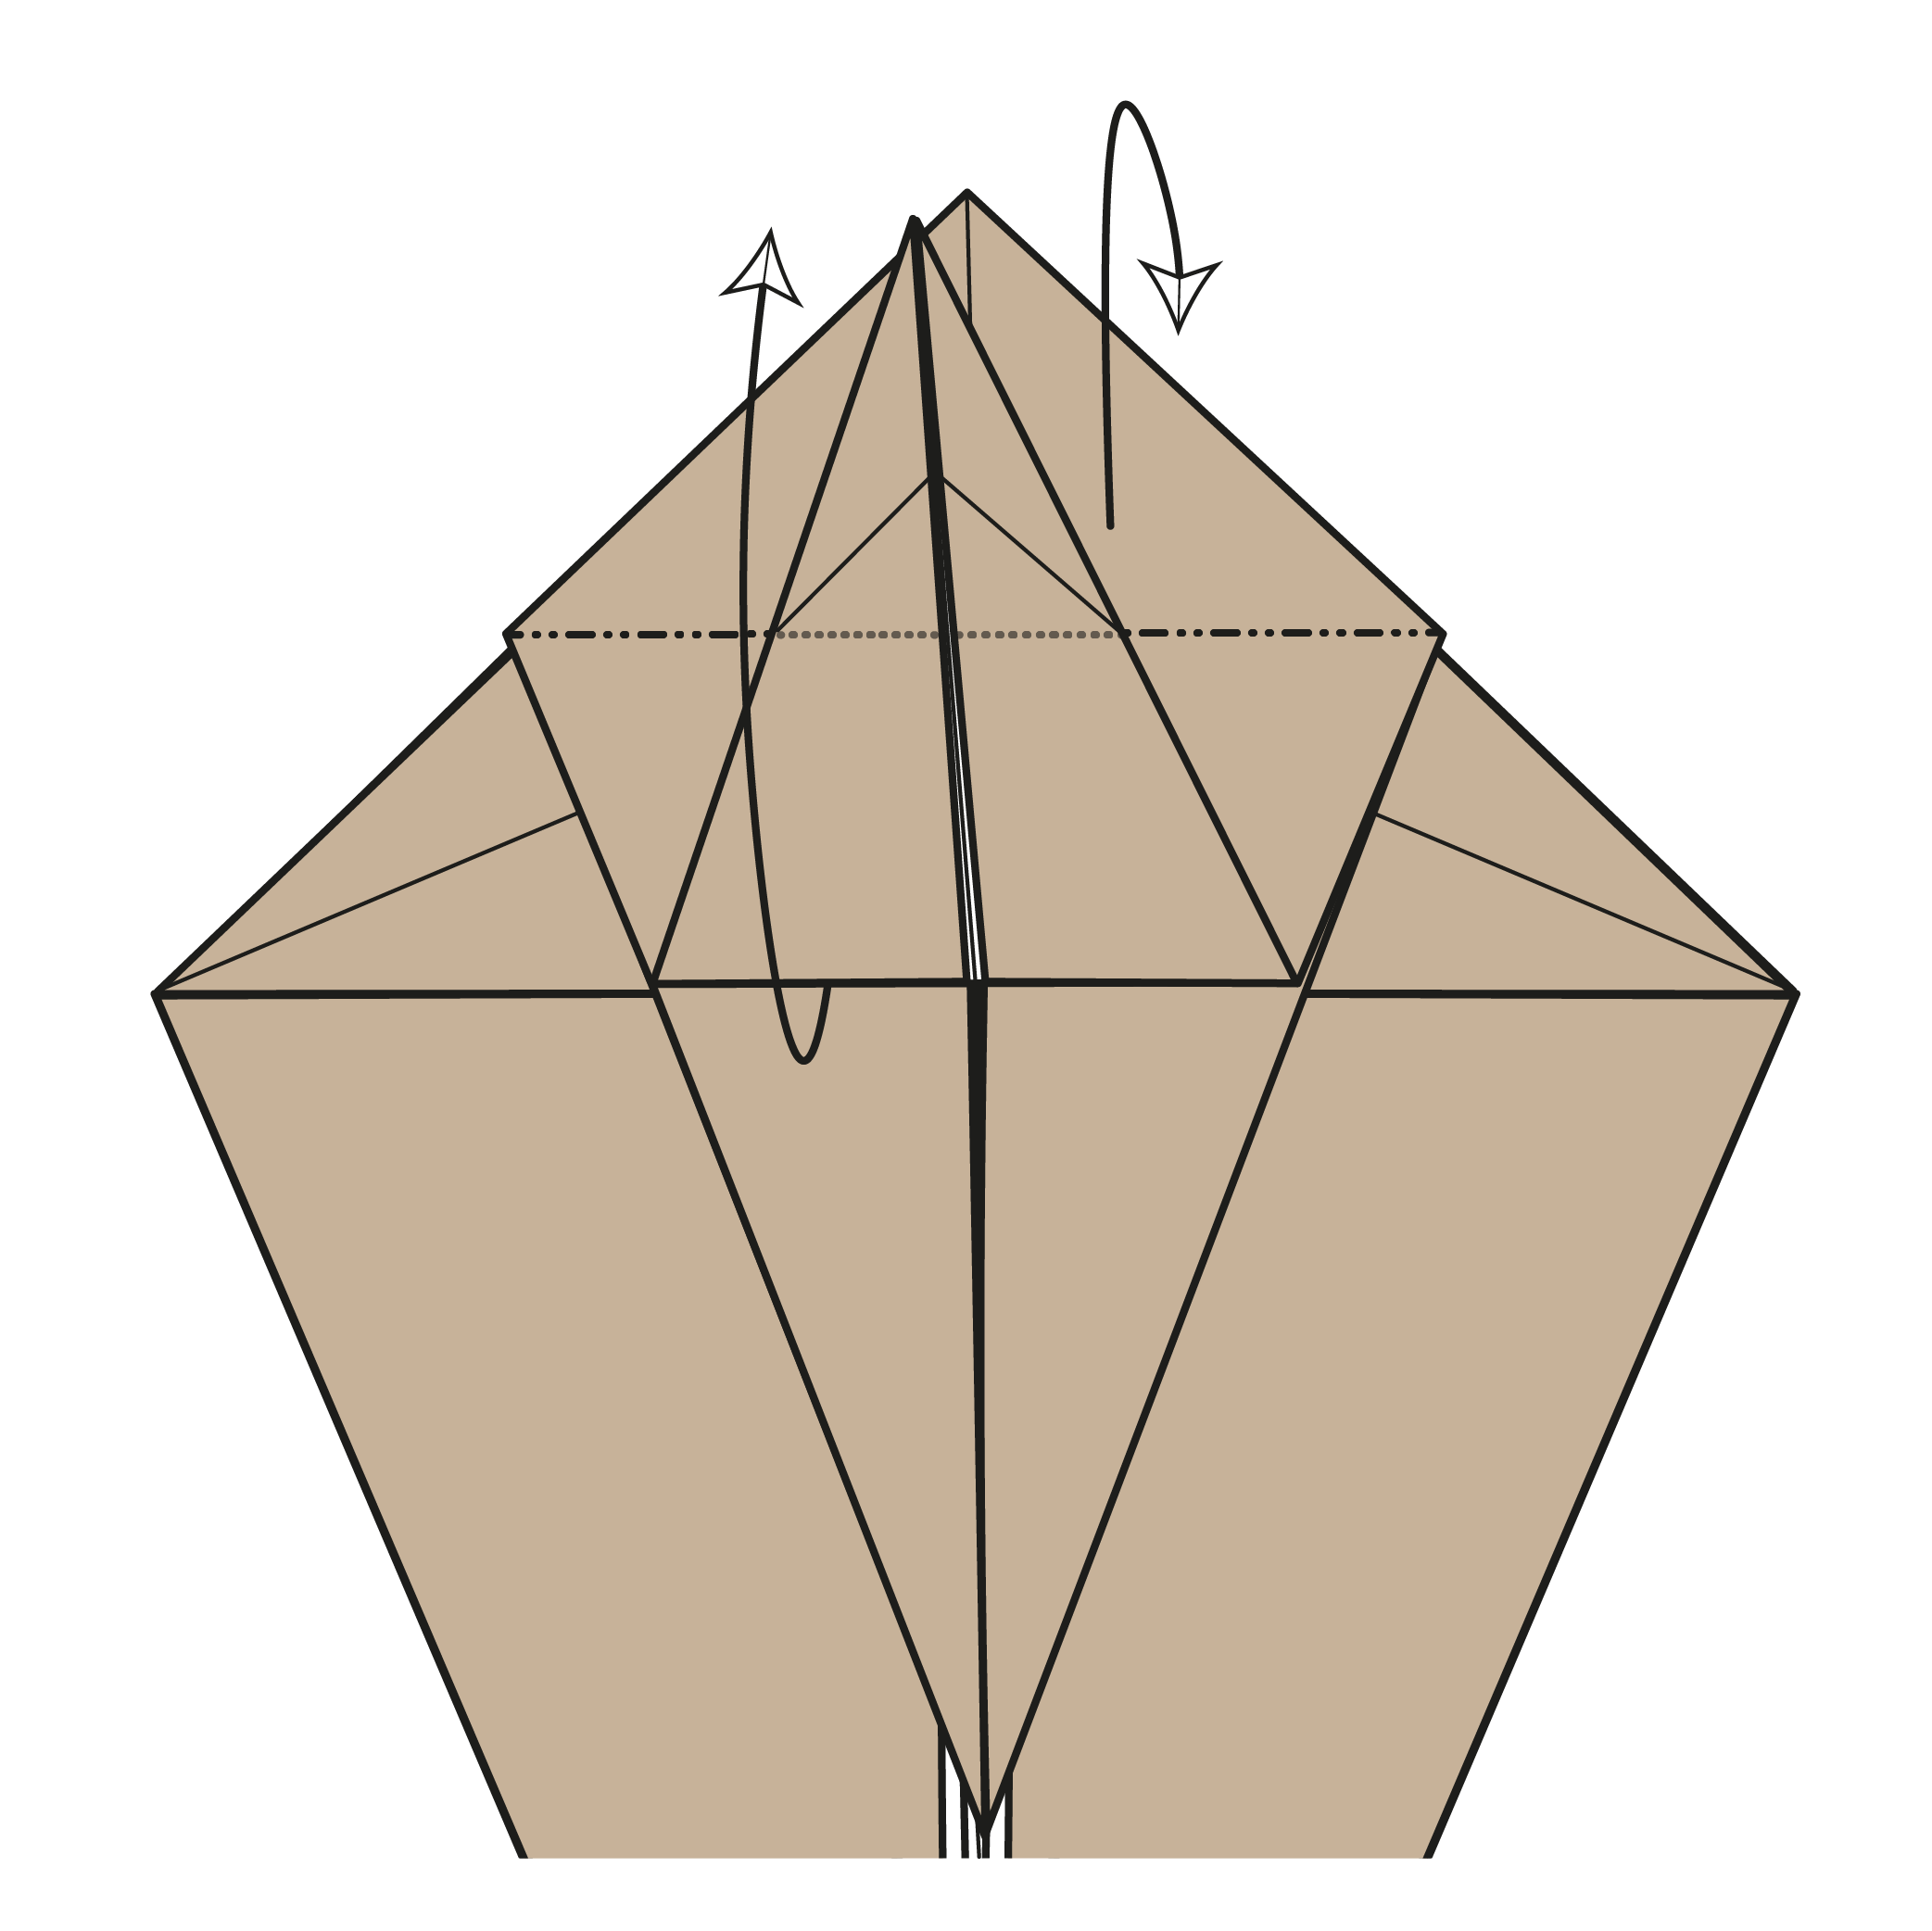
Fold the top triangle section to the back of the model. The front flap will now sit on top.
Step 21
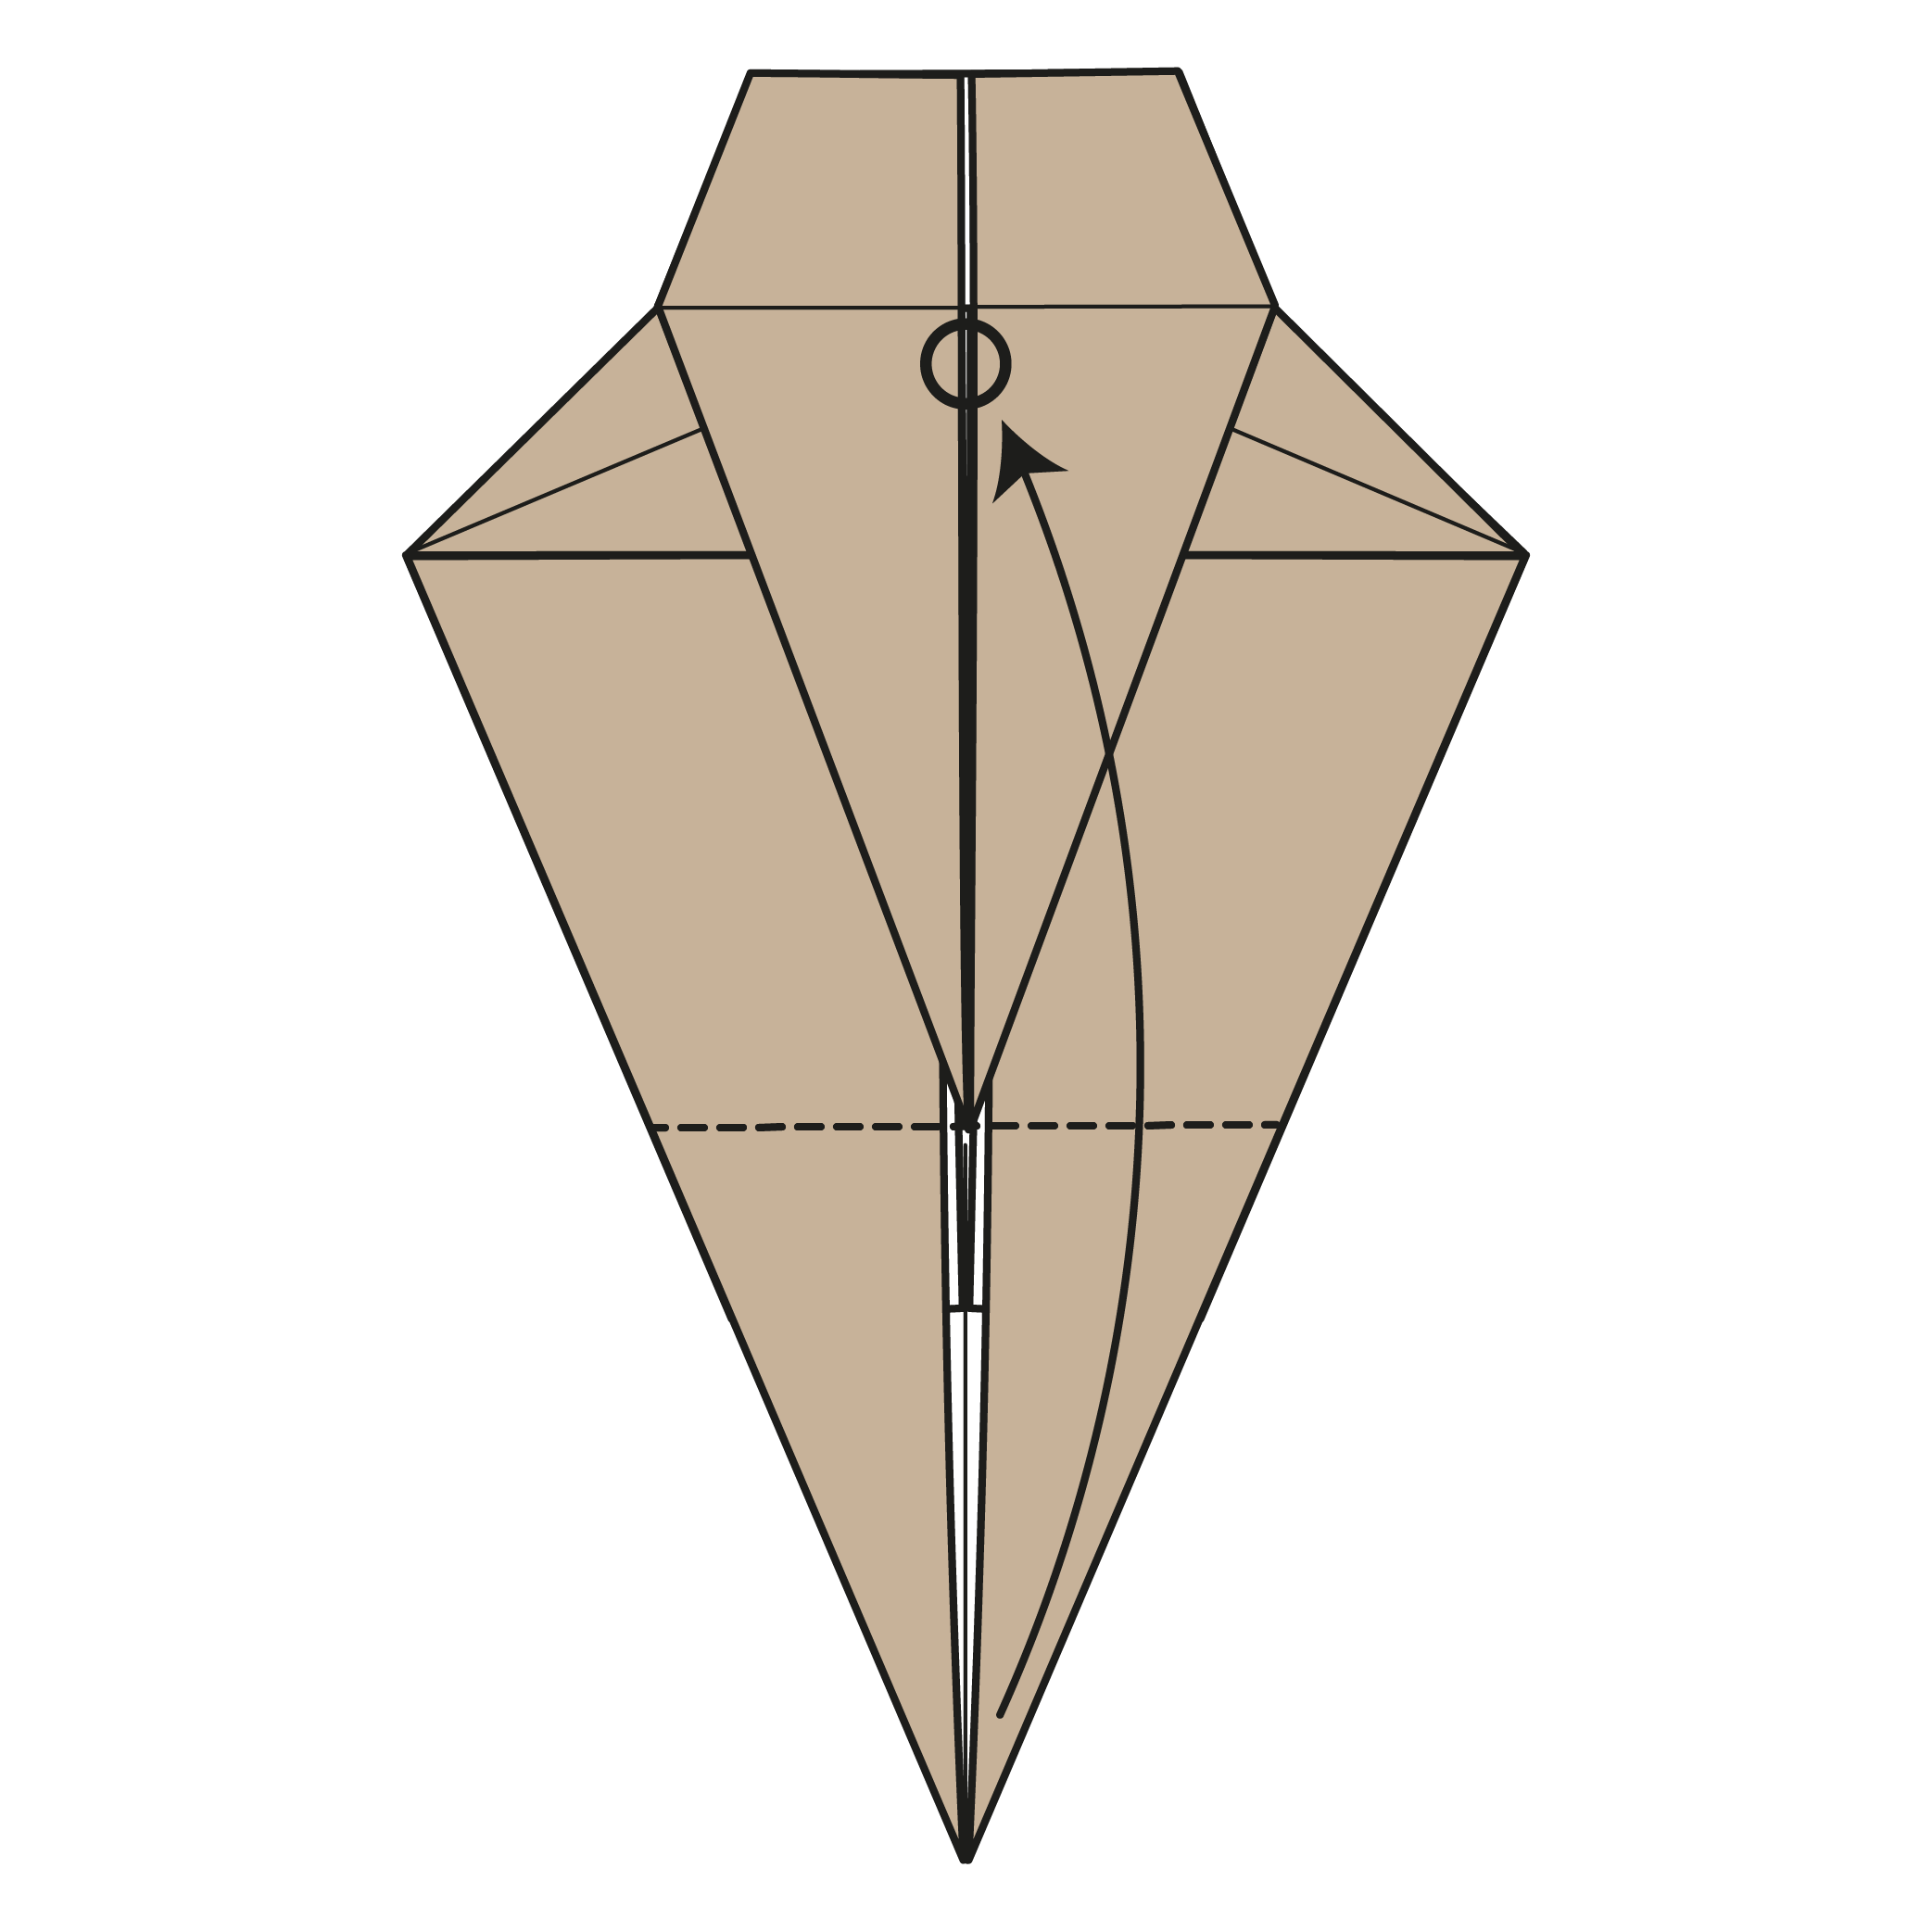
Fold the bottom corner up to the circled point.
Step 22
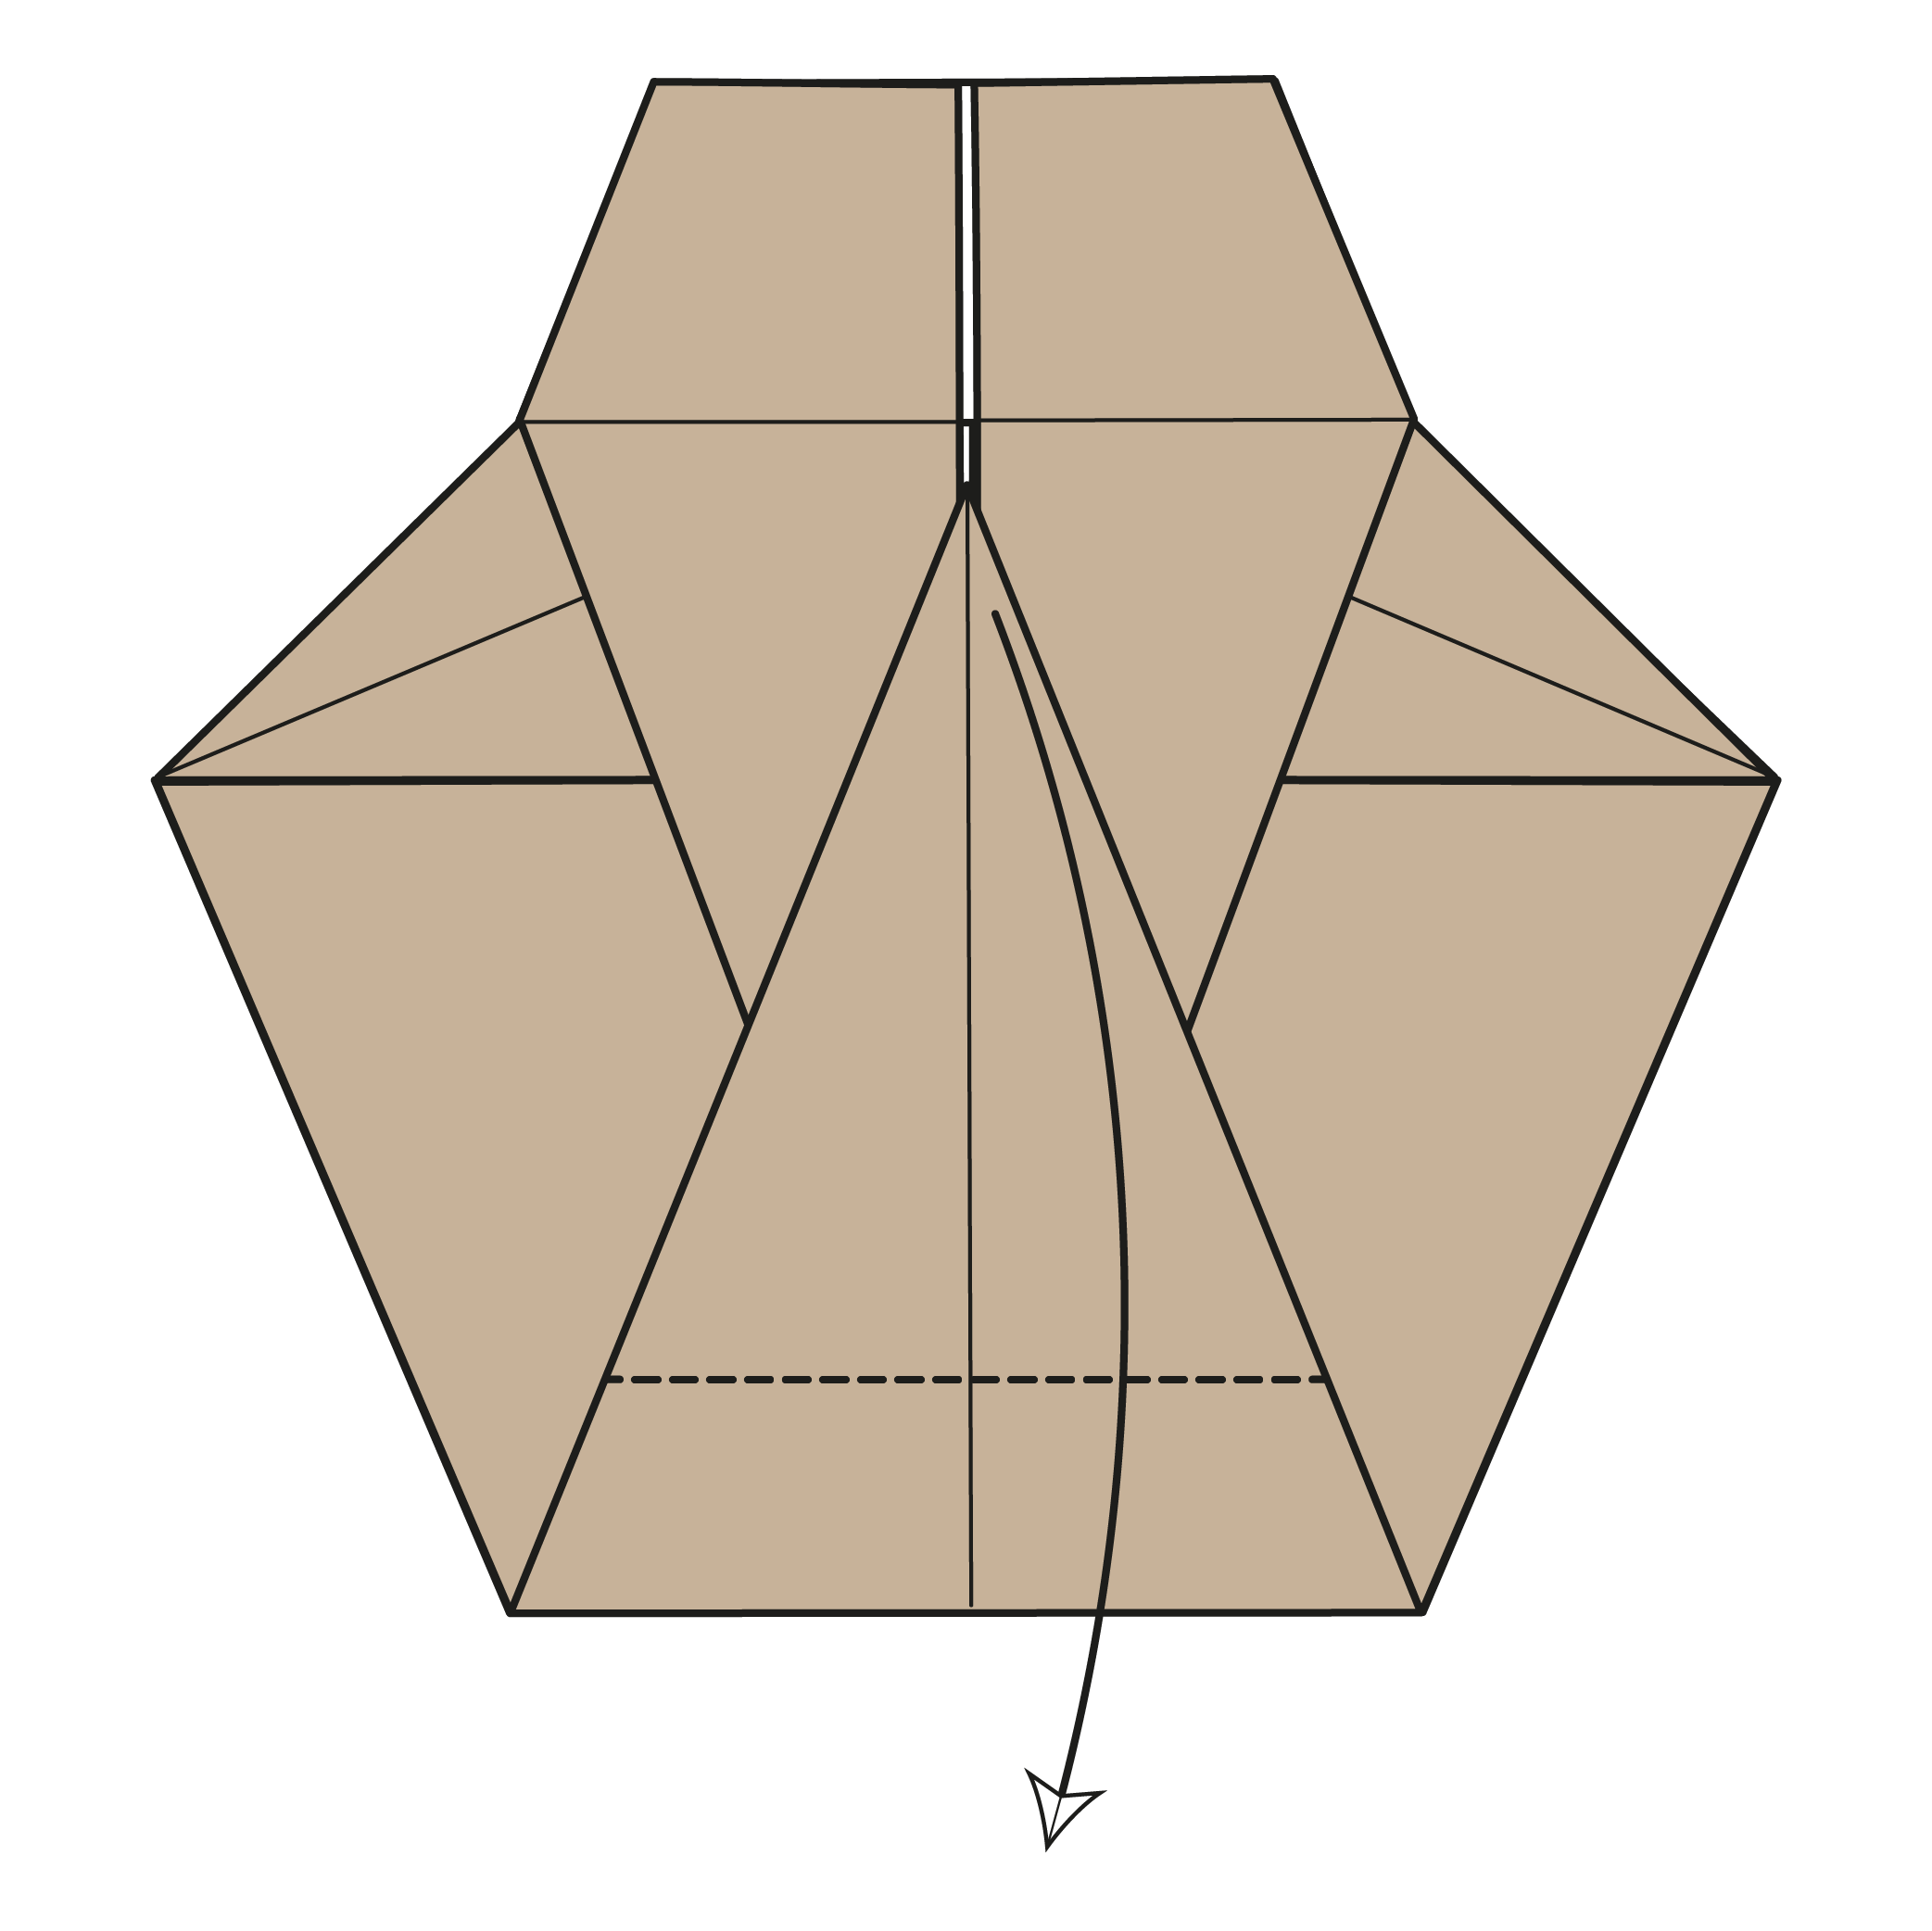
Fold the top flap down along the dashed line.
Step 23
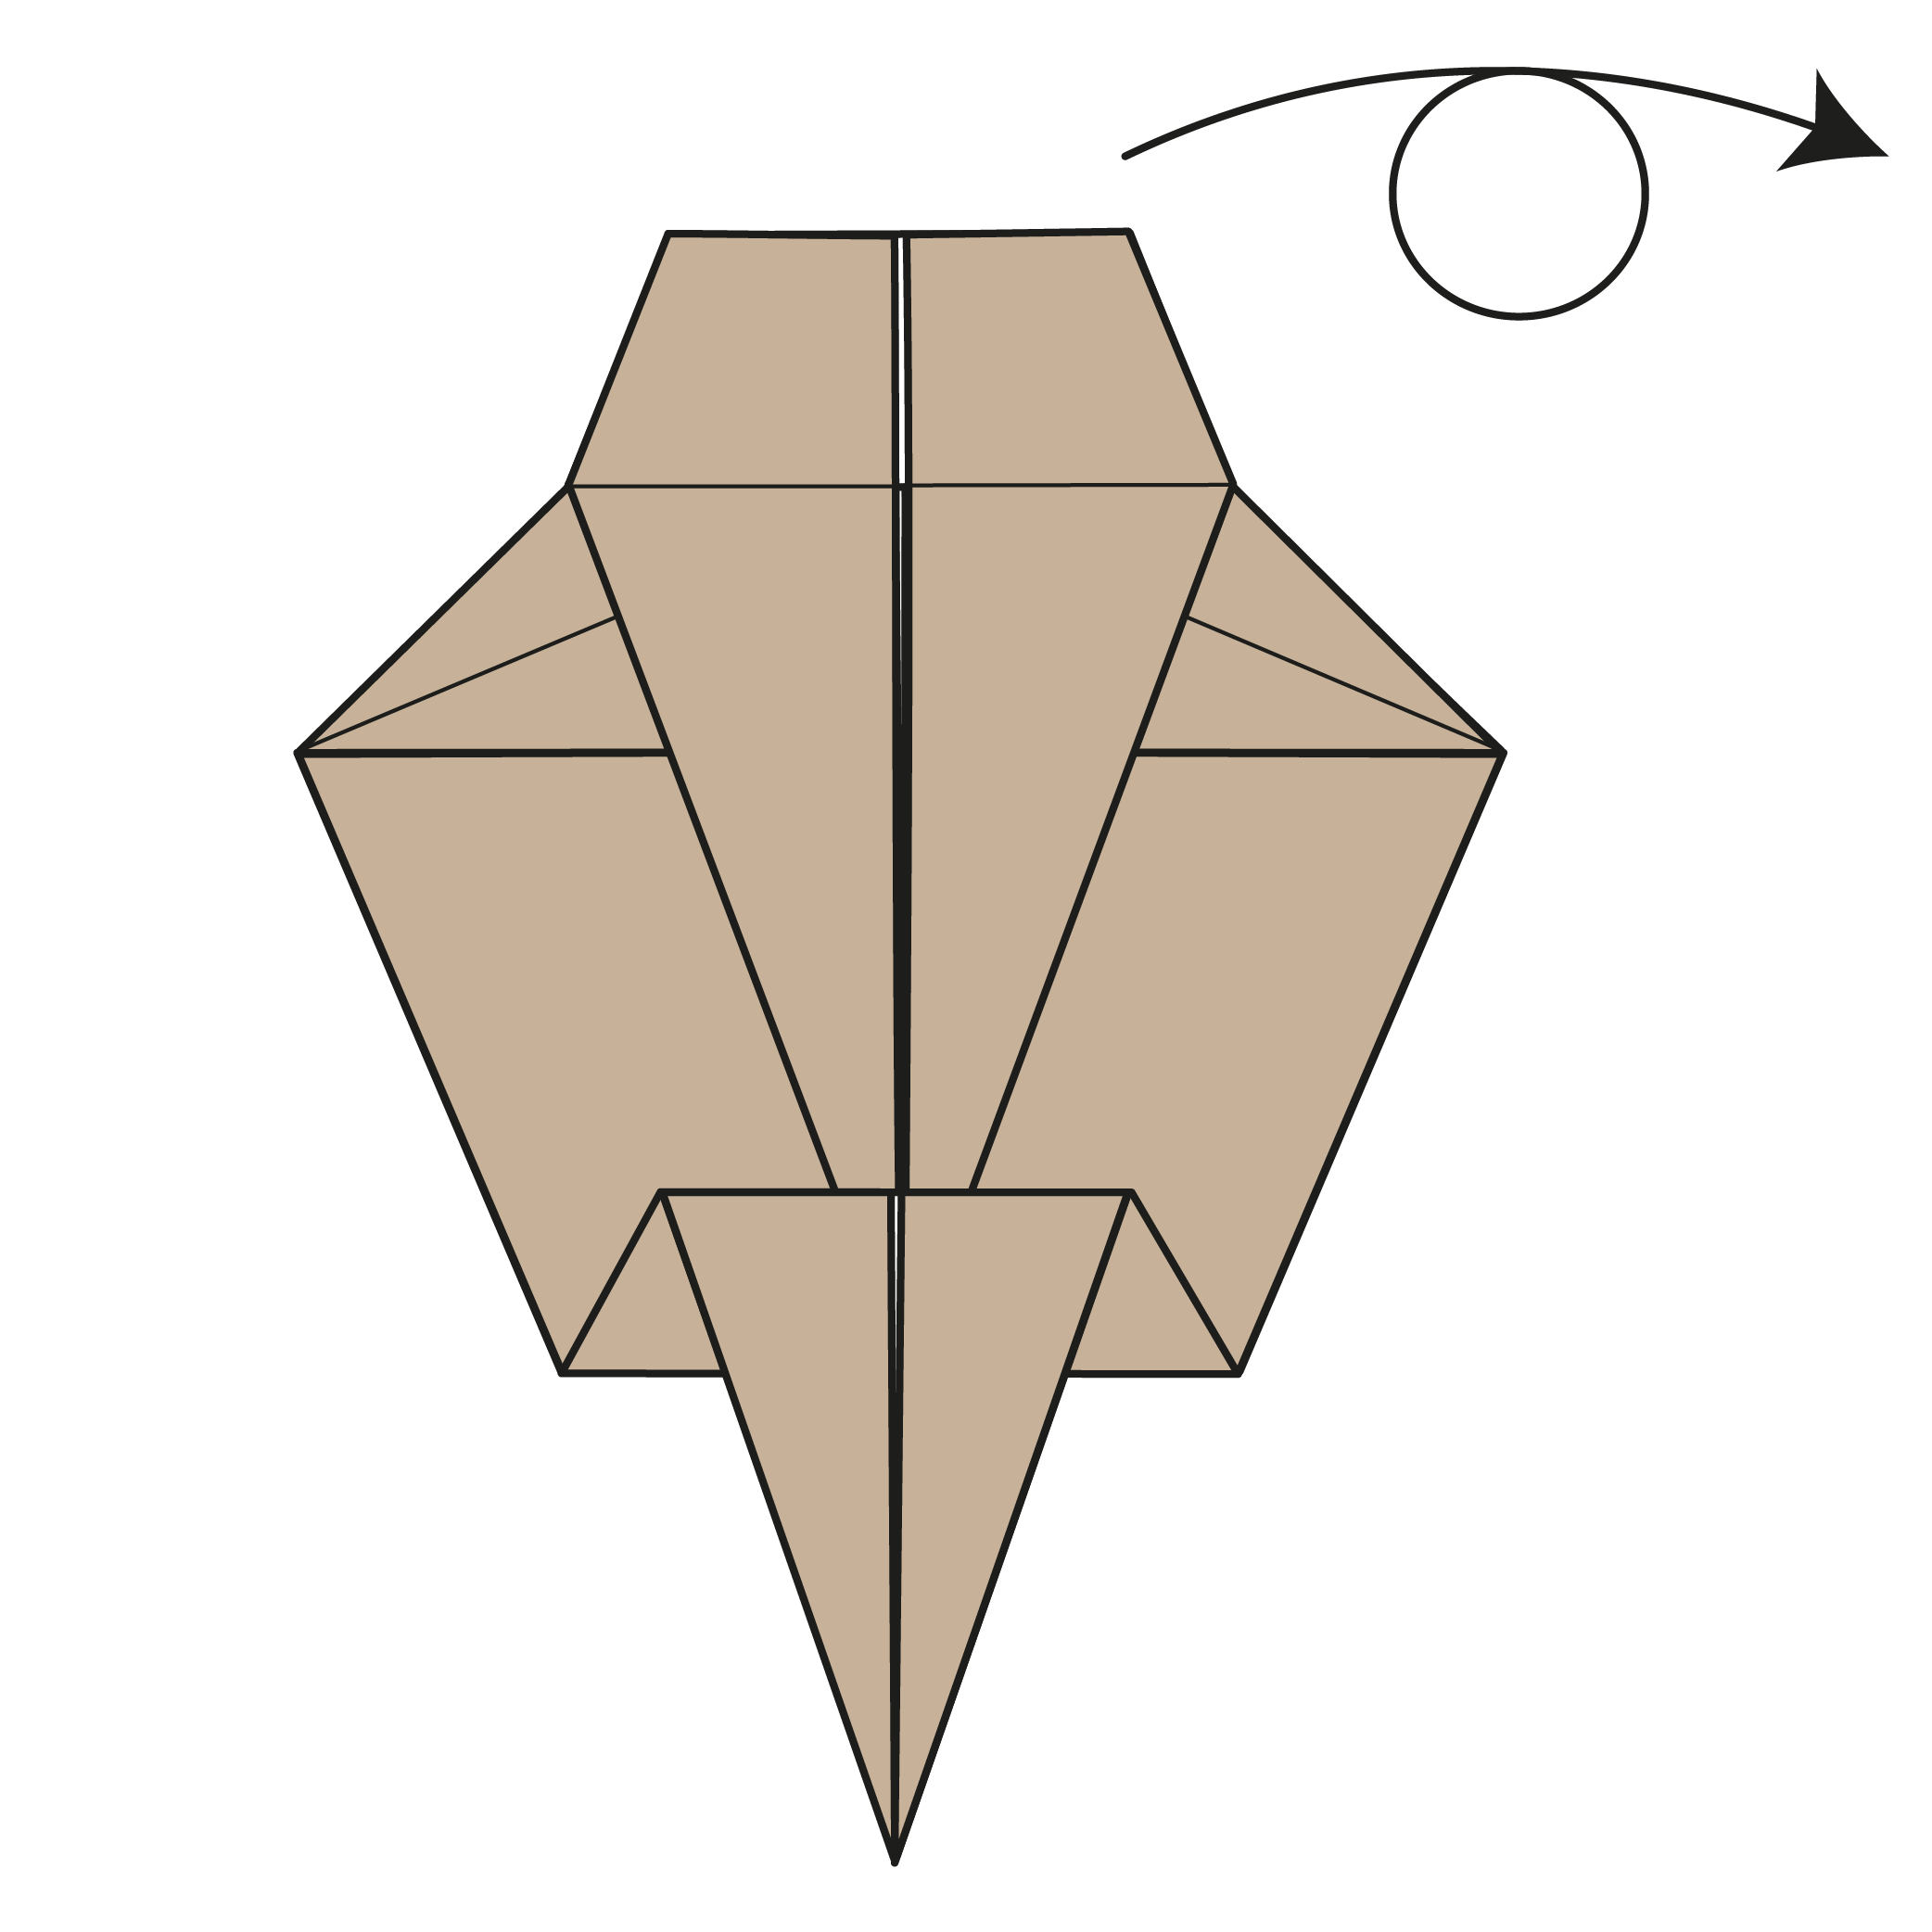
Turn the model over.
Step 24
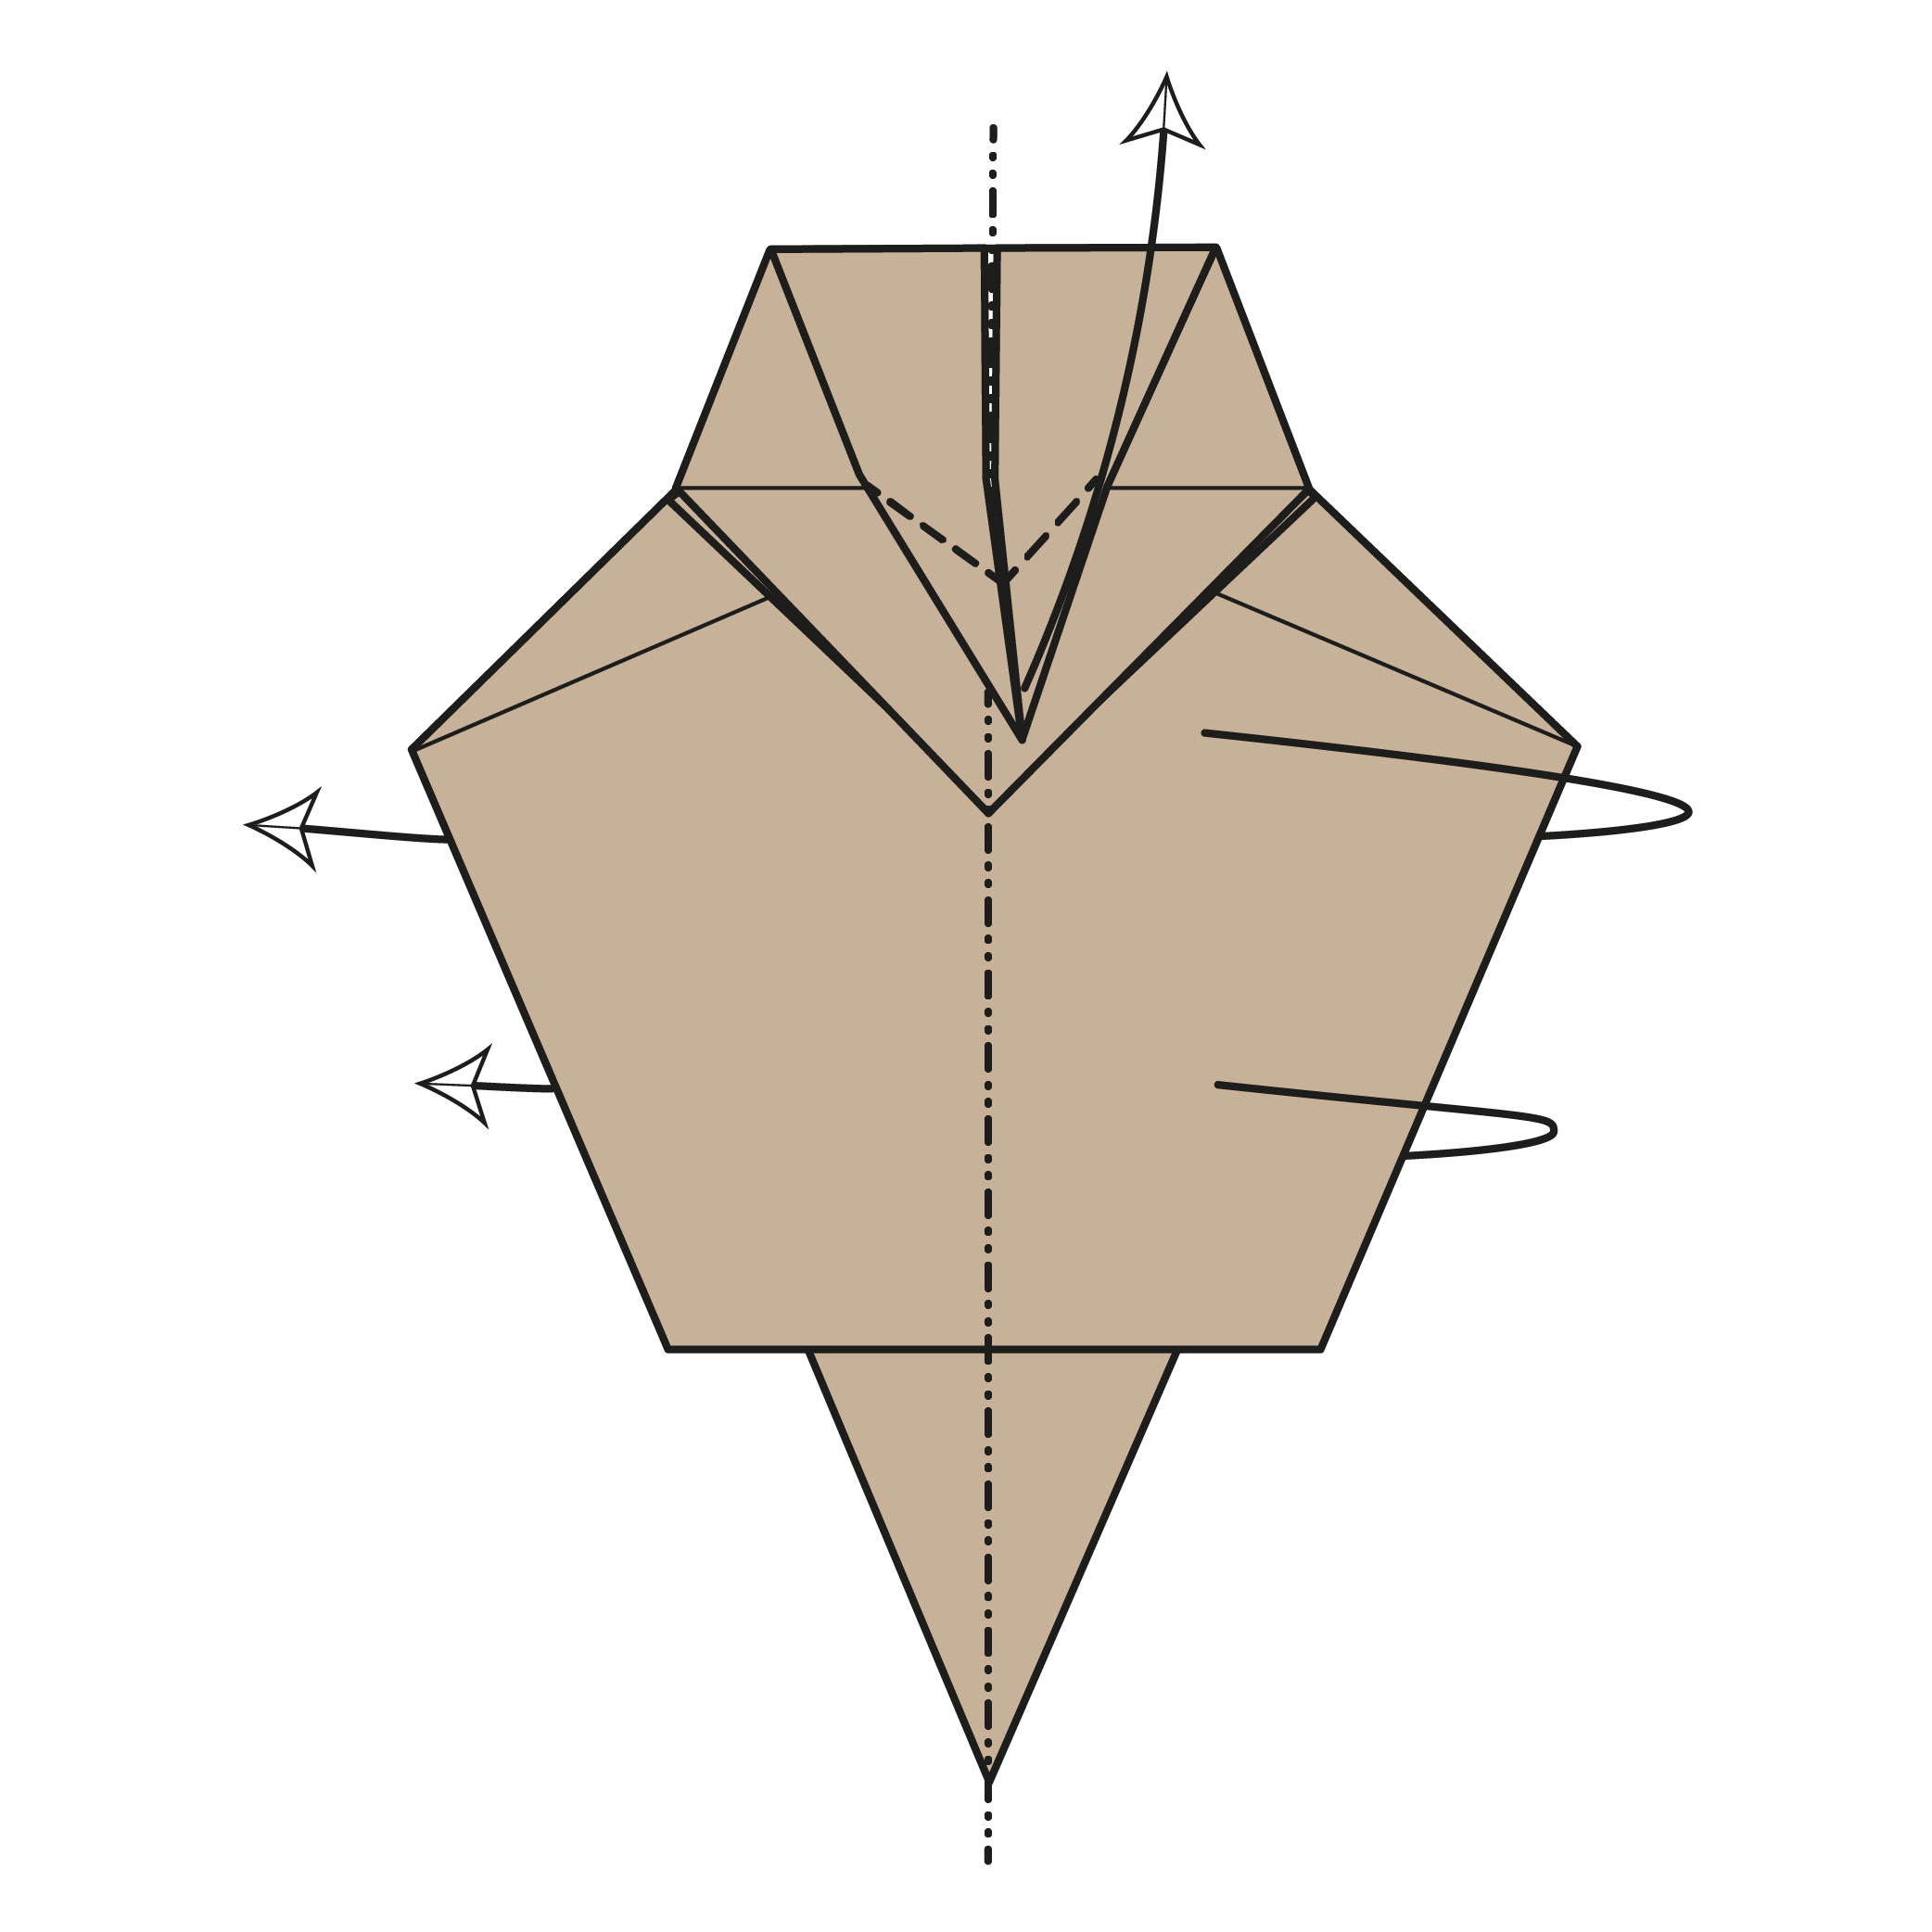
Mountain fold the model in half from right to left. At the same time, fold the top flap along the existing crease. It should stick out.
Step 25

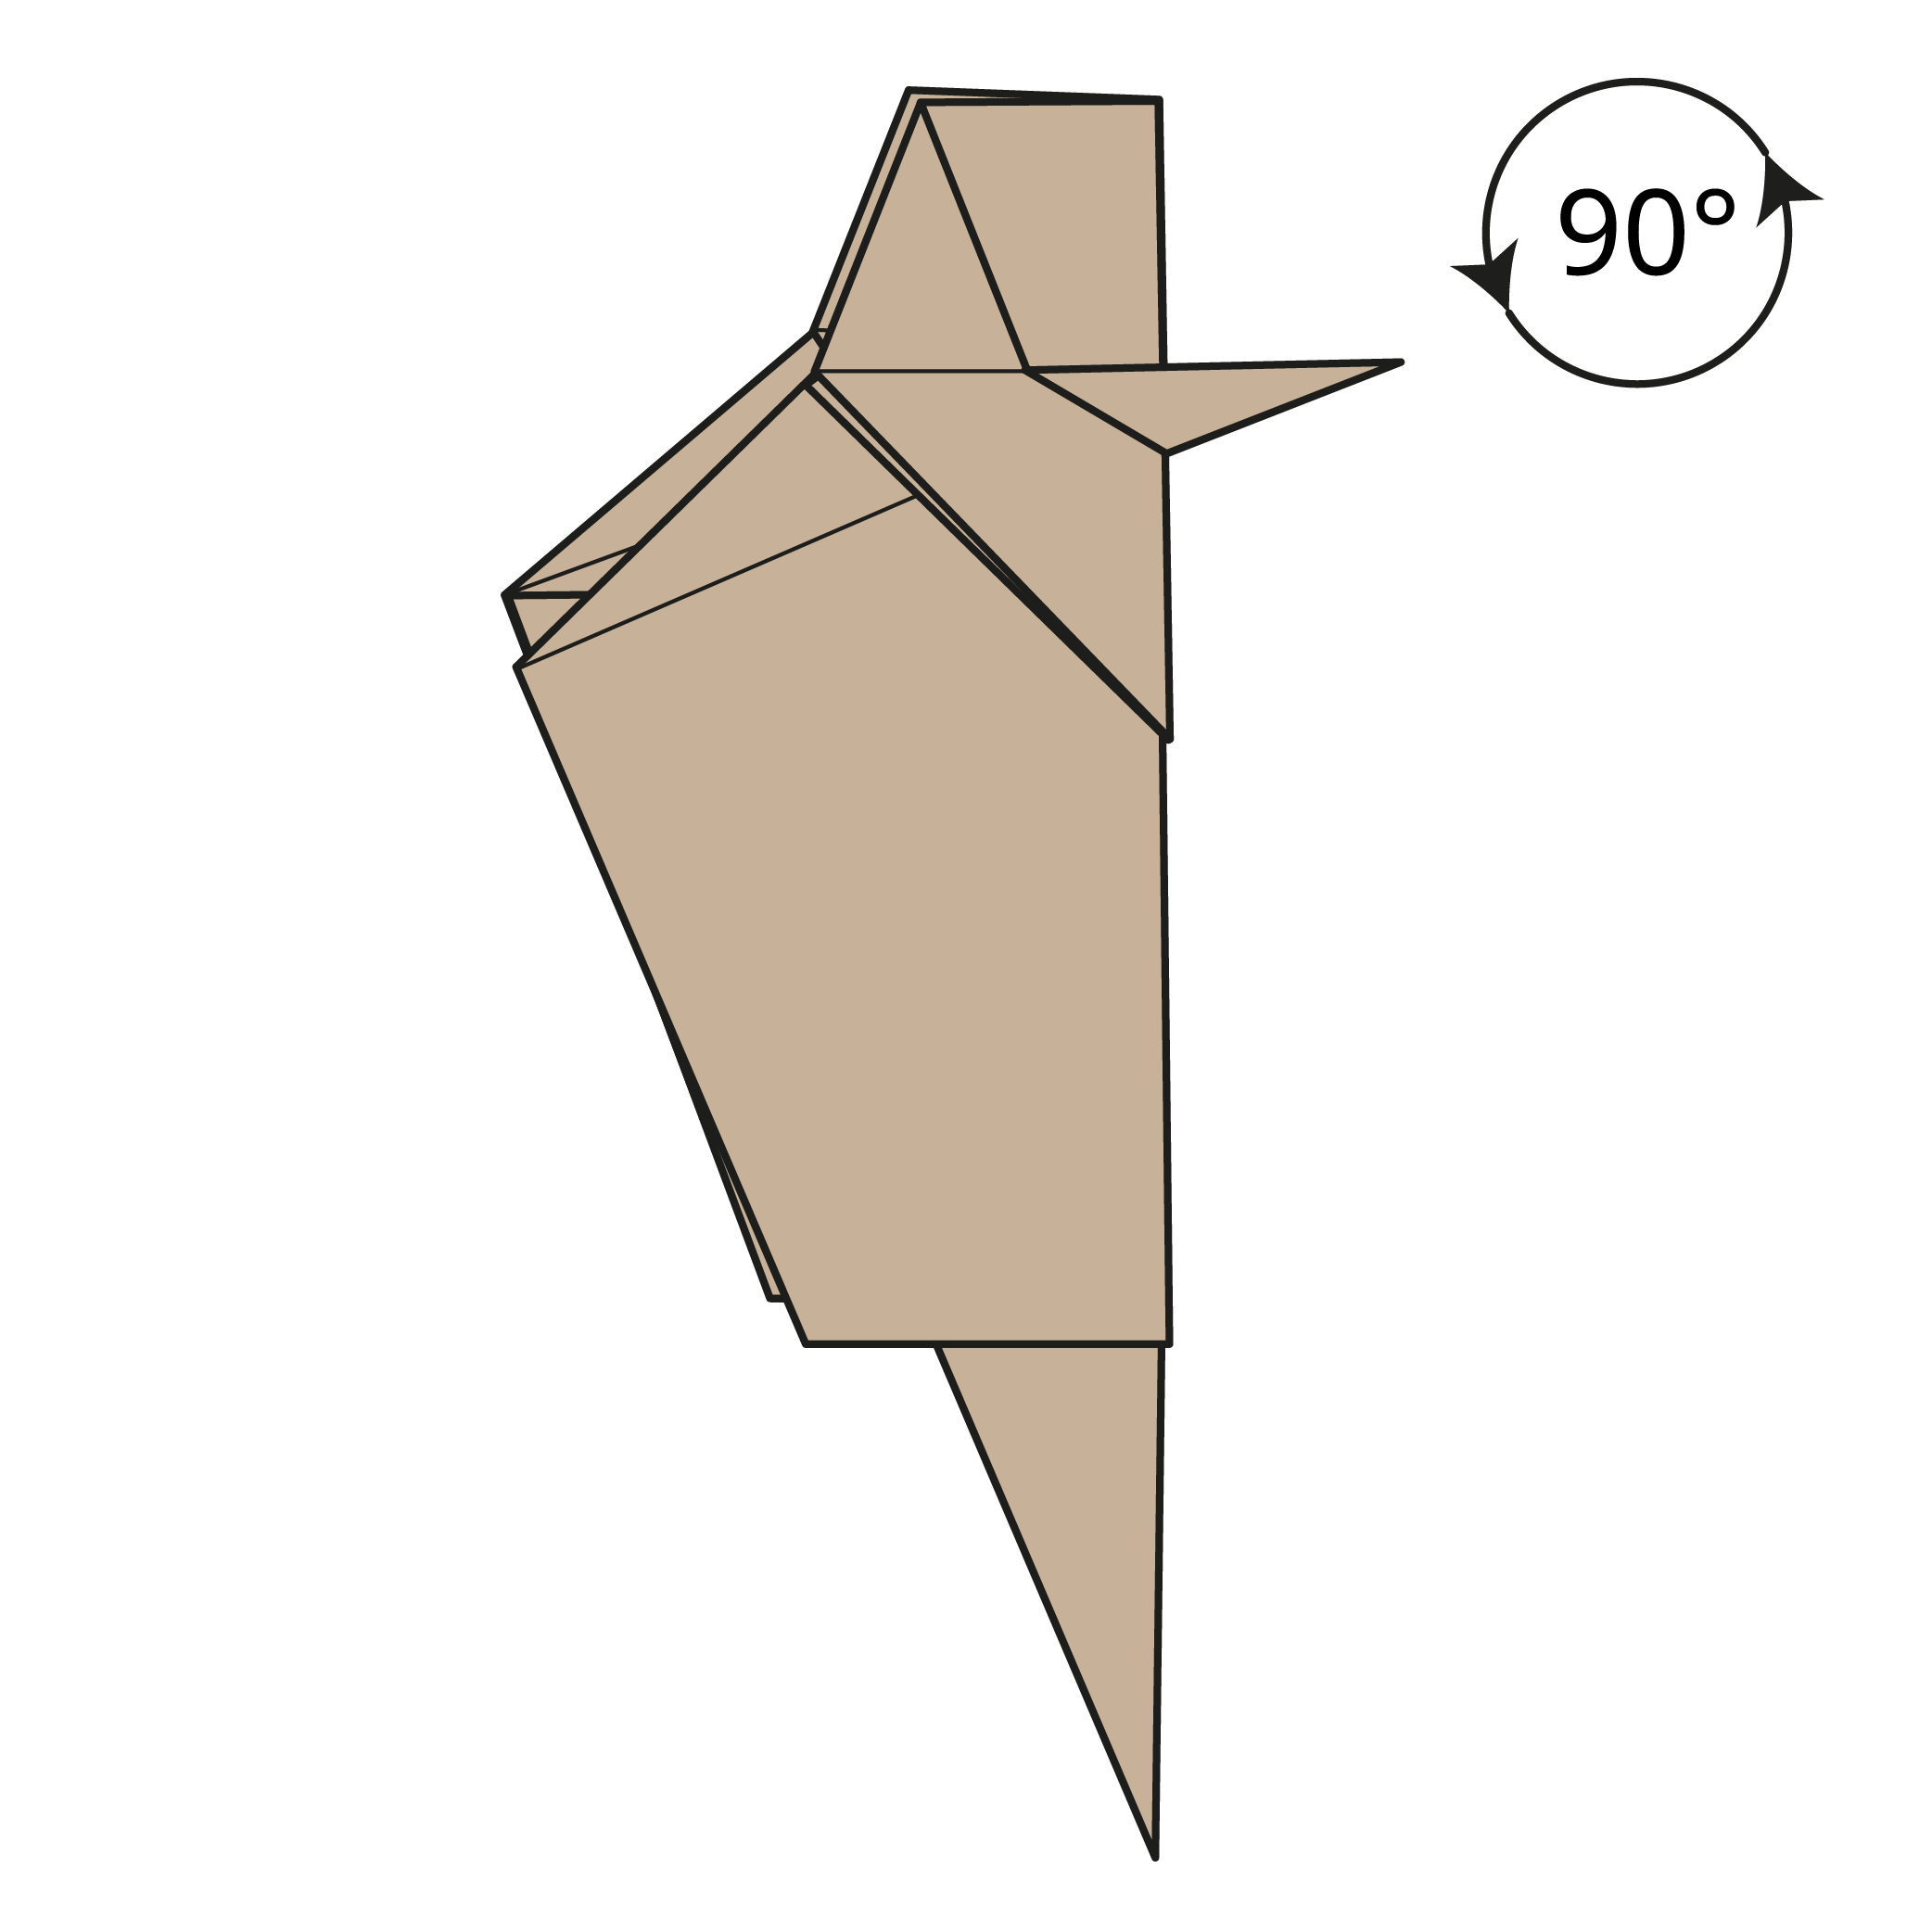
Rotate the model 90° counterclockwise.
Step 26
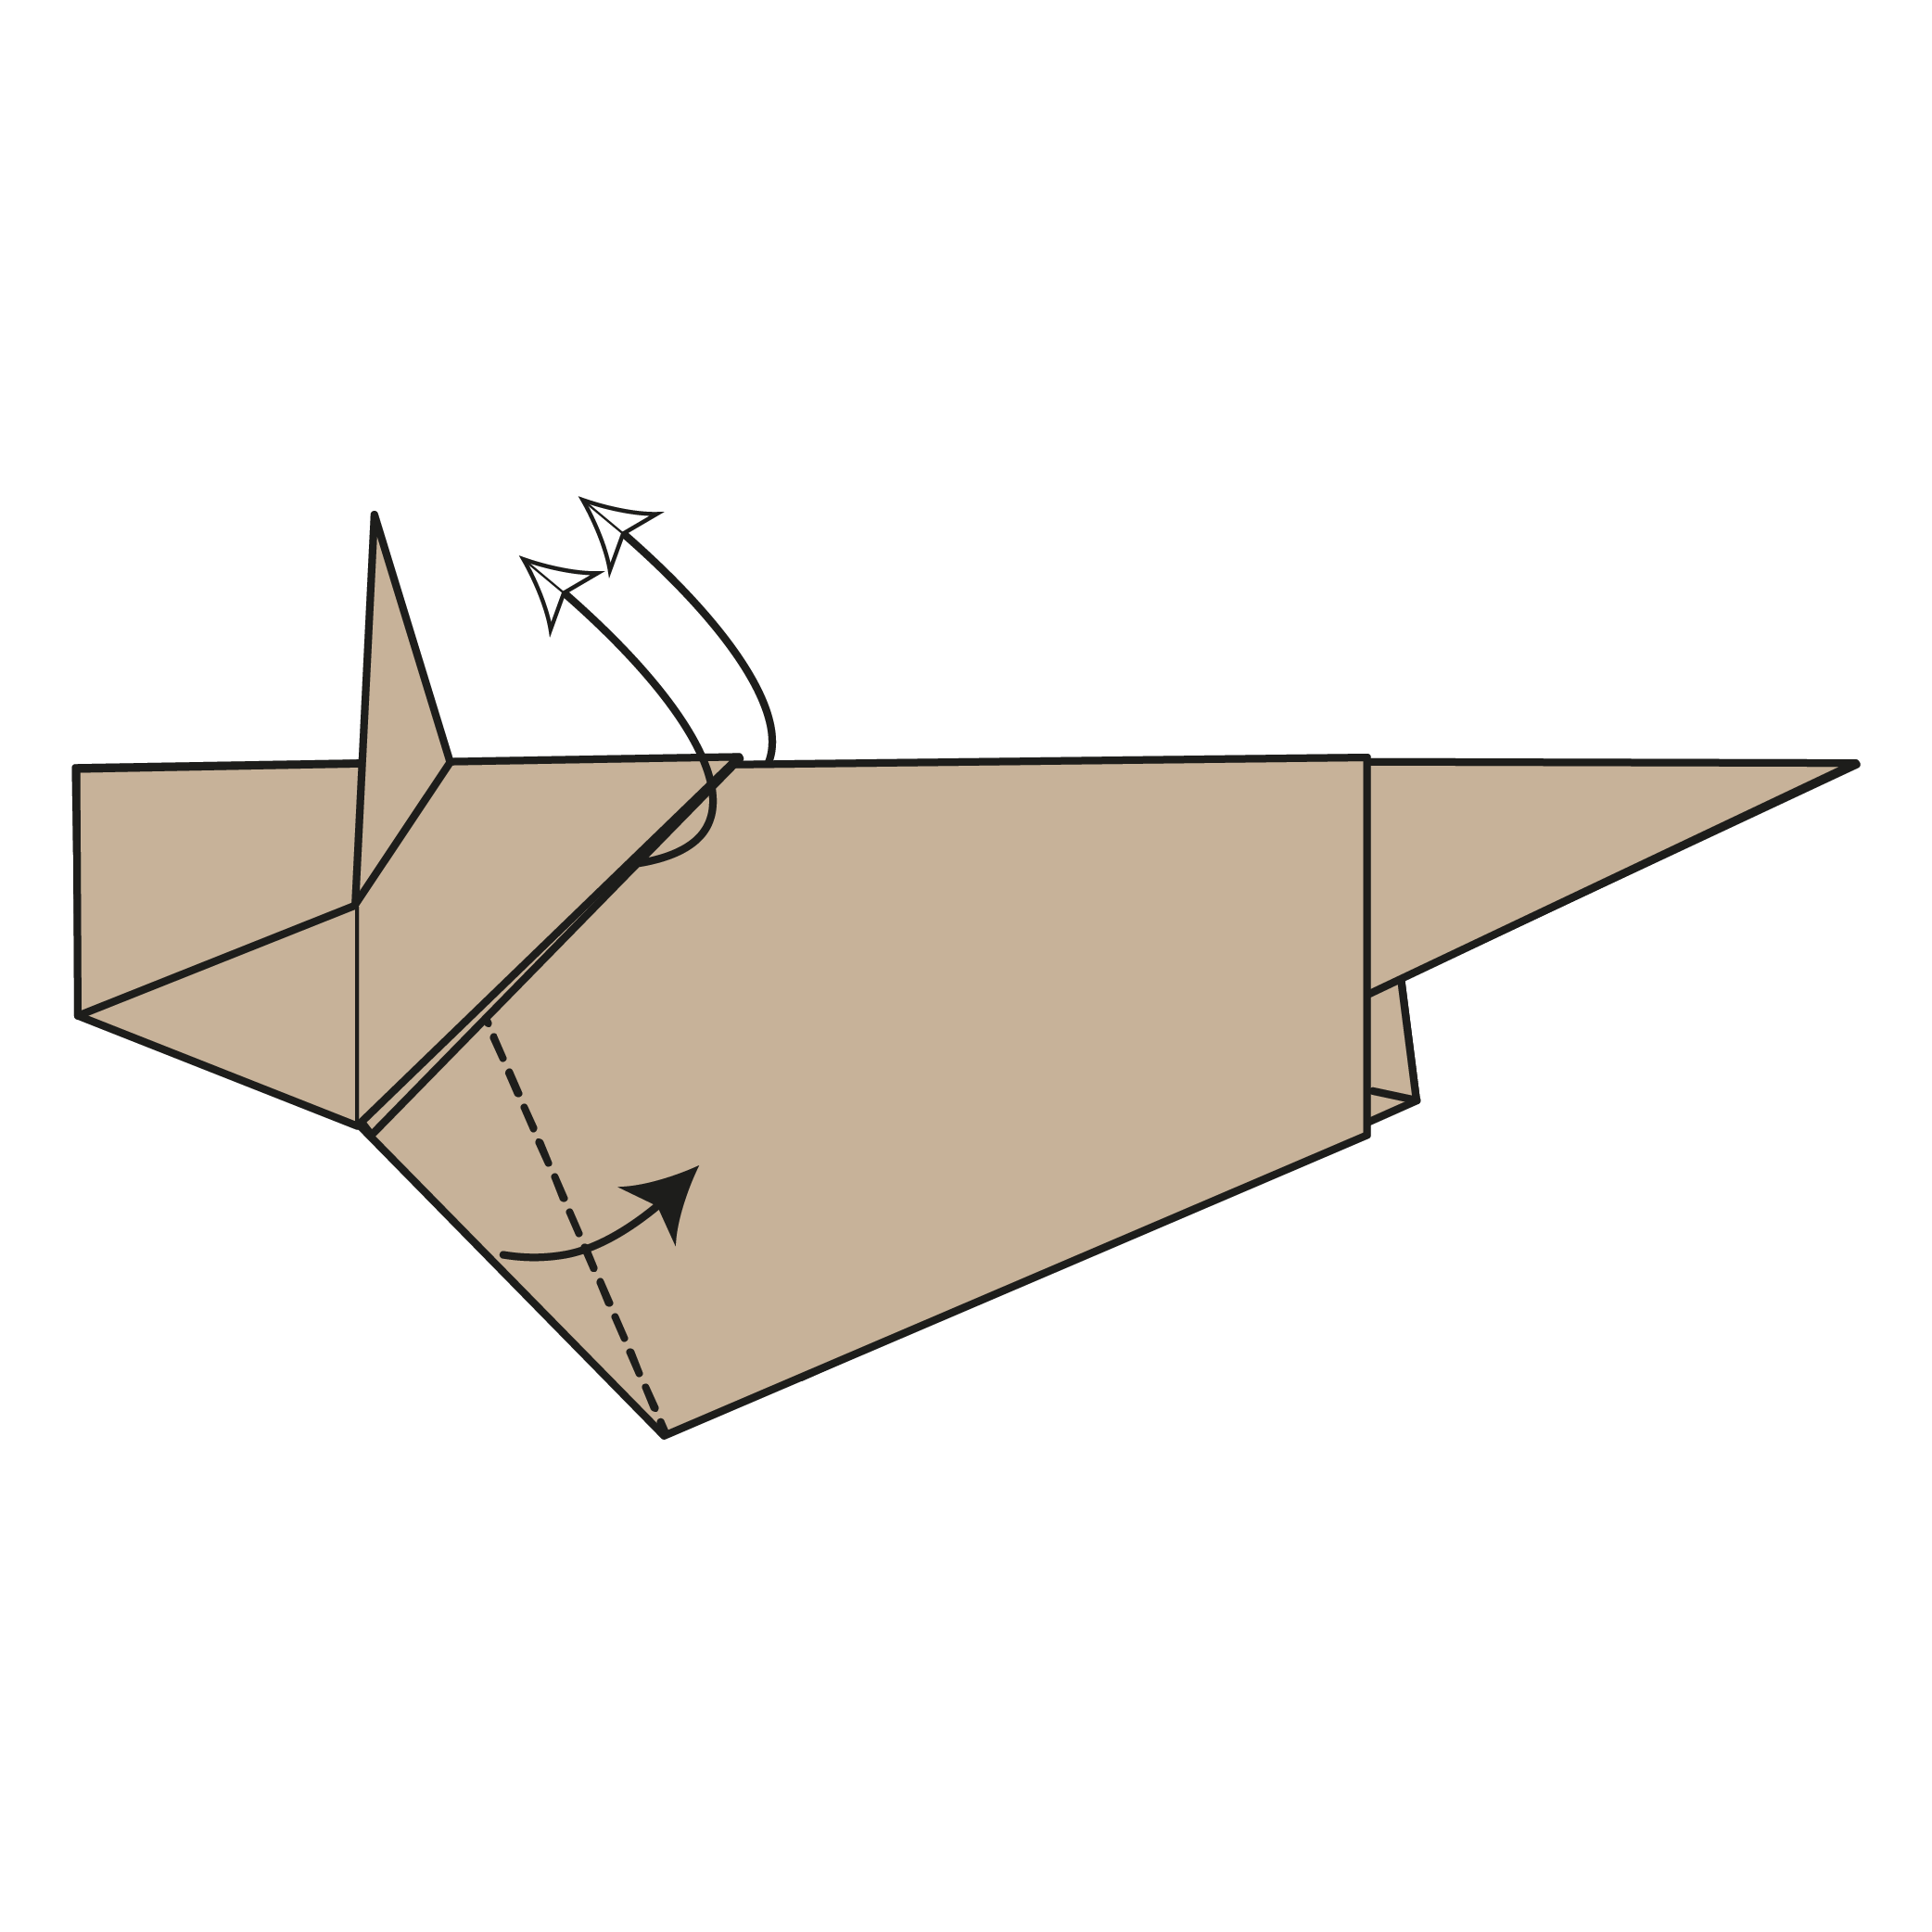
Pivot the head to the left using the existing creases.
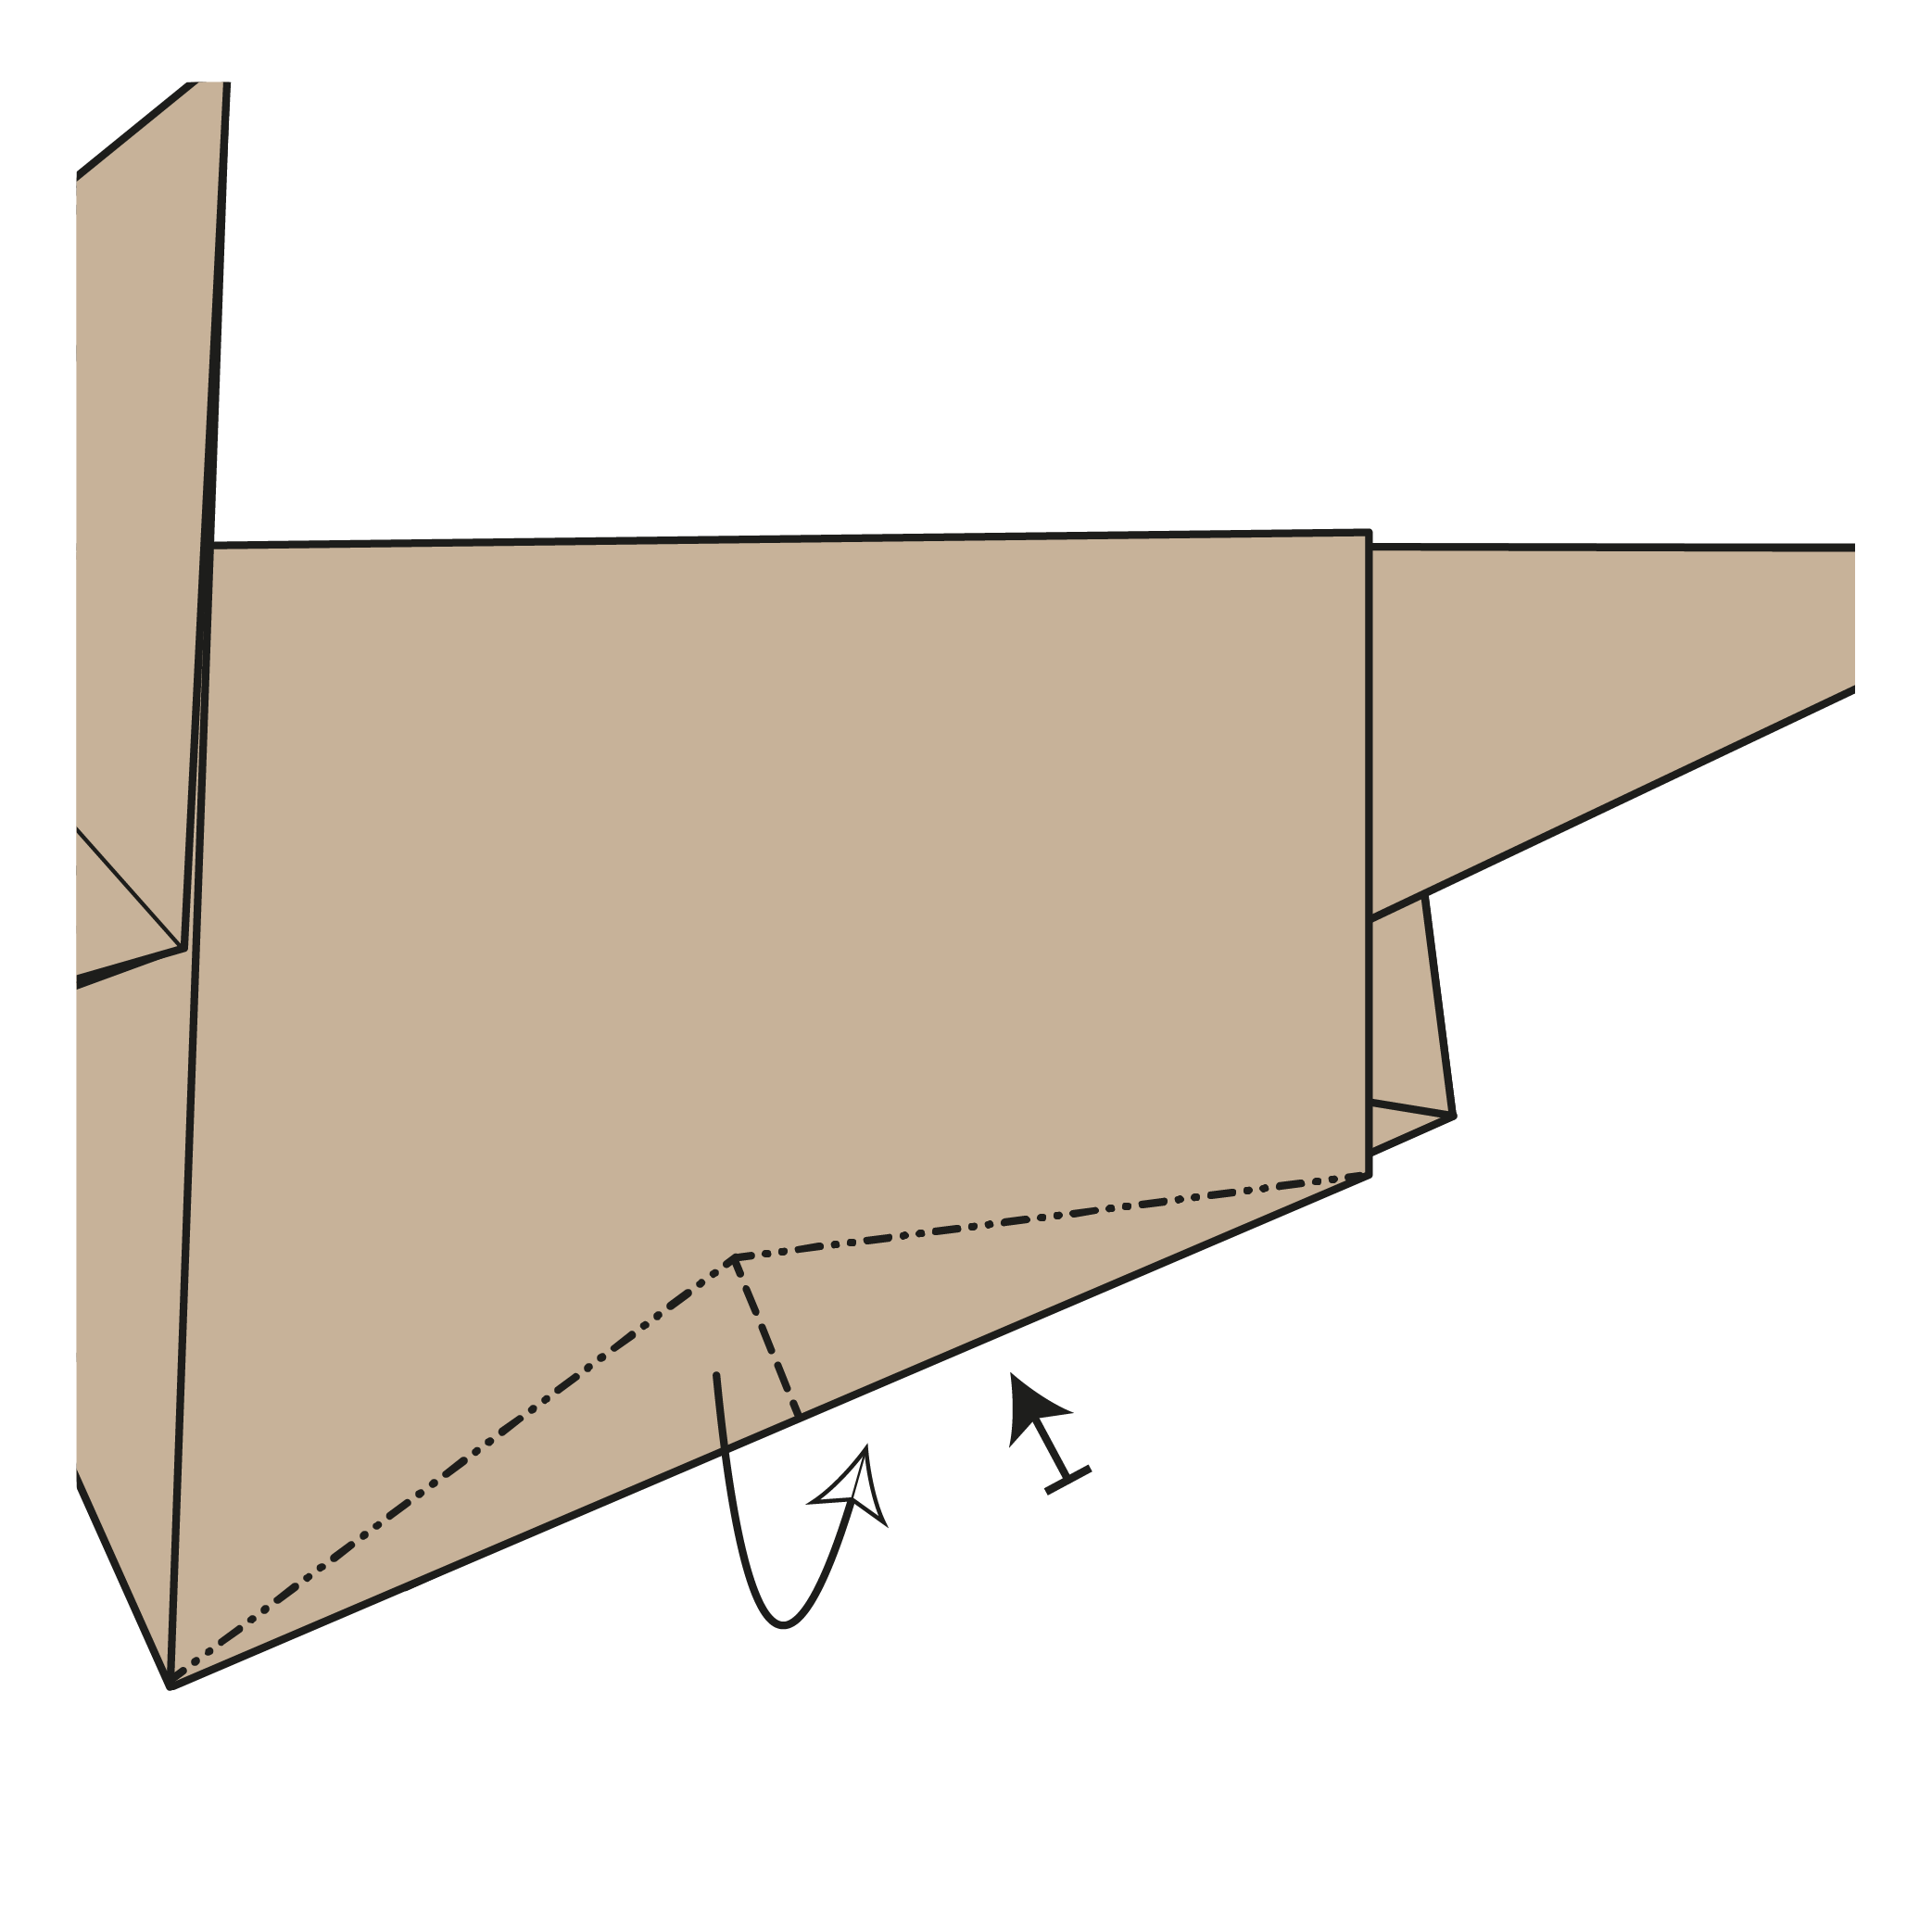
Step 27

Mountain fold the bottom corners of the head as shown.
Step 28
Gently round the bottom edges inward to shape the front and back legs.
Your origami Styracosaurus is ready to roam! 🦕


Despite its spiky inspiration, this little Styracosaurus feels friendly and fun, especially for dinosaur lovers.
Want more origami animals or prehistoric creatures to fold? Subscribe to our YouTube channel for video tutorials, and join our newsletter to get new ideas delivered each week.

Download the Complete Origami Styracosaurus Printable PDF Instructions
This printable PDF is part of our Origami Friends membership on Patreon. As a member, you get access to these diagrams, our full library of printable PDFs, and member-only content.