
How to Fold an Origami Heart with Wings
“On the Wings of Love” is an origami heart with wings designed by Francis Ow, known for his creative heart-themed models.
This model is a great project for beginners with some folding experience, offering a mix of simple and slightly tricky folds that come together to form a heart with a striking winged shape.
Whether you’re making it as a gift, a decoration, or just for the fun of folding, this model is a rewarding way to explore origami. Grab your paper, and let’s get started!
Looking for an easier model? This origami heart is one of our most popular beginner models, perfect for a quick and satisfying fold.
Origami Heart with Wings Step-by-Step Instructions
- Difficulty: Easy – Beginner Level 5
- Folding time: 10-15 minutes
Recommended Paper
15×15 cm (6×6 in) Kami
Step 1


Start with the colored side facing up. Fold the paper in half vertically and horizontally, then unfold to create a cross-shaped crease.
Step 2


Fold the top edge down to meet the center crease.
Step 3


Turn the paper over.
Step 4

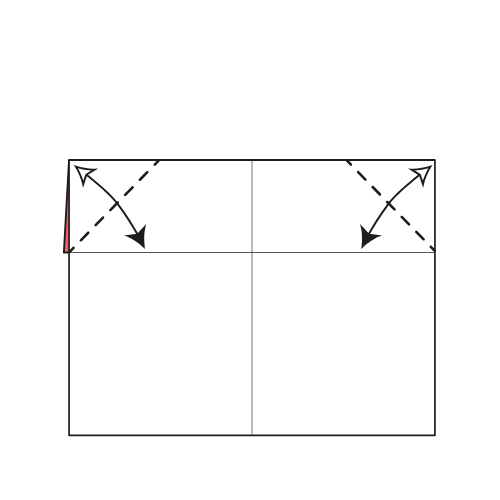
Fold the top corners down to meet the horizontal crease, then unfold.
Step 5


Fold the bottom edge up to the center crease.
Step 6


Turn the paper over.
Step 7


Unfold the top flap.
Step 8

Fold and unfold along the dotted lines, using the reference points as a guide. Align the left and right edges with the bottom edge.
Step 9

Fold and unfold the left and right edges to the center crease. Only crease the top two-thirds of the paper.
Step 10

Fold and unfold along the dotted lines, using the reference points as a guide. Align the bottom edges with the center crease.
Step 11

Collapse the right side of the model inwards along the creases from Steps 8 to 10.
💓 Folding Tip: Start by folding along the vertical crease, then push the bottom part upward. If you’re using double-sided red and white paper, the lower red square should cover the middle white square.
Step 12

Repeat Step 11 on the left side.
Step 13


Turn the model over.
Step 14


Fold down only the top flap along the dotted line, using the existing crease.
Step 15

Using the existing creases, open out the bottom layers.
💓 Folding Tip: Hold the top part of the model between your index and middle fingers, and position your thumbs at the bottom corners. Push the layers upward until the bottom edge aligns with the second horizontal line from the top. Refer to the diagram or video for clarification.
Step 16


Fold the four top corners inward to shape the heart.
💓 Folding Tip: Start by folding the center corners first, then move on to the side corners. This makes it easier to achieve a balanced heart shape. For extra precision, use a ruler to align the folds neatly.
Step 17


Fold the bottom edge up to the center line, only folding the top layer.
Step 18

Fold the strip created in Step 17 in half, then unfold Steps 17 and 18.
Step 19


Rotate the model 180°.
Step 20


Fold the top layer down.
Step 21

Fold each section from Steps 17 and 18 in half, dividing them into 1/8th sections.
💓 Folding Tip: Carefully pleat the white area as you fold, using the diagram to guide your mountain and valley folds. This requires precision, but it’s worth it. So, take your time. If you’re unsure, watch the video for additional help.
Step 22


Rotate the model 180°.
Step 23

Press the center and spread the layers outward to form the wings.
💓 Folding Tip: Experiment with different angles to customize the wings.
Step 24


Turn the model over.
Your origami heart with wings is ready to fly! 💓


Well done! You’ve folded “On the Wings of Love,” a unique origami heart with wings.
Try experimenting with different paper colors or sizes to give each model its own style.
Feel free to share your creations with us in the comments or on social. We’d love to see them!

Download the Complete Origami Heart with Wings Printable PDF Instructions
This printable PDF is part of our Origami Friends membership on Patreon. As a member, you get access to these diagrams, our full library of 120+ printable PDFs, and member-only content.
Watch the Origami Winged Heart Video Tutorial
Enjoyed this tutorial?
Subscribe to our YouTube channel for new inspiring origami videos every week!

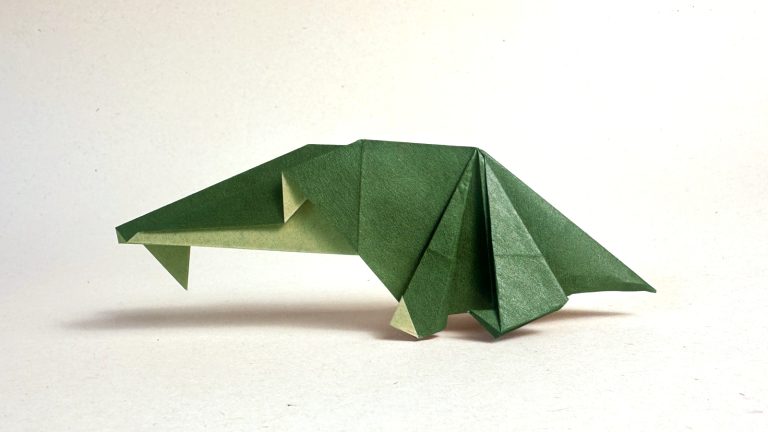


I’m happy with how this turned out, but I didn’t really enjoy how the wings work.
Love the paper! Thanks for sharing. The wings are the most challenging to fold. You did great 🙂
on my first try and it turned so good 🙂
It’s looking great! Thanks for sharing 🙂
OMG!! U need to try this!
I did it!! On the first try!!
I’m not that great at origami and I failed miserably. Congrats to you though!
Sometimes, succeeding takes several attempts! We will soon publish a full video tutorial for this model. Hang in there! 🙂
Very interesting