
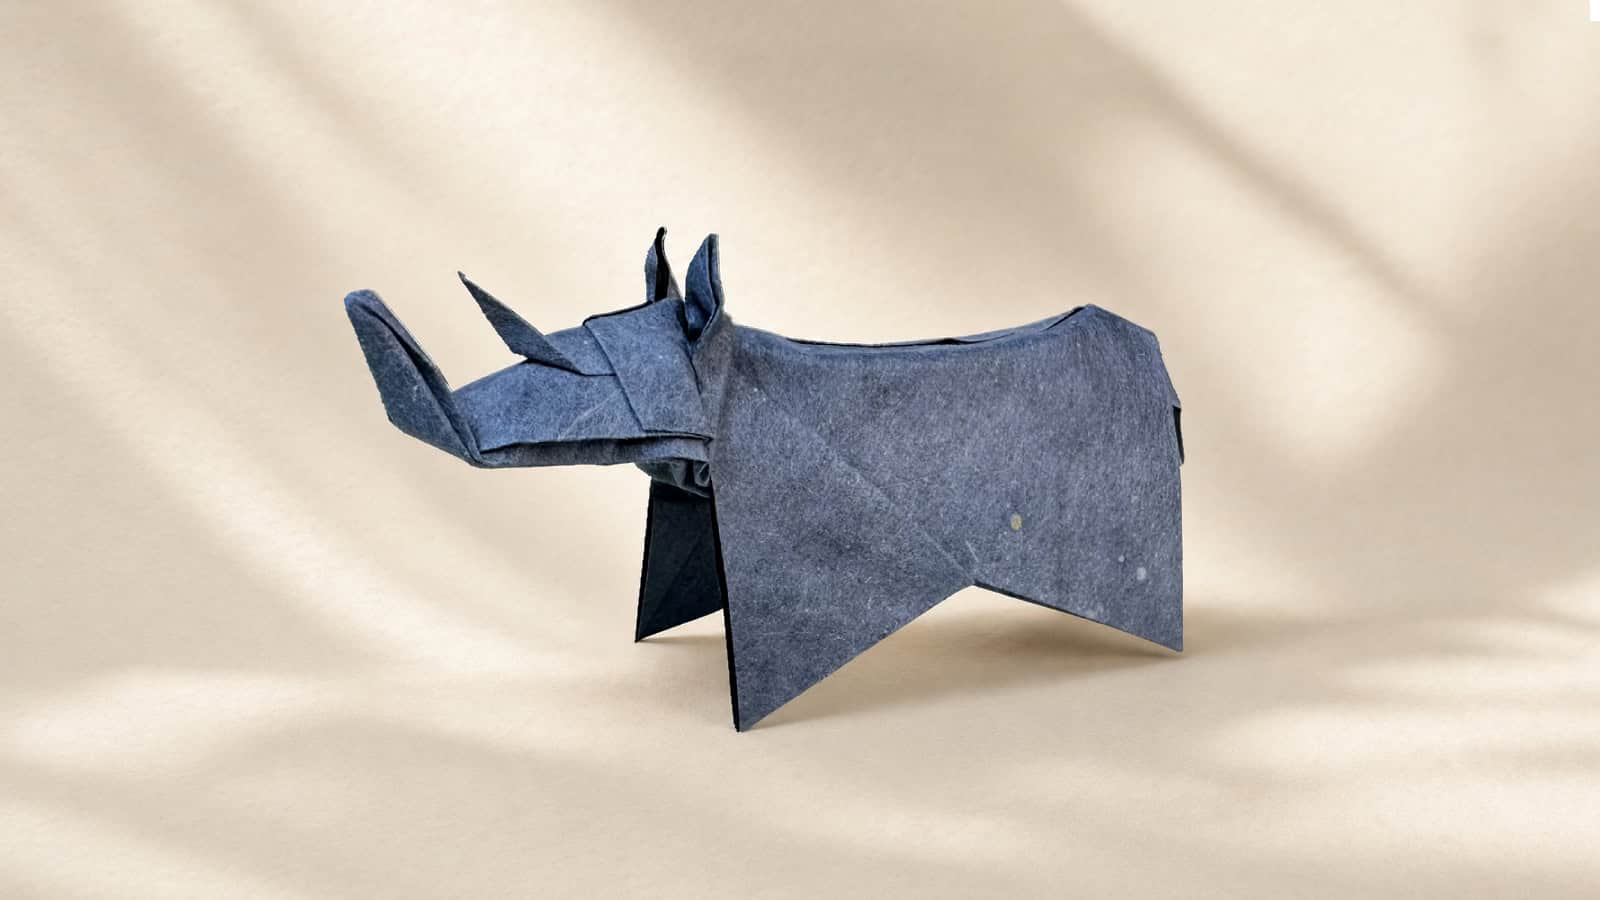
How to Fold an Origami Rhinoceros

 Caleb Witte
 Let’s learn how to fold an origami rhinoceros designed by Caleb Witte. This model has a strong shape with a large horn, a raised back, and short, sturdy legs that make it easy to recognize.
The folds around the head create nice layers, especially near the horn and ears. A little shaping near the end helps give the rhinoceros a more natural posture.
This is a low-intermediate model and a fun challenge for beginners with some folding experience. The folding sequence is fairly simple, but as the layers build up, some of the later folds become tighter and a little harder to shape neatly.
To make things easier to follow, we broke the tutorial into 39 detailed steps, including 37 video steps to guide you through the trickier parts of the model.
Origami Rhinoceros Step-by-Step Instructions
- Difficulty: Low-Intermediate
- Folding time: 20-30 minutes
Recommended Paper
9.5 x 9.5 in (24 x 24 cm) origami paper (Kami) or Kraft
Step 1
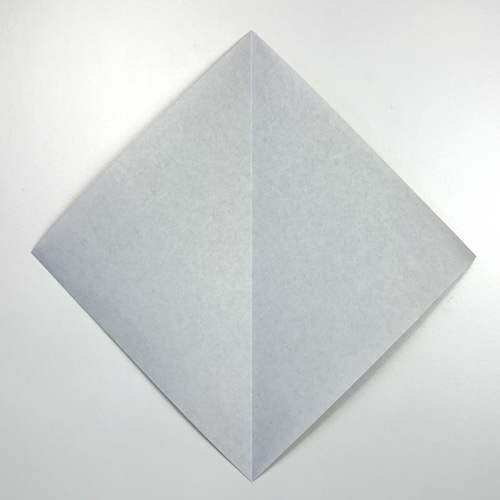
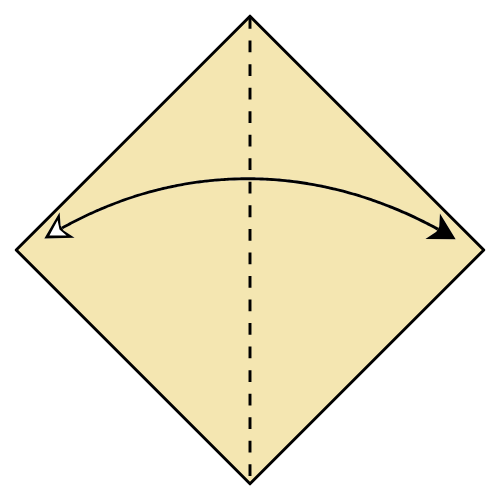
Start with the white side of the paper facing up in a diamond position. Fold the paper in half vertically, then unfold.
Step 2
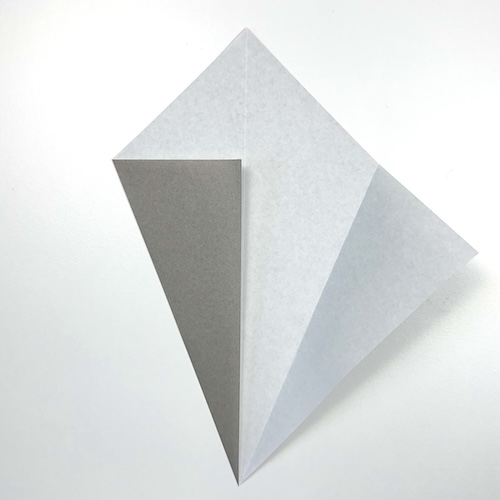
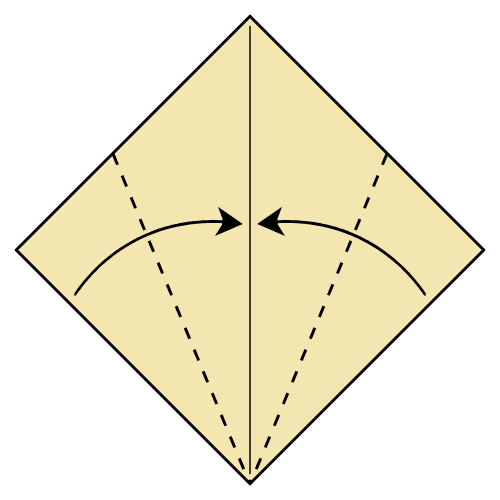
Fold the bottom left and right edges to the vertical centerline.
Step 3
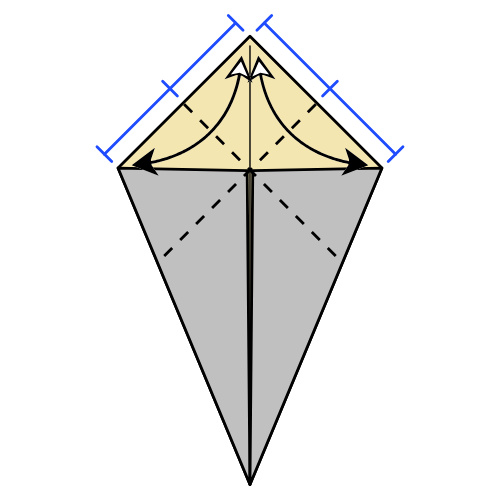
Fold the top left and right edges in half at a right angle, then unfold.
Step 4

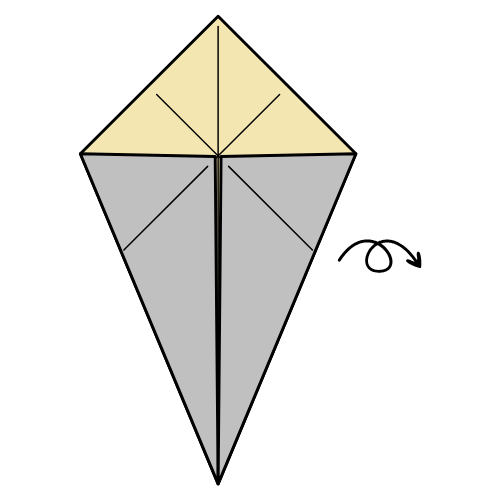
Turn the paper over.
Step 5
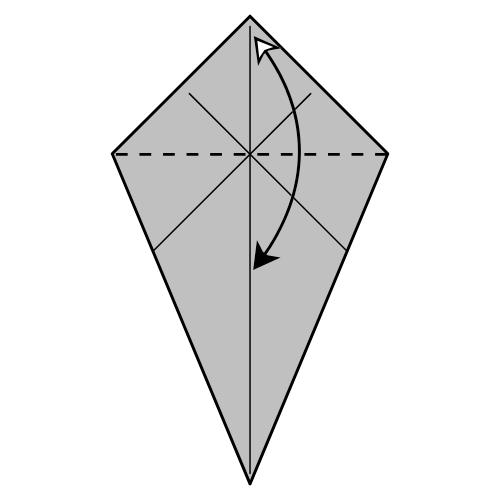
Fold the top corner down along the line connecting the left and right corners. Then unfold.
Step 6
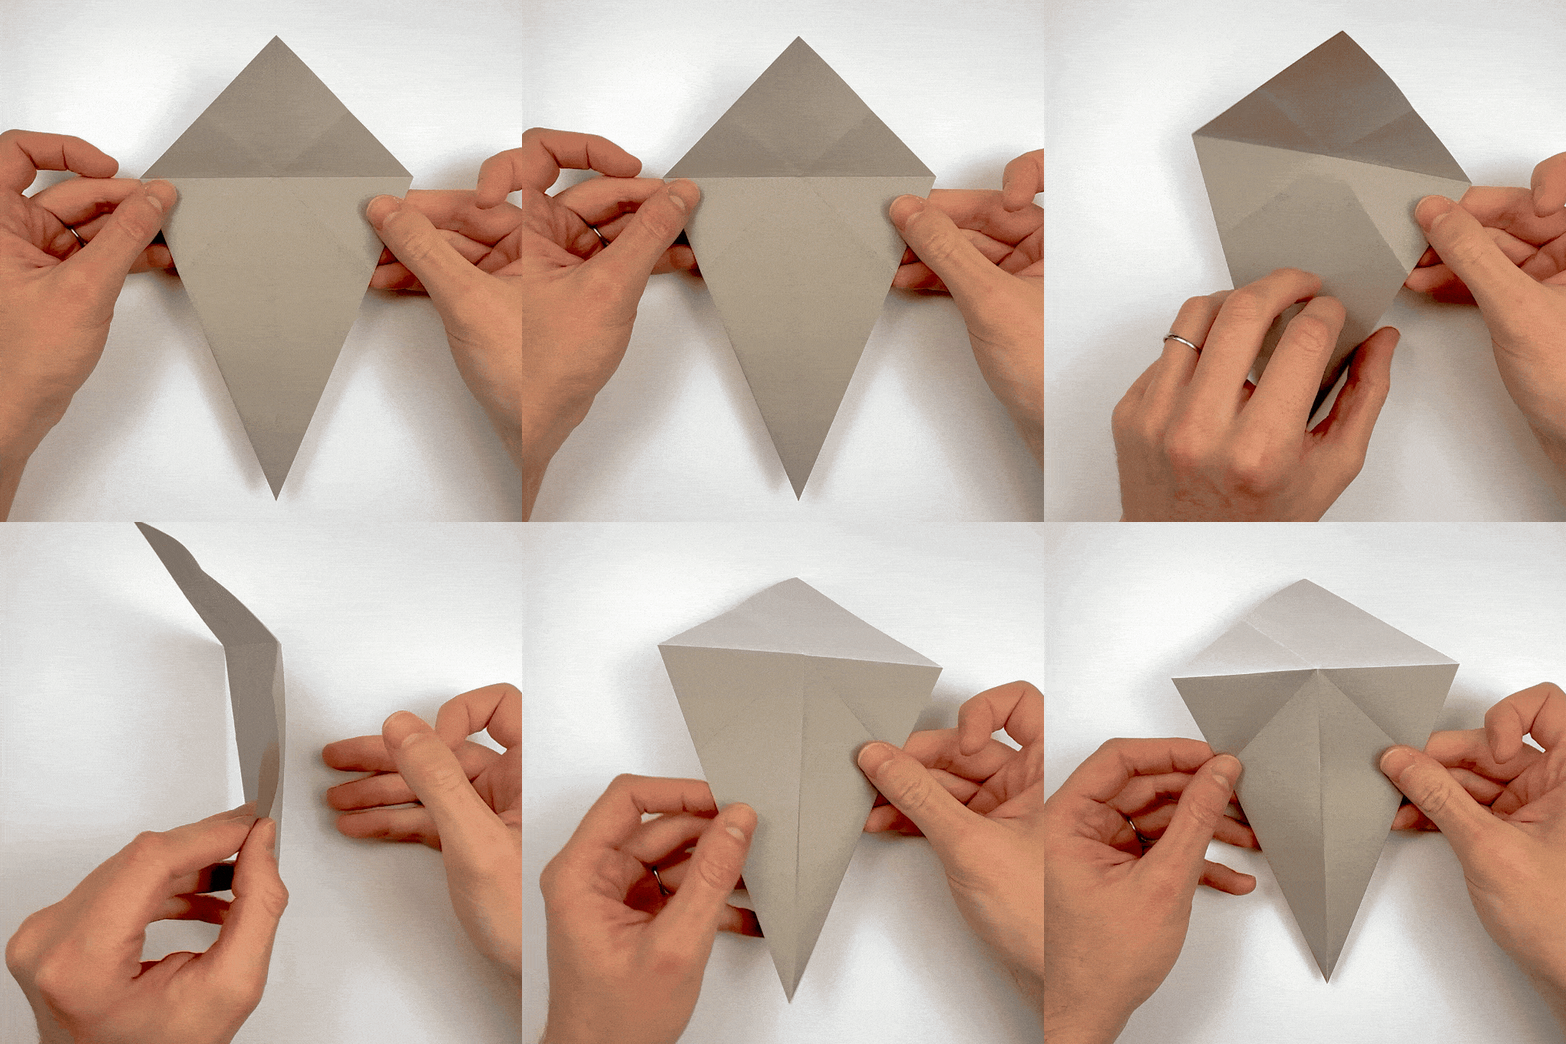
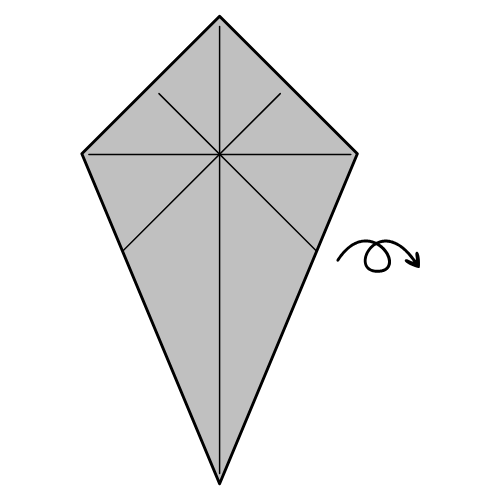
Turn the paper over.
Step 7
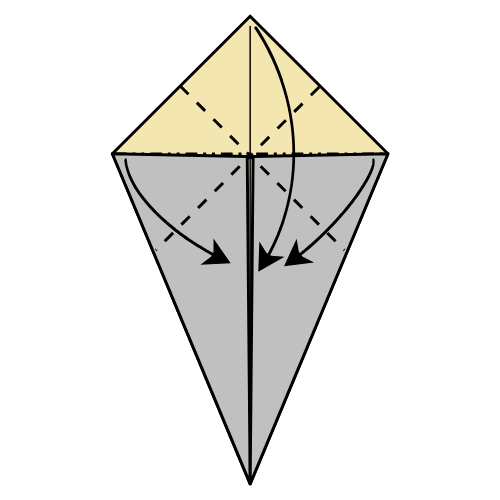
Collapse along the existing creases to form a square shape by bringing the left and right corners down to meet the vertical centerline.
Step 8
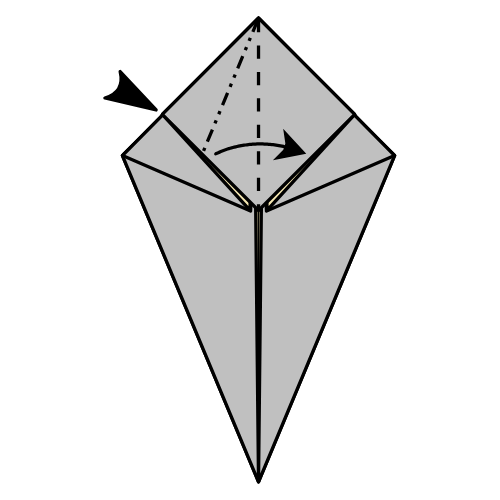
Squash fold the top left flap.
Step 9
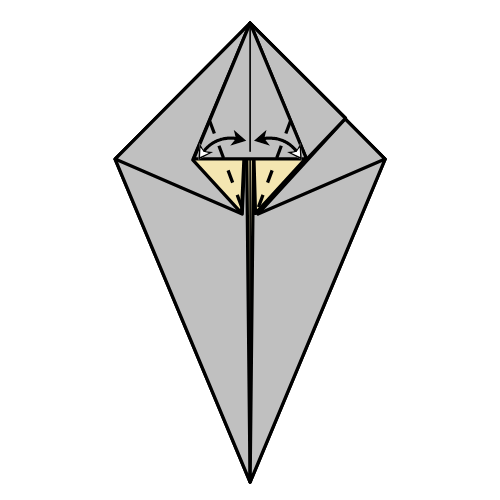
Fold and unfold the bottom left and right edges to the vertical centerline.
Step 10
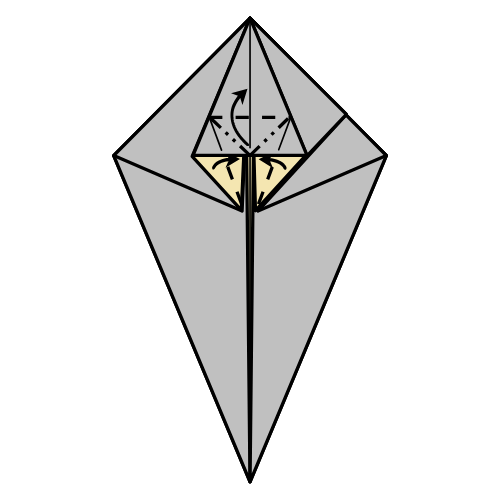
Petal fold the horizontal edge upward to form a small corner, using the creases made in Step 9.
Step 11
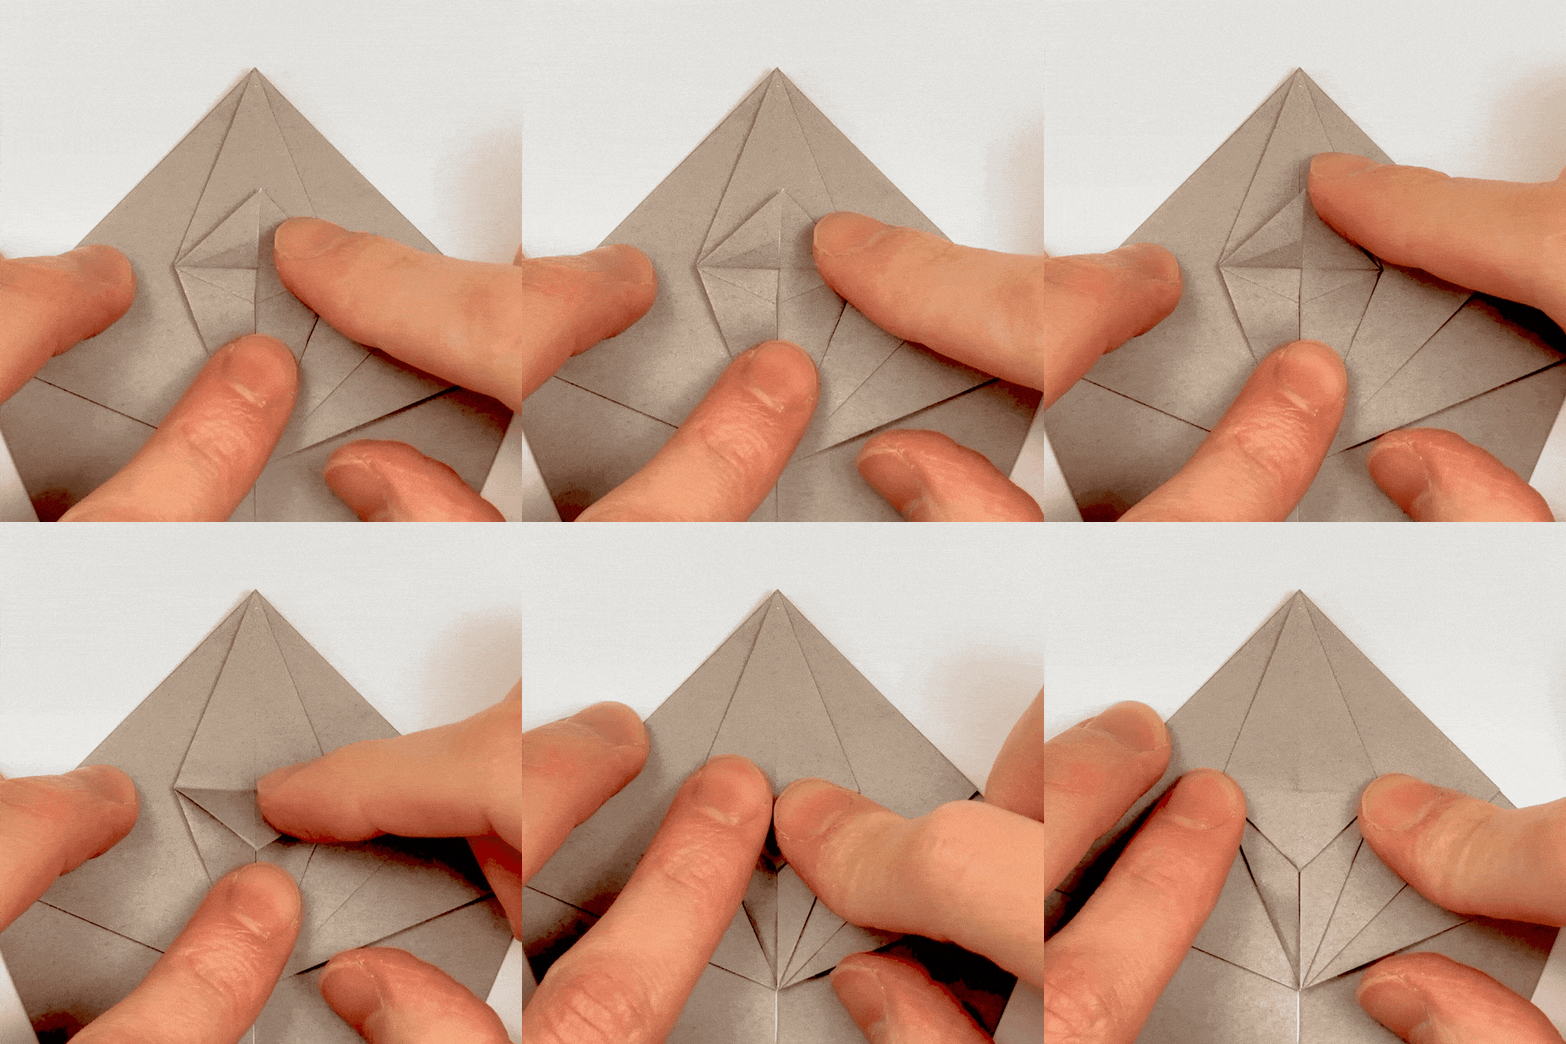
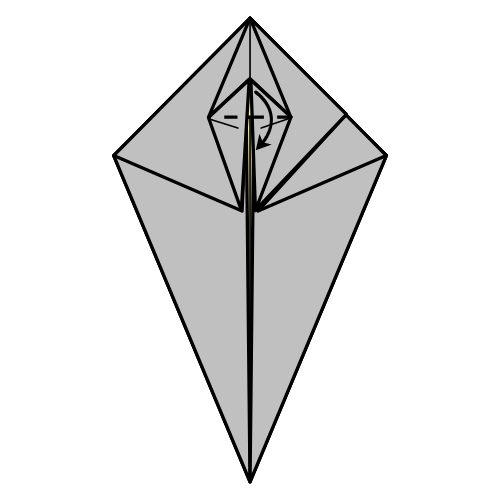
Fold the corner down along the existing crease.
Step 12
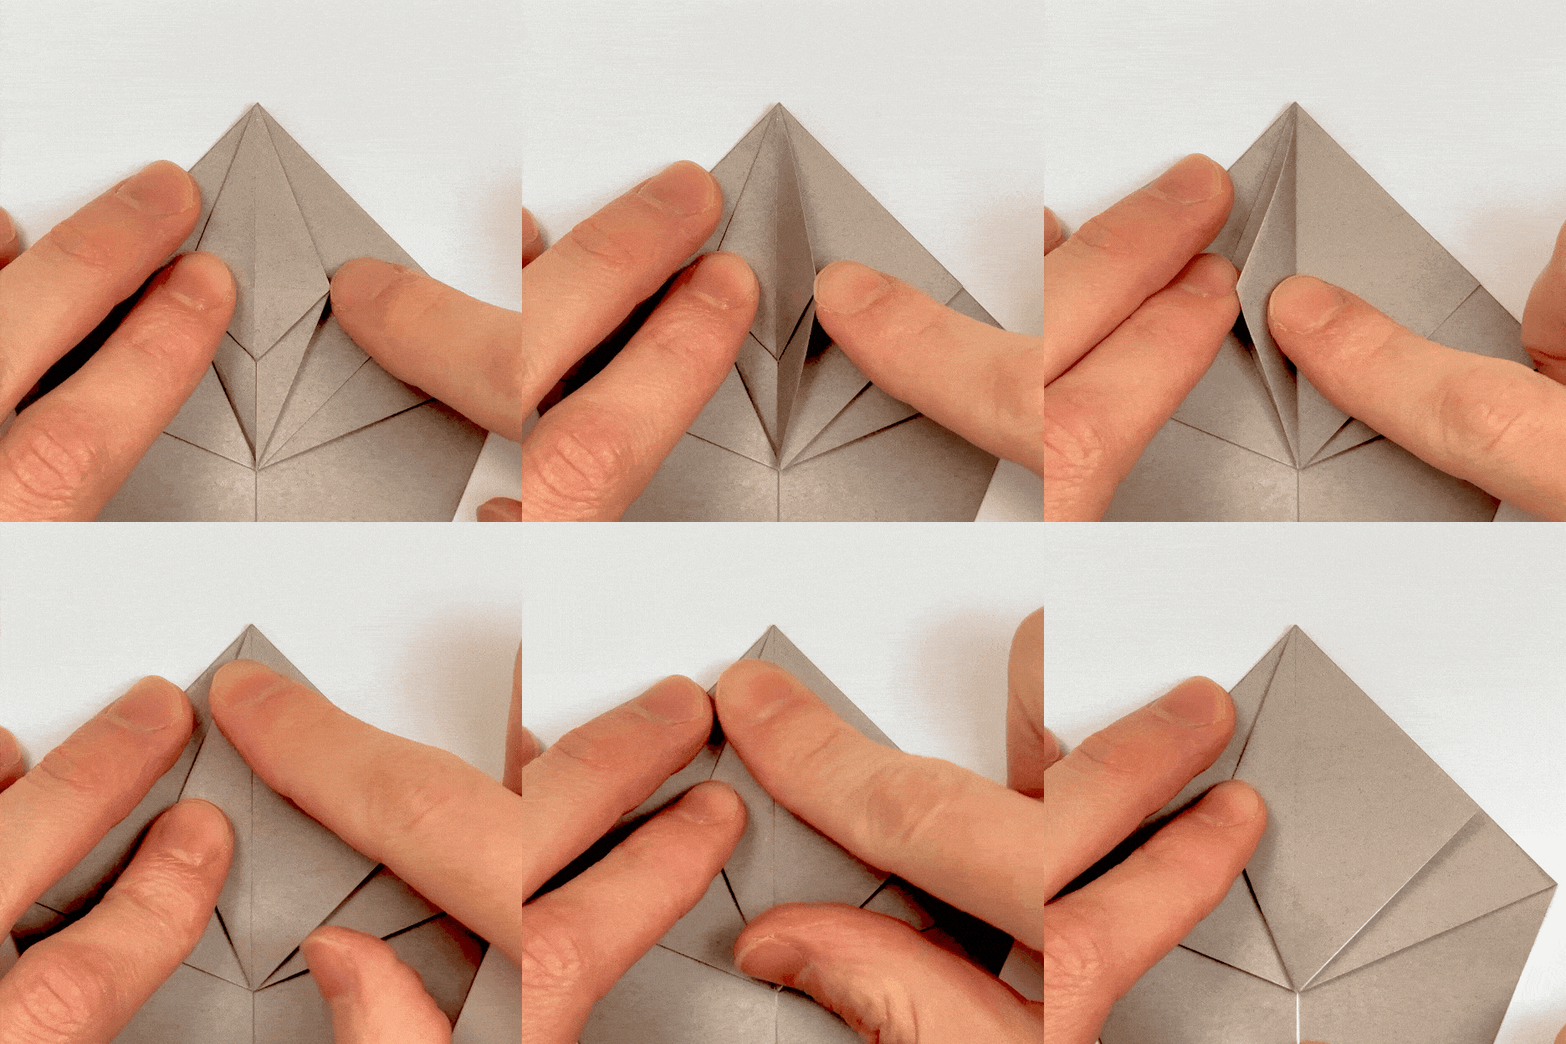
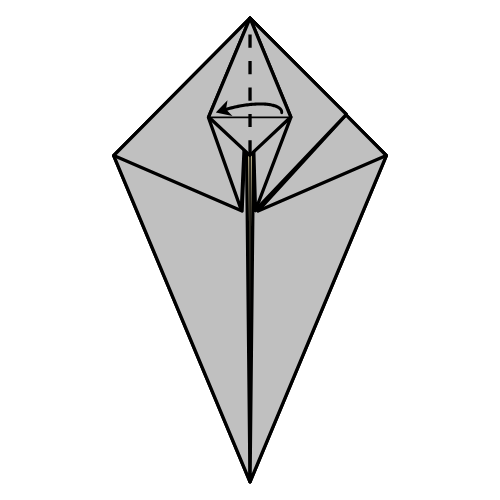
Fold one flap back to the left side.
Step 13
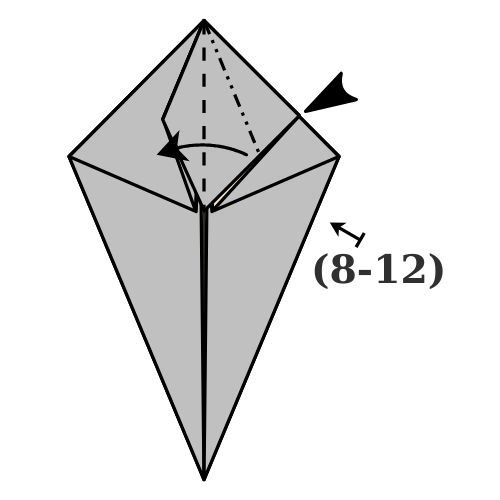
Repeat Steps 8 to 12 on the right side. Then fold one flap to the right.
Step 14

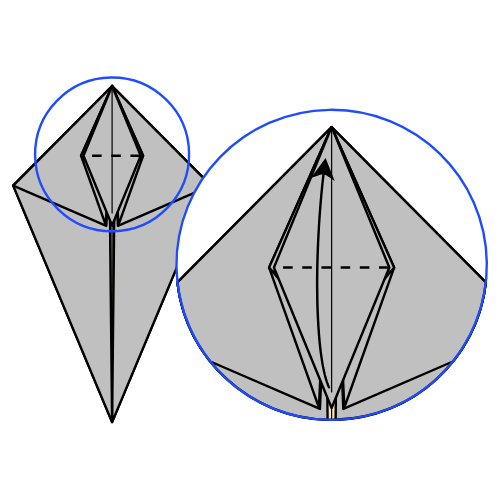
Fold the bottom corner up to the top along the existing crease.
Step 15
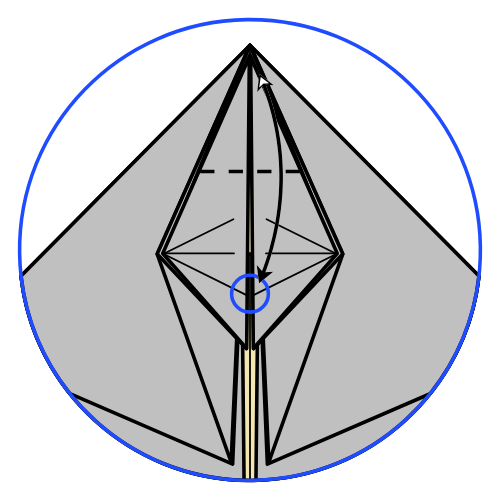
Fold the top corner down to the circled point, then unfold.
Step 16
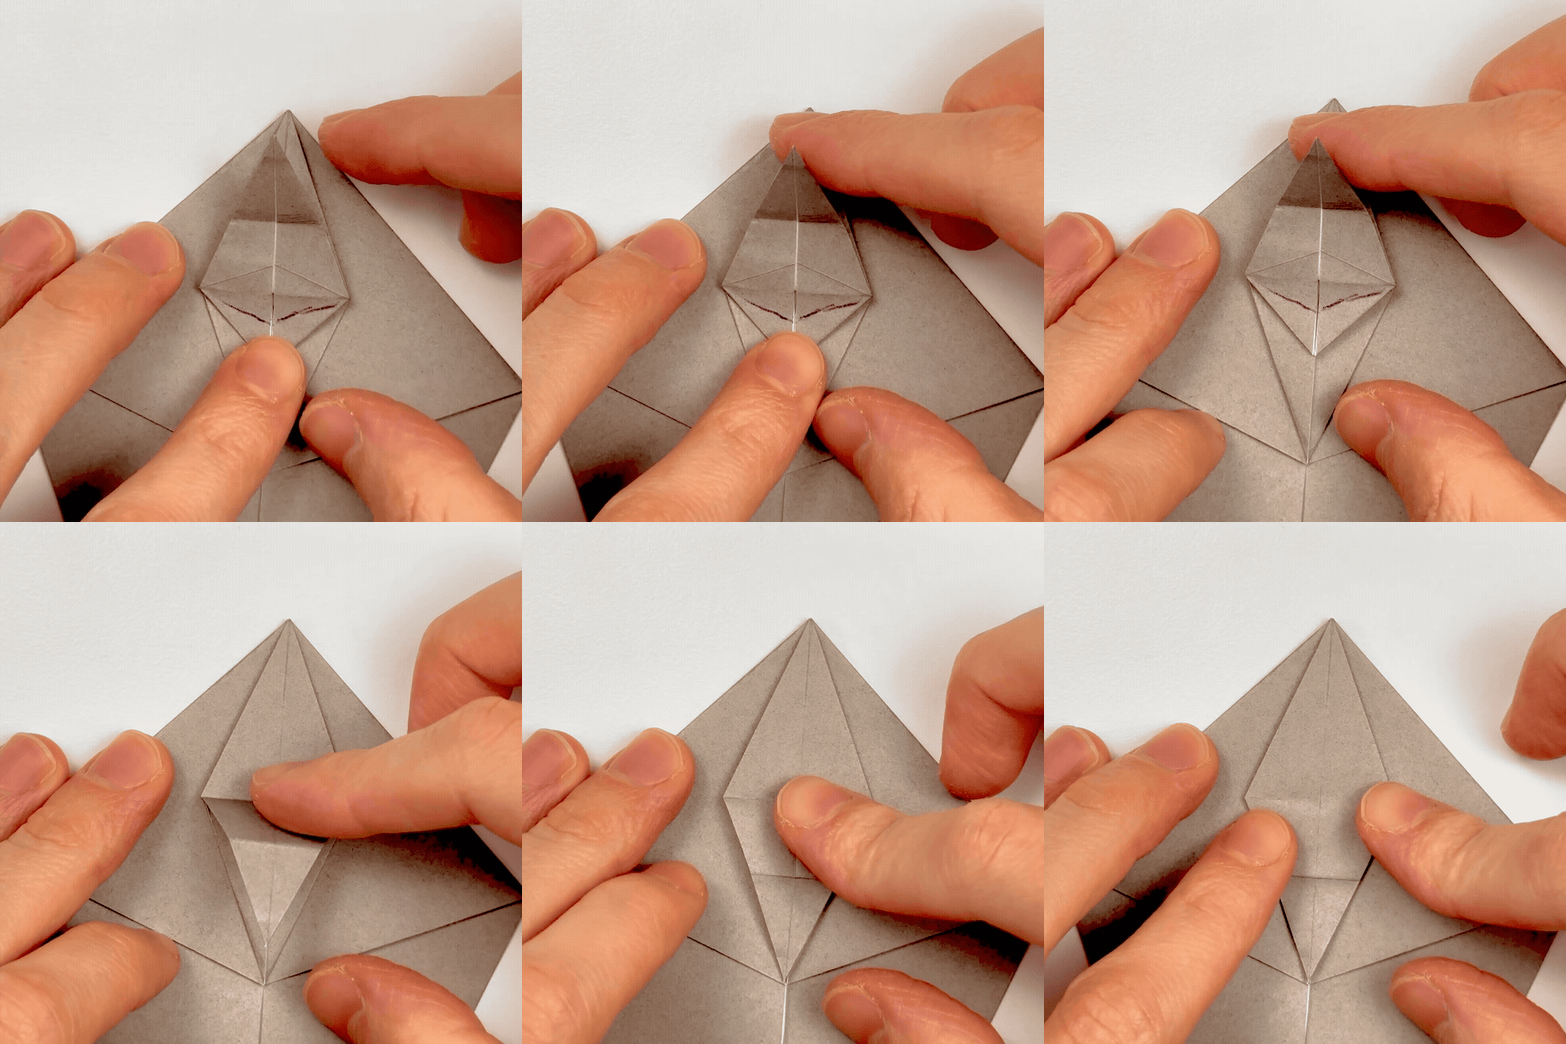
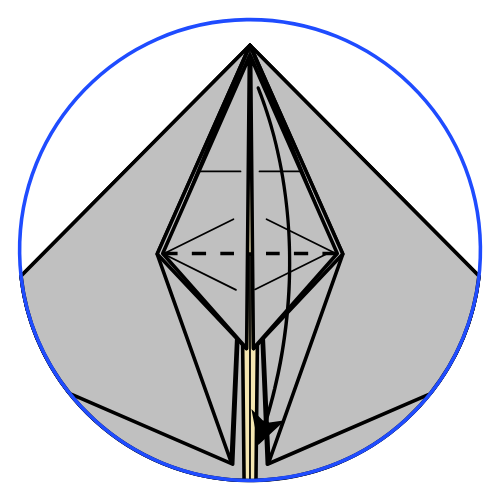
Fold the top flap down again along the existing crease.
Step 17
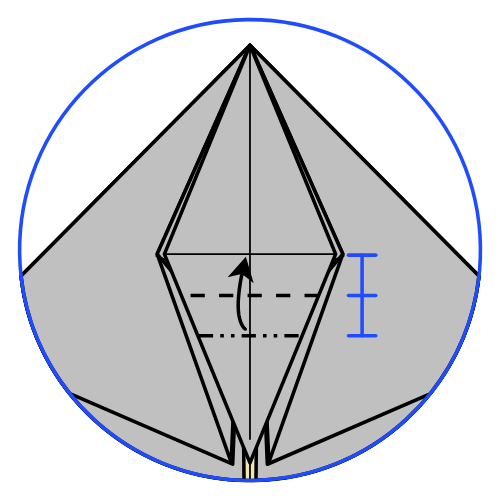
Pleat the mountain fold from Step 15 upward to the nearest horizontal crease, creating a new valley fold.
Step 18
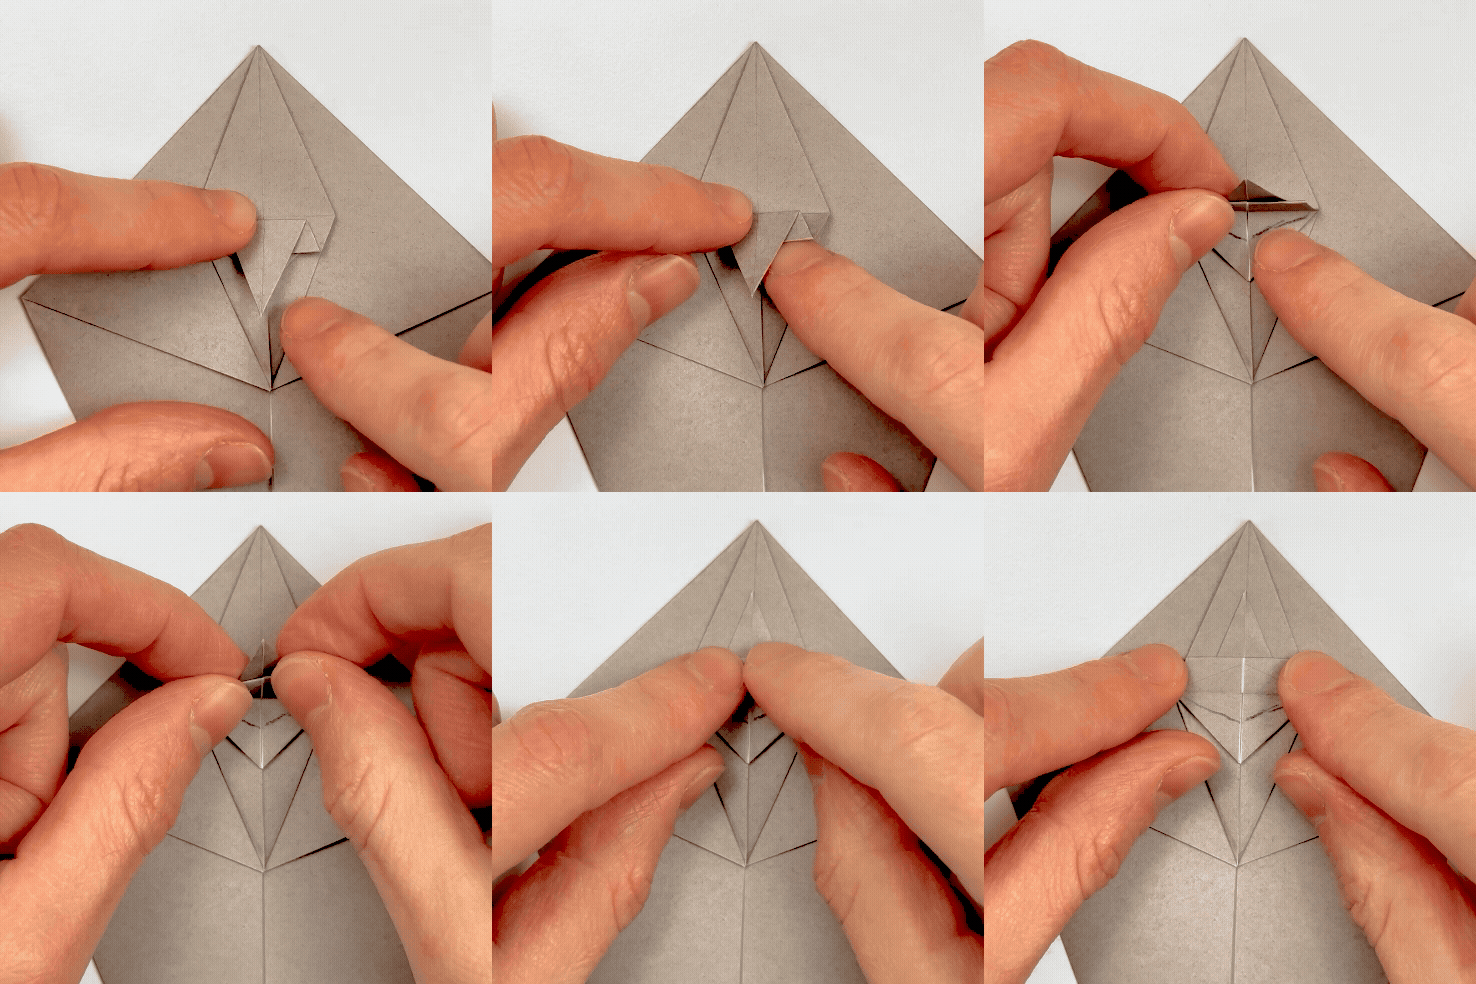
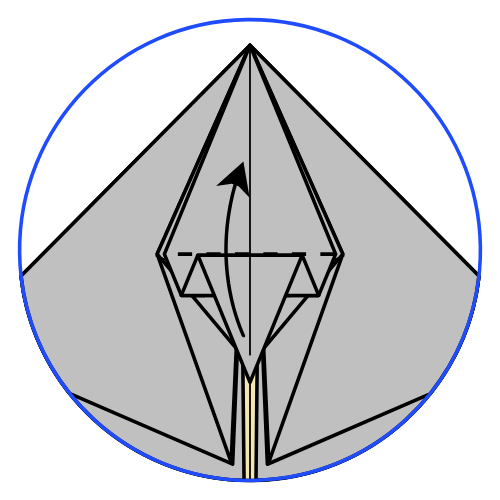
Fold the two flaps upward together.
Step 19
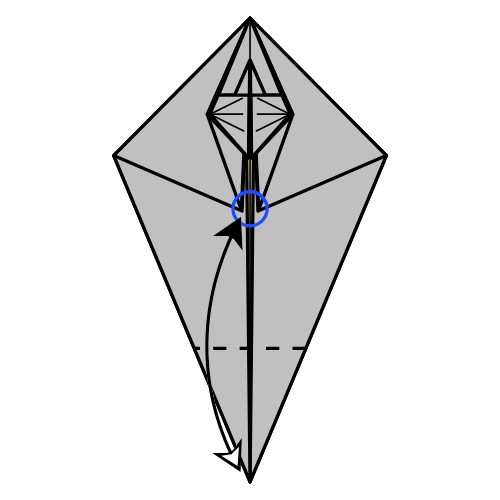
Fold the bottom corner up to the circled point, then unfold.
Step 20
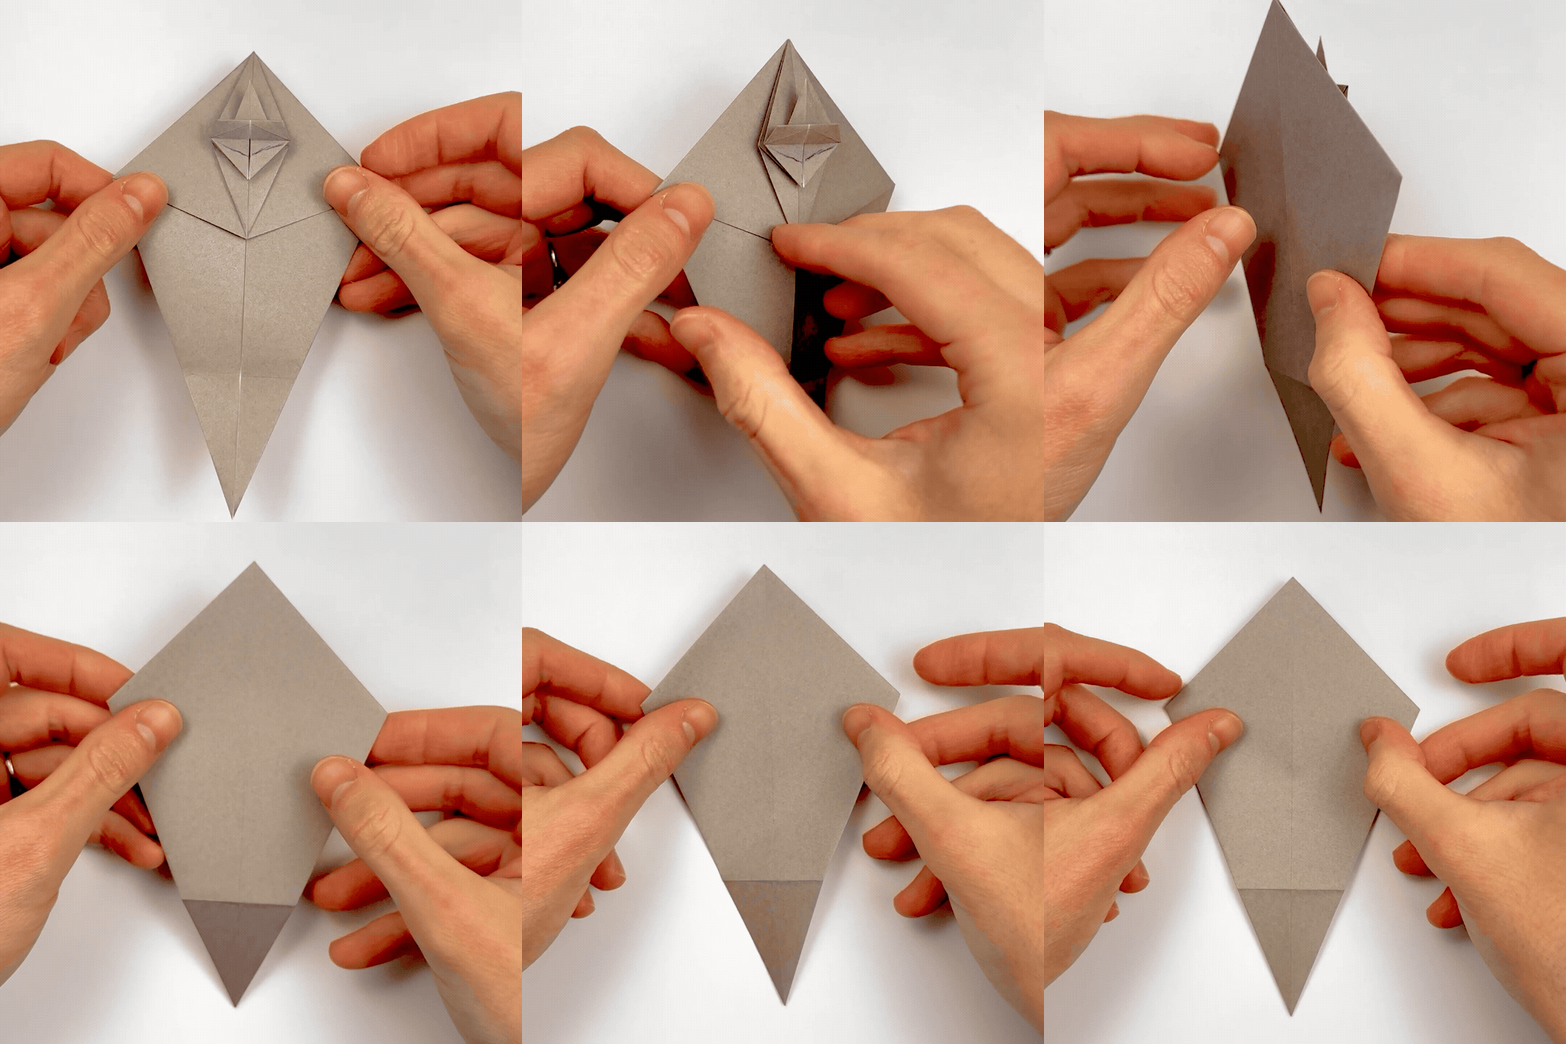
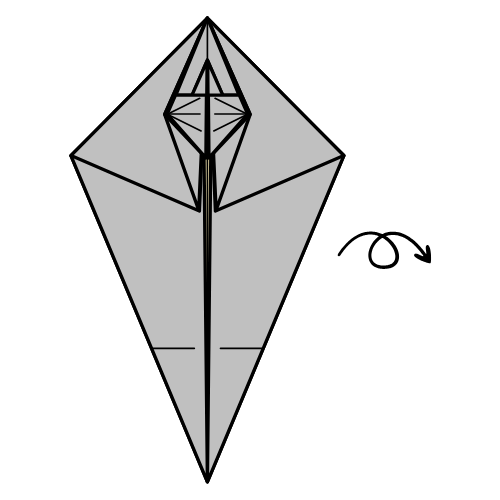
Turn the model over.
Step 21
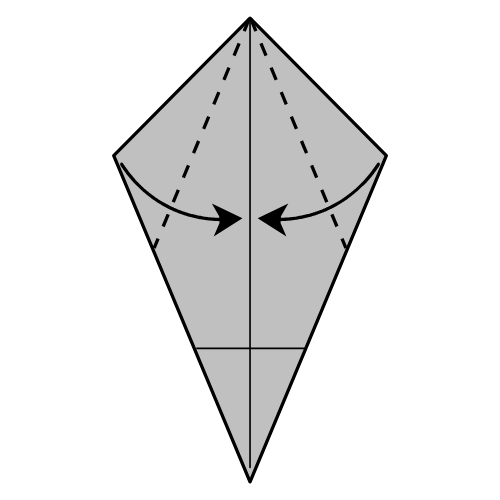
Fold the top left and right edges to the vertical centerline.
🦏 Folding tip: Hold all the layers firmly while making these folds to avoid creating a gap at the back of the model.
Step 22
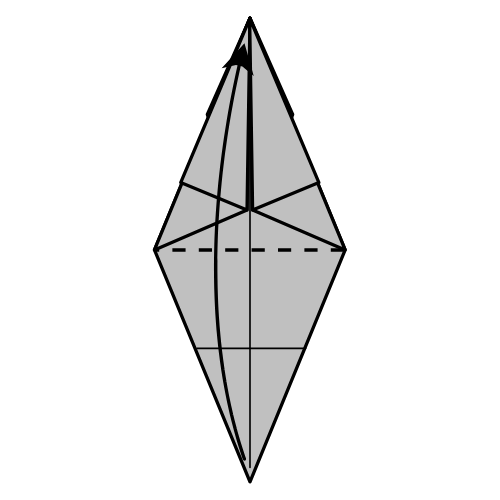
Fold the bottom corner up to the top.
Step 23
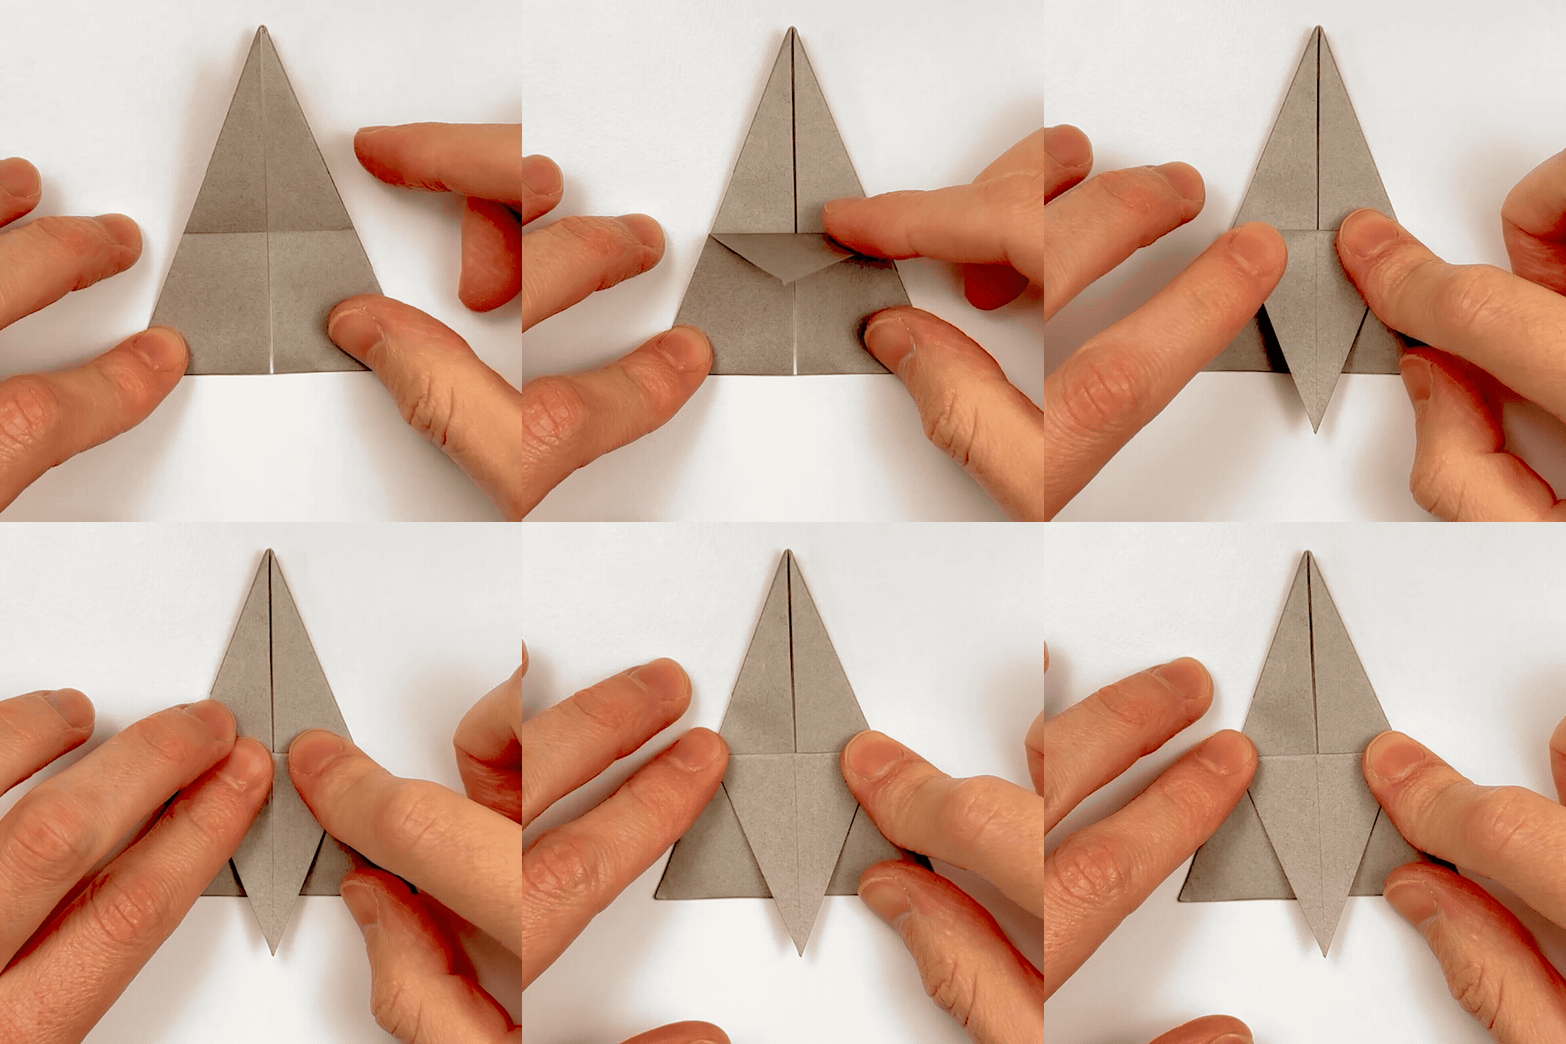
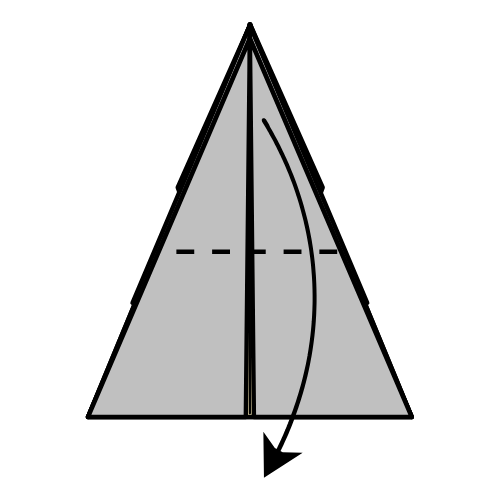
Fold the top corner down along the existing crease.
Step 24
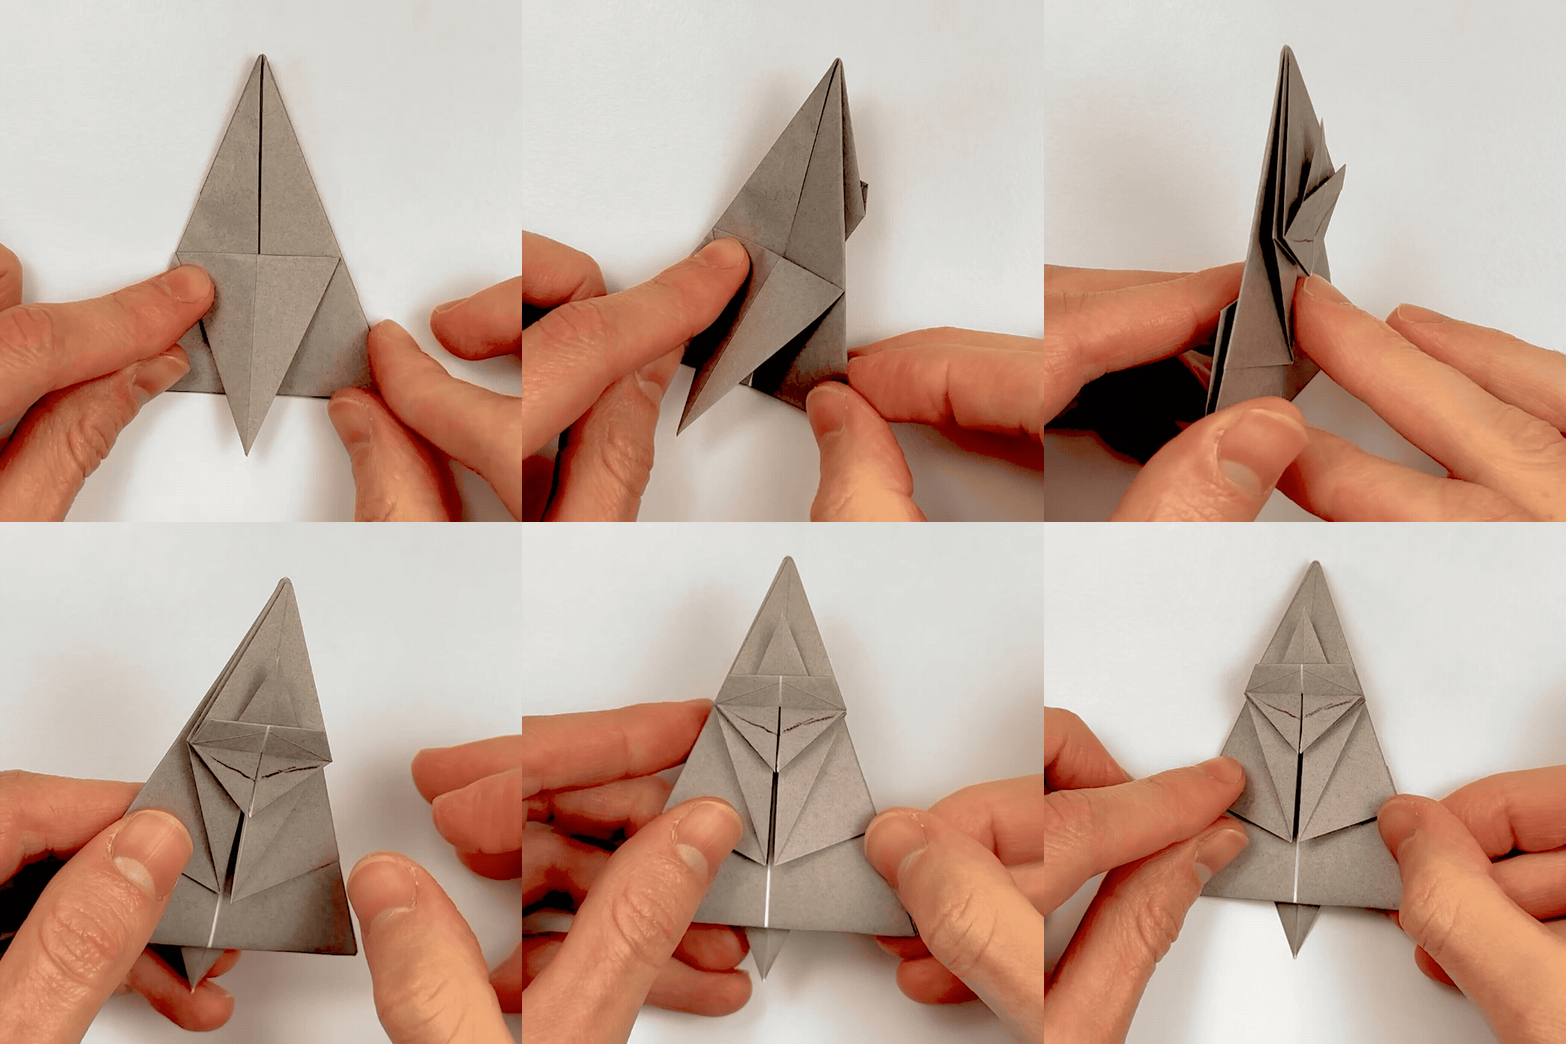
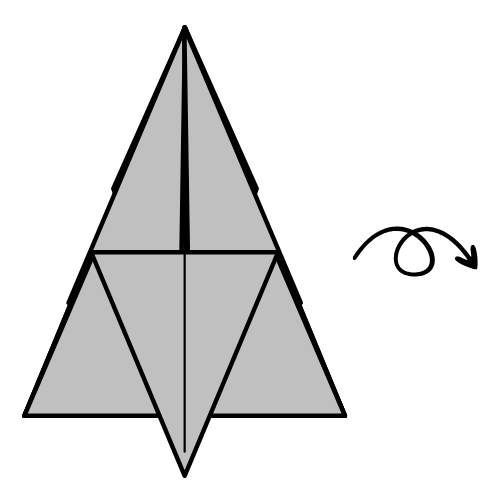
Turn the model over.
Step 25
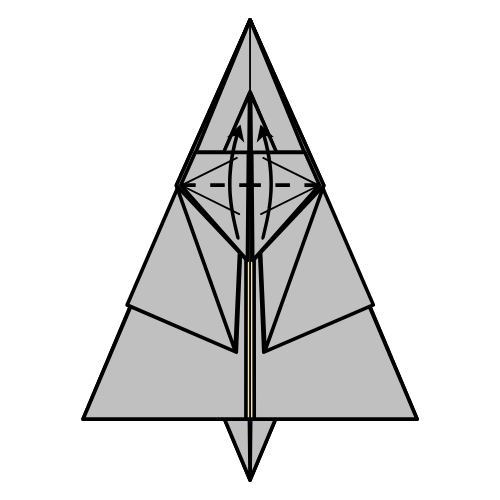
Fold the two small corners upward along the existing creases.
🦏 Note: I’m using a larger sheet of paper from this step onward because it makes the details easier to see on camera. This model can be folded with 6 × 6 in paper, but I recommend starting with something bigger (9.5 x 9.5 in), especially for your first fold.
Step 26
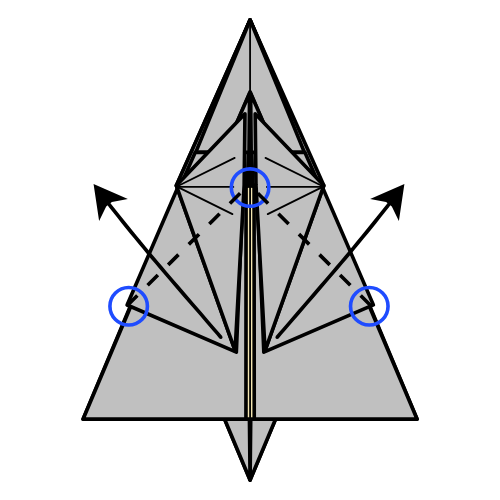
Fold the corners outward as far as they will go. The inner edges should align with the horizontal layers.
Step 27


Fold the two small corners downward along the existing creases.
Step 28
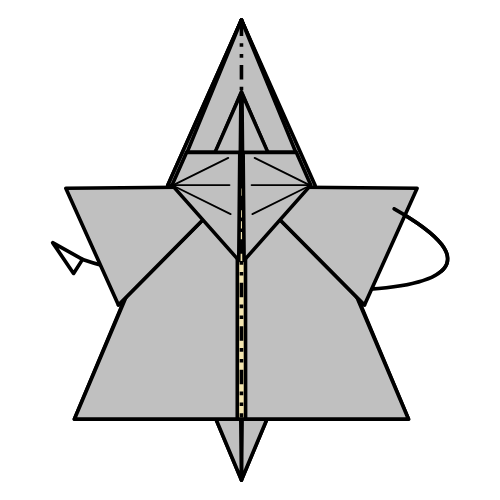
Gently fold the right half behind the left half. Be careful not to tear the paper, as the model becomes quite thick at this stage.
Step 29
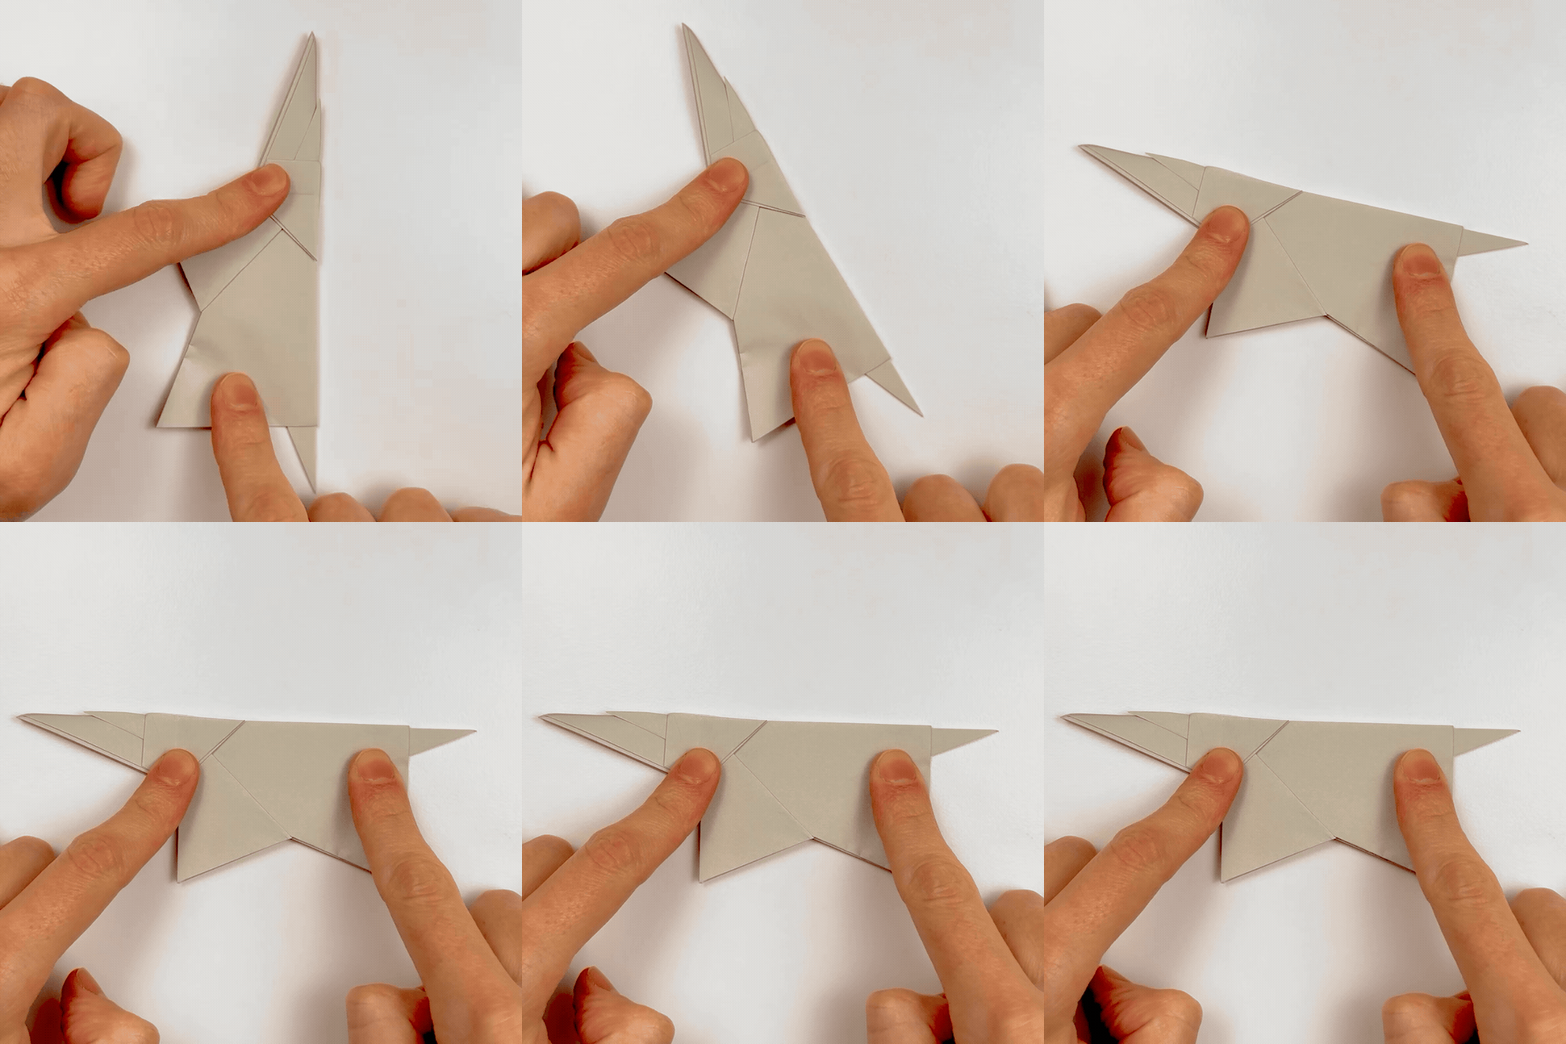
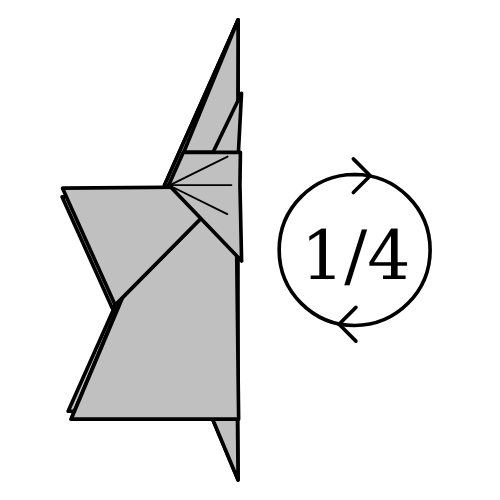
Rotate the model 1/4 turn anticlockwise.
Step 30
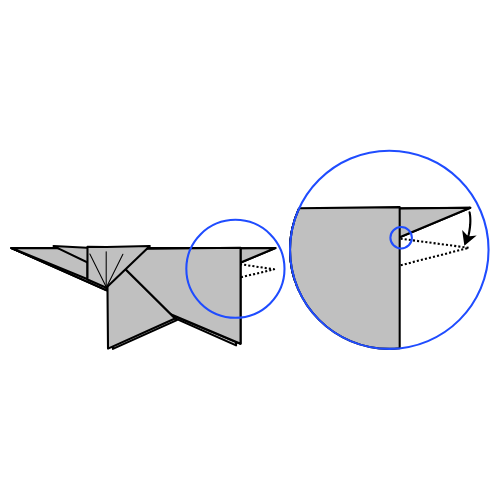
Slide the tail downward.
🦏 Folding tip: Gently open the leg layers and adjust the tail angle however you like. Then close the model again to set the creases.
Step 31
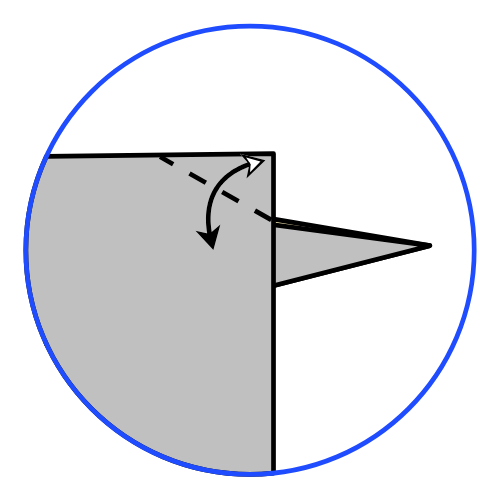
Fold and unfold along the dashed line. There are no exact reference points for the left end of the fold line.
Step 32
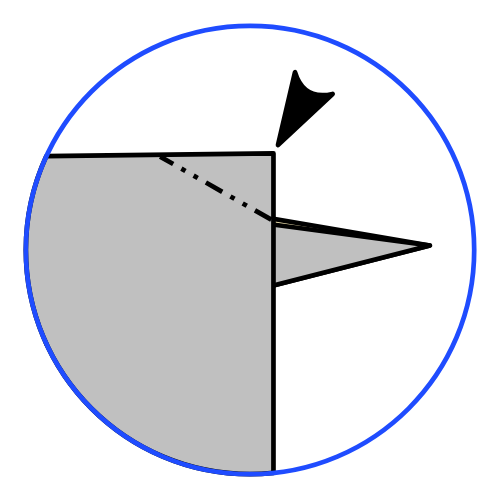
Inside reverse fold the corner behind the tail flap.
Step 33
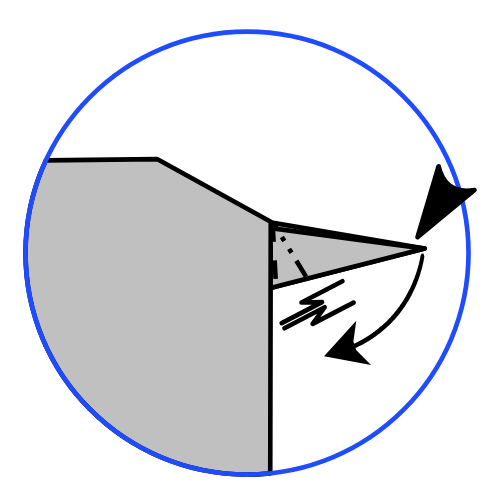
Crimp the tail downward.
🦏 Folding tip: You can precrease by folding the tail front and back along the body edges. Then gently open the tail layers and crimp them on each side of the body.
Step 34
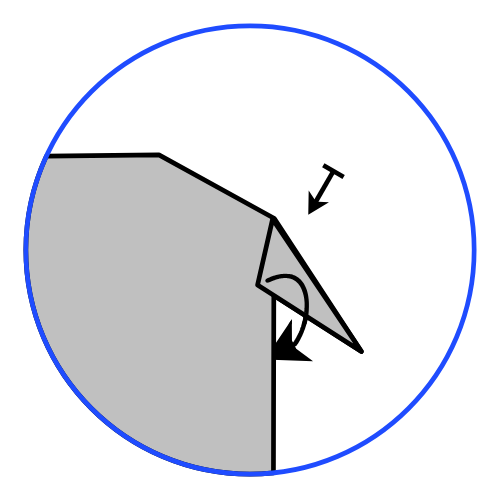
Tuck the nearest layer of the tail underneath the body. Then repeat on the back side.
Step 35
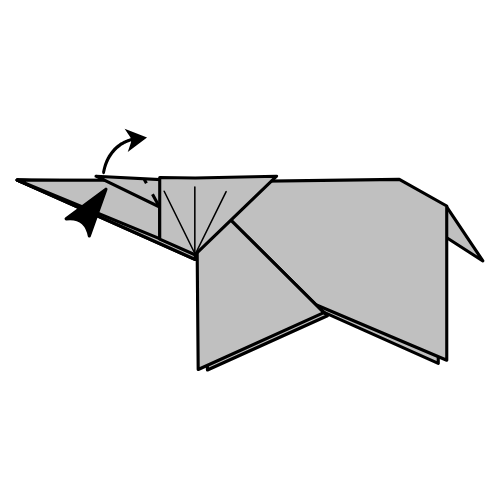
Outside reverse fold the small horn.
Step 36
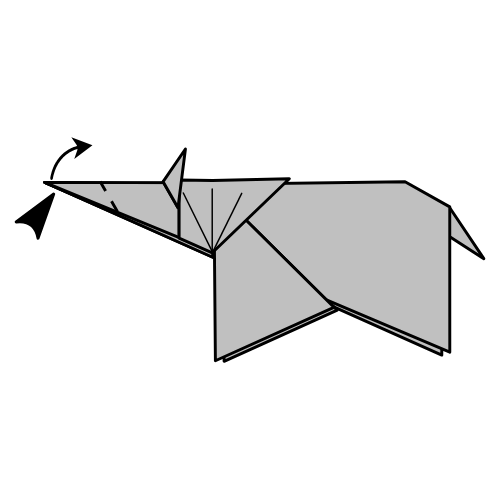
Outside reverse fold the large horn. There are many layers here, so fold carefully to avoid tearing the paper.
Step 37
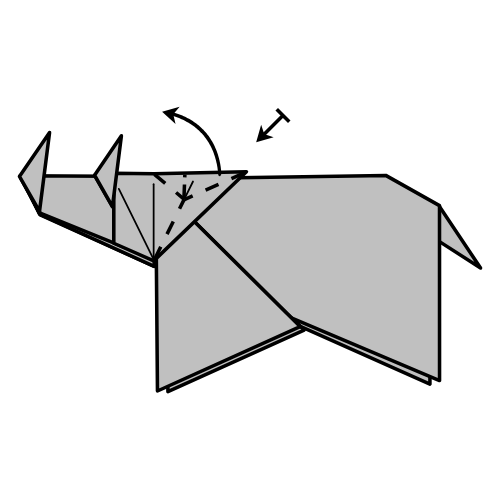
Rabbit ear fold the small flap to form an ear. Fold gently so the ear stays slightly open. Then repeat on the back side.
🦏 Folding tip: Start by precreasing the top left fold. Fold the top edge down to the nearest vertical edge and unfold. Pinch the right corner to fold it in half, then fold it upward along the existing creases. You can shape the ear further by gently opening it and turning the tip outward to lock it in place for a more realistic look.
Step 38
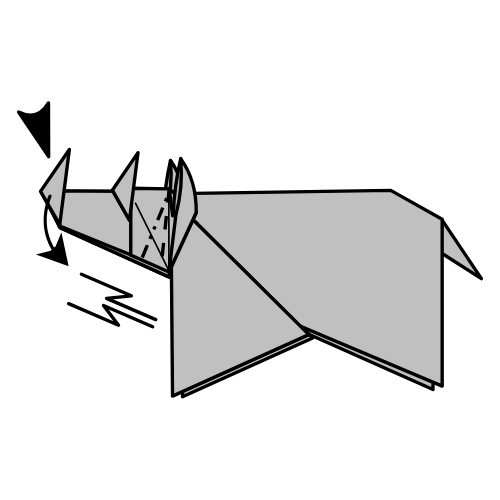
Carefully crimp the head downward.
🦏 Folding tip: This is the most difficult step of this origami rhinoceros, mostly because of the many layers. The fold does not need to be perfectly flat. The goal is simply to adjust the head angle slightly and give it more shape. You can watch the video for extra help with this step.
Step 39
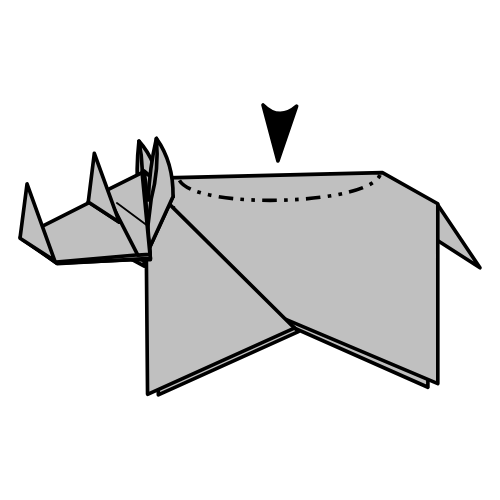
Push the back downward so the model becomes three-dimensional. This will also help the rhinoceros stand on its own.
You Did It! Your Origami Rhinoceros Is Looking Hornsome
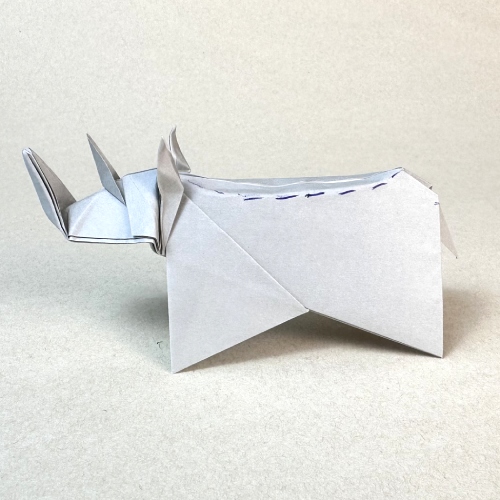
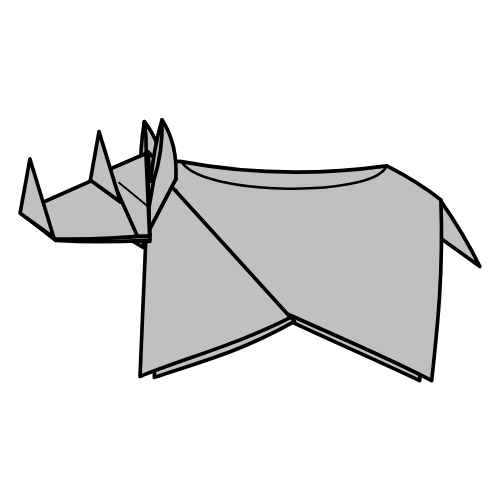
I hope you enjoyed folding this origami rhinoceros as much as I did. It’s a rewarding model, and the final shape has a lot of character once the horn and body come together.
If your first attempt doesn’t turn out exactly how you hoped, don’t worry. This is one of those models that gets better each time you fold it. As you become more comfortable with the layers and shaping, the rhinoceros starts to look cleaner and more balanced.
If you fold one, feel free to share a photo in the comments. I’d love to see them!
If you’d like to keep folding, you can explore more intermediate origami tutorials or browse other origami animals on the site.
You can also get new tutorials and folding ideas in our origami newsletter here. And if you prefer video instructions, you can follow along on YouTube.
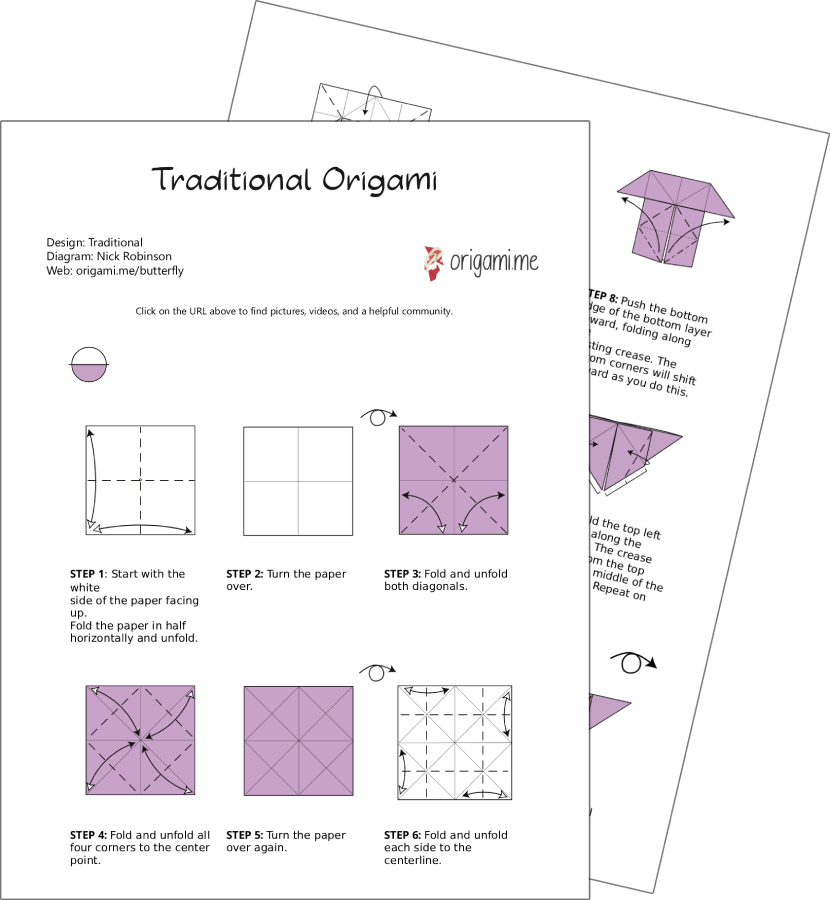
Download the Complete Origami Rhinoceros Printable PDF Instructions
This printable PDF is part of our Origami Friends membership on Patreon. As a member, you get access to these diagrams, our full library of 120+ printable PDFs, and member-only content.







hi