How to Fold an Origami Kusudama Chrysanthemum

 Traditional/Unknow
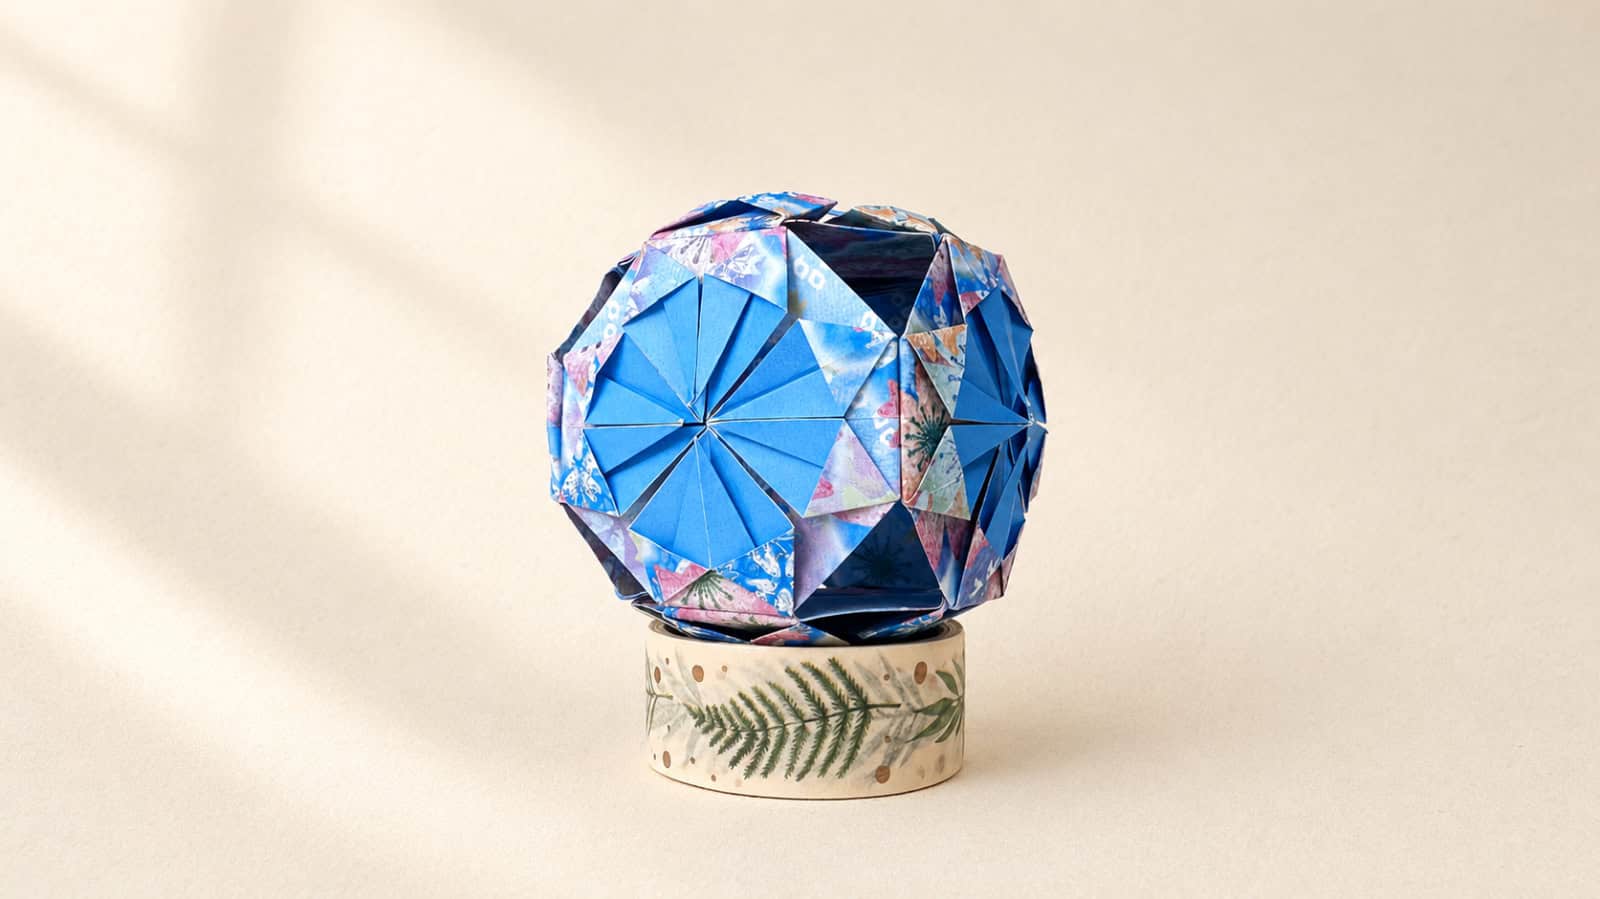
 Let’s fold a kusudama chrysanthemum, a beautiful paper ball made from six identical flower units. While the design is traditional, the name Kusudama Chrysanthemum was given by origami artist Tomoko Fuse.
If you’ve never folded a kusudama before, this is a great place to start. Each flower is easy to fold, and the assembly is simple too. You’ll glue the six units together to create a decorative ball with a flower on each side. The whole project takes about an hour, making it a relaxing way to spend an afternoon.
One of my favorite things about this model is how different it can look depending on the paper you choose. Try solid colors for a clean look, or mix colors and patterns to create something bright and unique.
Origami Kusudama Chrysanthemum Step-by-Step Instructions
- Difficulty: Easy – Beginner level 3
- Folding + assembly time: About 60 minutes
- Additional material: Glue
Recommended Paper
6 x 6 in (15 x 15 cm) origami paper (Kami). The finished kusudama measures about 3 × 3 × 3 inches (7.5 × 7.5 × 7.5 cm).
Folding One Unit
Step 1
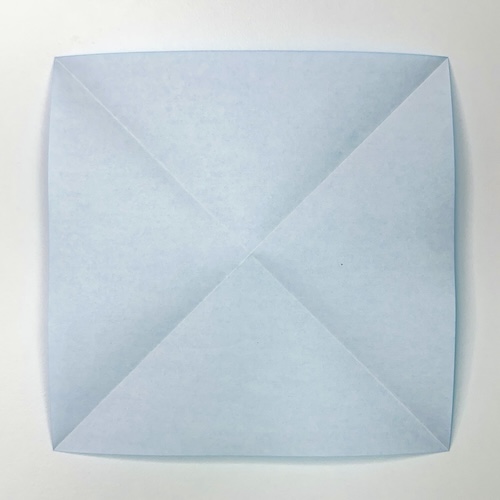
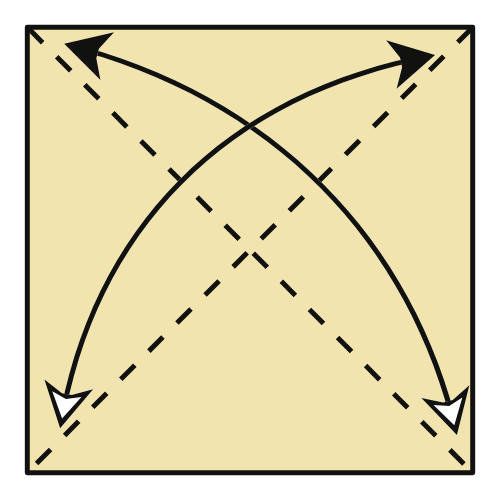
Start with the white side of the paper facing up. Fold along both diagonals, then unfold.
Step 2

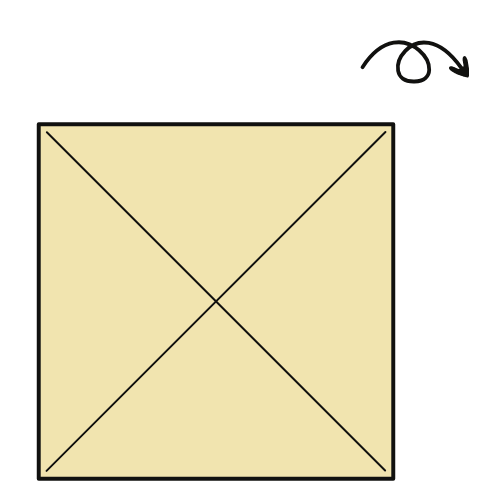
Turn the paper over.
Step 3
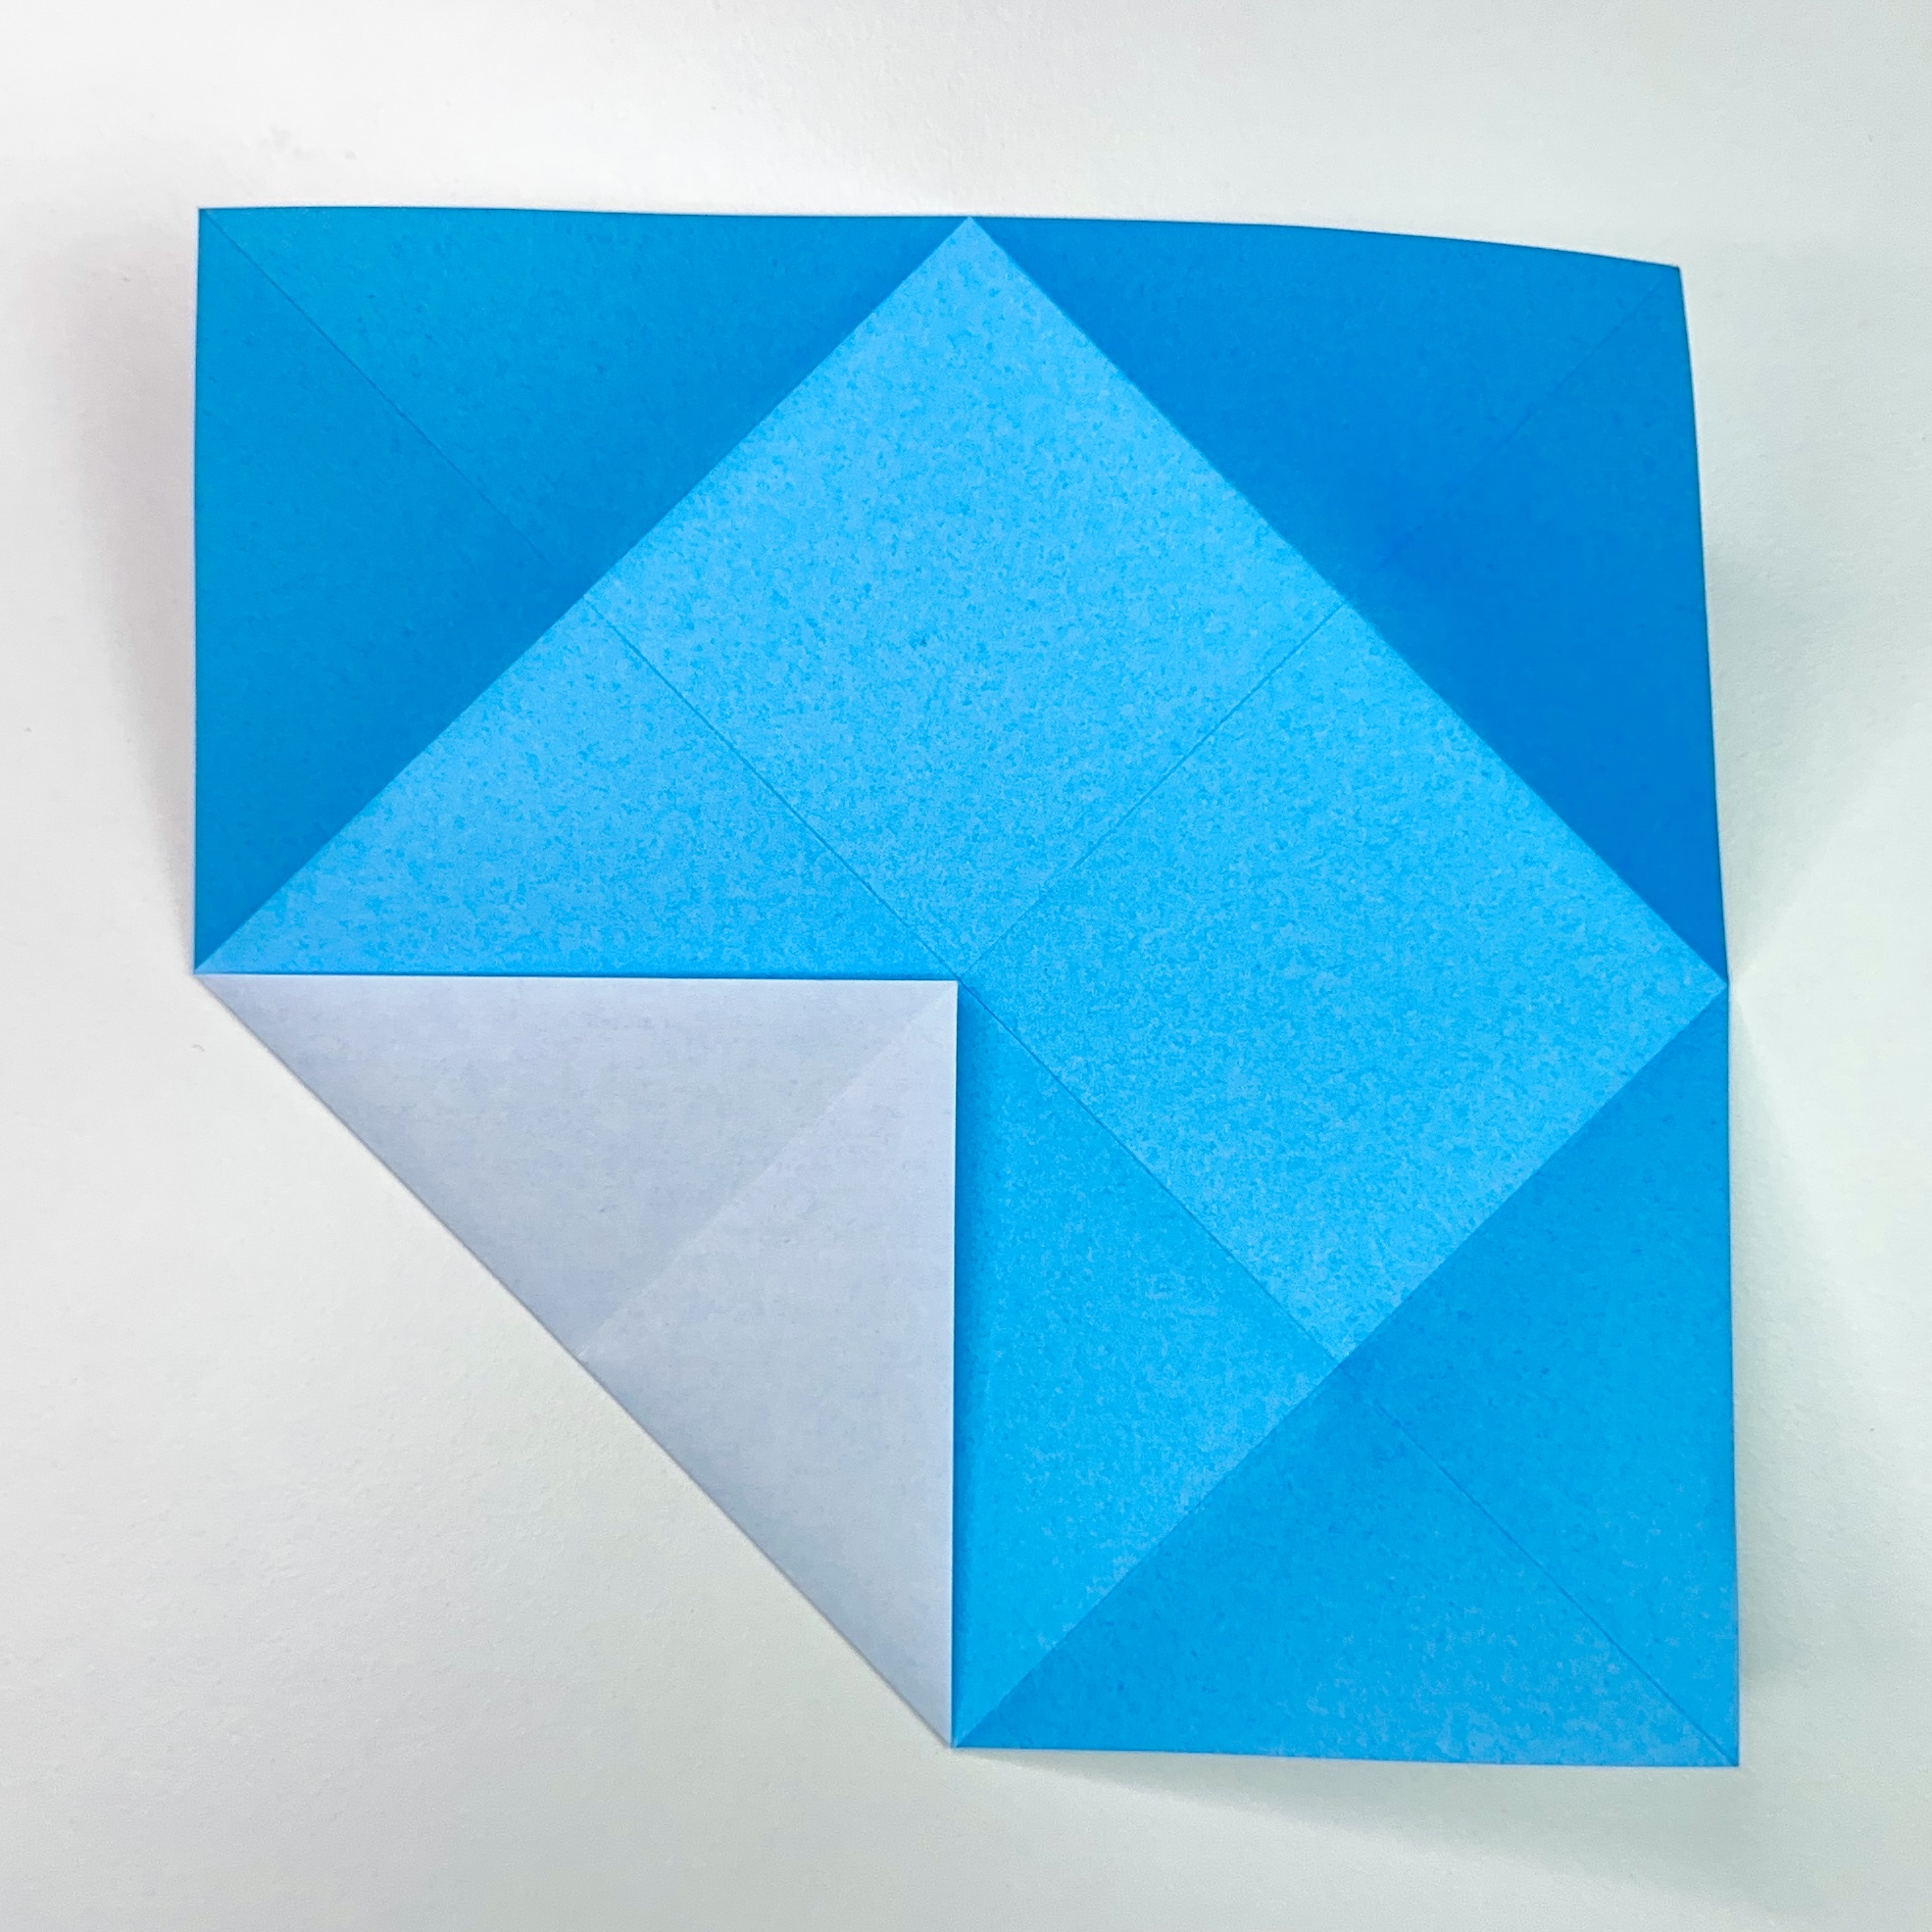
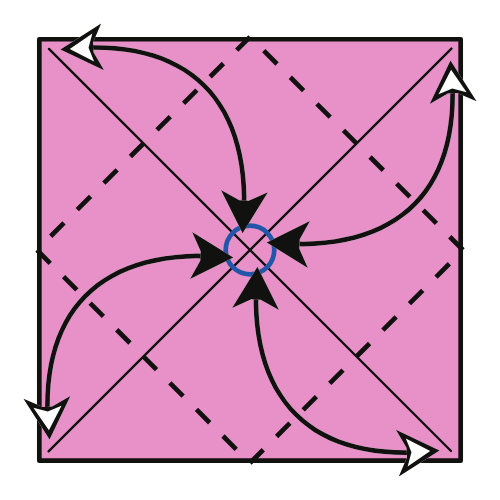
Fold each corner to the center point, then unfold.
🏵️ Folding tip: When folding to the center point, focus on aligning the edges rather than aiming directly for the center. Make sure the fold lines meet neatly.
Step 4
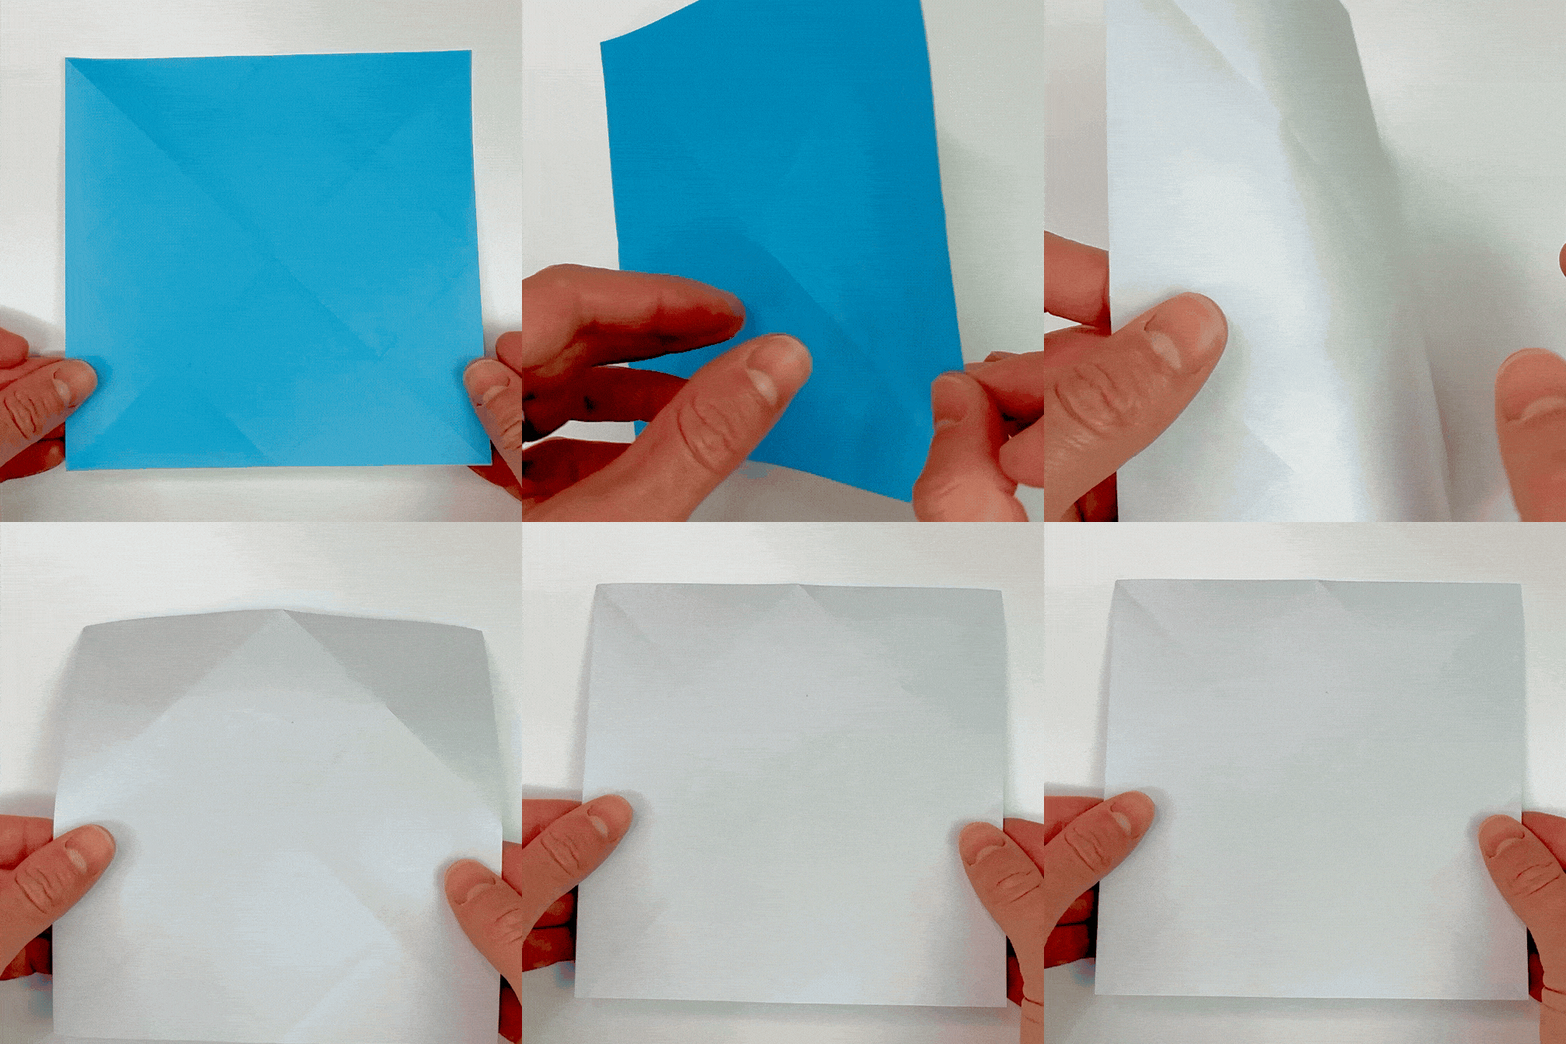
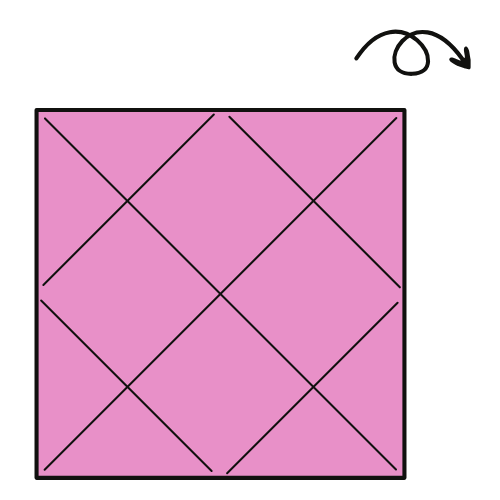
Turn the paper over.
Step 5
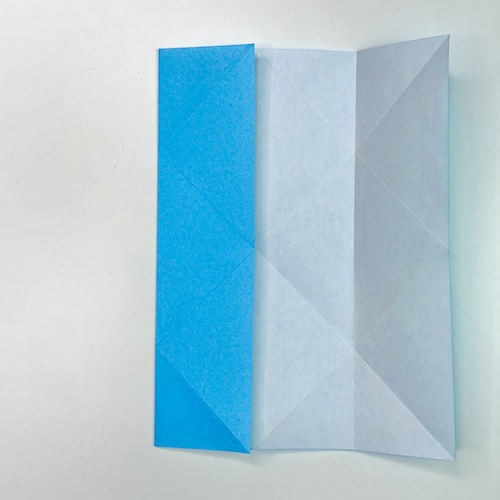
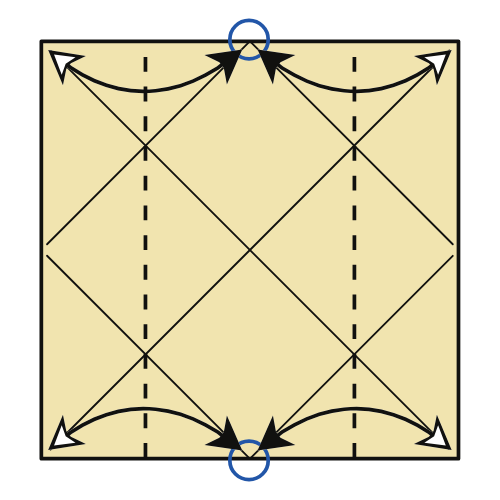
Fold the left and right edges to the vertical center crease, then unfold.
Step 6
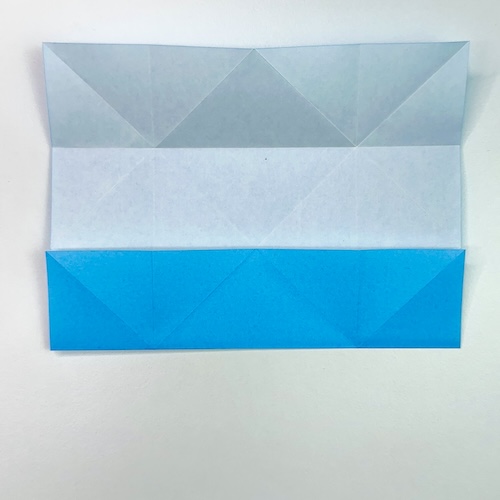
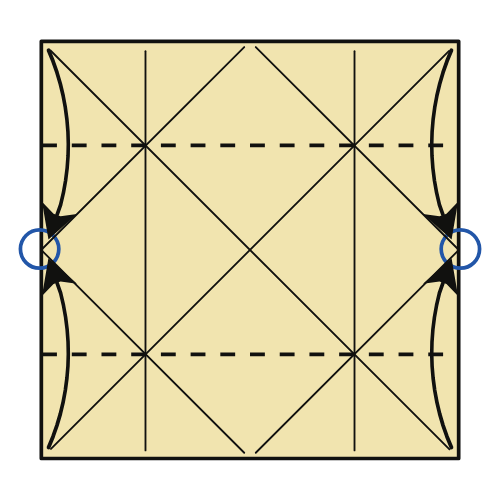
Fold the top and bottom edges to the horizontal center crease.
Step 7
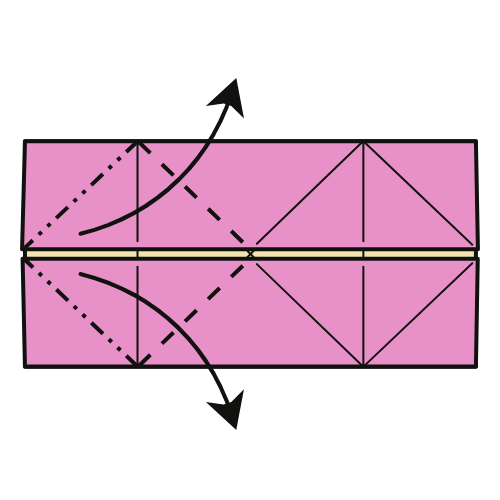
On the left side, slightly lift the top flaps. Then push the edge of the bottom flap toward the center. The corners will move toward the top and bottom.
Step 8
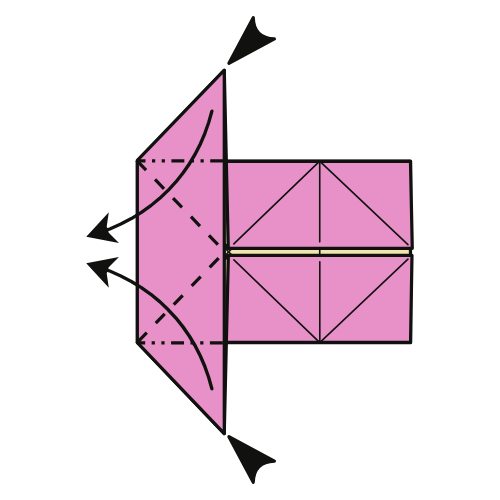
Squash fold the corners to the center point.
Step 9
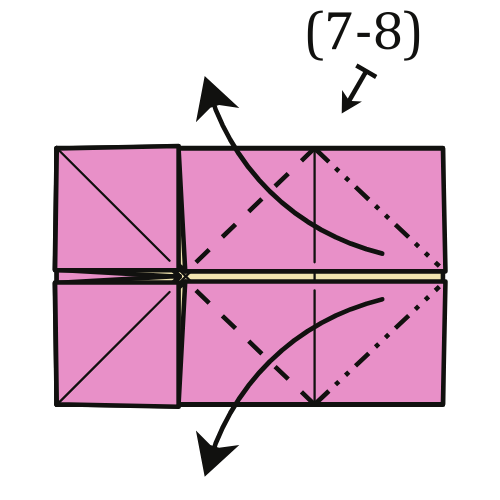
Repeat Steps 7 and 8 on the right side.
Step 10
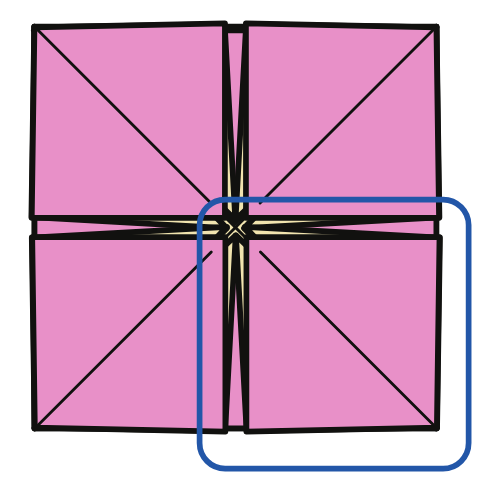
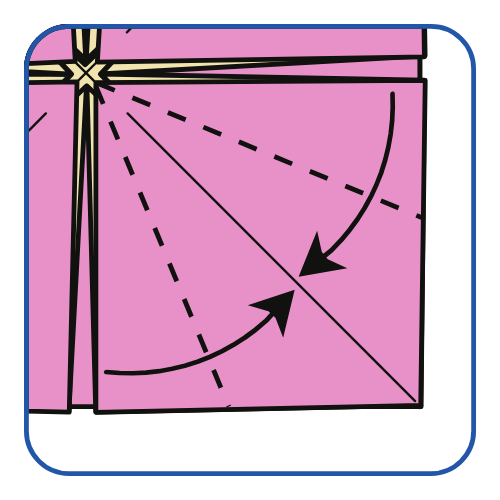
Focus on the bottom right square. Fold the left and top edges to the diagonal crease.
Step 11
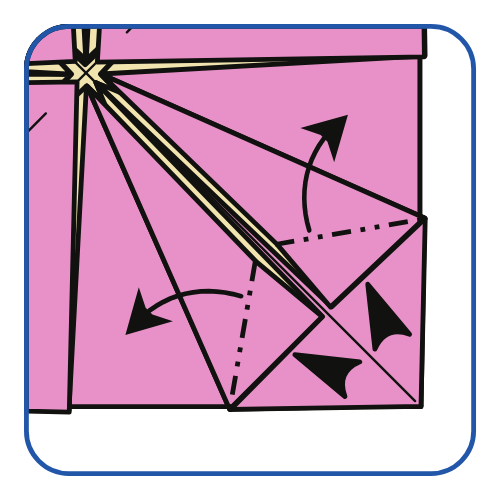
Lift each flap you just created and squash fold it flat.
Step 12
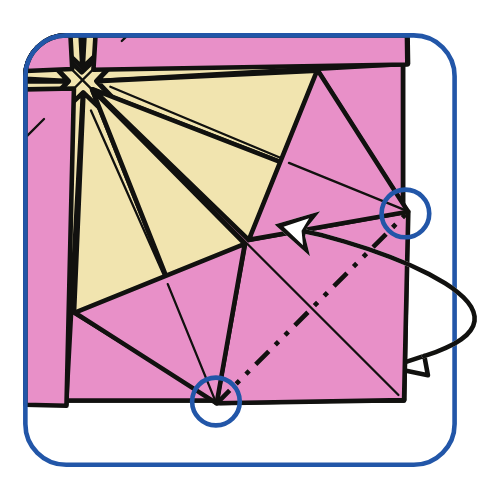
Mountain fold the corner behind the model, then unfold.
Step 13
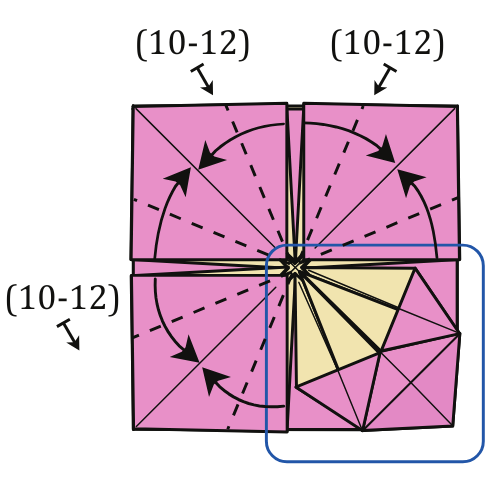
Repeat Steps 10 to 12 on the remaining three sections.
You Have Completed One Unit
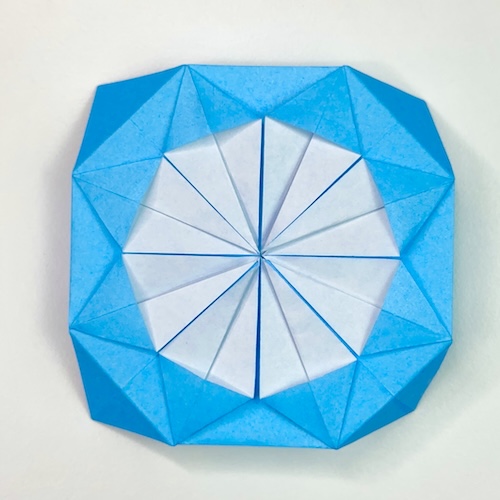
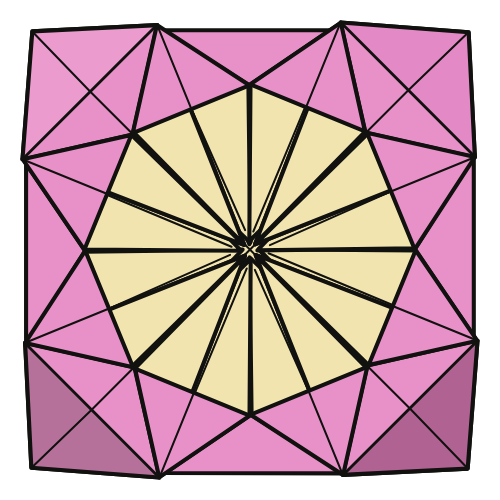
You have completed one unit. Fold 5 more units before moving on to the assembly stage.
Assembly
Step 1

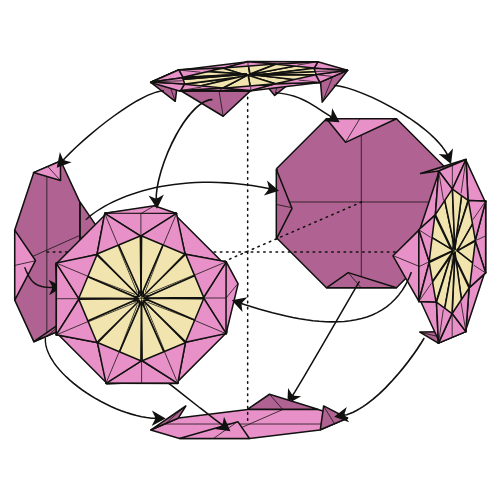
Apply glue to the folded triangles at the corners of all units, as shown by the shaded areas in the diagram.
Assemble the units into a cube shape by gluing the corners together.
🏵️ Folding tip: Use paper clips to hold the units in place while assembling the kusudama. It can help to assemble it over several sessions, allowing the glue to dry between each stage.
The Completed Origami Kusudama Chrysanthemum
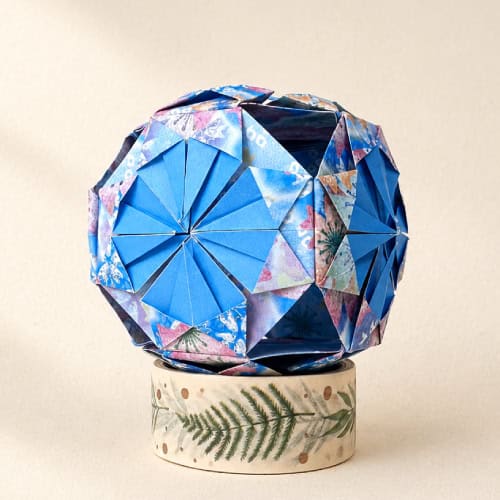
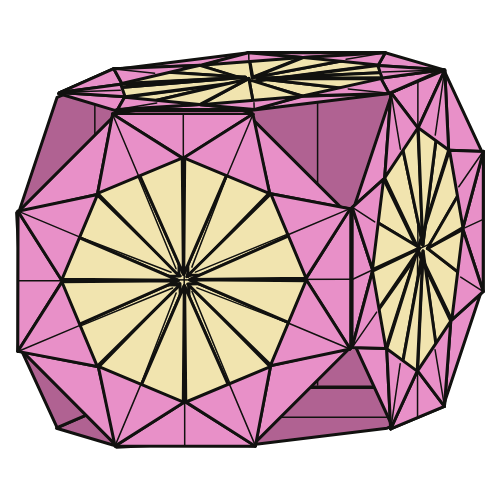
I hope you enjoyed making this kusudama chrysanthemum. It’s a simple project, but the finished ball looks much more impressive than the individual folds suggest.
If this is your first kusudama, don’t stop here. Try making another one with different paper colors or patterns. It’s amazing how much the finished model can change with a new color combination.
If you make one, I’d love to see it. Feel free to share a photo in the comments.
If you’d like to keep folding, have a look at our easy origami tutorials or explore more modular origami projects on the site.
You can also get new tutorials and folding ideas in our newsletter here. And if you’d like to fold along with videos, you can subscribe to our origami YouTube channel.
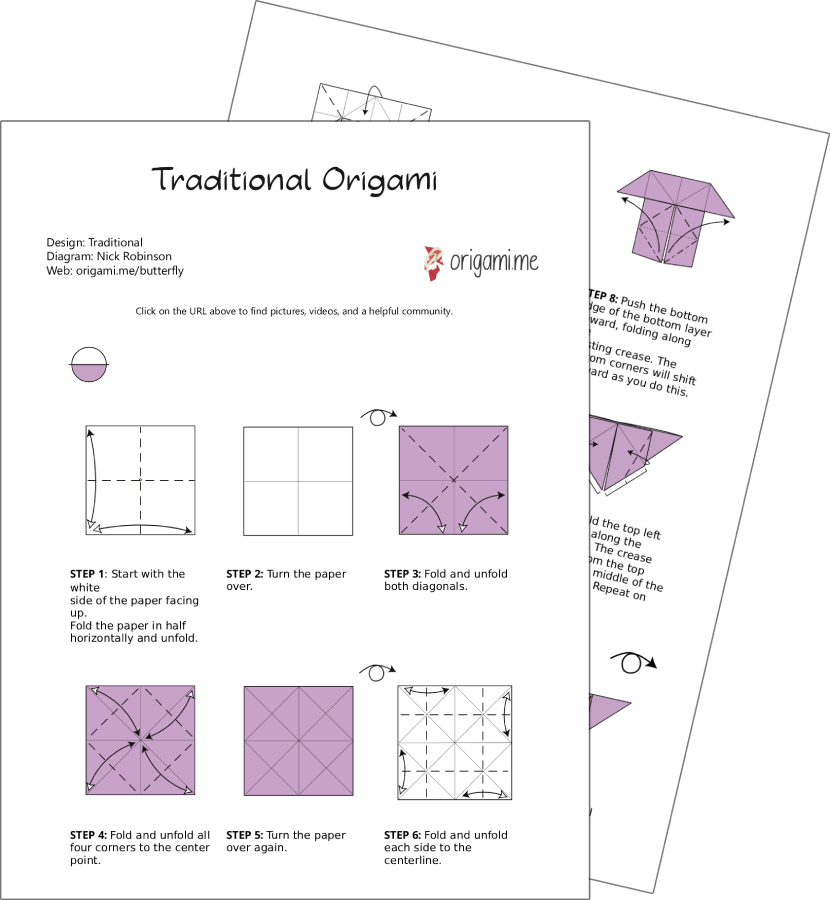
Download the Complete Origami Kusudama Chrysanthemum Printable PDF Instructions
This printable PDF is part of our Origami Friends membership on Patreon. As a member, you get access to these diagrams, our full library of 120+ printable PDFs, and member-only content.