
How to Fold an Origami Lotus Flower
The origami lotus is one of the most recognizable traditional models, symbolizing purity, renewal, and enlightenment. It has been folded for centuries in Japan and China and holds deep cultural significance, especially in Japan, where the lotus is linked to spirituality and beauty.
In this step-by-step tutorial, you’ll learn how to fold your own paper lotus flower with easy, beginner-friendly instructions. It’s a great project for relaxation, decoration, or even as a thoughtful handmade gift.
Grab your paper, and let’s start folding!
Traditional Origami Lotus Step-by-Step Instructions
- Difficulty: Easy – Beginner Level 3
- Folding time: 5-10 minutes
Recommended Paper
20×20 cm (8×8 in) tissue paper or any thin and soft paper, like mulberry.
If you don’t have any paper at home and don’t feel like waiting, I often use paper napkins for this model. They’re not perfectly square, so it makes the folding a bit more challenging, but the result is lovely and adds a nice touch to your table.
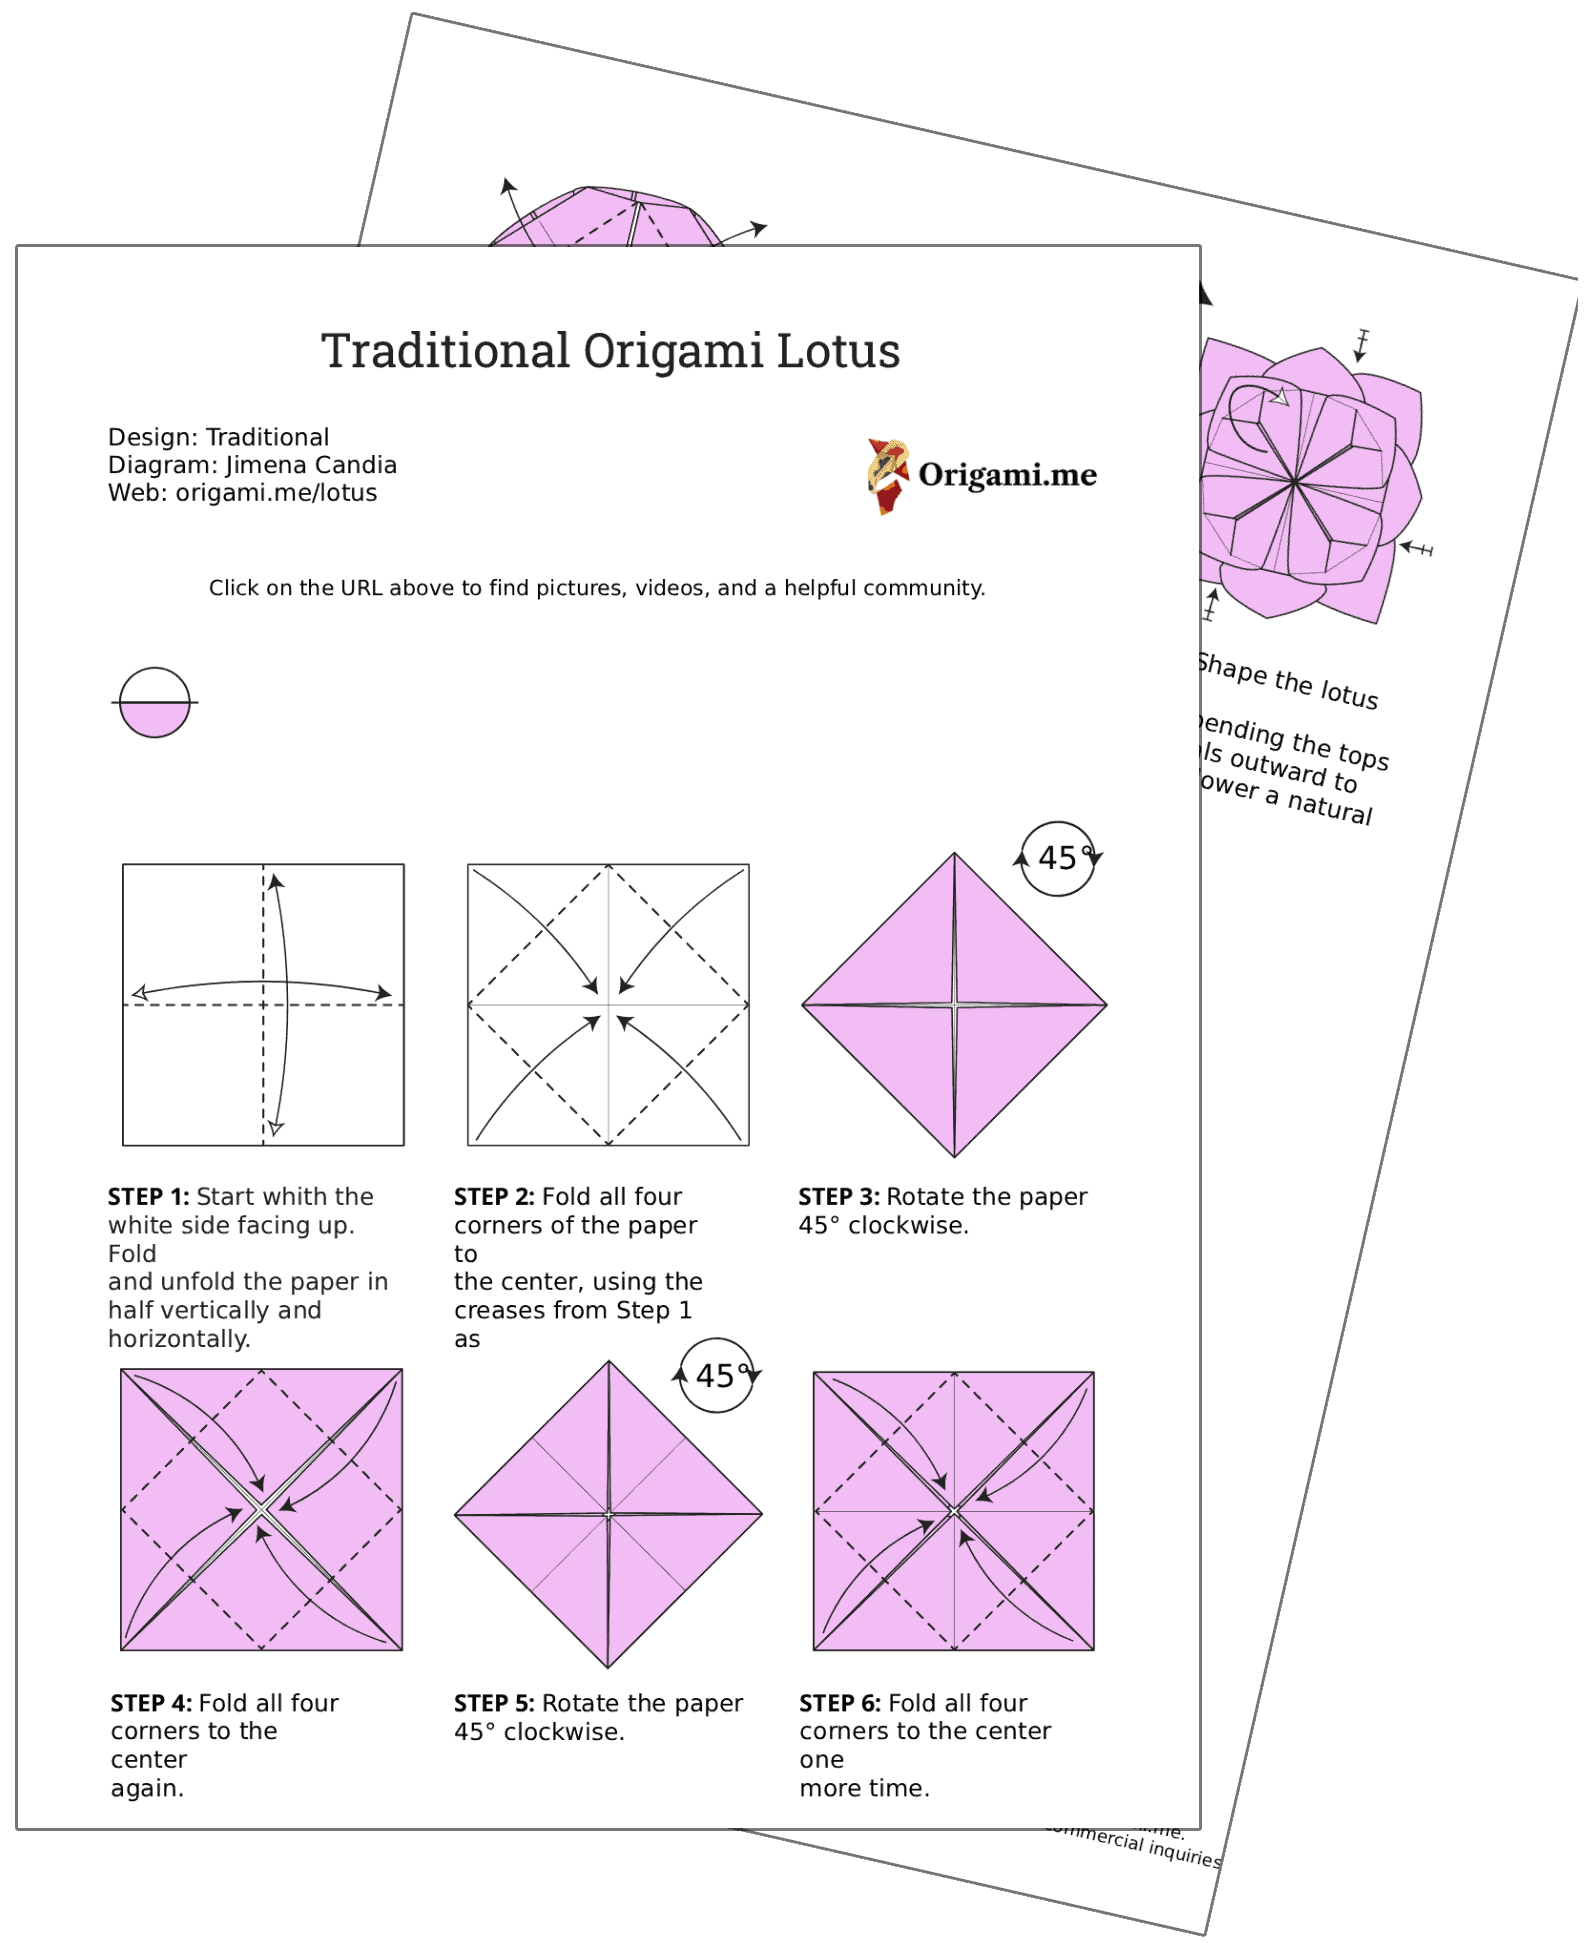
Step 1

Start with the white side facing up. Fold and unfold the paper in half vertically and horizontally.
Step 2

Fold all four corners of the paper to the center, using the creases from Step 1 as guides.
Step 3

Rotate the paper 45° clockwise.
Step 4

Fold all four corners to the center again.
Step 5

Rotate the paper 45° clockwise.
Step 6

Fold all four corners to the center one more time.
Step 7

Turn the model over.
Step 8

Fold all four corners to the center again.
🪷 Folding tip: Depending on its thickness, the paper might become harder to crease at this stage. For best results, we recommend using softer paper, like tissue or washi.
Step 9

Fold each corner inward along the dotted lines.
Step 10

Hold one small flap from Step 9 with one hand, and with the other hand, gently pull up and reverse the flap on the opposite side.
🪷 Folding tip: Be patient, as the paper may tear at this step. Mastering this part often takes several tries. Go slowly and guide the paper carefully.
Step 11


Repeat Step 10 for each corner to form the first set of lotus petals. Once done, push up all the flaps created in Step 9 so they point upward.
Step 12

Turn the model over.
Step 13

Gently pull down and reverse all four flaps to create a new layer of petals.
Step 14

Fold the remaining flaps along the dotted lines to create the final layer of petals.
Step 15

Turn the model over.
Step 16

Shape the lotus by carefully bending the tops of the petals outward to give your flower a natural look.
🪷 The Completed Origami Lotus!


Congratulations on folding your very own origami lotus!
Want to take it a step further? Try folding a smaller lotus and placing it inside a larger one! The flower will have more petals, creating a beautiful, full-bloom effect—just like the lotus on the right side of the featured image.
Experiment with different paper colors and sizes to make unique variations.
We’d love to see your creations! Feel free to share them with us in the comments or on socials.
Download the Complete Origami Lotus Printable PDF Instructions
This printable PDF is part of our Origami Friends membership on Patreon. As a member, you get access to these diagrams, our full library of printable PDFs, and member-only content.
Watch the Origami Lotus Video Tutorial
Enjoyed this tutorial?
Subscribe to our YouTube channel for new inspiring origami videos every week!


mine ripped
İt seems tissue paper works, heres my first try.
Well done! You’re right, I often fold this model with paper napkins. My son loves them. The only downside is that they are not perfectly squar,e which makes the folding sequence more challenging. I’ll add this info in the recommended paper section.
Bro, my post-it couldn’t take it no more!
This is sooooooooo hharrrrrddddddd!!!!!!!!!!!!
Haha, yes! You can forget sticky motes for this one 😉
This one is really hard, you need a soft and thin paper for this as you said at the recomended section, otherwise it is gonna tear the paper.
The paper selection is key for this origami lotus. Once you have the right paper, the folding sequence isn’t difficult 👌
Oops haha I guess my paper was too thick
bad luck