
How to Fold an Origami Heart Box
This origami heart box is another lovely creation by Francis Ow, and it’s actually built on top of his origami heart card design. If you’ve already folded the card, you’re halfway there. Just keep going, and you’ll end up with this sweet little box.
It’s easy to fold, and the result is perfect for holding a small note, chocolate, or other tiny gift. We’re using half of a square sheet here, just like for the card, so you can get two boxes out of one sheet of origami paper.
Origami Heart Box Step-by-Step Instructions
- Difficulty: Easy – Beginner level 4
- Folding time: 15 minutes
Recommended Paper
24×24 cm (9.5×9.5 in) Kami cut in half. This will make a 6x3x3 cm (2.4×1.2×1.2 in) box.
Step 1
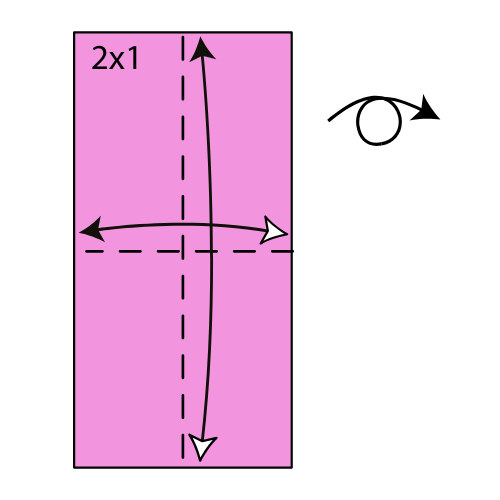
Start with a 2×1 rectangle (half of a square) with the colored side facing up. Fold and unfold the paper in half both vertically and horizontally. Then, turn the paper over.
Step 2
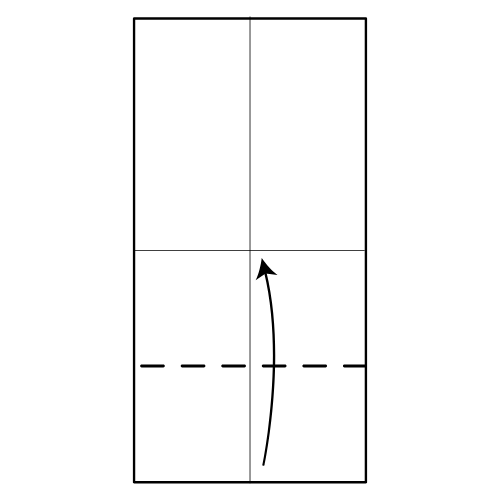
Fold the bottom edge up to the centerline.
Step 3
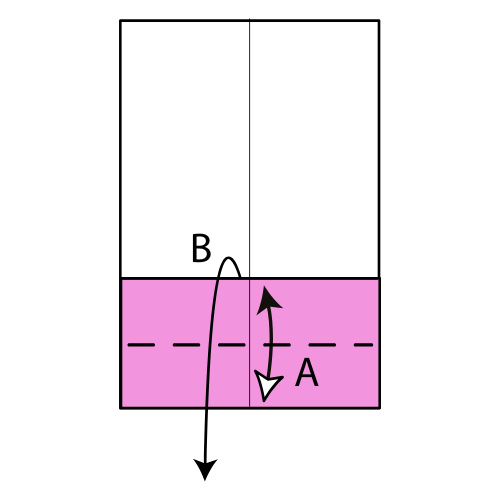
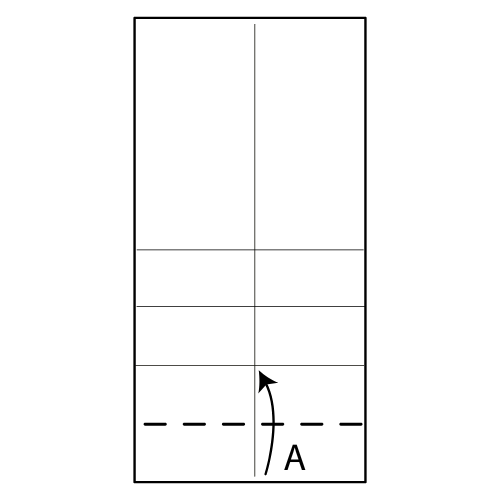
Fold and unfold the bottom edge to the nearest horizontal line (A). Then, unfold everything (B).
💖 Folding tip: When doing step A, hold the layers together firmly so they don’t move.
Step 4
Fold the bottom edge up along the crease you just made.
Step 5
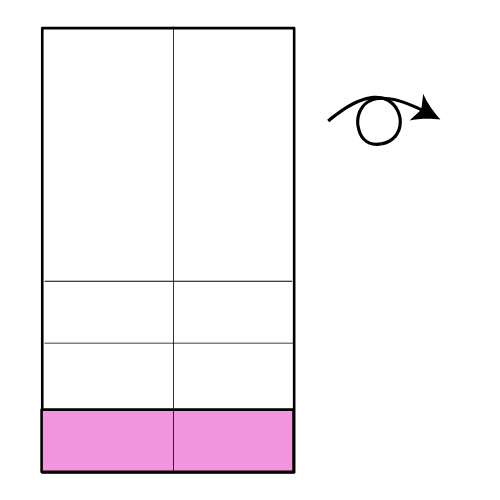
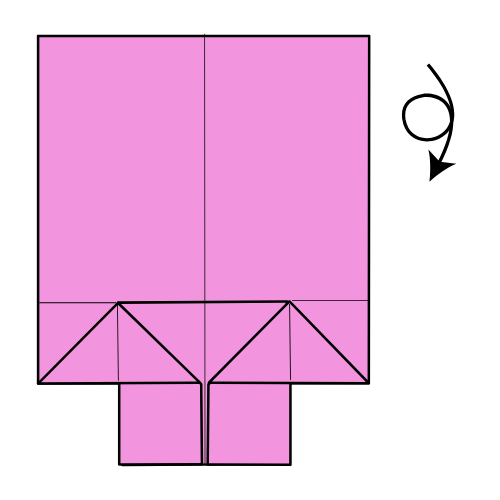
Turn the paper over.
Step 6

Pleat fold as shown:
- Valley fold along the horizontal centerline.
- Mountain fold the nearest horizontal line.
Step 7
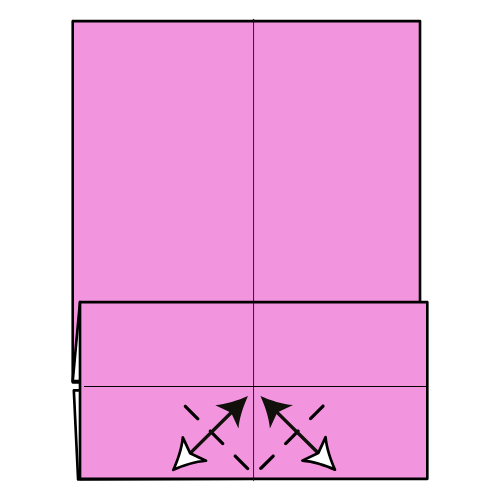
Fold and unfold the bottom corners inward to meet the vertical centerline. Crease only the bottom section as shown in the diagram.
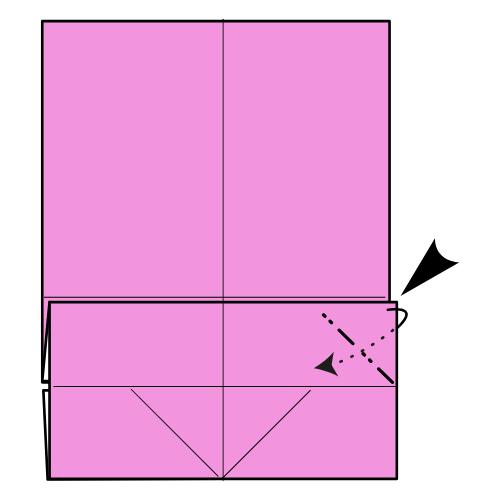
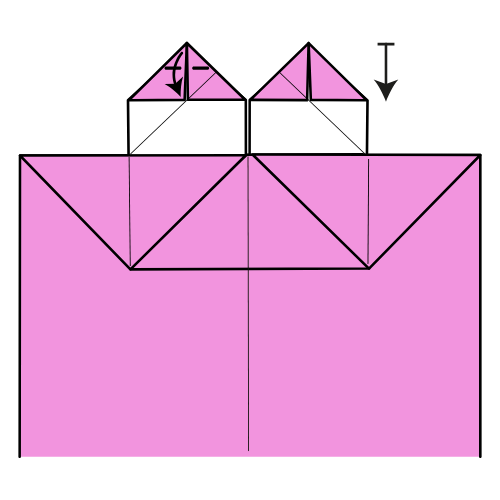
Step 8

Fold the top right corner of the top flap down to meet the nearest horizontal line. Then, unfold.
Step 9
Inside reverse fold along the crease you just made.
Step 10
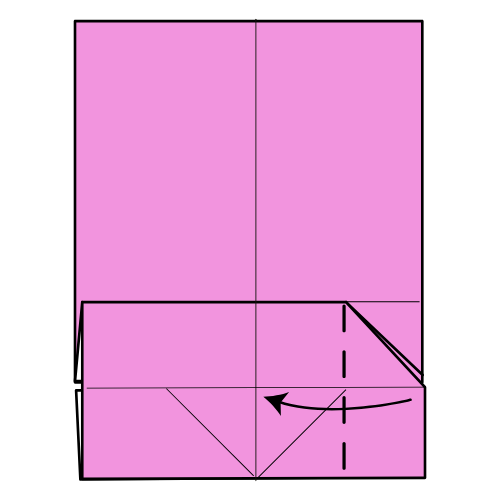
Fold the flap you just created to the left.
Step 11
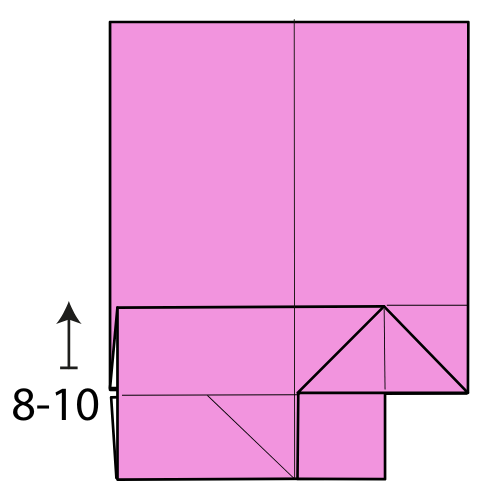
Repeat Steps 8 to 10 on the left side.
Step 12
Turn the model over from top to bottom.
Step 13

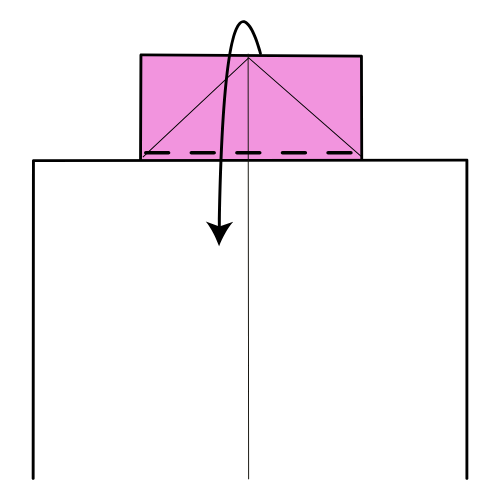
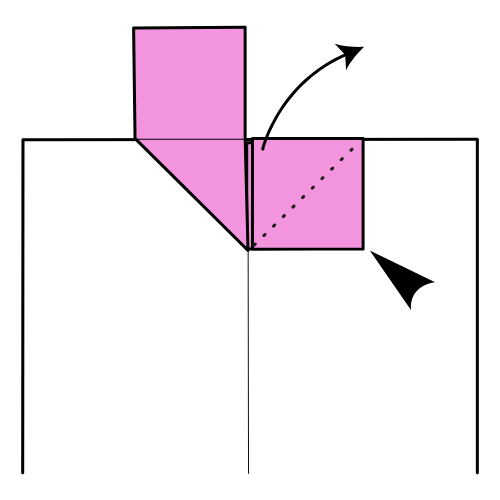
Fold the colored flap down.
Step 14
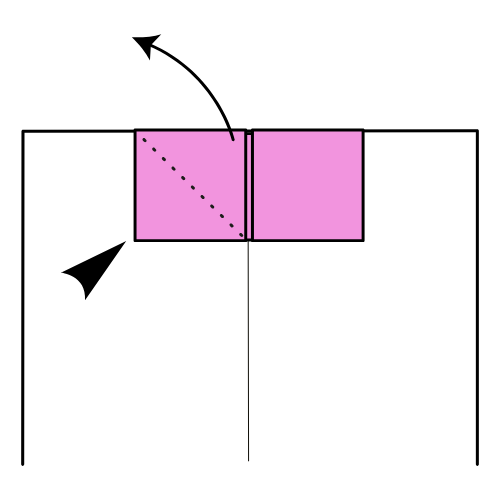
Lift the top square flap and make a swivel fold by pushing its bottom left corner in and rotating the square upward.
Step 15
Repeat Step 14 on the right side.
Step 16
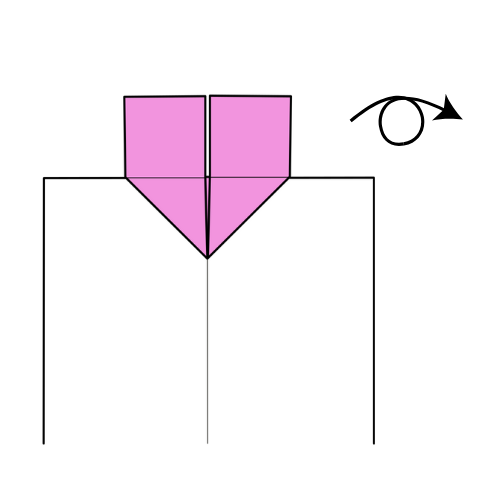
Turn the model over.
Step 17
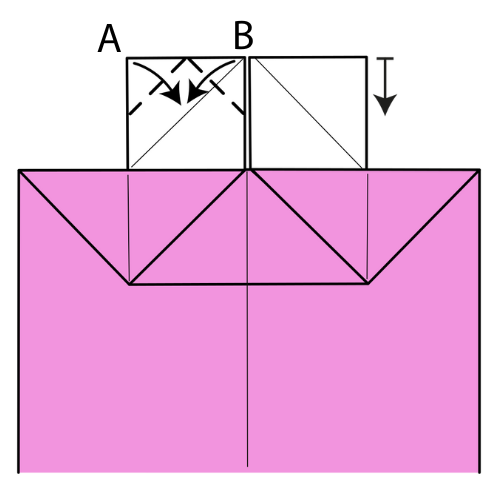
For each square area, fold the top corners inward so they meet at the center.
💖 Folding tip: Make a small pinch mark at the center of the top edge as a guide. Start by folding corner B, and align it with the diagonal line. You can now use this first fold as a reference for the remaining folds.
Step 18
Fold the top corners down to meet the nearest horizontal line.
Step 19
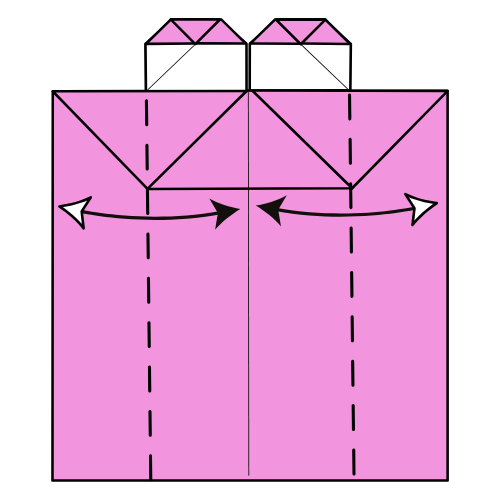
Fold and unfold the left and right edges to the vertical centerline.
Step 20
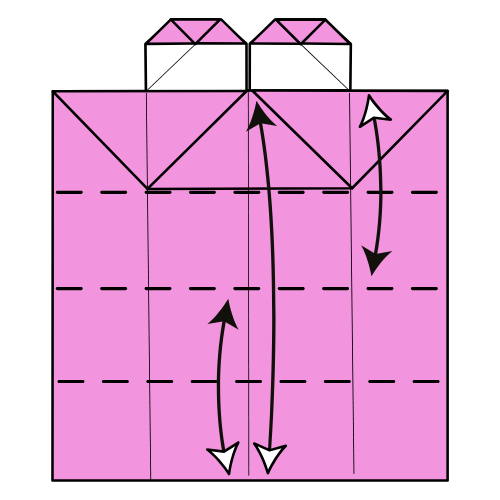
Make three horizontal folds to complete the 4×4 grid.
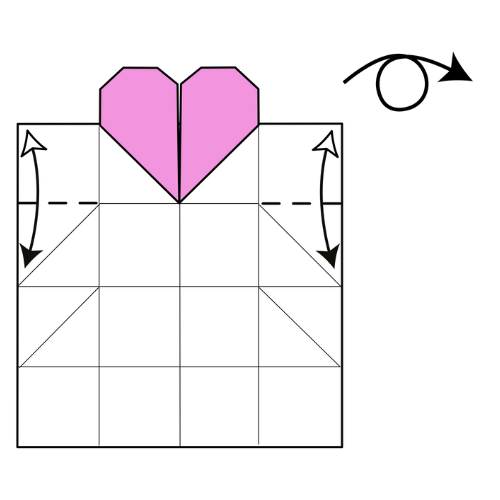
Step 21

Fold and unfold along the diagonal of each square (4 total). Then, turn the model over.
Step 22
Fold the top edge down to the nearest horizontal line. Crease only at the edge level on both sides, then unfold. Turn the model over again.
Step 23
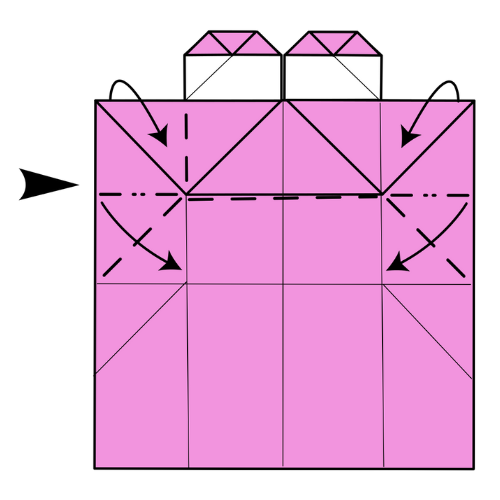
Collapse as shown. The heart will move 90° upward as the sides fold inward.
💝 Folding tip: For the box collapse (Steps 23 to 27), always glance at the next step to preview what your folds should look like. Pay close attention to how the layers are arranged and where they’re supposed to sit.
Step 24
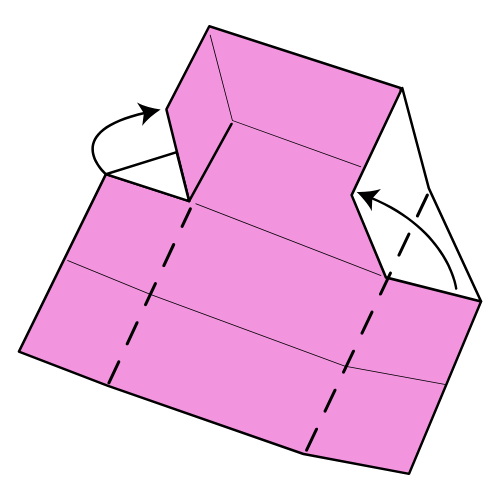
Fold both sides up at a 90° angle.
💝 Note: From Steps 24 to 27, the heart is not shown in the diagrams so you can focus on the box structure.
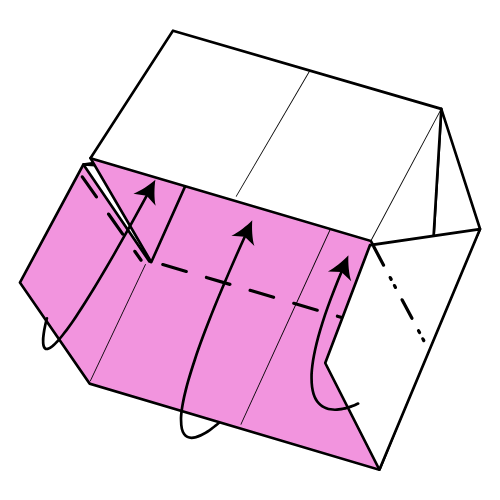
Step 25

Collapse as shown. This step is similar to Step 23.
Step 26

Fold both sides up again at a 90° angle.
Step 27
Lock the box by folding the remaining flap inward.
💝 Folding tip: You’ll need to press all sides at the same time to secure it in place. Then, gently roll the paper between your fingers to adjust everything neatly. You can also use a pen or bone folder to shape the inner corners of the box.
The Completed Origami Heart Box
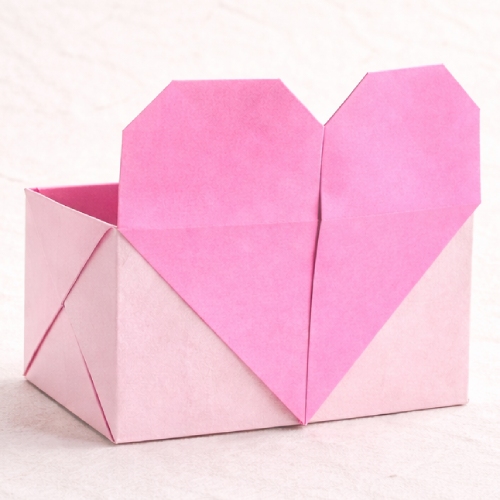
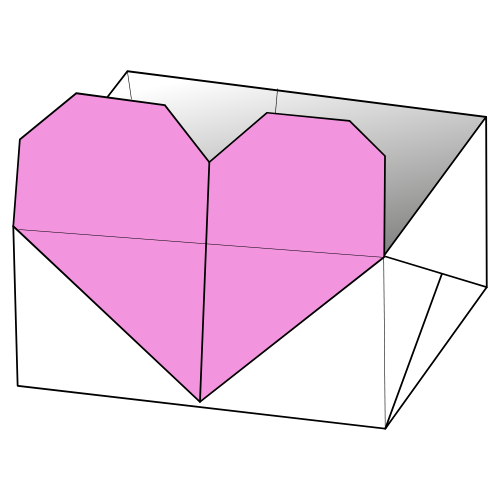
I hope you enjoyed turning the card into this little heart box! It’s a thoughtful handmade touch for Valentine’s Day, anniversaries, or just because.
If you haven’t already, check out our Valentine’s Day origami collection. And for more creative ideas like this, subscribe to our YouTube channel or join our origami newsletter to get fresh tutorials sent your way.

Download the Complete Origami Heart Box Printable PDF Instructions
This printable PDF is part of our Origami Friends membership on Patreon. As a member, you get access to these diagrams, our full library of printable PDFs, and member-only content.