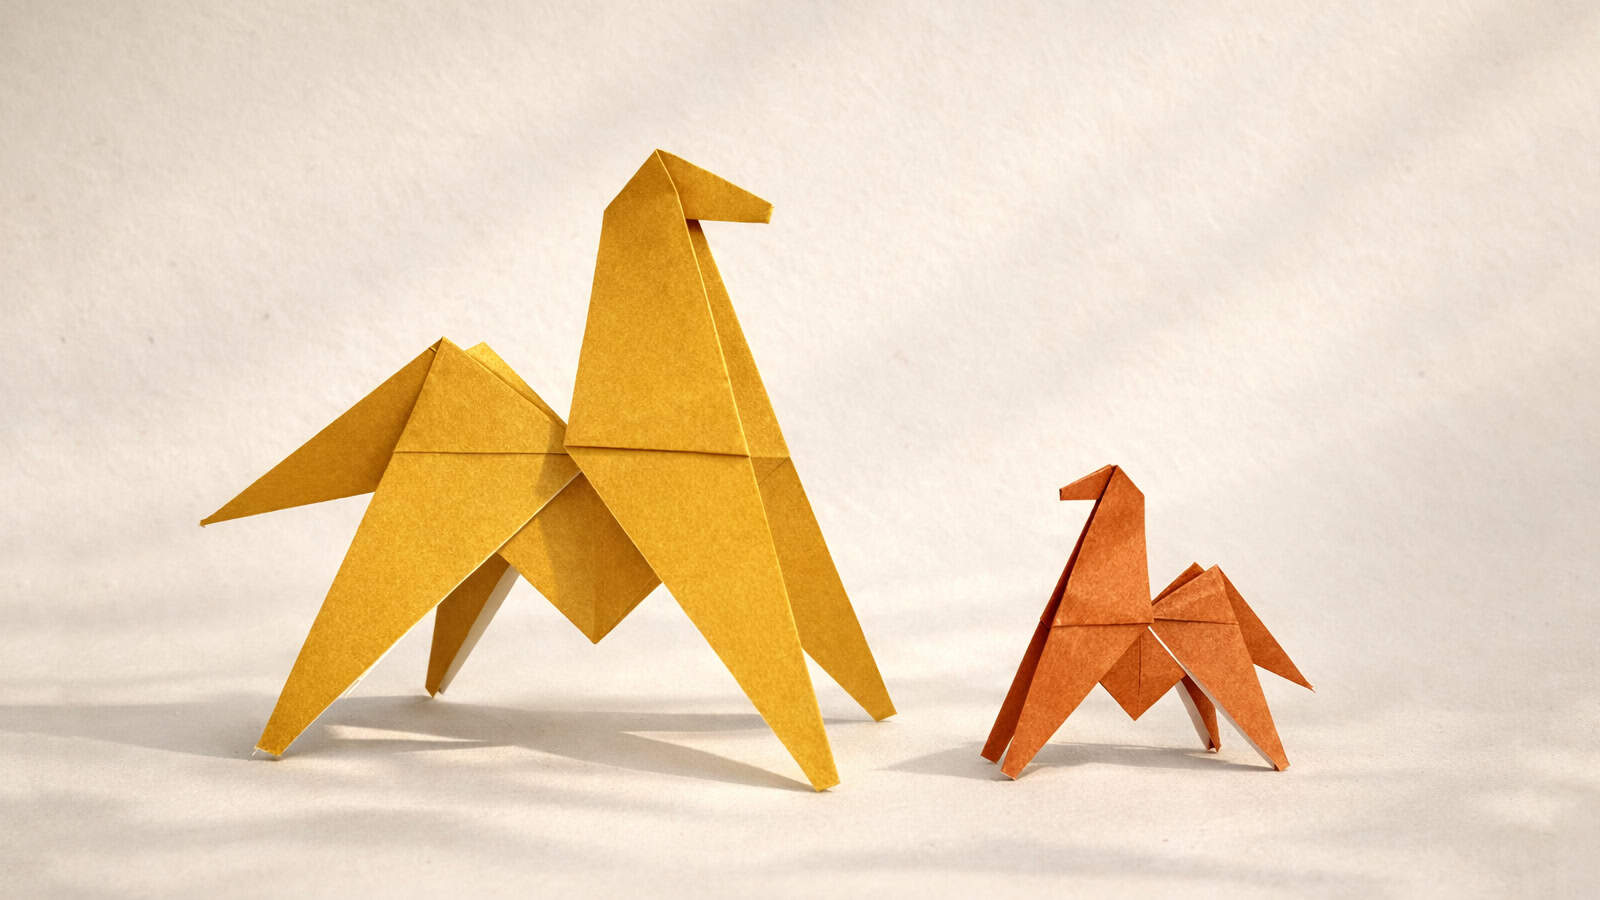
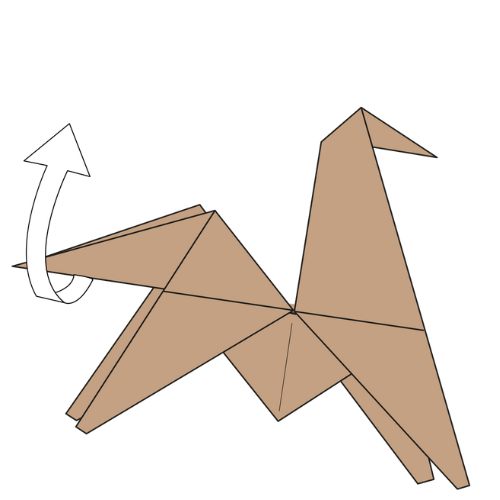
How to Make an Easy Origami Horse
This playful origami horse is a super simple model with a geometric look and a fun little trick. If you flick the tail just right, it flips and lands back on its feet!
It’s very beginner-friendly, and while it uses scissors to separate the legs, that shortcut makes it even easier to fold.
We don’t know much about its origin, but it appeared first in a Spanish book and is sometimes referred to as a llama!
Traditional Origami Horse Step-by-Step Instructions
- Difficulty: Easy – Beginner level 2
- Folding time: 5 minutes
- Material: Scissors
Recommended Paper
15×15 cm (6×6 in) Kami
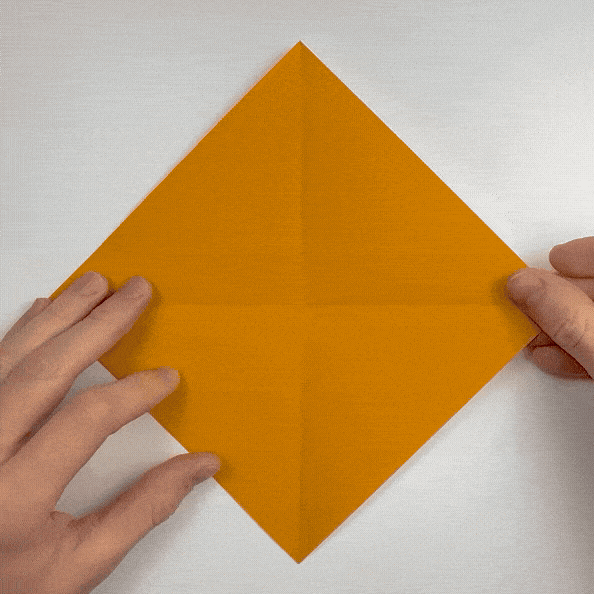
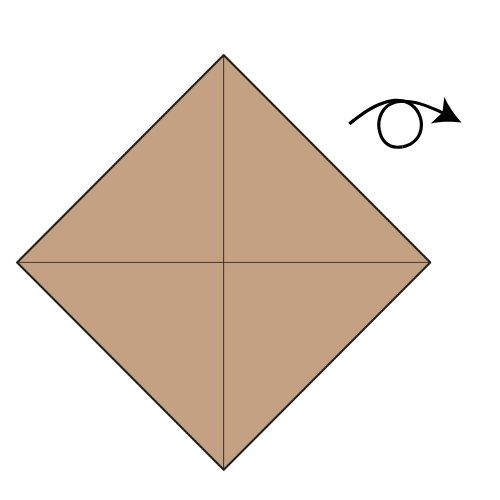
Step 1
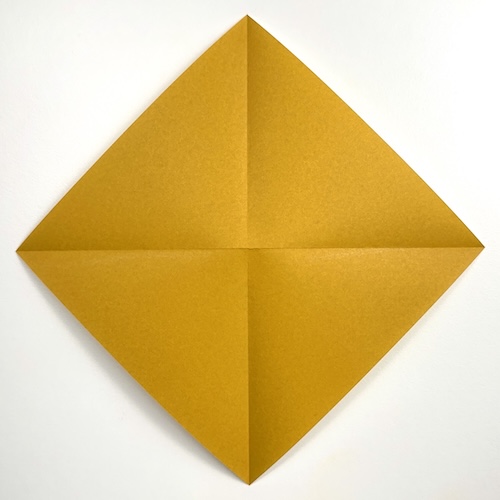
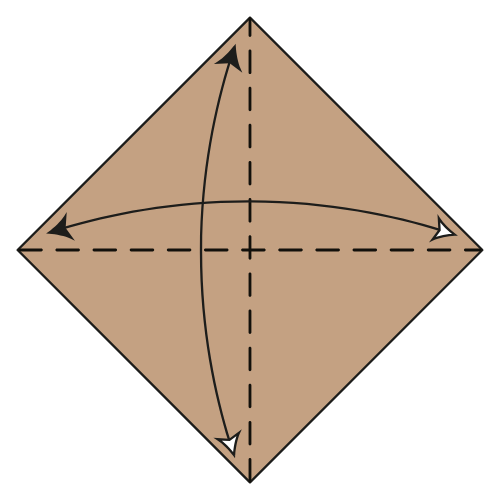
Start with the colored side facing up in a diamond position. Fold and unfold along both diagonals.
Step 2
Turn the paper over.
Step 3
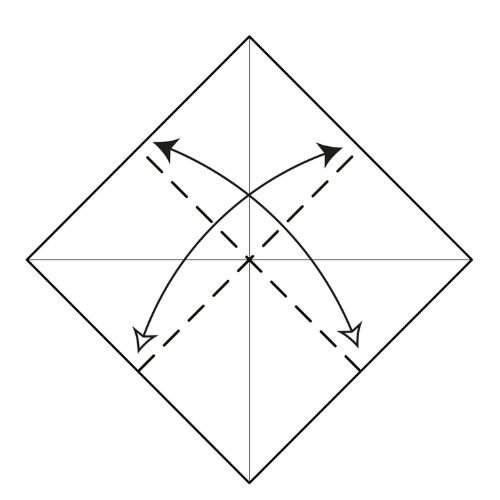
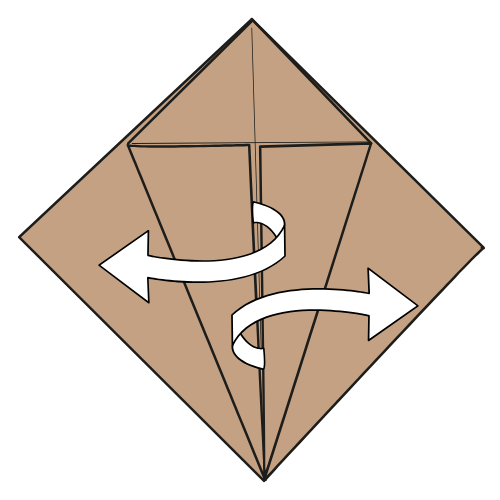
Fold and unfold in half on both sides.
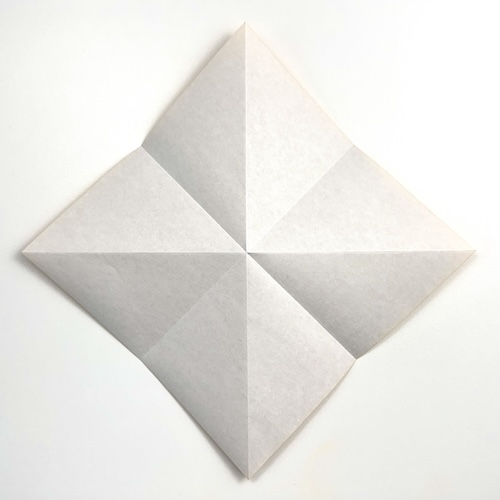
Step 4
Collapse along the existing creases to form a square base.
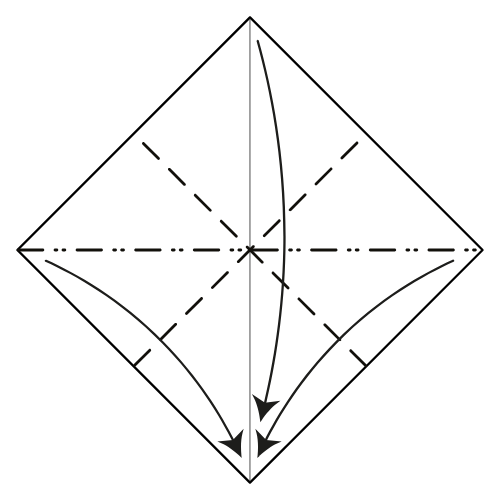
Step 5
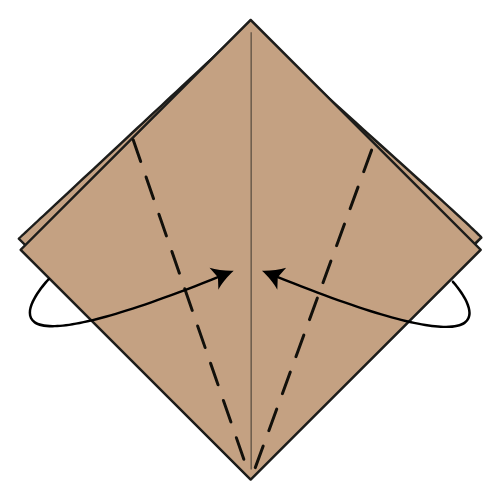
Fold the bottom left and right edges (top layer only) in to meet the vertical centerline.
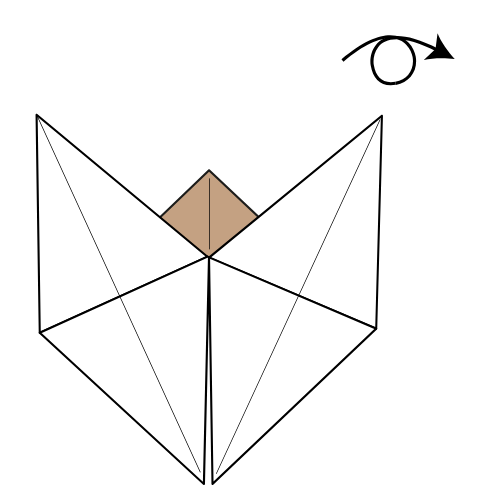
Step 6
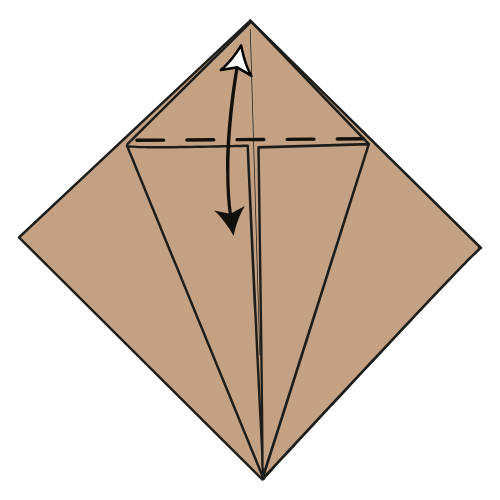
Fold the top corner down, using the top edge of the flaps from Step 5 as a guide. Then unfold.
Step 7
Unfold the flaps from Step 5.
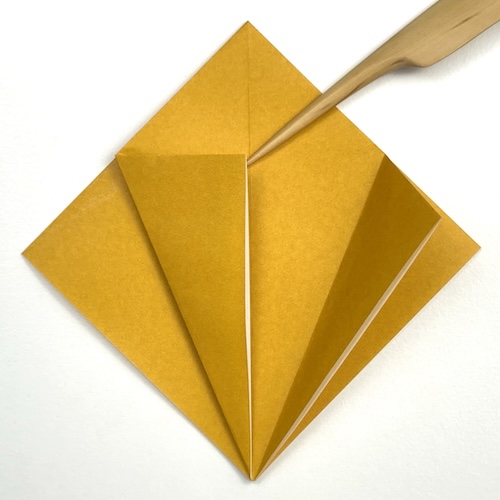
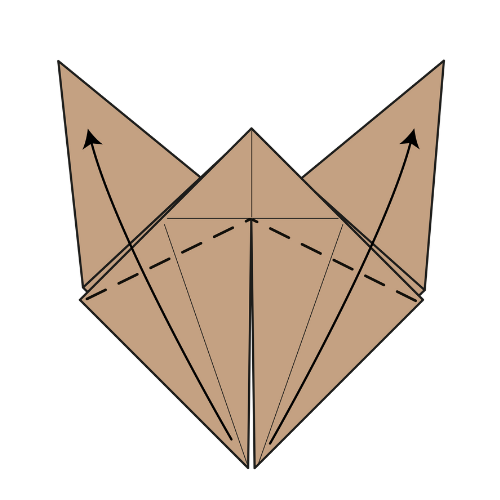
Step 8
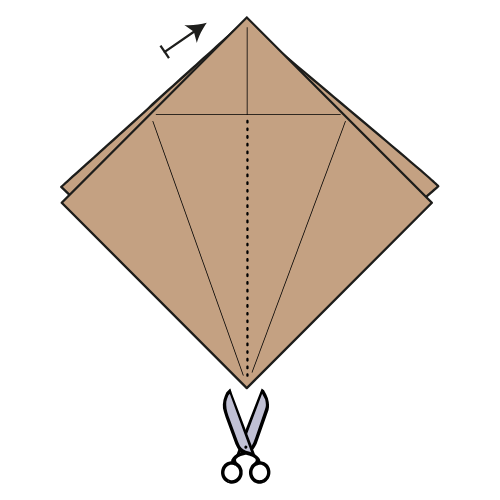
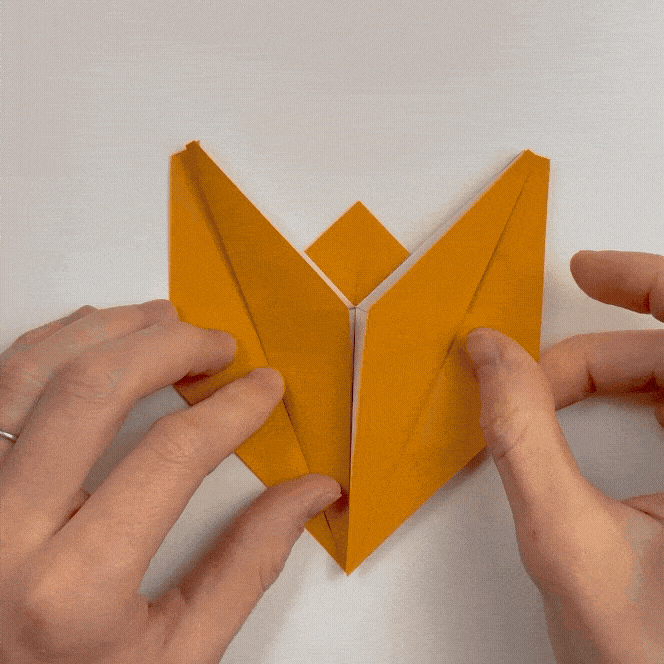
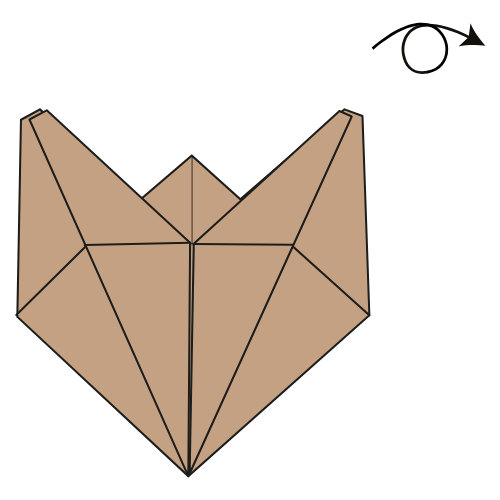
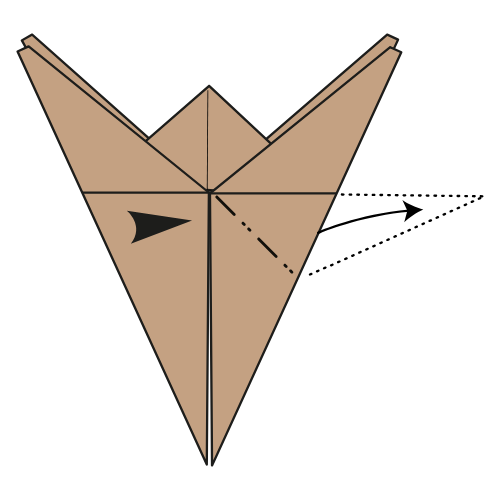
Cut along the vertical centerline (top layer only) from the bottom corner up to the crease you made in Step 6. Then, repeat Steps 5, 7 and 8 on the other side.
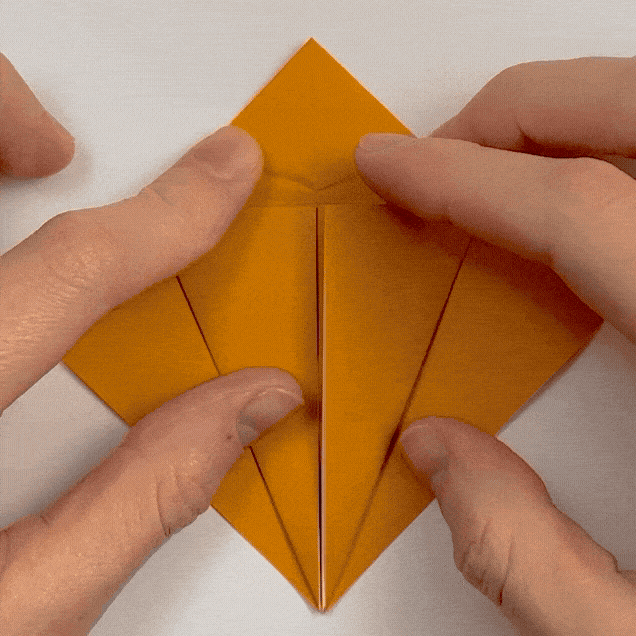
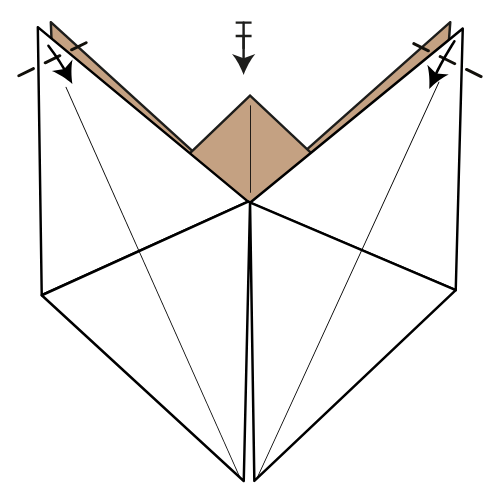
Step 9
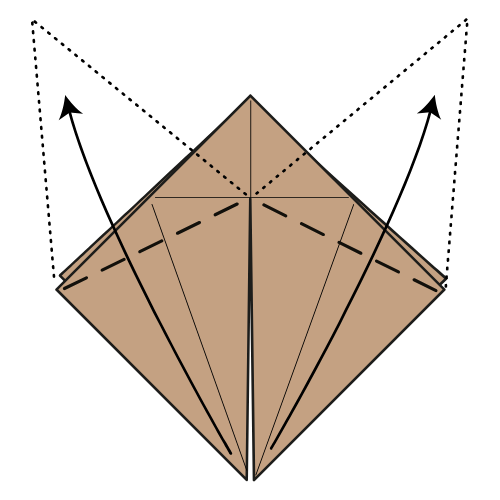
Fold the bottom corners of the top layers (left and right) up.
🐎 Folding tip: Gently stretch the flaps upward until they stop, then fold.
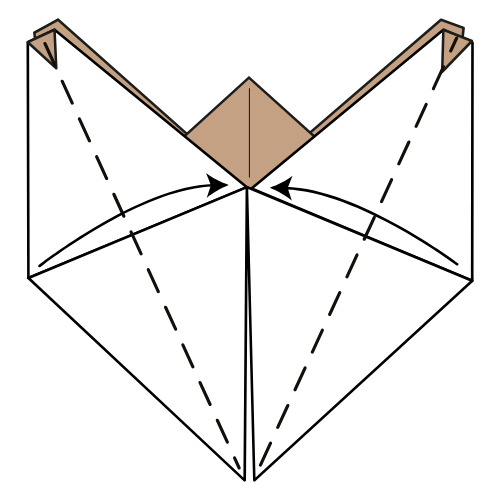
Step 10
Turn the model over.
Step 11
Repeat Step 9 on this side.
Step 12
Fold the top corners in slightly to shape the horse’s hooves. There are no exact reference points here, just aim for symmetry. Repeat on the other side.
Step 13
Fold the left and right corners in to the centerline, using the existing creases.
Step 14
Turn the model over.
Step 15
Repeat Step 13 on this side.
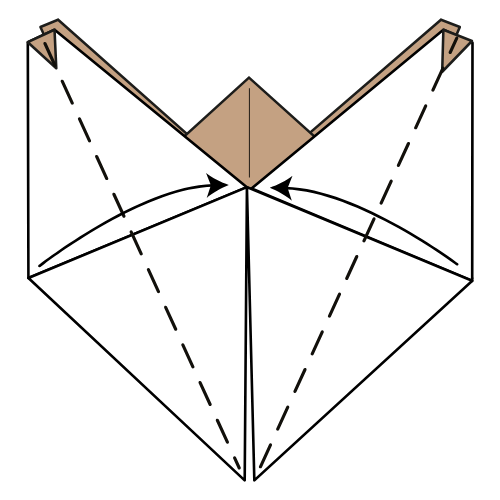
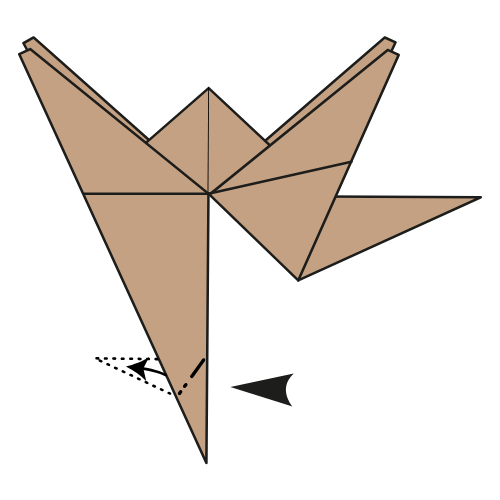
Step 16
Fold the bottom right corner out to form the horse’s tail. The vertical centerline should now line up with the nearest horizontal crease. Crease well, then unfold.
Step 17
Inside reverse fold along the creases you just made.
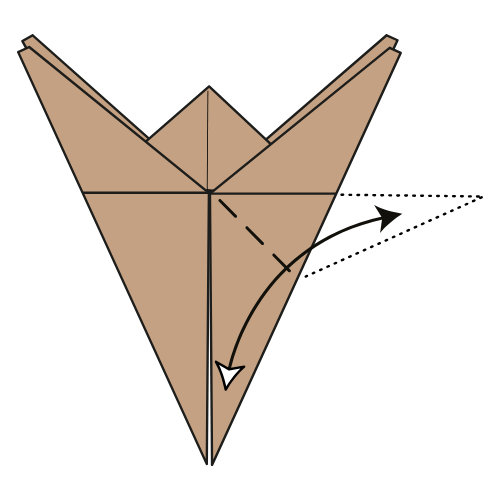
Step 18

Fold the bottom left corner out to form the horse’s head. There are no exact reference points here, so feel free to shape it how you like. Crease well, then unfold.
Step 19
Inside reverse fold along the creases you just made.
Step 20
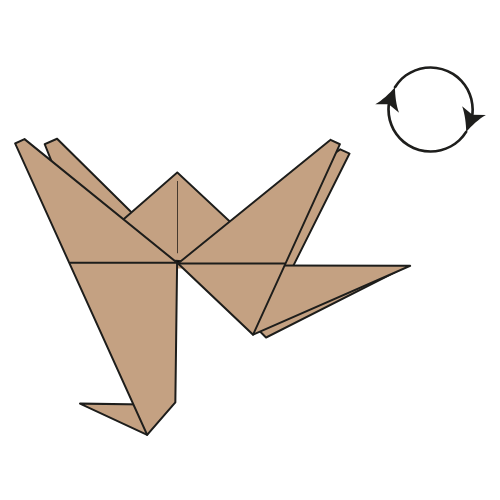
Rotate the model 180°.
Your Origami Horse Is Ready to Flip!

🐎 Folding tip: You can also inside reverse fold the tip of the head and adjust the angle of the tail for a more natural look.
I hope you had fun with this little origami horse, and that you nailed the tail flip! It’s a great model to fold with kids or to show off some simple origami movement.
And if you want more easy and fun animal tutorials, don’t forget to check out our YouTube channel or sign up for our newsletter to get fresh folds straight to your inbox.

Download the Full Origami Horse Printable PDF
Instructions
We’d love to keep you in the loop, so by sharing your email with us, you’ll be signed up for our mailing list. Don’t worry; we won’t bombard you with spammy emails, and your information is safe with us – we won’t share it with anyone else.


thanks for the steps.
I loved making an origami heart ❤ ♥ ???? ????
I liked making an origami horse ????????????
this was really helpful but it was a bit hard for my daughter to do it for herself because the pictures arn’t so clear, so i had to help her but otherwise amazing
Steps 7, 8, and 9 are very hard to follow.
You’re making a series of Inside Reverse Folds here. Check the Beginner’s Guide here: https://origami.me/beginners-guide/ to learn more about how to do these folds.
I want to learn those wonderful folds