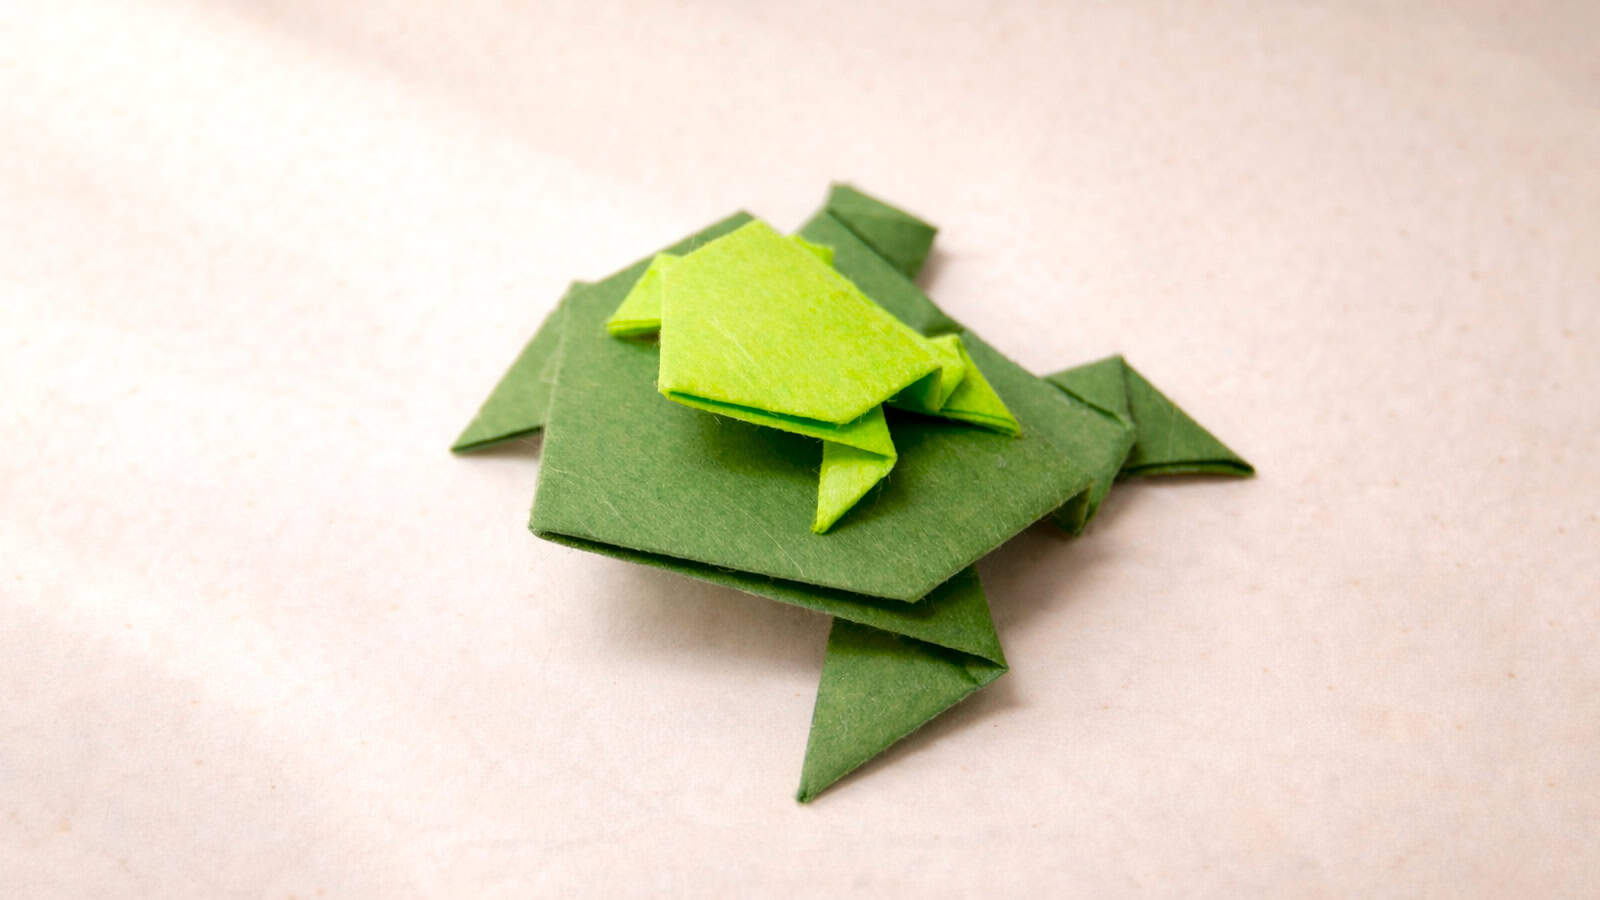
How to Make an Origami Jumping Frog
Let’s learn how to fold an origami jumping frog, a classic model that’s been around since at least the 1960s, often linked to Lillian Oppenheimer and Shari Lewis, though the exact origin isn’t fully clear.
What makes this model especially fun is not just how it looks, but what it does. Once folded, this little origami frog can actually jump pretty far if you press down on its back.
The shape is simple but works really well. It’s a great example of how a few folds can create something playful and interactive.
As you go through the steps, you’ll notice the paper gets quite thick toward the end. That’s normal. Don’t worry too much about perfectly sharp folds at that stage. Even with a few imperfections, the frog will still look good and, more importantly, it will jump.

Origami Frog Step-by-Step Instructions
- Difficulty: Easy – Beginner Level 3
- Folding time: 5-10 minutes
Recommended Paper
15×15 cm (6×6 in) Kami
This tutorial was updated in February 2026 with clearer steps and improved visuals.
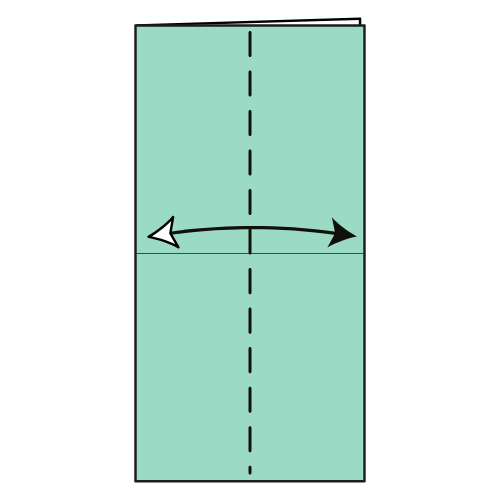
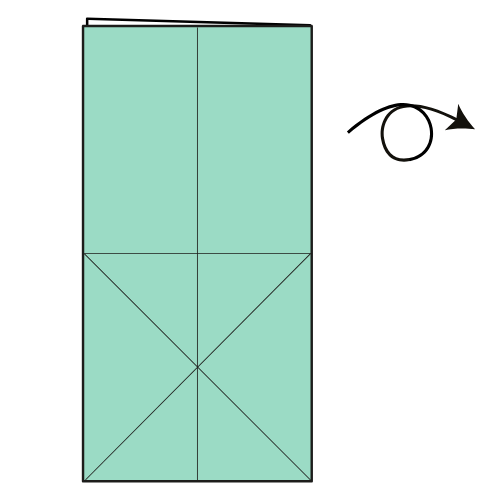
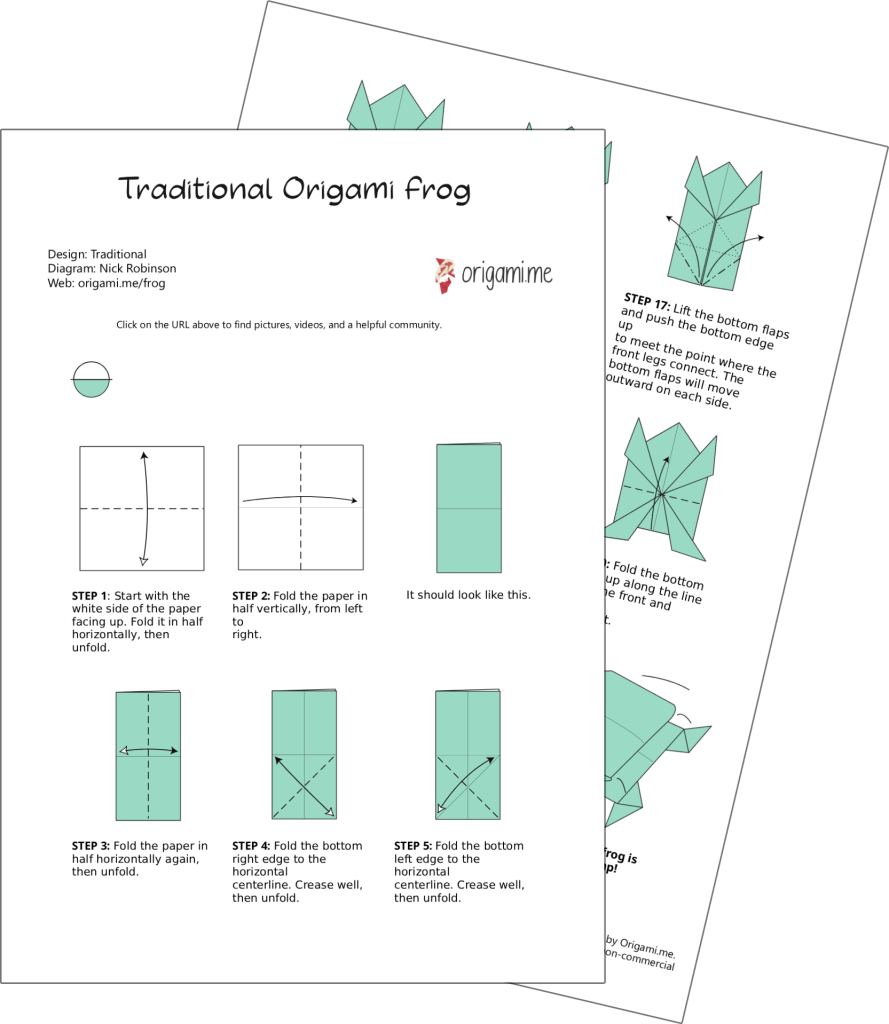
Step 1

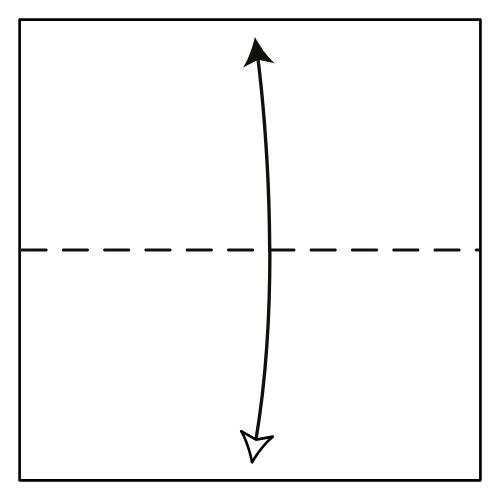
Start with the white side of the paper facing up. Fold it in half horizontally, then unfold.
🐸 Folding tip: You can start with a rectangle, half of a square, and begin from Step 3 instead. The frog will be easier to fold because there are fewer layers, but it will not jump as high, especially if your paper is thin. If you are using thick paper like construction or printer paper, go for it.
Step 2
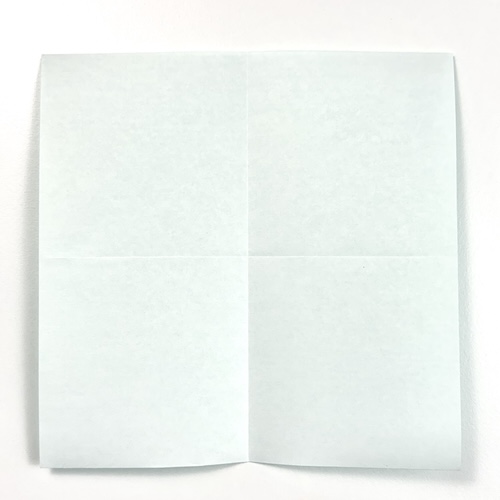
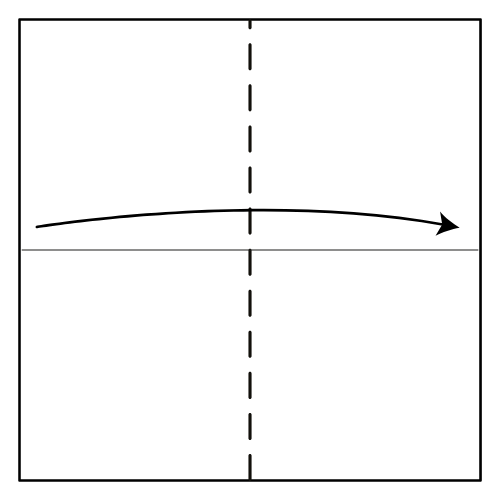
Fold the paper in half vertically, from left to right.
Step 3
Fold the paper in half horizontally again, then unfold.
🐸 Folding tip: Before folding, place your fingers on the right side to hold all the layers together so they do not shift.
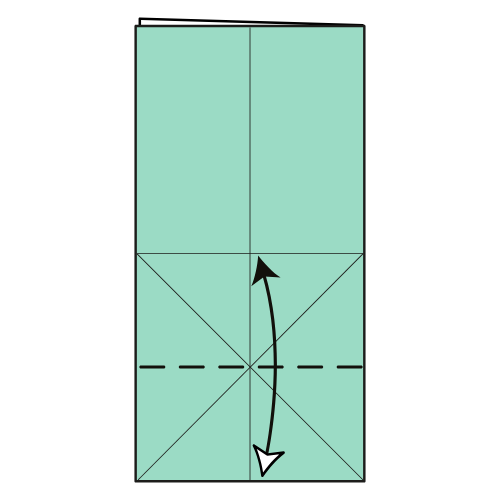
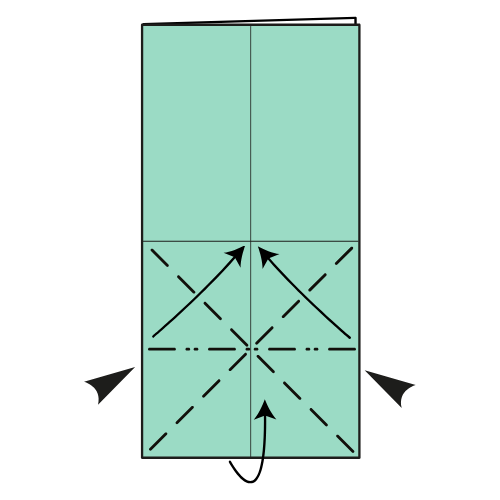
Step 4
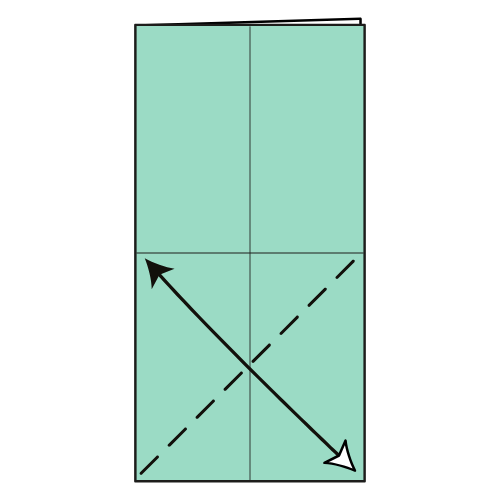
Fold the bottom right edge to the horizontal centerline. Crease well, then unfold.
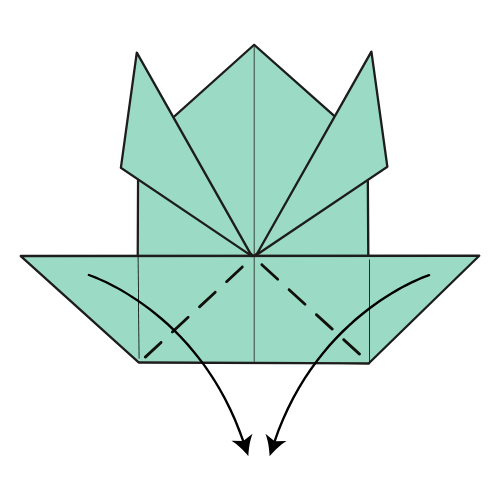
Step 5
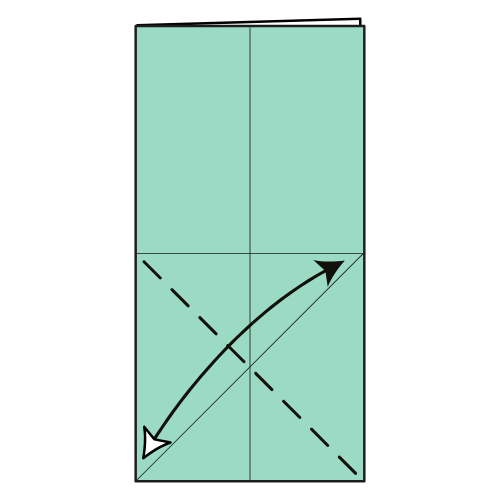
Fold the bottom left edge to the horizontal centerline. Crease well, then unfold.
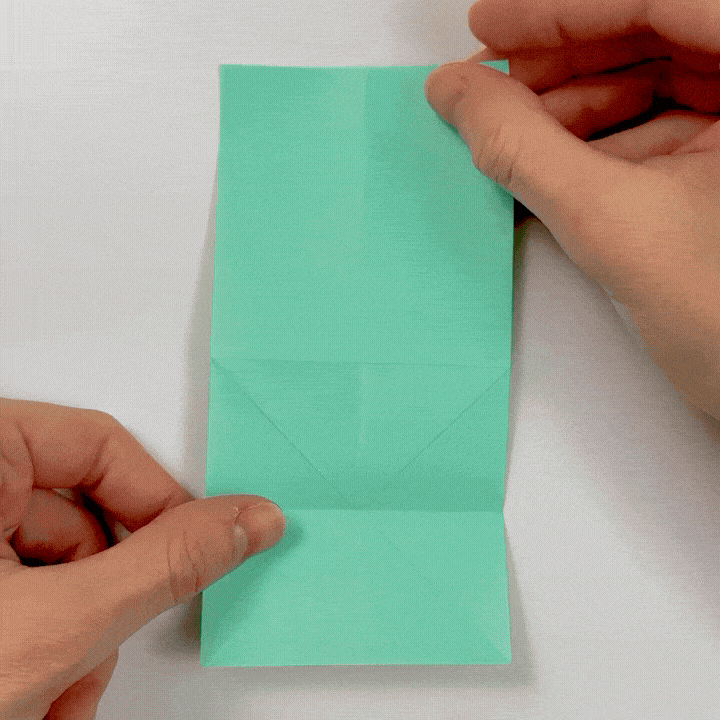
Step 6
Turn the paper over.
Step 7
Fold the bottom edge to the horizontal centerline. Crease well, then unfold.
Step 8
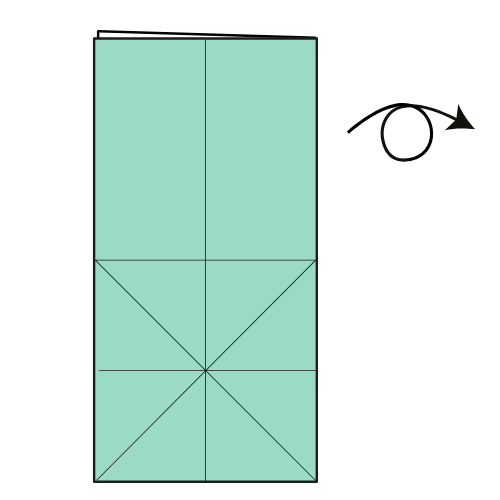
Turn the paper over.
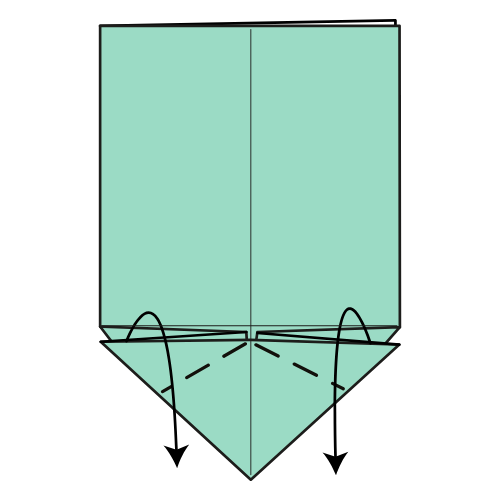
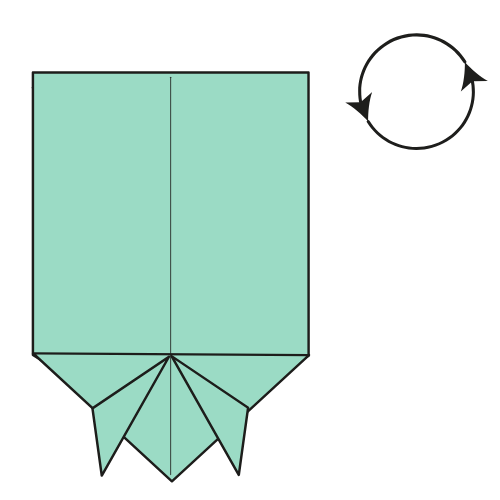
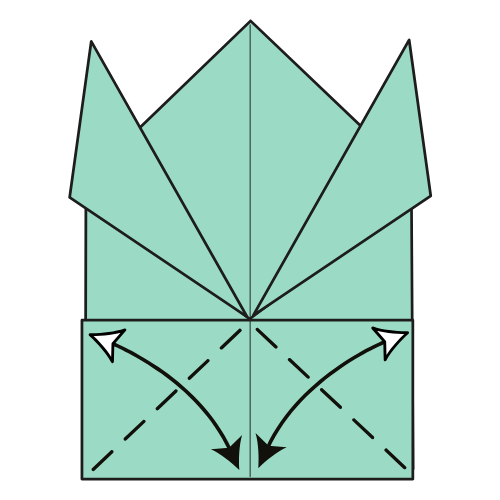
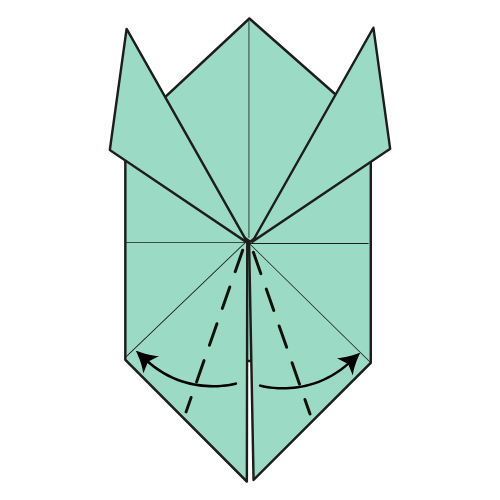
Step 9
Push the bottom left and right sides inward while folding the bottom edge up to meet the horizontal centerline.
Step 10
Fold the top flaps downward. There are no exact reference points here. These will become the frog’s front legs, so try to make them symmetrical.
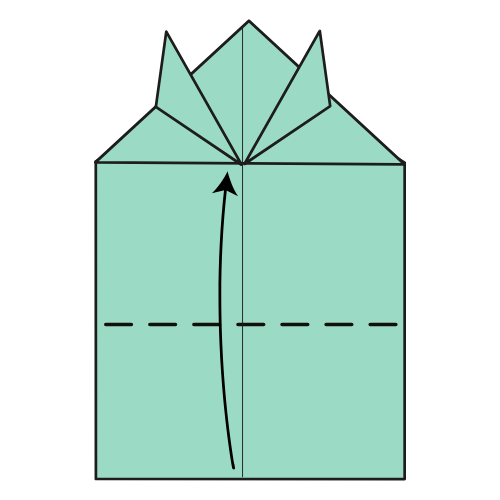
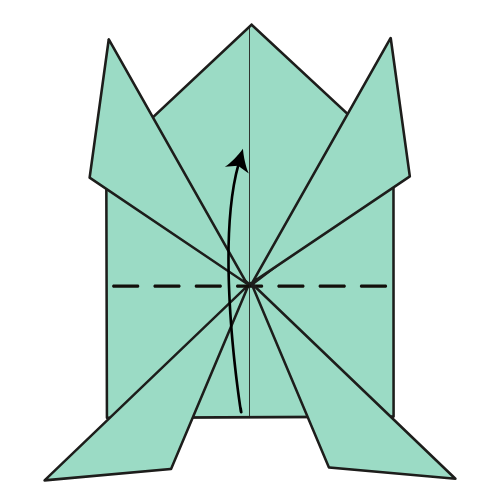
Step 11
Rotate the model 180 degrees.
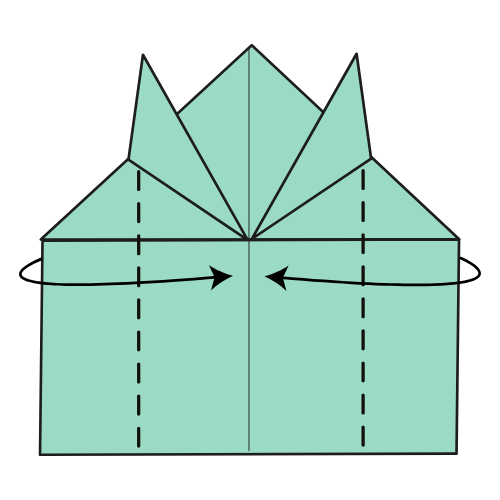
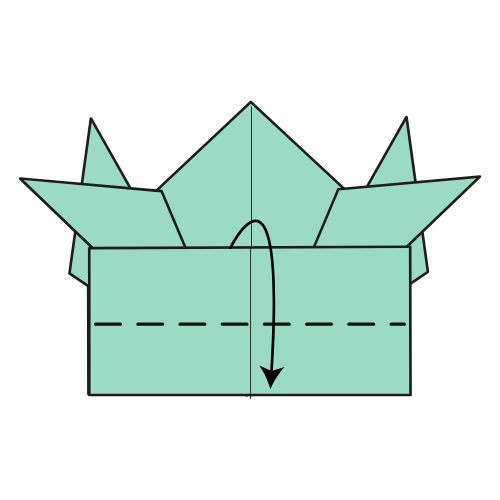
Step 12
Fold the bottom edge up to the nearest horizontal line.
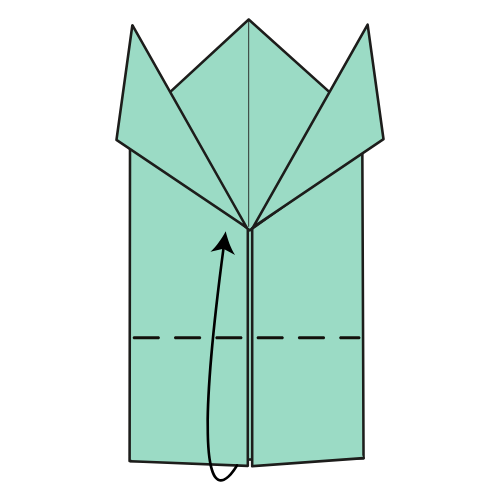
Step 13
Fold the left and right edges to the vertical centerline.
🐸 Folding tip: Lift the front leg flaps before folding so they don’t get in the way.
Step 14
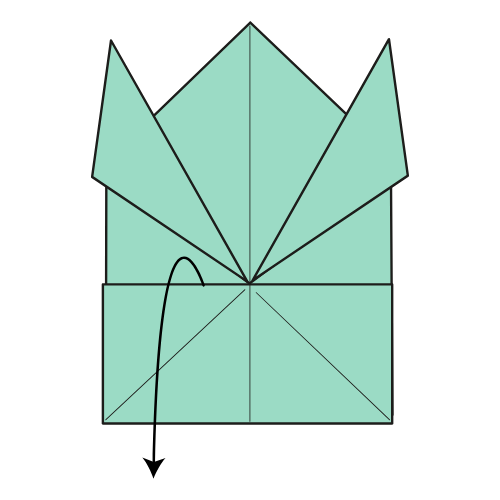
Fold the bottom edge up to meet the point where the front legs connect.
Step 15
Fold the left and right edges of the top flap down to the bottom edge, then unfold them.
Step 16

Unfold the top flap from Step 14.
Step 17
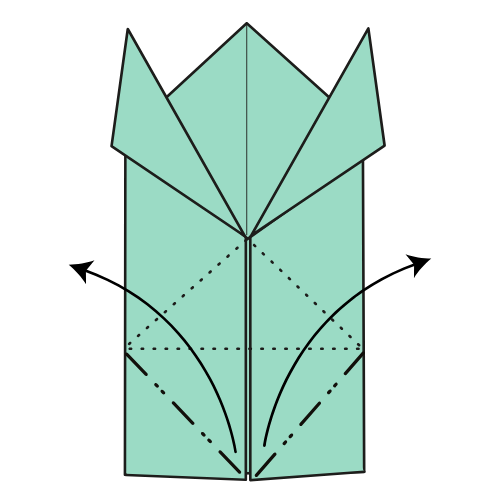
Lift the bottom flaps and push the bottom edge up to meet the point where the front legs connect. The bottom flaps will move outward on each side.
Step 18
Fold the left and right flaps down along the existing creases.
Step 19
Fold the inner edges of the bottom flaps to the nearest crease lines to form the frog’s back legs.
Step 20
Fold the bottom section up along the line where the front and back legs meet.
Step 21
Fold the top flap in half from top to bottom. Crease well.
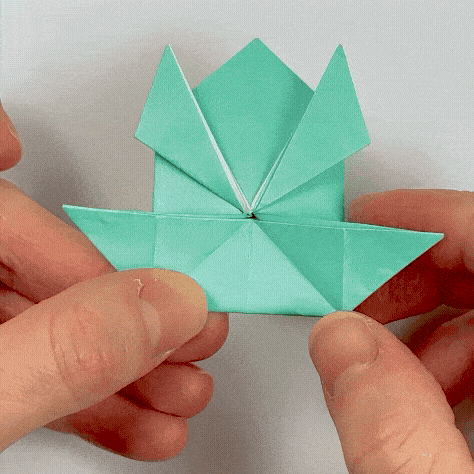
Step 22
Turn the model over and gently stretch out the back legs.
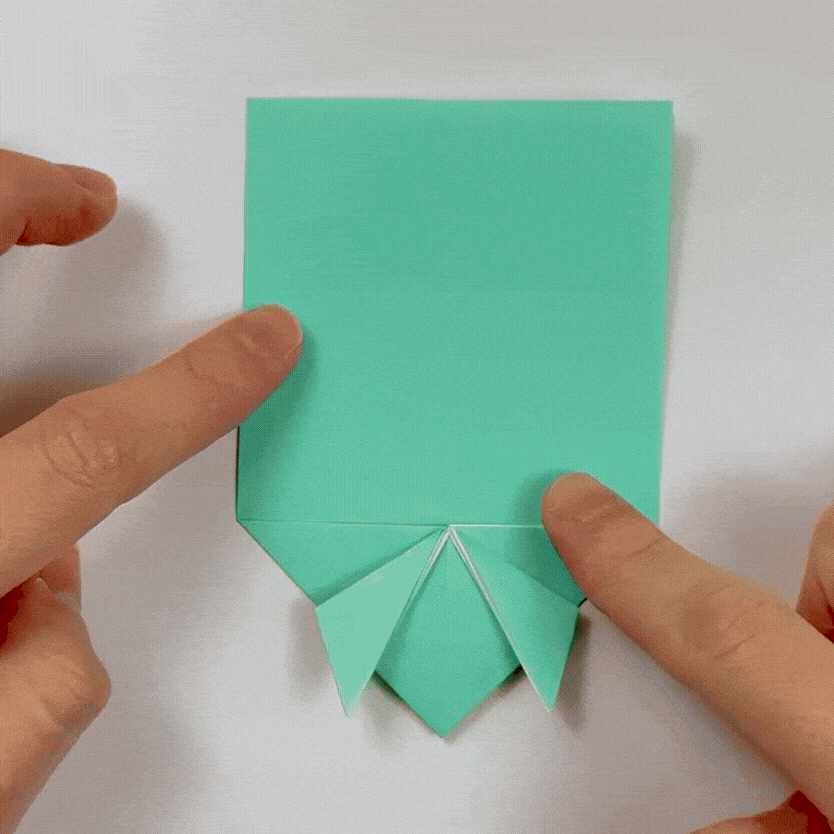
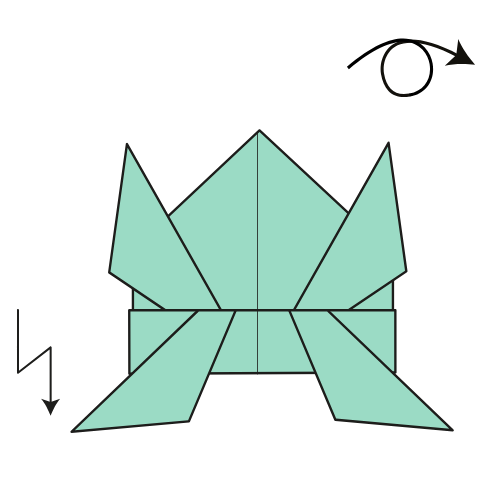
Your Origami Frog Is Ready to Jump!
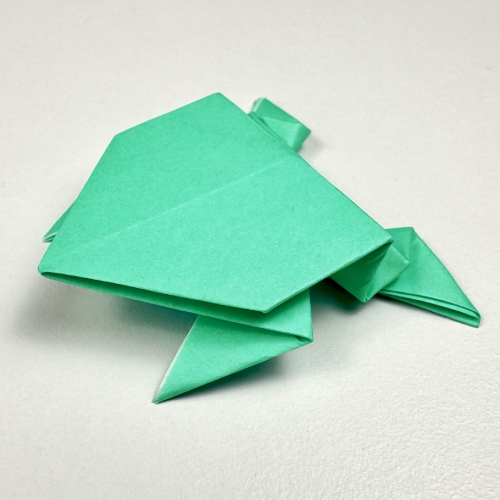
Press down on the back and let it hop 🐸
I hope you had fun folding this one. It’s one of those models that you end up making more than once, just to see how far you can get it to jump.
If you try it, feel free to share your frogs in the comments. Different papers can slightly change how it behaves, so it’s always interesting to compare.
And if you haven’t yet, check out our YouTube channel for more step-by-step tutorials, or join our origami newsletter to get new models delivered straight to your inbox.
You can also explore more easy origami models or browse our origami animals collection if you want to keep folding.
Download the Full Origami Frog Printable PDF Instructions
We’d love to keep you in the loop, so by sharing your email with us, you’ll be signed up for our mailing list. Don’t worry; we won’t bombard you with spammy emails, and your information is safe with us – we won’t share it with anyone else.
Watch the Origami Frog Video Tutorial
Enjoyed this tutorial?
Subscribe to our YouTube channel for new inspiring origami videos every week!


Hi everyone! I just wanted to let you know that we’ve added images, gifs, and videos to make this traditional origami jumping frog a lot easier for you. Enjoy 🐸
Thanks! i can now make a million! and thanks for approving my comment!
This frog is so cool and I even did a backflip with it.
Me too!
If i use a smaller paper, the frog is smaller than an atom ????♀️
It would be a bit difficult if you use the small paper.
Search online for boat base
Hi Rob, I added a video that shows how to tackle this step. Hope it makes things easier!
I did it! And it jumps but sometimes it lands on its back.
How on earth do you do the boat thing in step 22??
I cant do step 15, help? ;_;
Fold the back triangle but not the front triangle.
it was so hard
this frog is so cool and i was able to fold it i will teach my brother today!
The frog is awesome and I wanted to do origami cause my friend at school does it and ot is super cool
I can’t do step 23 there is not enough info for me
Same here. It’s like I’ve started with the open ends of the paper in the wrong spot…
The link to the boat base doesn’t have the information needed.
I know right?
I cannot do step 16. It is impossible without ripping the paper
it depends on the paper
you have to fold the paper behind the top triangle as well, which is why the front layer of the top triangle still looks the same. fold the square up to the triangle behind the first. ????
It did get wider
The image itself is less tall than the previous step so the graphic is zoomed in more to fill up the space.
6 inch
I LOVE IT
It was kinda stiff at the end…and hard to fold
Same, Its Really cool
Fantastic
is it just me or did the model get wider in step 15……
The image itself is less tall than the previous step so the graphic is zoomed in more to fill up the space.
i was not able to step 26 to 27 help me out
same…
This is the fourth model I’ve tried, and the first that actually works. Thank you.
Nice
I go on some website because I had nothing to do in class and I wanted to try out origami, and of course even then I still run into f*****g JoJo references
Cool!
Very cool indeed
thanks to this tutorial i was finally able to complete my stand, 「Paper Moon King」
Now you can help me get the rokakaka and then we can have endless “summer vacation”.
wow that sounds awesome!
What is paper moon king???