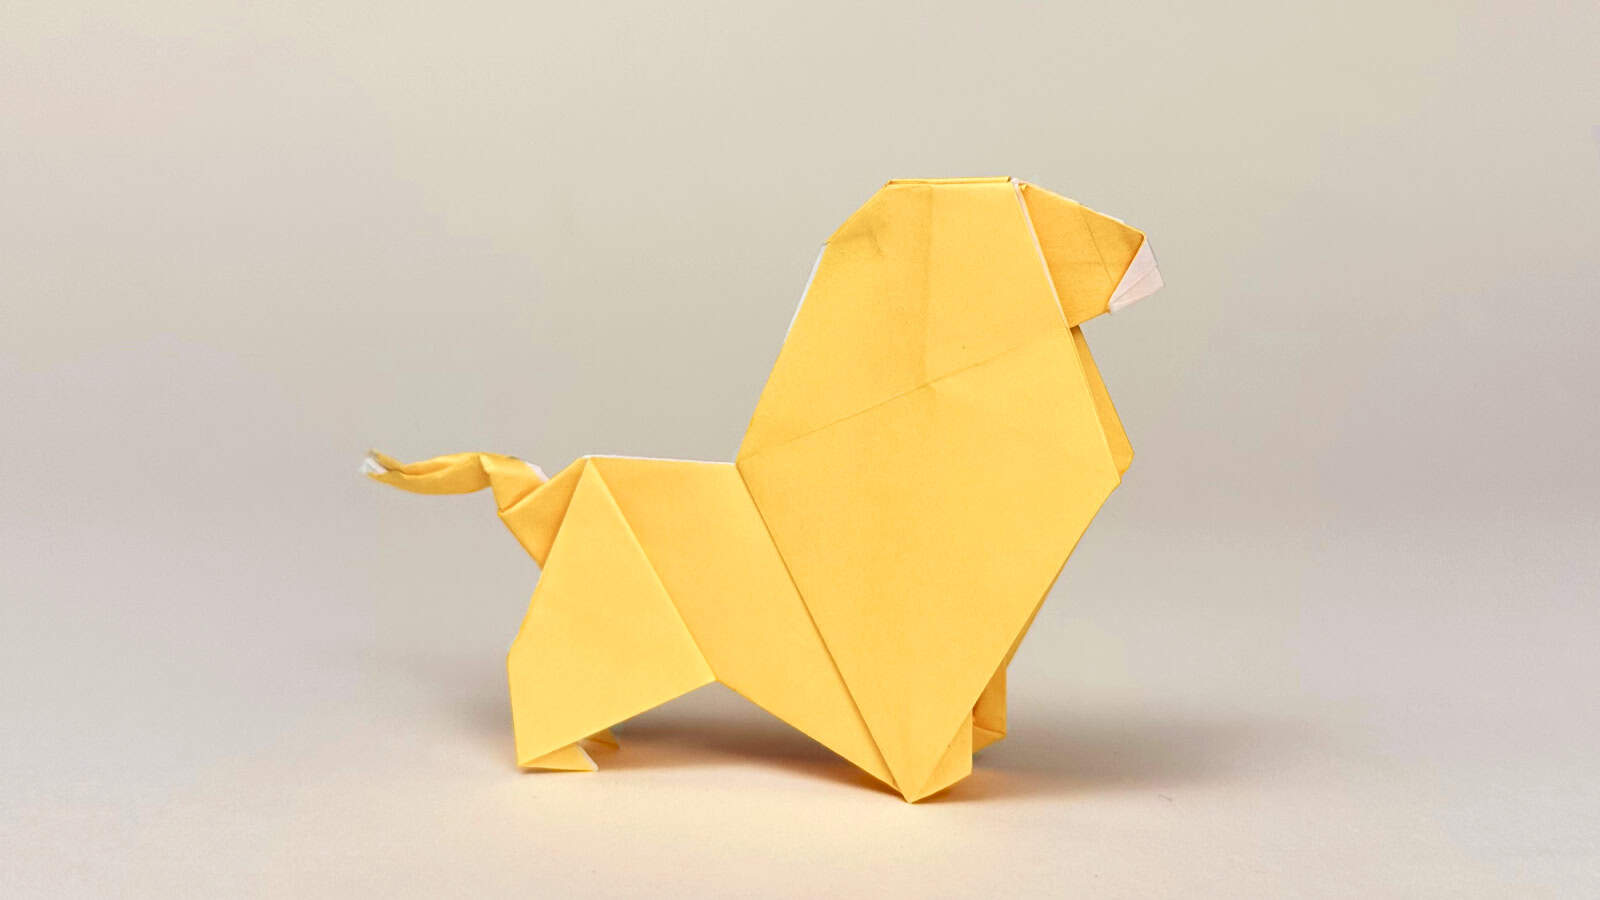
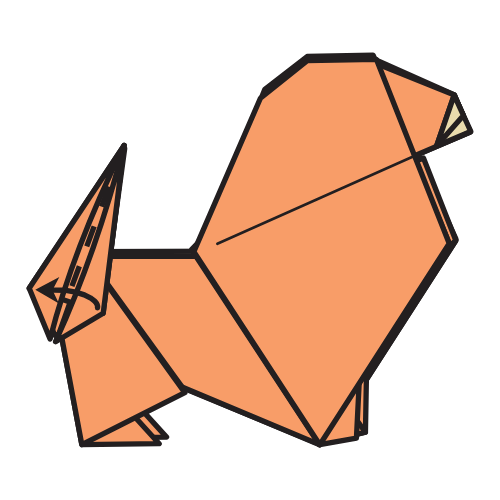
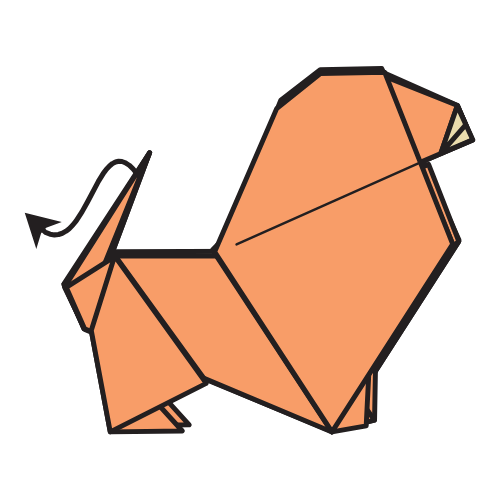
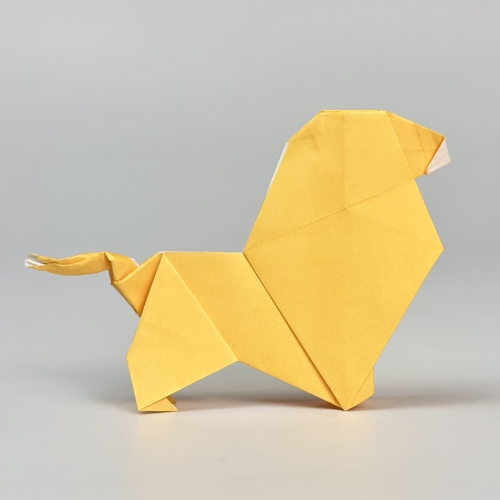
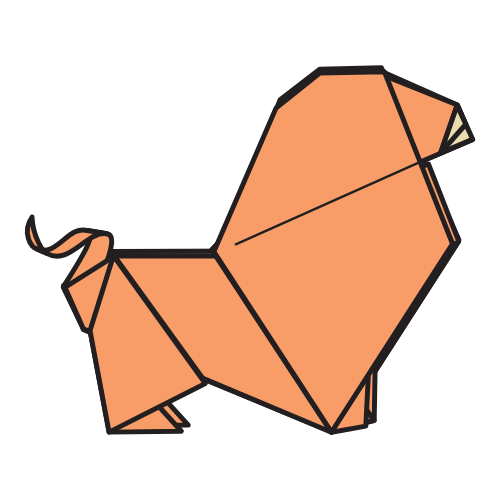
How to Fold an Origami Lion
This origami lion, designed by Sébastien Limet, has a simple, geometric look that’s really satisfying to fold.
Most of the model is quite accessible with a little folding experience. The tail section is where it gets a bit more technical, but still very doable.
The model is full of thoughtful details: the front legs are shaped from two small hidden flaps, the mane is large and angular, giving this origami lion a proud, upright posture, and the curved tail wraps around slightly, ending in a small white tip if you use duo-colored paper.
The design cleverly reveals a bit of white at the nose, echoing the lighter fur around a lion’s muzzle and giving the model a lifelike expression.
Origami Lion Step-by-Step Instructions
- Difficulty: Easy – Beginner level 5
- Folding time: 15 minutes
Recommended Paper
15×15 cm (6×6 in) Kami
Step 1

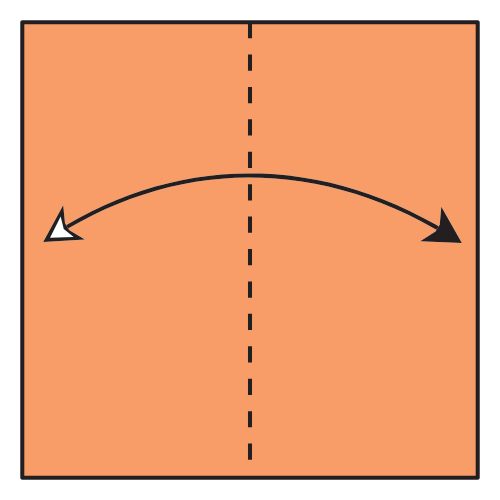
Start with the colored side of the paper facing up. Fold the paper in half vertically, then unfold.
Step 2
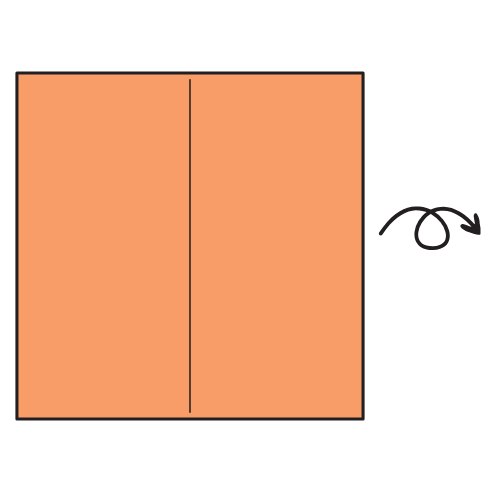
Turn the paper over.
Step 3

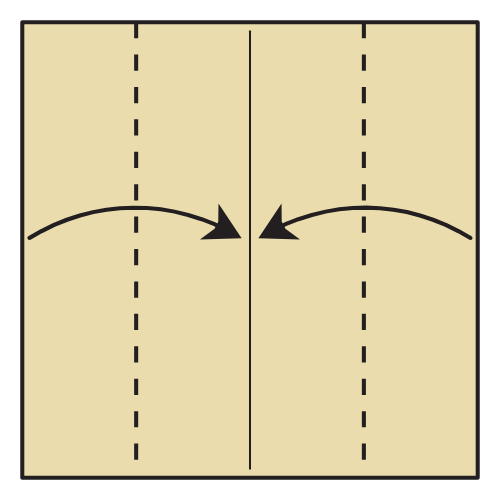
Fold the left and right edges to the centerline.
Step 4
Fold all four corners in so the top and bottom edges align with the vertical centerline.
Step 5

Fold the two top triangles in half.
Step 6
Unfold Steps 4 and 5.
Step 7
Inside reverse fold along the creases from Step 4.
Step 8
Reverse fold the hidden edges along the creases from Step 5.
Step 9
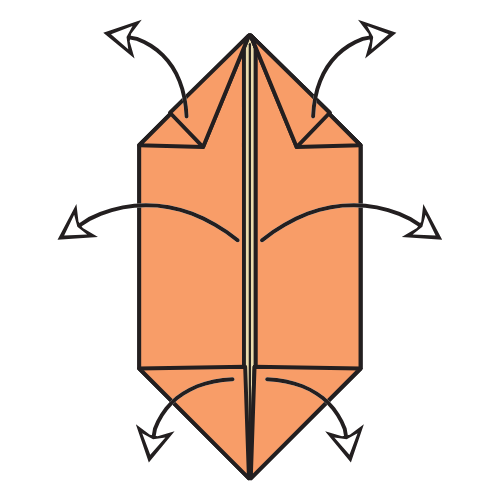
Fold the two top flaps out to the sides.
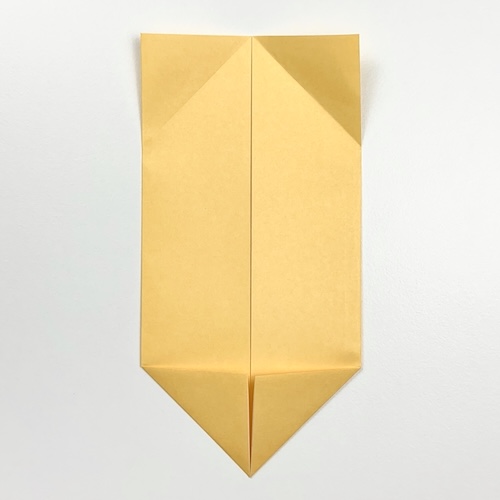
Step 10
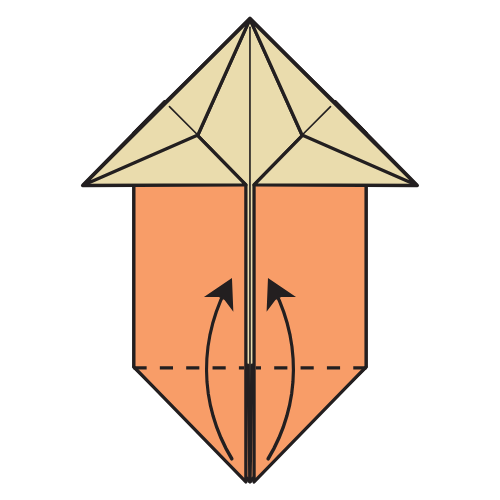
Fold the two bottom corners up.
Step 11

Turn the paper over.
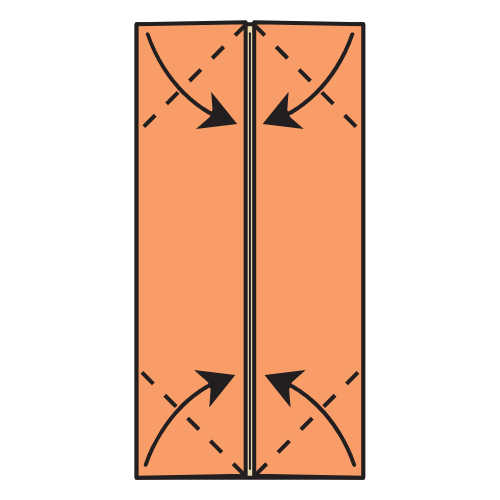
Step 12

Fold the bottom left and right edges in to the centerline.
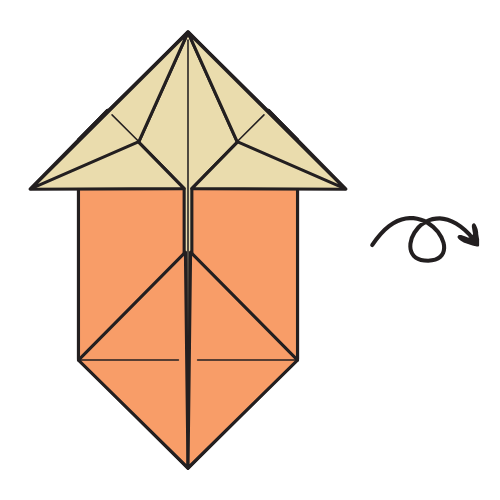
Step 13

Turn the paper over again.
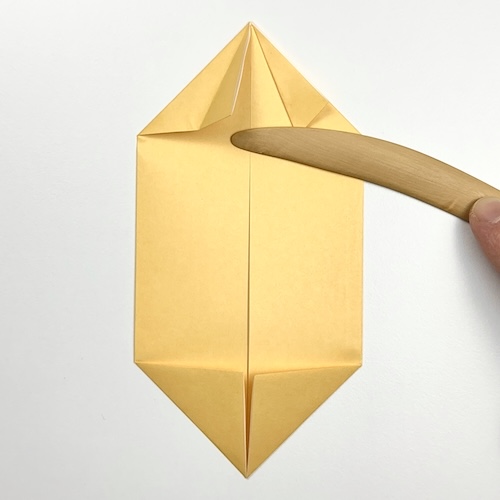
Step 14
Fold the corners of the top flaps outward.
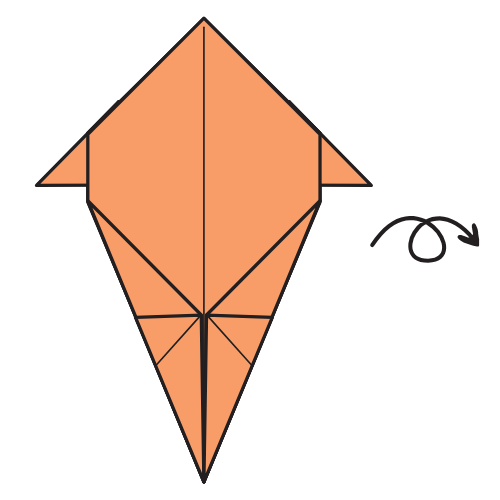
Step 15
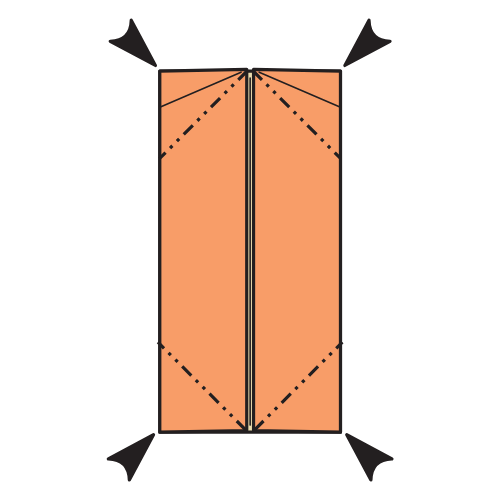
Fold the top corner down to meet the bottom corner.
Step 16
Fold the bottom tip upwards. There’s no exact reference point here.
🦁 Note: I folded it too much in the video. I’ll adjust this during Step 23.
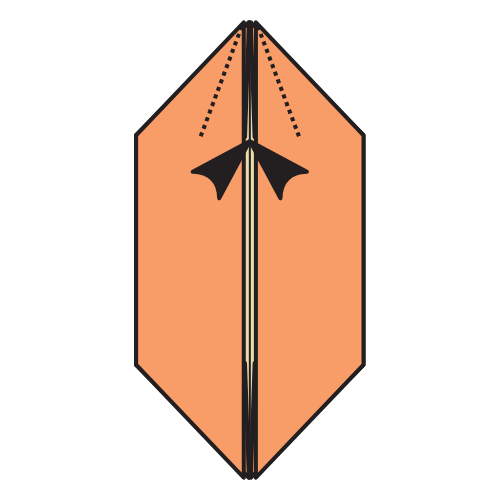
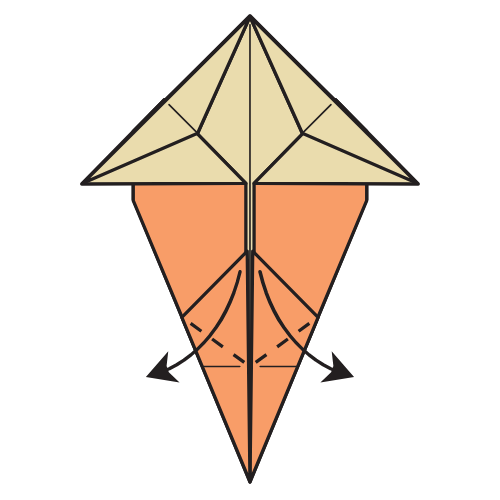
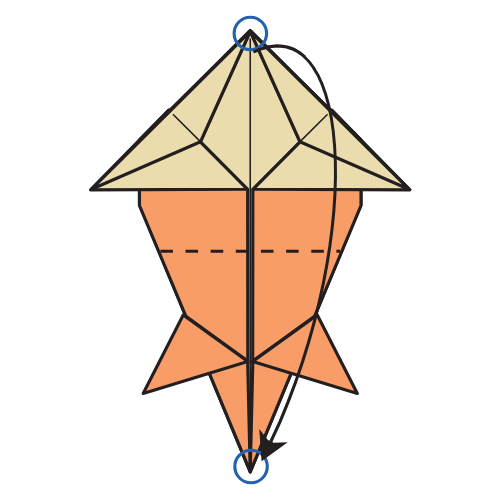
Step 17
We’re about to collapse the model in half in Step 18. For now, valley fold between the circled points and start a rabbit-ear fold.
Step 18
Fold the model in half. Flatten it so the near corner goes left and the far layers shift right.
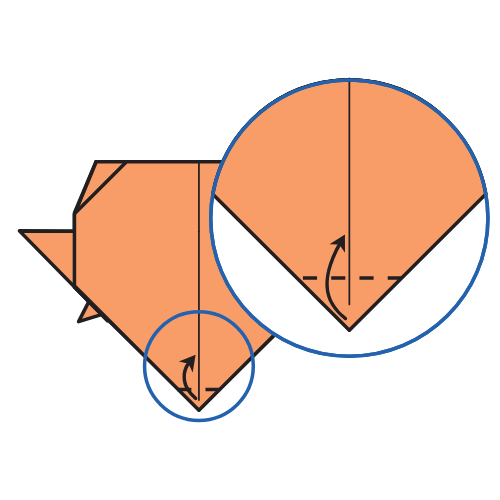
Step 19
Fold the edge to the nearest crease line, then unfold.
Step 20
Inside reverse fold along the creases you just made.
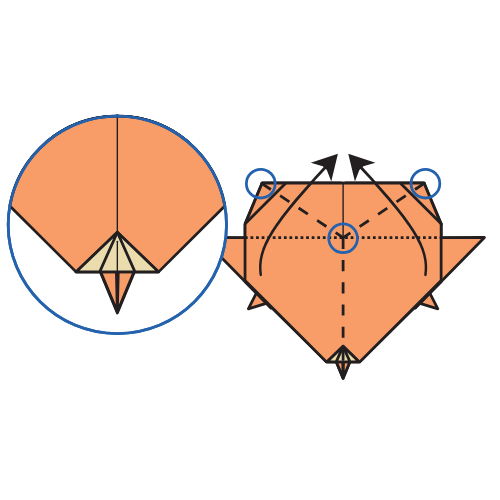
Step 21
Fold the top flap to the left. Repeat on the other side.
Step 22
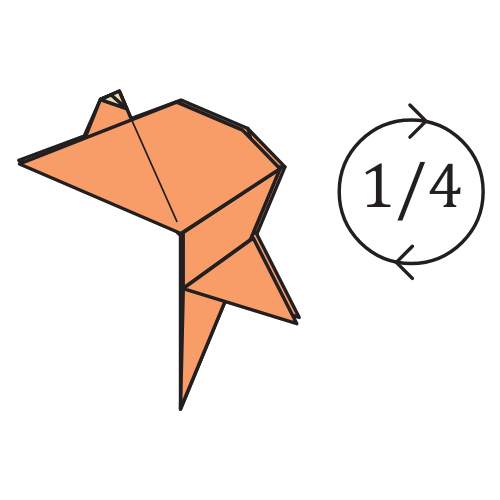
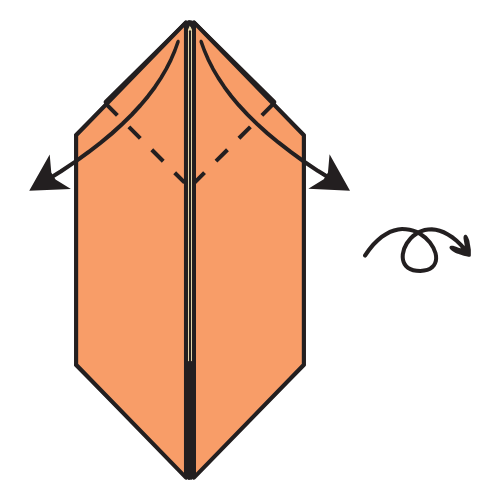
Rotate the model a 1⁄4 turn clockwise.
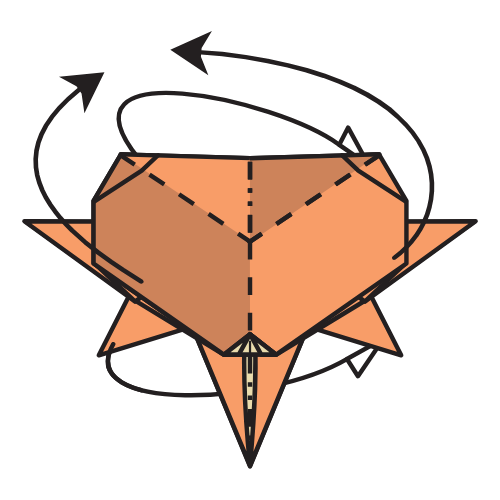
Step 23
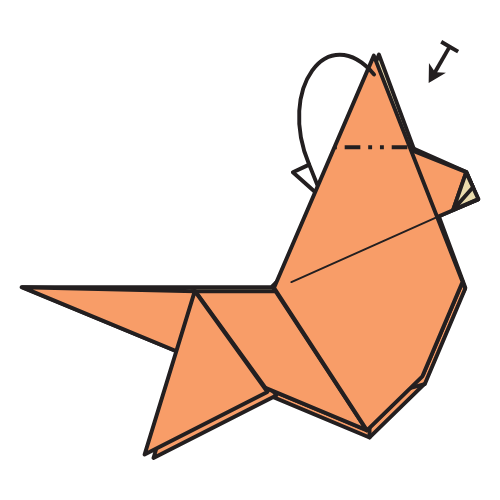
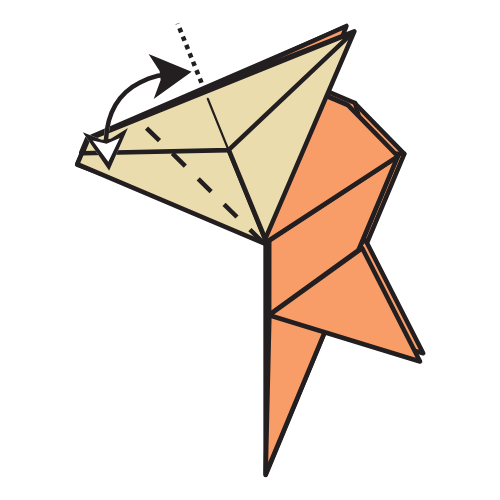
Mountain fold the top corner inward. There’s no exact reference. Repeat on the other side.
🦁 Note: This is where I’m fixing the lion’s snort. It was too short earlier.
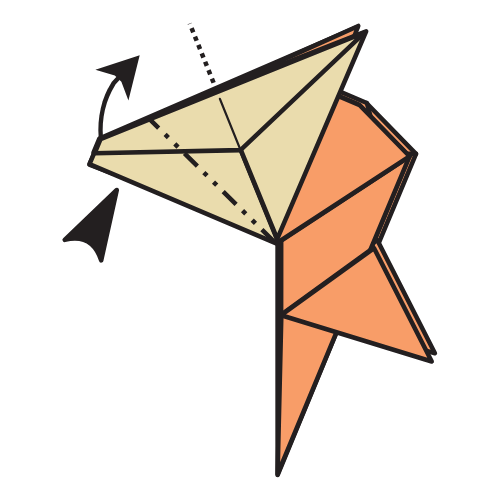
Step 24
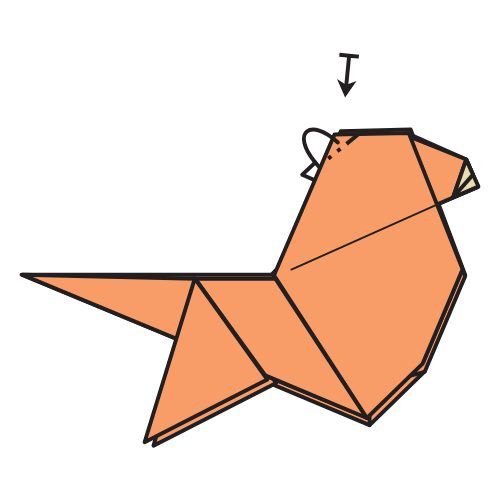
Mountain fold the top left corner inward. No exact reference again. Repeat on the other side.
Step 25
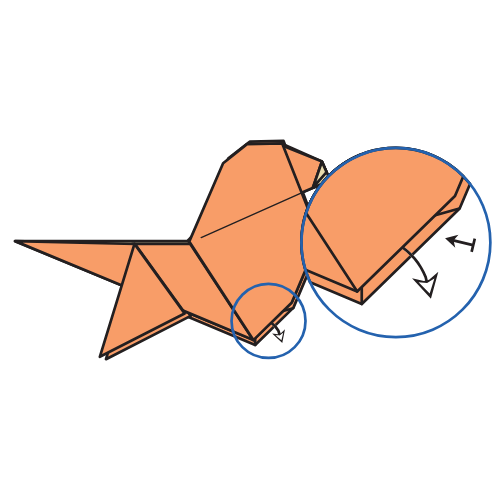
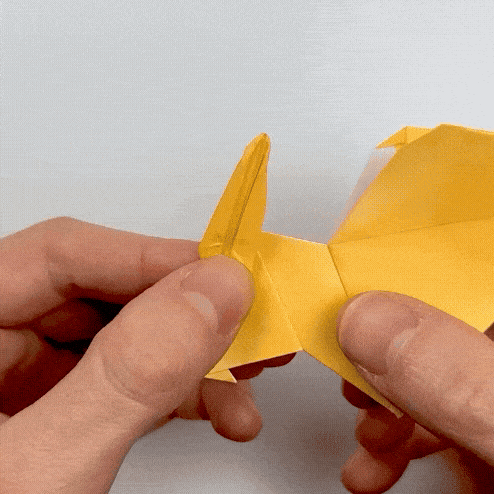
Pull out the hidden edge to form the front leg. Repeat on the other side.
🦁 Folding tip: A pen tip or bone folder helps here.
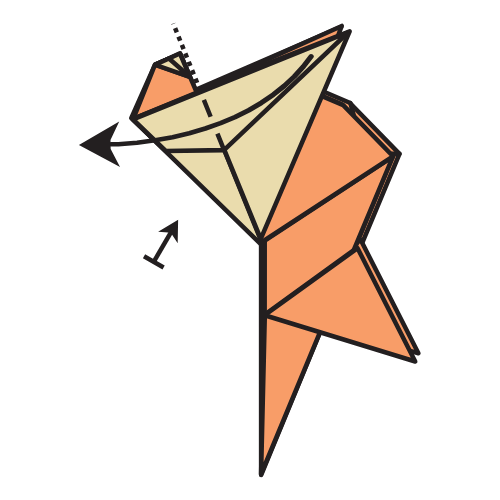
Step 26
Make a new mountain fold between the circled points. Then, use a valley fold along the existing crease to swivel fold the layer underneath. Repeat on the other side.
Step 27

Mountain fold the corner to make a foot on the hind leg. Repeat on the other side.
Step 28
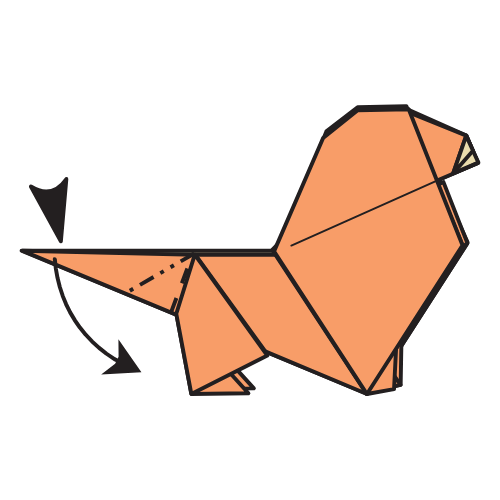
Squash fold the tail down. Align the tail’s centerline with the lion’s rear line.
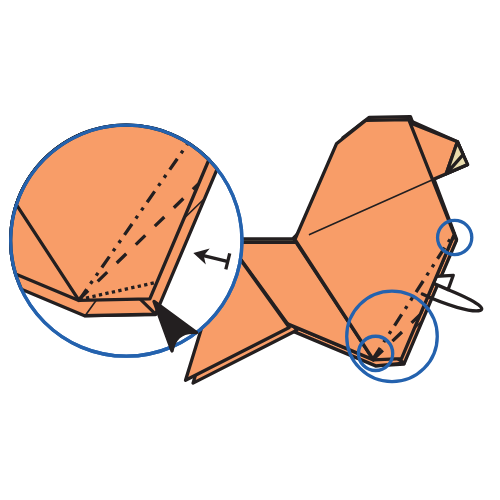
Step 29
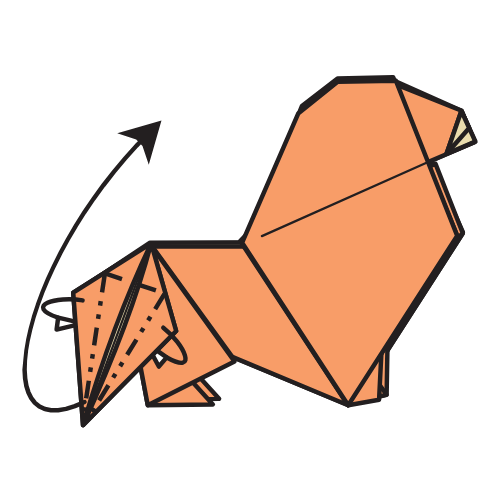
Petal fold the tail upward.
🦁 Folding tip: This is the trickiest step as pre-creasing won’t help much. Try breaking it into two motions:
- Press your thumb on the top of the tail and lift it. The edges will move toward the centerline.
- Flatten the left and right edges inward. The goal is to slim down the tail.
Step 30
Fold the tail in half, right to left.
Step 31
Curl the tail however you like.
Rawr! Your Origami Lion Is Complete
I hope you enjoyed folding this origami lion! If you’d like more tutorials like this one, be sure to check out our YouTube channel and join our newsletter to get beautiful models and tips sent straight to your inbox.
And if you fold it, we’d love to see your version! Tag us on socials or share a photo in the comments. We’d love to see your lion take shape.

Download the Complete Origami Lion Printable PDF Instructions
This printable PDF is part of our Origami Friends membership on Patreon. As a member, you get access to these diagrams, our full library of printable PDFs, and member-only content.


awsome!