
How to Fold an Easy Origami Seal
This traditional origami seal is a great example of how much you can get from a good base and just a few extra folds.
It starts from the fish base and comes together in just a few minutes.
The little flipper and curved tail give it a lot of character. It’s one of those models that folds quickly but still feels really satisfying to finish.
Origami Seal Step-by-Step Instructions
- Difficulty: Easy – Beginner Level 3
- Folding time: 5-10 minutes
Recommended Paper
15×15 cm (6×6 in) Kami
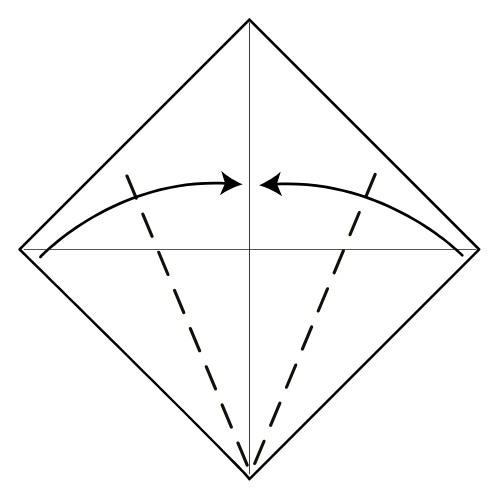
Step 1


Start with the white side of the paper facing up in a diamond position. Fold and unfold both diagonals.
Step 2

Fold the bottom left and right edges in to meet the centerline.
Step 3


Turn the paper over.
Step 4

Fold the bottom corner up to meet the top corner.
Step 5


Turn the paper over.
Step 6
In one motion, bring the top left flap downward and fold the left edge to the centerline. Use the existing creases to guide the fold.
Step 7

Repeat the same fold on the right side.
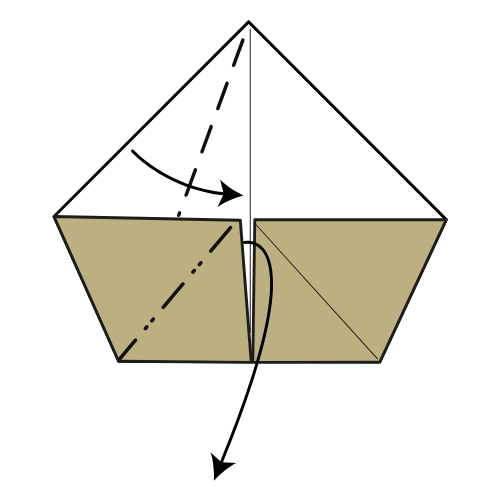
Step 8


Bring the top corner down and fold along the existing crease to form a fish base.
Step 9

Fold the model in half from left to right.
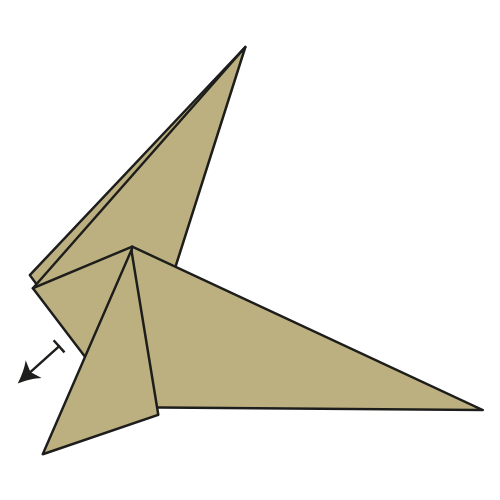
Step 10


Rotate the model 90° counterclockwise.
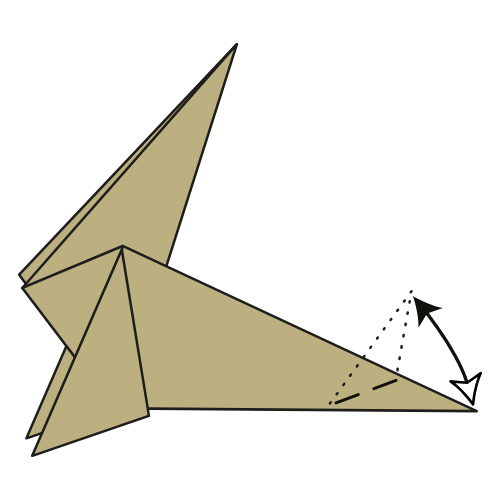
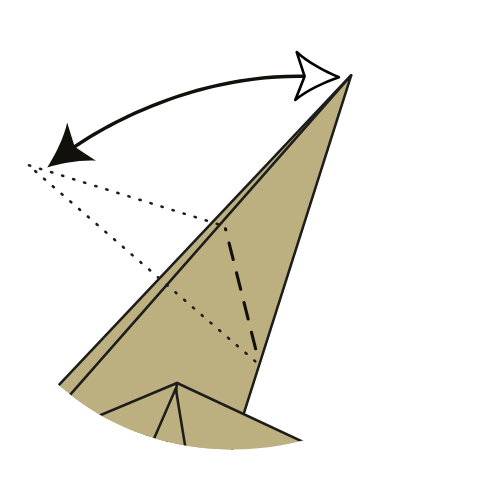
Step 11

Bring the left corner up and fold along the dashed line. Crease well, then unfold.
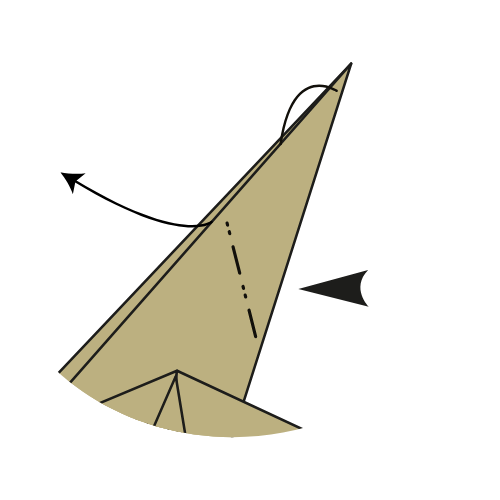
Step 12

Make an inside reverse fold along the creases you just made.
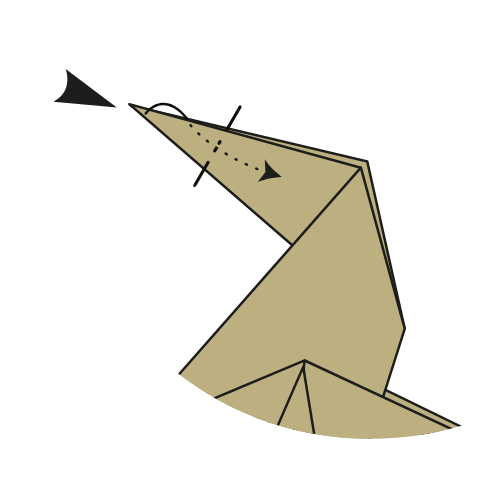
Step 13

Fold the top flap to the left along the dashed line.
Step 14
Repeat on the other side to create the flippers.
Step 15
Fold the tail upward. Crease well and unfold.
🦭 Folding tip: There’s no exact reference point here, so feel free to adjust the angle to your liking.
Step 16

Make an inside reverse fold along the creases you just made.
Step 17
Fold the top flap to the left along the dashed line. Crease well and unfold.
🦭 Folding tip: Again, no fixed reference point.
Step 18
Make an inside reverse fold along the creases you just made.
Step 19

Fold the left corner along the dotted line. Align the bottom edges. Crease well and unfold.
Step 20
Make an inside reverse fold along the creases you just made.
Step 21

Fold both flippers upward at a 90° angle so that your seal can stand on its own.
Completed: You’ve Folded an Adorable Origami Seal! 🦭


I hope you enjoyed folding this seal!
It’s a fun little project to add to your collection, especially if you’re into sea creatures or looking for easy models with personality.
How did you find this way of folding the fish base? Did you find it easier? Let us know in the comments!
For more simple tutorials and creative paper ideas, subscribe to our YouTube channel and join our newsletter. We send out fresh models every week.

Download the Complete Origami Seal Printable PDF Instructions
This printable PDF is part of our Origami Friends membership on Patreon. As a member, you get access to these diagrams, our full library of 120+ printable PDFs, and member-only content.
Watch the Origami Seal Video Tutorial
Enjoyed this tutorial?
Subscribe to our YouTube channel for new inspiring origami videos every week!


