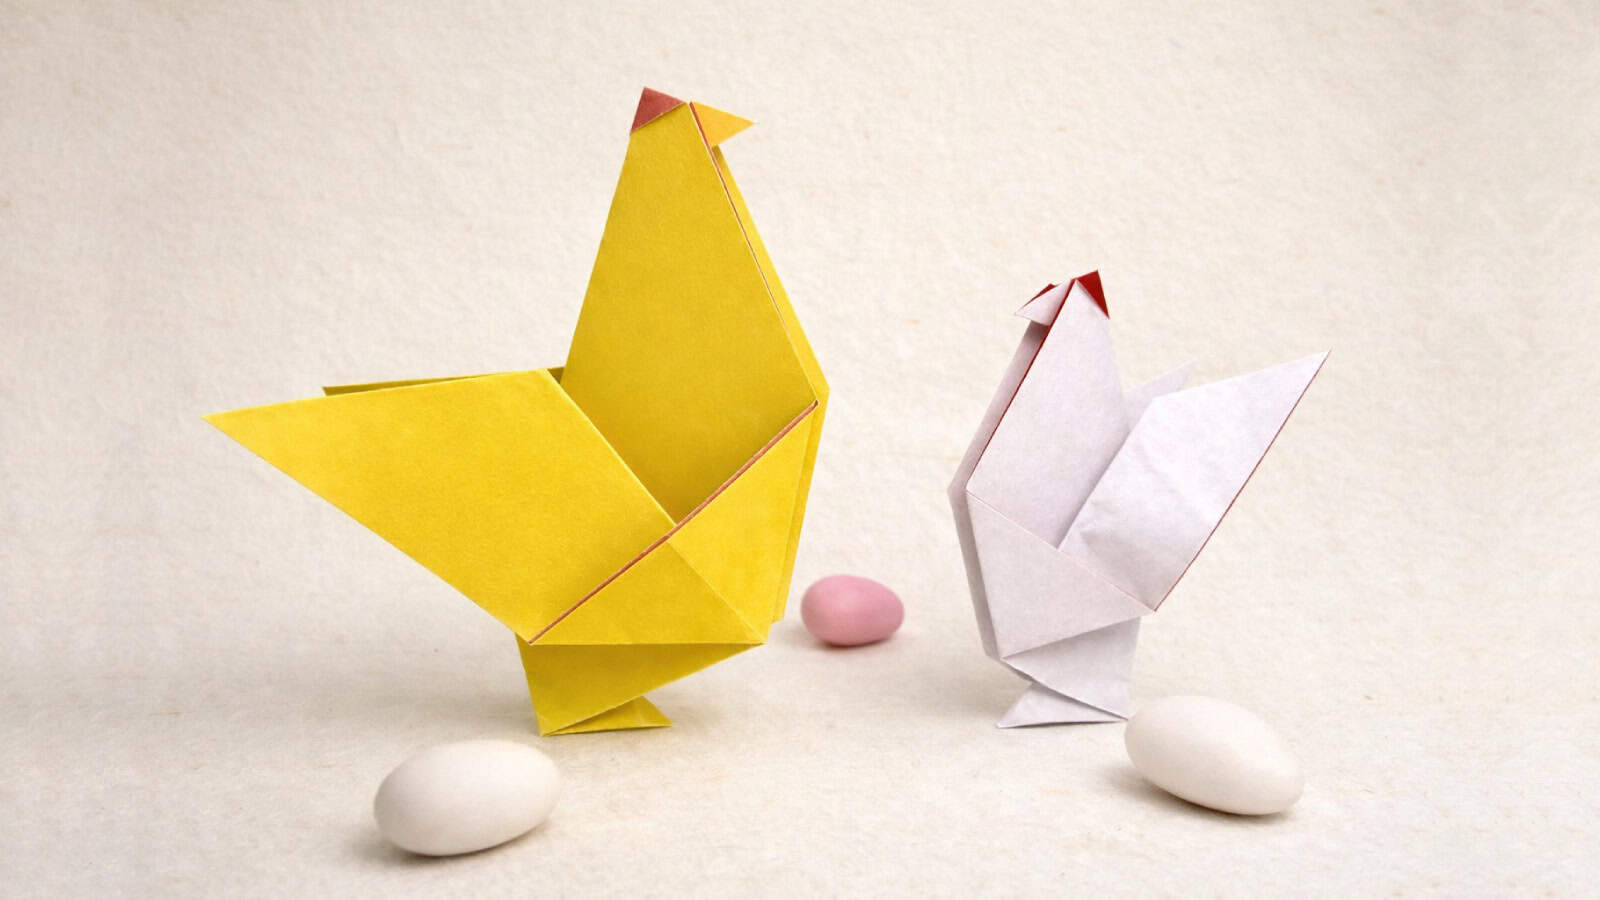
How to Fold an Easy Origami Chicken
This traditional origami chicken is a lovely project for Easter or spring. While it takes a few more steps than simpler models, it’s still beginner-friendly and easy to follow with a little patience.
Once folded, the hen stands upright and looks great as part of a festive table display or tucked among some Easter treats.
We used a sheet of paper with yellow on one side and red on the other to make ours, but it also works really well with red and white paper.
If you’re using red origami paper, start folding with the red side facing up. This way, the red will appear on the top of the hen’s head (the comb), and the body will stay white.
Pick your favorite paper, and let’s get started!
Traditional Origami Chicken Step-by-Step Instructions
- Difficulty: Easy – Beginner Level 3
- Folding time: 5-10 minutes
Recommended Paper
15×15 cm (6×6 in) Kami
Step 1


Start with the white side of the paper facing up, positioned like a diamond. Fold vertically across the diagonal, then unfold.
🐔 Note: This color will make the chicken’s comb! So, if you’re using red and white paper, start with the red side up.
Step 2


Fold the paper in half diagonally from bottom to top.
Step 3

Fold the left edge down to meet the bottom edge. Make only a light pinch on the right edge to mark the spot, then unfold.
Step 4

Fold the right corner up to meet the pinch made in Step 3. Again, make only a light pinch on the right edge, then unfold.
Step 5


Bring both the left and right corners up to meet the top corner and fold along the dotted lines.
Step 6

Fold the bottom corner up to meet the pinch made in Step 4. Crease only from the centerline to the right edge, then unfold.
Step 7


Fold the left side of the model to the back along the vertical diagonal.
Step 8


Fold the bottom left edge up to meet the crease made in Step 6. Crease well, then unfold.
Step 9

Using the crease from Step 8, make an inside reverse fold to form the chicken’s feet.
Step 10

Bring the middle of the top flap’s right edge (the pinch you made in Step 3) down to the bottom corner of the left edge. Squash fold along the dotted lines to form the first wing.
Step 11


Turn the model over.
Step 12

Repeat Step 10 on this side to create the second wing. Align the wings carefully so they match. Then, turn the model over.
Step 13


Fold the top corner down along the dotted line. Crease well, then unfold. This will form the beak.
🐔 Folding tip: You can play with the folding angle to create different beak lengths for your origami chicken.
Step 14

Push the top corner down and make an inside reverse fold along the crease you made in Step 13.
Step 15

Unfold just the top layer from Step 14. This flap will become the chicken’s comb.
Step 16

Fold the top corner down along the dotted line, aligning the left edges. Crease well and unfold.
Step 17

Pull the top corner outward and make an outside reverse fold along the crease made in Step 16.
All Done! Your Origami Chicken Is Ready to Strut!


🐔 Folding tip: If your chicken does not stand up well, open the feet flap, adjust its angle, and flatten it a bit.
🐔 Shaping tip: Gently curve the wings for a more natural look.
Well done, your origami hen is finished!
It’s a great model to fold a few of and arrange around your Easter table (check out our other Easter origami), gift baskets, or spring decorations. Try using different paper sizes or colors to create a lively little flock.
If you want to show off your hens, we’d love to see them. Feel free to post a photo in the comments or tag us on social media.

Download the Complete Origami Chicken Printable PDF Instructions
This printable PDF is part of our Origami Friends membership on Patreon. As a member, you get access to these diagrams, our full library of 120+ printable PDFs, and member-only content.
Watch the Origami Chicken Video Tutorial
Enjoyed this tutorial?
Subscribe to our YouTube channel for new inspiring origami videos every week!


Very interesting