
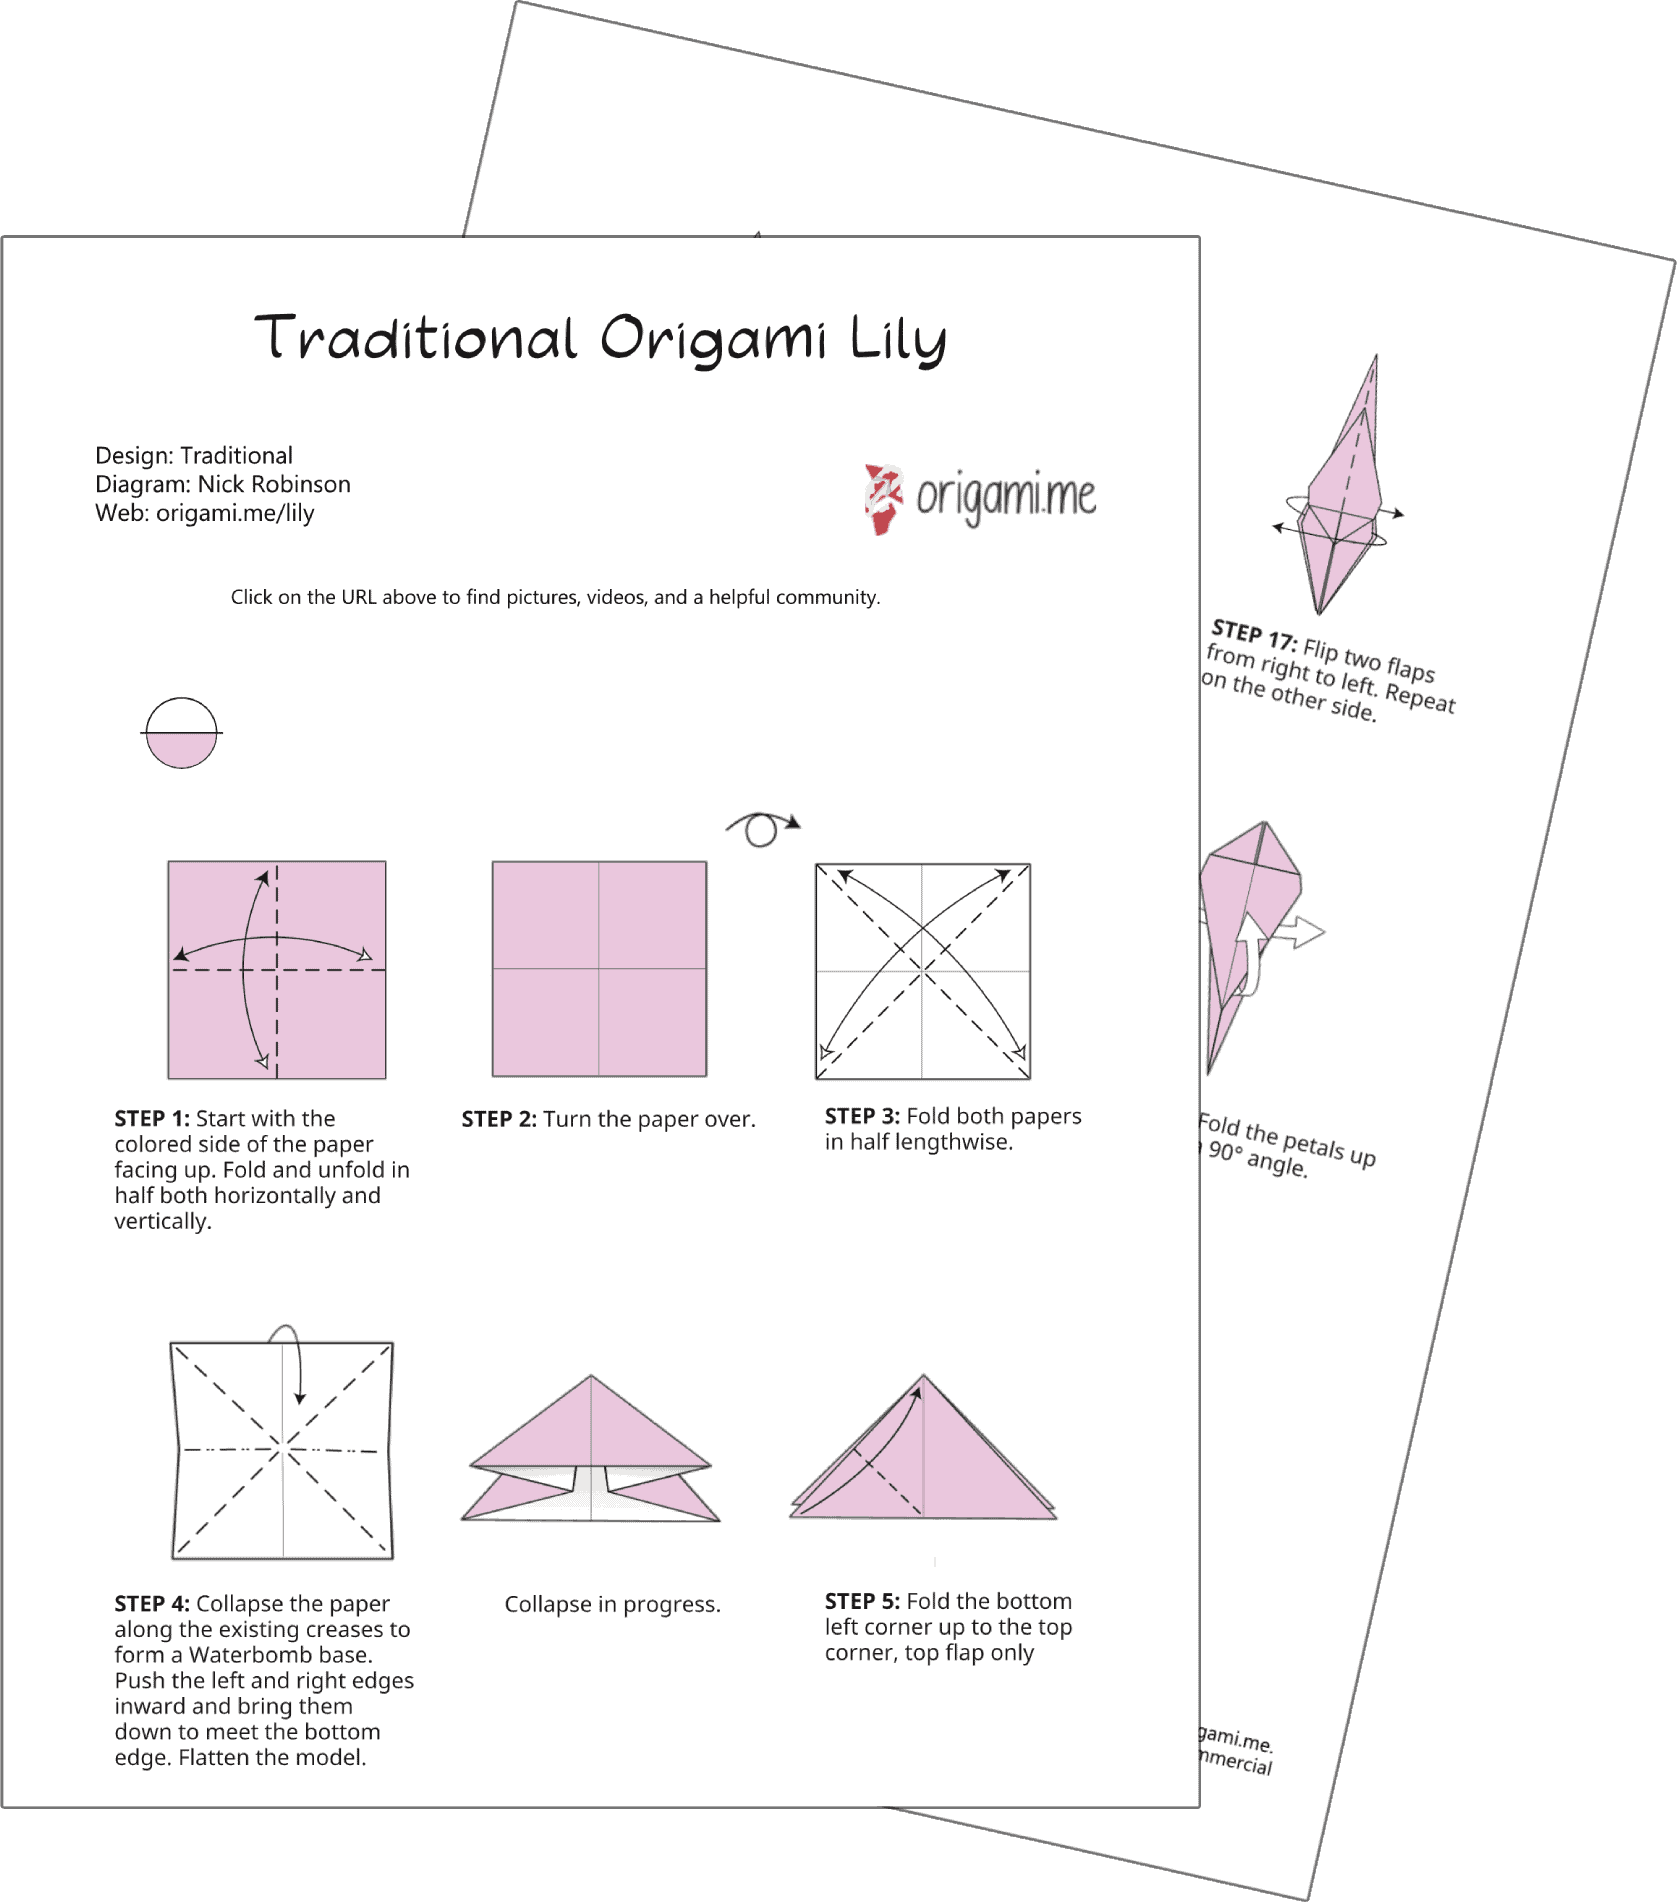
How to Make an Origami Lily Flower
Let’s learn how to fold a traditional origami lily, a flower with gently curved petals and a simple, elegant shape.
In Japan, lilies are often linked to purity and new beginnings. They are also sometimes associated with femininity and are a natural fit for occasions like weddings or spring decorations.
This model is approachable for beginners, with a clear folding sequence that comes together step by step. At the same time, the final result feels refined, which is why many folders return to it again over time.
Take your time with the folds, and let’s create an origami lily together.
Origami Lily Step-by-Step Instructions
- Difficulty: Easy – Beginner level 4
- Folding time: 10-15 minutes
Recommended Paper
6 x 6 in (15 x 15 cm) origami paper (Kami)
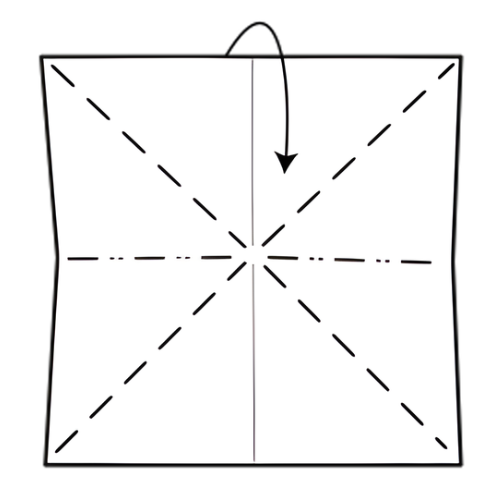
Step 1
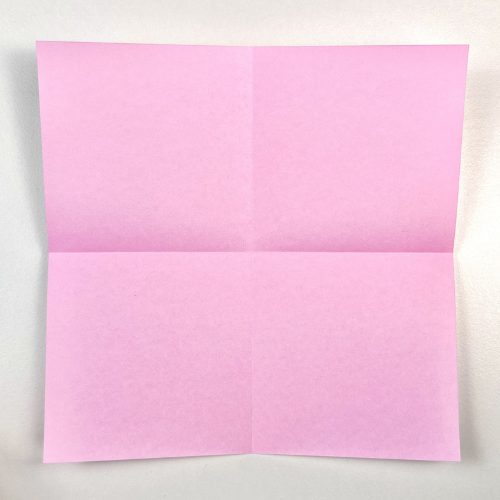
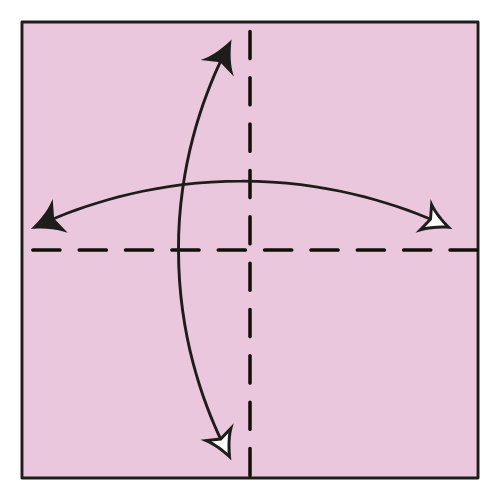
Start with the colored side of the paper facing up. Fold and unfold in half both horizontally and vertically.
Step 2

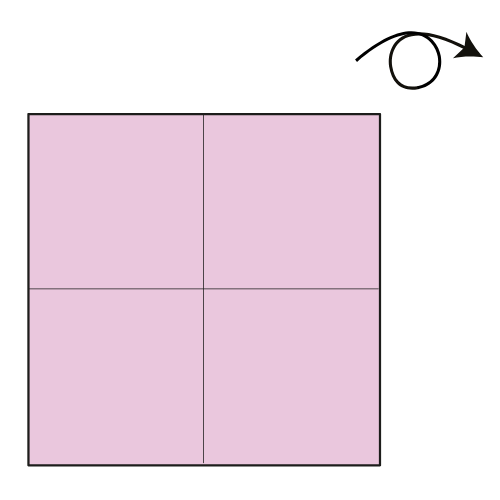
Turn the paper over.
Step 3
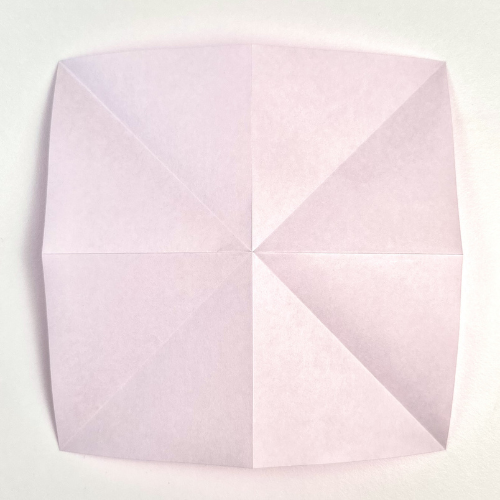

Fold and unfold along both diagonals.
Step 4
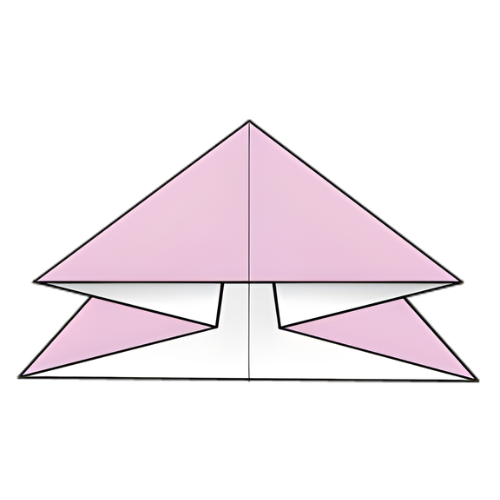
Collapse the paper along the existing creases to form a Waterbomb base. Push the left and right edges inward and bring them down to meet the bottom edge. Flatten the model.
Step 5
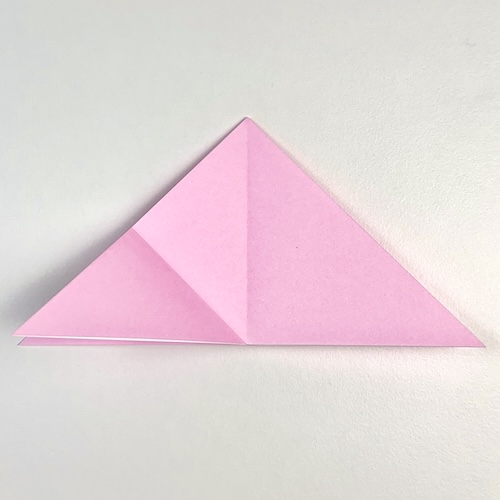
Fold the bottom left corner up to the top corner, top flap only.
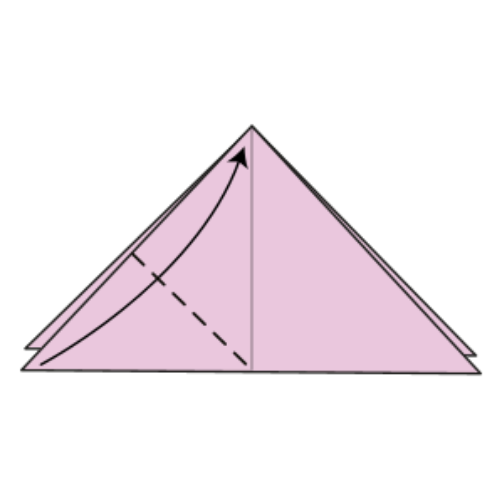
Step 6
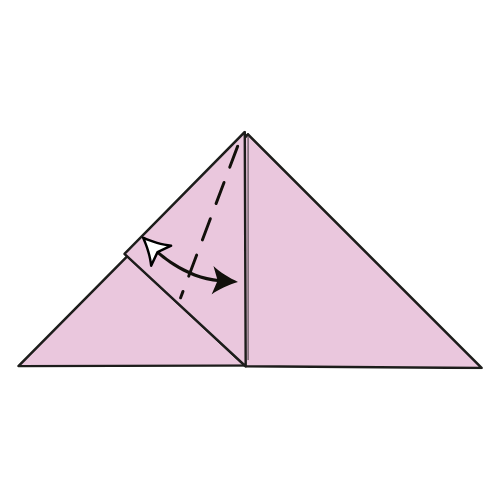
Fold and unfold the flap from Step 5 in half from left to right. The left edge should meet the vertical centerline.
🌷 Folding tip: Getting a clean fold at the top angle can be tricky. I like to hold the layers in place with the tip of my bone folder while making the fold. You can also use any pointy tool, or your nails if they are long.
Step 7

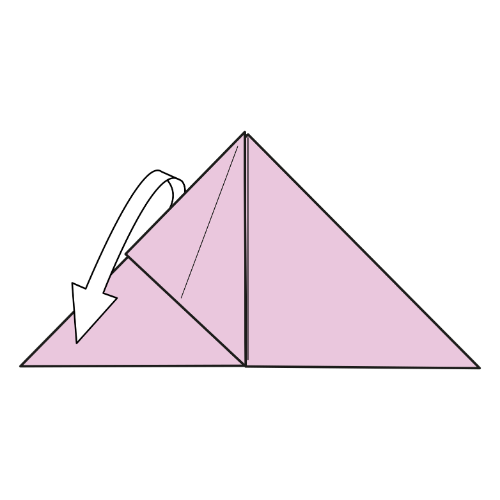
Unfold the flap from Step 5.
Step 8
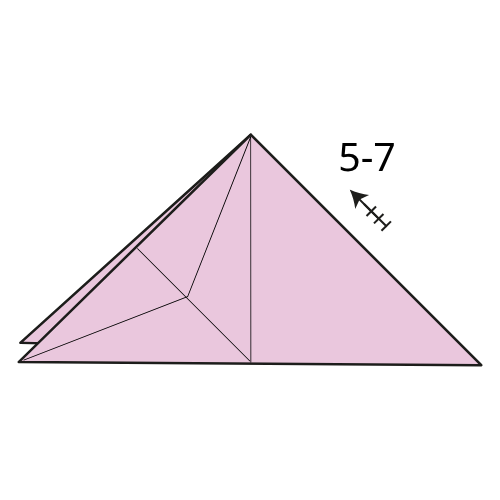
Repeat Steps 5 to 7 on the three remaining flaps.
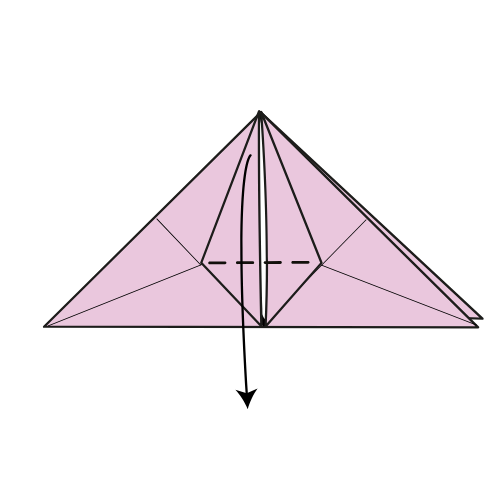
Step 9

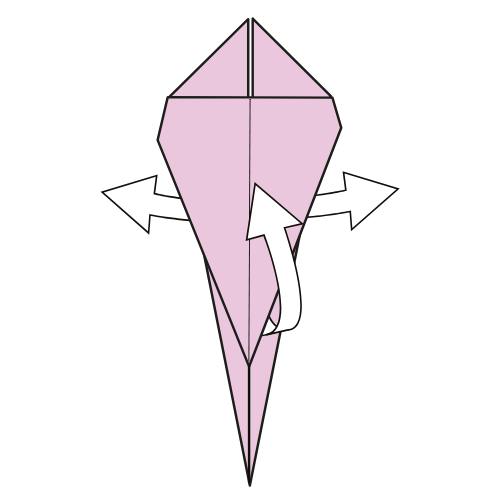
Lift the top left flap. Open and spread its layers, then Squash fold along the existing creases in the top triangle area. The model will not lie flat yet.
🌷 Folding tip: Check the next diagram to see what the result should look like. If this step feels tricky, you can also watch the video to see how I do it.
Step 10
Mountain fold the bottom left and right areas behind the bottom triangle to start a Petal fold. Then fold the triangle area upward. The model should now lay flat.
🌷 Folding tip: This is a good moment to adjust the layers at the tip of the petal if they do not line up neatly. Gently roll the layers between your fingers until they meet the centerline.
Step 11

Fold the top flap you just made down.
Step 12
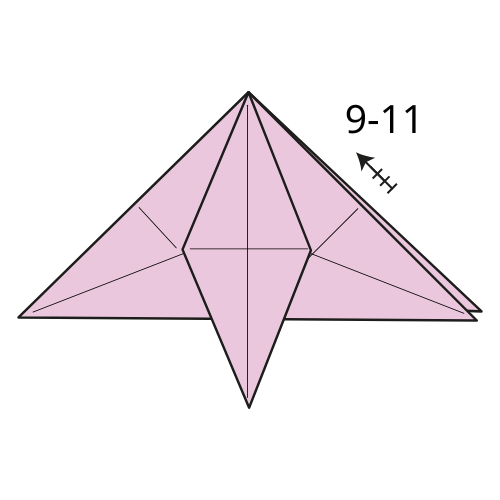
Repeat Steps 9 to 11 on the three remaining flaps. You just folded the origami lily’s petals.
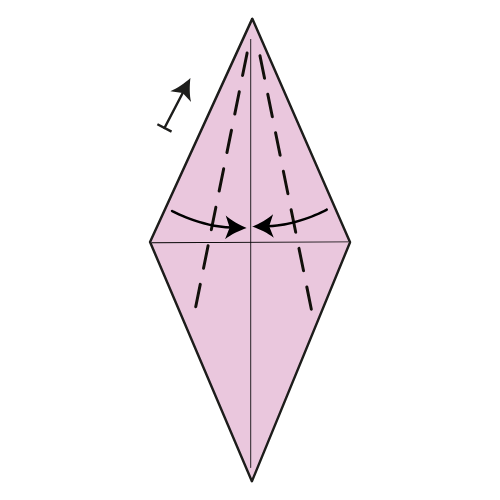
Step 13
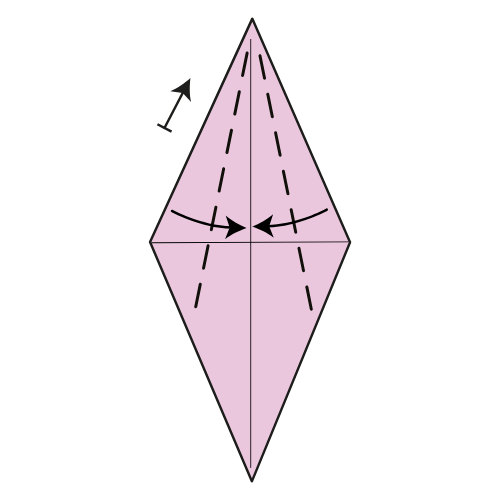
Fold the top left and right edges to the vertical centerline. Repeat on the other side.
Step 14
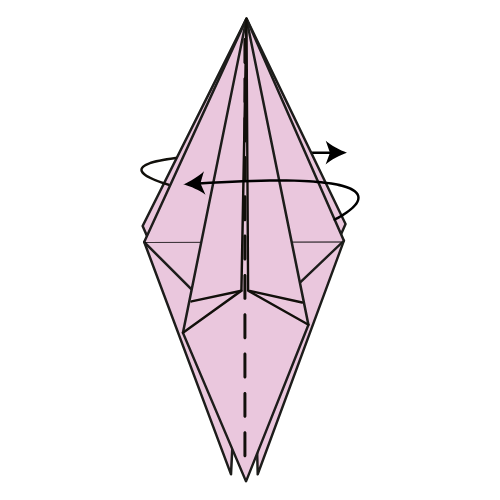
Flip two flaps from right to left. Repeat on the other side.
Step 15
Again, fold the top left and right edges to the vertical centerline. Repeat on the other side.
Step 16
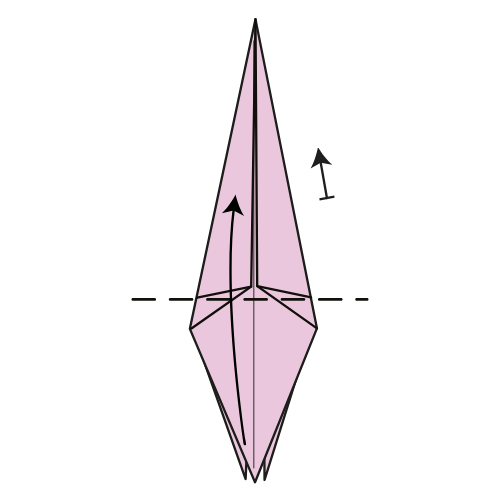
Fold the top flap in the bottom section up along the dashed line. Then repeat on the other side.
Step 17
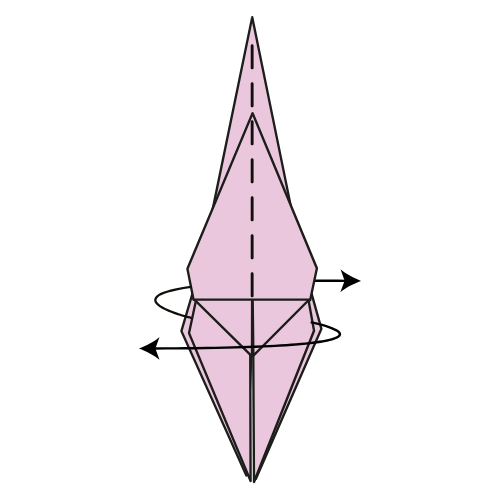
Flip two flaps from right to left. Repeat on the other side.
Step 18
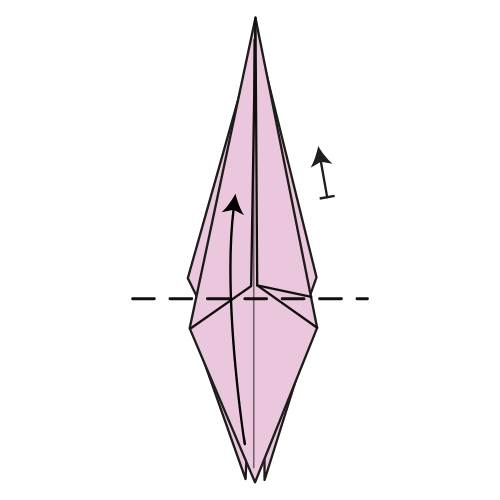
Again, fold the top flap in the bottom section up along the dashed line. Then repeat on the other side.
Step 19


Rotate the model 180°.
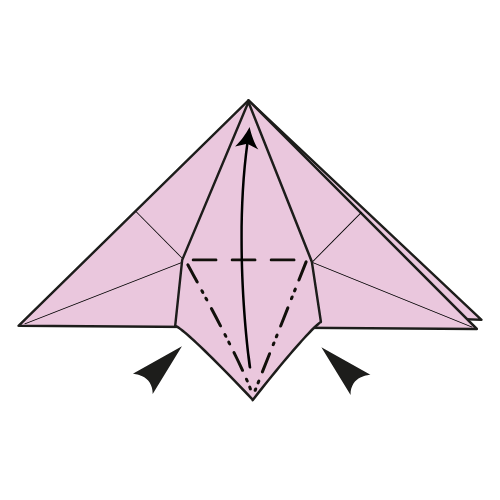
Step 20
Fold the petals up to about a 90° angle.
🌷 Folding tip: Adjust the petals’ angle to your liking. You can also curl the petals with a bone folder or a pen to give them a more natural look.
The Completed Origami Lily


I hope you enjoyed folding this origami lily. It’s a calm and satisfying model, and the final shaping really brings the petals to life.
If you fold one, feel free to share a photo in the comments. It’s always nice to see the different colors and arrangements people create.
If you’d like to keep folding, you can explore more easy origami tutorials or browse our collection of origami flowers on the site.
You can also get new tutorials and folding ideas in our newsletter here, and if you prefer video instructions, you can follow along on YouTube.
Download the Complete Origami Lily Printable PDF Instructions
This printable PDF is part of our Origami Friends membership on Patreon. As a member, you get access to these diagrams, our full library of printable PDFs, and member-only content.
Watch the Origami Lily Video Tutorial
Enjoyed this tutorial?
Subscribe to our YouTube channel for new inspiring origami videos every week!


I was getting bored and ended up making this
Wow, these are very clean folds. Thanks for sharing!
Why are the instructions on this page different than the printable PDFs?
Hi Martha, the PDF wasn’t updated. It’s now done. Thank you for letting us know!
I’m confused on step 9 and no matter how I fold it it just doesn’t fold right and I’m getting quite frustrated from it but i would recommend it since it’s probably just me
Hi there, are you able to watch the videos side to the diagrams? In Step 9, we’re doing a squash fold using the existing creases from the previous steps. The key is to separate the layers (I use the pointy side of my bone folder in the video but you can use your nails or a pen for example) and squash the paper down. Happy to do a complementary video if that can help!
I was obsessed with probably as a kid, now my kiddo and I do it together as a hobby (we have SO MANY COOL PROJECTS). We both loved the design of this, very therapeutic to fold.
Hi Courtney, That’s lovely to hear. Even better when you can share it with your kid. Glad you both enjoyed this one, it’s a really calming fold 🙂
Got into origami recently (2 hours back). My lily turned out okay i guess? 😀
It’s not the easiest model to start with. You did very well 👍
Made myself a set of flowers, they look sooooo pretty. By the way, I’ve recently created my own miniature origami cat. Is there any way to post a tutorial on this website???
Hi Miro. Nice flowers. Thanks for sharing! We have a lot of tutorials in the pipeline, so we won’t be able to welcome new projects at the moment. But feel free to email me about it.
I did vase and lily yesterday and today I tried to put this together (lily in the vase) and it looks SO AWESOME. I recommend to try put this together, good luck.
I’m glad you enjoyed folding these two beautiful models 🙂 Feel free to share pictures of your creations with us!
I made my first Lilly and heart today it worked out sooooo well I’m so excited
AT THE SAME TIME IT LOOKS EZ BUT MY BRAIN JUST AINT BRANING
this origami lily has to be my favourite thing to fold:) It’s so satisfying once you learn enough and can scroll through the instruction without stopping to figure out what to do evey five seconds 🤣I’ve folded one before and I gave it to my friend, and his reaction was so cute, I decided to make those in one sitting, because I plan on giving them to my other friends. I can’t wait to see how others will react to my little gift😺 Thank you for helping me to spread joy with this instruction💜🩵🩷
They are lovely! Thank yo for sharing 🙂
It turned out well
hey im confused on step 5 mines not folding still gave it a try though, love it bye
Is it supposed to look like this?
Hi Kay! It looks like there might be a little mistake somewhere. Maybe it was a mix-up with flipping the layers or missing a rotation. No worries, though! Check our video tutorial at the bottom of the article. It should help!
Same thing happened to meಠ︵ಠ
😒😒😒😒😒😒😭
wait is tat starry night
Ohhh that’s nic
I got confused on step 5 and it messed up my whole iris i wasn’t successful but I would recomend trying it
Hi Emily, One of the best ways to get better at origami is to fold the same model a few times. You’ll be amazed at how much your skills improve with each new version! Happy folding!
You will find the same thimg in most 3d flowers. You need to take both corners and unite them, then you flatten the upper and bottom part of the paper, and tada! You passed step5
I just started doing origami today, but I made the thing! It’s a bit wonky and weird, but I did it! Also there’s a frog 😆
That’s amazing, Linn! 🎉 Congratulations on creating your first lily! A bit of wonkiness just adds charm. And a frog, too? You’re off to a fantastic start!
what type of paper do I need to use for this?
Hi Bill, any cheap 15×15 cm origami paper will do. We used the Kami 15×15 cm for the tutorial.
I LOVE flowers so I’m doing a lily for school
A couple videos are to bright to see what’s happening
Hi Alan, it’s a bit counterintuitive, but try increasing the brightness of your screen, especially if you’re on a phone. The paper color we used was too pale to show well on the screen.
what does counterintuitive mean?
Hi Margaret, It means it goes against what you’d expect or find easy to understand. For example, if a red light means “go” and a green light means “stop,” that would be counterintuitive.
yeah your right