How to Make an Origami Easter Egg
Let’s learn how to fold an origami Easter egg.
This is a very simple model that comes together in just a few folds. In fact, you only need about 7 steps and less than five minutes to make one. That makes it a great little project for kids, beginners, or anyone who wants something quick and relaxing to fold.
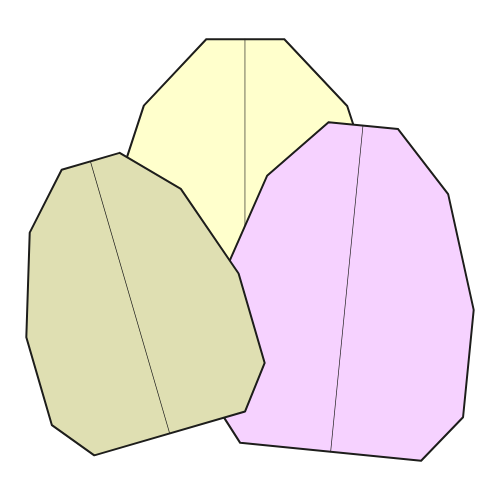
The shape is clean and slightly rounded, which works really well for an egg. Once you make a few, they start to look great together, especially if you use patterned or colorful papers.
Because it’s so quick to fold, this model is perfect if you want to decorate for Easter, make a small garland, or simply fill a table with cheerful paper eggs.
Origami Easter Egg Step-by-Step Instructions
- Difficulty: Easy – Beginner level 1
- Folding time: Less than 5 minutes
Recommended Paper
15×15 cm (6×6 in) Kami or smaller
Step 1

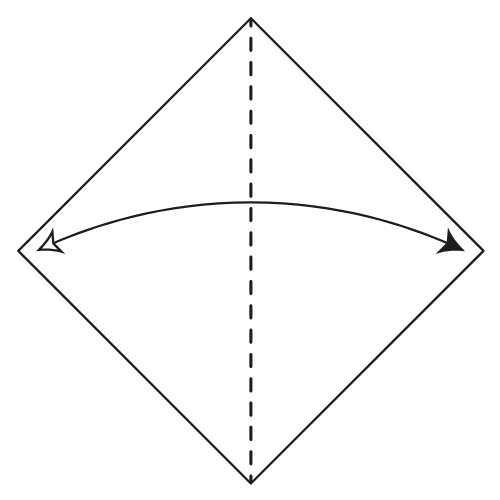
Start with the white side facing up in a diamond position. Fold in half along the vertical diagonal, then unfold.
Step 2
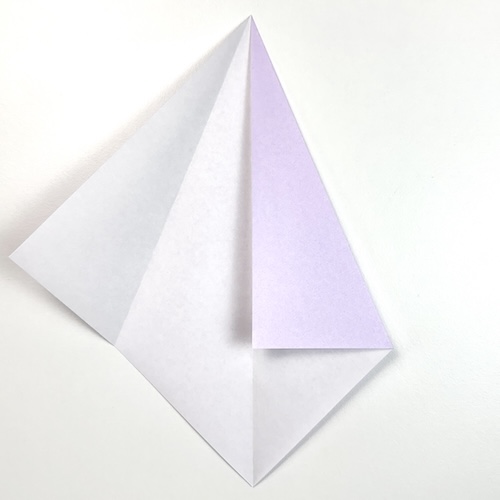
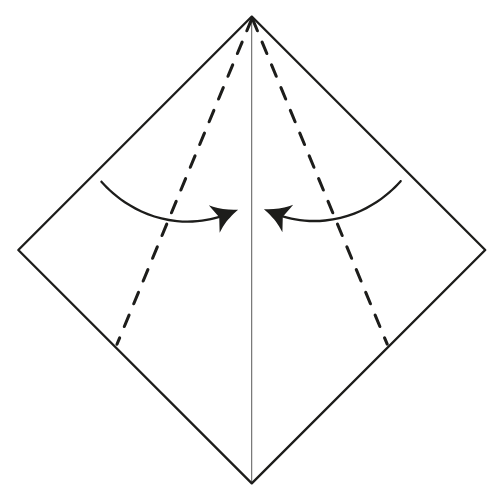
Fold the left and right edges to meet the vertical centerline.
Step 3
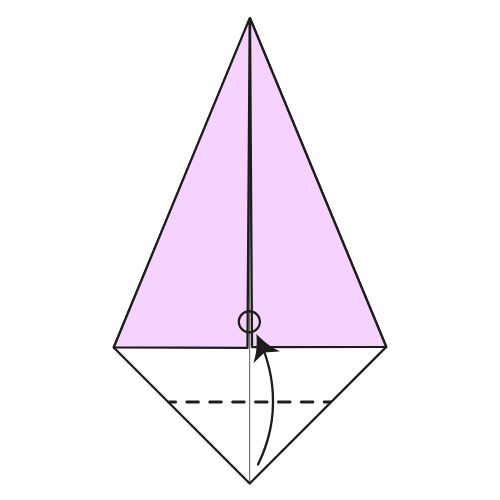
Fold the bottom corner up along the dashed line. The bottom corner should land slightly above the horizontal line where the layers meet.
Step 4
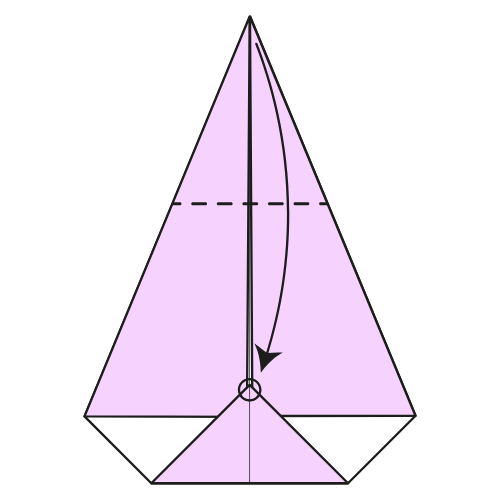
Fold the top corner down to meet the bottom corner from Step 3.
Step 5
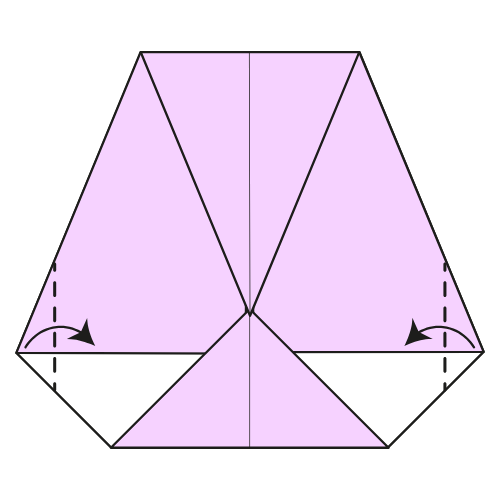
Fold the left and right corners inward. There is no exact reference point, just fold them evenly and symmetrically.
Step 6
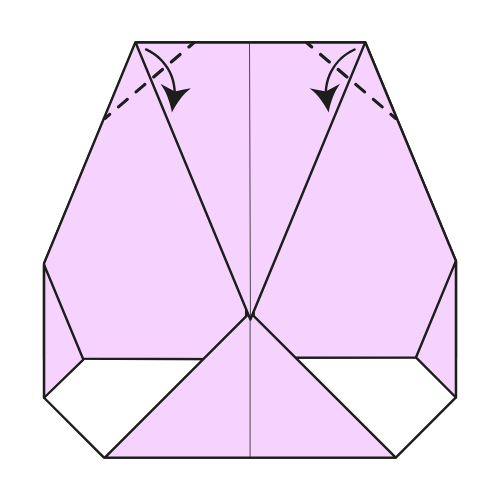
Fold the top left and right corners inward. Again, there is no specific reference point, just keep both sides even.
Step 7
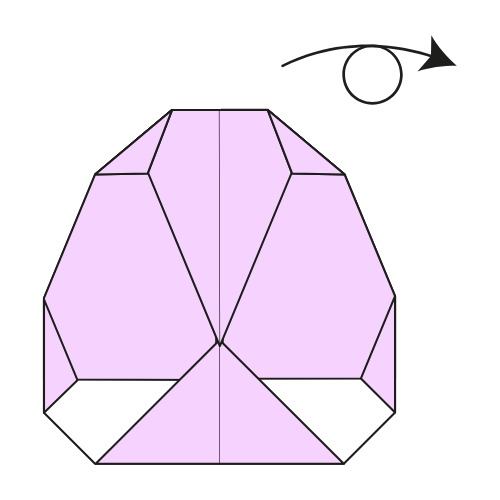
Turn the model over.
🥚 Folding tip: Gently fold the model in half to check if your folds are symmetric and adjust as needed.
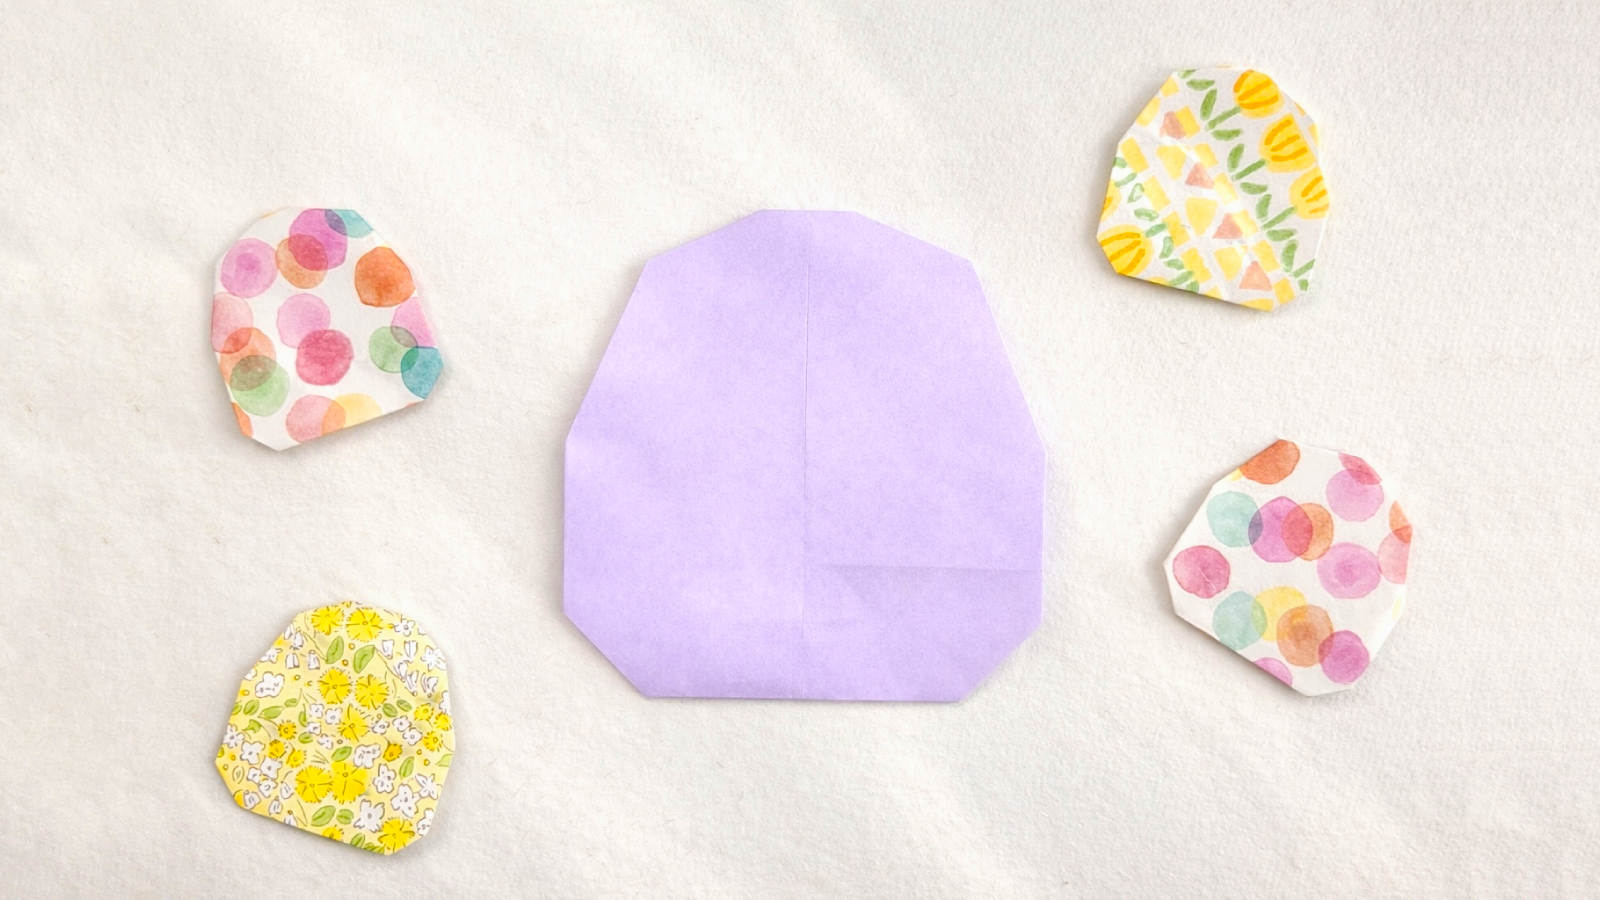
The Completed Origami Easter Egg
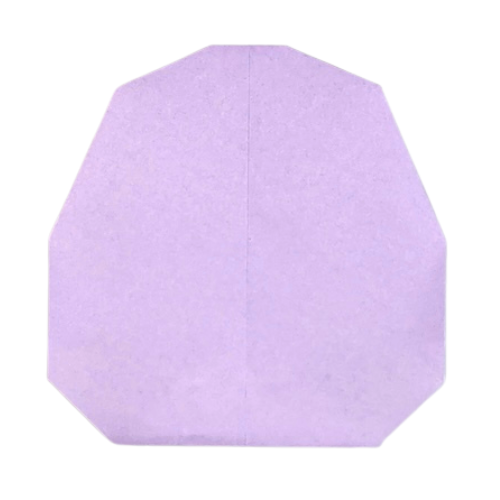
And that’s it, your origami Easter egg is ready.
This is one of those models that’s hard to stop making once you get started. Since each one only takes a few minutes, it’s easy to fold a whole collection in different colors and patterns.
If you try it, feel free to share your eggs in the comments. I’d love to see the papers you choose or how you use them for decorations.
If you’d like more quick models like this, you can explore our easy origami collection or browse our Easter origami ideas.
And don’t forget to subscribe to our YouTube channel for step-by-step tutorials and join our newsletter to get new folding ideas straight to your inbox.

Download the Complete Origami Easter Egg Printable PDF Instructions
This printable PDF is part of our Origami Friends membership on Patreon. As a member, you get access to these diagrams, our full library of printable PDFs, and member-only content.