How to Fold an Origami Heart Envelope
This origami heart envelope was designed by the late Francis Ow, whose heart-themed creations continue to inspire folders around the world.
Folded from a single rectangle, this sweet design transforms a simple sheet of paper into an envelope locked with a heart. It’s not difficult, but it does require a bit of folding experience.
I recommend starting with a square and cutting it in half. That way, you can make two envelopes at once, perfect for sending a little love to more than one person.
Looking for an easier model? This origami heart is one of our most popular beginner models, perfect for a quick and satisfying fold.
Origami Heart Envelope Step-by-Step Instructions
- Difficulty: Easy – Beginner level 4
- Folding time: 10-15 minutes
Recommended Paper
24×24 cm (9.5×9.5 in) Kami cut in half. This will make a 6x3x3 cm (2.4×1.2×1.2 in) box.
Step 1

Start with a 2×1 rectangle (half of a square), colored side facing up. Fold and unfold in half vertically and horizontally. Then, turn the paper over.
Step 2

Fold the left and right edges to the centerline, but only crease the top half. Then unfold.
Step 3

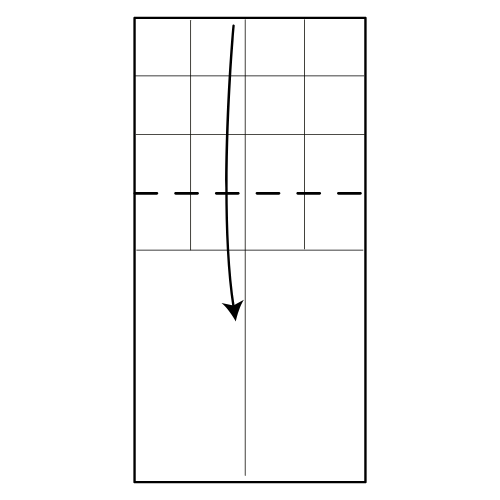
Fold the top edge down to meet the centerline.
Step 4
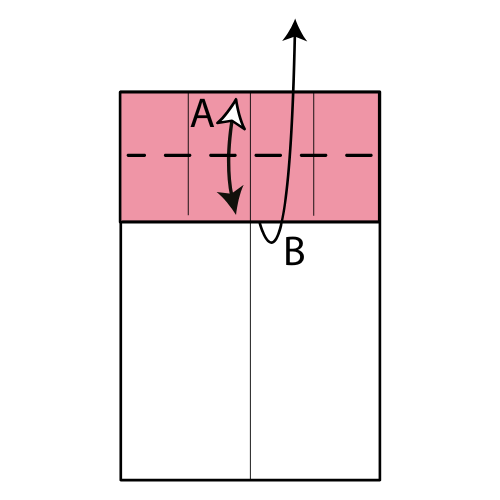
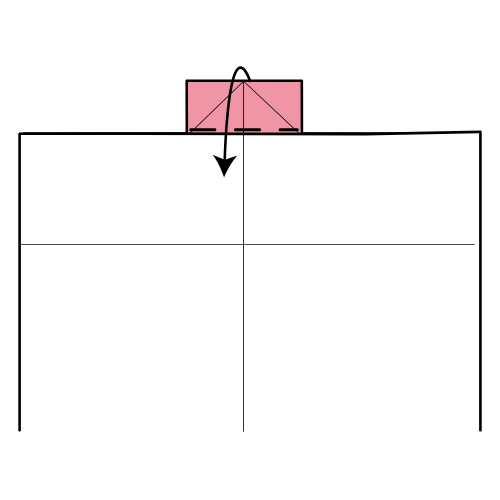
Fold and unfold the top edge to the nearest horizontal line (A). Then, unfold everything (B).
💌 Folding tip: When doing step A, hold the layers together firmly so they don’t move.
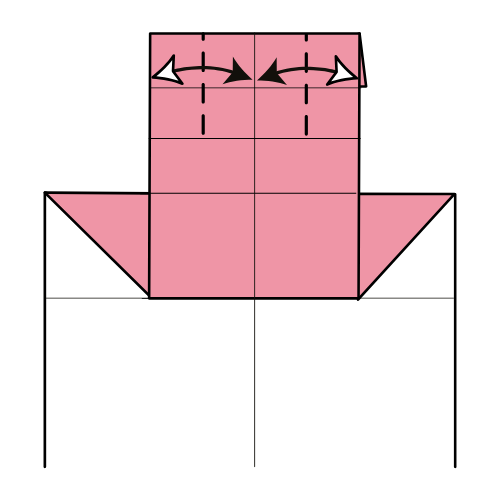
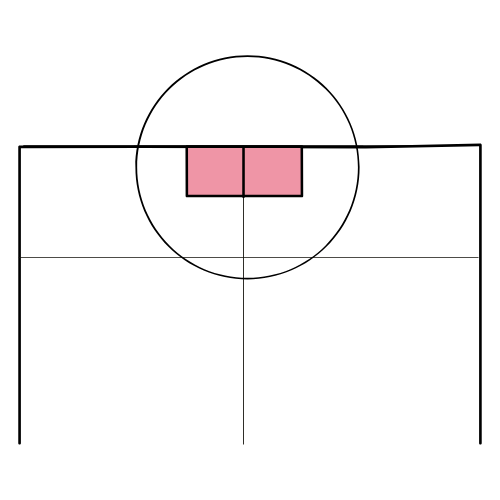
Step 5

Fold the top edge down along the third horizontal line from the top.
Step 6

Fold the top left and right corners in so their points meet the nearest corners.
Step 7
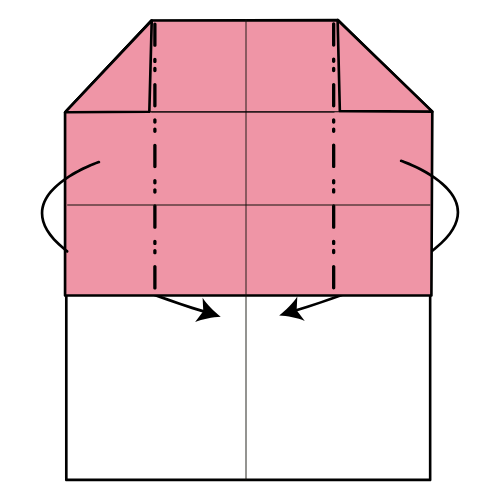
Mountain fold the top layer’s left and right edges inward to the centerline.
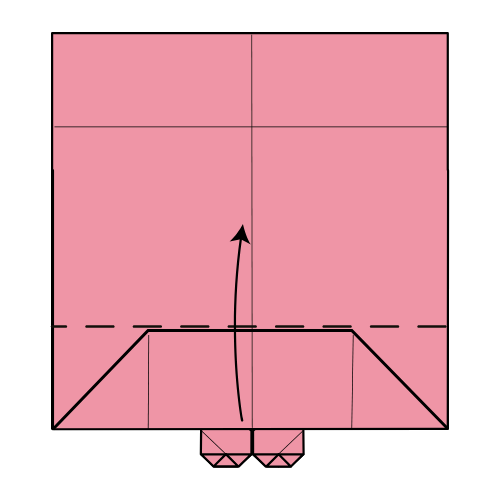
Step 8
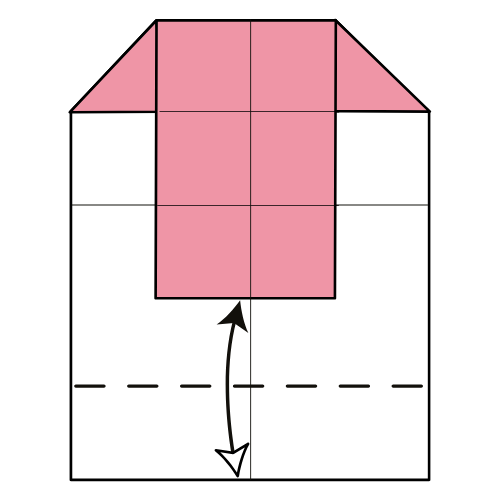
Fold the bottom edge up to the nearest horizontal line. Then unfold.
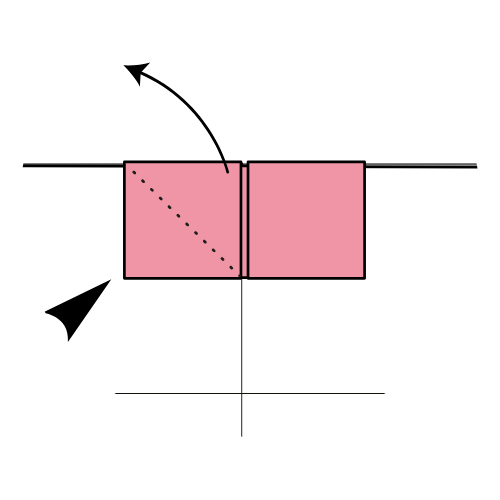
Step 9

Fold the colored rectangle in half (bottom to top), then unfold.
Step 10
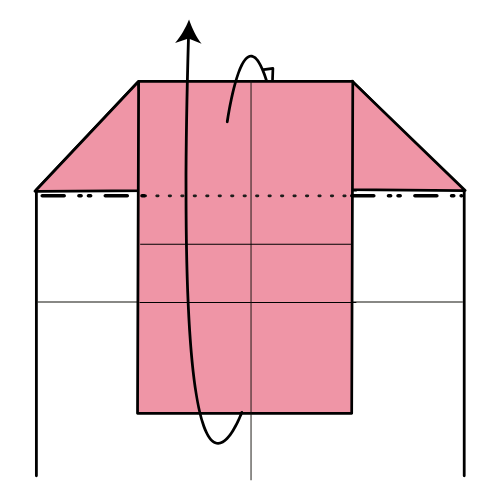
Mountain fold the top colored section at the back. The top flap should lift up as you do this.
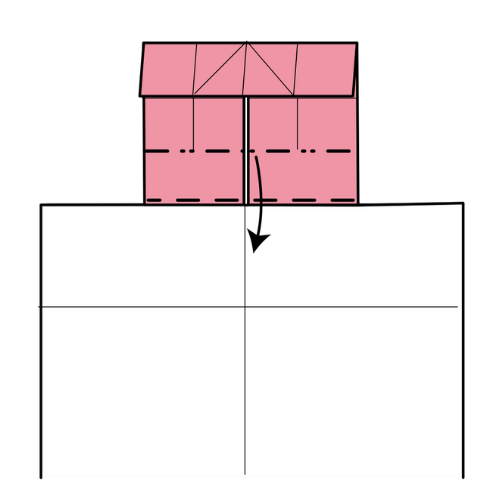
Step 11

Fold the top edge down to the nearest horizontal crease.
Step 12

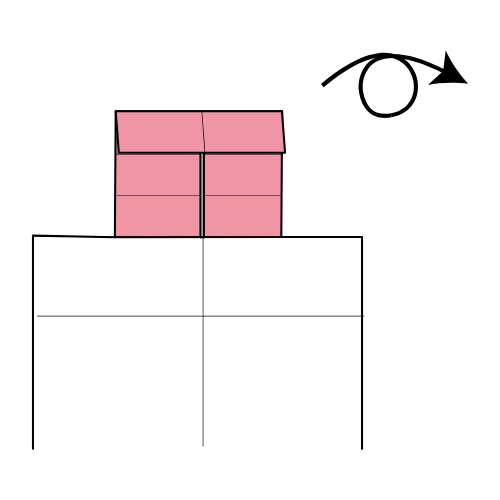
Turn the model over.
Step 13
Fold the left and right edges of the colored flap to the centerline. Only crease the top part.
Step 14

Fold the top corners in so they meet the vertical centerline. Only crease halfway along the length. Unfold, then turn the model over.
Step 15
Pleat the top colored flap downward.
Step 16
Fold in the bottom corners of the colored rectangle.
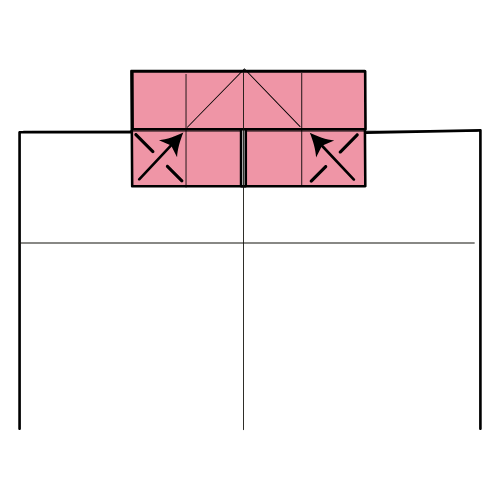
Step 17

Mountain fold both the left and right edges inward.
Step 18
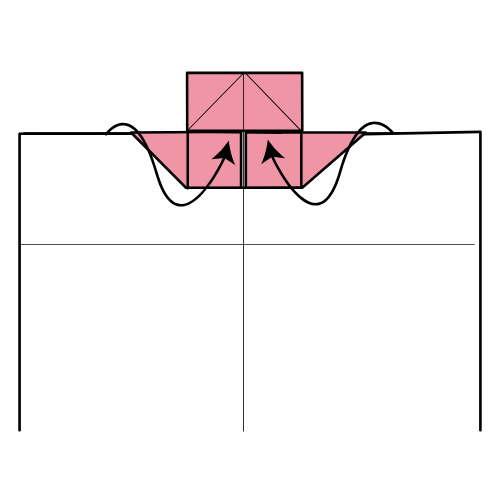
Tuck the bottom part of the top flap into the pocket underneath.
Step 19
Fold the top flap down along the top edge.
Step 20
Lift the top square flap and make a swivel fold by pushing its bottom left corner in and rotating the square upward.
Step 21

Repeat on the right side. Then, turn the model over.
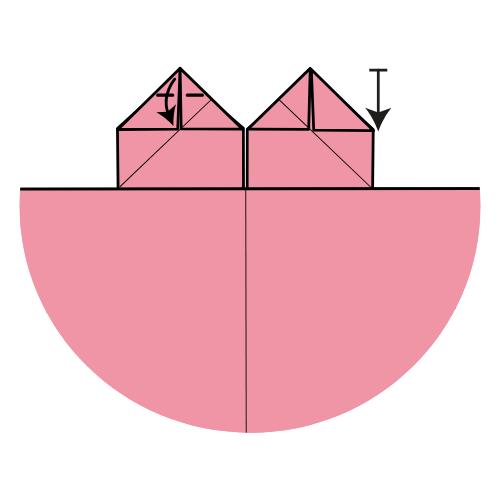
Step 22

For each square, fold the top corners in to meet at the center point.
💌 Folding tip: Make a small pinch at the center of the top edge as a reference. Start with corner “B” and align it with the diagonal crease. You can now use this first fold as a reference for the remaining folds.
Step 23
Fold the top corners down to meet the nearest horizontal line.
Step 24
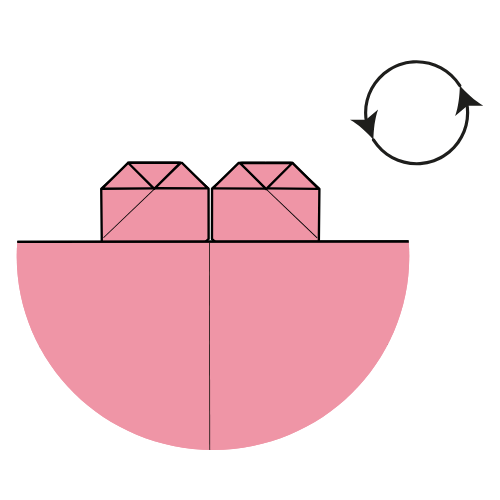
Rotate the model 180°.
Step 25
Fold the bottom edge up along the nearest horizontal crease.
Step 26

Fold and unfold the left and right edges so they align with each side of the heart.
Step 27
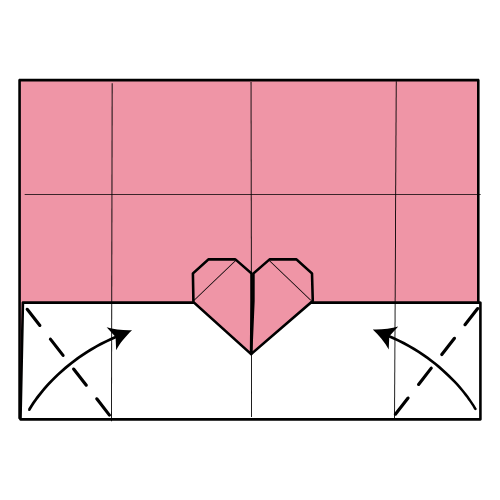
Fold along the diagonals of the bottom-left and bottom-right rectangles.
Step 28

Fold along the creases made in Step 26.
Step 29

Fold along the diagonals of the top-left and top-right rectangles.
Step 30

Fold the top edge down along the existing crease. Then tuck the flap under the heart to close the envelope.
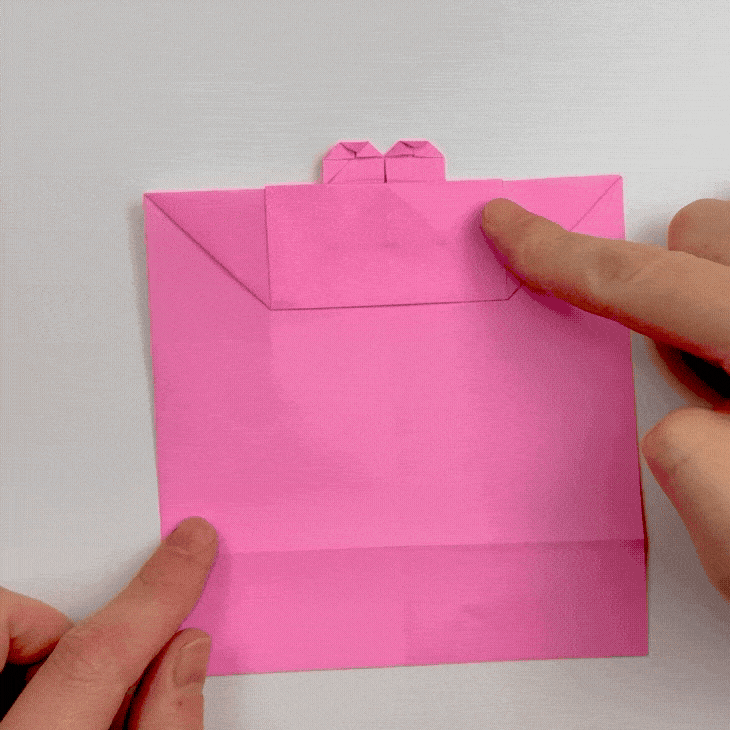
The completed origami Heart Envelope


This envelope is a great way to add a handmade touch to your messages, whether it’s for Valentine’s Day, a birthday, or just because.
Try it with contrasting colors like we did here, or go for something more subtle and monochrome.
And if you enjoyed folding this design, check out more Valentine’s Day origami creations, including Francis Ow’s origami heart card and the heart box, which all pair beautifully together.

Download the Complete Origami Heart Envelope Printable PDF Instructions
This printable PDF is part of our Origami Friends membership on Patreon. As a member, you get access to these diagrams, our full library of printable PDFs, and member-only content.