How to Fold an Origami Lazy Susan
This clever origami Lazy Susan is a great example of functional folding. With five neat compartments, it’s perfect for holding paperclips, candy, or other little desk items.
The model first appeared in the 1963 book The Best of Origami by Samuel Randlett, and it has become a classic ever since. Most of the folds are beginner-friendly, but the final shaping step, where you open and round the compartments, can be a little tricky the first time.
You can watch our video where we show you exactly how to get it right. Once you’ve folded one, you’ll want to make more for every corner of your home or workspace!
Origami Lazy Susan Step-by-Step Instructions
- Difficulty: Easy – Beginner Level 4
- Folding time: 5-10 minutes
Recommended Paper
20×20 cm (8x8in) Tant
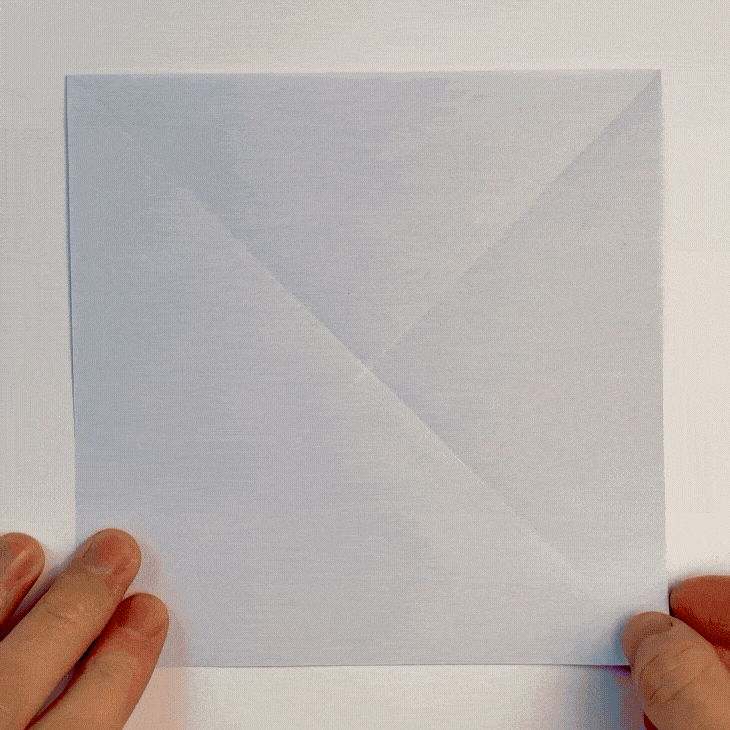
Step 1


Start with the white side of the paper facing up. Fold and unfold both diagonals.
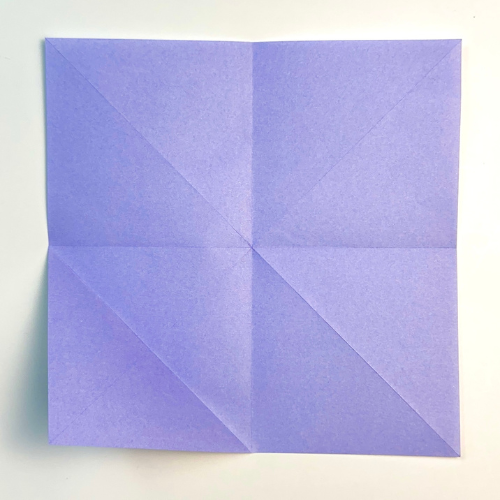
Step 2

Turn the paper over.
Step 3
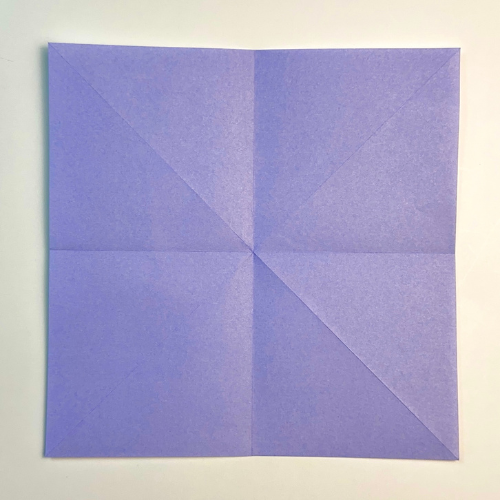

Fold and unfold from side to side, both horizontally and vertically.
Step 4

Fold the bottom left corner to meet the centerpoint.
Step 5

Repeat Step 4 on all remaining corners.
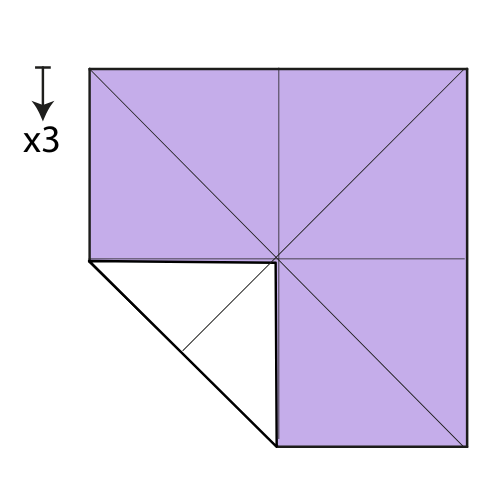
Step 6


Fold each corner to the middle of the edge.
Step 7

Fold and unfold the bottom corner to meet the center point. Repeat on all remaining corners. Then, rotate 90° clockwise.
Step 8

Turn the model over.
Step 9

Fold and unfold each side to the center line.
Step 10

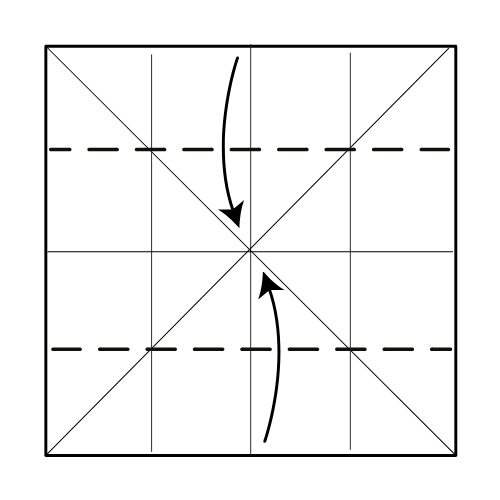
Fold the top and bottom edges to the center line.
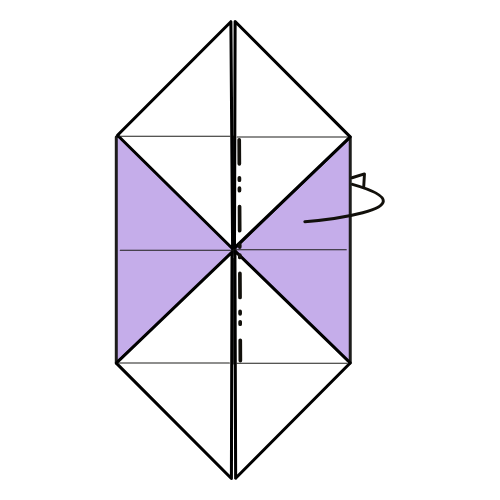
Step 11

Open the layer on the left and collapse along the existing creases.
Step 12

Repeat Step 11 on the right side.
Step 13

Mountain fold in half from right to left.
Step 14

Rotate the model 90° counterclockwise.
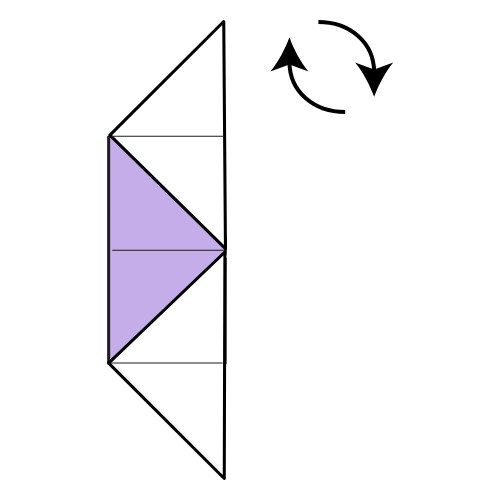
Step 15

Inside reverse fold the left corner inward.
Step 16

Repeat Step 15 on all remaining corners.
Step 17

Place a finger in the first pocket facing you and open it by pushing the top edge down.
Step 18
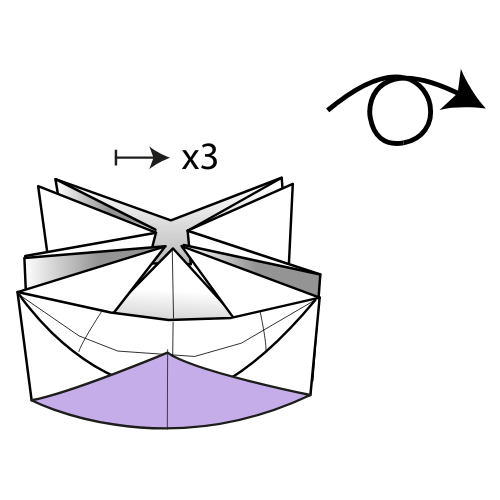
Repeat Step 17 on all remaining sides. Then, turn the model over.
Folding tip: Try to shape all pockets the same way. After turning the model over, you can round the top edge further with your nails or the edge of a bone folder.
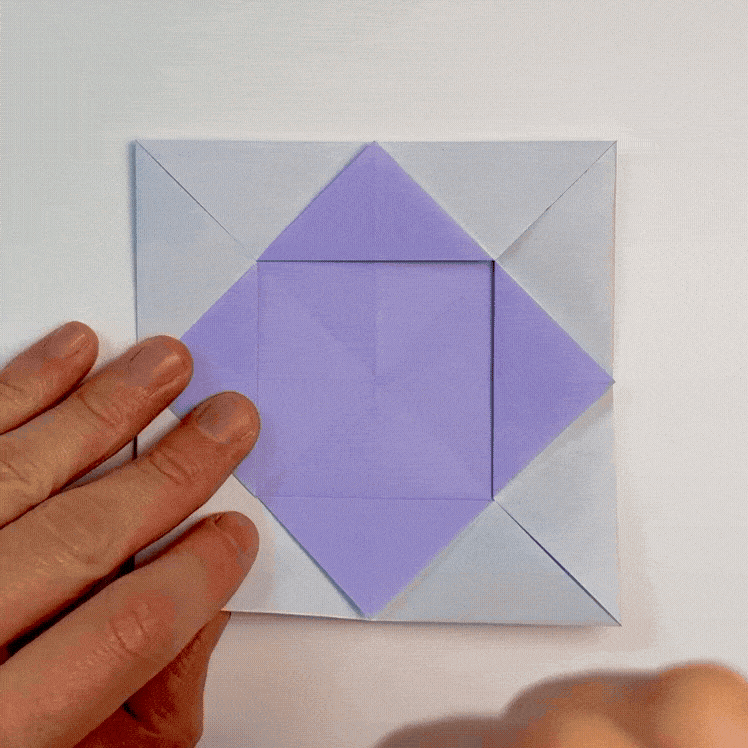
The Completed Origami Lazy Susan


Going Further: How to Get Rounder Edges?
With Kami, the center of your Lazy Susan might look a bit star-shaped. To soften that look and get rounder edges, try using thicker paper like Tant. You can also skip Step 1.
This will make the folding process a bit trickier, but the final result will have smoother, rounder shapes.
I hope you enjoyed crafting your origami Lazy Susan!
For more tutorials, tips, and seasonal paper‑projects, don’t forget to sign up for our newsletter so you won’t miss what’s next in the folding lineup.
And if you fold this Lazy Susan, feel free to share it in the comments below. We’d love to see them!

Download the Complete Origami Lazy Susan Printable PDF Instructions
This printable PDF is part of our Origami Friends membership on Patreon. As a member, you get access to these diagrams, our full library of printable PDFs, and member-only content.