How to Make an Advanced Origami Skull

 Sebastien Limet (Mister Paperfold)
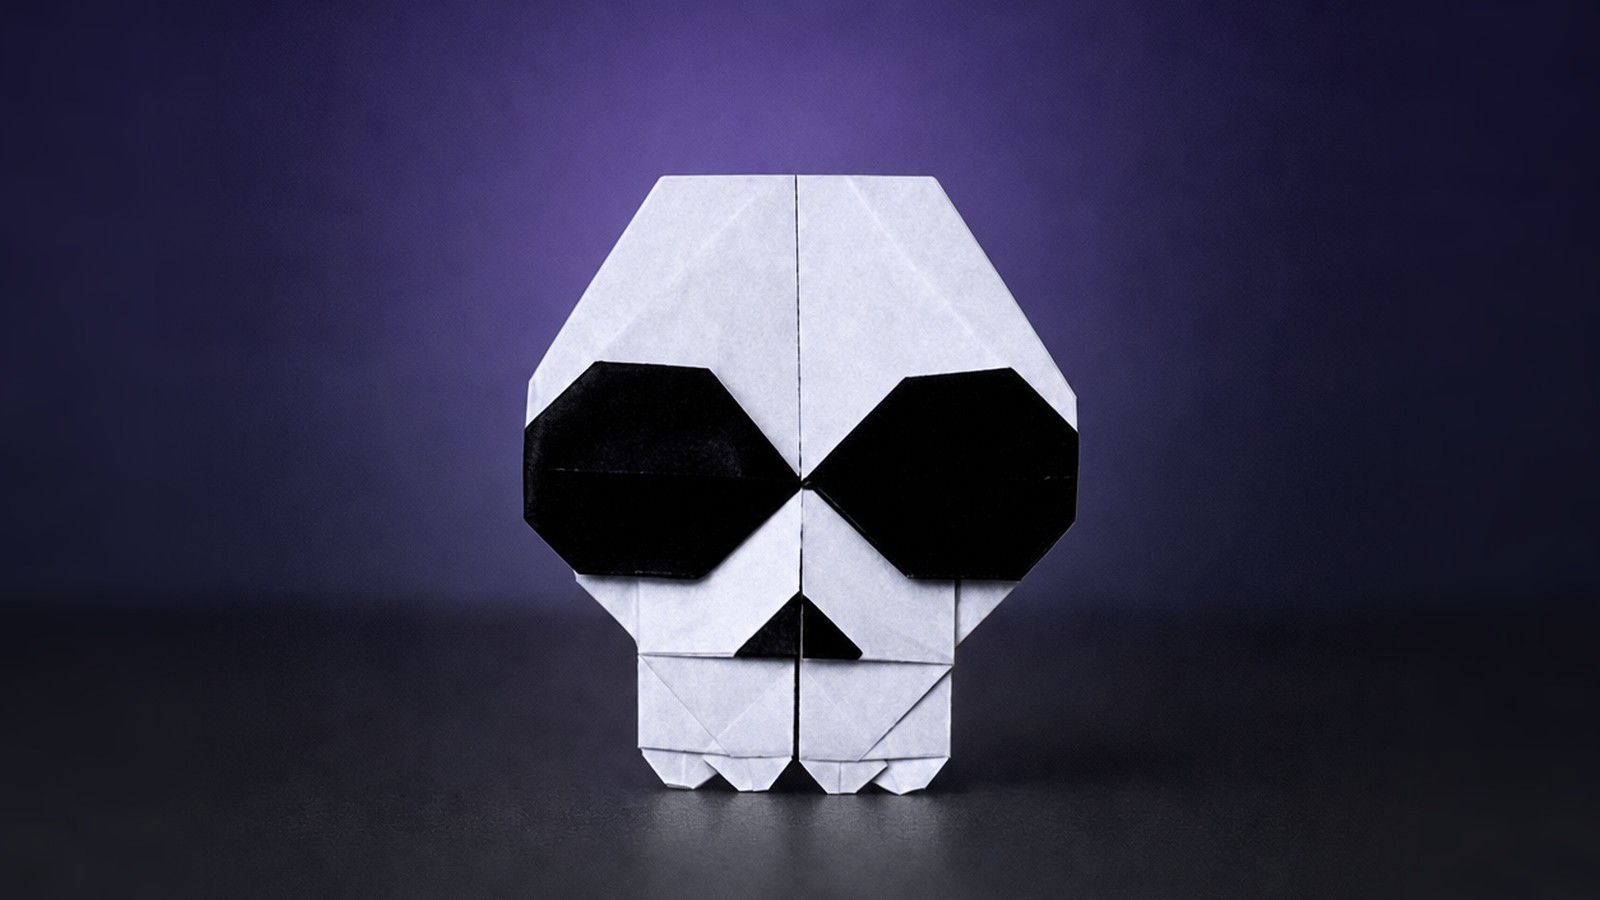
 Same base, very different result. This advanced skull by Mister Paperfold builds on his easy origami skull with much more detail and shaping.
It has a wide, rounded cranium, large eye sockets, a small triangular nose, and a neat row of teeth along the bottom that gives it its grin. The teeth are probably the trickiest part and take a little patience, so I’d recommend this model for folders who are already comfortable with the basics and looking for a challenge.
If you’ve folded the easy version first, it’s especially fun to see how far the same base can go.
Origami Skull Step-by-Step Instructions
- Difficulty: Low-Intermediate
- Folding time: 30 minutes
Recommended Paper
8 x 8 in (20 x 20 cm) origami paper (Kami) for a first attempt.
Step 1
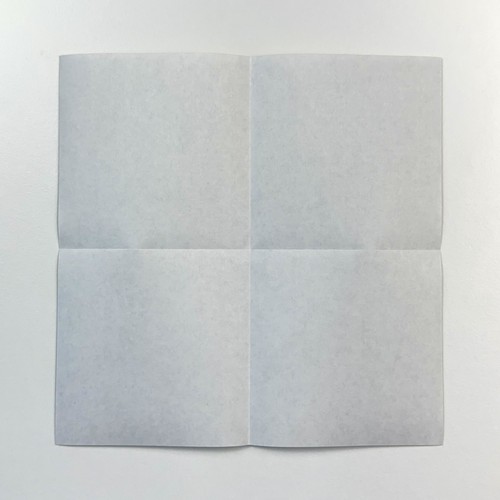
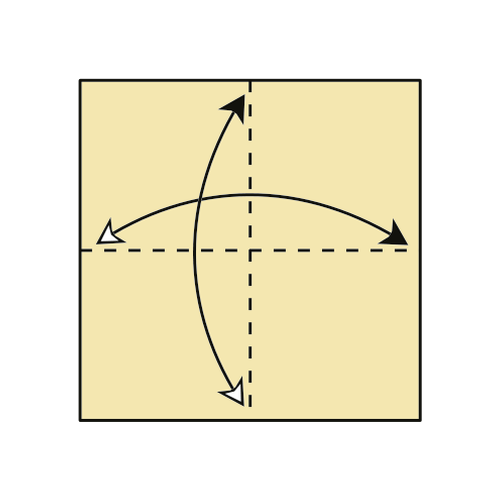
Start with the white side of the paper facing up. Fold the paper in half vertically and horizontally, then unfold.
Step 2
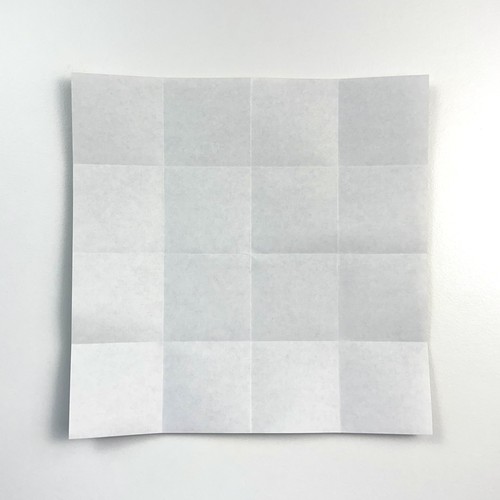
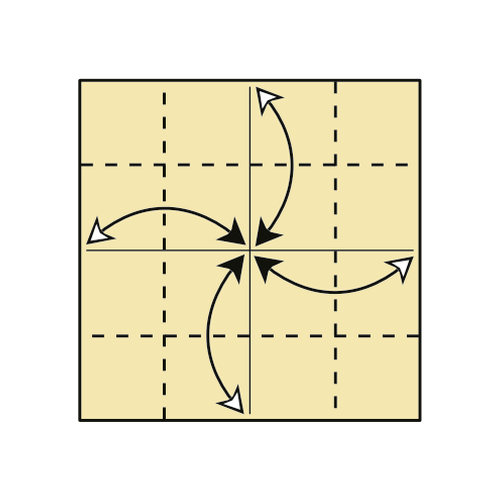
Fold and unfold each edge to meet the center creases, creating a 4×4 grid.
Step 3
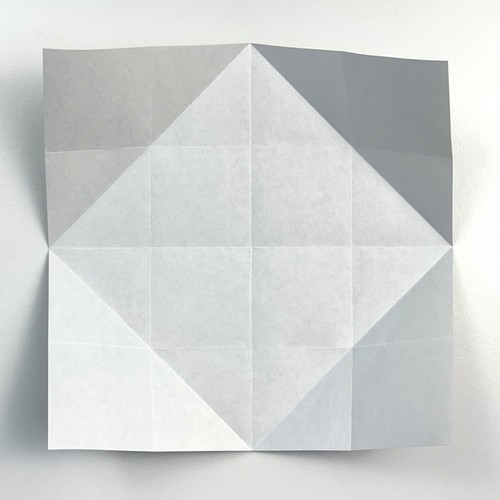
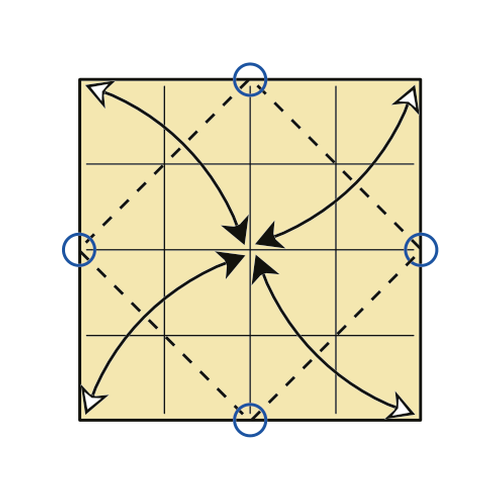
Fold and unfold each corner to the center point.
Step 4
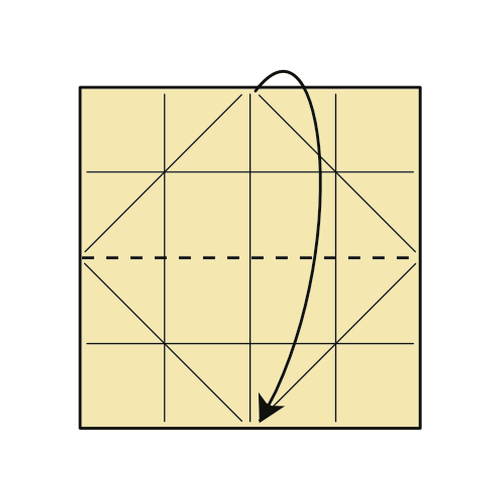
Fold the top edge down to meet the bottom edge.
Step 5
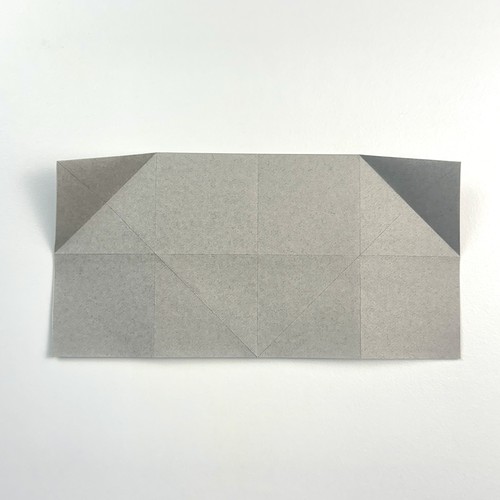
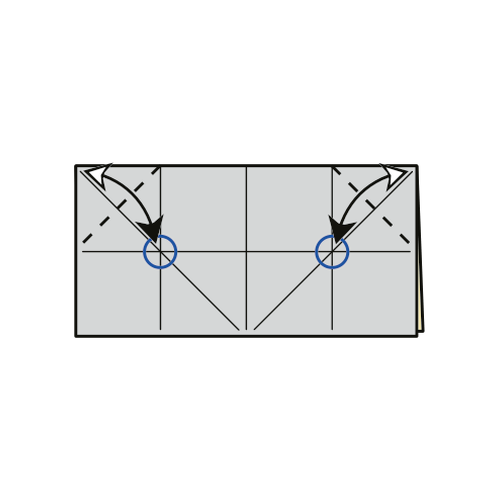
Fold the top left and right corners down to the circled points, then unfold.
Step 6
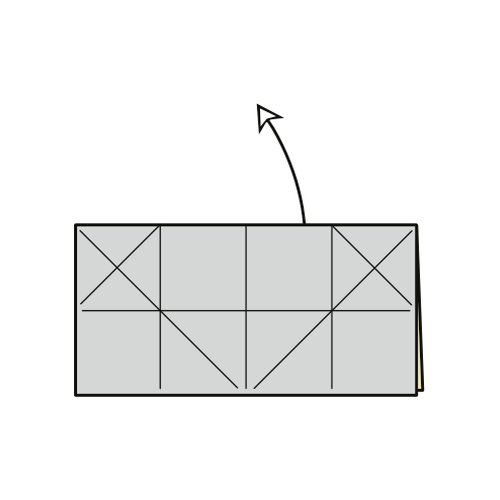
Unfold the back layer up to the top.
Step 7
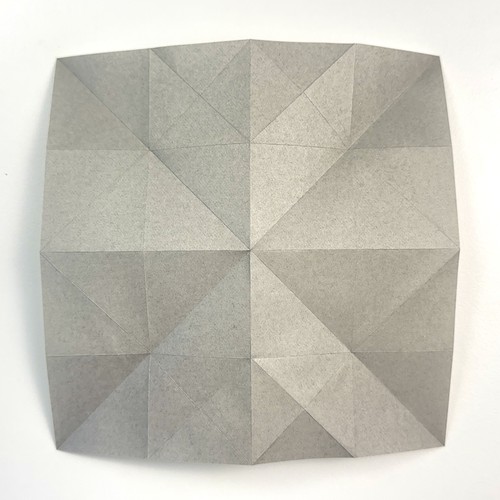
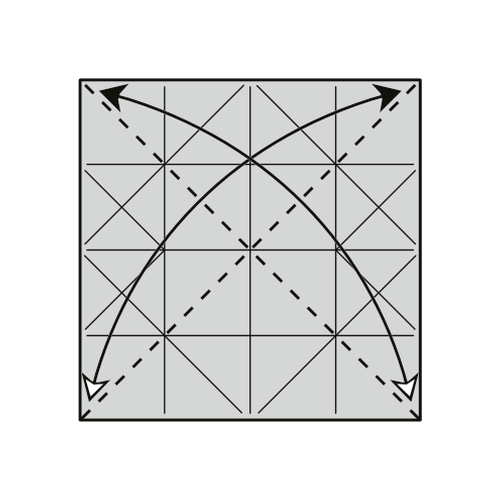
Fold and unfold both diagonals.
Step 8
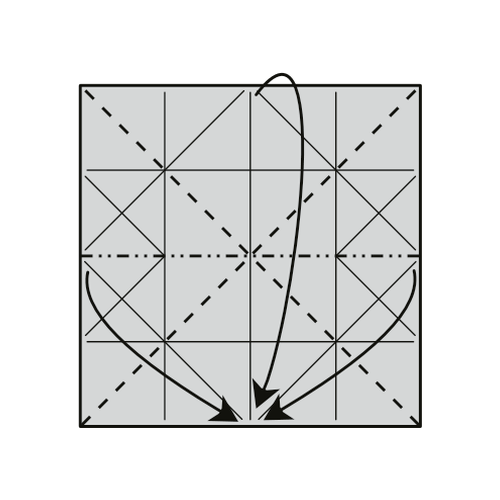
Collapse the paper along the existing creases to form a Waterbomb base.
Step 9
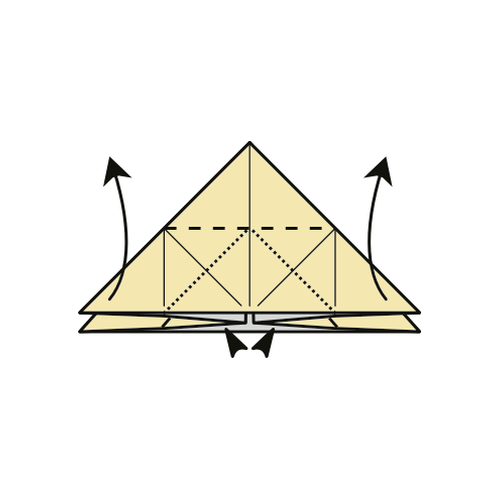
Fold the top layers up along the existing horizontal crease. At the same time, squash-fold the inner edges flat along the existing creases.
Step 10
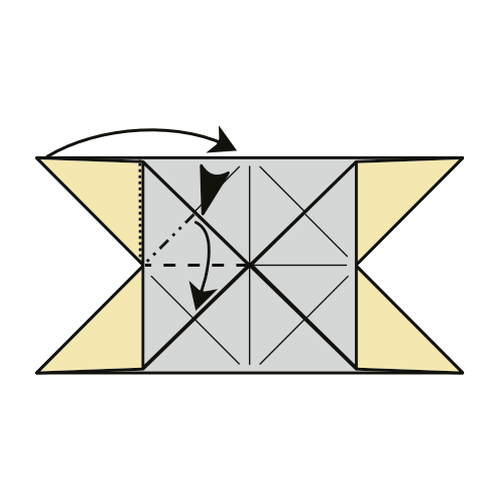
On the left side, swivel-fold the top layer to the right along the existing creases.
Step 11
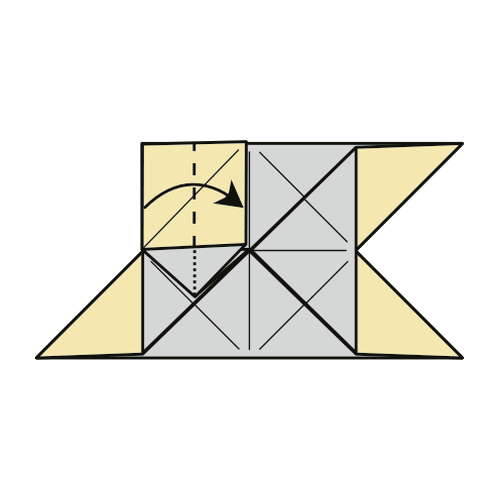
Fold the left edge of the flap to the vertical centerline, sliding it underneath the colored triangle.
💀 Folding tip: Hold the layers firmly to keep them from shifting.
Step 12
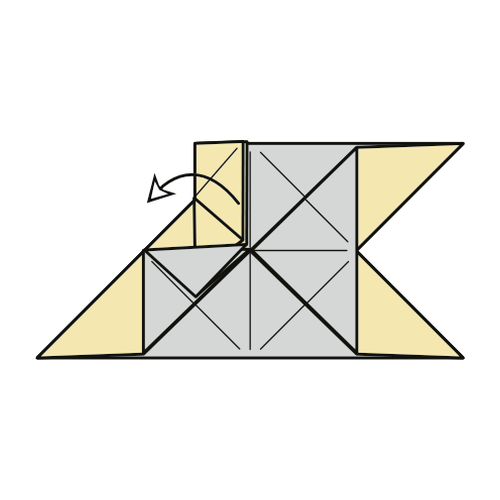
Unfold the fold from Step 11.
Step 13
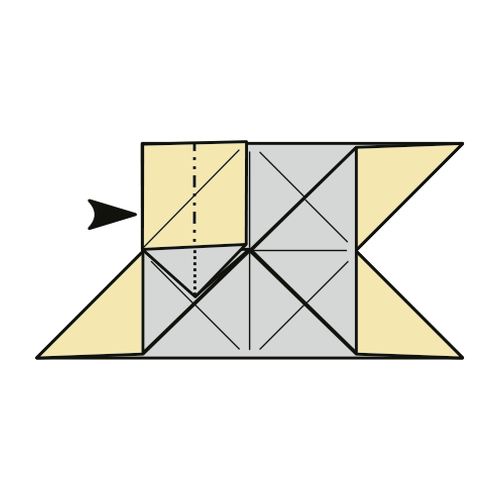
Closed-sink the left edge of the flap along the crease you just made.
💀 Folding tip: You can use an open sink instead if you find it easier.
Step 14
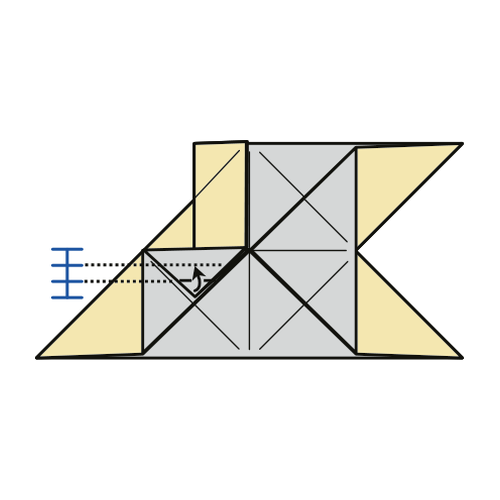
Fold the small bottom corner of the flap up.
Step 15
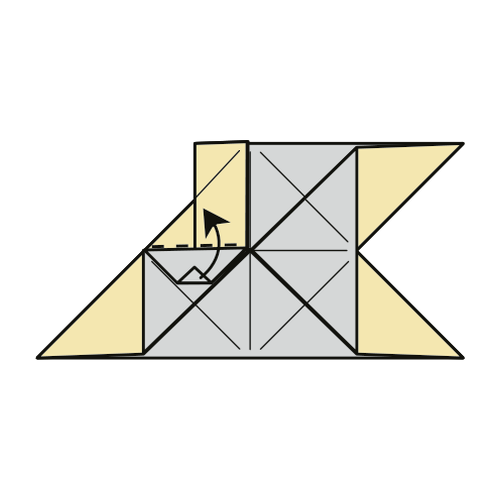
Fold the flap up.
Step 16
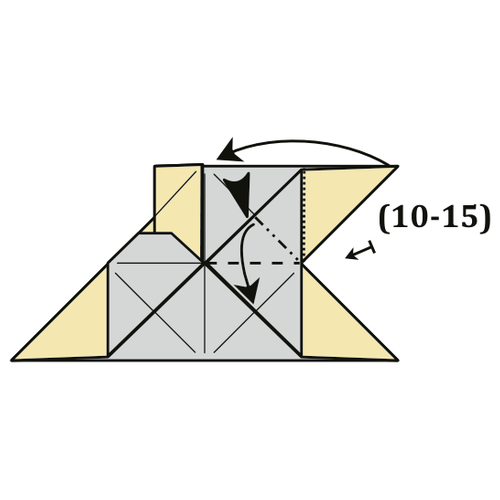
Repeat Steps 10 to 15 on the right side.
Step 17
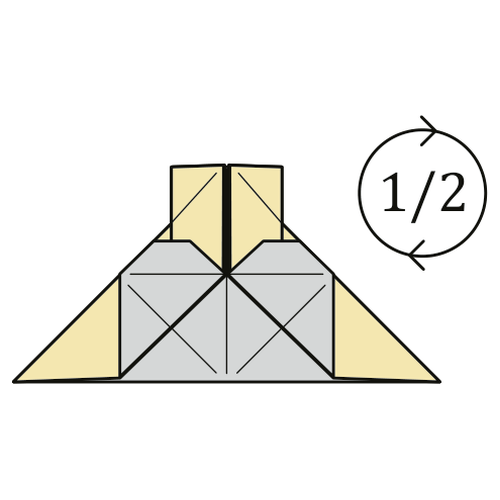
Rotate the model 180°.
Step 18
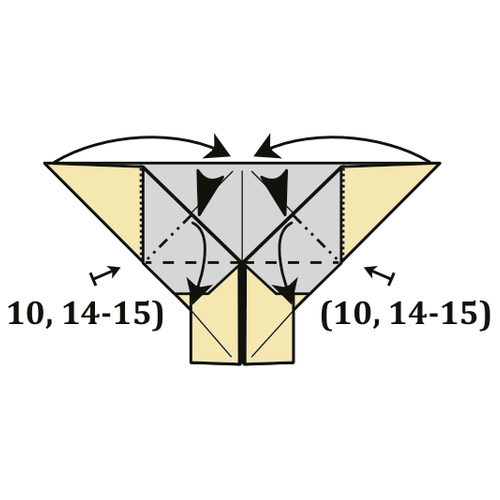
Repeat Steps 10, 14, and 15 on the left and right sides.
Step 19
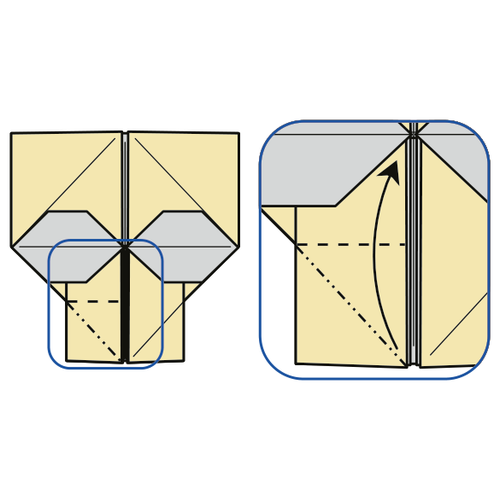
Swivel-fold the bottom-right corner of the left flap upward.
Step 20
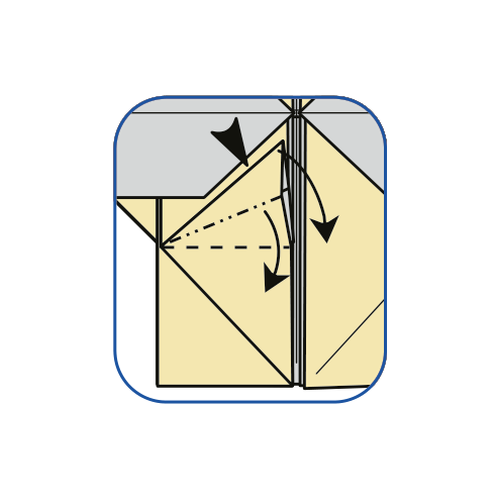
Squash-fold the corner to the right.
Step 21
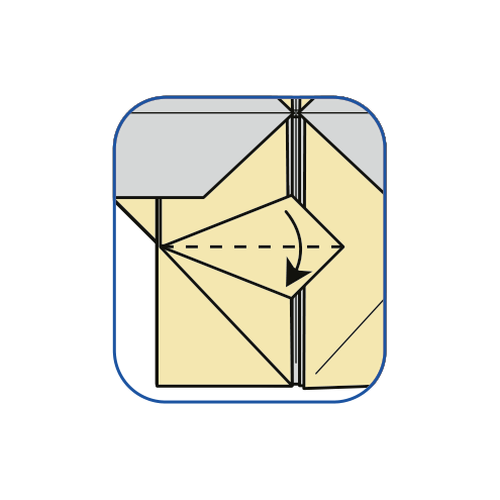
Fold the top half of the flap down along the horizontal line through its points.
Step 22
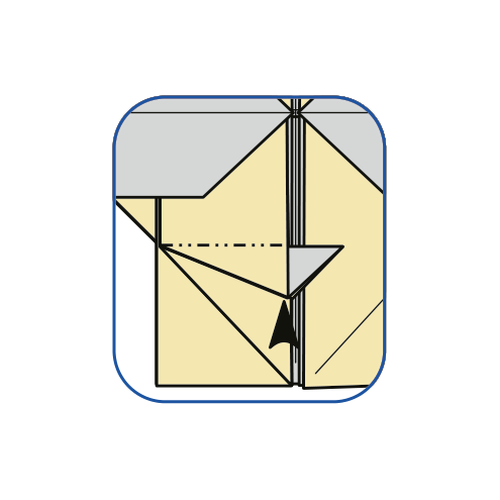
Inside-reverse-fold the edge upward (top flap only).
Step 23
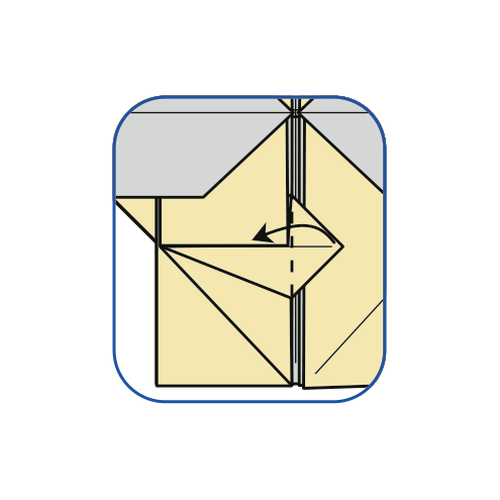
Fold the right corner over to the left.
Step 24
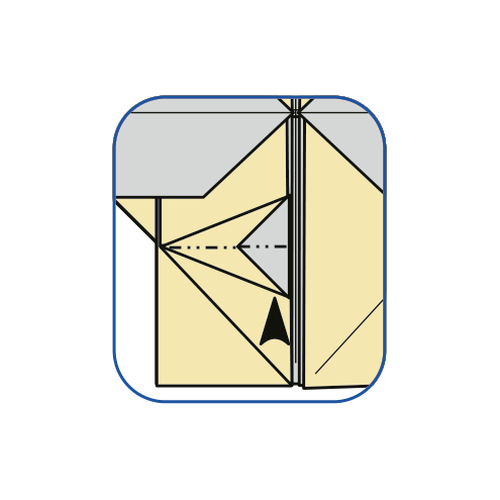
Inside-reverse-fold the edge upward.
Step 25
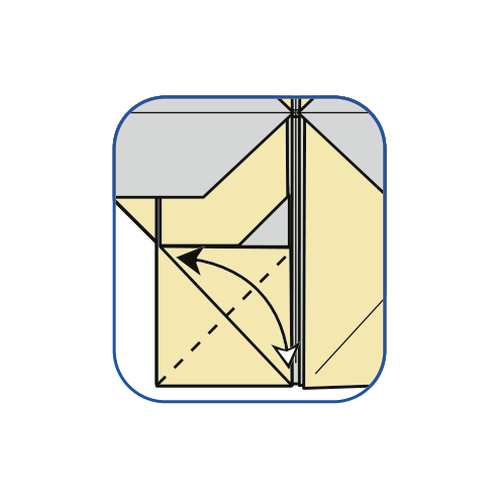
Fold the bottom-right corner up to the top-left corner, then unfold. Crease lightly.
Step 26
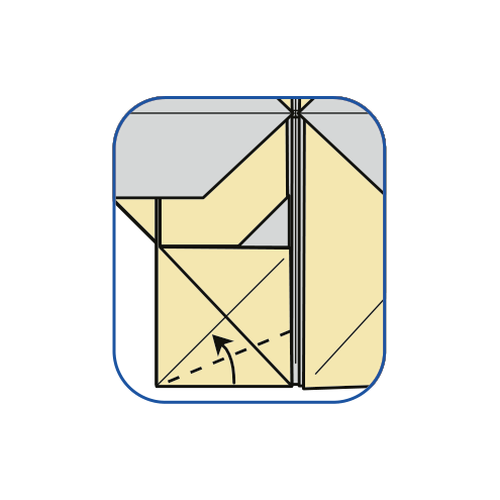
Fold the bottom edge up to meet the crease you just made.
Step 27
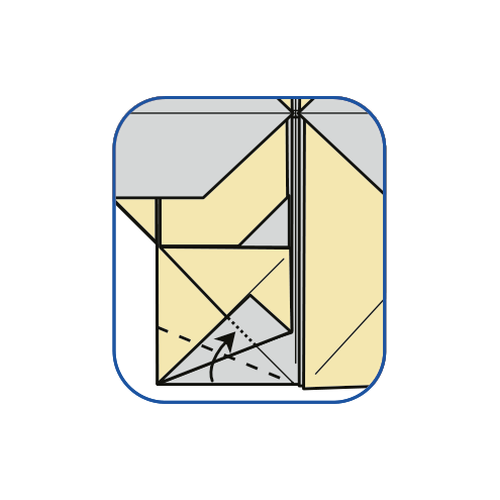
Fold the bottom edge up again, from the bottom-left corner, to meet the other diagonal.
Step 28
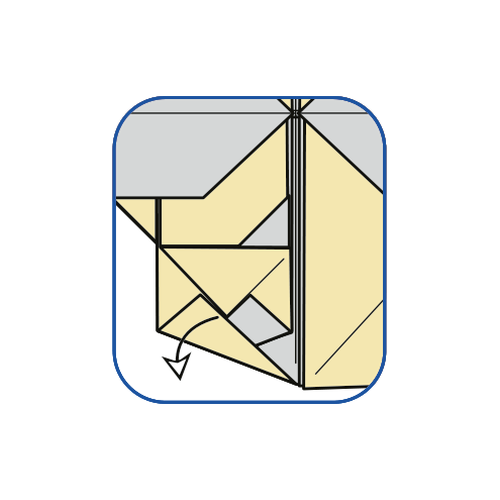
Unfold the fold from Step 27.
Step 29
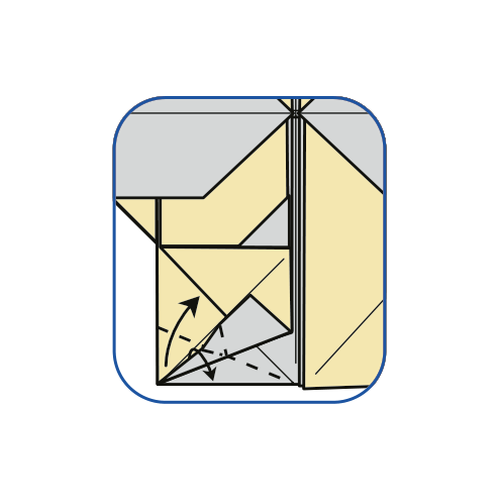
Refold Step 27, but make a small squash fold to bring the colored edge down.
Step 30
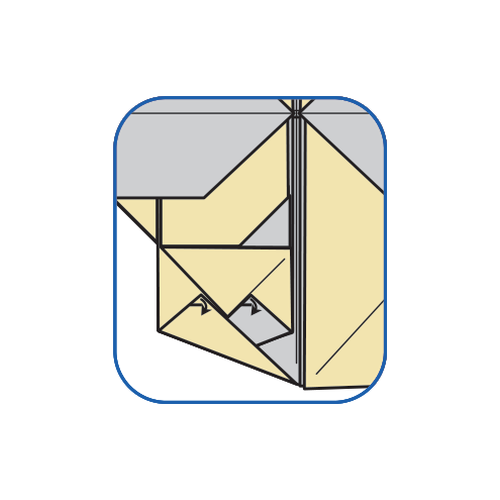
Fold the tips of the two corners down.
💀 Folding tip: If you’re using a small paper sheet, tweezers can make this step easier.
Step 31
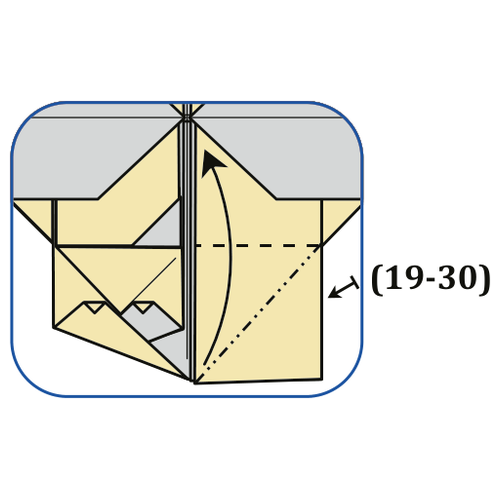
Repeat Steps 19 to 30 on the right side.
Step 32
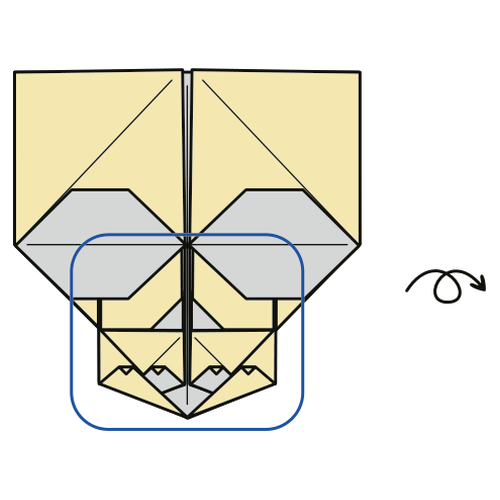
Turn the model over.
Step 33
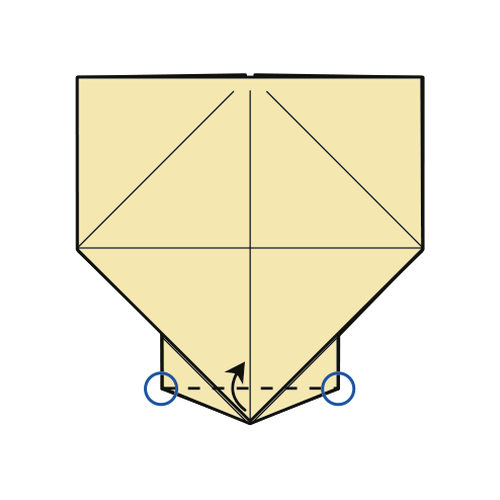
Fold the bottom corners up. The fold line runs between the two circled points.
Step 34
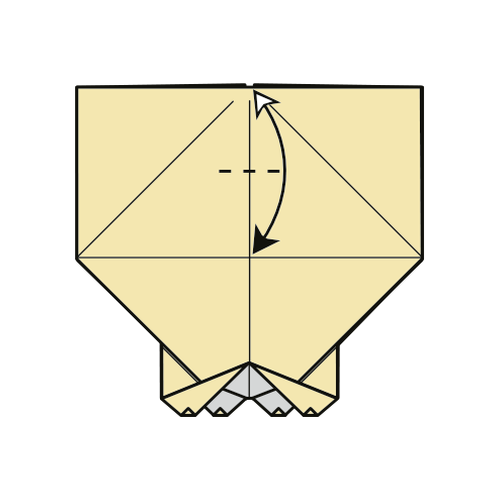
Fold the top edge down to the center of the square, pinching only at the vertical centerline, then unfold.
Step 35
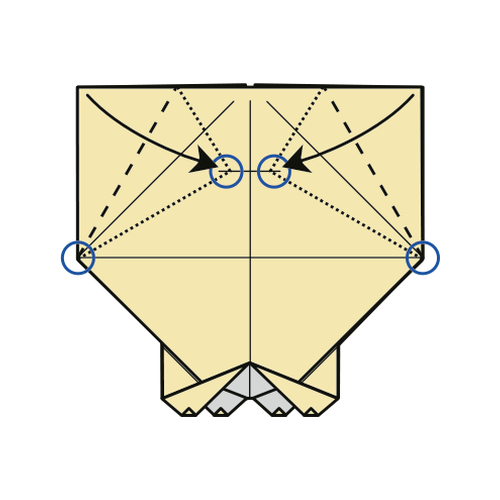
Fold the top left and right corners down to the pinch mark.
Step 36
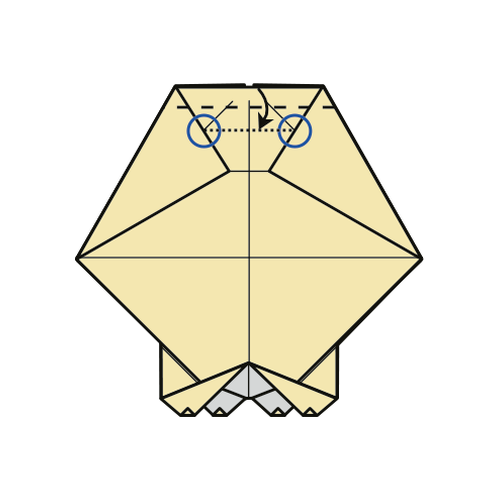
Fold the top edge down to the circled points.
Step 37
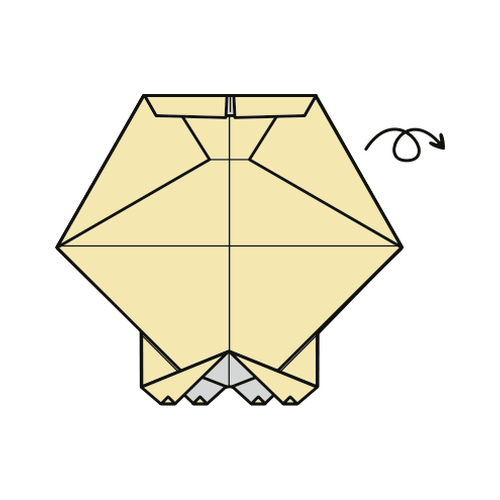
Turn the model over.
Step 38
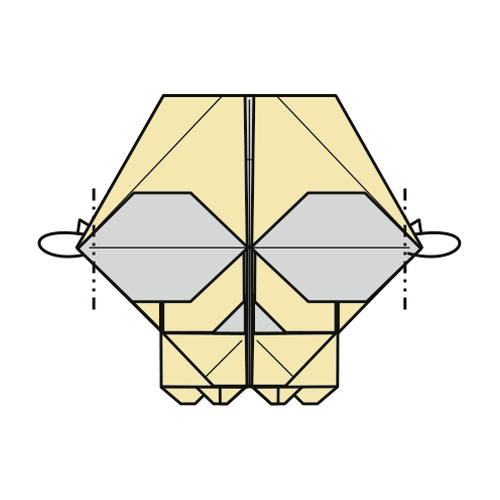
Mountain-fold a small strip on the left and right sides behind the model.
💀 Your Origami Skull Is Complete
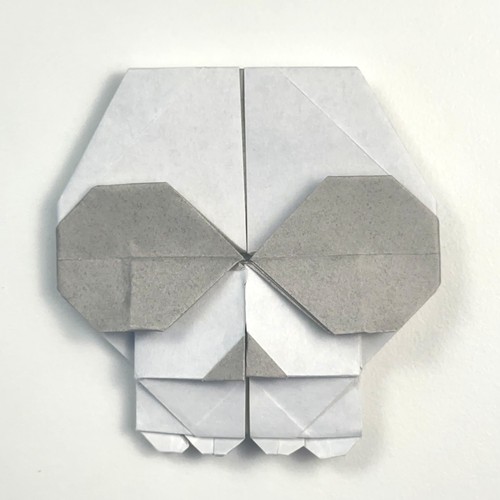
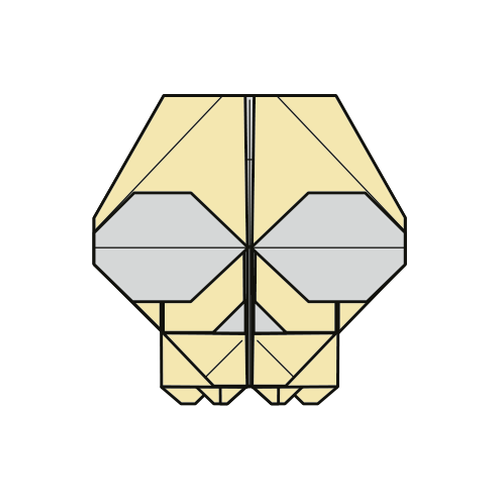
I hope you enjoyed folding this skull with me today!
Paper with a dark color on the back works best here, since the eye sockets and nose come from the colored side. White and black makes the face really stand out.
If you fold one, share a photo in the comments. I would love to see which paper you used.
Want to keep folding? Browse more Halloween origami, or try the easy origami skull if you haven’t folded it yet.
You can also get new tutorials and folding ideas in our newsletter, and if you like folding along with video, subscribe to our origami YouTube channel.
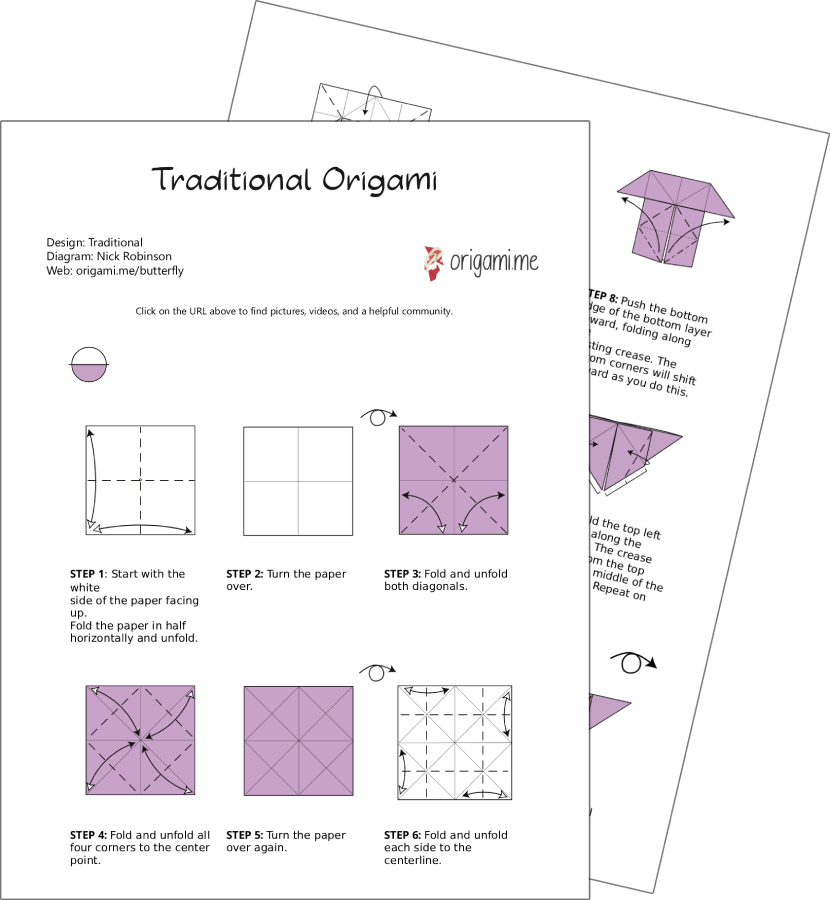
Download the Complete Origami Advanced Skull Printable PDF Instructions
This printable PDF is part of our Origami Friends membership on Patreon. As a member, you get access to these diagrams, our full library of 120+ printable PDFs, and member-only content.
🎓 Need printables licensed for classroom or group use? See the Origami Library for Educators →