How to Fold a Traditional Origami Swallow
This traditional origami swallow is a quick and satisfying model you can fold in under five minutes.
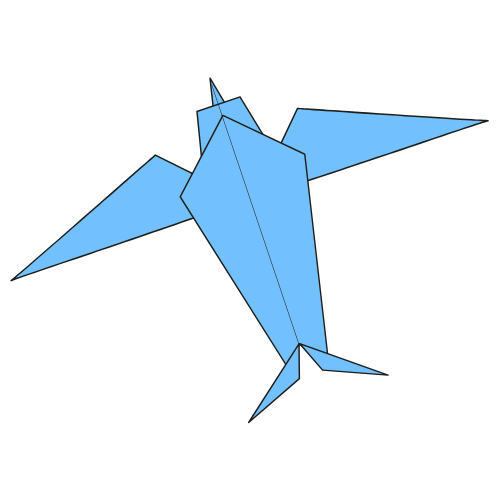
It starts from the familiar bird base, much like the classic crane, but takes a different turn at the end to create the long, tapered body and striking angular wings of a swallow.
The final shape has a clean, dynamic silhouette that looks like the bird is soaring straight across the sky.
One small note: the tail is split with scissors in the final step. If you prefer origami without cutting, you might want to check out another origami bird instead. Otherwise, this is a fun and satisfying fold with just the right amount of flair.
Traditional Origami Swallow Step-by-Step Instructions
- Difficulty: Easy – Beginner Level 3
- Folding time: 5-10 minutes
Recommended Paper
15×15 cm (6×6 in) Kami or Chiyogami
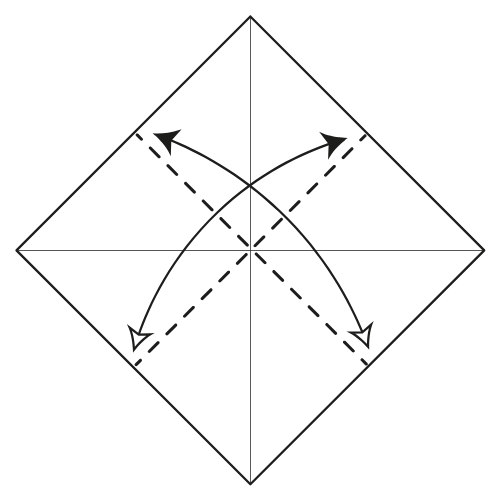
Step 1
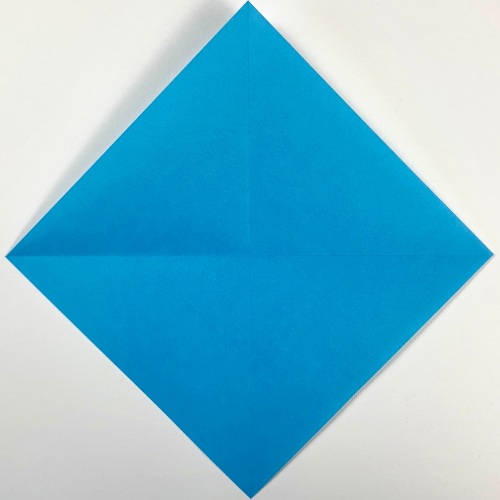

Start with the colored side facing up in a diamond position. Fold and unfold both diagonals.
Step 2


Turn the paper over.
Step 3
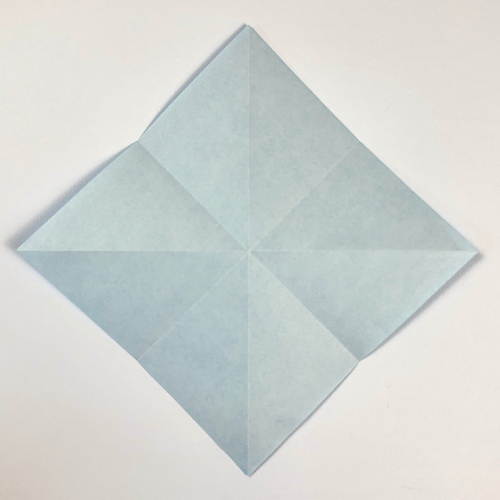
Fold and unfold in half both ways.
Step 4
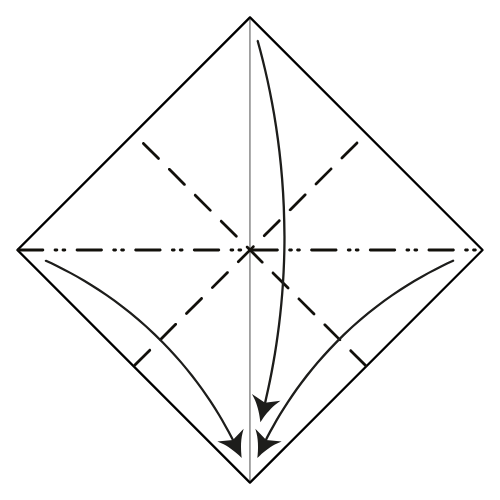
Collapse along the creases to form a Square Base.
Step 5

Fold the bottom left and right edges (top layer only) to the centerline.
Step 6
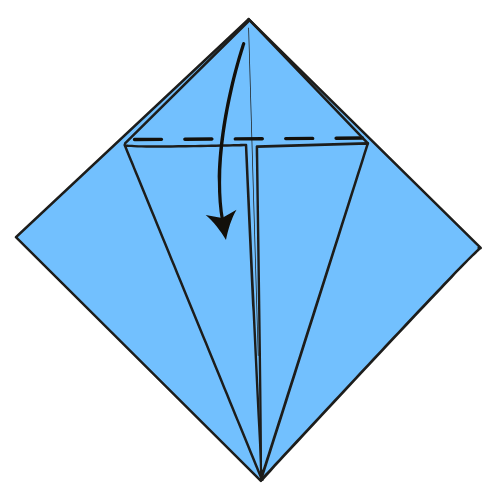
Fold the top corner down, using the top edges of the flaps as a guide.
Step 7

Unfold the flaps from Step 5.
Step 8

Petal fold by bringing the bottom corner of the top flap upward.
Step 9

Repeat Steps 5 to 8 on the other side.
Step 10
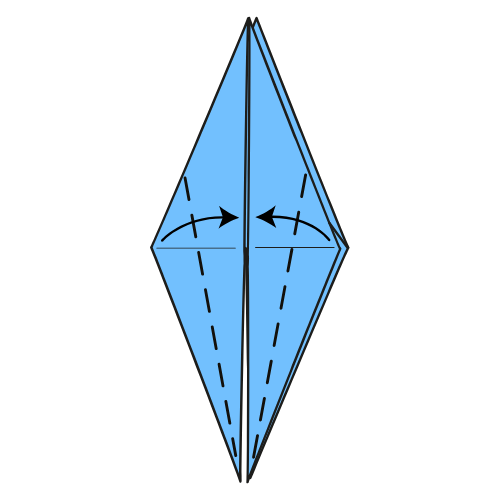
Fold the bottom left and right edges to the centerline.
Step 11
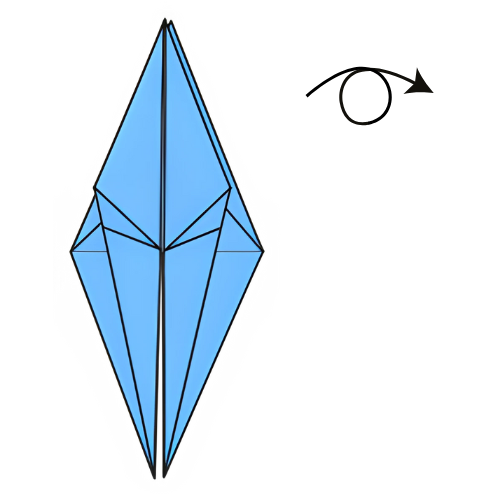
Turn the model over.
Step 12
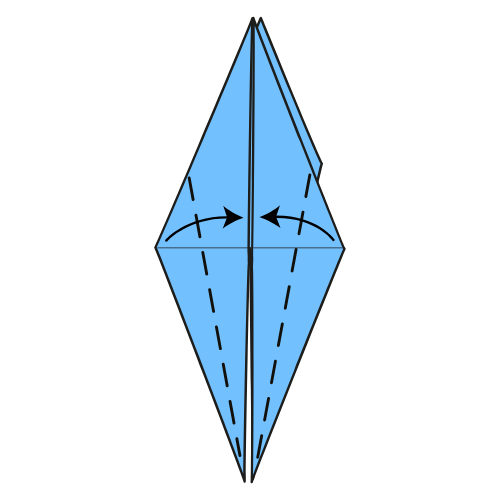
Fold the bottom left and right edges to the centerline again.
Step 13

Swing the top flap to the left. Fold along the dashed line where this flap intersects with the layer underneath. Crease well and unfold. Then, repeat on the right side.
🐦 Note: The paper won’t lie flat when you crease it.
Step 14

Fold the top and right flaps to the left in one movement using the creases from Step 13.
Step 15

Turn the model over.
Step 16

Repeat Step 13 on this side.
🐦 Folding tip: Now that you’ve got the motion down, try skipping the precrease and going straight into the fold for Step 17.
Step 17

Repeat Step 14 on this side.
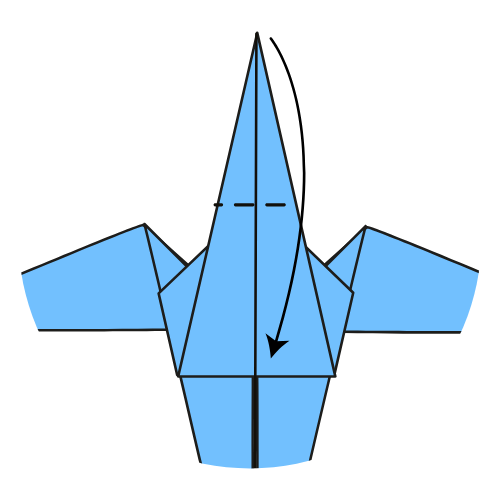
Step 18
Fold the bottom corner up (top flap only) along the existing crease.
🐦 Folding tip: From Steps 18 to 20, crease everything well so your swallow lies nice and flat. After Step 21, you can slightly fold the model in half to help it stay flat.
Step 19
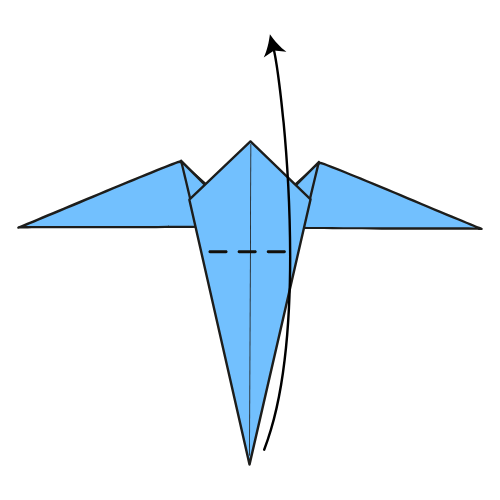
Fold the top corner down to meet the horizontal crease.
Step 20

Fold the top flap up along the dotted line to form the swallow’s beak.
🐦 Folding tip: There’s no reference point, just adjust it to your liking.
Step 21


Turn the model over.
Step 22

Cut the bottom corner in half along the centerline.
🐦 Folding tip: Gently open the layers at the back so you’re only cutting through the top layer.
Step 23

Fold the cut sections outward to form the swallow’s tail.
🐦 Your origami swallow is ready to take flight!
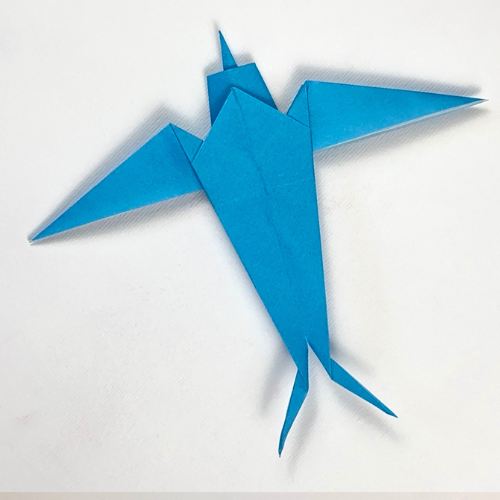
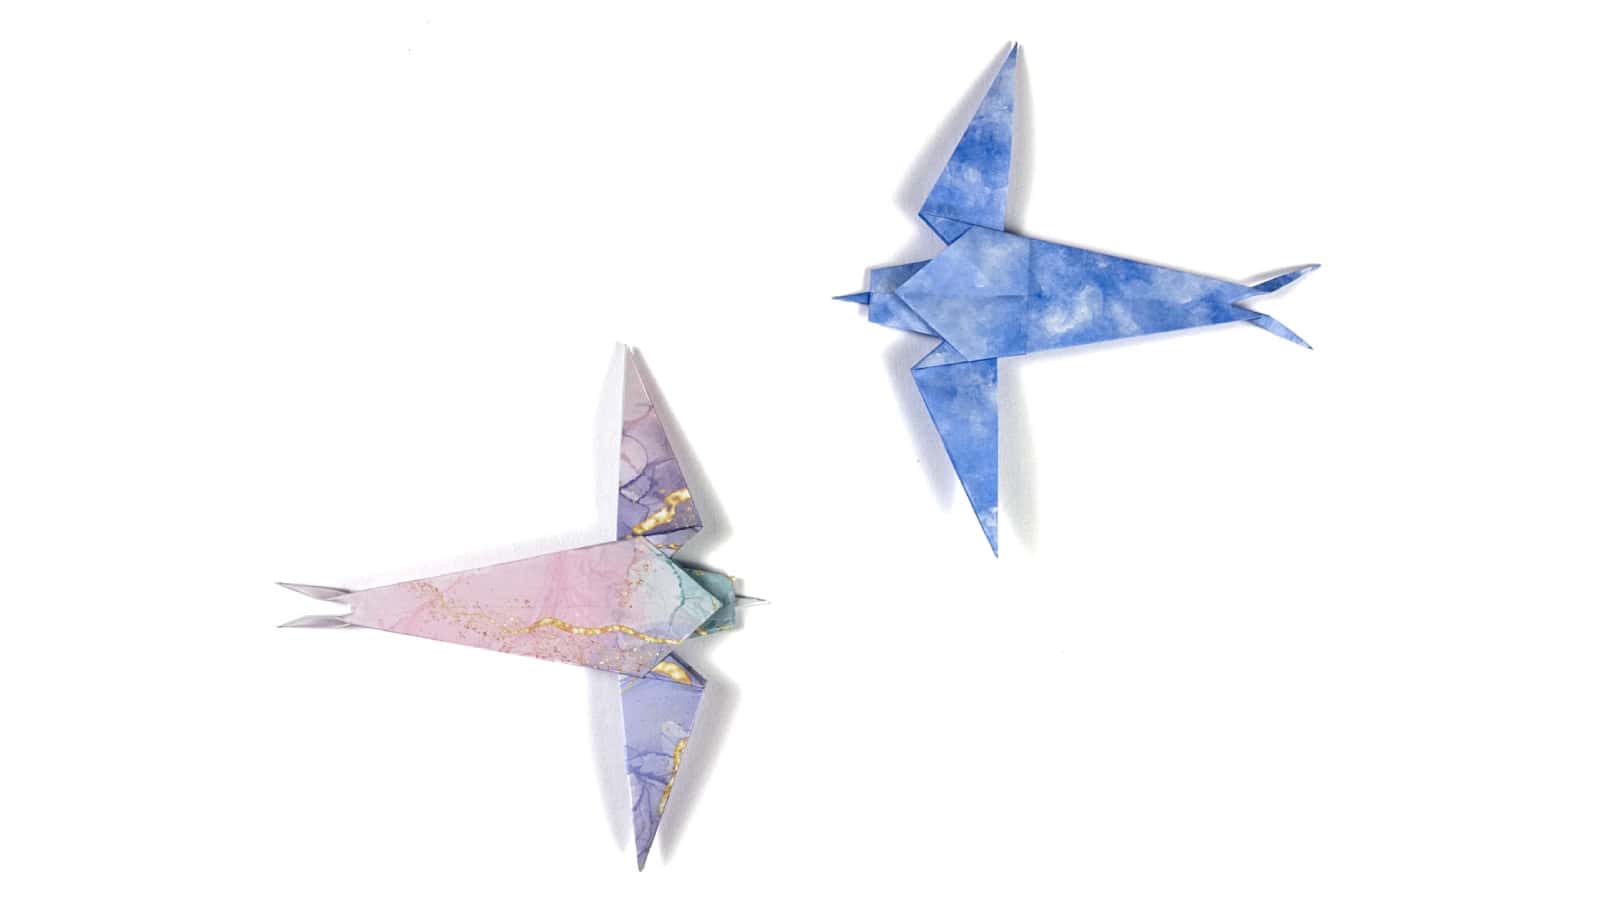
With its sharp lines and skyward shape, this origami swallow brings a nice sense of movement and grace to your paper collection.
Try it in cloudy blue, sunset pink, or marbled papers to match the sky it flies through. It’s also a lovely model to use for wall decorations, garlands, or greeting cards.
If you enjoyed this fold, be sure to subscribe to our YouTube channel for more tutorials and join our newsletter to get exclusive diagrams and folding ideas sent straight to your inbox. We’d love to have you in our growing community of folders.

Download the Full Origami Swallow Printable PDF
Instructions
We’d love to keep you in the loop, so by sharing your email with us, you’ll be signed up for our mailing list. Don’t worry; we won’t bombard you with spammy emails, and your information is safe with us – we won’t share it with anyone else.
Watch the Origami Swallow Video Tutorial
Enjoyed this tutorial?
Subscribe to our YouTube channel for new inspiring origami videos every week!