How to Fold an Origami T-Rex
Let’s learn how to fold an origami T-Rex designed by Adriano Mariani. While the model was originally created as a paper version of Rex from Toy Story, it also makes a fun and recognizable Tyrannosaurus with its big head, tiny arms, and long tail.
This is a great next step if you’re ready to move beyond very simple models. I’d call it a “challenging easy” fold. Most of the steps are straightforward, but you’ll get to practice crimp folds and a few techniques that will help you tackle more advanced designs later.
The finished dinosaur stands on its own and has a playful shape with a chunky body, short legs, and a wide jaw. It’s a fun project for dinosaur fans of all ages and can be folded in just a few minutes.
Origami T. Rex Step-by-Step Instructions
- Difficulty: Easy – Beginner level 5
- Folding time: 20 minutes
Recommended Paper
15 x 15 cm (6 x 6 in) Kami
Step 1

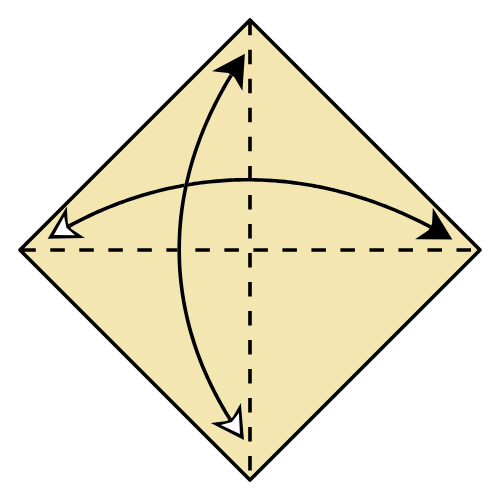
Start with the white side of the paper facing up in a diamond position. Fold and unfold both diagonals.
Step 2
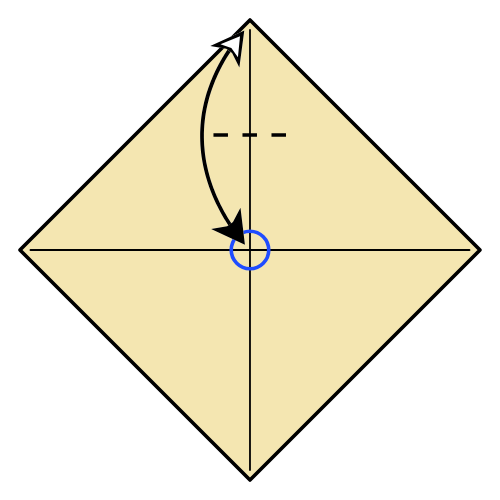
Fold the top corner down to the center point. Make a pinch at the center, then unfold.
Step 3
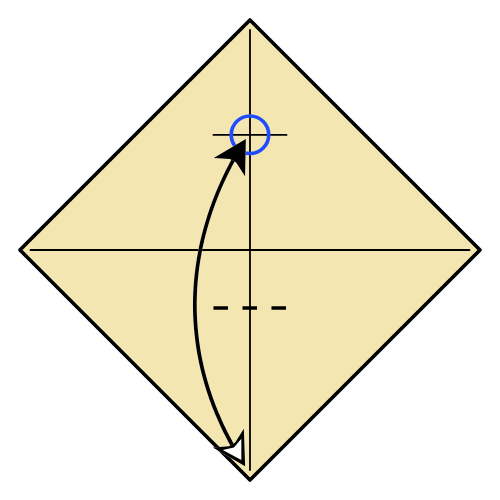
Fold the bottom corner up to the pinch mark you made in Step 2. Make a new pinch at the center, then unfold.
Step 4
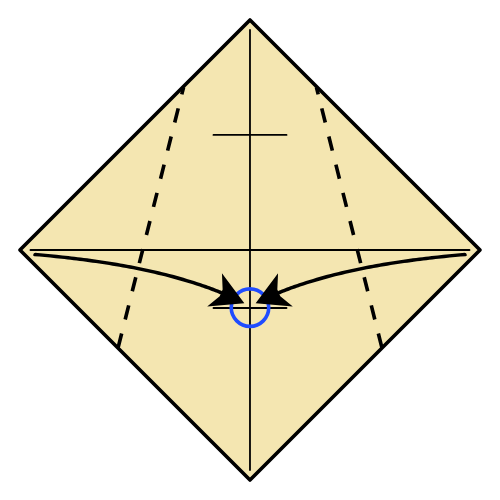
Fold the left and right corners to the pinch mark you made in Step 3.
Step 5
Fold and unfold the left and right edges to the nearest crease lines.
Step 6
Turn the paper over.
Step 7
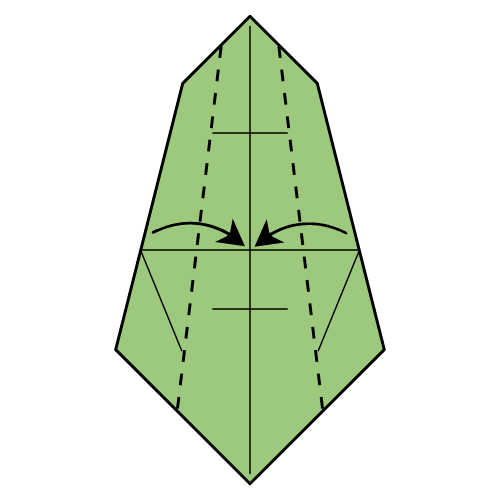
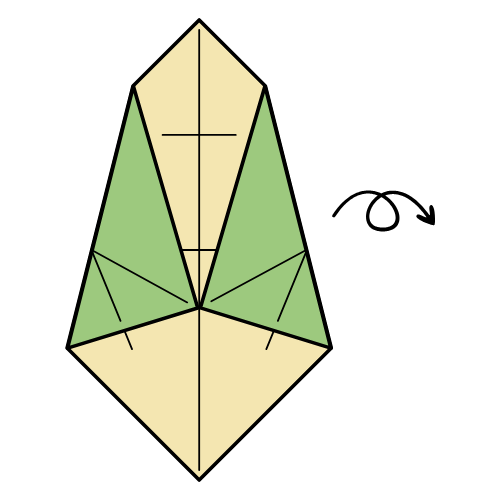
Fold the left and right edges to the vertical center crease. Let the flaps at the back shift to the front.
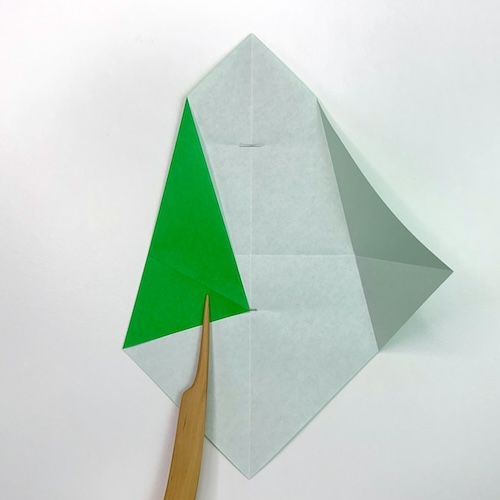
Step 8
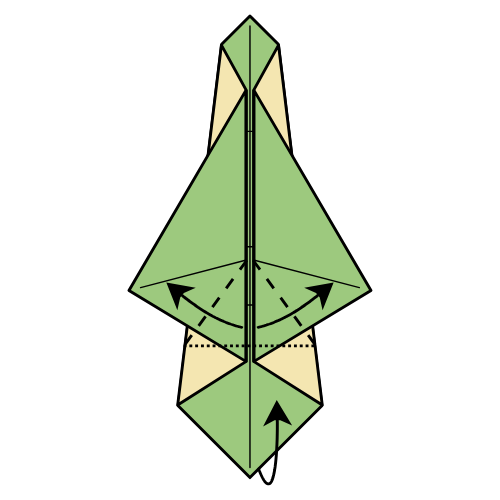
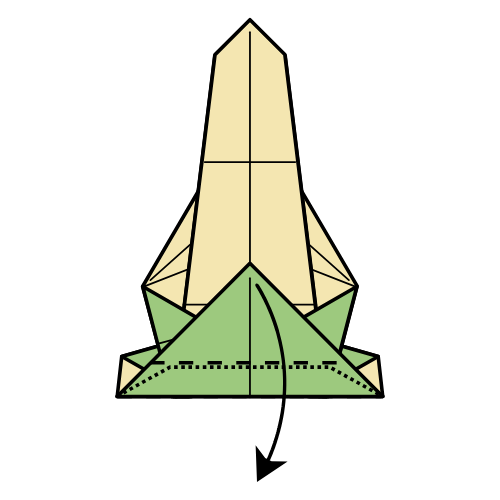
Fold along the existing creases and let the bottom corner come upward. The paper will not lie flat until after Step 9.
Step 9
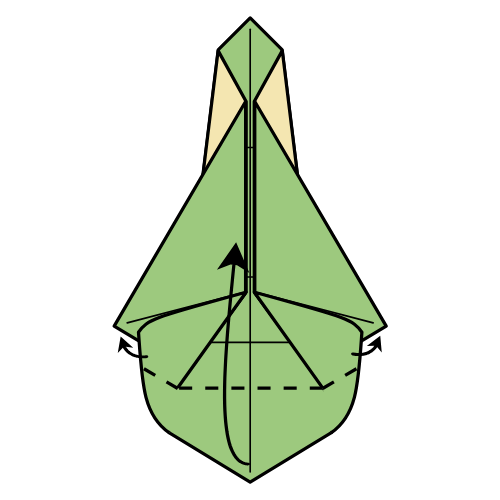
Flatten the bottom corner upward.
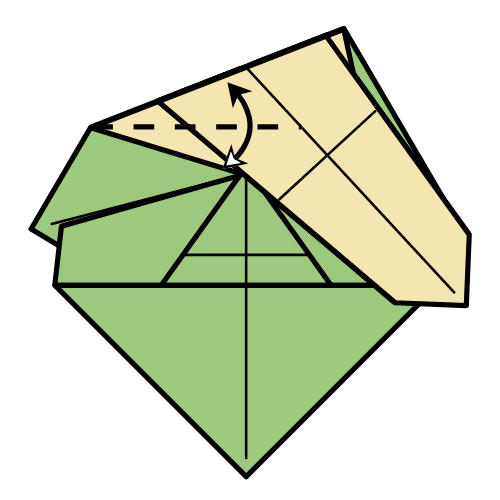
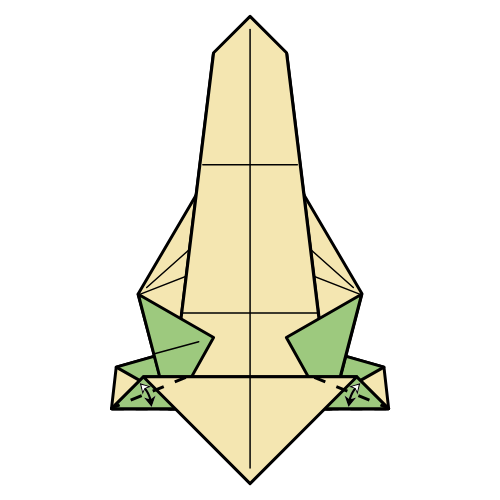
Step 10
Fold the top corner of the top flap down using the fold line between the circled points.
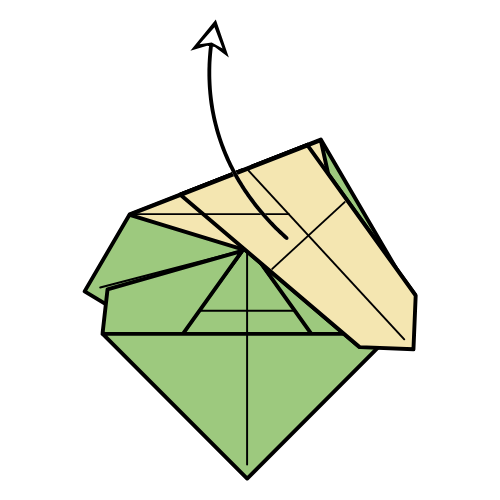
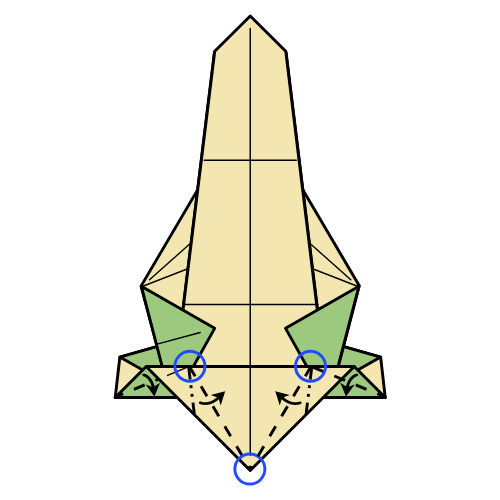
Step 11
Fold the upper circled point to the lower circled point. Only crease firmly where shown.
🦖 Folding Tip: We’ll use the pre-creases made in Steps 11 to 14 later when collapsing the origami t-rex in half. Make sure to crease firmly.
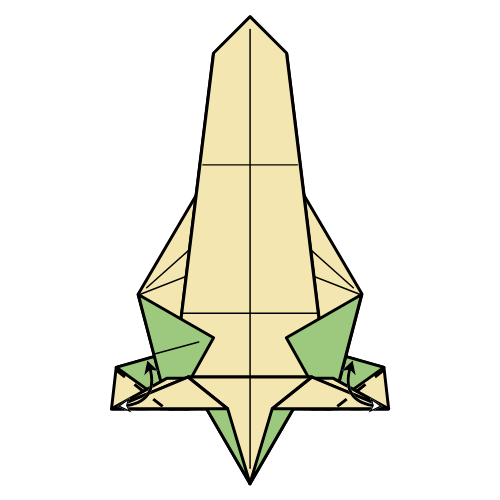
Step 12
Fold the bottom edge to the top edge, then unfold.
Step 13
Unfold Step 11.
Step 14
Repeat Steps 11 to 13 on the right side. Make sure the creases are symmetrical.
Step 15
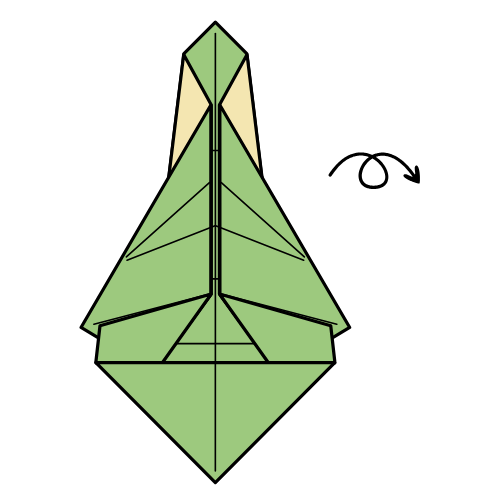
Turn the model over.
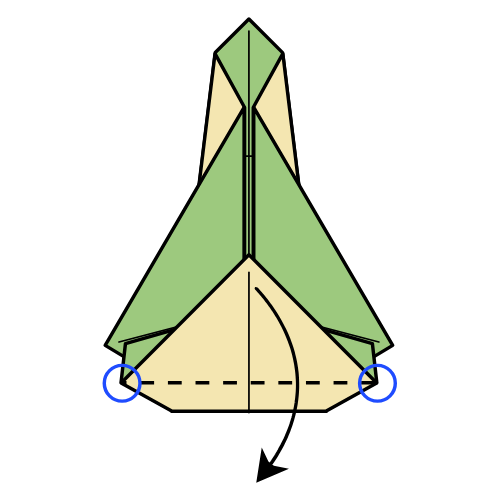
Step 16
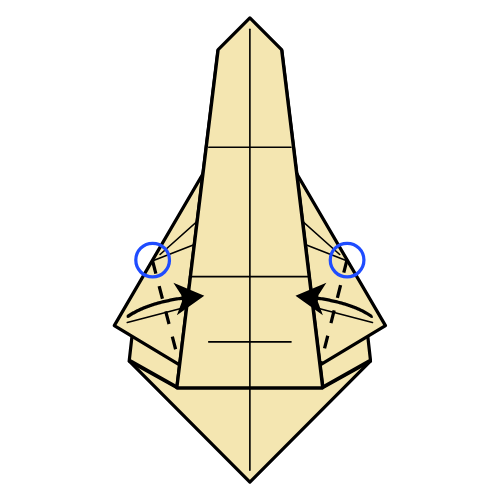
Fold the left and right corners inward using the circled points as references.
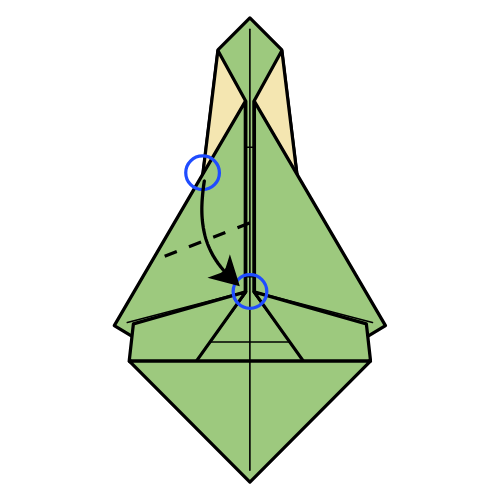
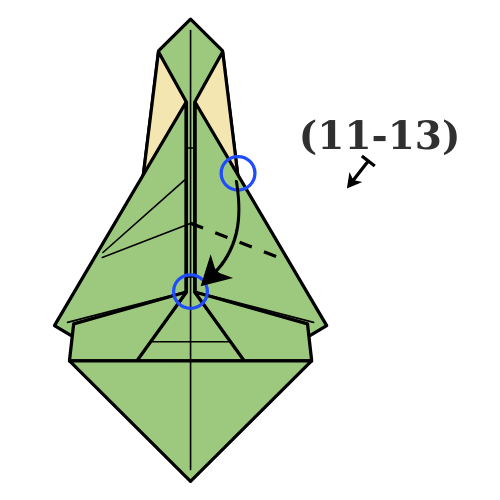
Step 17
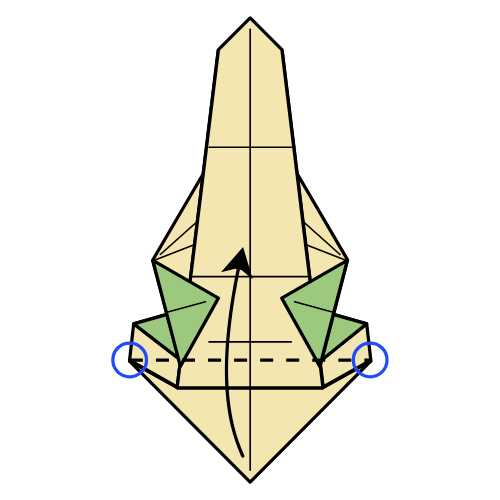
Fold both flaps upward together using a new valley fold line between the circled points.
Step 18
Fold the raw corner down using a valley fold line along the hidden edge directly behind it.
Step 19
On each side, fold the top edge to the bottom edge, then unfold.
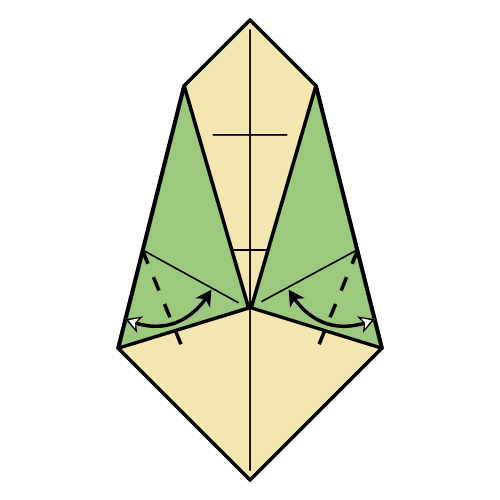
Step 20
Swivel fold the edges inward by making new valley fold lines between the circled points.
🦖 Folding Tip: This is the most delicate fold in the model. It is perfectly fine if it is not 100 percent accurate. Focus on the bottom corner, since it will remain visible in the finished model and become the t-rex tail.
Step 21
Fold the bottom left edge to the top edge, then unfold. Repeat on the right side.
Step 22
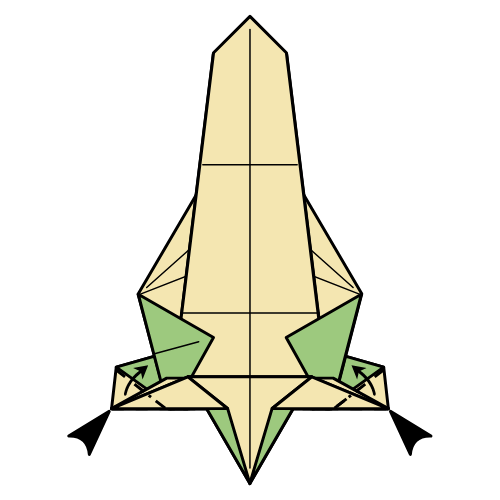
Inside reverse fold along the creases you just made.
Step 23
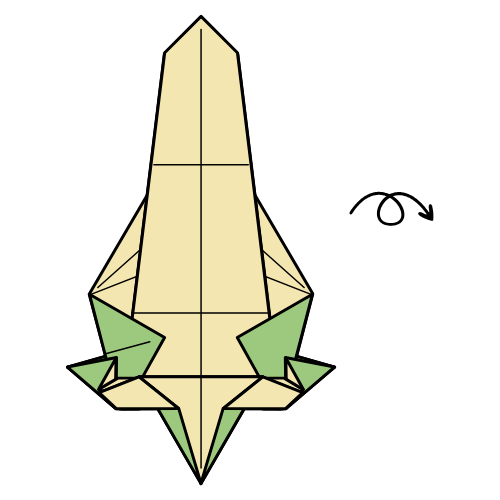
Turn the model over.
Step 24
Mountain fold the top corner behind using the circled point as a reference.
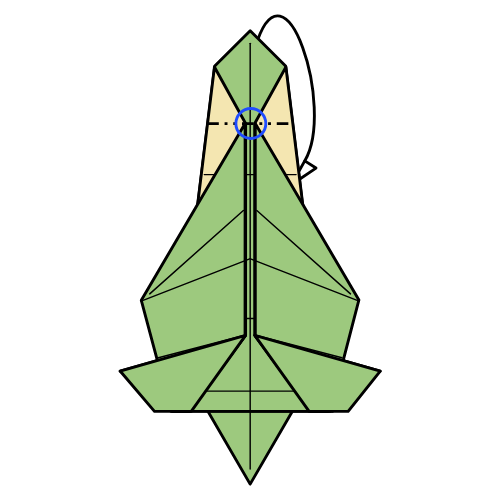
Step 25
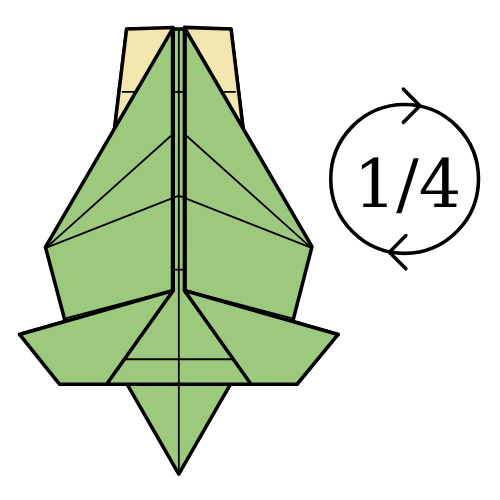
Rotate the model one quarter turn clockwise.
Step 26
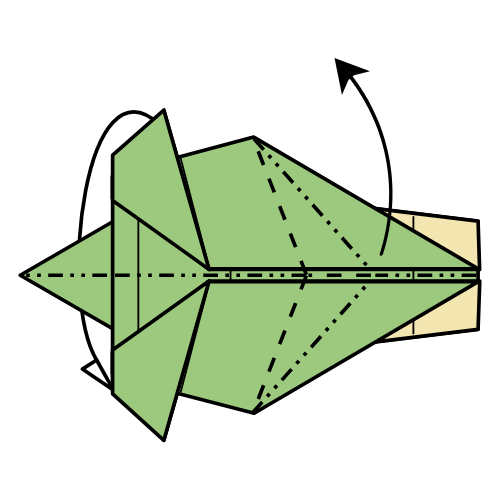
Fold the top half behind the right half and begin collapsing the right section using the existing creases. Then, flatten the paper.
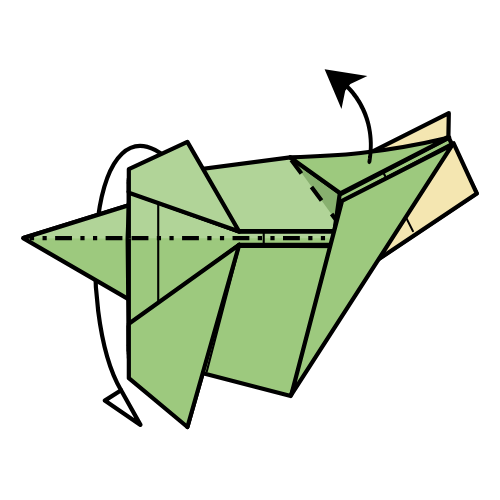
Step 27
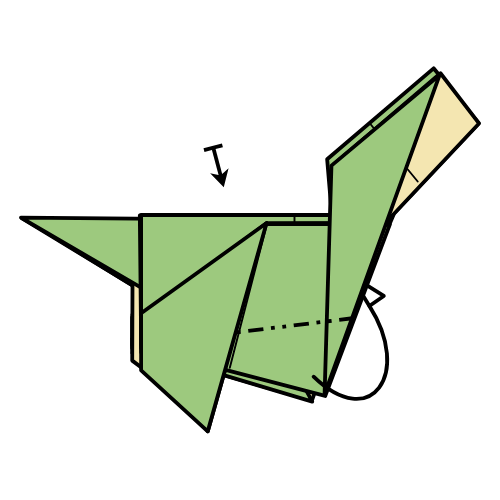
Mountain fold along the edge underneath. You can feel where the paper becomes thicker. Repeat on the other side.
Step 28
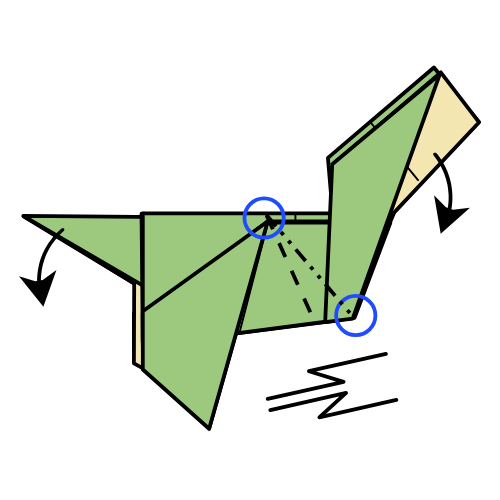
Crimp the paper using a mountain fold line that connects the circled points.
🦖 Folding Tip: Start by folding the two mountain fold lines on each side of the model. Then hold the model where the mountain folds join with your left hand and pinch the head section with your right hand. Pivot the front section downward and flatten it when you are happy with the shape. If this step feels tricky, don’t worry. I show how to do it in the video step.
Step 29
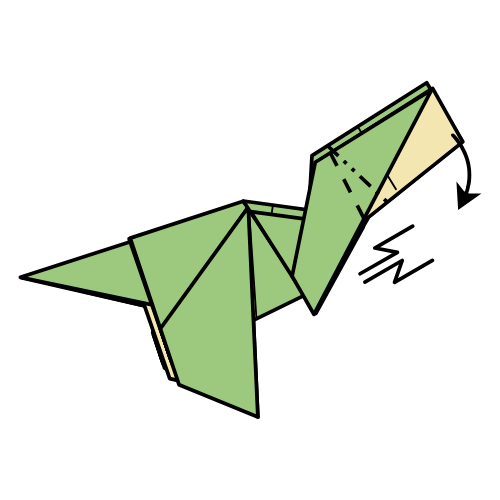
Make another crimp fold at the head level. There are no exact references, so adjust it until it looks right.
🦖 Folding Tip: Here, I’m pre-creasing the valley folds on each side to make the crimp easier. If this step feels tricky, I also show how I do it in the video step.
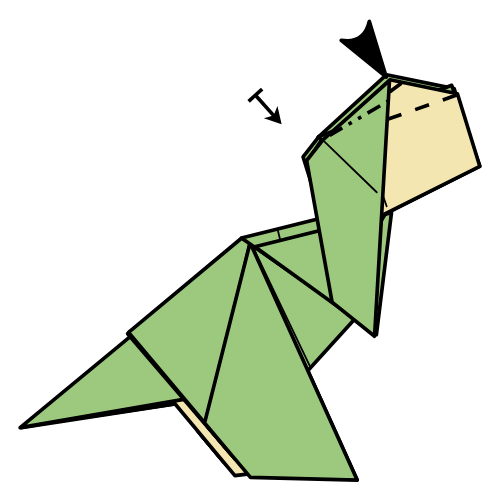
Step 30
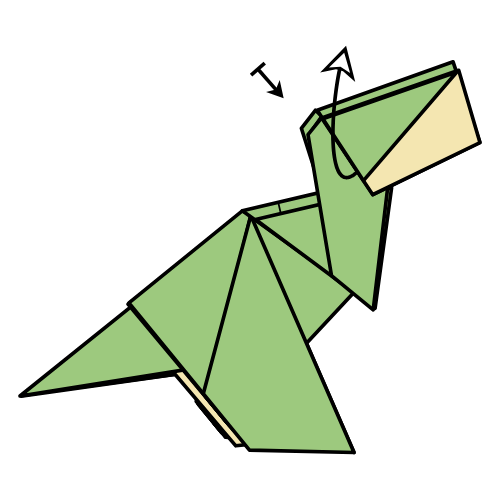
Carefully unfold the tucked flap by pulling it upward on each side of the head.
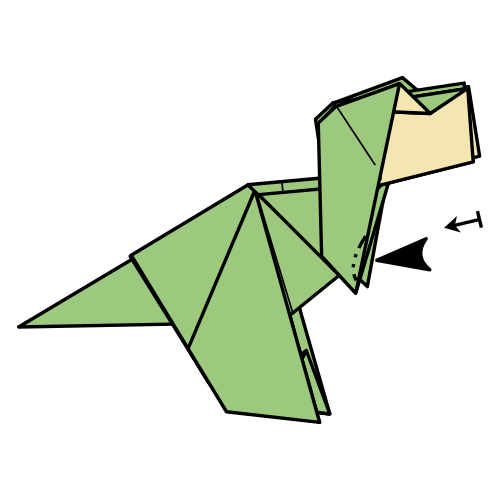
Step 31
Reverse fold the corner downward to create an eye that sticks up slightly above the top of the head. There are no exact references, so use the next diagram as a guide. Then, repeat on the other side.
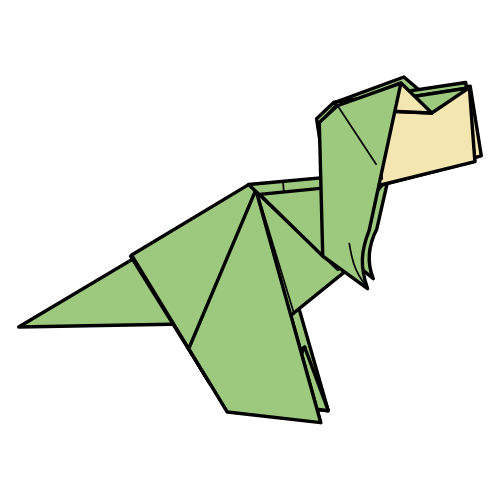
Step 32
Pinch the arm to make it slightly thinner. Repeat on the other side.
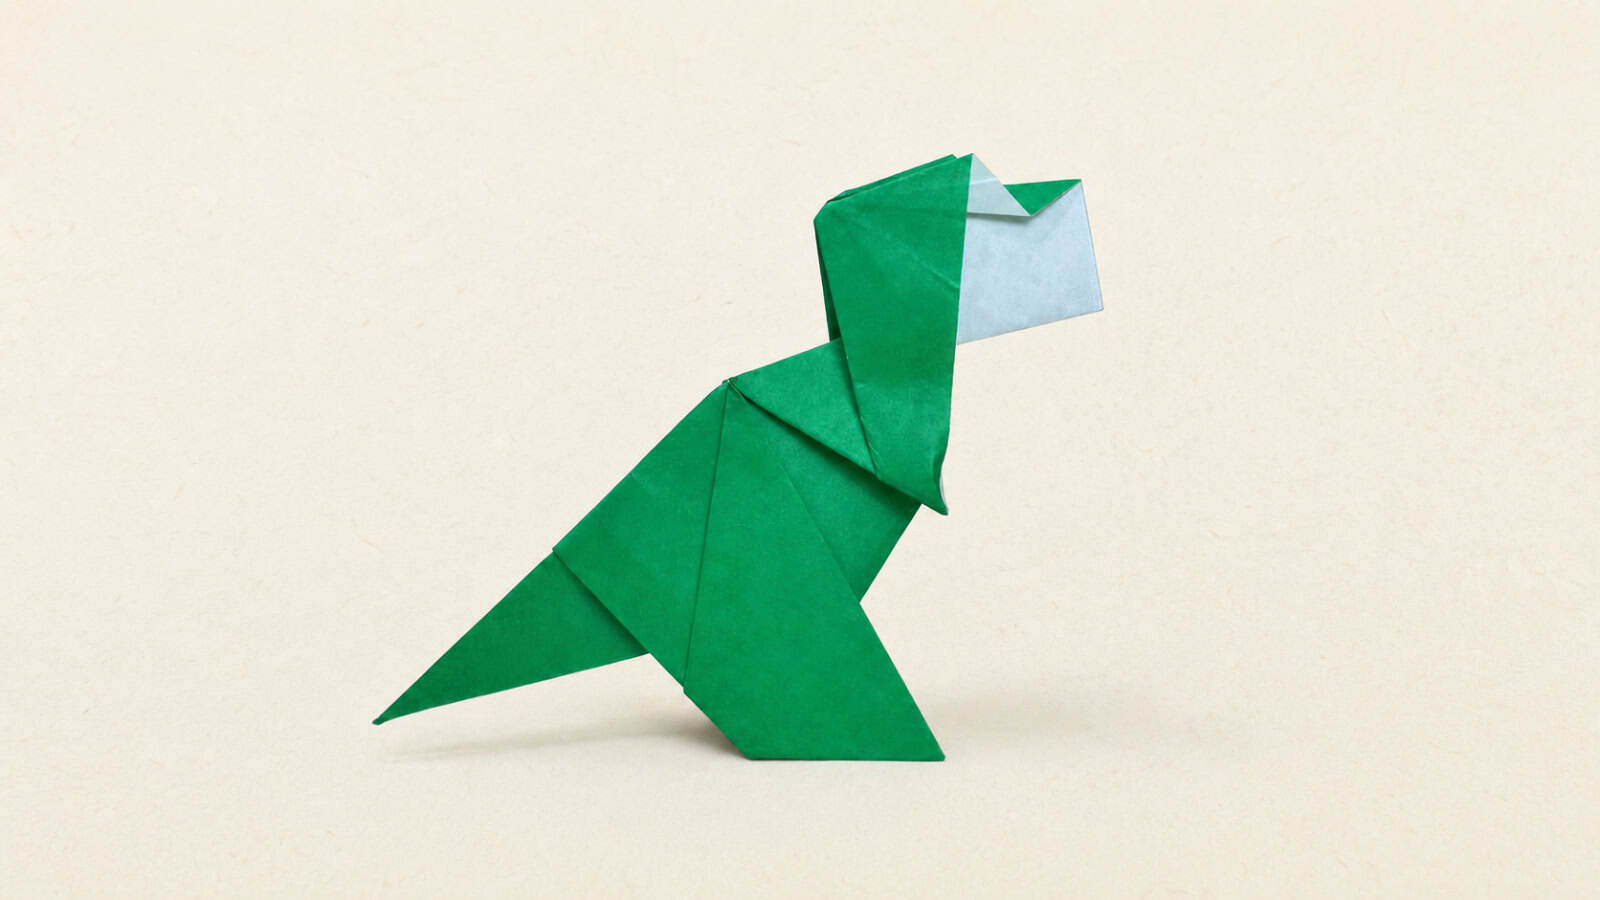
The Completed Origami T-Rex 🦖
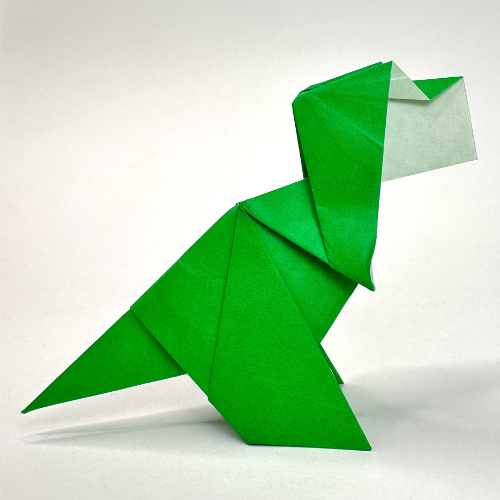
I hope you enjoyed folding this origami T. rex. It’s a great model to build your skills while ending up with a fun dinosaur you can proudly display.
If some of the crimp folds feel tricky the first time, don’t worry. Fold the model again, and you’ll quickly see how everything starts to make sense.
If you fold one, feel free to share a photo in the comments. I’d love to see your paper dinosaurs and the colors you choose.
If you’d like to keep folding, you can explore more easy origami tutorials or browse our collection of origami dinosaurs.
You can also get new tutorials and folding ideas in our newsletter here. And if you’d like to fold along with videos, you can subscribe to our origami YouTube channel.