
How to Make an Origami Mouse
Let’s learn how to fold a cute origami mouse designed by Mister Paperfold (Sébastien Limet). It’s a small model with a lot of character and a nice balance between structure and shaping.
The finished mouse has a compact body, a pointed snout, and a long tail that can be curved or left straight. The ears and head can be adjusted to change the posture, which gives the model a surprising range of expressions.
As you can see, the same base can lead to very different results depending on how much shaping you add, from a clean, geometric form to a more realistic mouse with a slightly rounded body, a lowered head, and a gently curved tail.
This model is suitable for beginners with a bit of experience. The folds themselves are not too complex, but it’s a great opportunity to practice crimp folds and especially shaping.
Take your time with the last steps and try a few variations. You can keep it simple and geometric, or push the shaping further to create a more lifelike mouse.
Origami Mouse Step-by-Step Instructions
- Difficulty: Easy – Beginner level 5
- Folding time: 10-15 minutes
Recommended Paper
15×15 cm (6×6 in) Kami.
Sébastien used Shadow Thai paper to fold the mice you can see in the featured image.
Step 1
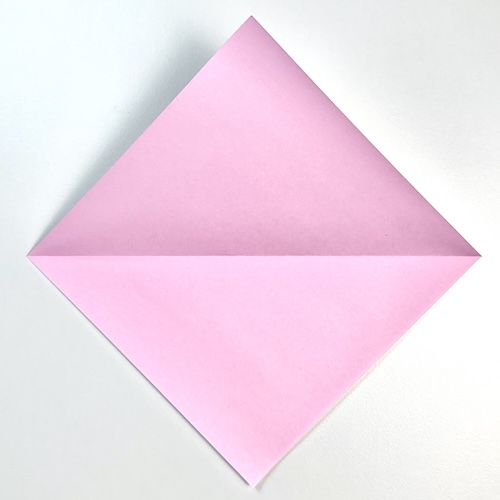
Start with the colored side facing up in a diamond position. Fold along the horizontal diagonal, then unfold.
🐭 Folding tip: The color facing you will show on the mouse’s tail and ears.
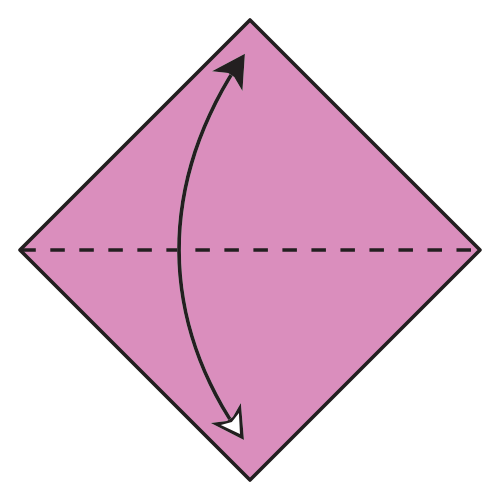
Step 2
Fold along the vertical diagonal, but only make a small pinch at the center. Then unfold.
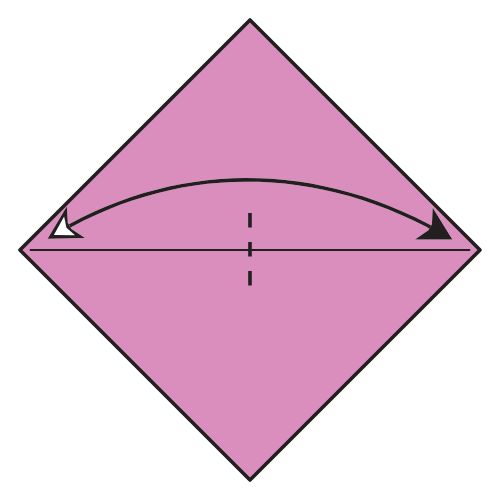
Step 3
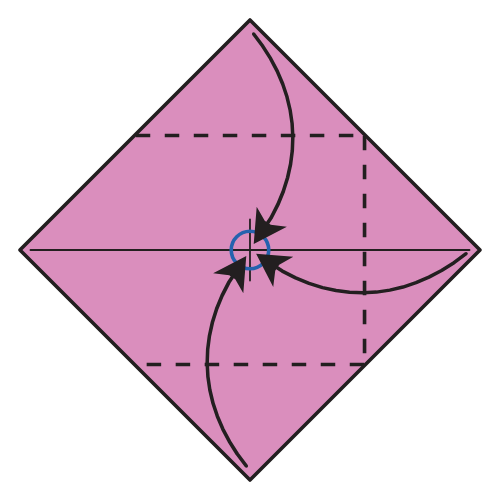
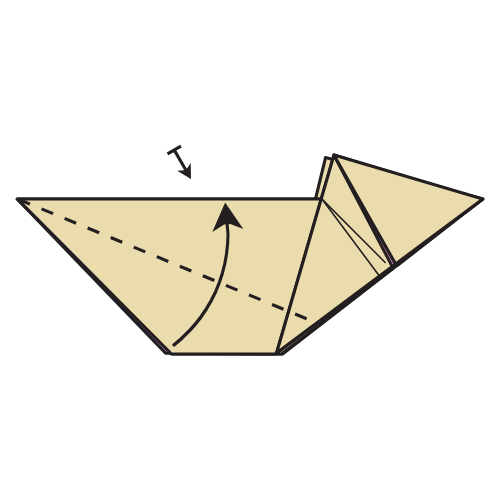
Fold the top, right, and bottom corners to the center point marked by your pinch from Step 2.
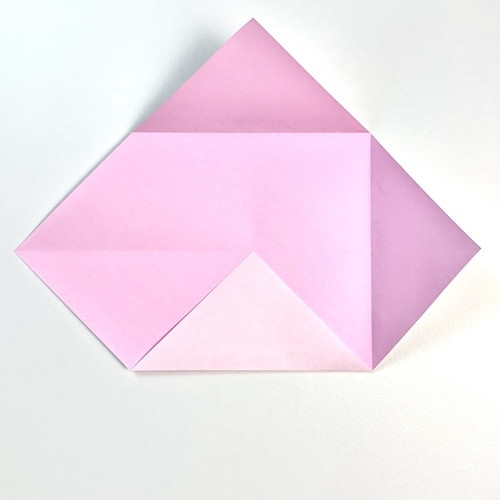
Step 4

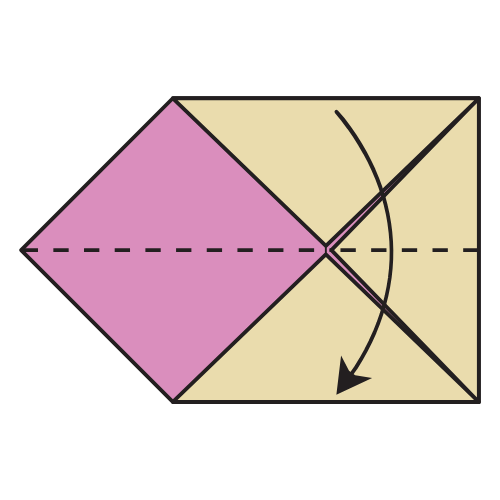
Fold the model in half from top to bottom.
Step 5
Fold the bottom right corner of the top flap upward along the dashed line. This does not need to be exact.
Step 6
Fold the remaining corner up behind the model to match the fold from Step 5.
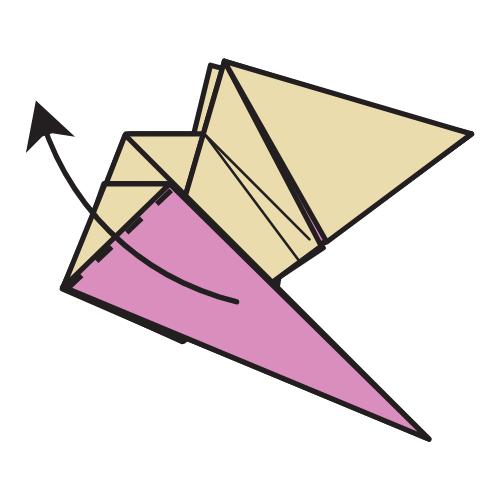
Step 7
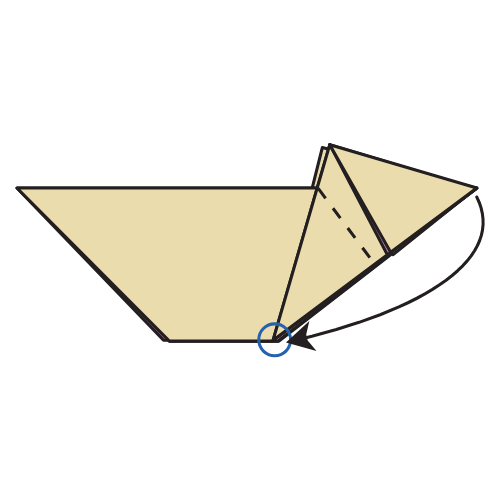
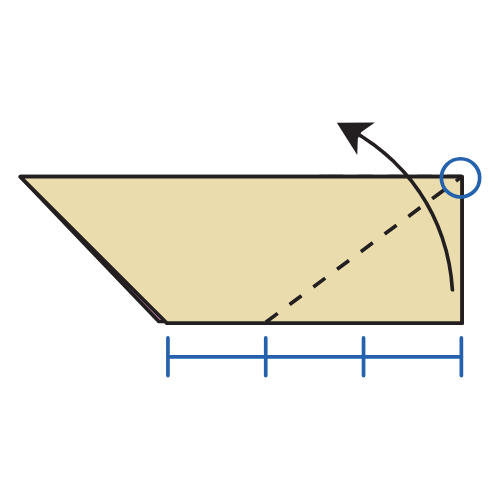
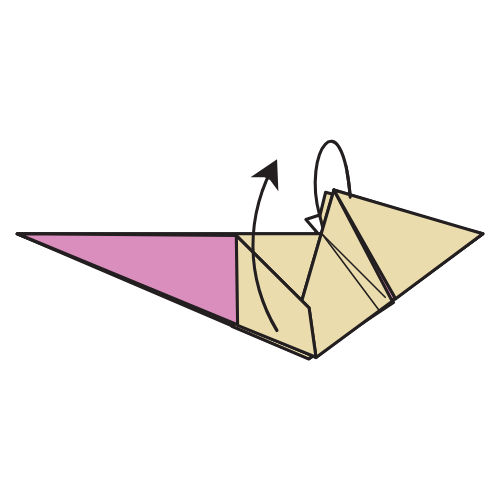
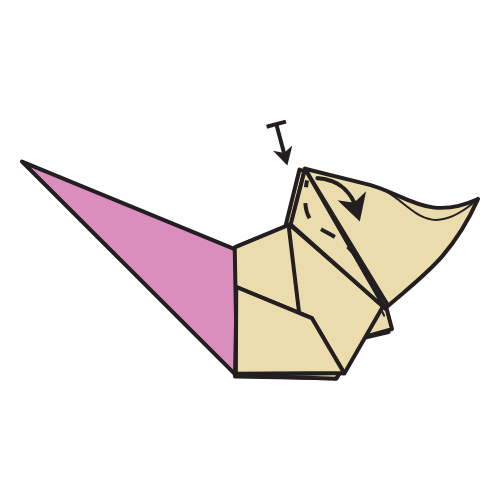
Fold the right corner to the circle point. Crease well.
Step 8
Fold the flap you just made to the right using a crease line that connects the circle points. Crease well.
🐭 Folding tip: This step needs precision. Folding mid air can make it easier. This is a pre-crease.
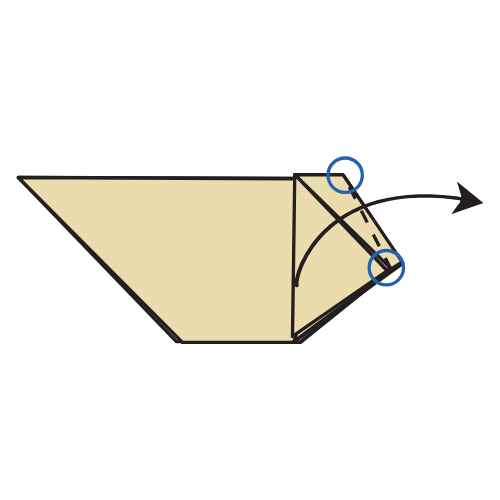
Step 9
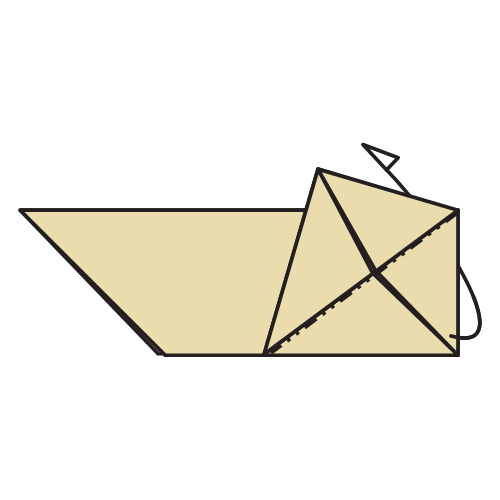
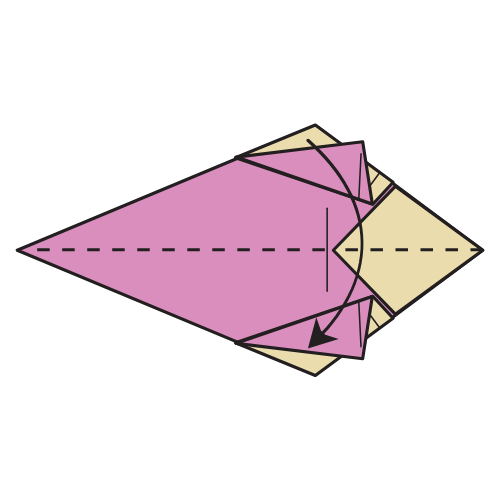
Unfold Steps 7 and 8.
Step 10
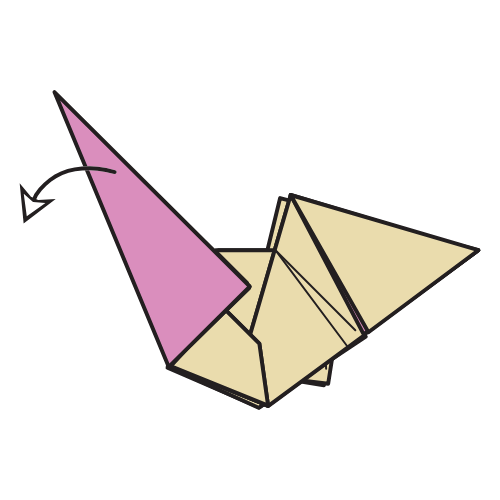
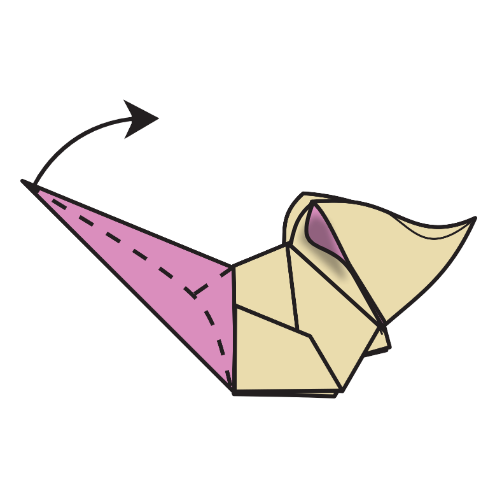
Fold the left edge of the top flap to meet the top edge. Repeat on the other side.
Step 11
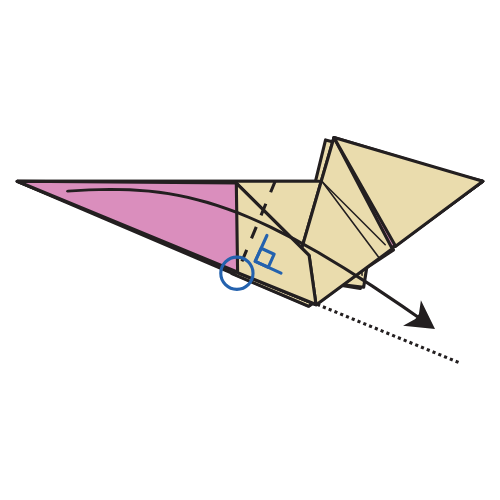
Open the model from bottom to top. Tuck one ear under the other to avoid creating a new crease.
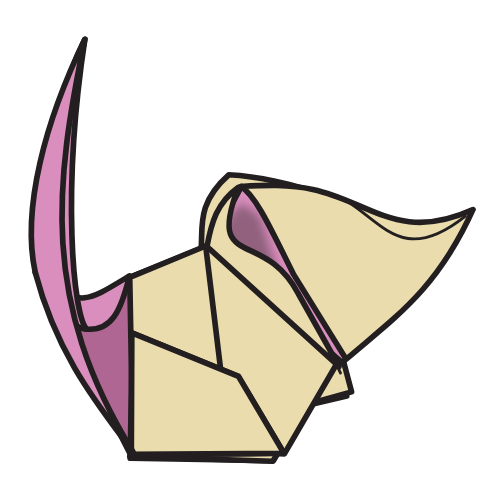
Step 12

Fold the corners of the two top layers outward so they stick out past the edges, one folding up and the other folding down.
🐭 Folding tip: These will be the mouse’s front legs. Adjust the angle for shorter or longer legs.
Step 13
Fold the model in half from top to bottom, undoing Step 11.
Step 14
Fold the tail to the right so the bottom edges line up. Crease well.
Step 15
Fold the tail upward along a new crease where the paper changes color. Crease well.
Step 16

Unfold Steps 14 and 15.
Step 17
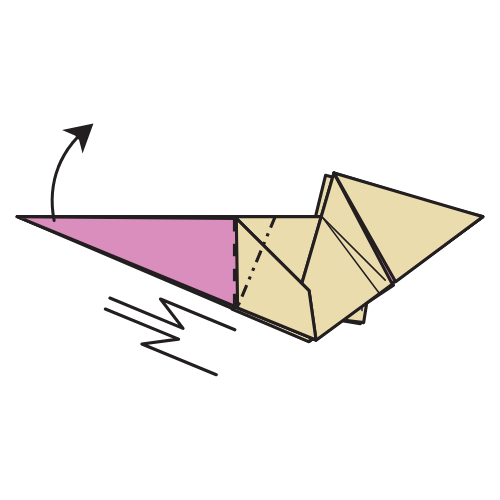
Crimp the tail using the creases from Steps 14 and 15.
🐭 Folding tip: Gently open the layers, then reverse fold the tail in and out to make this easier.
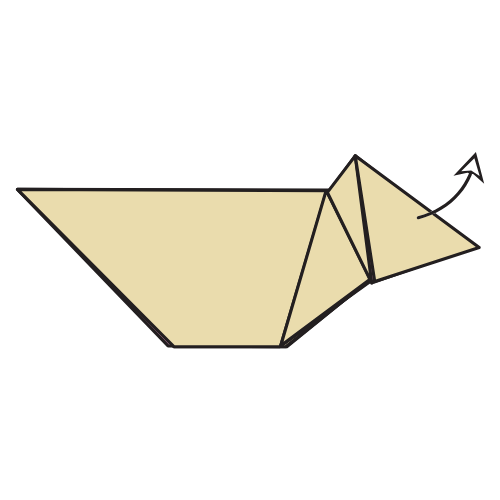
Step 18
Crimp the head downward using the existing creases.
🐭 Folding tip: You can stop here for a geometric look, or keep shaping for a more realistic mouse.
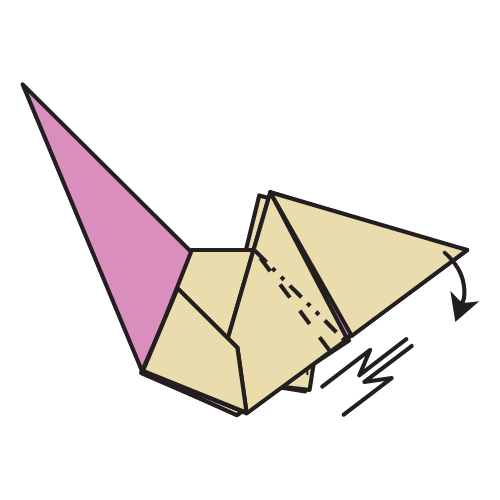
Step 19

Pinch the nose upward by flattening and slightly curling the paper.
🐭 Folding tip: Slightly separate the layers as you pinch to keep both sides symmetrical. Take your time.
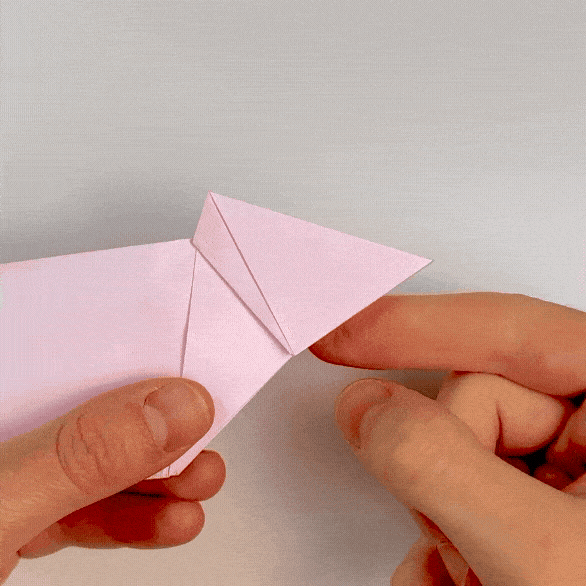
Step 20
Open and shape one ear to your liking, then repeat on the other side.
Step 21
Curl the tail using a rabbit ear fold. Start by folding the tip of the tail in half, then curl it as desired.
🐭 Folding tip: Check the next diagram for guidance on the final shape. You can also watch the video above for extra help.
The Completed Origami Mouse

🐭 Folding tip: You can shape it further by pinching the front legs and gently rounding the body and ears.
I hope you enjoyed folding this origami mouse. It’s a small model, but shaping really makes a difference and gives each mouse its own personality.
If you fold one, feel free to share a photo in the comments. It’s always interesting to see how different people interpret the same model.
If you’d like to keep folding, you can explore more easy origami tutorials or browse other origami animals on the site.
You can also get new tutorials and folding ideas in our newsletter here. And if you prefer video instructions, you can follow along on our YouTube channel.


Genial