How to Fold an Origami Bellflower
Let’s learn how to fold a traditional origami bellflower, an elegant model with long-pointed petals and a gently curved stem.
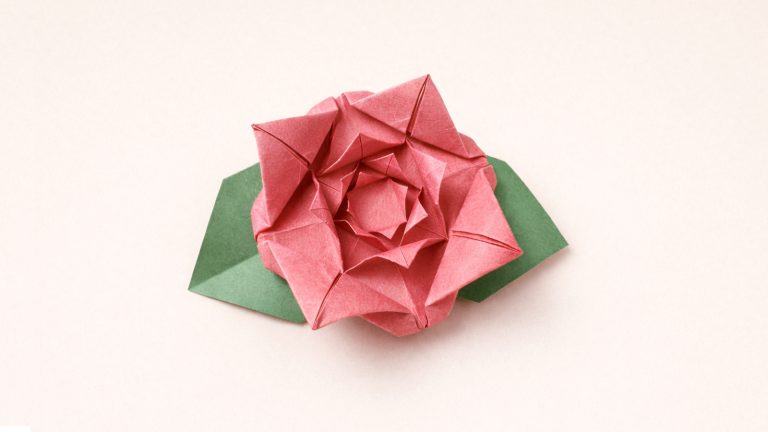
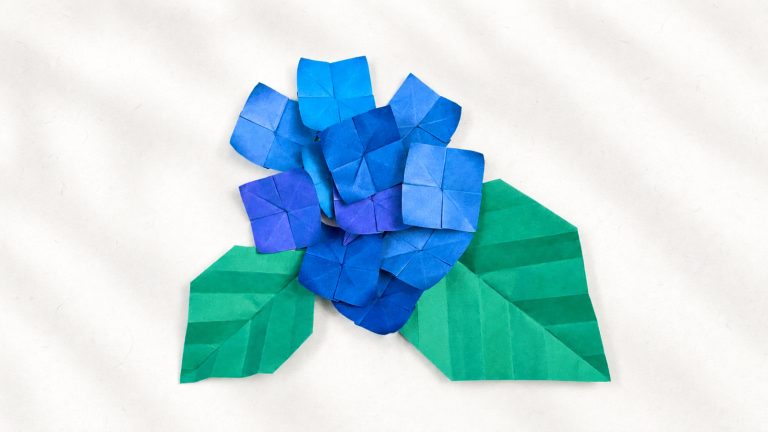
The finished flower has a distinctive drooping shape, with its petals opening outward like a hanging blossom. The pointed edges and soft curves give it a delicate, decorative look that stands out nicely among traditional origami flowers.
This model is relatively easy, though it’s best suited for beginners who already have a little folding experience. The petal folds can be a bit tricky at first, but they’re also a great way to practice them as they appear in many floral models.
One of the most satisfying parts of this design comes near the end, when the model is opened and collapsed into its final form. It’s an enjoyable sequence that gives the flower much of its final character.
Origami Bellflower Step-by-Step Instructions
- Difficulty: Easy – Beginner level 4
- Folding time: 15 minutes
Recommended Paper
Use 15 x 15 cm (6 x 6 in) Kami paper to fold a bellflower about 2 inches (5 cm) tall.
If you’d like to create several smaller flowers for a stem or arrangement, use smaller squares.
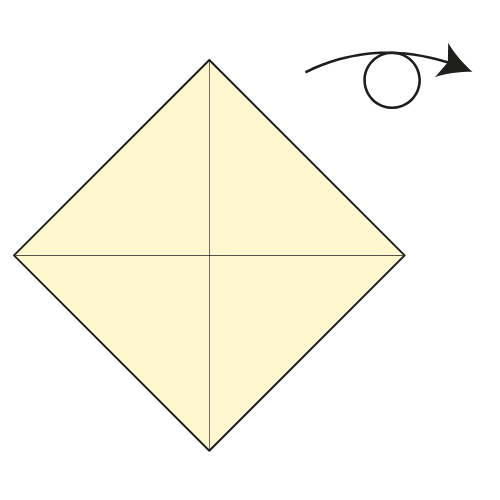
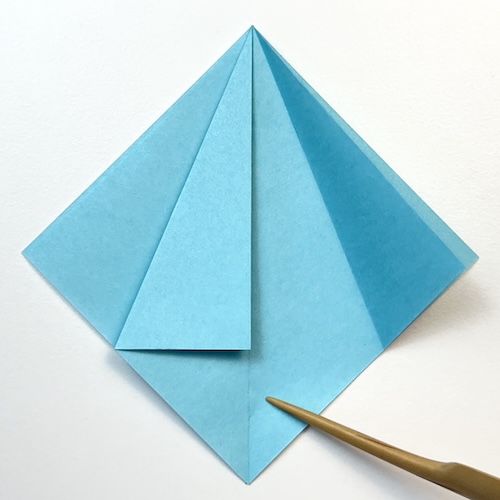
Step 1
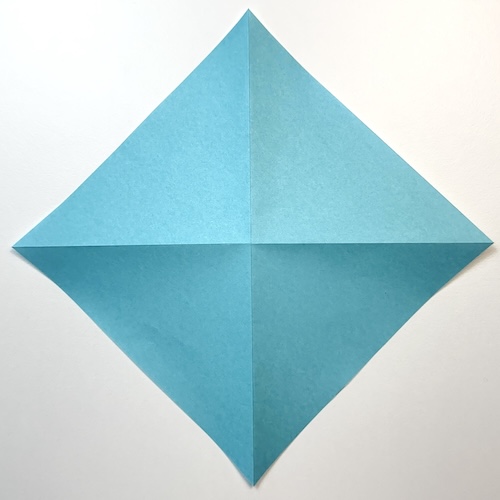
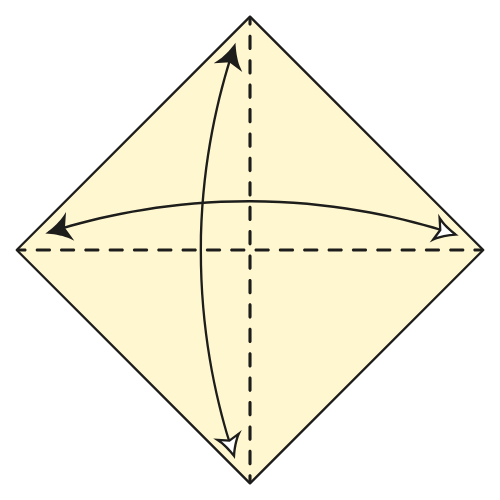
Start with the colored side facing up in a diamond position. Fold the paper in half horizontally, then unfold. Repeat vertically and unfold.
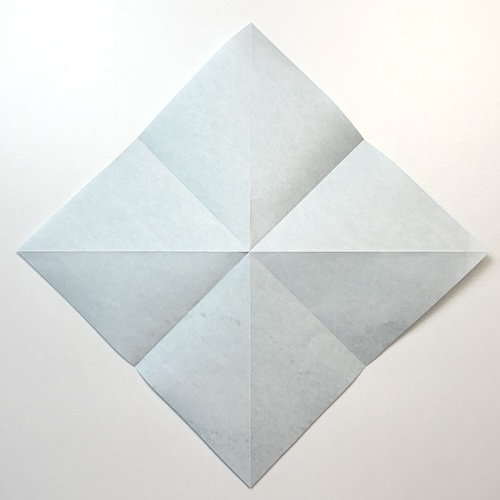
Step 2

Turn the paper over.
Step 3
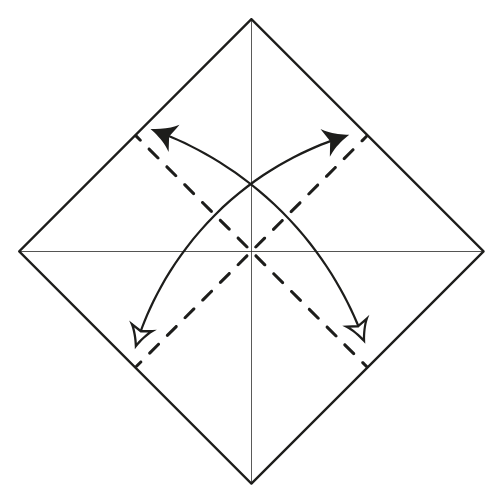
Fold the paper in half side to side in both directions, then unfold each time.
Step 4
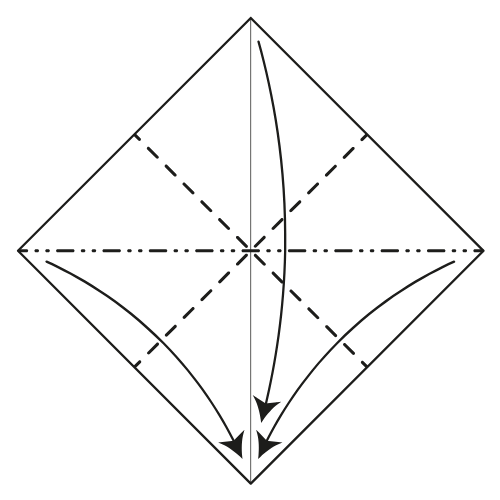
Collapse along the existing creases to form a Square base by bringing the left and right corners down to meet the bottom corner.
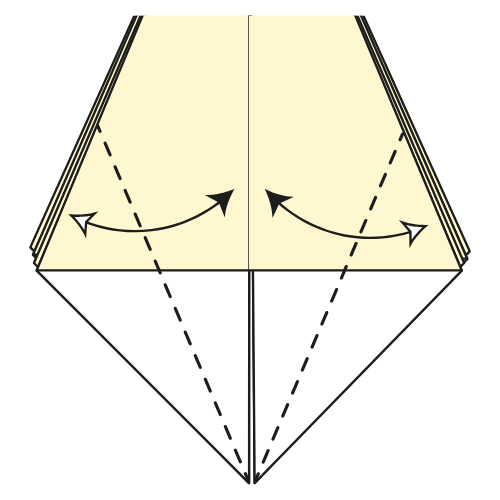
Step 5
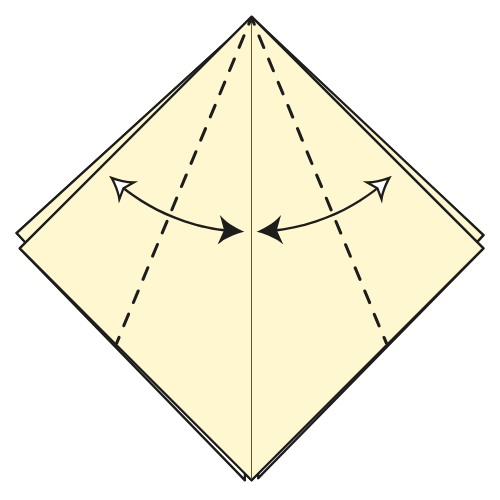
Fold the top flaps’ top left and right edges to meet the vertical centerline. Crease well, then unfold.
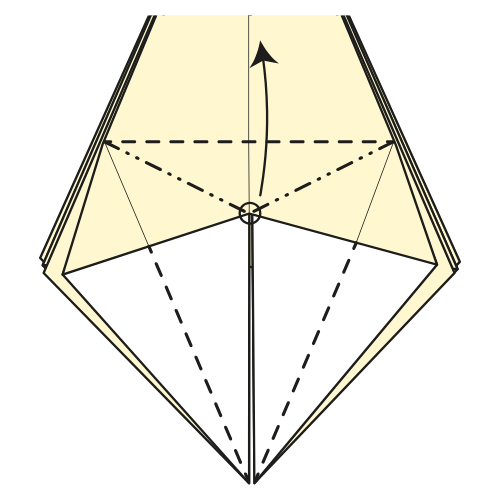
Step 6
Inside reverse fold along the creases you just made in Step 5.
Step 7

Turn the paper over.
Step 8
Repeat Steps 5 and 6 on this side.
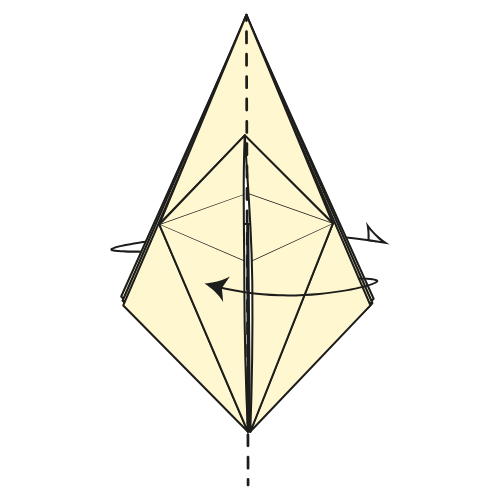
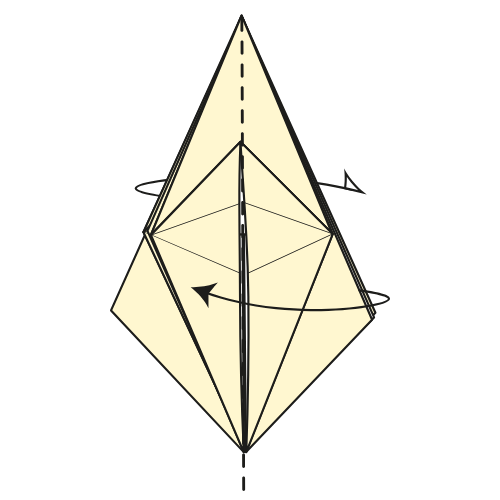
Step 9
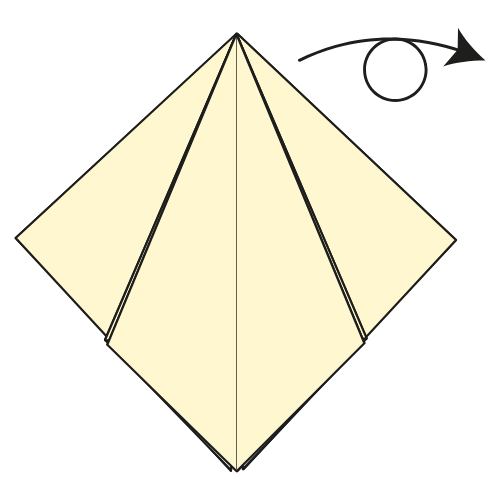
Flip the top right flap to the left. Repeat on the back.
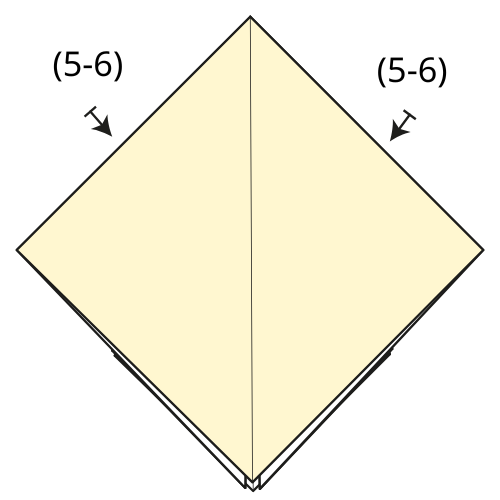
Step 10
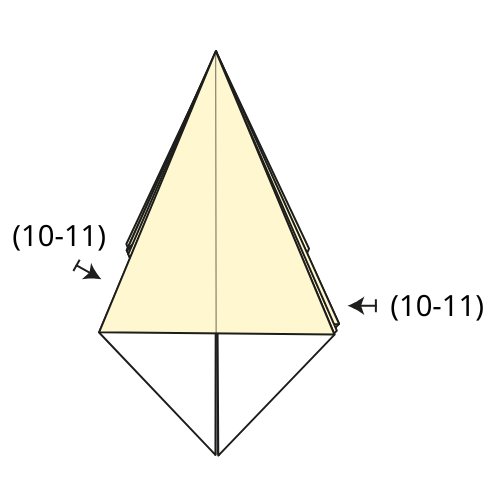
Fold the bottom left and right edges to the vertical centerline (one flap only). Crease well, then unfold.
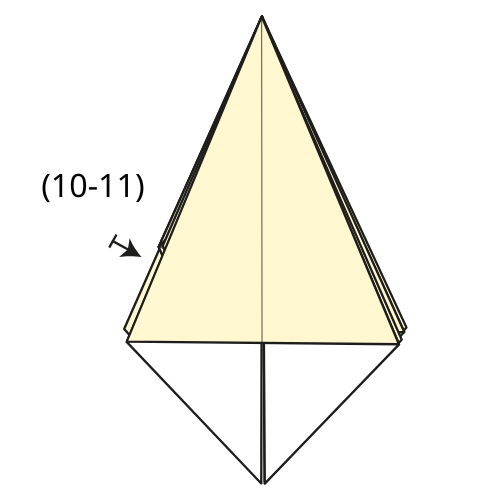
Step 11
Petal fold along the creases you just made in Step 10.
💠 Folding tip: Start by lifting the horizontal edge. Then fold the left and right edges toward the center using the existing creases. The top edges will meet at the center point. Take your time here and adjust as needed so everything lines up nicely.
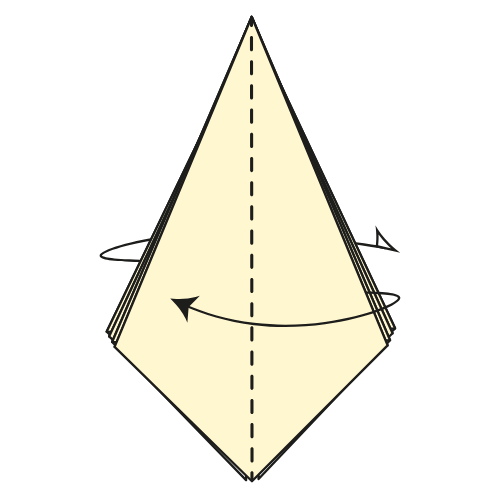
Step 12
Flip the top two right flaps to the left. Repeat on the back.
Step 13
Repeat Steps 10 and 11 on this side.
Step 14
Flip the top two right flaps to the left again. Repeat on the back.
Step 15
Repeat Steps 10 and 11 on the remaining flaps.
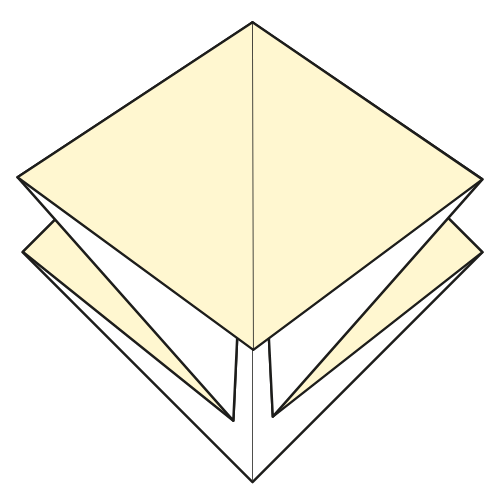
Step 16

Unfold everything and position the paper in a square orientation.
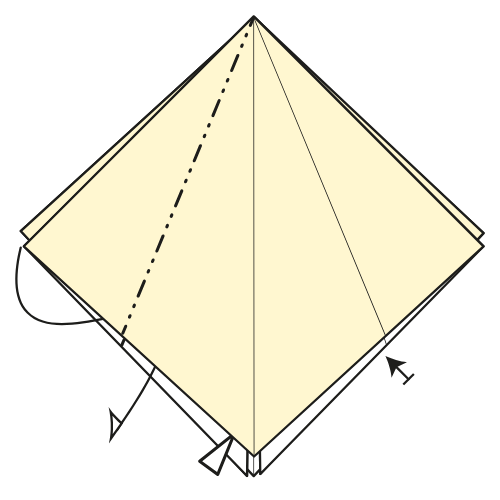
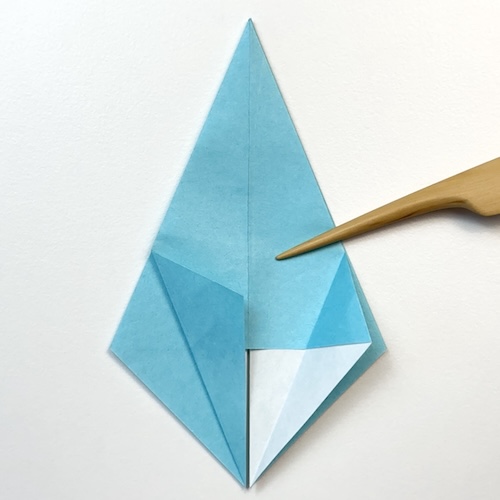
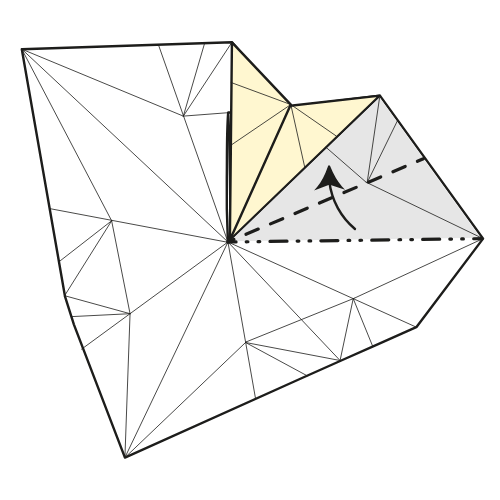
Step 17
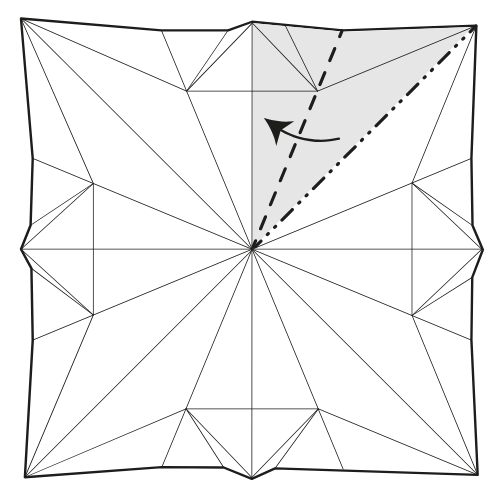
Fold the top right diagonal crease to meet the vertical centerline. The paper will not lie flat from this step onward.
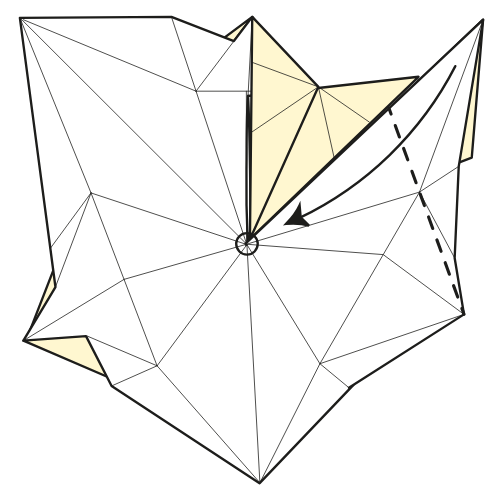
Step 18
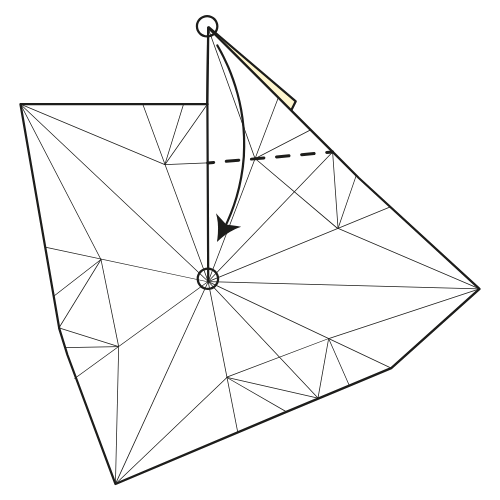
Fold the tip down to the center of the paper.
💠 Folding tip: Use the existing horizontal crease as a guide. Fold down one layer, then the top layer will naturally fold to the left. Flatten the paper to create an extra crease.
Step 19
Repeat Step 17 on the bottom right diagonal.
Step 20
Repeat Step 18.
Step 21
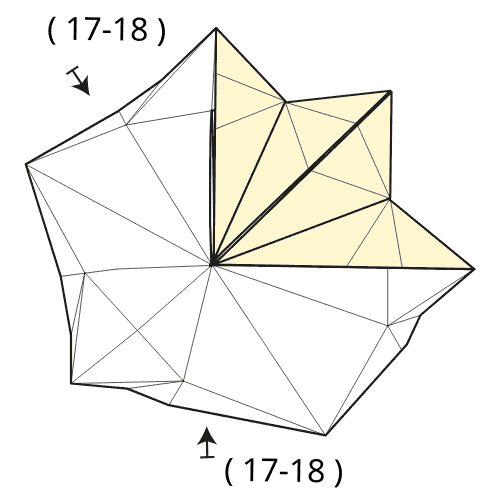
Repeat Steps 17 and 18 on the remaining flaps, two more times.
The Completed Origami Bellflower
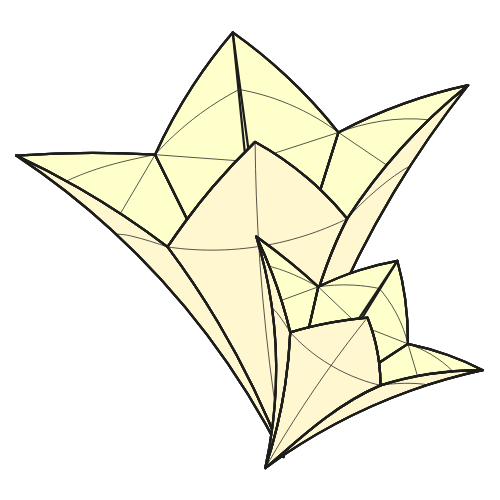
💠 Folding tip: Gently curl the petals to give your flower a more realistic look.
I hope you enjoyed folding this traditional origami bellflower. It’s a lovely model that combines simple structure with delicate shaping.
If you fold one, feel free to share a photo in the comments. It’s always wonderful to see the different paper choices and floral variations you create.
If you’d like to keep folding, you can explore more easy origami tutorials or browse our collection of origami flowers on the site.
You can also get new tutorials and folding ideas in our newsletter here. And if you prefer video instructions, you can follow along on our origami YouTube channel.

Download the Complete Origami Bellflower Printable PDF Instructions
This printable PDF is part of our Origami Friends membership on Patreon. As a member, you get access to these diagrams, our full library of 120+ printable PDFs, and member-only content.