How to Fold an Easy Origami Witch Hat
This fun origami witch hat by Francesco Mancini is quick to fold and perfect for Halloween decorations, classroom crafts, or a playful afternoon session.
The model features a clever collapsing step that shapes the hat in one satisfying move, making it both beginner-friendly and enjoyable to fold.
It works especially well in black, orange, purple, or green paper, and you can play with different sizes to create a whole set of magical hats.
Origami Witch Hat Step-by-Step Instructions
- Difficulty: Easy – Beginner Level 2
- Folding time: Under 5 minutes
Recommended Paper
15×15 cm (6×6 in) Kami
Step 1

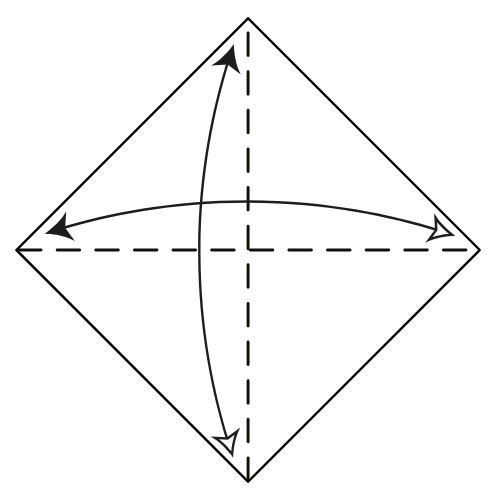
Start with the white side of the paper facing up in a diamond position. Fold and unfold along both diagonals.
Step 2
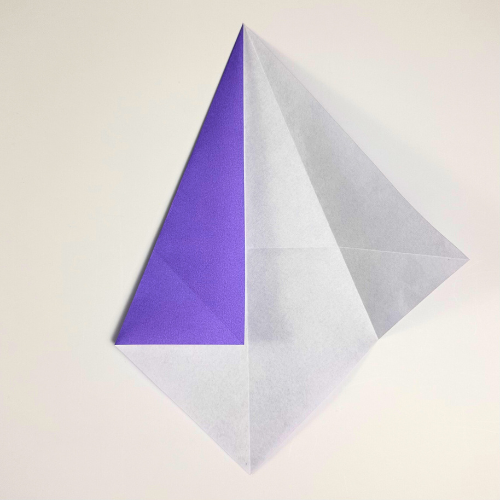

Fold the top edges in to meet the centerline.
Step 3

Fold the bottom corner up along the line where the colored and white sides meet, then unfold. Turn the paper over.
Step 4
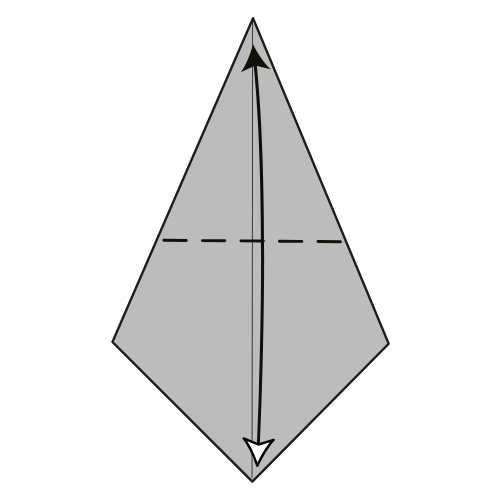
Fold the bottom corner up to the top corner. Then, unfold.
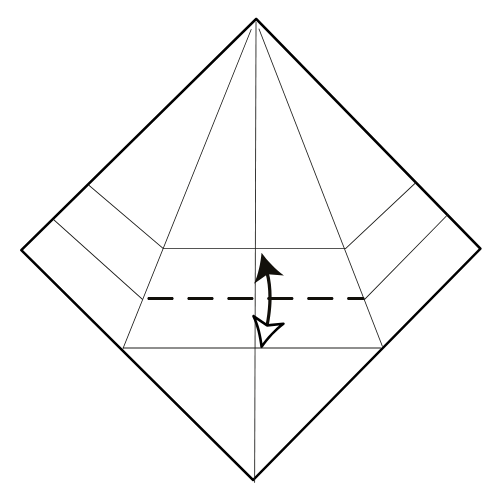
Step 5
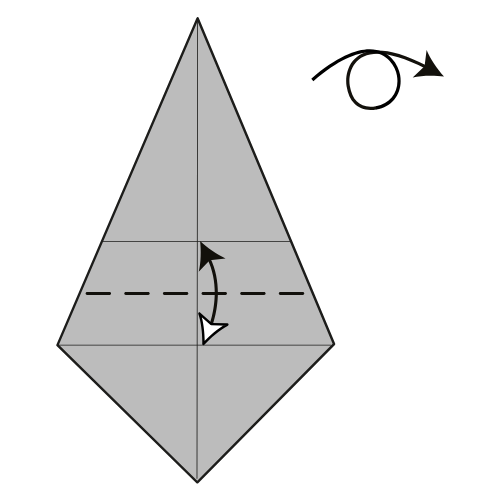
Fold and unfold the crease from Step 3 upward so it meets the crease from Step 4. Then, turn the model over.
Step 6


Open the top flaps.
Step 7
Fold along the crease you just made to reverse the fold (just the middle section).
Step 8

Collapse along the existing creases. Start with the two center folds, then fold in the sides inward.
Step 9
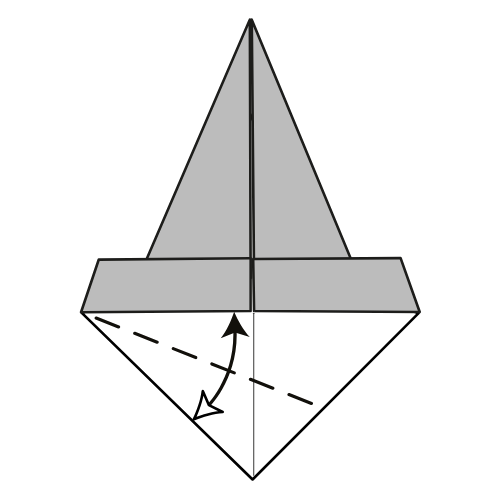
Fold the bottom left edge up to meet the line where the colored and white sides meet. Then, unfold.
Step 10

Repeat on the bottom right edge.
Step 11
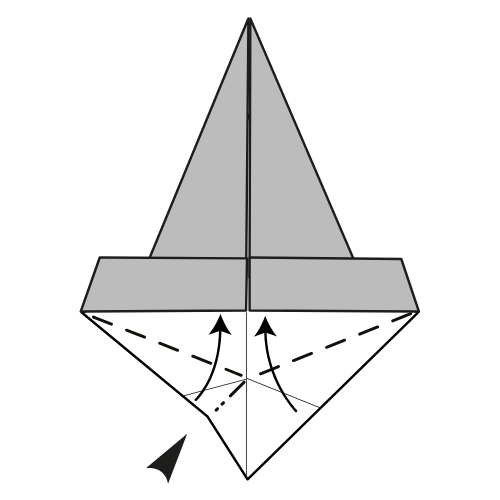
Collapse along the creases you just made. Fold the flap that sticks up to the left.
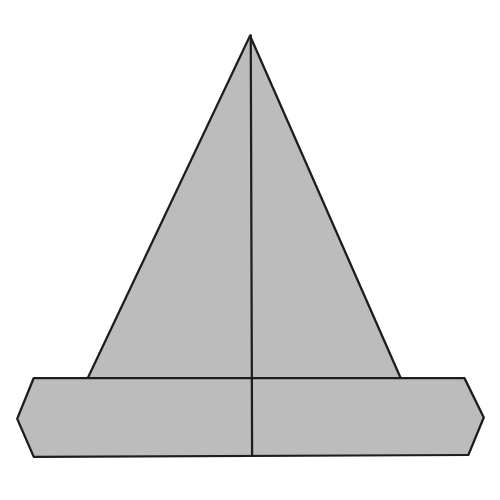
Step 12

Slightly fold the bottom left and right corners inward.
Step 13

Fold the bottom corner up along the line where the colored and white sides meet.
Step 14

Tuck the middle flap (from Step 11) into the pocket behind it. Then, turn the model over.
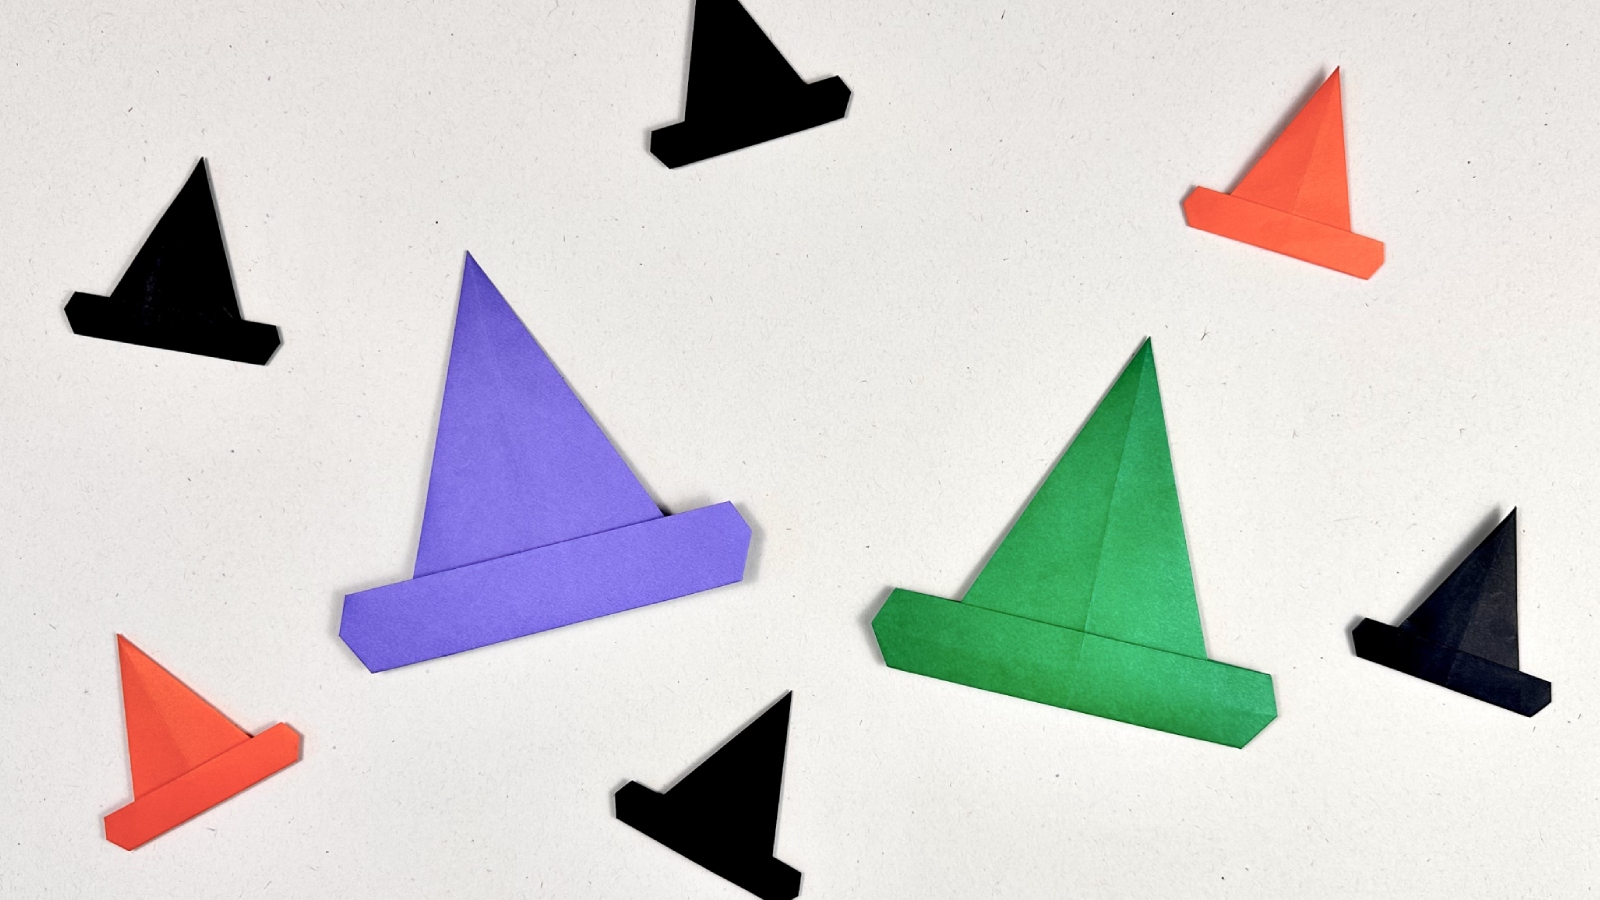
The Completed Origami Witch Hat! 🧙♀️

Whether you’re crafting party decorations or just getting into the Halloween spirit, this simple origami witch hat is a great place to start. Try folding a bunch in different colors and sizes. They look fantastic on a card or pinned to a garland.
If you enjoyed this model, join us on YouTube for more fun seasonal tutorials, and don’t forget to sign up for our newsletter for folding tips, printable diagrams, and exclusive content.
Happy folding! 🎃🧙♂️🧙♀️

Download the Complete Origami Witch Hat Printable PDF Instructions
This printable PDF is part of our Origami Friends membership on Patreon. As a member, you get access to these diagrams, our full library of 120+ printable PDFs, and member-only content.