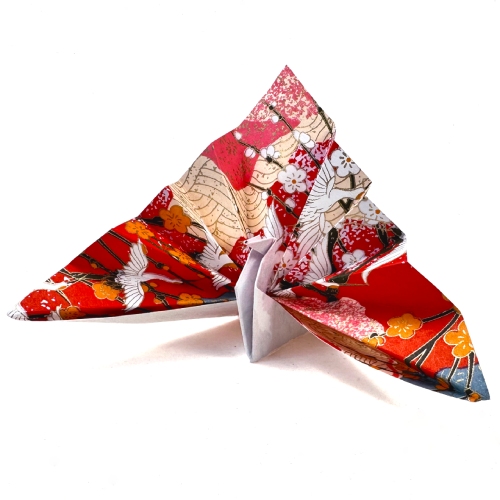
How to Make an Origami Crane
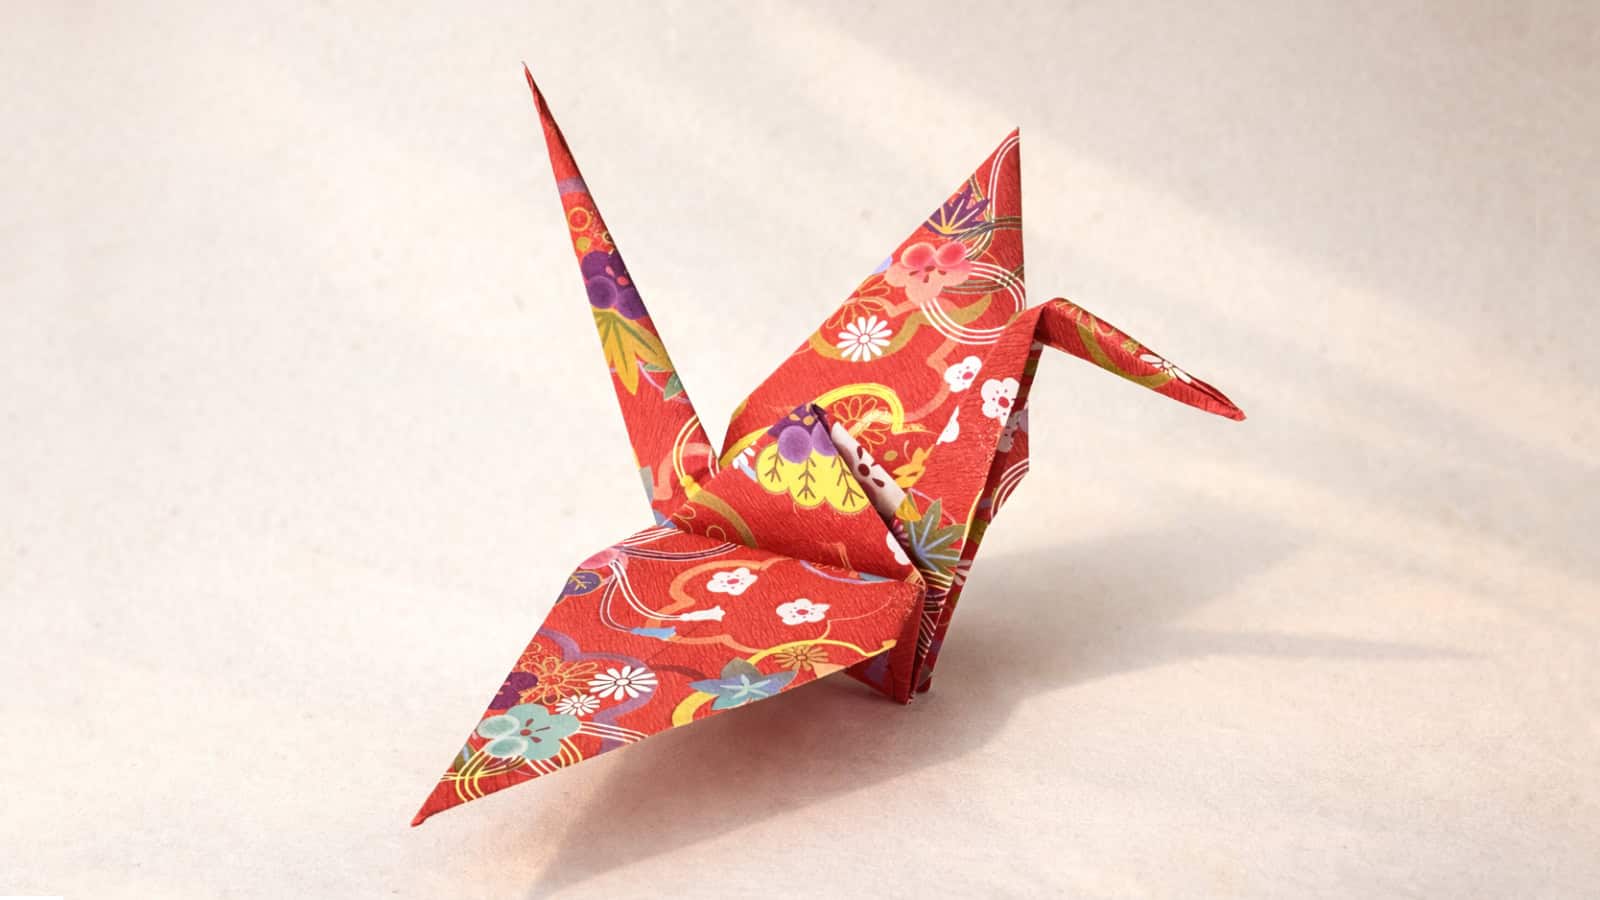
If there’s one model that feels inseparable from origami, it’s the crane. In this tutorial, you’ll learn how to fold a traditional origami crane, the same way it has been folded in Japan for generations.
The crane is built from the bird base, one of the most important bases in origami. Once you learn it, you’ll start seeing it everywhere, in birds, animals, and many classic designs.
In Japan, many children learn how to fold a crane in kindergarten or early elementary school. It’s not a difficult model, but it does require a bit of care and patience. If you take your time and follow the steps calmly, it’s a very approachable fold, even if you’re still fairly new to origami.
Here, we’ll go through the steps calmly and clearly, so you can focus on the process and end up with a balanced, elegant crane.
Traditional Origami Crane Step-by-Step Instructions
- Difficulty: Easy – Beginner level 3
- Folding time: 5-10 minutes
Recommended Paper
15×15 cm (6×6 in) Kami or Chiyogami (patterned paper).
This tutorial was updated in February 2026 with clearer steps and improved visuals.
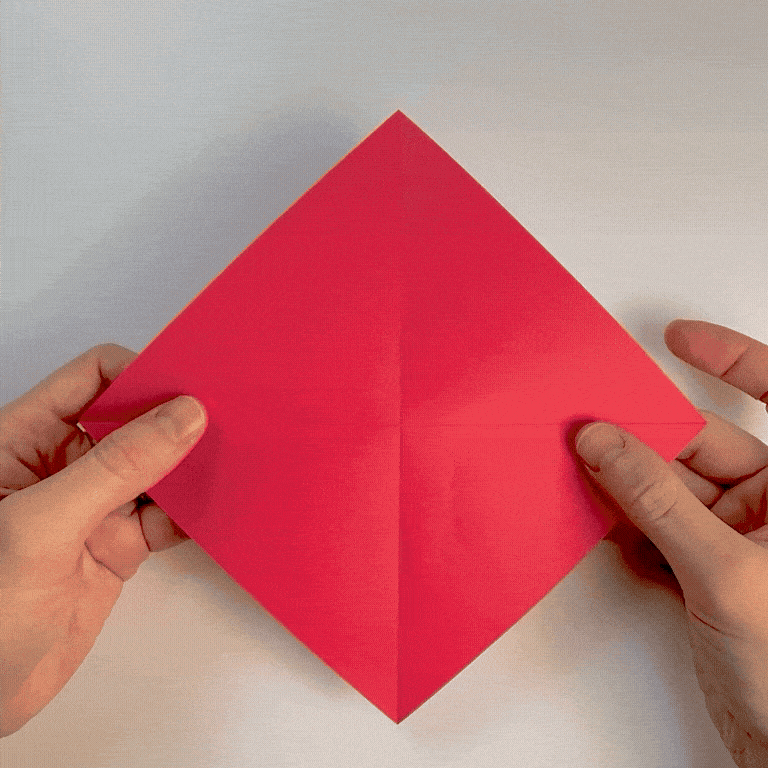
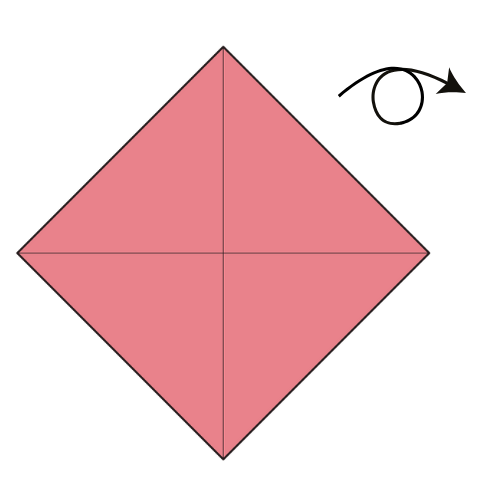
Step 1
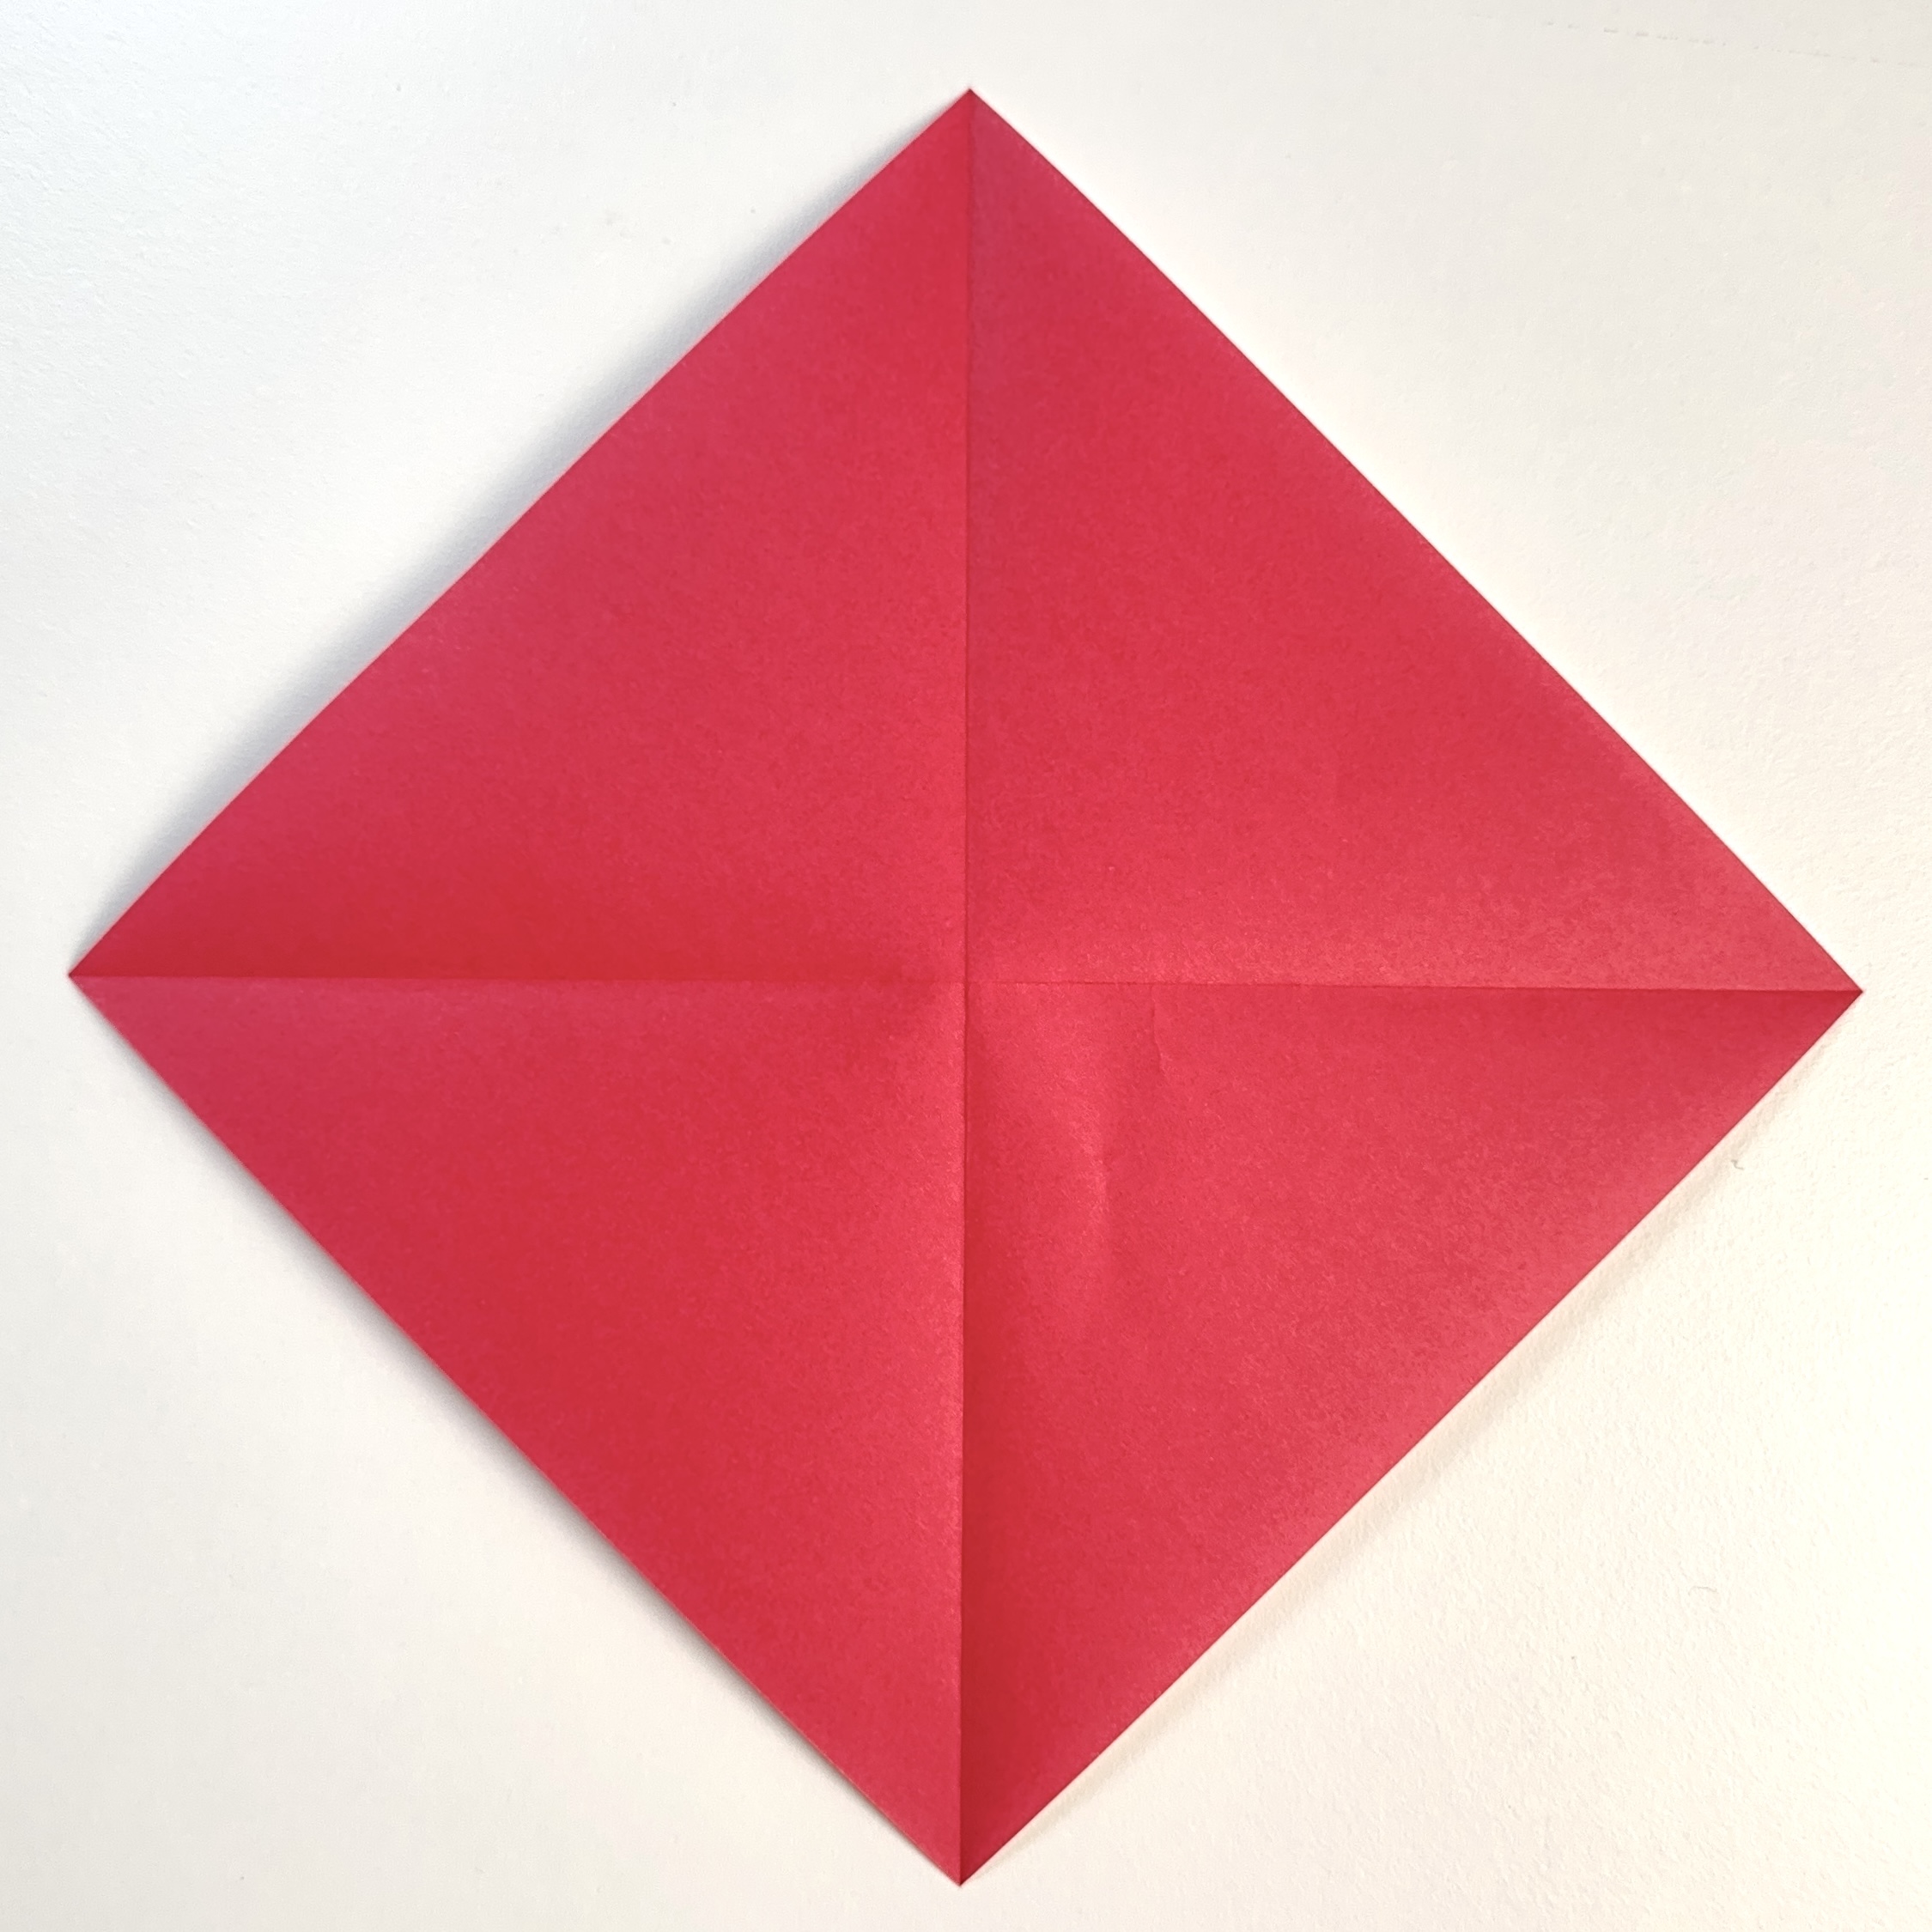
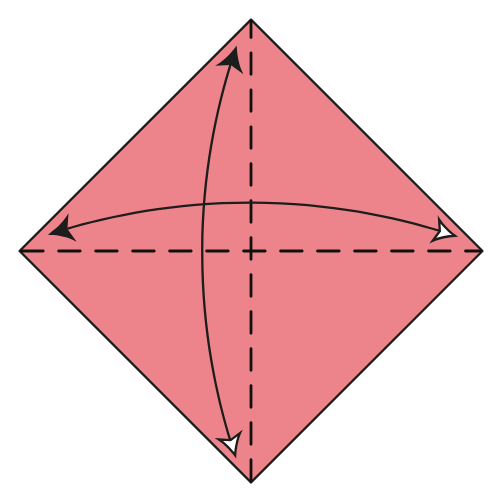
Start with the colored side of the paper facing up in a diamond position. Fold and unfold along both diagonals (horizontal and vertical).
🕊️ Folding tip: The first creases are often the most important. Take your time and align everything carefully.
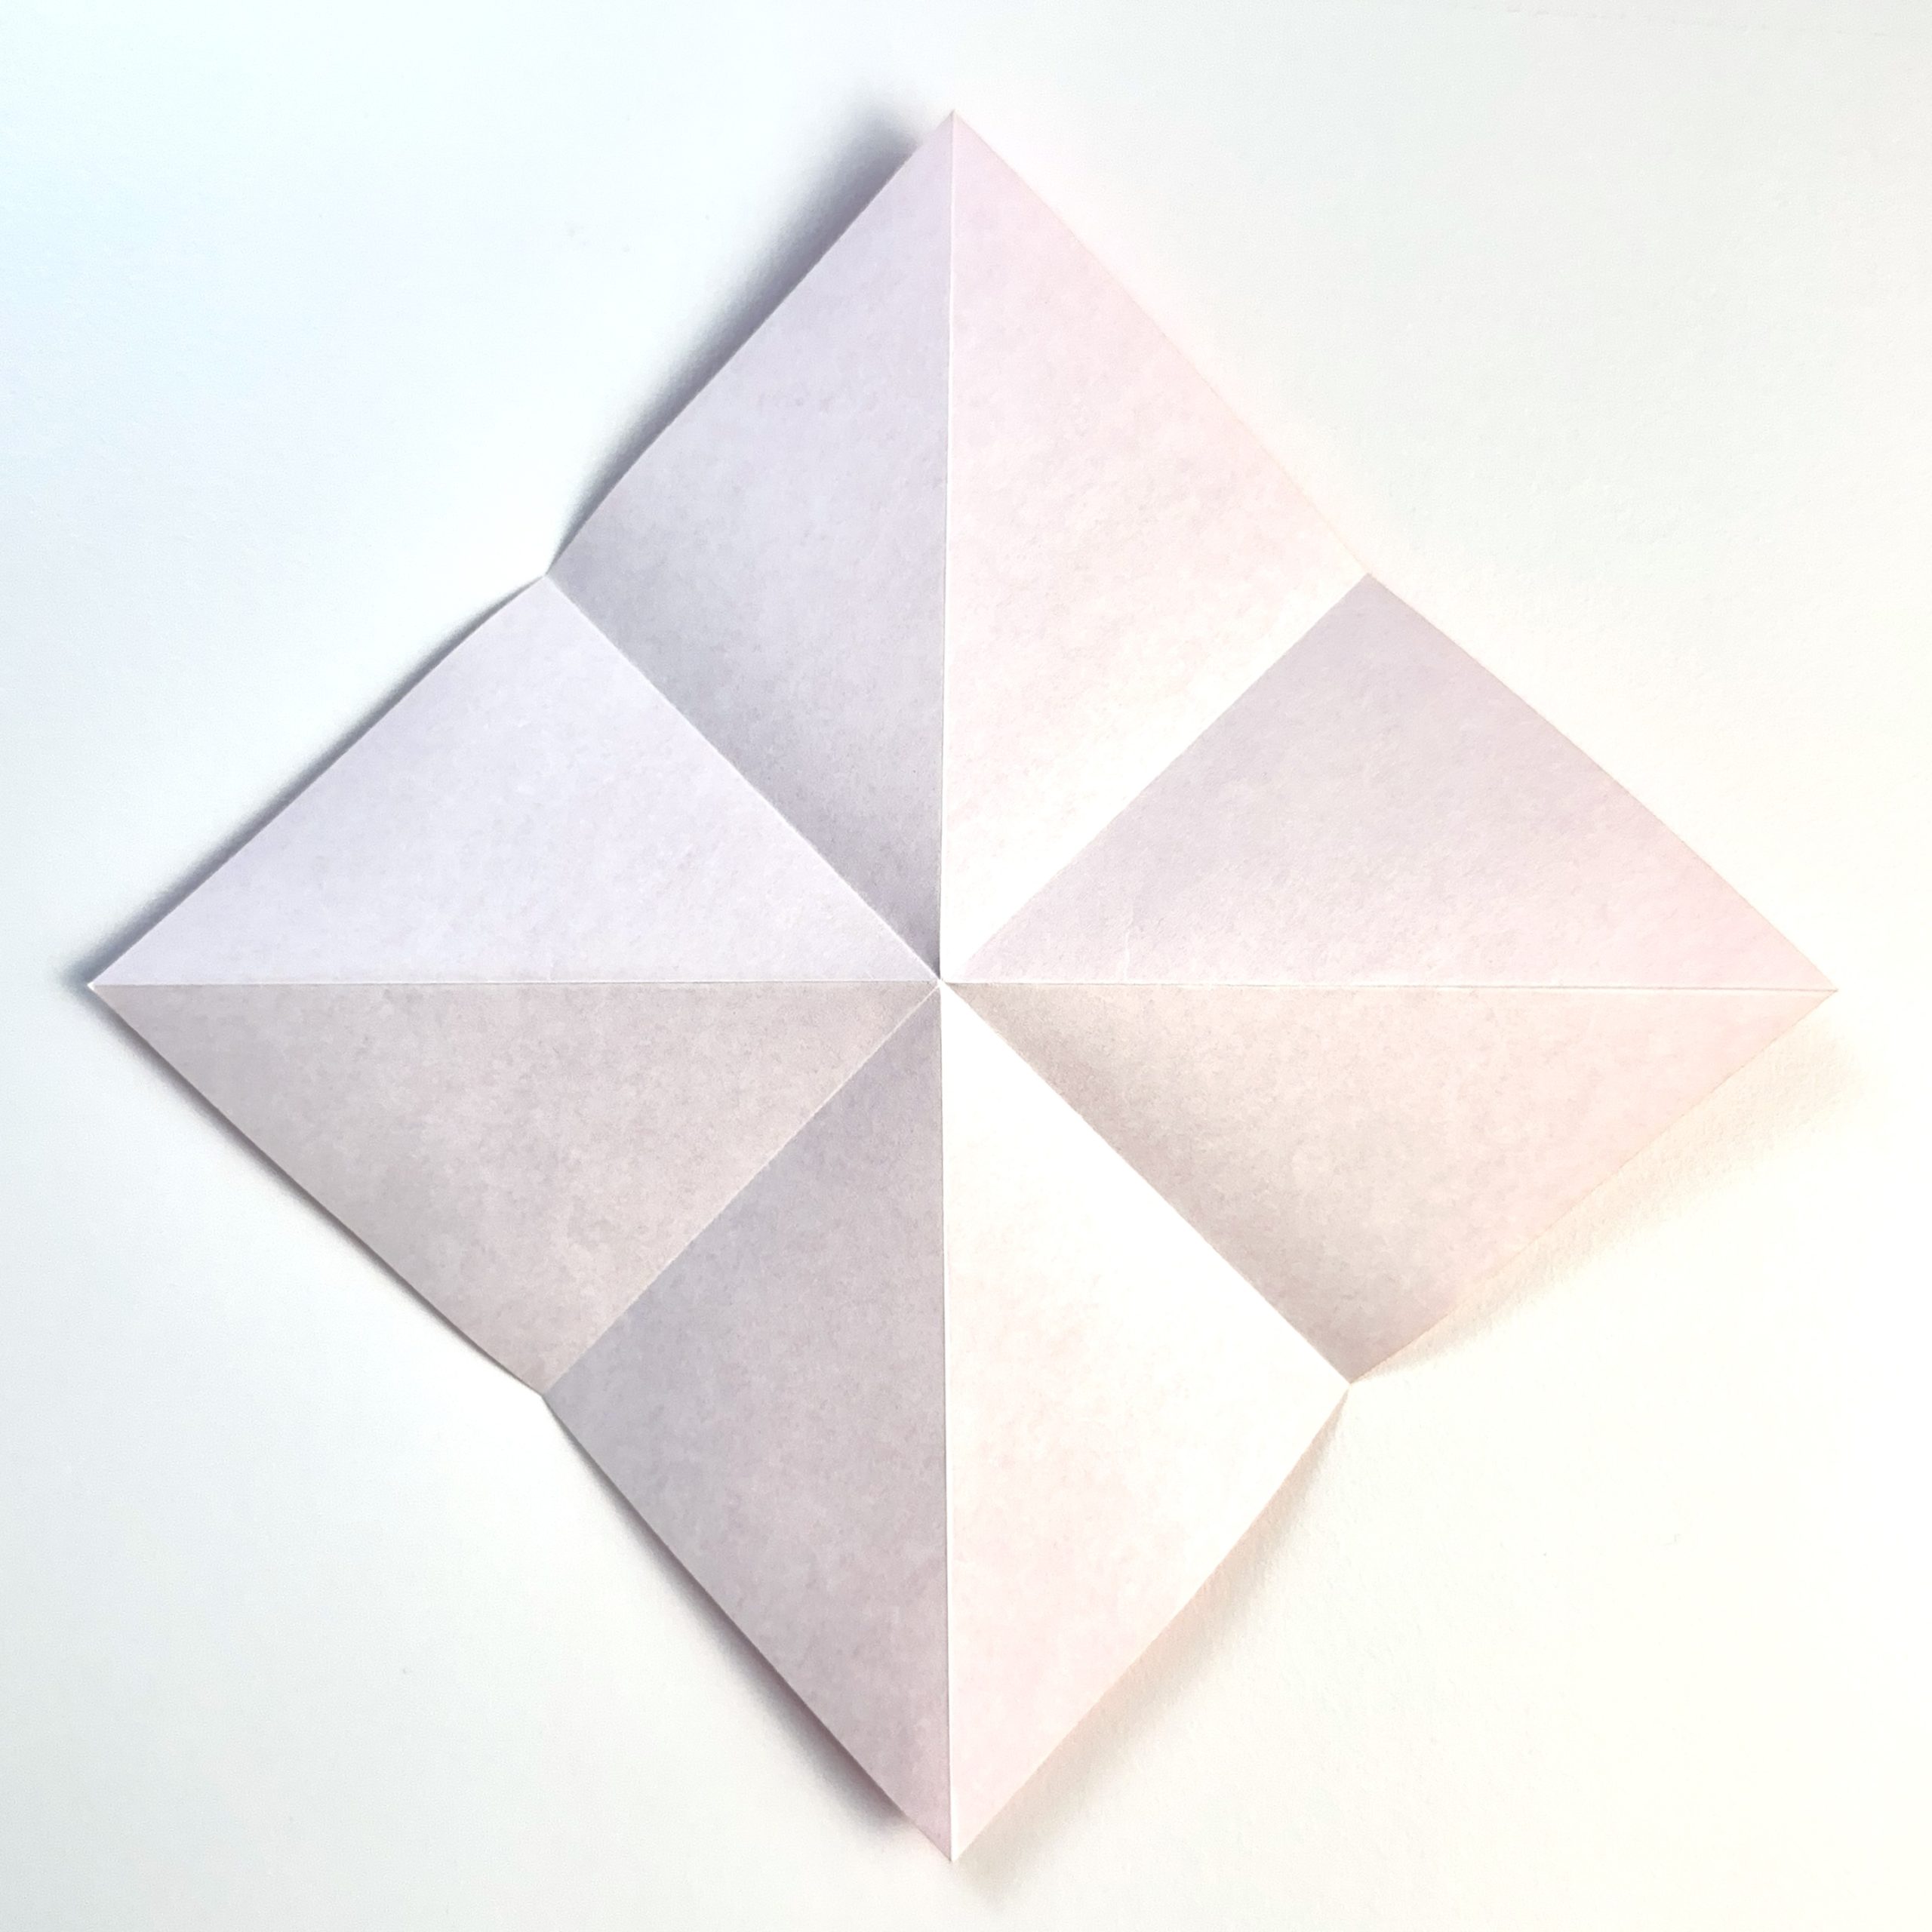
Step 2
Turn the paper over.
Step 3
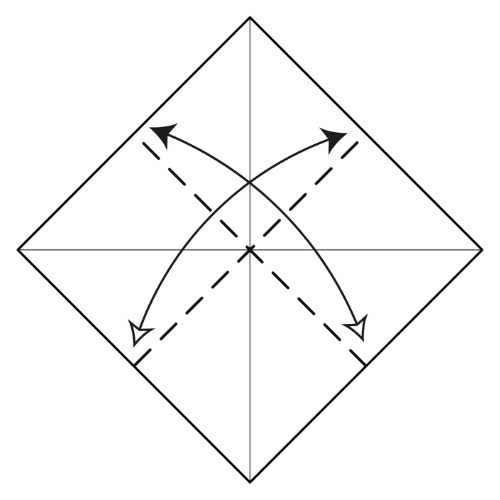
Fold and unfold the paper side to side, in both directions.
Step 4
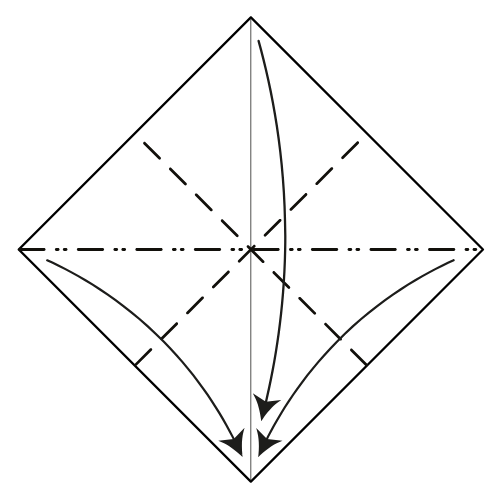
Collapse along the existing creases to form a Square base by bringing the left and right corners down to meet the bottom corner.
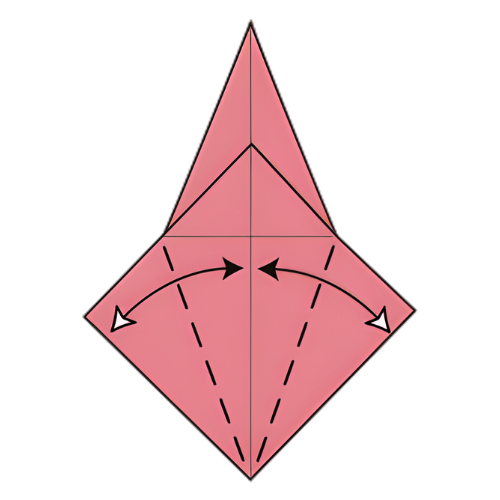
Step 5
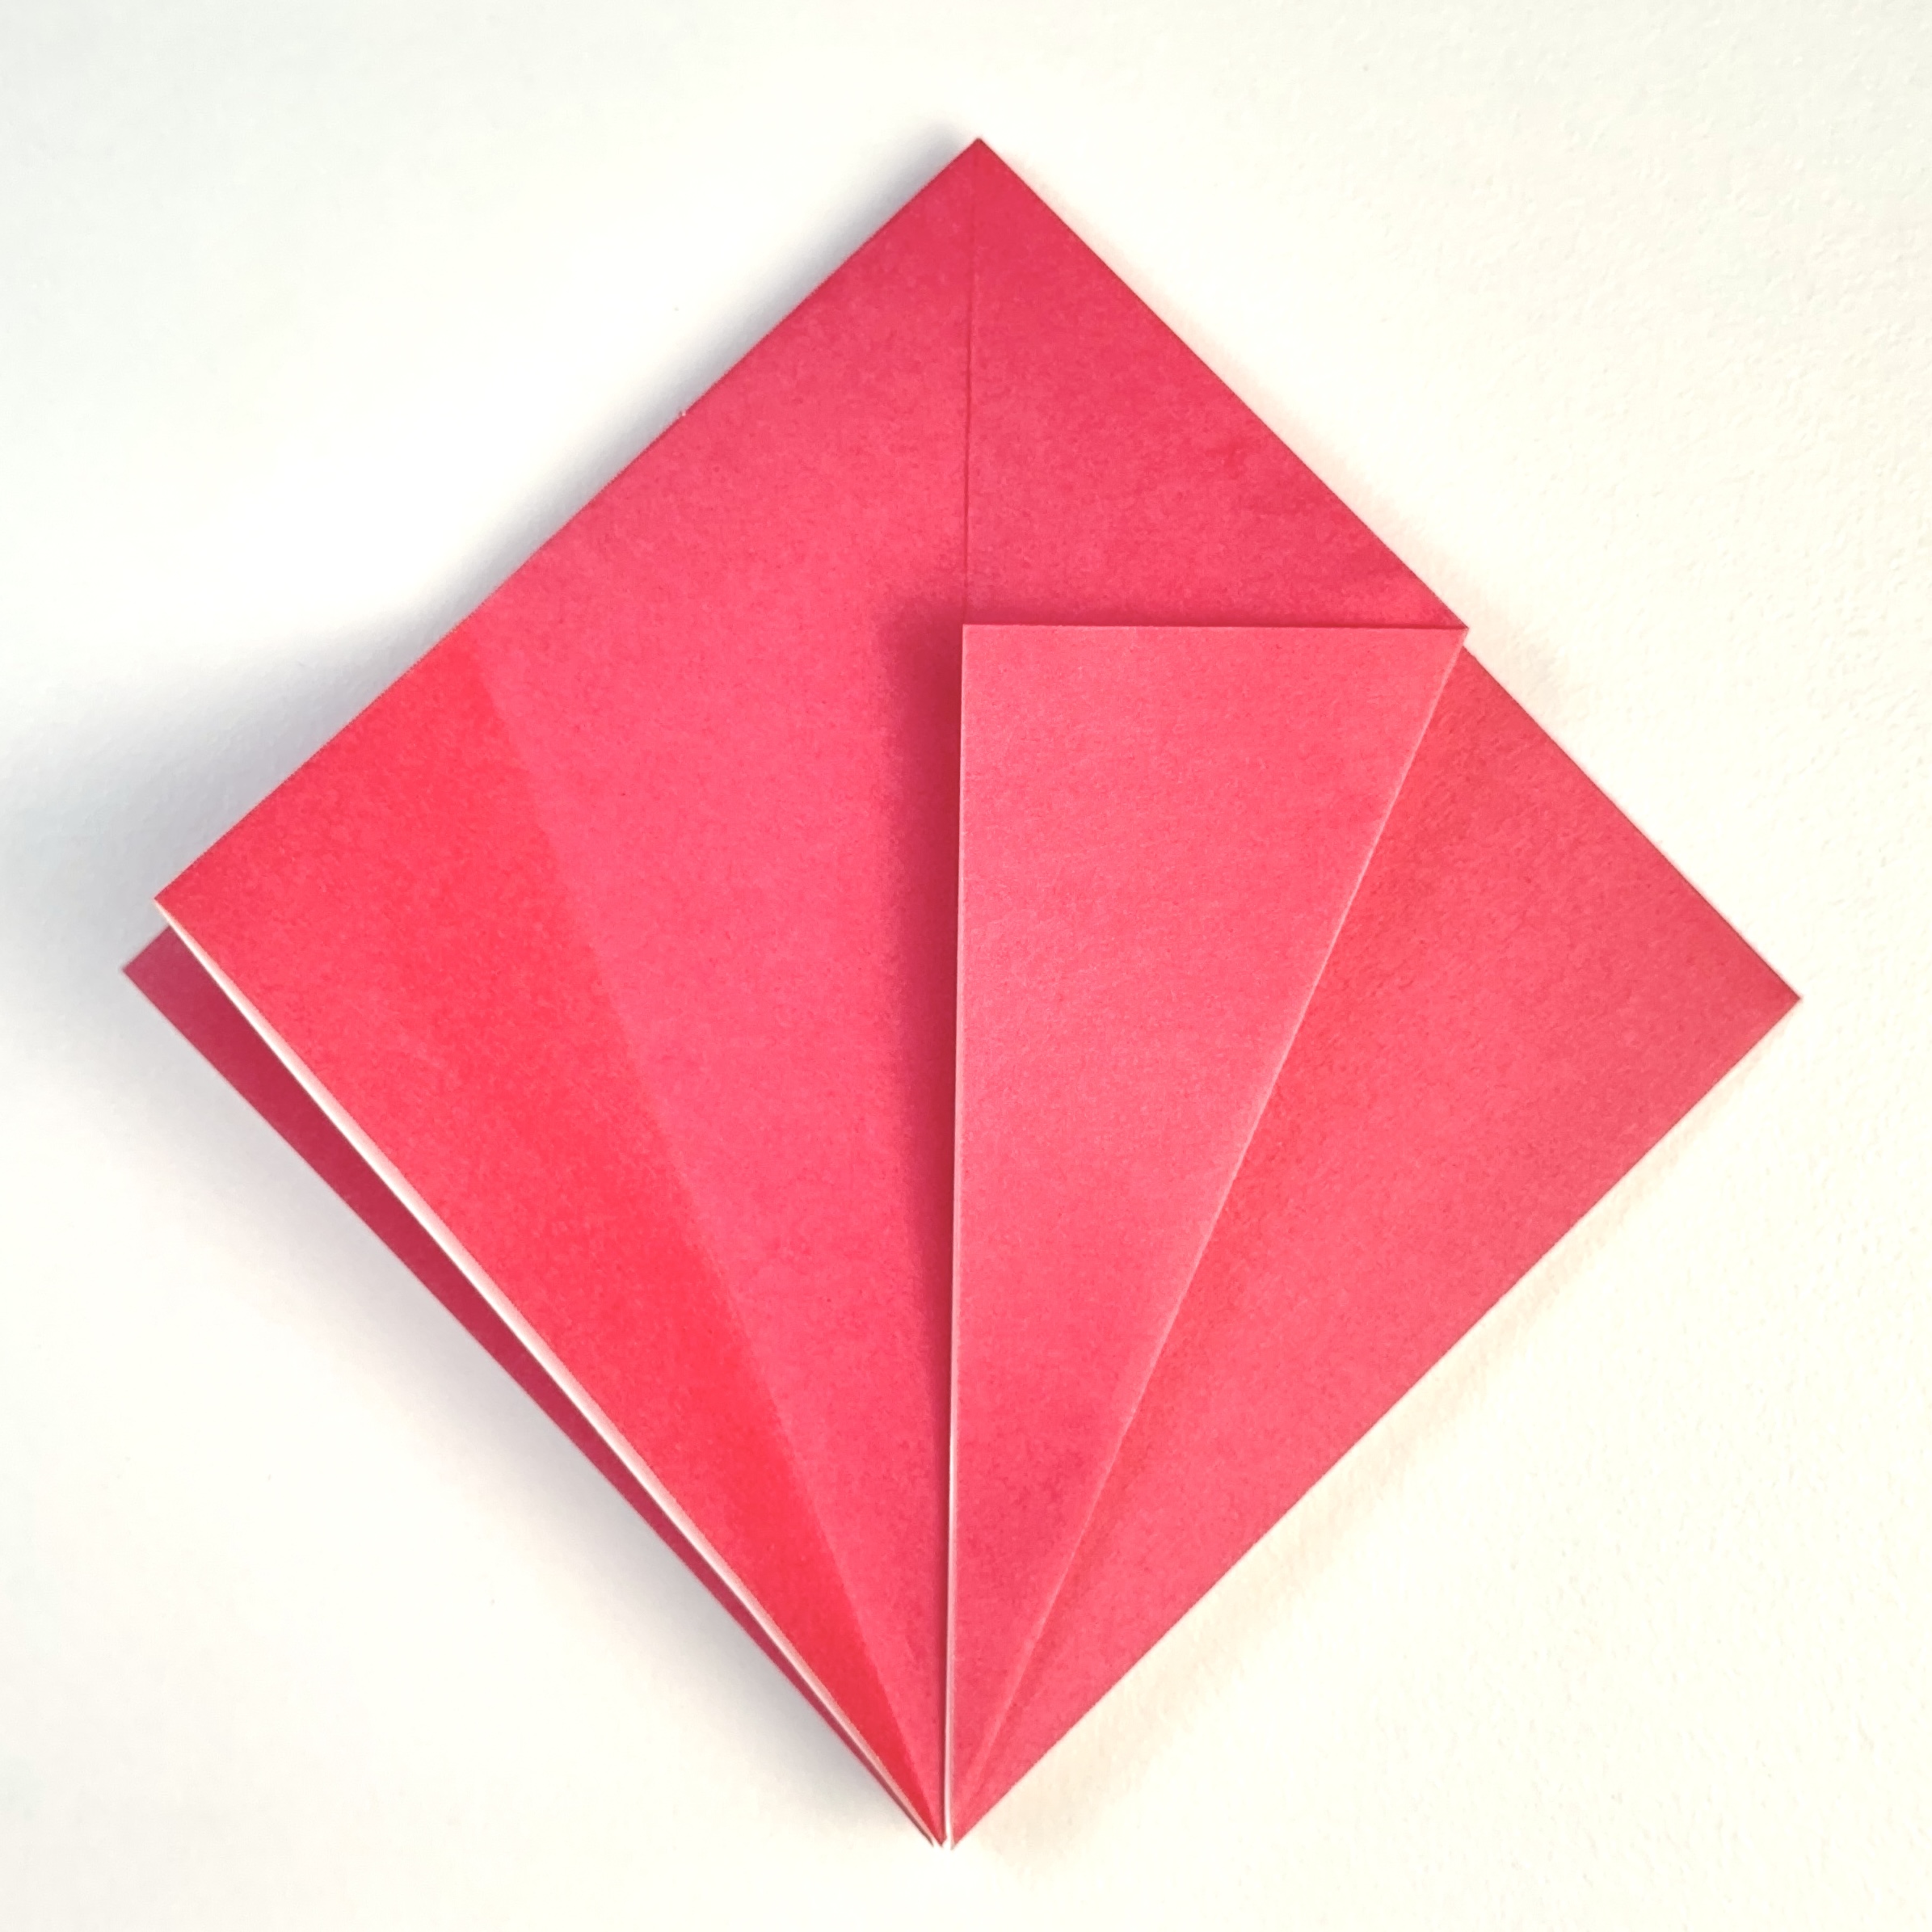
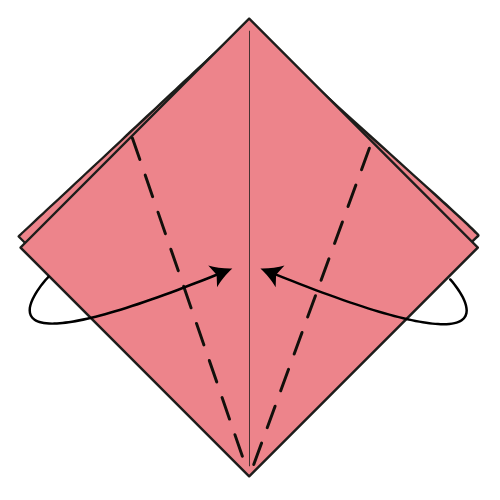
Fold the top layer’s left and right edges to meet the vertical centerline.
Step 6
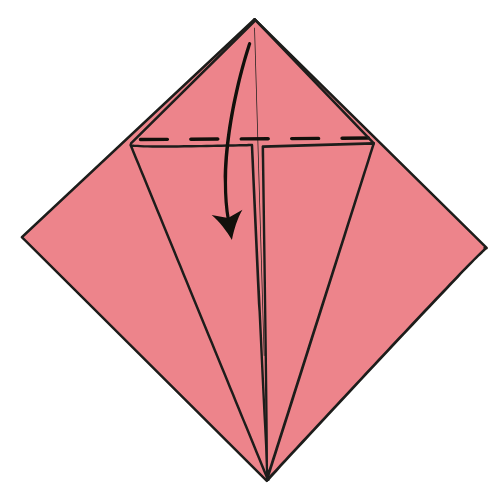
Fold the top corner down, aligning it with the top edges of the flaps you just made in Step 5.
Step 7
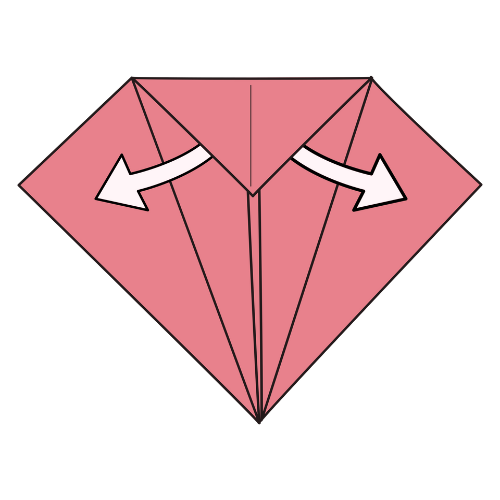
Unfold Step 5.
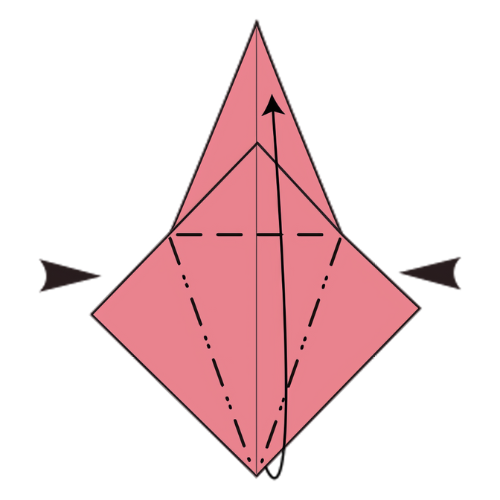
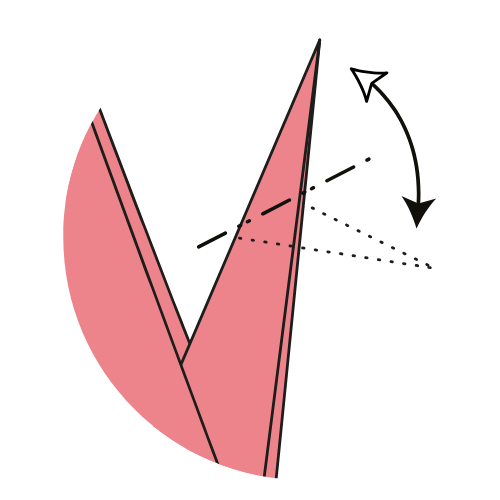
Step 8
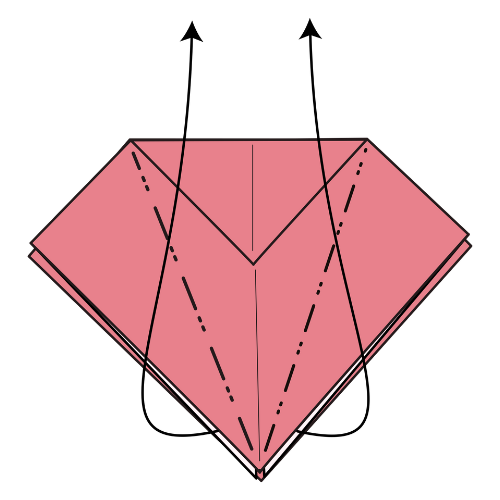
Lift the top layer and bring the bottom corner up to form a Petal fold. The outer edges will meet the vertical centerline.
Step 9
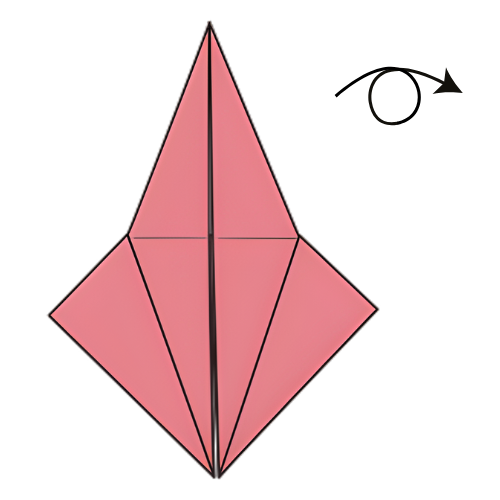
Turn the model over.
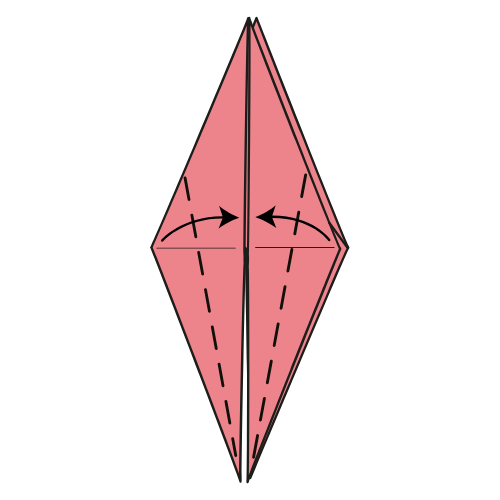
Step 10
Fold and unfold the left and right edges to meet the vertical centerline.
Step 11
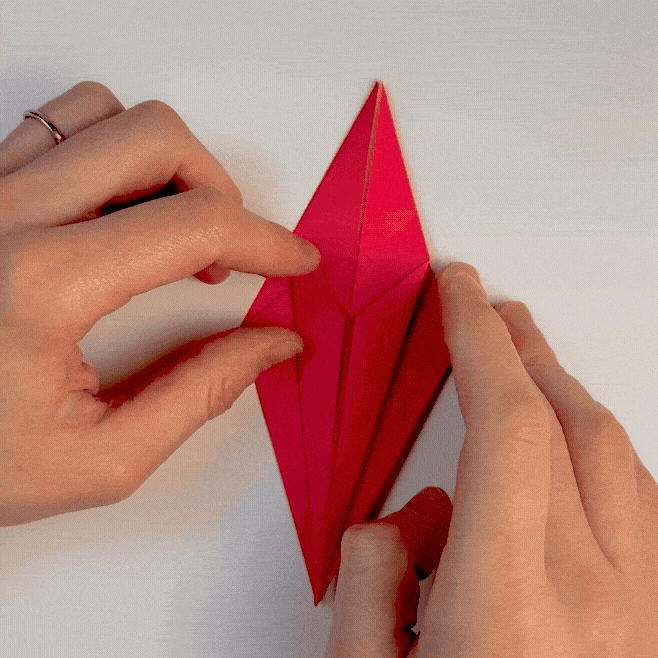
Just like in Step 8, lift the top layer and bring the bottom corner up to form another Petal fold.
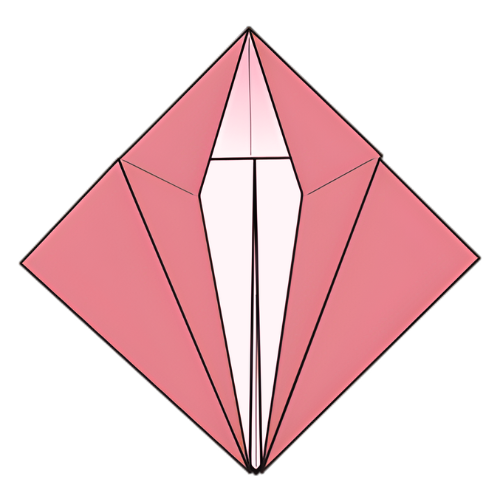
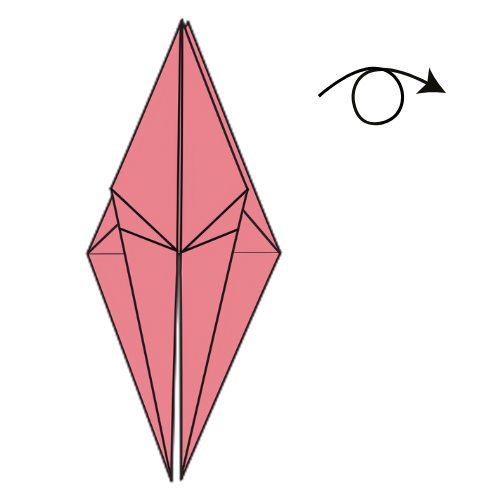
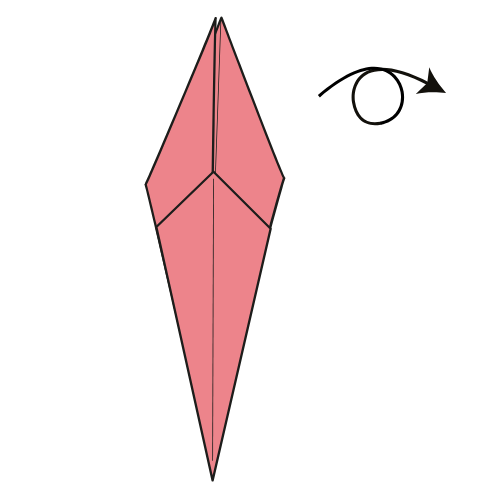
You now have a completed Bird base 🐦
Step 12
Fold the left and right edges to the vertical centerline.
🕊️ Folding tip: Don’t fold right up to the centerline and leave a small gap. This will make the upcoming steps easier. Do the same in Step 14.
Step 13
Turn the model over.
Step 14

Again, fold the left and right edges to the vertical centerline, leaving a small gap.
Step 15
Fold the top right flap over to the left.
Step 16
Turn the model over.
Step 17
Fold the top right flap over to the left, just like in Step 15.
Step 18
Fold the bottom corner of the top flap upward along the existing horizontal crease.
Step 19

Turn the model over.
Step 20
Repeat the same fold as in Step 18.
Step 21
Fold the top right flap over to the left.
🕊️ Folding tip: This is where those small gaps you left earlier come in handy. Things fold more smoothly now with all the layers involved.
Step 22
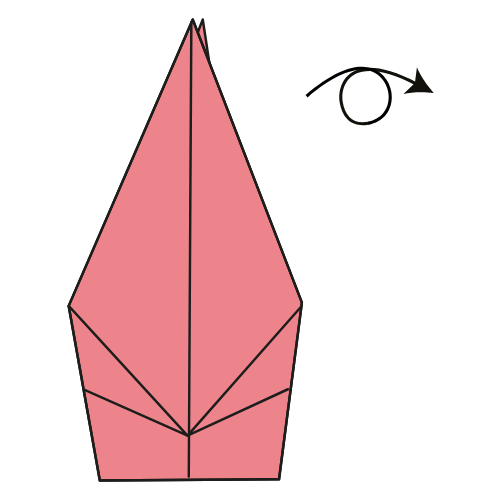
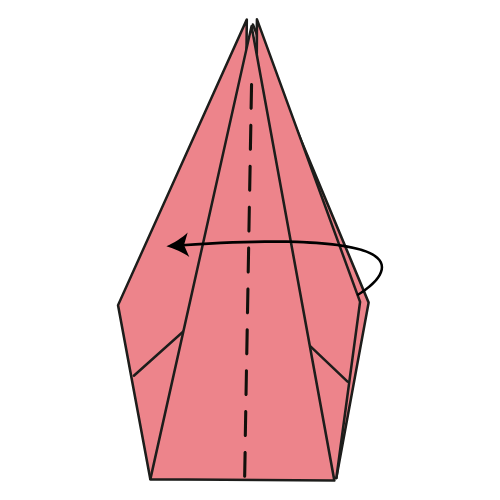
Turn the model over.
Step 23
Fold the top right flap over to the left again.
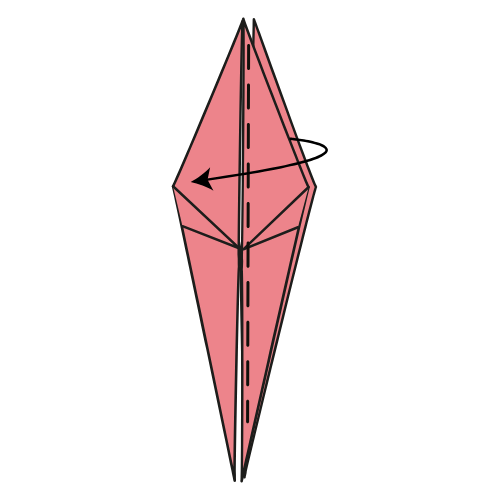
Step 24
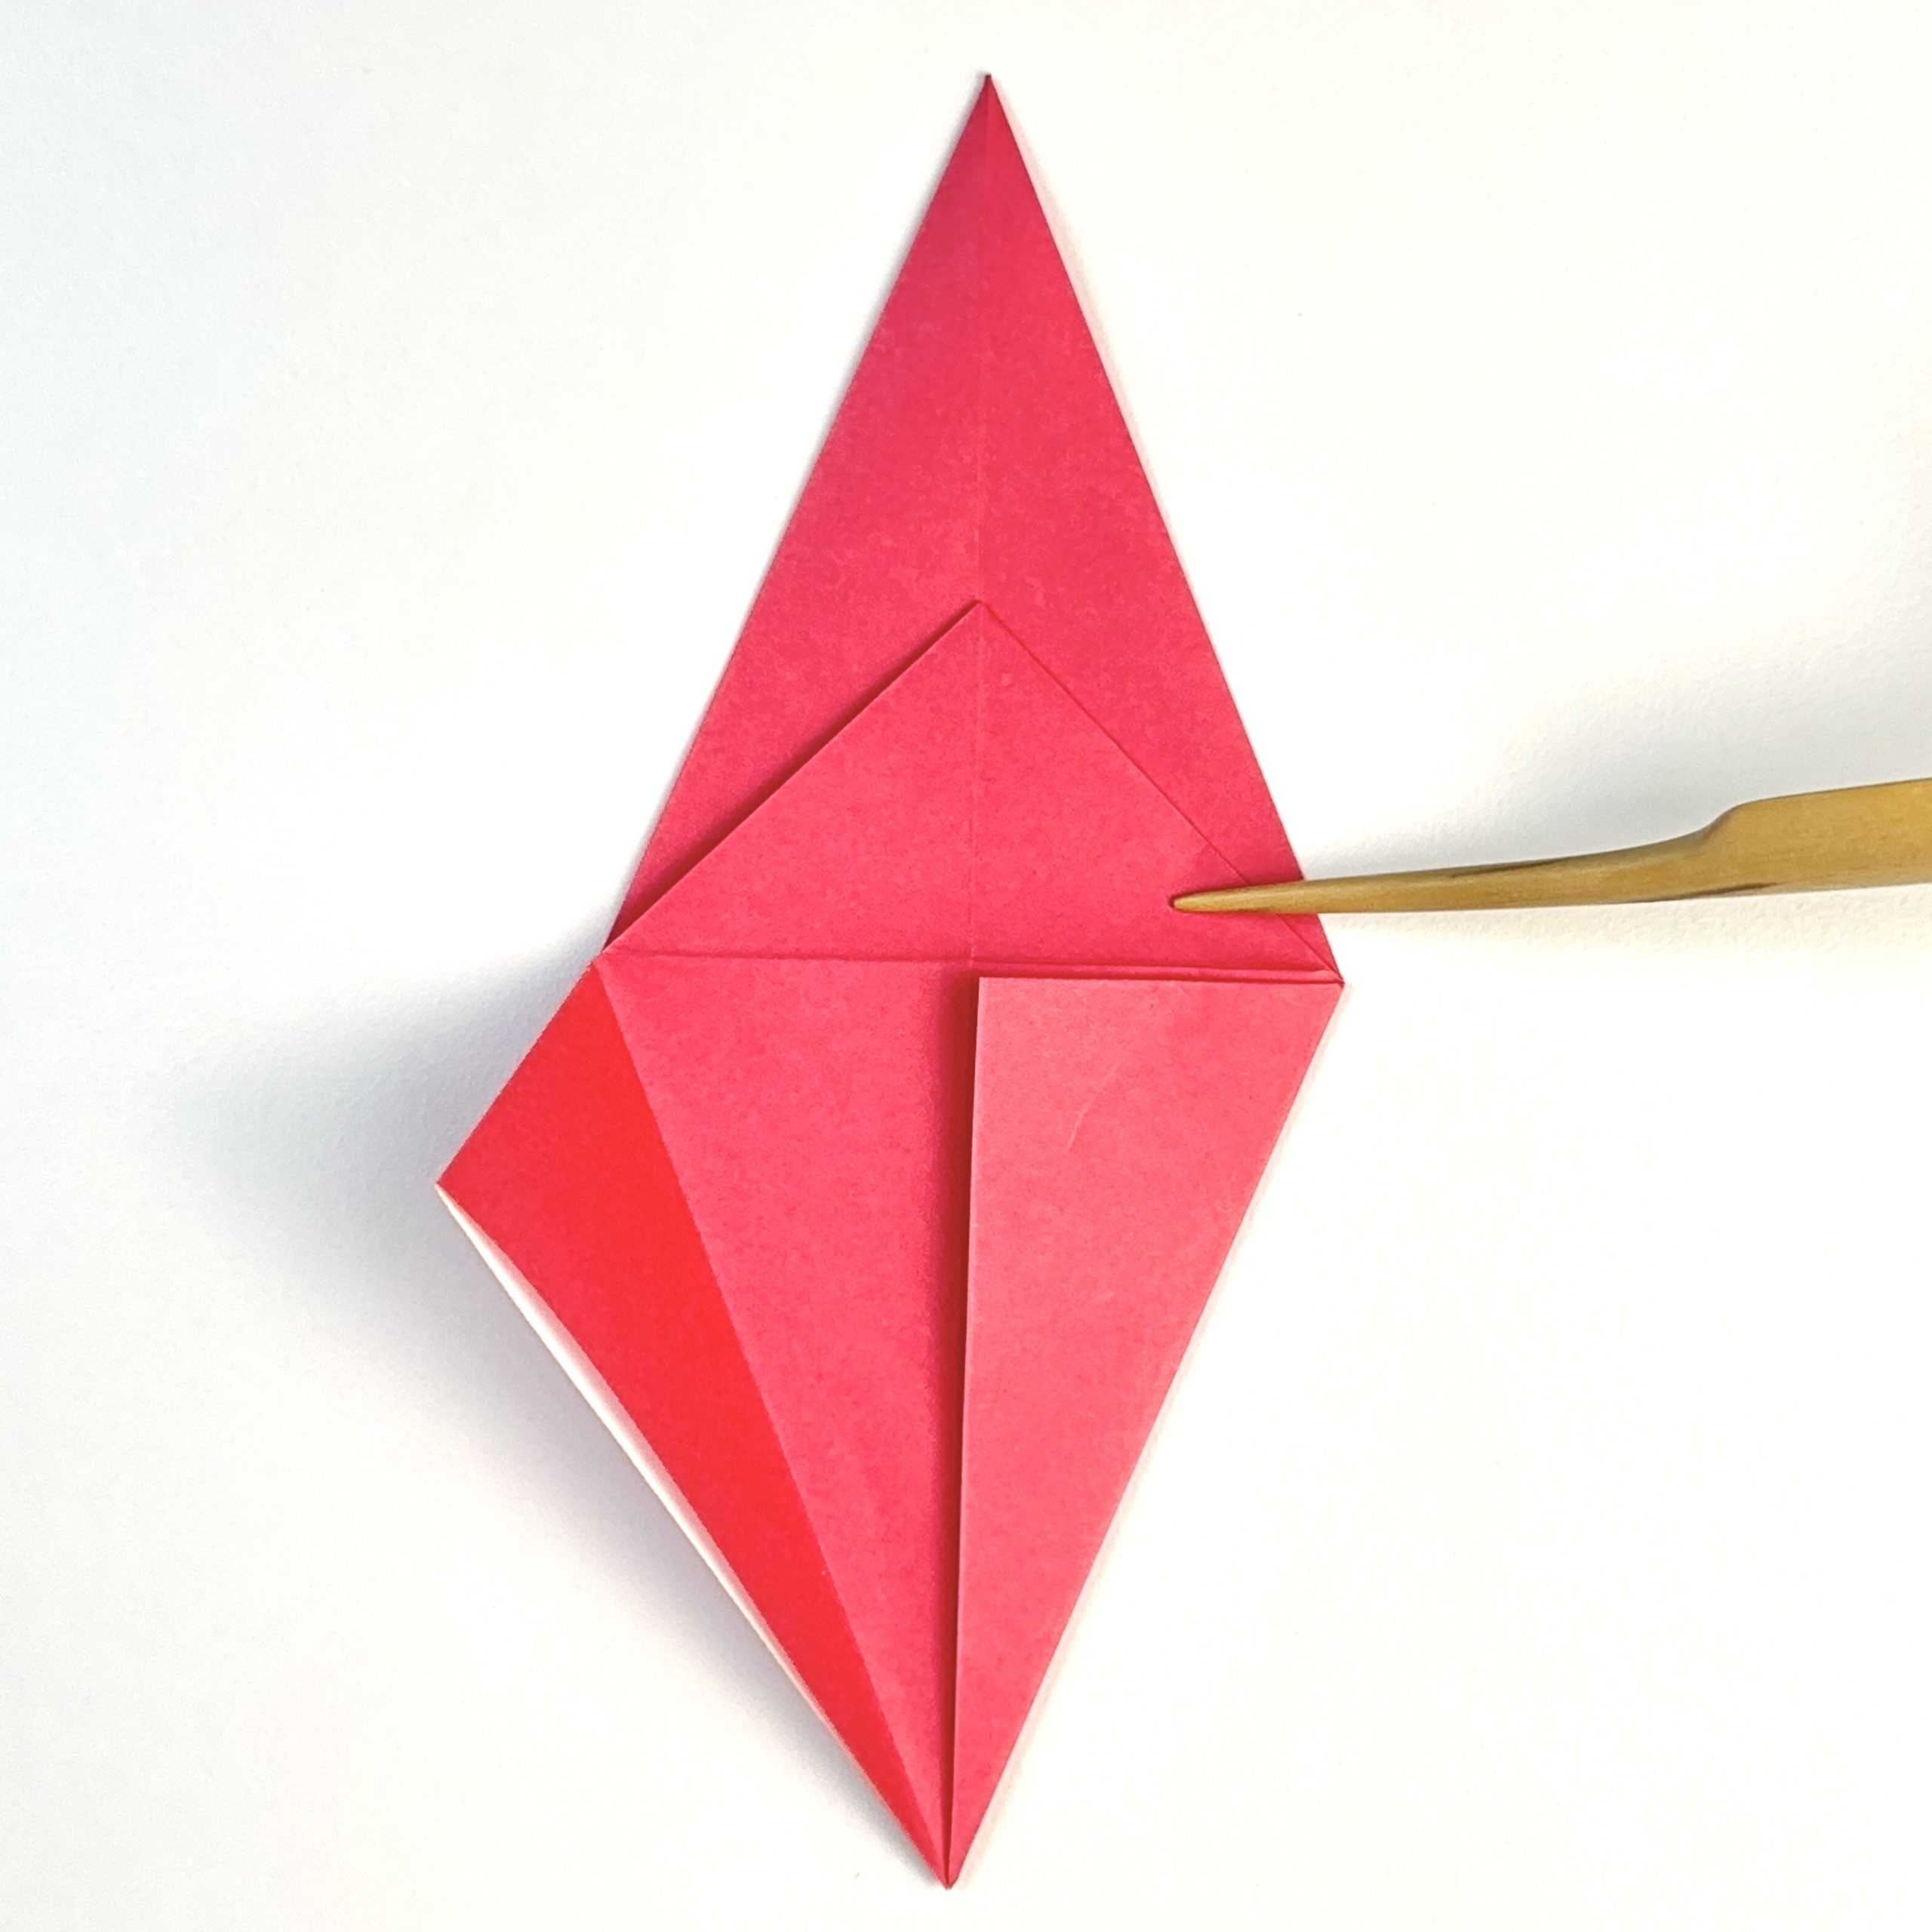
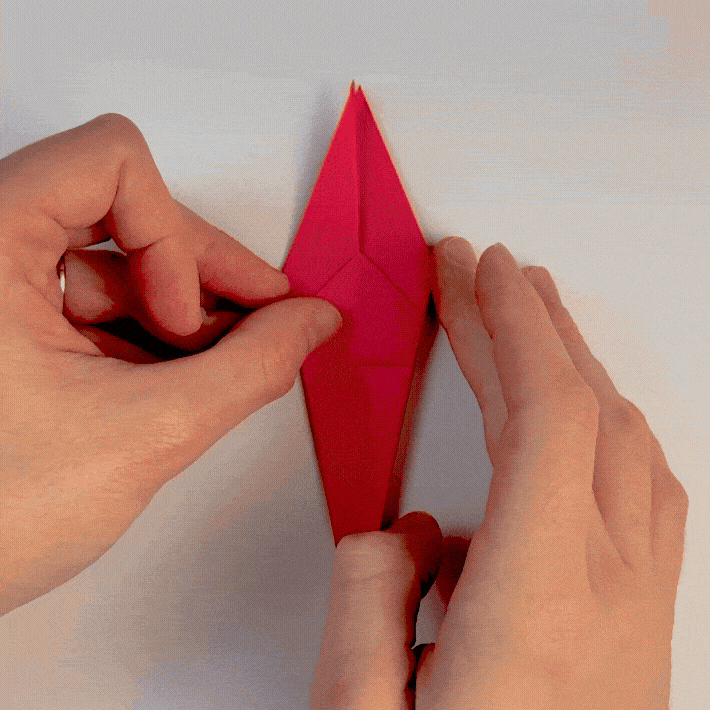
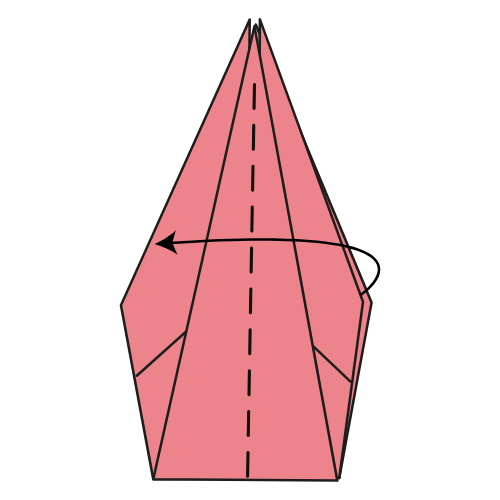
Grab the crane’s tail (it’s between the wings) and Swivel fold it to the left. Align it with the outer edge and flatten the paper.
Step 25
Do the same on the right side.
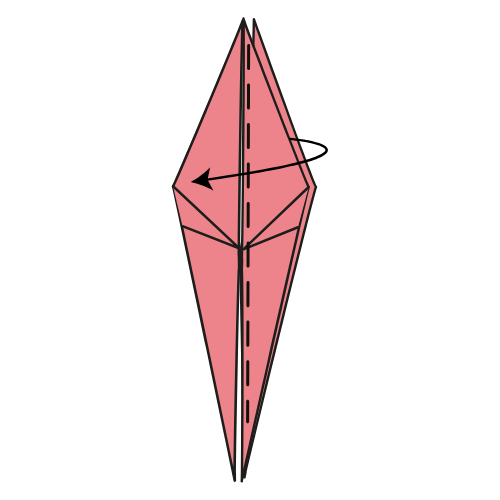
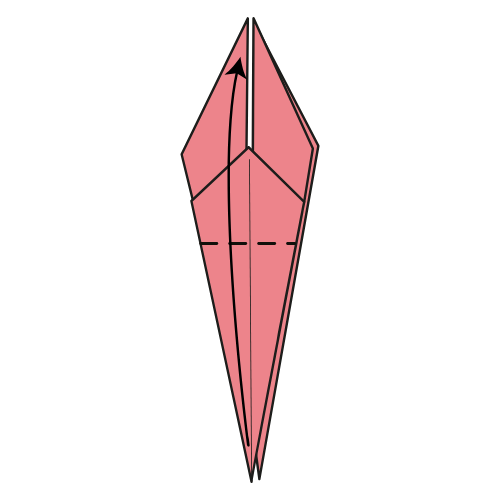
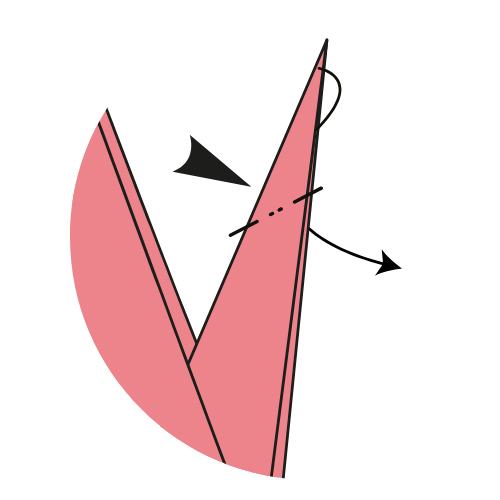
Step 26
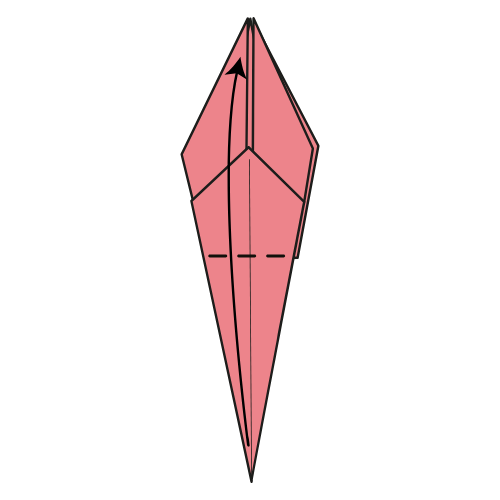
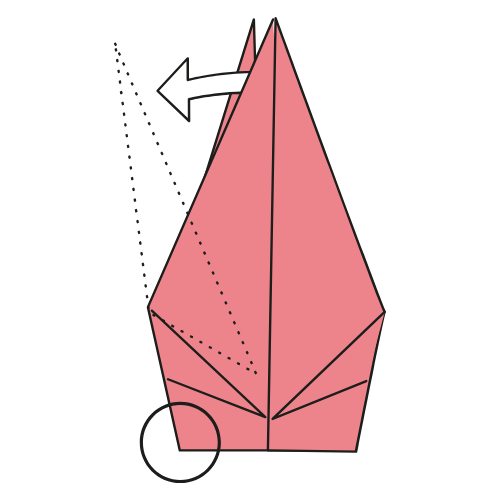
Mountain fold the crane’s head to the right. There’s no exact reference point here, so adjust the position to your liking. Crease well, then unfold.
🕊️ Note: In the video, I used a valley fold. It won’t affect the next step. But if you’re folding in the air, a mountain fold is usually easier to manage.
Step 27
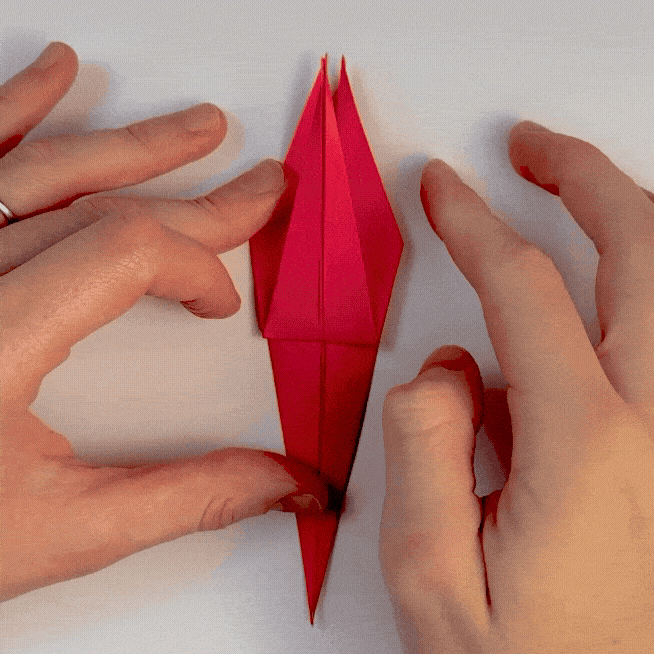
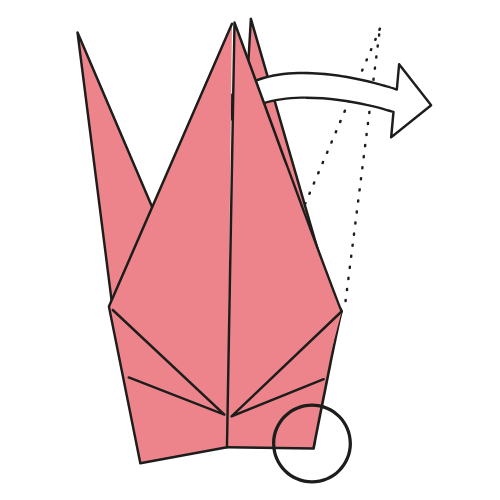
Push down the crane’s head, and inside reverse fold the head along the creases you just made.
Step 28
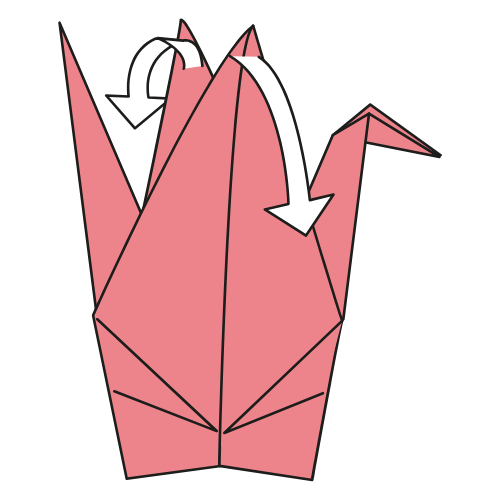
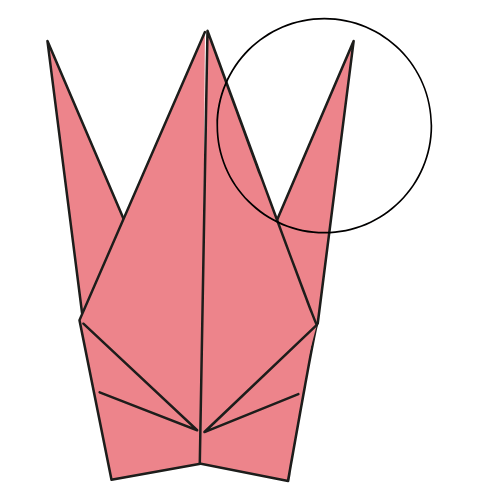
Gently open the wings.
🕊️ Folding tip: You can round out the back of the crane by pulling the wings gently in opposite directions. Totally optional, but super satisfying 😊
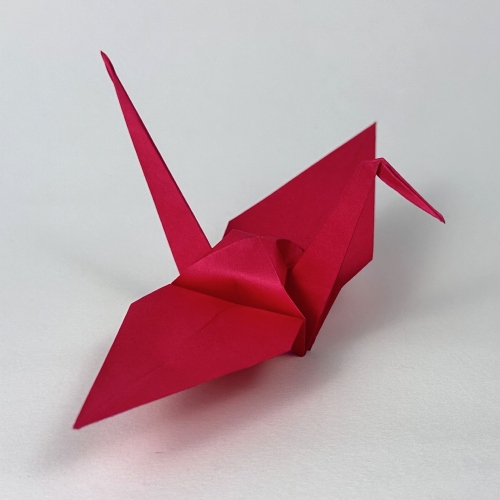
Your Paper Crane Is Ready to Be Displayed!
The Thousand Paper Cranes
In Japan, the crane is traditionally said to live for a thousand years. From this belief comes the idea that folding one thousand paper cranes can bring good fortune, healing, or the fulfillment of a wish. Over time, this story became one of the most well-known traditions connected to the origami crane.
The crane’s worldwide recognition is closely tied to Sadako and the Thousand Paper Cranes, a children’s book written by Eleanor Coerr. It tells the story of Sadako Sasaki, a young Japanese girl who was exposed to radiation as a toddler during the Hiroshima bombing and later developed leukemia.
While in the hospital, Sadako folded paper cranes, inspired by the hope that reaching one thousand would help her recover. According to her family, she folded well over a thousand cranes. After her death, her classmates continued folding cranes in her memory.
Today, paper cranes are widely used as symbols of peace and hope. They are often sent to memorials, museums, and remembrance sites around the world, where they stand not just for a single story, but for resilience, care, and the quiet power of a simple fold.

I hope you enjoyed folding this paper crane and taking the time to slow down with such a classic model. It’s one of those folds that becomes more satisfying each time you come back to it.
If you make one, feel free to share a photo in the comments. Different papers, sizes, and small variations always give the crane a slightly different feel, and it’s always nice to see how others approach it.
If you’d like to keep folding, you can explore our easy origami collection for simple, relaxing projects, or browse our origami bird category to see how the bird base evolves into many other designs.
And if you’d like to stay connected, don’t forget to subscribe to our origami YouTube channel for step-by-step tutorials, and join our newsletter to receive new models, tips, and inspiration straight to your inbox.
Other Origami Cranes:


Download the Full Origami Crane Printable PDF
Instructions
We’d love to keep you in the loop, so by sharing your email with us, you’ll be signed up for our mailing list. Don’t worry; we won’t bombard you with spammy emails, and your information is safe with us – we won’t share it with anyone else.
Watch the Origami Crane Video Tutorial
Enjoyed this tutorial?
Subscribe to our YouTube channel for new inspiring origami videos every week!


I started this and my boyfriend finished it off
Thanks for the instructions! My first origami, she is retarded but I still love her 🥺🥰 999 to go 😏
Your first crane looks fantastic! Ask some help for the 999 others 🙂
Nice paper crane
How did you makes those leaves or palm trees that are in the first photo with the crane?
Hi Tabitha, I couldn’t find a tutorial for the ones used in the pictures, but I recommend this one: https://www.youtube.com/watch?v=szeR5M7uXlU
Great, clear instructions. Thanks! This is also a good origami figure because you do almost everything twice. The repetition helps practice the correct way to fold. I just left a visit to Hiroshima and was able to see some of the origami cranes made by Sadako. A very sad but important story in human history. Peace.
Thank you for your thoughtful message!
cool crane
Love the way the instructions are written. Thank you! I made my first crane!!
This wasn’t easy, but I just made my first paper crane! Thank you!
Congrats! The crane isn’t the easiest origami.
I used the wrong kind of paper but it still worked very well!
Glad to hear it! The Kami 15×15 works well for this crane. You can learn more about origami paper here.
It took half an hour, but I made a recognizable origami crane in the end. I’m gonna call him Birdstrike.
Great job! Feel free to share a picture of it 🙂
paper crane is easy and nice
No way you think this was easy :skull:
😊
[…] How to Fold a Traditional Origami Crane […]
This is amazing.
I have just found your website and its great! I love the guide to Origami paper very helpful.
I have been making paper cranes for 20 years and I even got to place 1000 at the peace memorial in Hiroshima Japan in 2019.
I currently have about 6000 more at home and I hope you break a world record at some point.
Thank you for your website so I can share my love fort Origami and Paper cranes 🙂
Have never made a Crane before today, and these steps were SO easy to follow. My lil’ bird is sitting on my windowsill now. If you can’t follow these instructions, then I am sorry to say that it must be you, not the wonderful person who created this space for us. Looking forward to trying out another animal later. <3
Thanks for the kind words!
Everything was good until I reached the inside reverse fold. Still unsure how to do that
Check the beginner’s guide if you need help with any of the folds
Thank you very much.
Your instructions really clear for me. It’s really helpful when I try to make my orizuru.
This isn’t helping at all, I don’t even understand how one part turns into the other. I guess I need to keep trying to achieve the perfect Traditional Paper Crane. Thanks for the ‘not’ so useful instructions.
It may just be as simple as you need a more visual step by step instruction. We all learn differently. Unique to our own brain. Don’t give up yet
this is so really really hard I had to get my friend to help with it from step 7 till it was finished????????????????????????????????????????
[…] took me about five-and-a-half careful minutes to fold one paper crane, a meditative process that gradually calmed the overactive fight-flight part of my tired brain. […]
How do you fold other stuff?