
How to Fold an Origami Crow
This traditional origami crow is folded from the classic bird base, with just a few simple steps added to shape its beak and feet.
It’s quick to make, beginner-friendly, and has been around in various forms since at least the 1960s.
The version we’re folding here is the standing crow, elegant and slightly ominous, great for Halloween or as a minimalist decoration.
Kami paper works well, but for a sharper silhouette and more structure, I recommend Tant paper in black or dark grey.
You can perch your crow on an origami cube like in our photo, or let it loom from the edge of a shelf, a branch, or a basket.
Traditional Origami Crow Step-by-Step Instructions
- Difficulty: Easy – Beginner Level 3
- Folding time: 5 minutes
Recommended Paper
15×15 cm (6×6 in) Kami or Tant
Step 1

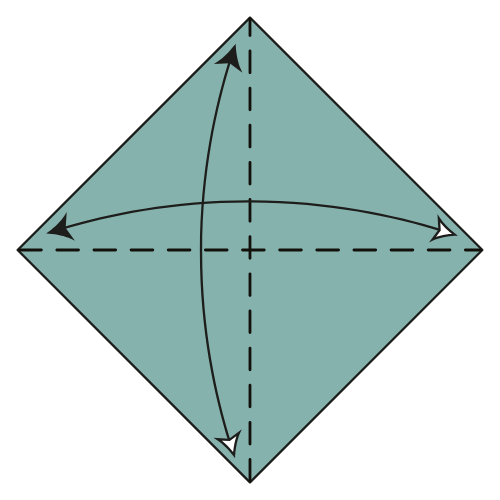
Start with the colored side facing up. Fold and unfold along both diagonals.
Step 2

Turn the paper over.
Step 3

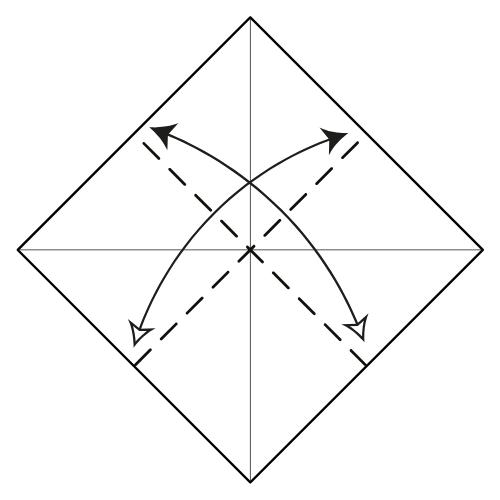
Fold and unfold side to side in both directions.
Step 4
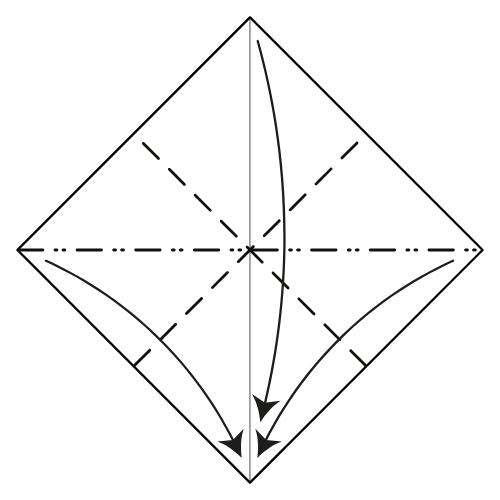
Collapse along the existing creases to form a Square base.
Step 5

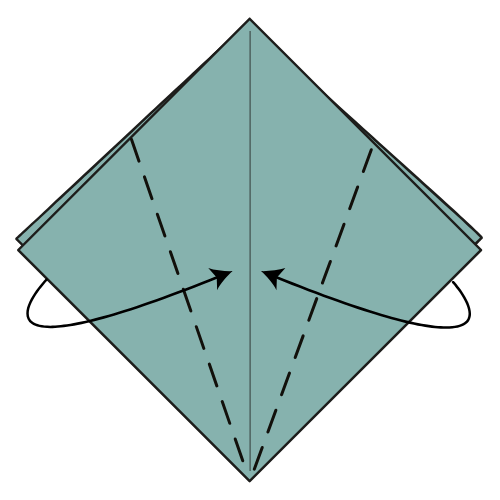
Fold the bottom edges to the centerline.
Step 6
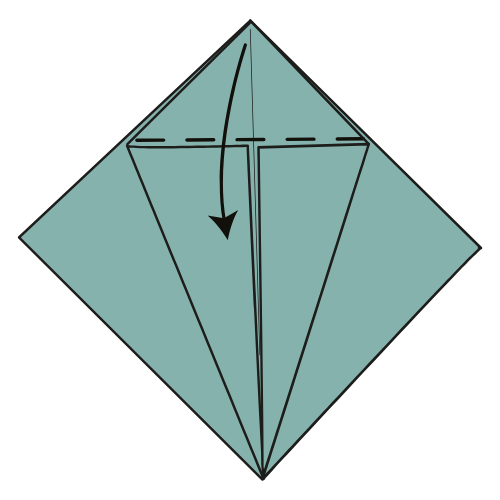
Fold the top corner down. Crease where the layers intersect.
Step 7

Unfold Step 5.
Step 8

Petal fold the bottom corner upward (one layer only), using the existing creases.
Step 9
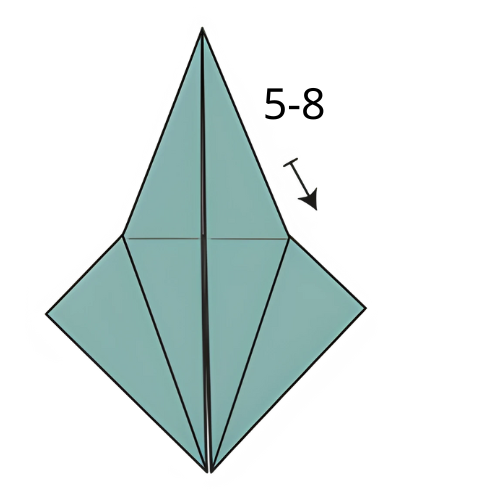
Repeat Steps 5 to 8 on the other side.
Step 10


Fold the top flap downward.
Step 11


Turn the model over.
Step 12
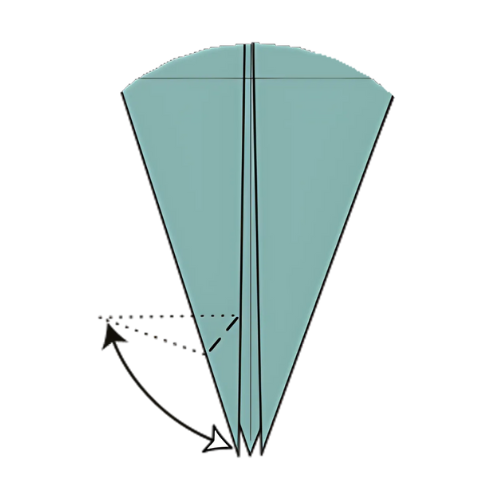
Fold the bottom left corner (top flap only) outward to the left. Crease well, then unfold.
Step 13

Inside reverse fold along the creases to form the first crow’s foot.
🐦 Folding tip: Try to fold the foot so it’s parallel to the vertical centerline.
Step 14
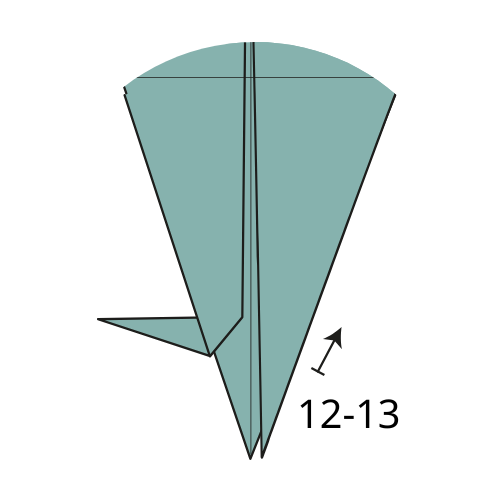
Repeat Steps 12 and 13 on the right side.
Step 15
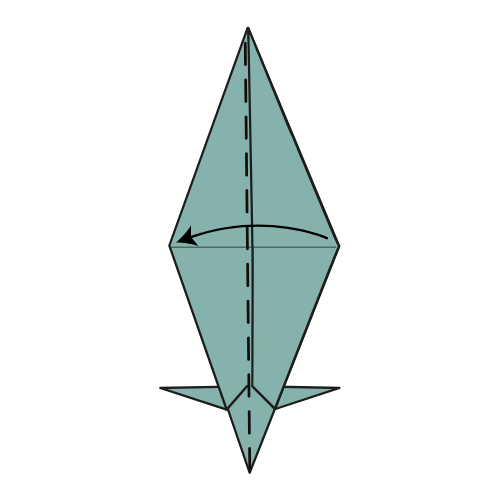
Fold the model in half from right to left.
Step 16
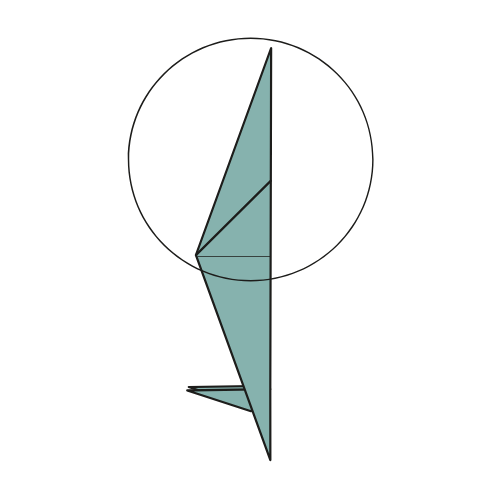
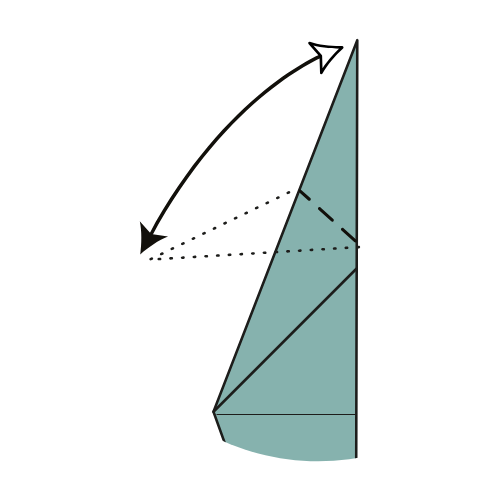
Fold the top corner to the left. Crease well, then unfold.
🐦 Folding tip: There’s no exact reference point here, so fold it however looks good to you.
Step 17
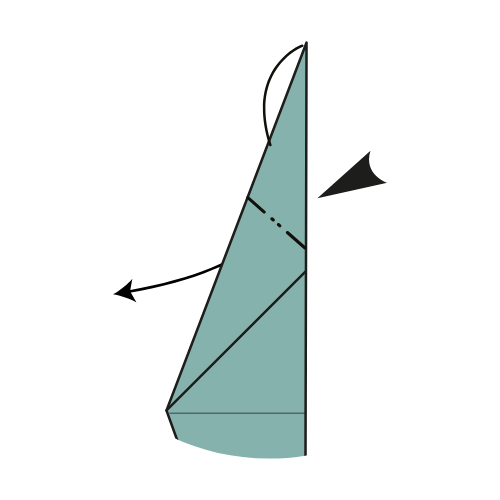
Inside reverse fold along the creases to form the crow’s head.
Your Origami Crow Has Landed 🪶
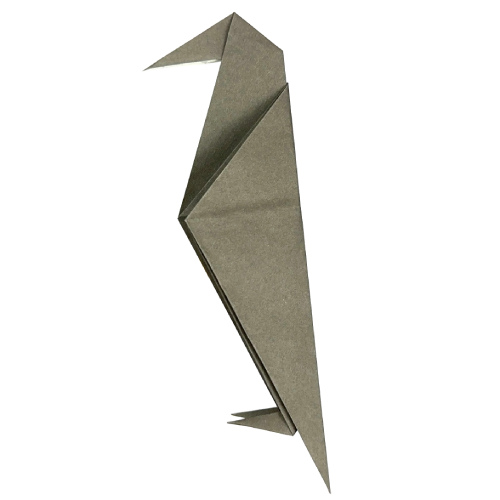
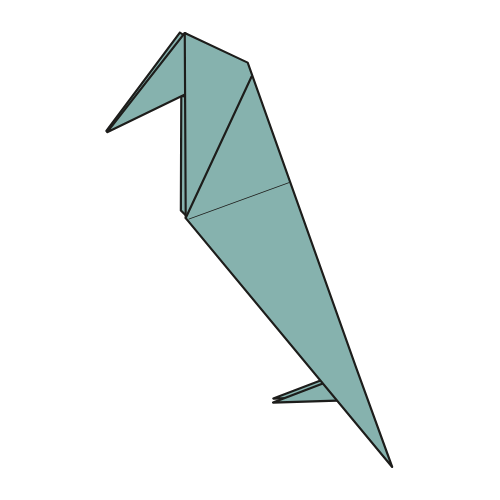
We hope your crow turned out beautifully, and maybe even found a spooky perch somewhere in your home.
Whether you’re folding origami for Halloween, decorating a reading nook, or just enjoying a quiet moment with paper, this model is a fun and satisfying little project.
If you enjoyed this one, don’t forget to subscribe to our YouTube channel for more tutorials, and join our newsletter for free diagrams and seasonal ideas.

Download the Full Origami CrowPrintable PDF
Instructions
We’d love to keep you in the loop, so by sharing your email with us, you’ll be signed up for our mailing list. Don’t worry; we won’t bombard you with spammy emails, and your information is safe with us – we won’t share it with anyone else.
Watch the Origami Crow Video Tutorial
Enjoyed this tutorial?
Subscribe to our YouTube channel for new inspiring origami videos every week!


Loved this one, thank you! Step 4 has the wrong video as a heads up, by the way. (:
Thank you for the heads up! We’ll update that soon 🙂
such a cute paper companion it is… 10/10 tutorial ! 🩷